Easy-to-use user interface design is essential for raising user satisfaction and engagement in the ERP space. A key element of this post is the seamless integration of OWL notification service into dashboard interfaces. We will look at how to use JavaScript and XML templating to add notifications to Odoo dashboards to improve user experience.
Implementation of XML:
The purpose of this XML template is to render the AwesomeDashboard component's user interface (UI). It specifies how the UI elements of the dashboard component are arranged and composed.
<?xml version="1.0" encoding="UTF-8" ?>
<templates xml:space="preserve">
    <t t-name="awesome_dashboard.AwesomeDashboard">
        <Layout className="'o_dashboard h-100'" display="{controlPanel: {} }">
            <t t-set-slot="control-panel-always-buttons">
                <button t-on-click="showNotification" type="button" class="btn btn-secondary" title="Show Notification">Show</button>
            </t>
        </Layout>
    </t>
</templates>
This XML template defines the layout of our dashboard and incorporates a button that, when clicked, triggers the showNotification() method defined in our JavaScript component.
In this XML template snippet:
<t t-name="awesome_dashboard.AwesomeDashboard">
This template name is later specified inside the OWL component as its template.
<Layout className="'o_dashboard h-100'" display="{controlPanel: {} }">Layout is a built-in Odoo component that we utilize to ensure our template has the correct layout around our user interface. It is typically utilized inside root templates.
<button t-on-click="showNotification" type="button" class="btn
btn-secondary" title="Show Notification">Show</button>
We include a button element in the layout that, when clicked, calls the showNotification() function created in the JavaScript component. This button is where the user interacts with the alerts.
Integration of JavaScript:
Let us get started by exploring the JavaScript implementation that serves as the basis for our notification system:
import { useService } from "@web/core/utils/hooks";
import { Component } from "@odoo/owl";
import { Layout } from "@web/search/layout";
import { registry } from "@web/core/registry";
import { _t } from "@web/core/l10n/translation";
class AwesomeDashboard extends Component {
static template = "awesome_dashboard.AwesomeDashboard";
static components = { Layout };
setup() {
this.notificationService = useService("notification");
}
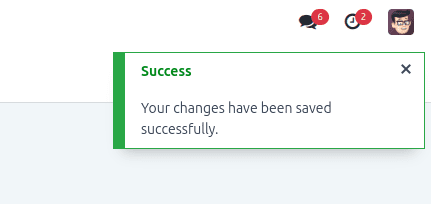
showNotification() {
this.notificationService.add(_t("Your changes have been saved successfully."), {
title: "Success",
type: "success"
});
}
}
registry.category("actions").add("awesome_dashboard.dashboard", AwesomeDashboard);We define an AwesomeDashboard component with a notification service in the above. When the showNotification() function is called, a success-type notification with the title "test" is displayed.
"Info," "warning," "danger," and "success" are the four different notification types that the Notification Service offers. Every type has a distinct function in providing users with varying degrees of information or feedback. Here is a quick summary and some sample usage scenarios for each type.
In addition to the standard parameters for the notification service, such as type, title, and message, Odoo's notification service offers the flexibility to control the persistence of notifications on the screen through the "sticky" parameter. Here's how you can incorporate this parameter into the notification display:
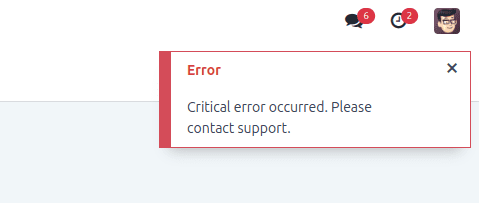
showNotification() { this.notificationService.add(_t("Critical error occurred. Please contact support."), { title: "Error", type: "danger", sticky: true, });}
The notification configuration object now has the sticky: true parameter added to it in this code line. If this parameter is set to true, then regardless of any default timeout settings, the notice will stay on the screen until the user actively dismisses it. This can be very helpful for showing crucial or significant messages that need the user's immediate attention.
In addition to conveying critical information, notifications in Odoo 17 can be further enriched with actionable buttons, enabling users to take immediate steps to address issues or navigate to relevant sections within the application. Let's integrate this functionality into the notification:
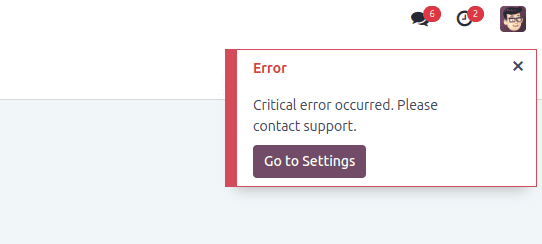
showNotification() {
    this.notificationService.add(_t("Critical error occurred. Please contact support."), {
        title: "Error",
        type: "danger",
        buttons: [{
                    onClick: () => {
                        this.actionService.doAction(
                            "base_setup.action_general_configuration"
                        );
                        closeFn();
                    },
                    primary: true,
                    name: "Go to Settings",
                },
        ],
    });
}
The title and error message along with an actionable button that says "Go to Settings." Users are redirected to the general configuration settings after clicking this button, where they can take the required steps to fix the mistake. This proactive strategy gives users the ability to quickly resolve problems and preserve the integrity of their Odoo environment.
Manifesting:
This sample describes a manifest structure that an Odoo module can use to include files.
    'assets': {
        'web.assets_backend': [
            'awesome_dashboard/static/src/**/*',
        ],
    },
It specifically tells you to include all files and directories in the awesome_dashboard/static/src directory, with particular emphasis on the backend assets (web.assets_backend).
Conclusion:
With this guide's instructions, you will be well-equipped to add integrated notifications to your Odoo applications, giving users an unmatched experience and boosting engagement. if you want to read more refer to An Overview of Owl Reactivity System in Odoo 16