Adding demo data to our custom modules is a common need.
Demo data for each Odoo model is loaded only if the option to load demo data was enabled during database creation.
So, if we want to load the Demo data, we can specify it when we create the database.
In this blog, We'll go over how to add demo data using XML and CSV files.
Create Demo data using an XML file

Here, I am going to create some job positions through my custom module. For that, I created a directory named demo, in which I added an XML file that contains job position data.
<?xml version="1.0" encoding="utf-8"?>
<odoo>
	<data noupdate =”1”>
    	<!--DEPARTMENT DEMO DATA -->
    	<record id="dep_ps" model="hr.department">
        	<field name="name">DEMO DEPARTMENT</field>
    	</record>
    	<!--CONTRACT DEMO DATA -->
    	<record id="demo_contract_type" model="hr.contract.type">
        	<field name="name">DEMO CONTRACT</field>
        	<field name="sequence">3</field>
    	</record>
    	<!--JOB DEMO DATA -->
      	<record id="demo_job" model="hr.job">
      	<field name="name">DEMO JOB</field>
      	<field name="department_id" ref="dep_ps"/>
      	<field name="no_of_recruitment">5</field>
      	<field name="contract_type_id" ref="demo_contract_type"/>
  	</record>
	</data>
</odoo>
Here you can see -before creating a job position, we should create other records such as department, contract and etc. It may differ depending on our requirements. Here, I am creating a job position with these values. Before we get there, you'll notice a new attribute in the data tag called noupdate.
<data noupdate="1">
If we add demo data, we must specify noupdate=1 because the contents of this data file should only be used once when we install the module.
The following step is to include the path to this demo data file within the manifest.
We can include it as follows:
'data':['demo/load_data.xml',],
After creating a database with Load demo data enabled, install the module. Automatically the data will be loaded. If Load demo data is not enabled, it will not get loaded, and the records will not be created.

The above image shows that the demo job position is also loaded.
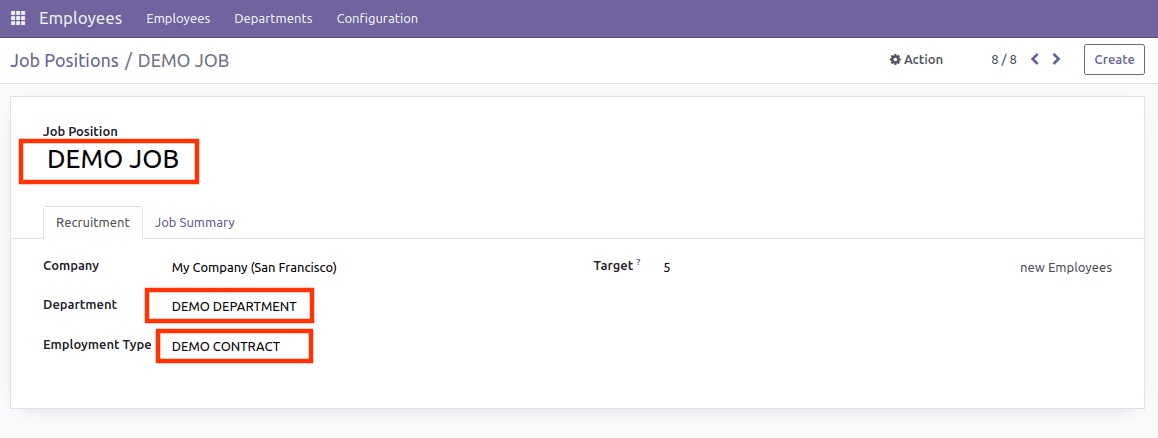
By clicking that newly created demo job position, we can enter into its form view, and from here, we can see the demo department and demo contract.
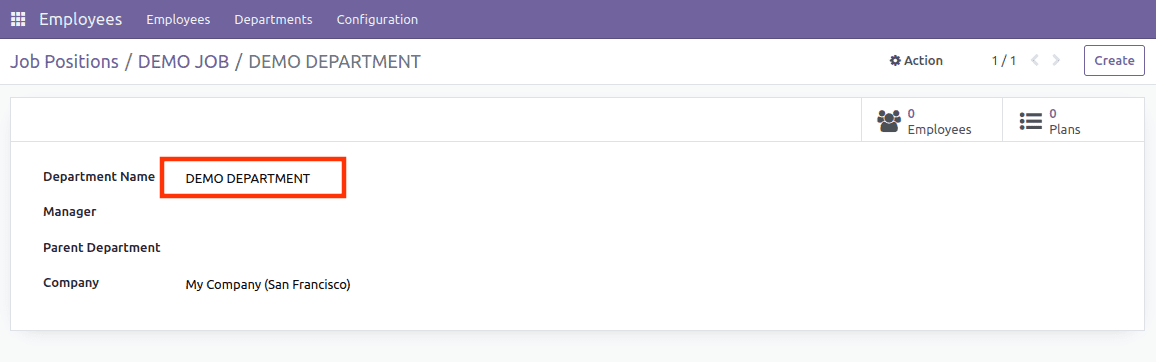
From the above image, you can see the form view of the loaded demo department.
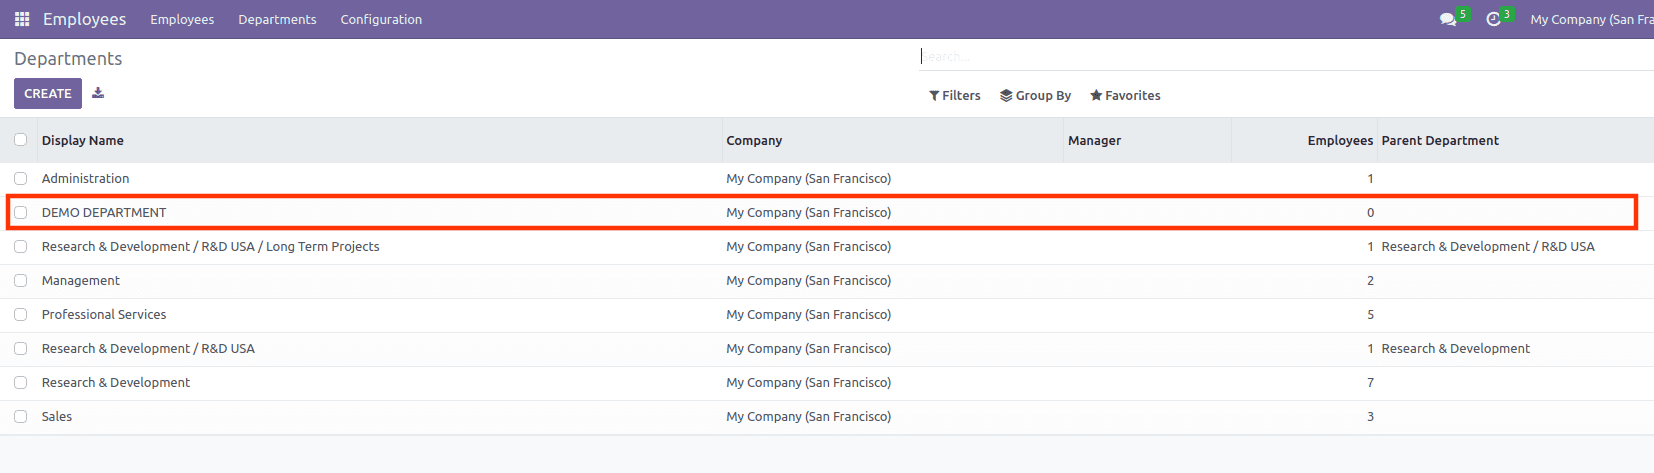
Likewise, you can see the list view of the loaded demo department in the image above.
Create Demo data using a CSV file.
Even if it is self-descriptive and flexible, data files in XML format are very verbose when creating large numbers of simple records for the same model. We can use CSV-formatted data files in this case. However, we must create separate CSV files for each model when creating demo data with CSV. In our case, we are creating a Job Position, Department, and contract, so we should create three files, one for the Job Position, one for the Department, and one for the contract itself, with the file names following the format.
model_name.csv
Let us now look at how to import demo data via CSV.
hr.contract.csv file
id,name
contract_demo_1,DEMO CONTRACT 1
contract_demo_2,DEMO CONTRACT 2
contract_demo_3,DEMO CONTRACT 3
hr.department.csv file
id,name
department_demo_1,DEMO DEPARTMENT 1
department_demo_2,DEMO DEPARTMENT 2
department_demo_3,DEMO DEPARTMENT 3
Hr.job.csv file
id,name,department_id:id,contract_id:id,description
job_demo_1,DEMO JOB 1,department_demo_1,contract_demo_1,DEMO DESCRIPTION 1
job_demo_2,DEMO JOB 2,department_demo_2,contract_demo_2,DEMO DESCRIPTION 2
job_demo_3,DEMO JOB 3,department_demo_3,contract_demo_3,DEMO DESCRIPTION 3
Field names are sufficient unless we supply an external id for the field, in which case we must use the format "field name: id" in the first row.
We need to enter the paths for the CSV files on the manifest as we did for our XML demo data file.
'demo': [
		'demo/hr.contract.csv',
		'demo/hr.department.csv',
         'demo/hr.job.csv',
	]
In this blog, we discussed loading demo data into Odoo 16 using XML and CSV files.