In Odoo 18, the Marketing Automation module allows businesses to design, launch, and track automated marketing campaigns effortlessly. Using a visual workflow builder, marketers can create multi-step sequences that may include sending emails, modifying records, or executing server actions—triggered by specific conditions or customer interactions. These steps can be organized with customizable delays, branching paths, and conditions to deliver personalized communication at scale.
The system offers live performance analytics for each activity, including metrics such as delivery, open, and click rates, along with conversions. Audience segmentation can be achieved through dynamic filters, ensuring campaigns reach the most relevant customers at the most effective moments. Workflows can be paused, adjusted, or resumed at any time without interrupting active campaigns, giving teams complete flexibility and control.
Seamless integration with Odoo’s CRM, Email Marketing, and Sales modules enables the automation of lead nurturing, customer onboarding, product promotion, and retention strategies—all from one unified platform. By centralizing these processes, businesses can reduce manual effort, enhance marketing efficiency, and deliver consistent, timely, and impactful messaging to their audience.
Creating a New Marketing Campaign
Navigate to the Marketing Automation module, and under the Campaign menu, you’ll find a list of existing campaigns along with the option to create a new one.
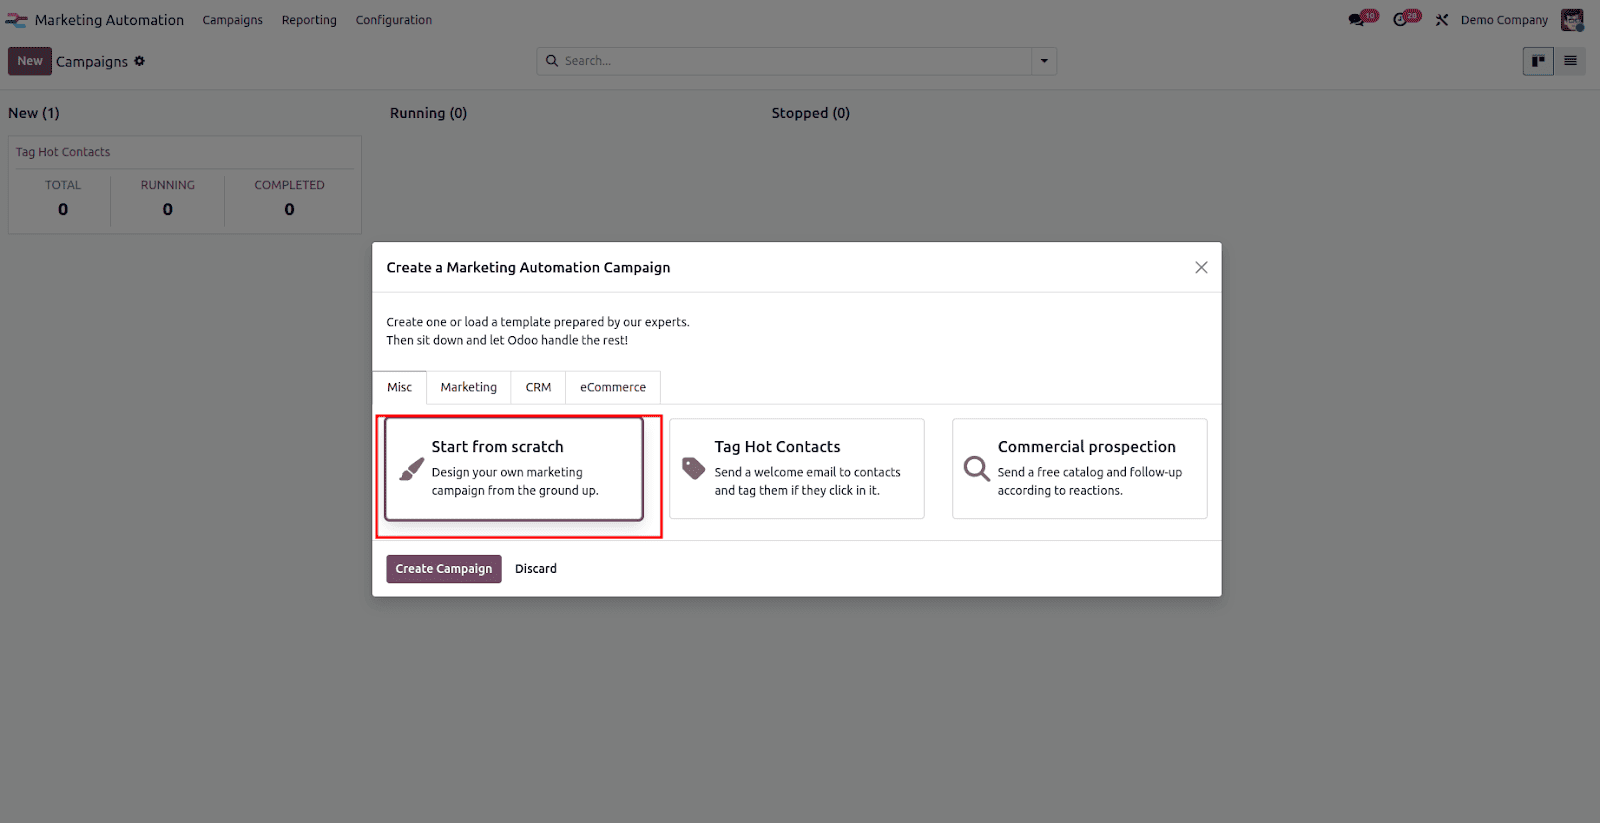
When you click the New button, a popup window will appear, allowing you to choose between building a campaign from scratch or using one of the available pre-defined templates.
Creating a campaign using a pre-defined template
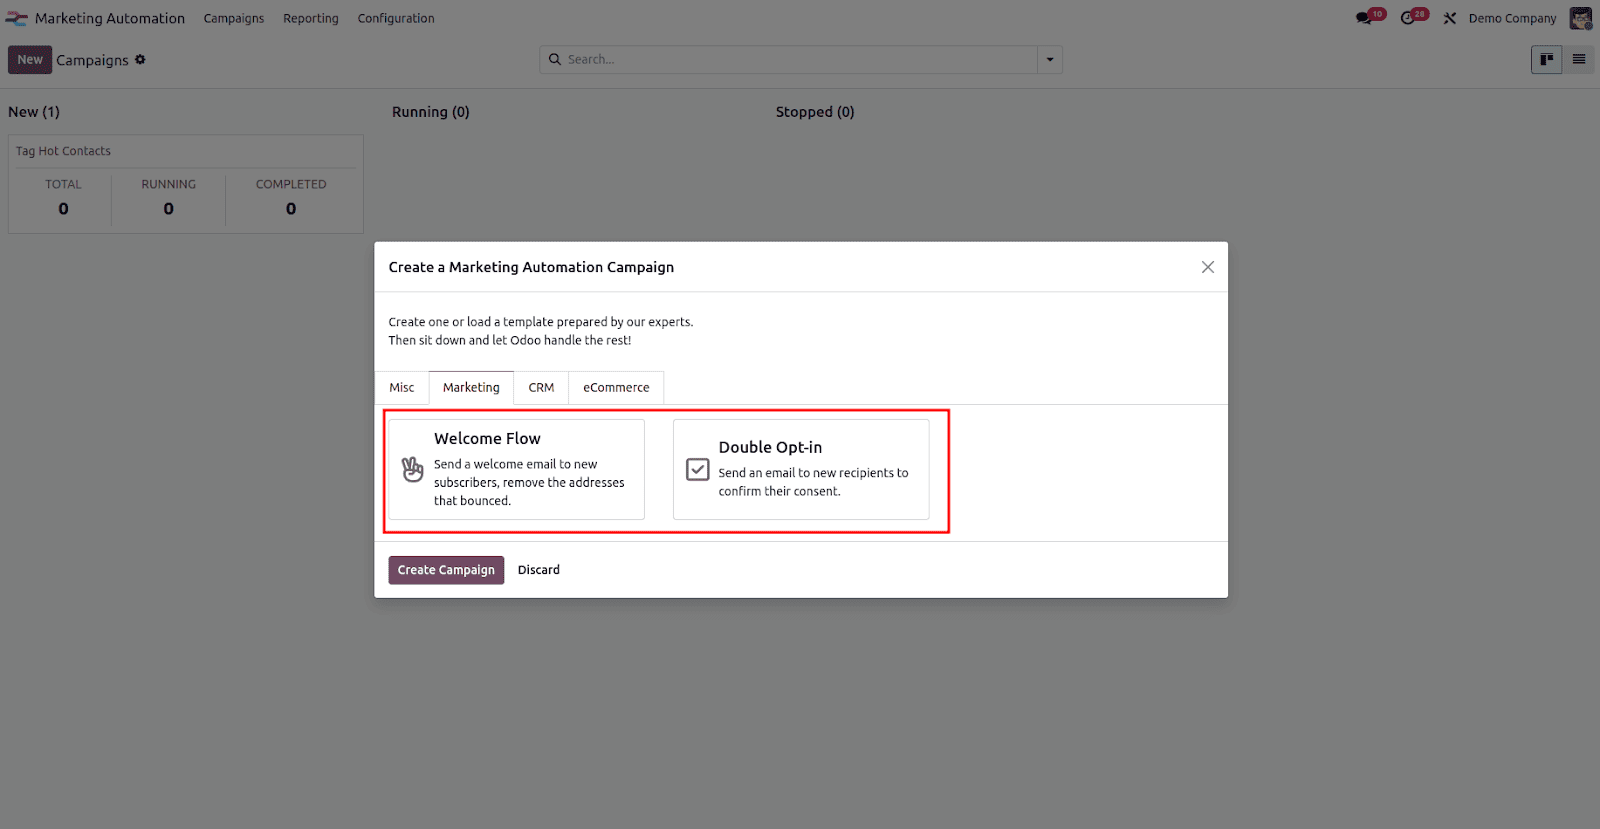
If you decide to use a template, simply pick the one that fits your needs and click Create Campaign. You will then be directed to the campaign’s main workspace, where you can review, customize, and launch it according to your marketing goals.
Creating a new campaign
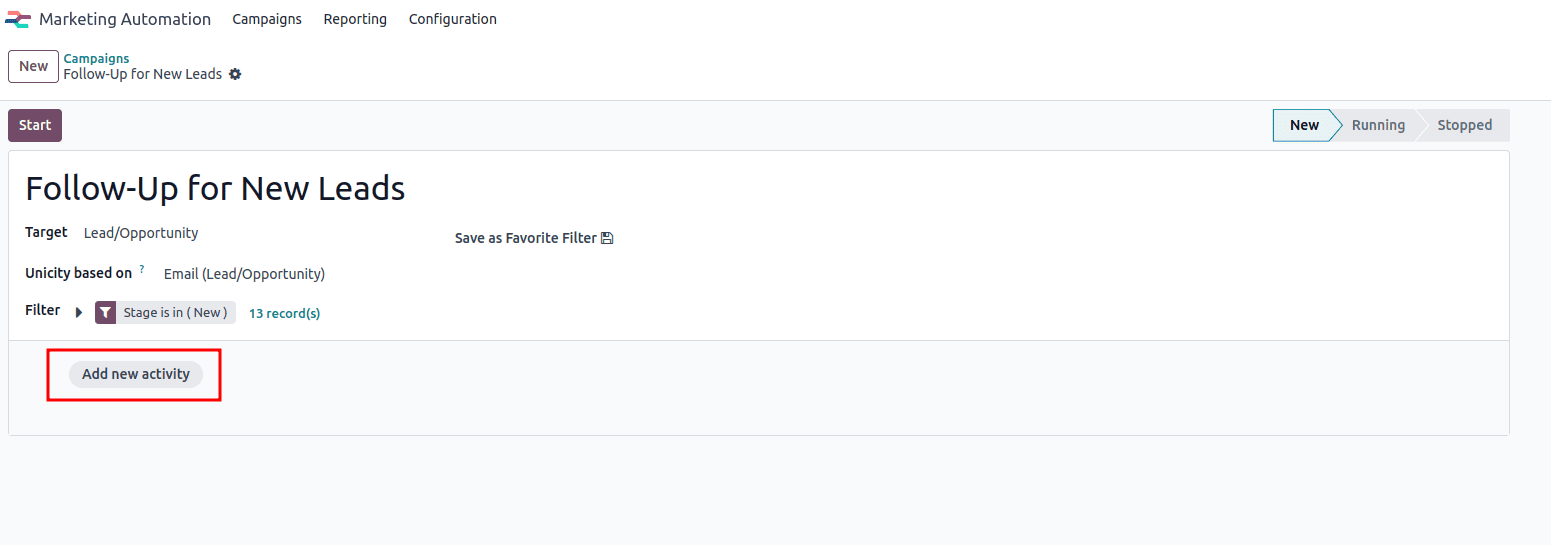
To create a new campaign, choose Start from Scratch in the wizard. This will take you to the campaign creation view.
Clicking the New button will open the campaign creation form, where you can enter all the necessary details for your campaign.
- Campaign Name: Enter a descriptive name for your campaign (e.g., Welcome Email for New Customers).
- Target: Choose the target model that the campaign will run on.
- Unicity Based On: Select a field (e.g., Email) to ensure each record is processed only once, preventing duplicate actions.
- Filter: Add domain filters to define which records will be included in the campaign.
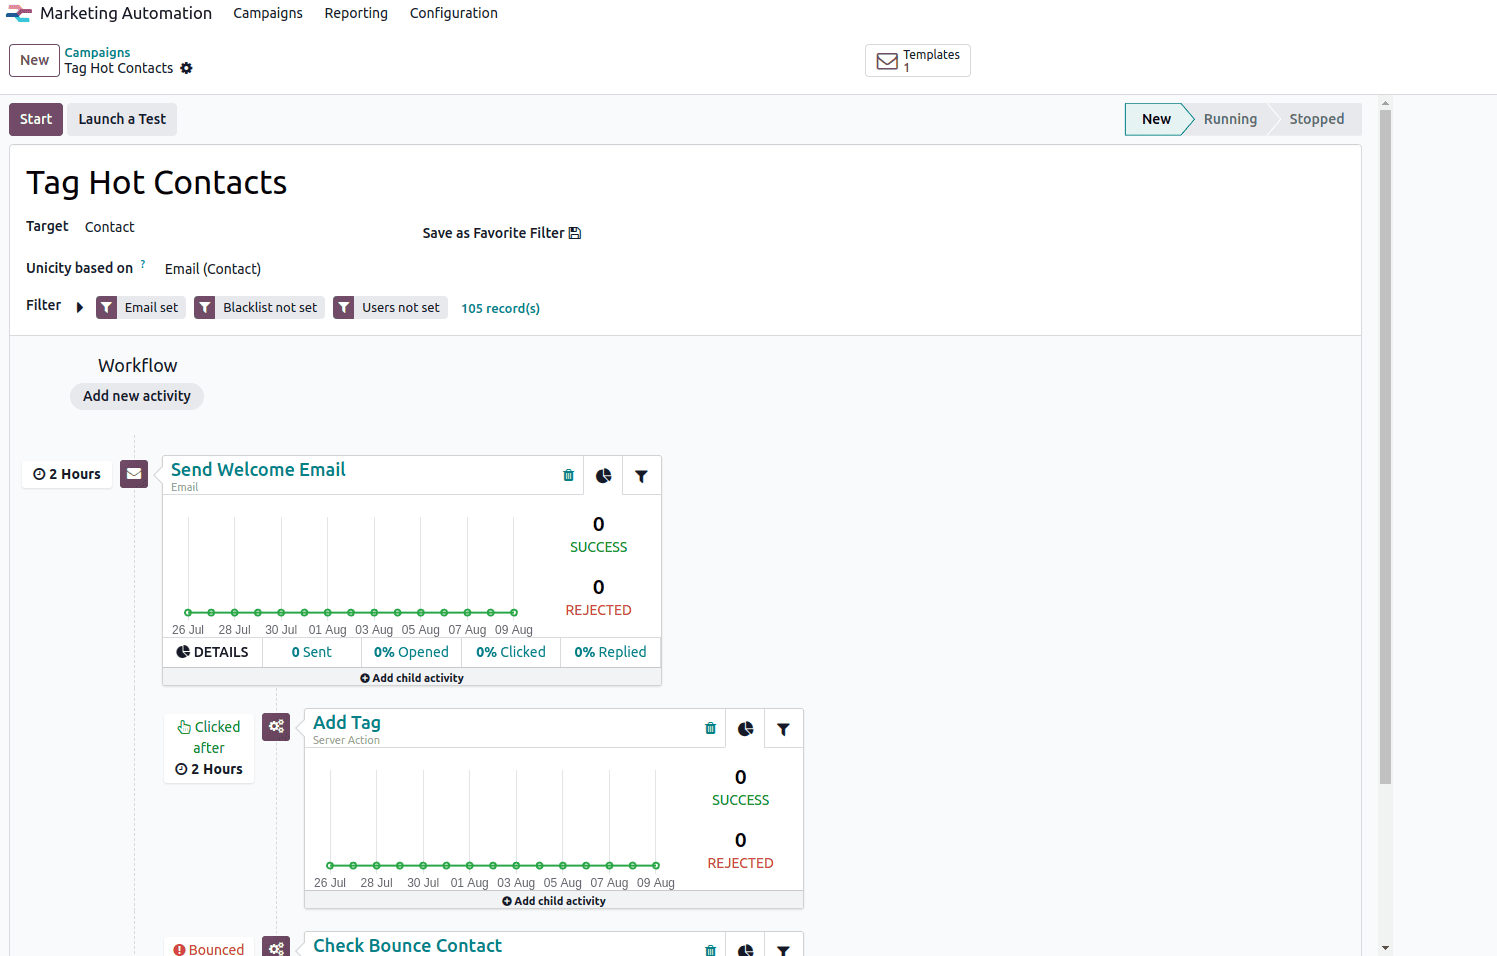
Configuring Campaign Activities
To launch the campaign, you need to configure at least one activity. Click Add New Activity, and a wizard will appear where you can define the action to be performed.
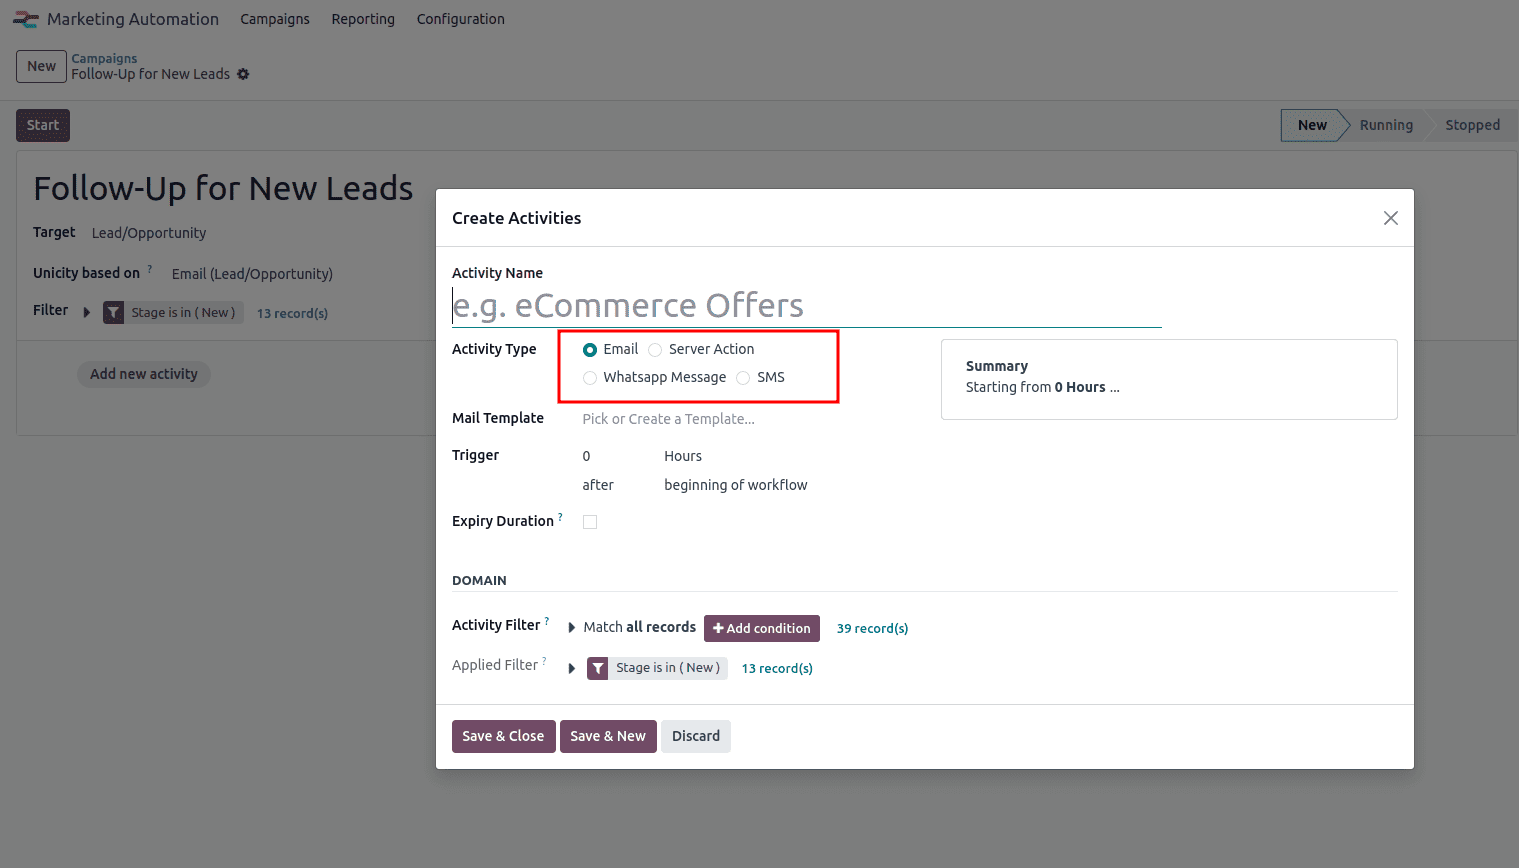
Activity Name: Enter a descriptive name for the activity (e.g., eCommerce Offers or Follow-Up Email).
Activity Type: Choose the type of action to execute
- Email – Send a predefined email template to the selected audience.
- Server Action – Trigger a backend process or automation within Odoo.
- WhatsApp Message – Send a message through WhatsApp (requires WhatsApp integration).
- SMS – Send a text message to the customer’s phone.
Template:
- If Email is selected > Choose an Email Template.
- If WhatsApp Message is selected > Choose a WhatsApp Template.
- If SMS is selected > Choose an SMS Template.
- If Server Action is selected > Choose the Server Action to run.
Trigger: Define the delay before this activity is executed.
Expiry Duration: Specify how long the activity remains valid before expiring (optional).
Activity Filter: Add conditions to determine which records within the campaign should receive this activity.
Applied Filter: Displays the final applied conditions from the campaign and the activity filter combined.
Email Activity
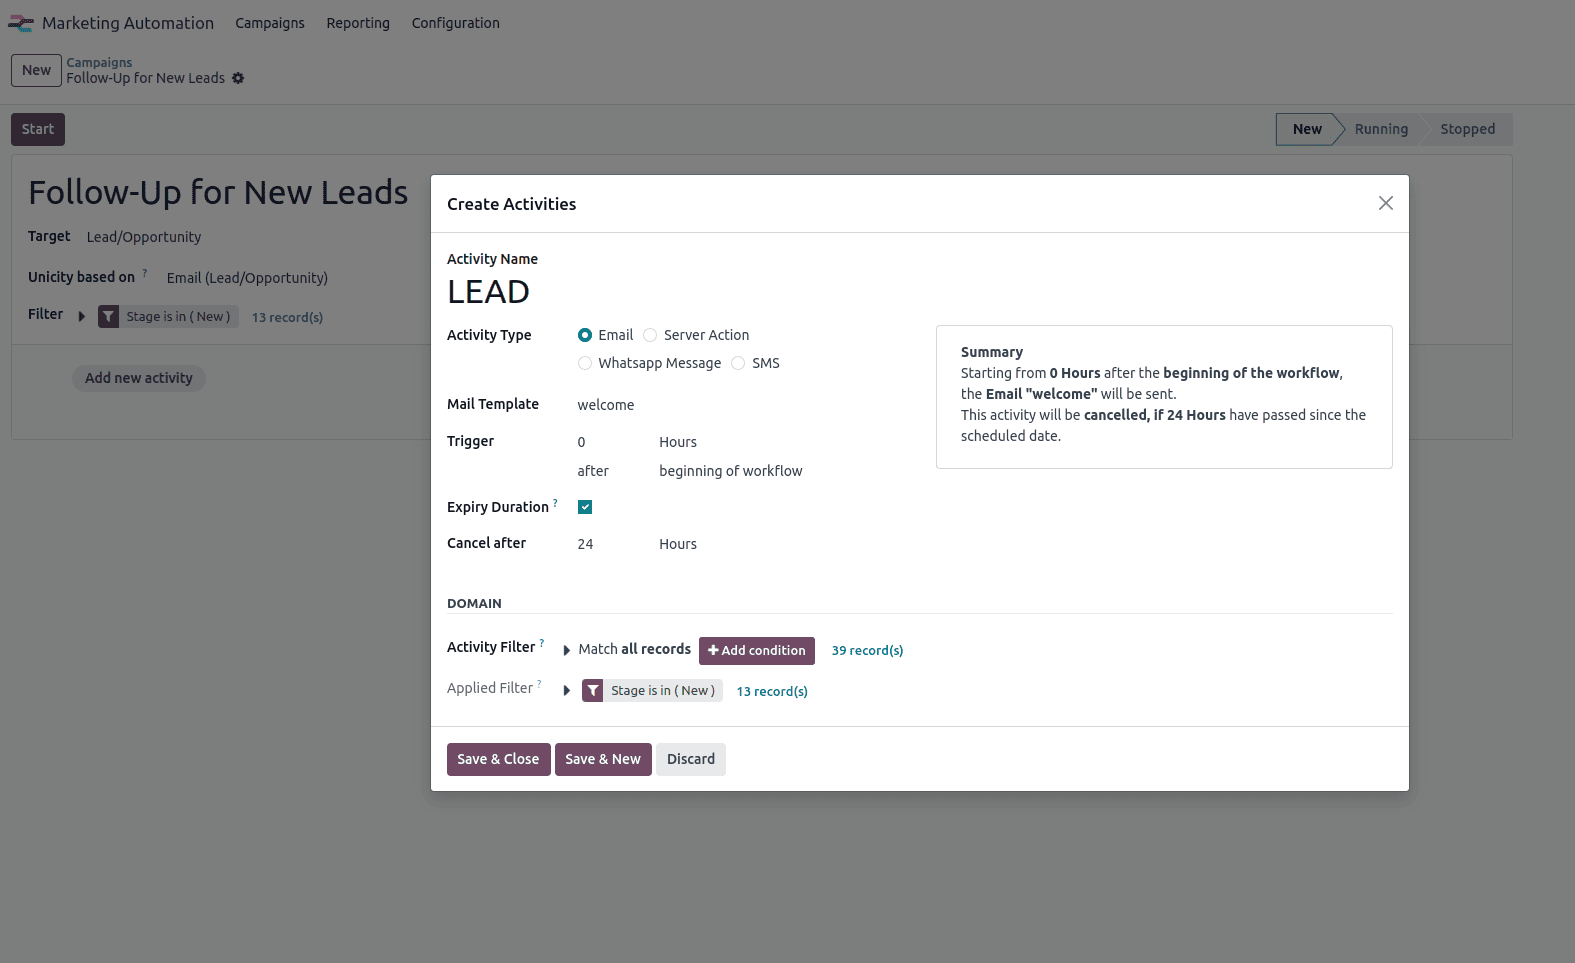
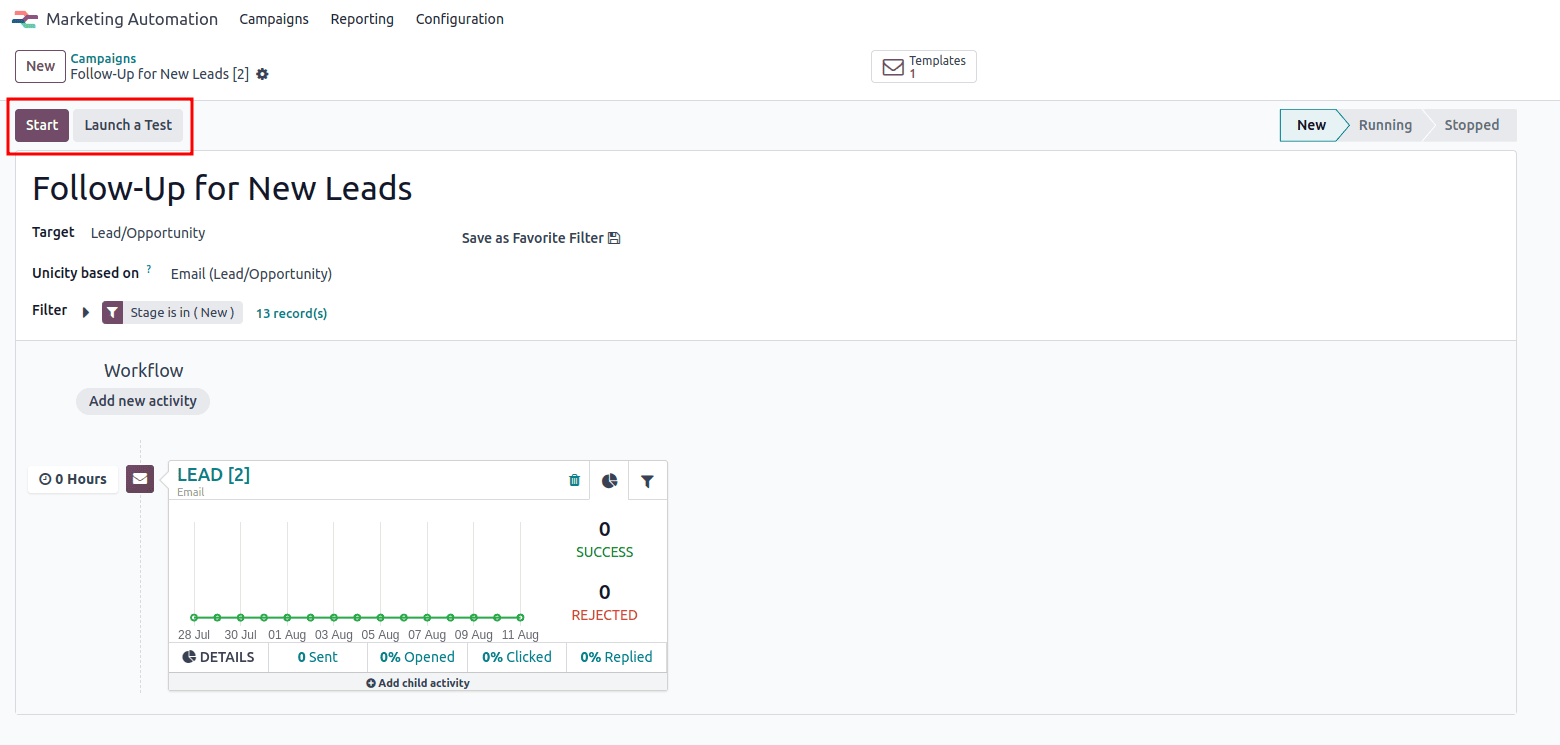
Once the email activity is configured, click Save to keep the changes or Save & New if you want to add another activity. When all activities are set up, click the Start button to launch the campaign.
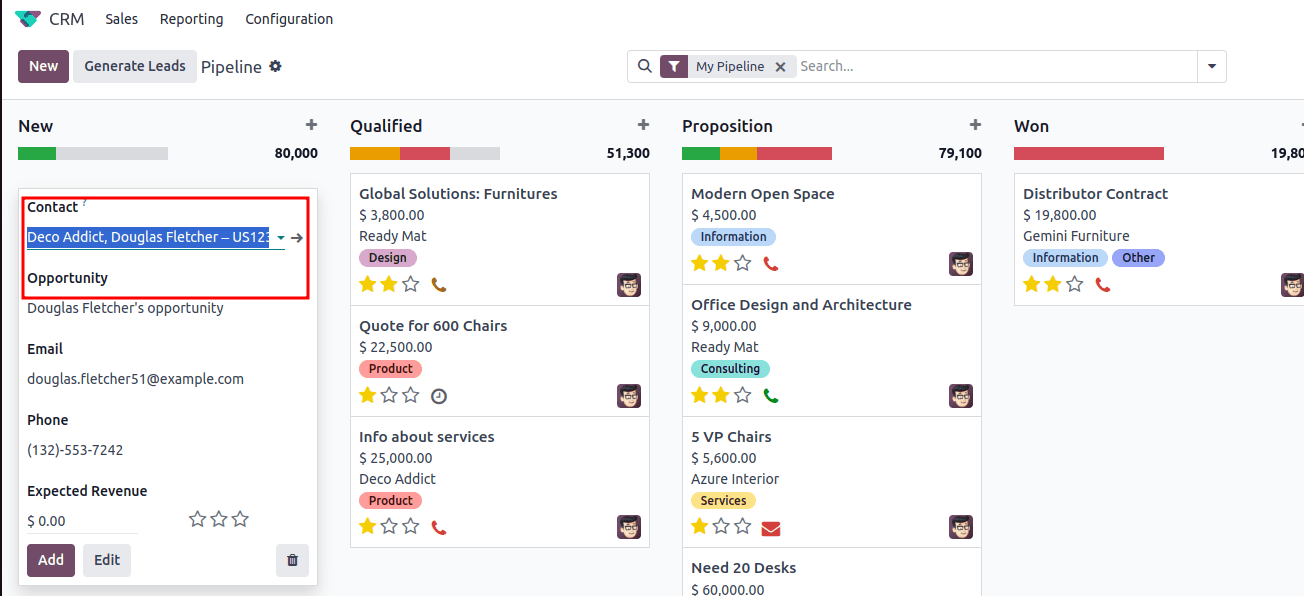
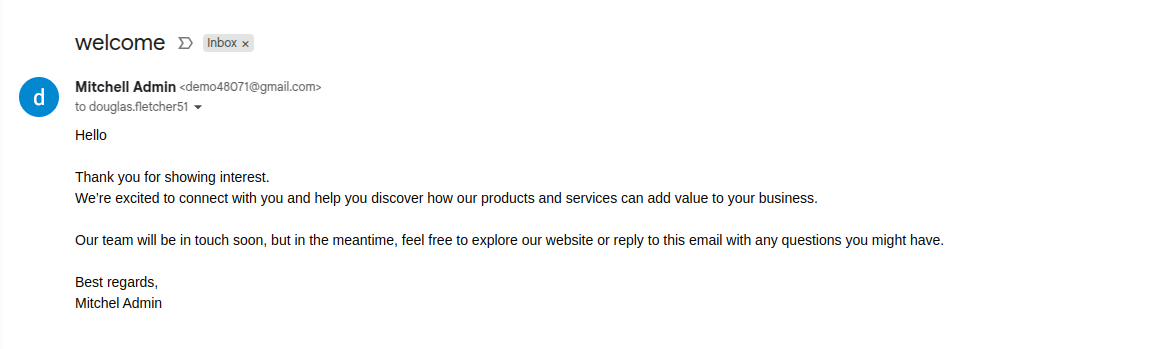
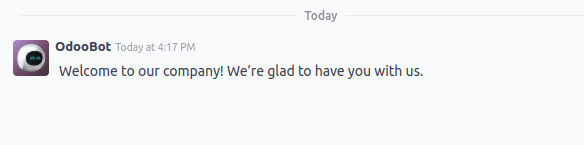
To test the campaign, navigate to the CRM module. For this demonstration, the outgoing email server has been configured to ensure that the email activity can be sent successfully.
By checking the customer’s mailbox, you can confirm that the email has been delivered.
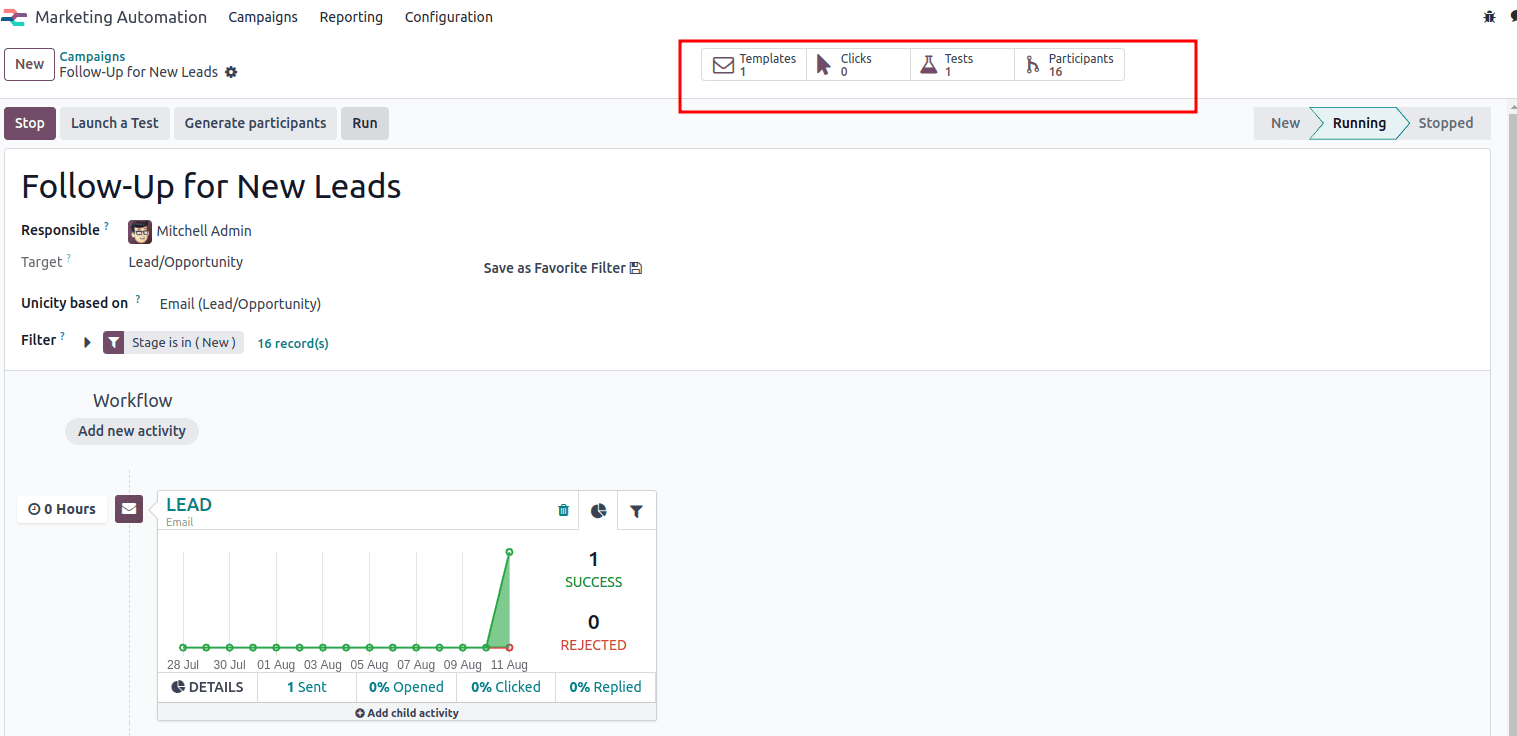
You can view the participants, templates, and test results, along with click statistics through the smart buttons. The outcomes are displayed in a graphical format, indicating successes and rejections.
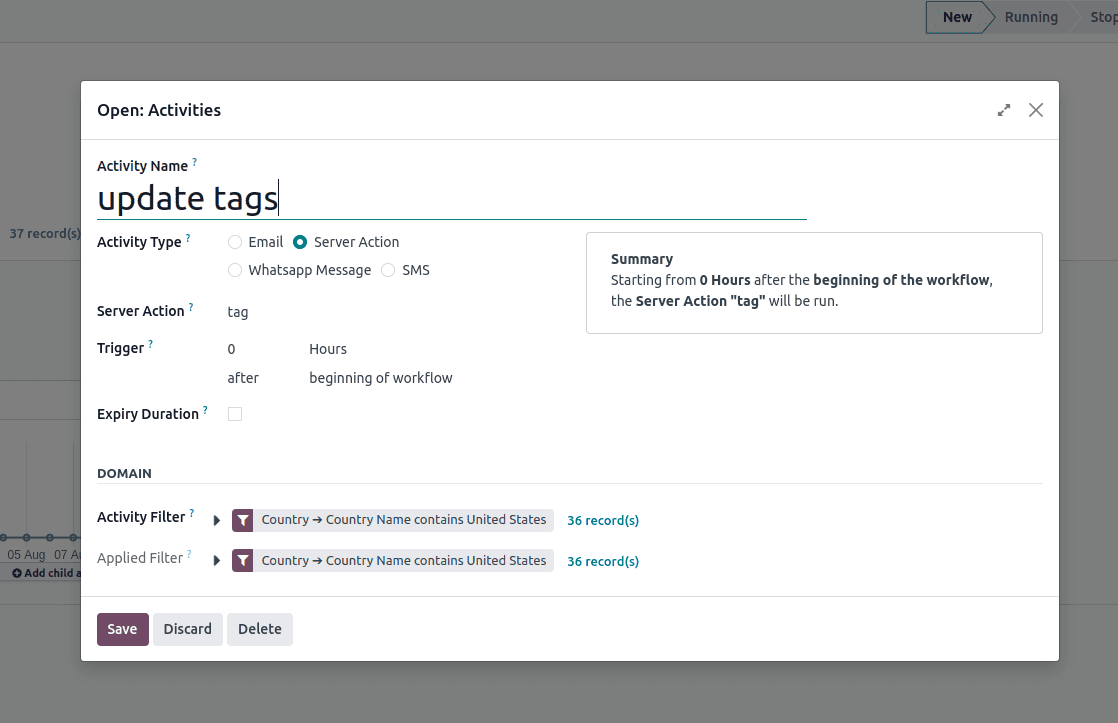
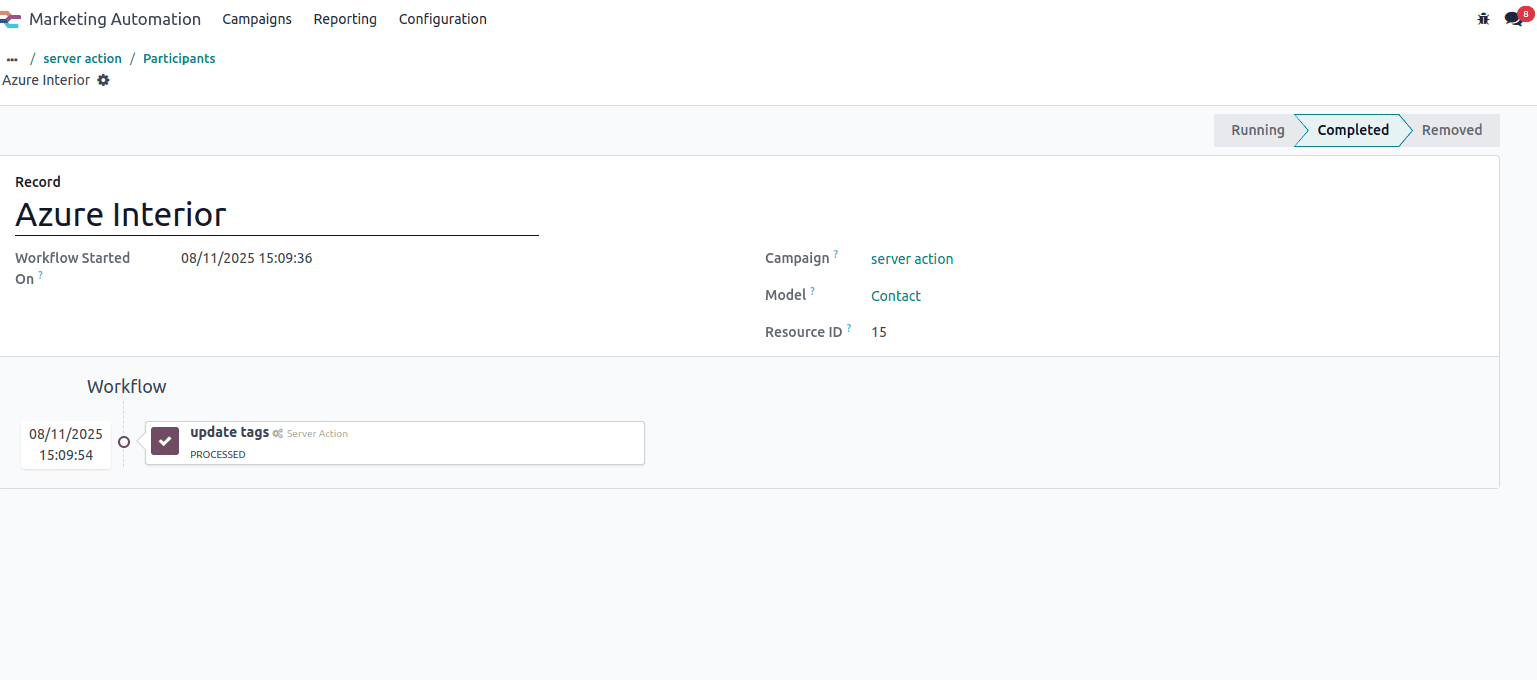
Server Action Activity
A server action has been configured to automatically assign the "US Customer" tag to a contact whenever their country is set to the United States.
After execution, navigate to the participants list. Here you can see all the participants in the automation.
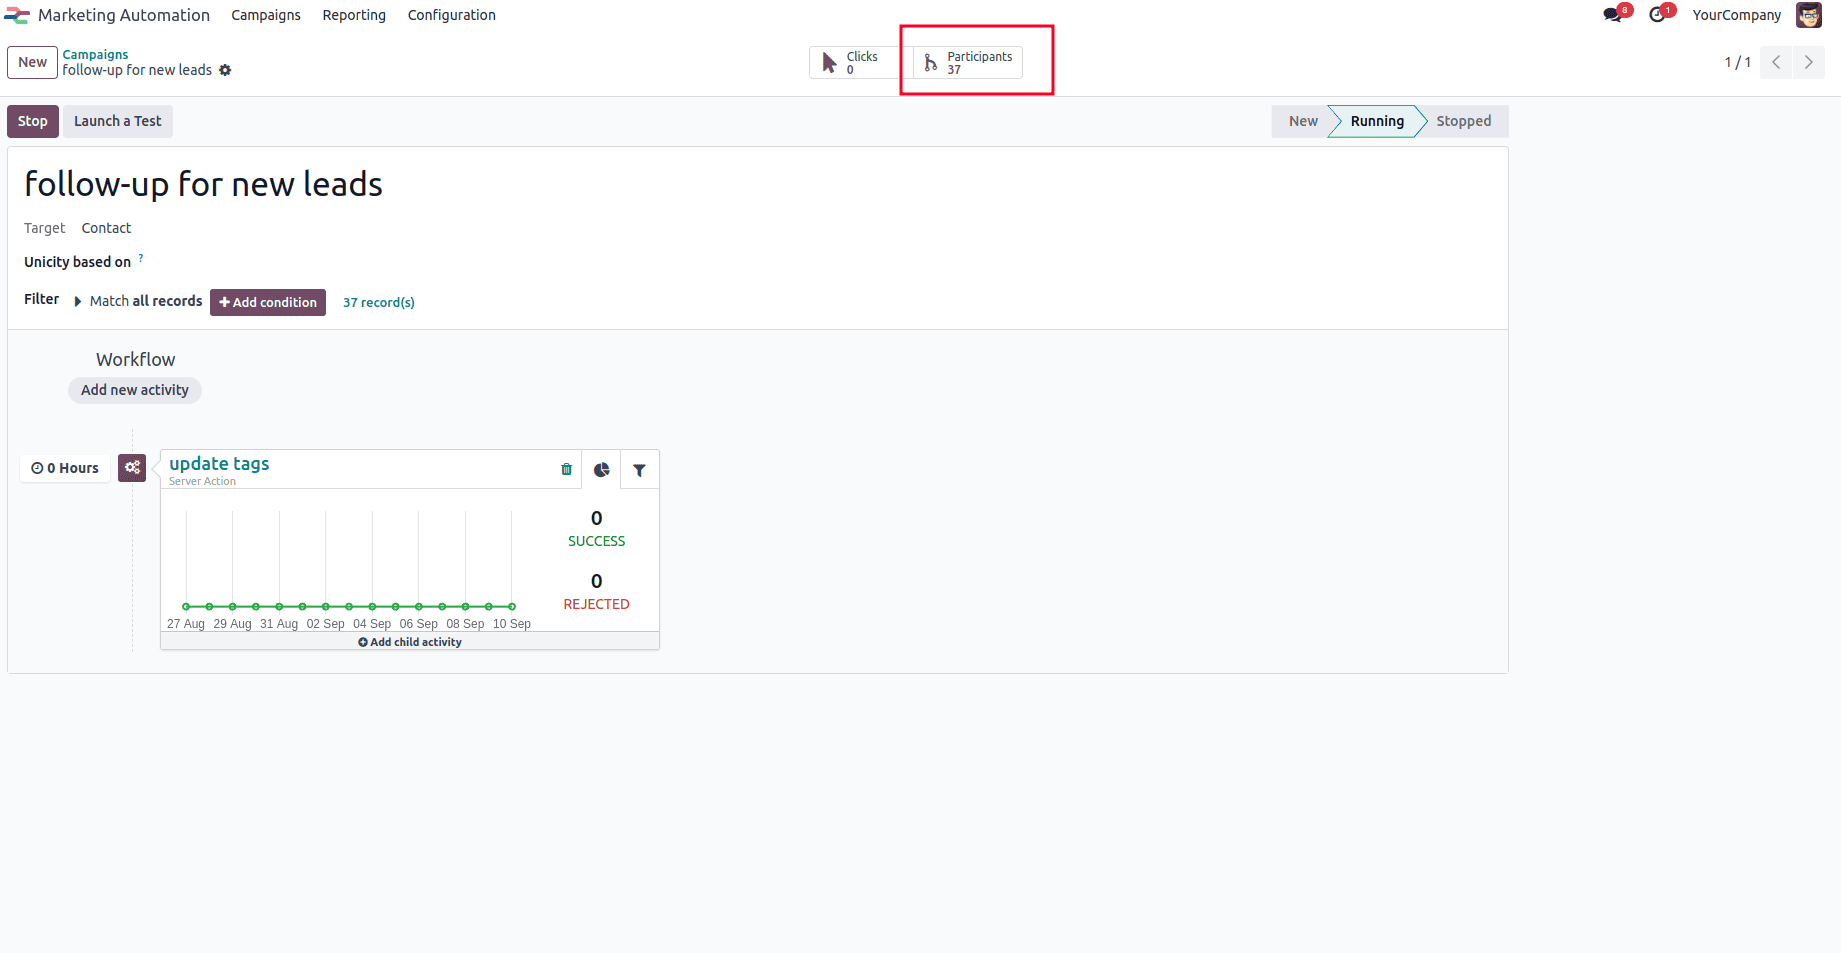
select the desired participant, and you’ll see that the process has successfully completed for the contact.
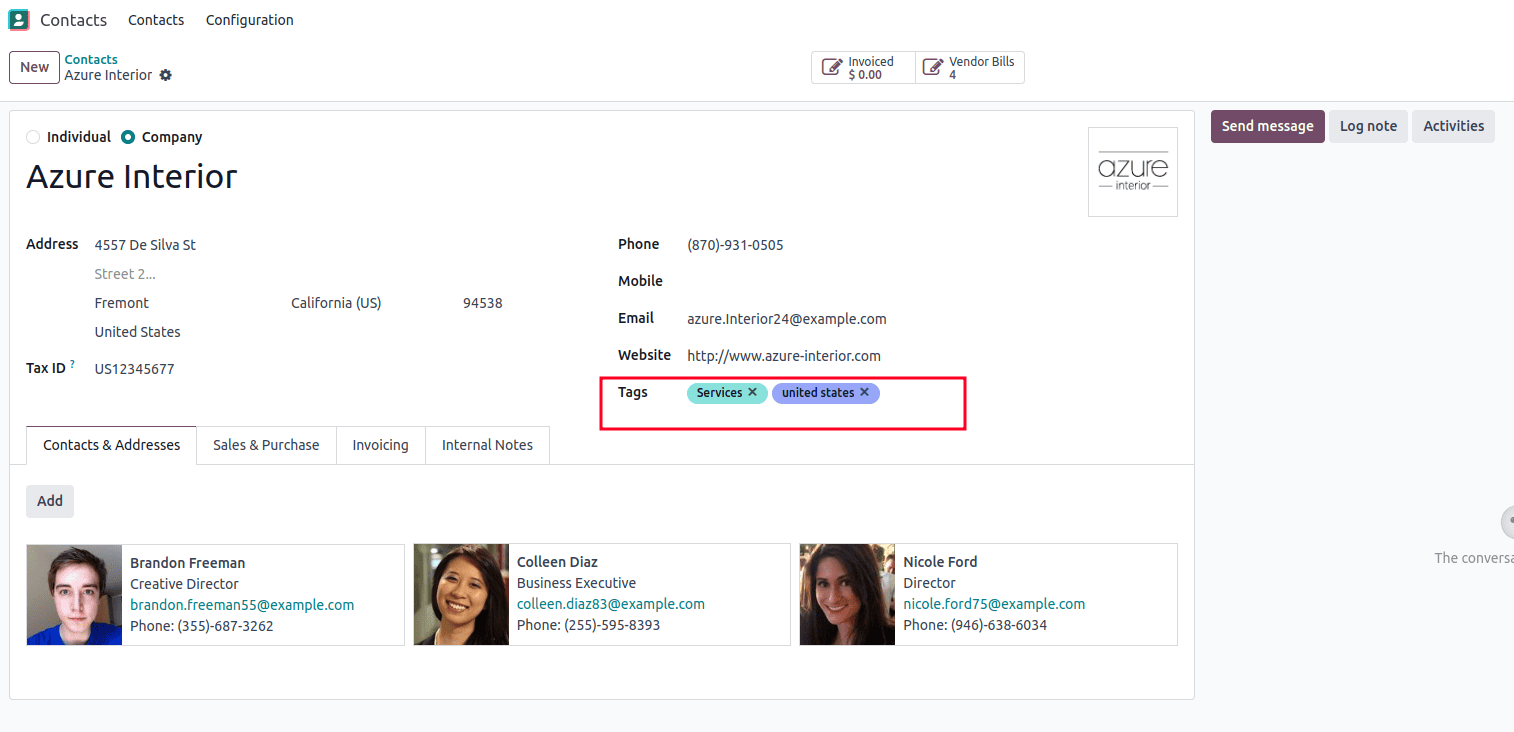
You can now navigate to the Contacts form view, where the tags field will display 'United States' as one of the assigned tags.
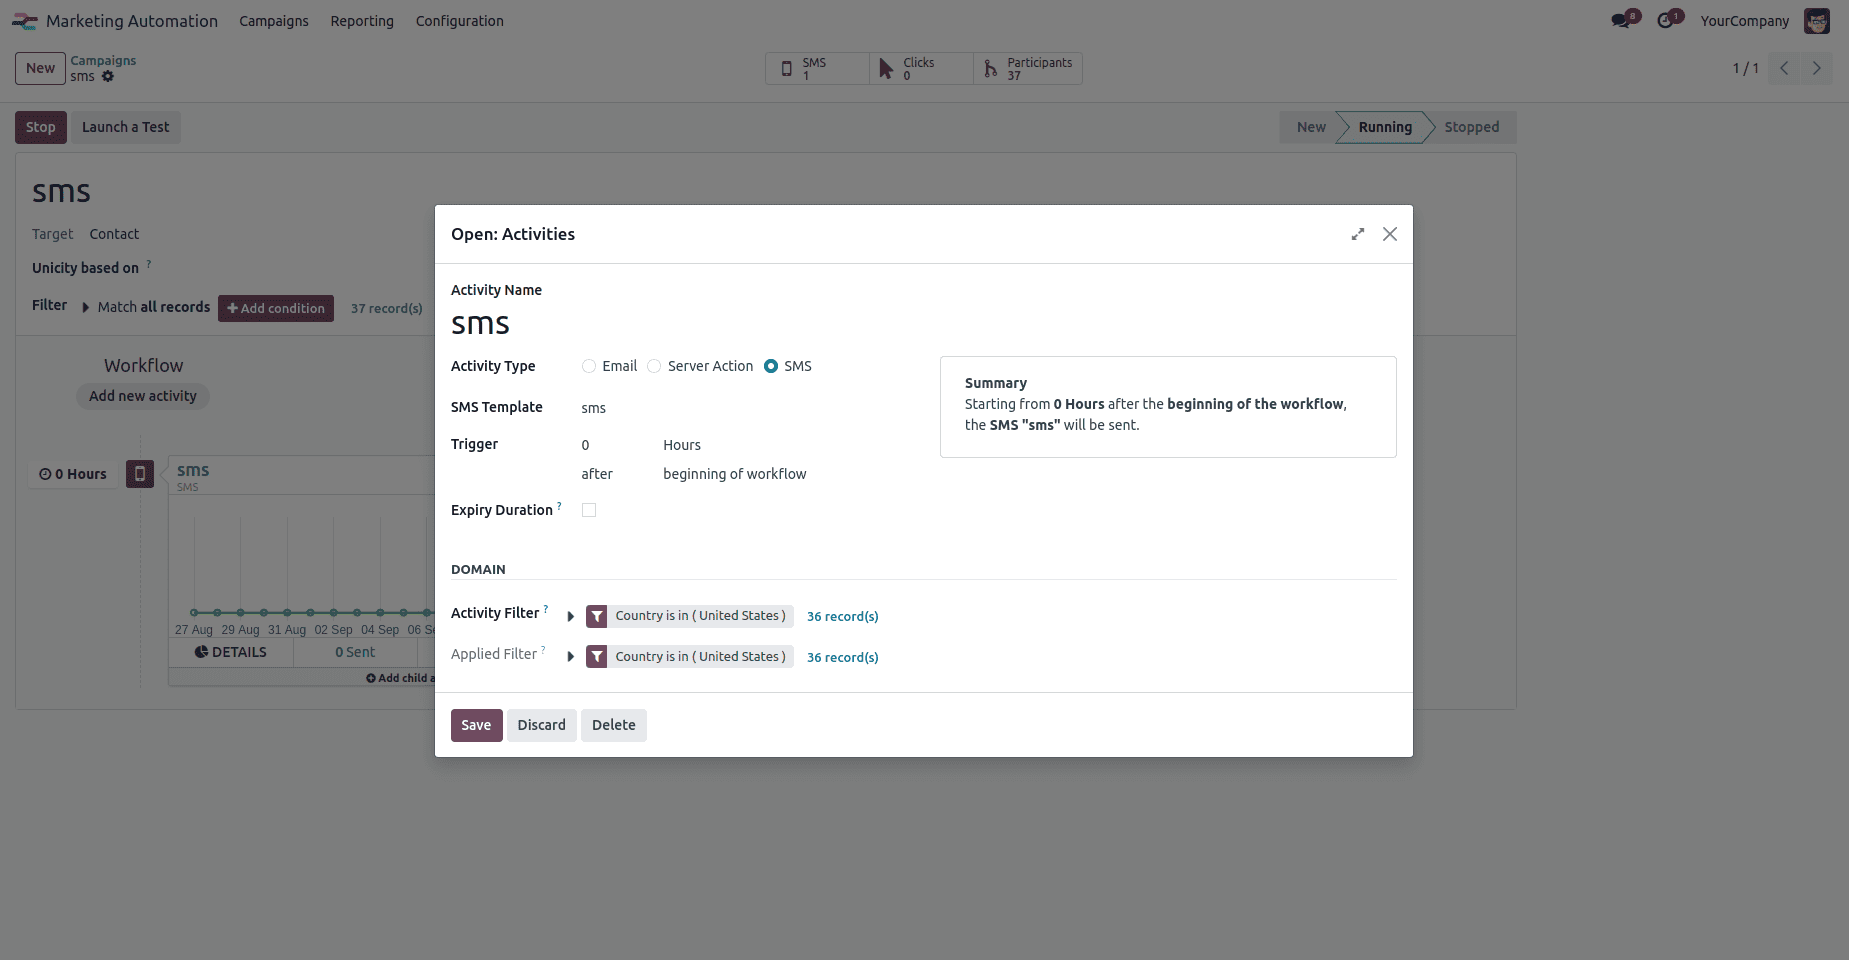
SMS Message Activity
An activity can be configured to automatically send an SMS to contacts that meet specific criteria—for example, customers from a particular country. When triggered, the system applies the defined filter to identify the relevant contacts and then sends them a predefined message, such as a promotion, reminder, or important update. You have to select the sms template while creating the activity. This approach ensures that communication is targeted and reaches only the intended audience without requiring manual effort.
Once the automation is initiated, you will be able to view the participant list as well as access the SMS functionality through the smart button.
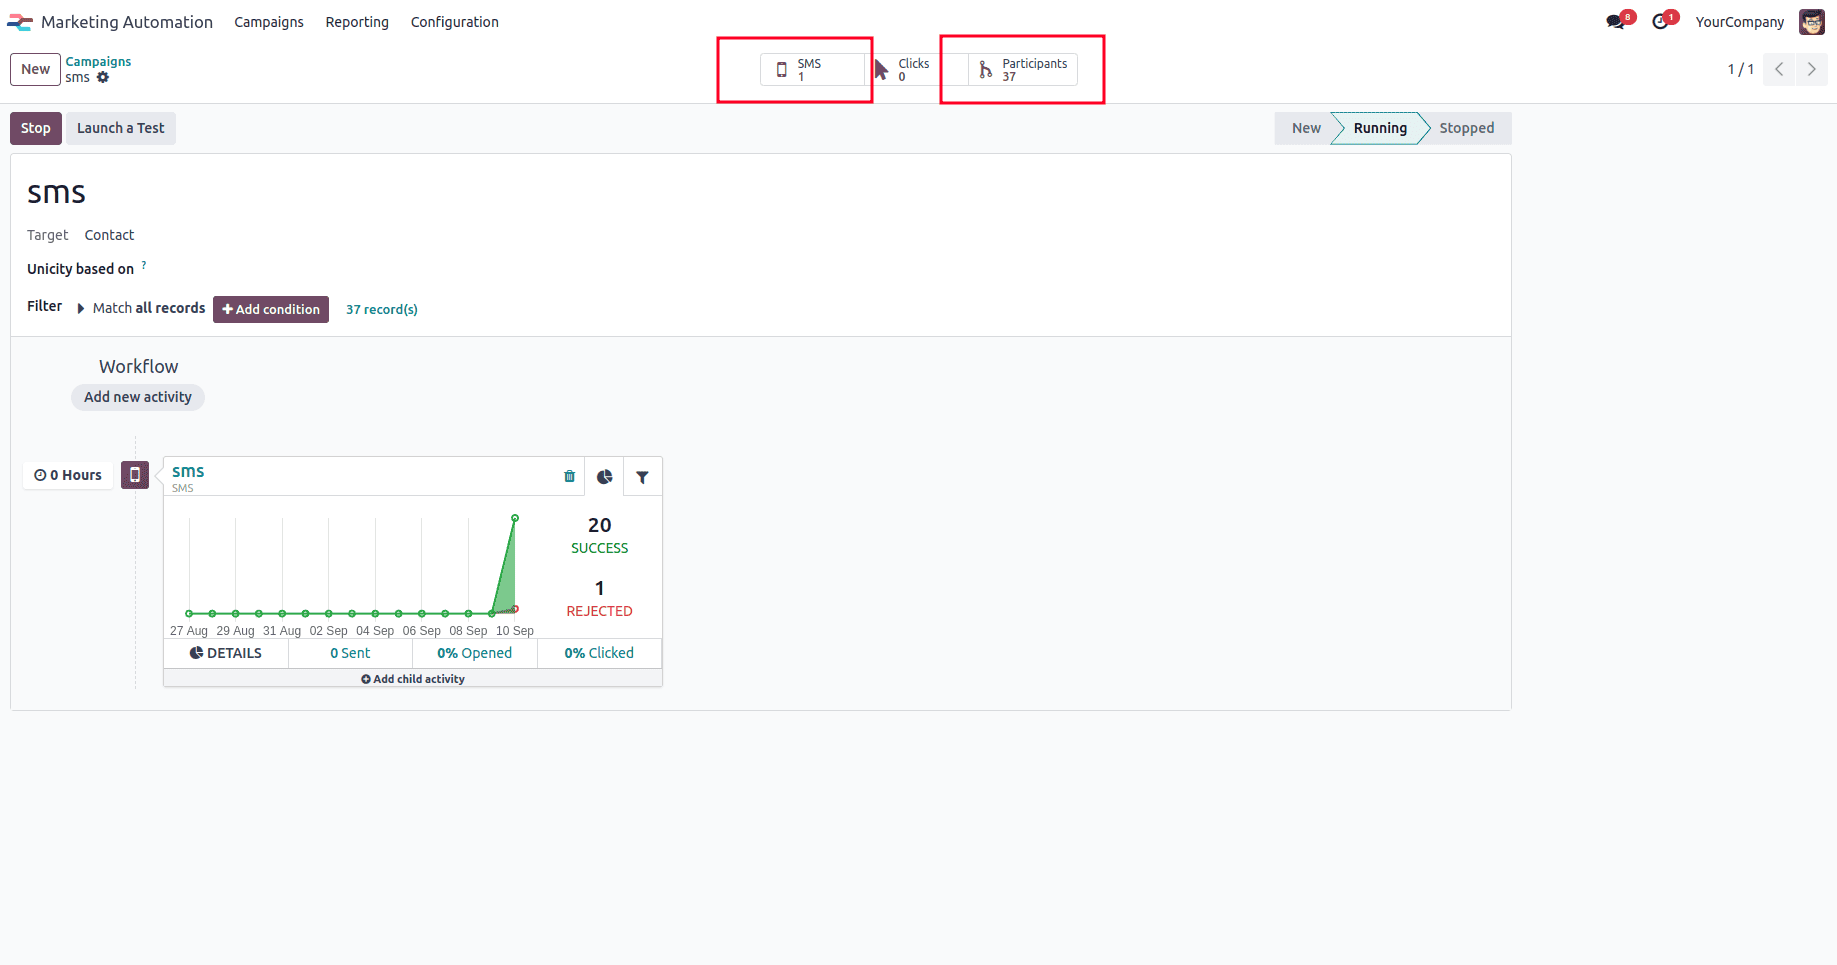
Clicking the SMS button allows you to view the complete details of the SMS activity.

To view the sent SMS messages, navigate to the Contacts app, select the desired record, and check the chatter, where all SMS communications are recorded.
Whatsapp Message Activity
To configure a WhatsApp message activity, begin by creating a new activity within the campaign. From the available options, select the WhatsApp template that will define the message content and format. In this template, make sure to enter the correct WhatsApp account number that will be used for message delivery. Next, set up the domain or target criteria to ensure the activity reaches the intended audience. Once the configuration is complete, include this activity in your campaign workflow. Similar to other activity types, the WhatsApp messages will only be sent after the campaign is activated by clicking the Start button.
To sum up, marketing automation in Odoo offers a versatile approach to designing, running, and monitoring customer outreach across various channels like WhatsApp, SMS, and email. Through the use of ready-made message templates, customizable filters, and event-based triggers, companies can deliver precise and relevant campaigns tailored to customer characteristics, actions, and needs. This automation minimizes repetitive tasks, ensures consistent and timely communication, and adds a personal touch to customer interactions. As a result, businesses can build stronger connections, boost engagement, increase conversions, and make informed decisions, all while staying competitive in a rapidly evolving market.
To read more about Overview of Odoo 18 Email Marketing Module, refer to our blog Overview of Odoo 18 Email Marketing Module