Email marketing in Odoo 18 is a powerful tool for companies seeking to engage with their audience in a focused, cost-effective, and automated manner. With the help of a user-friendly drag-and-drop email builder, segmentation capabilities, and automation flows, users may create unique campaigns for various customers. Odoo 18 enables users to deliver timely communications that convert, whether you’re nurturing leads, promoting a product, or advertising an event. Its smooth integration with the Contacts, CRM, and Sales modules facilitates campaign optimization and engagement tracking. It enables customers to continually refine their strategy by analyzing real-time analytics, including click-through rates, bounce rates, and open rates. Deliverability is increased and spam traps are reduced by utilizing link trackers and blacklist management. This blog offers a detailed overview of the email marketing module.
Firstly, select the Email Marketing app from the Odoo 18 dashboard.
Mailing Dashboard Views:
The mailing dashboard offers three types of views:
* List View
* Kanban View
* Calendar View
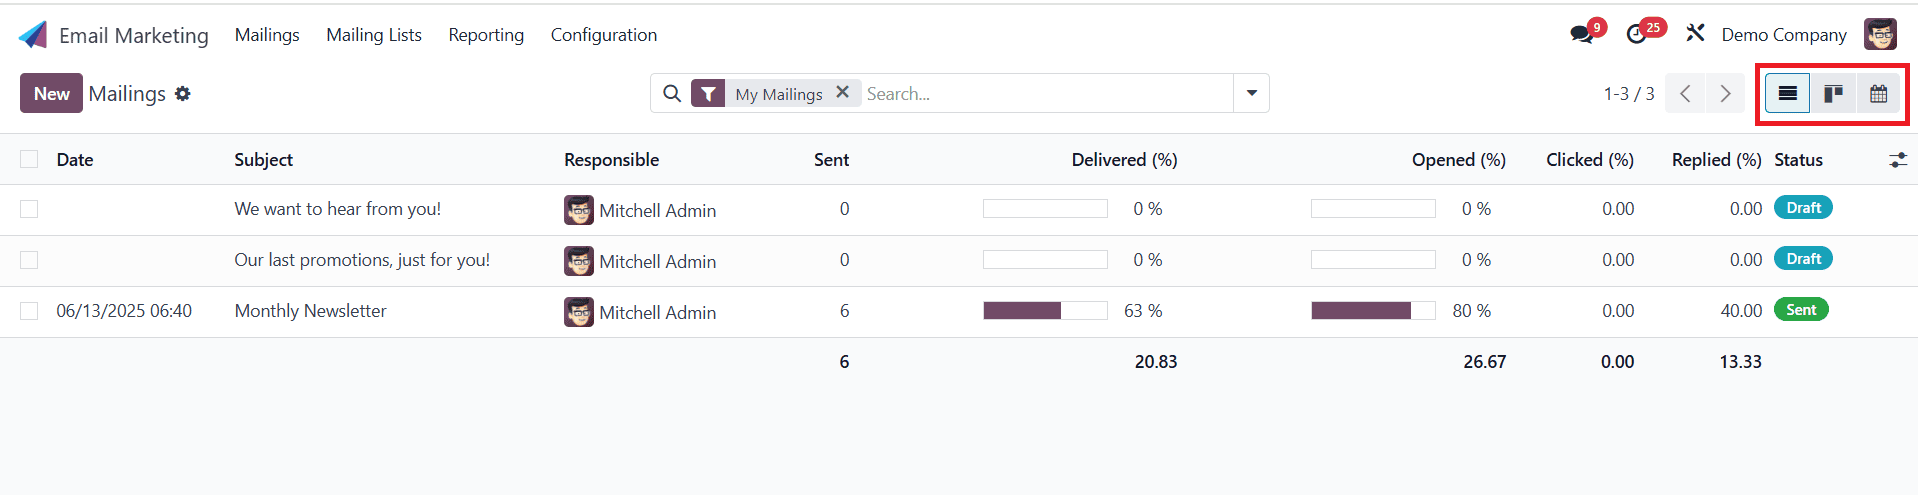
List View:
The List View is located in the upper-right corner of the dashboard, which is the default dashboard in the email marketing module in Odoo 18. In the list view, information is arranged in tabular columns.
* Date: shows the date when the email was sent.
* Subject: content of the email.
* Responsible: the person who is responsible for the email.
* Sent: shows the number of emails that have been sent.
* Delivered: percentage of successfully delivered emails.
* Opened: percentage of opened emails by recipients.
* Clicked: percentage of clicked emails by recipients.
* Replied: percentage of replied emails by recipients.
* Status: Displays the status of the email (Draft, In Queue, or Sent).
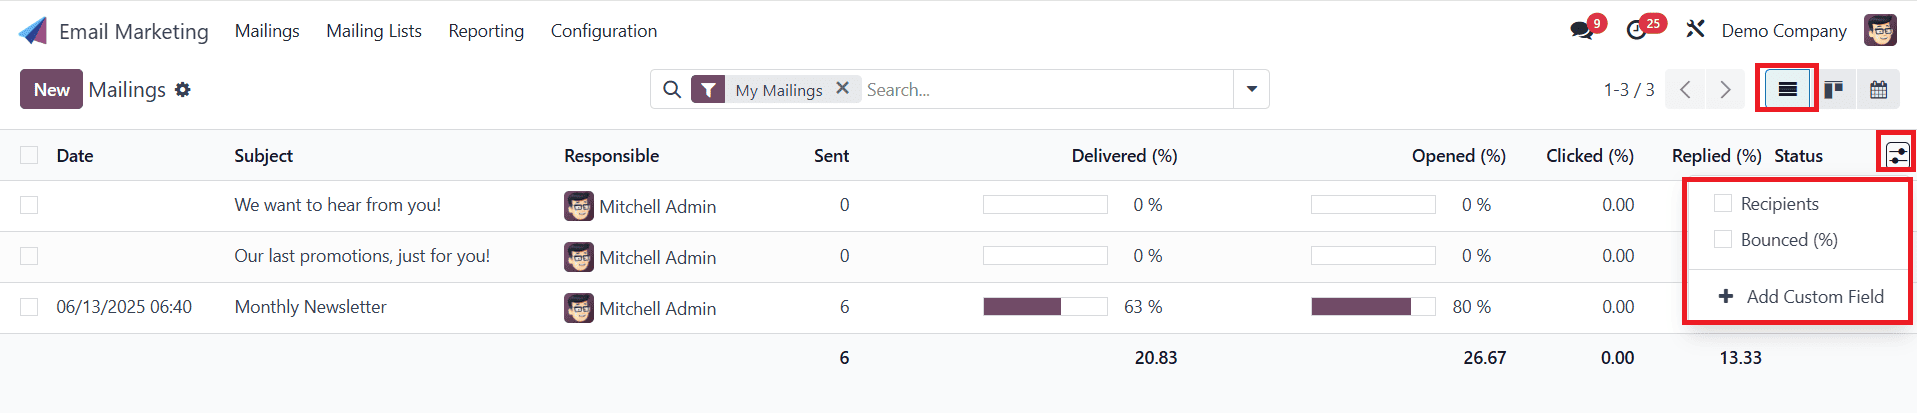
Next to the column title, an Additional Options icon is available, which helps to add or remove columns.
Kanban View:
In Kanban View, emails are arranged in the various stages, such as:
* Draft: emails are written/created.
* In Queue: emails are scheduled to be sent later.
* Sending: emails is being sent to the recipients.
* Sent: emails are sent to the recipients.

Calendar View:
In the Calendar view, you can view the mailings that have been created or scheduled. On the right side of the calendar, you can filter the data using the Responsible and Status fields.
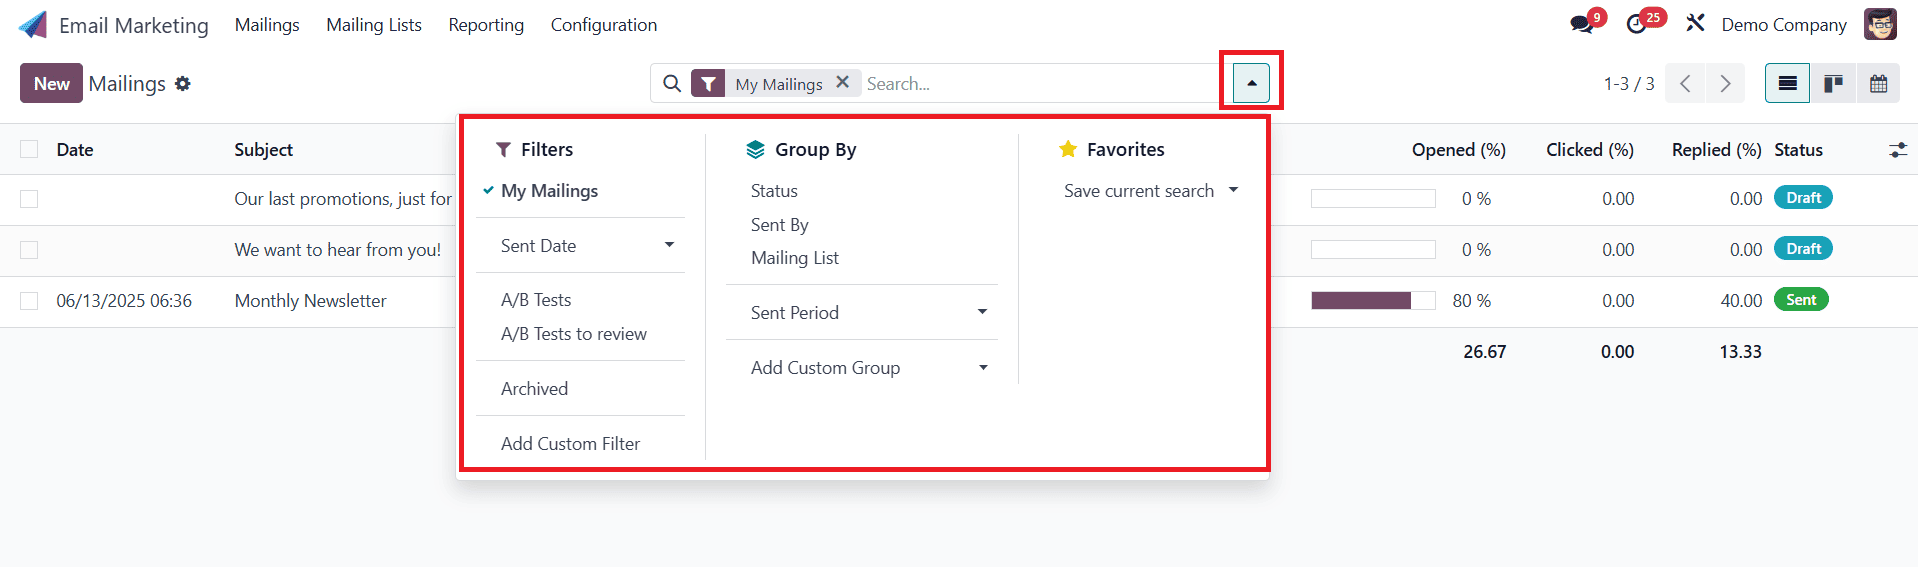
Search Option:
Click on the downward arrow on the right side of the search bar, where you can see options like Filters, Group By, and Favorites.
* Filters: You can filter the data based on My Mailings, Send Date, A/B Tests, A/B Tests to review, Archived, and Add Custom Filter.
* Group By: You can group the data based on Status, Sent By, Mailing List, Send Period, and Add Custom Groups.
* Favorites: You can add emails to the favorites list.
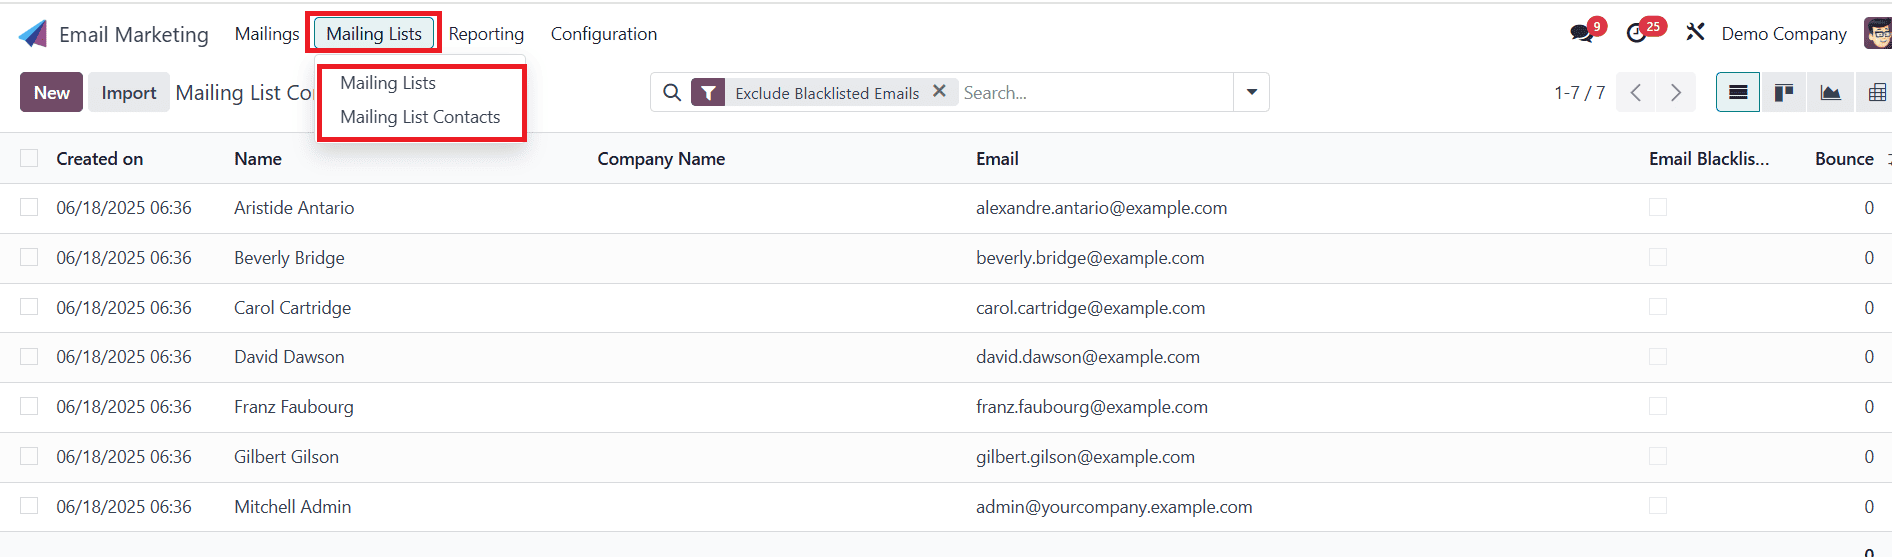
Mailing Lists:
The Mailing Lists option in Odoo 18 Email Marketing allows you to create and manage groups of recipients for your email campaigns. It has two options: Mailing Lists and Mailing List Contacts, as shown below:
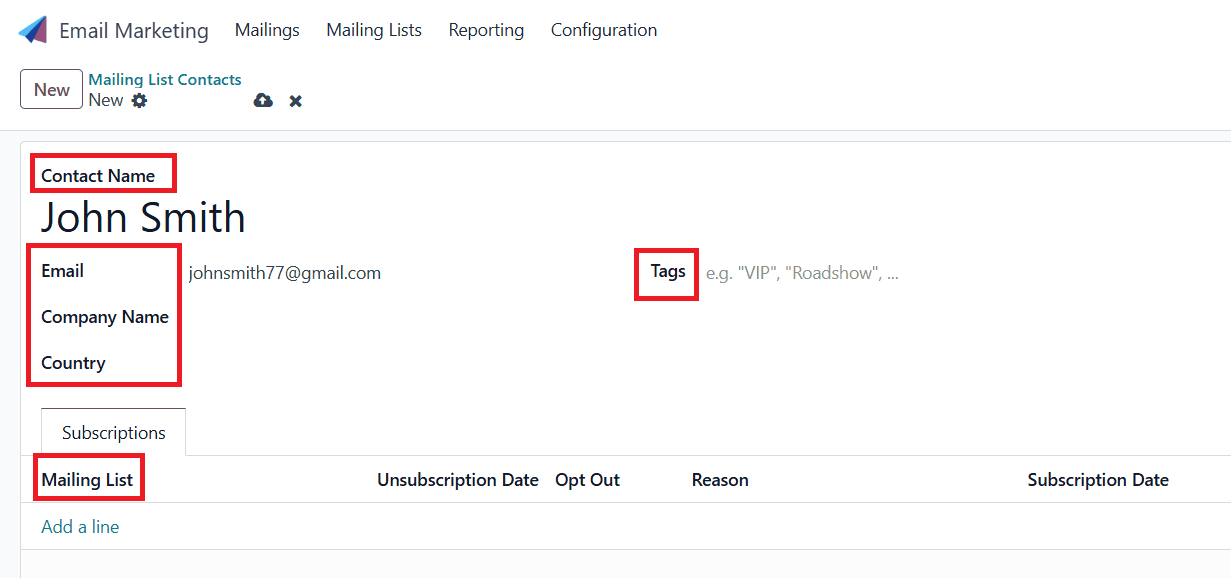
Mailing List Contacts:
To create a new Mailing List Contact, click on the New button. Then, you can add details such as Contact Name, Email, Company Name, Country, Tags, and either select an existing Mailing List or create a new one. Then save the newly created mailing list contacts.
Mailing Lists:
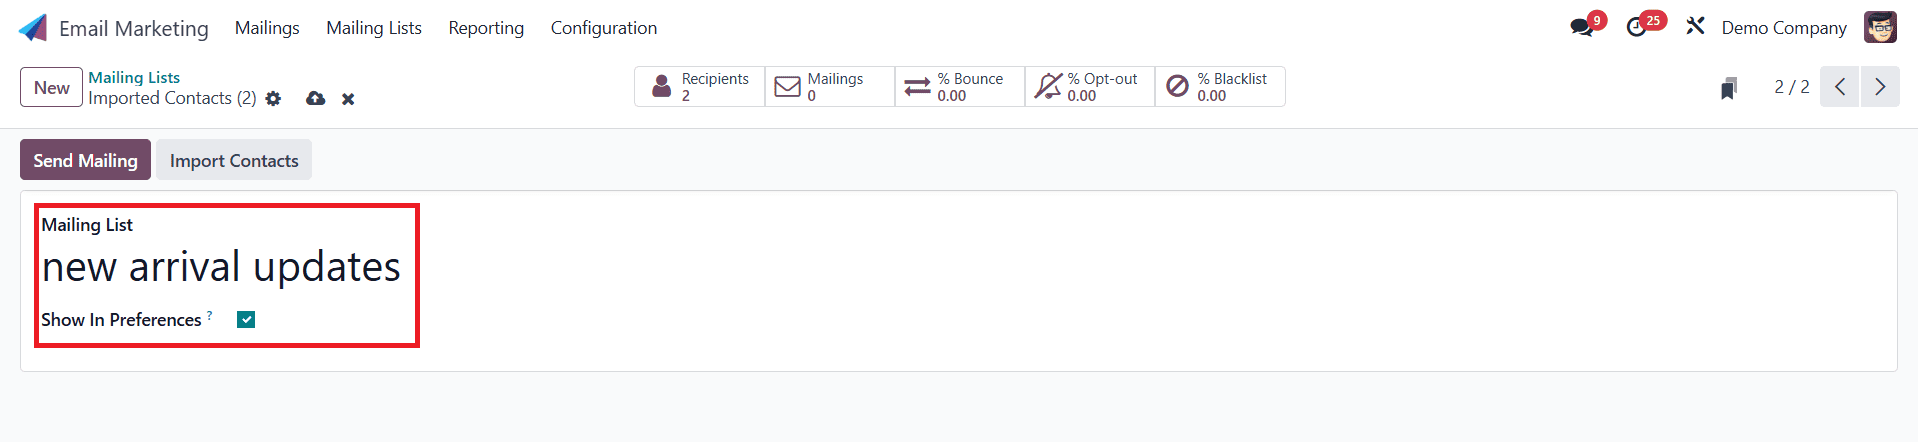
Navigate to Mailing Lists > Mailing Lists, where you can view the already created mailing lists. To create a new one, click on the New button as shown below:

Here, you can add the new mailing list and enable Show In Preferences. Then save the newly created one.
Then click on the Recipients to add or import the recipient contact.

Here, you can see the newly created mailing lists appear under the Subscription tab, as shown below:
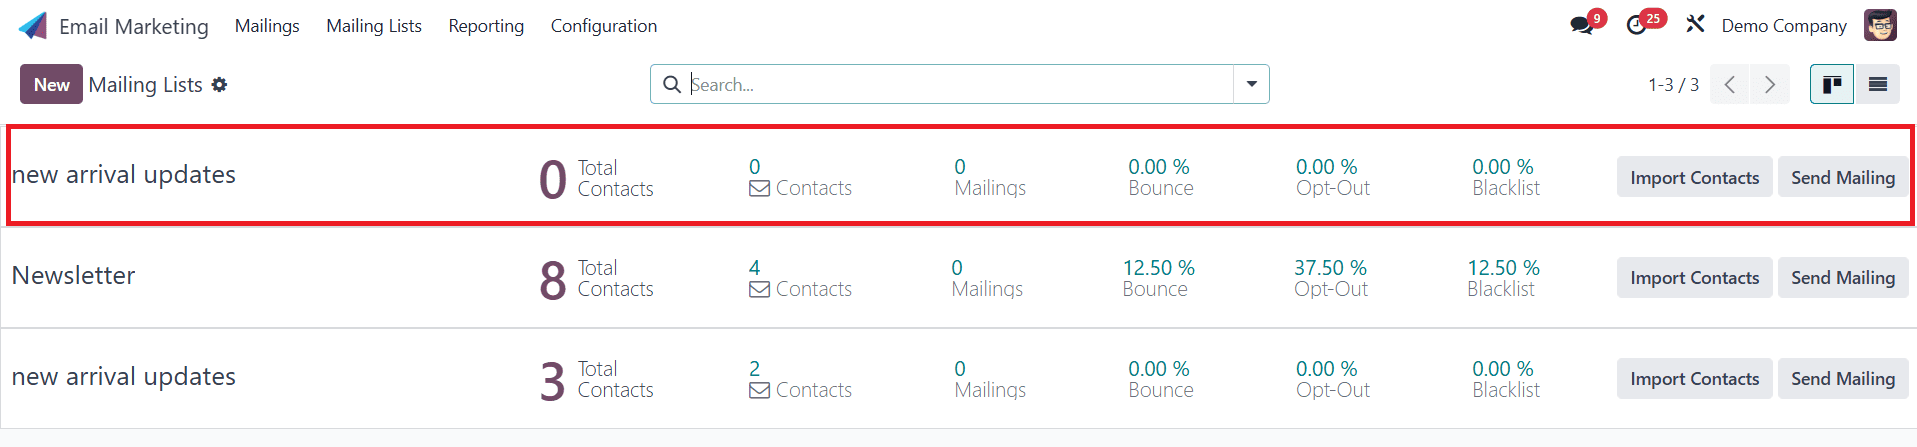
Then, go back to the Mailing Lists, where you can see the new arrival updates that the mailing lists have already created. There are no more contacts that can be seen in the new arrival updates mailing lists.
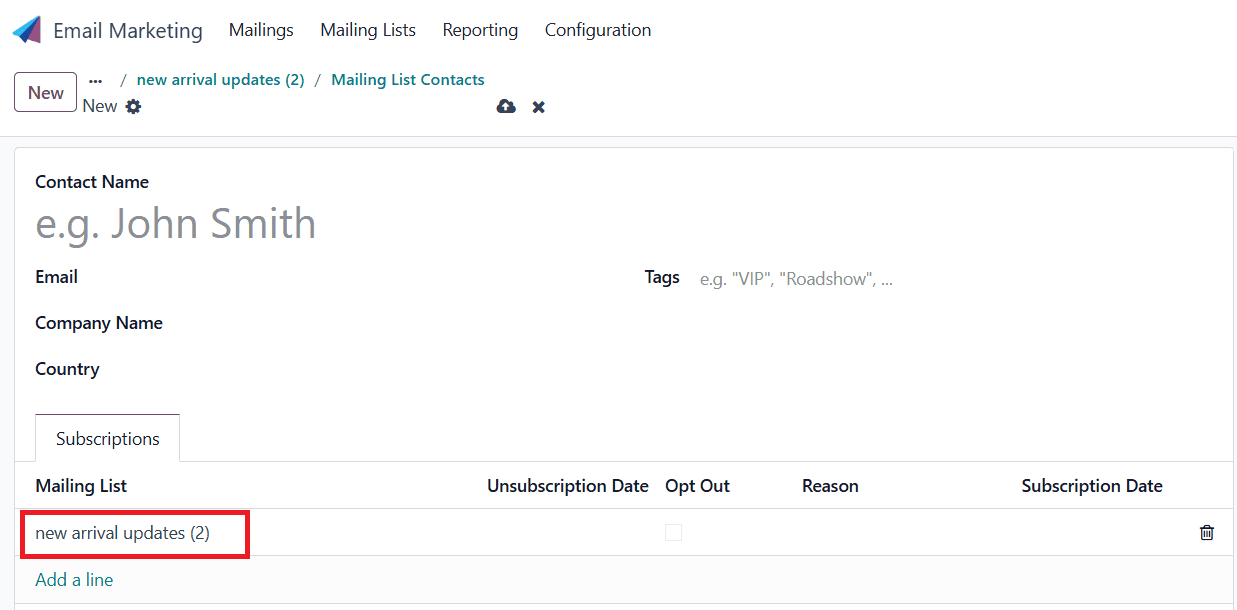
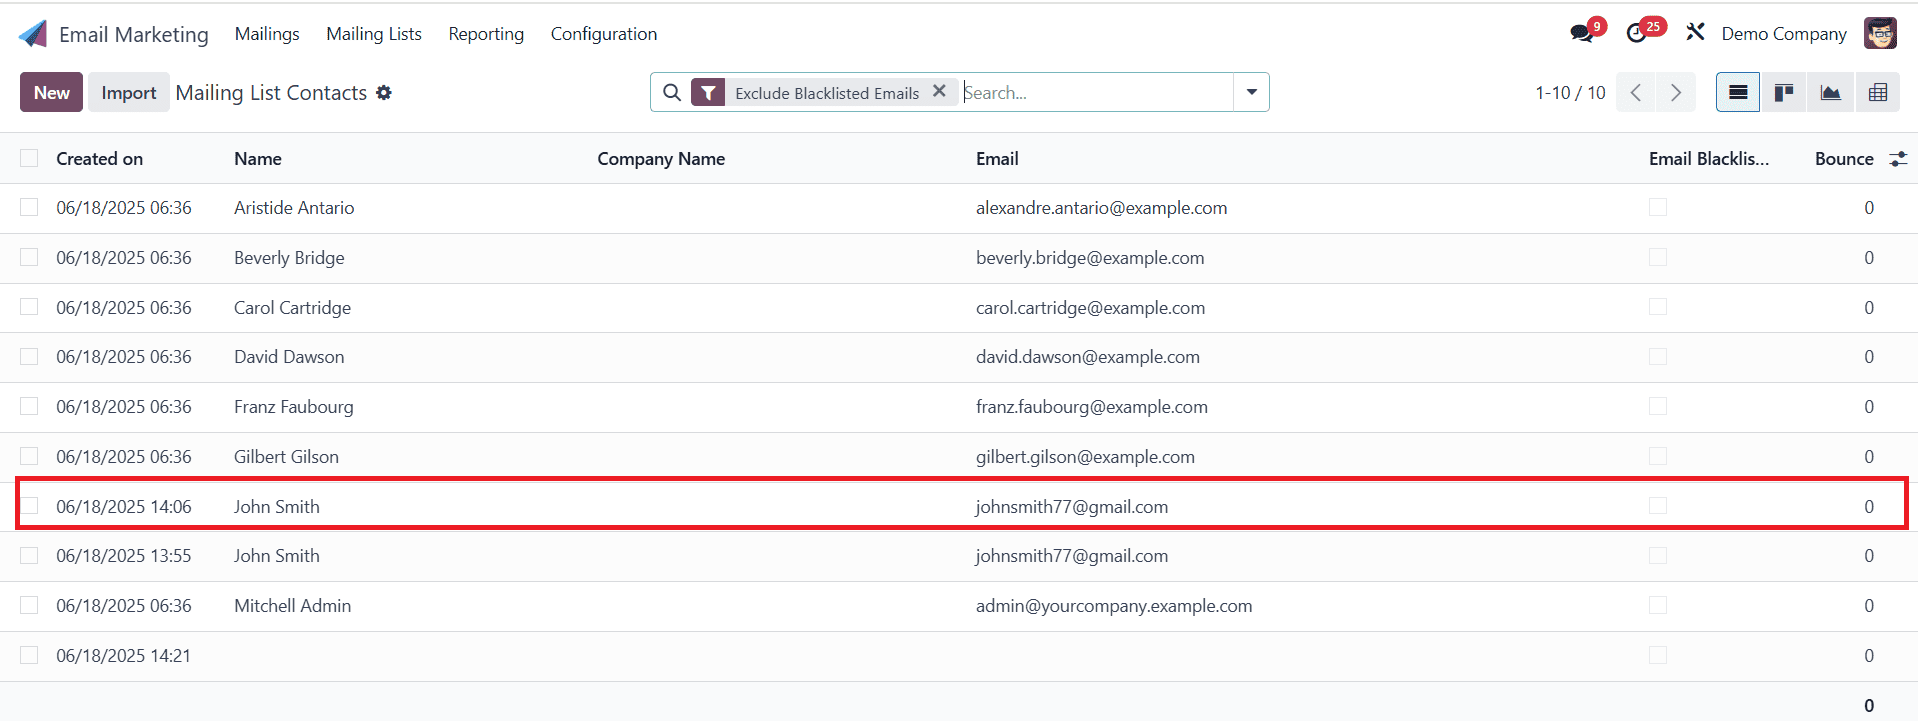
Then go back to the Mailing Lists Contacts, and select the created contact as shown below:
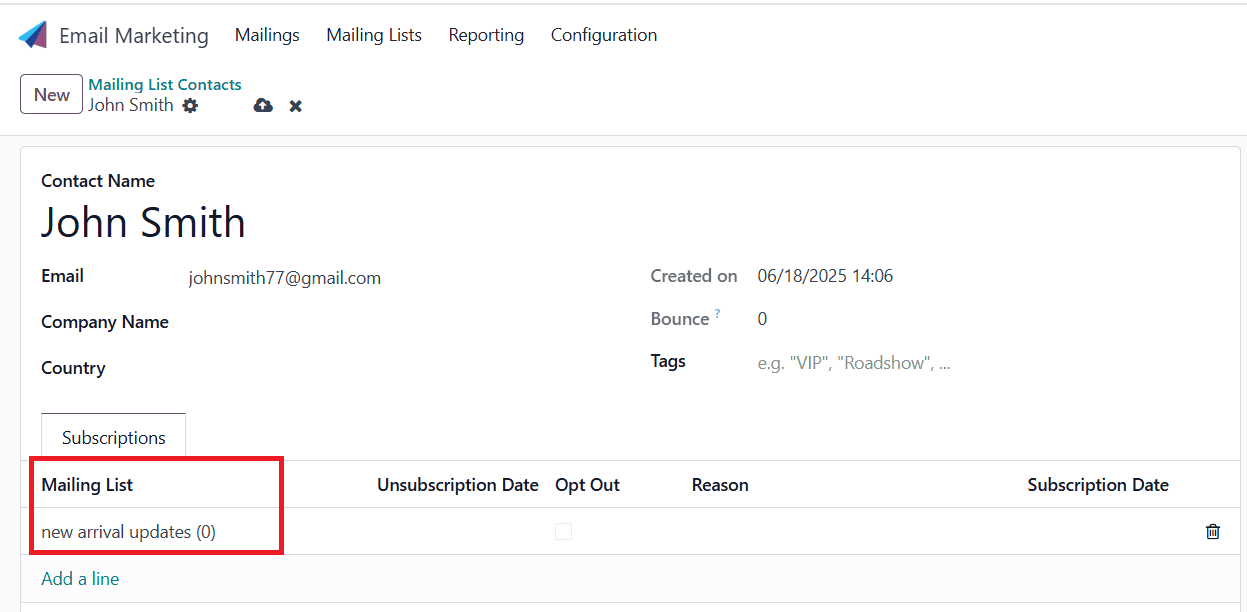
Under the Subscription tab, you can add the newly created mailing list as shown below:
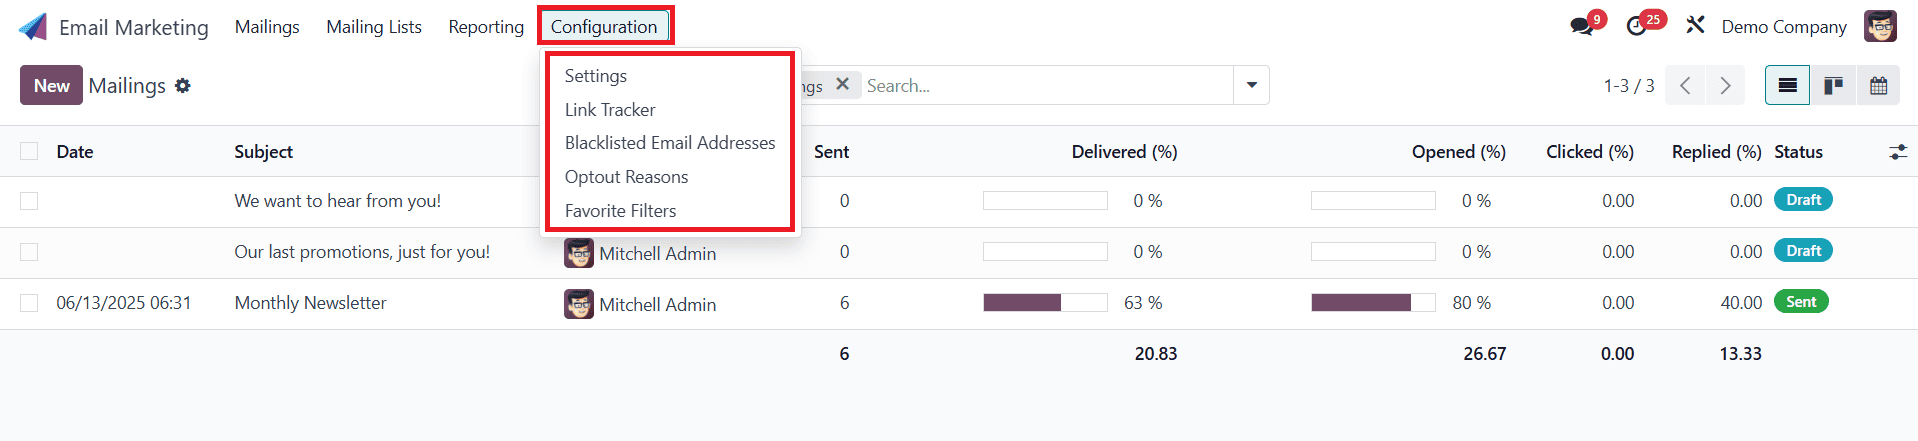
Configuration:
Under the Configuration menu, we have options such as Link Tracker, Blacklisted Email Addresses, Optout Reasons, and Favorite Filters.
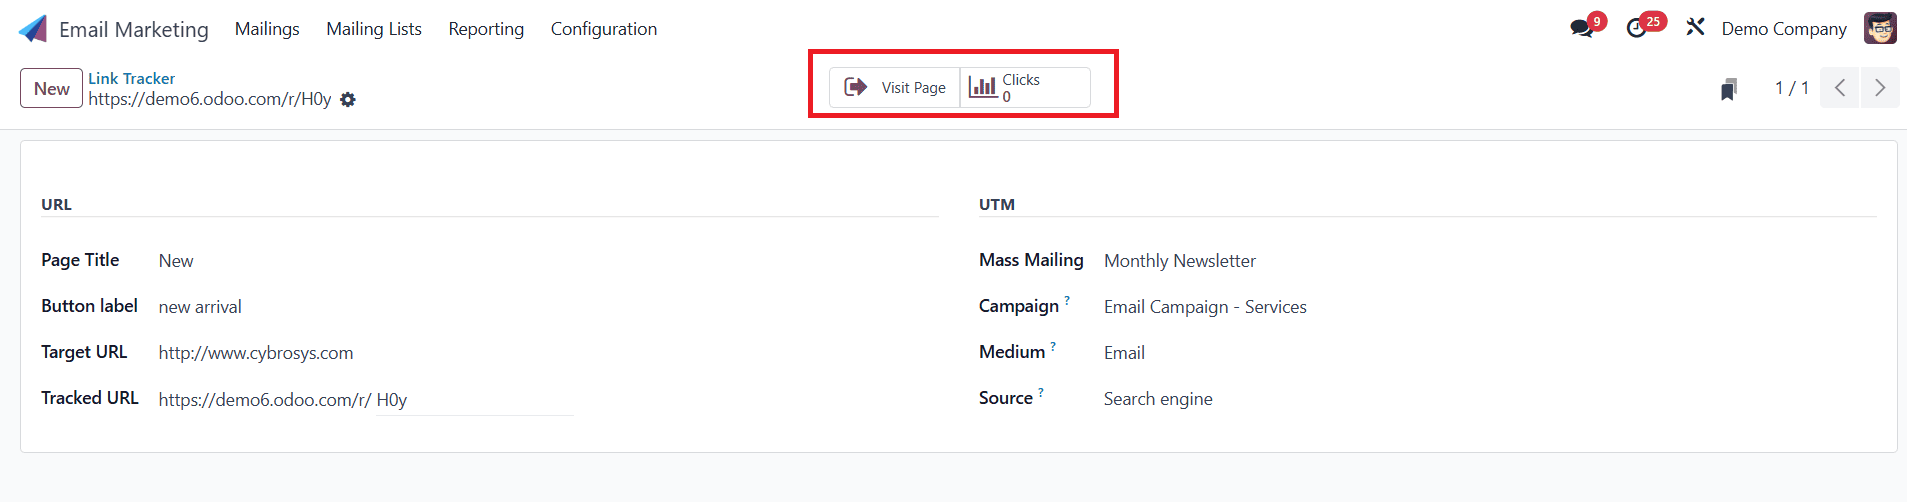
Link Tracker:
Navigate to Configuration > Link Tracker. When you click on the link tracker, we can track the number of clicks and related visits to the mail, then you can click the New button to create a new mail link tracker.

Here, you can add a Page Title, Button Label, Target URL, Mass Mailing, Campaign, Medium, and Source as shown below:
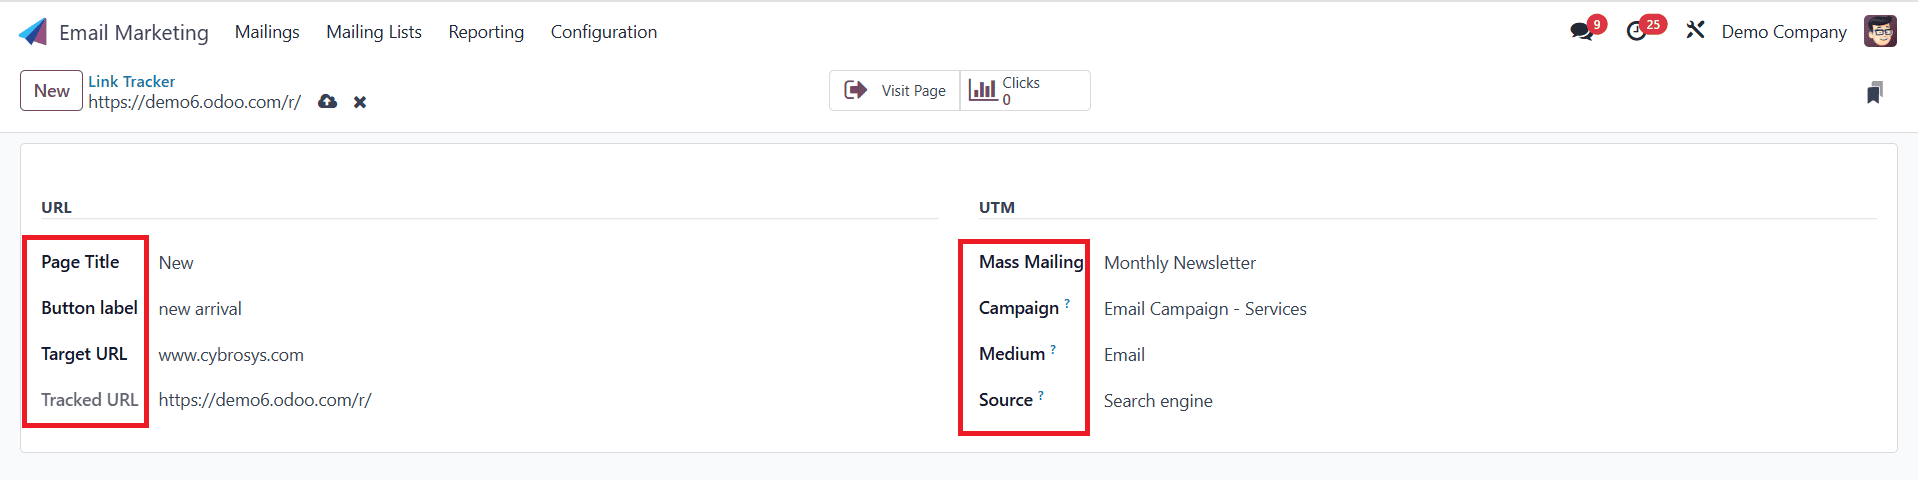
When you click on Visit Page, you can be taken directly to the specified Target URL page. When anyone has visited the target URL, you can see the number of clicks in the Clicks section.
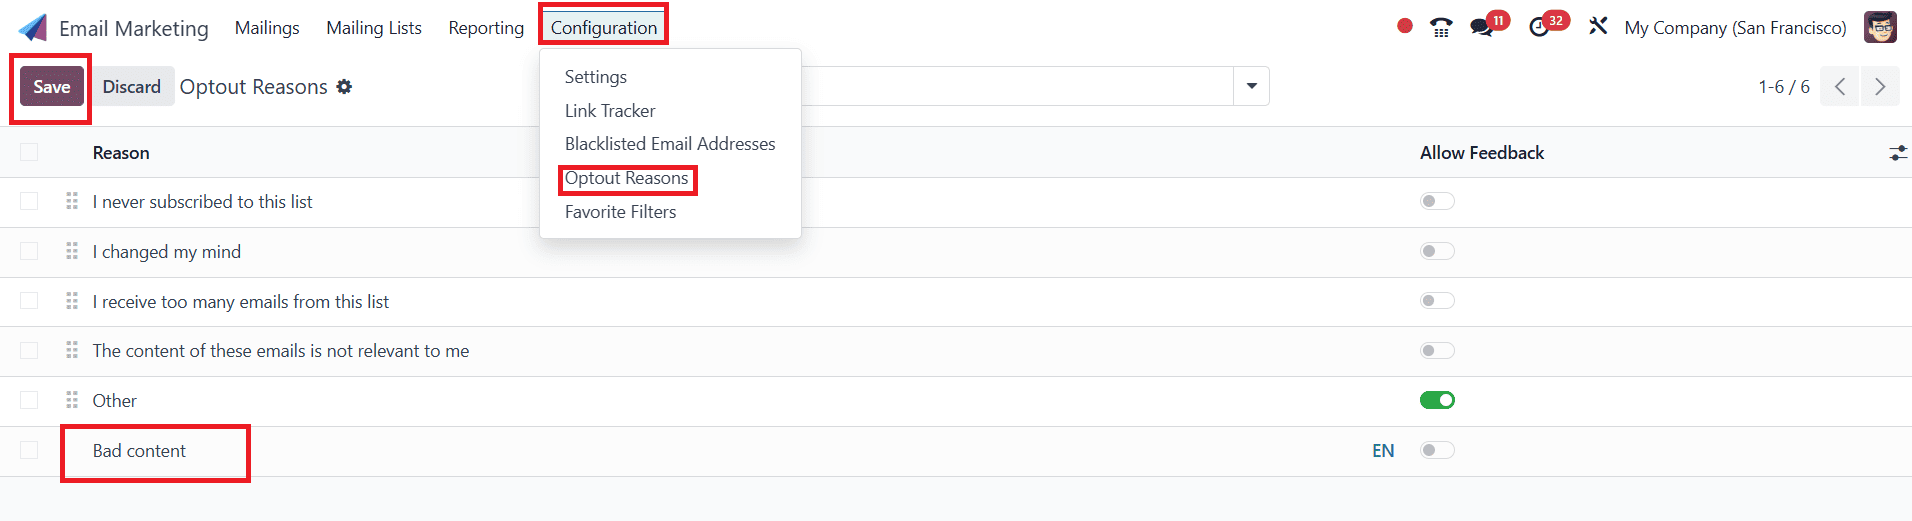
Opt-out Reasons:
Navigate to Configuration > Opt-out Reasons, where you can see the created Optout reasons. To create a new Optout Reason, click on the New button, then add a new optout reason and click on the Save button as shown below:
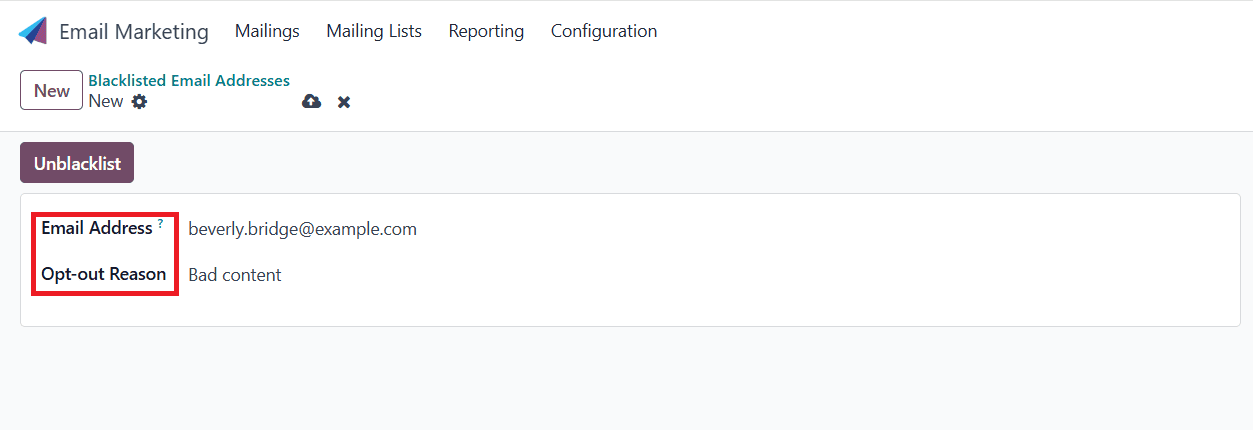
Blacklisted Email Addresses:
Navigate to Configuration > Blacklisted Email Addresses. Here, you can see the list of blacklisted email addresses. To create a new blacklisted email address, click on the New button as shown below:

Here, you can copy an existing email address and add the newly created Opt-out Reason. Then save it as shown below:
Here, you can see the newly created blacklisted email address.

To unblacklist the email address, click on the Unblacklist. A new pop-up screen will appear, where you can add the reason for unblacklisting, and then click on the Remove address from blacklist as shown below:
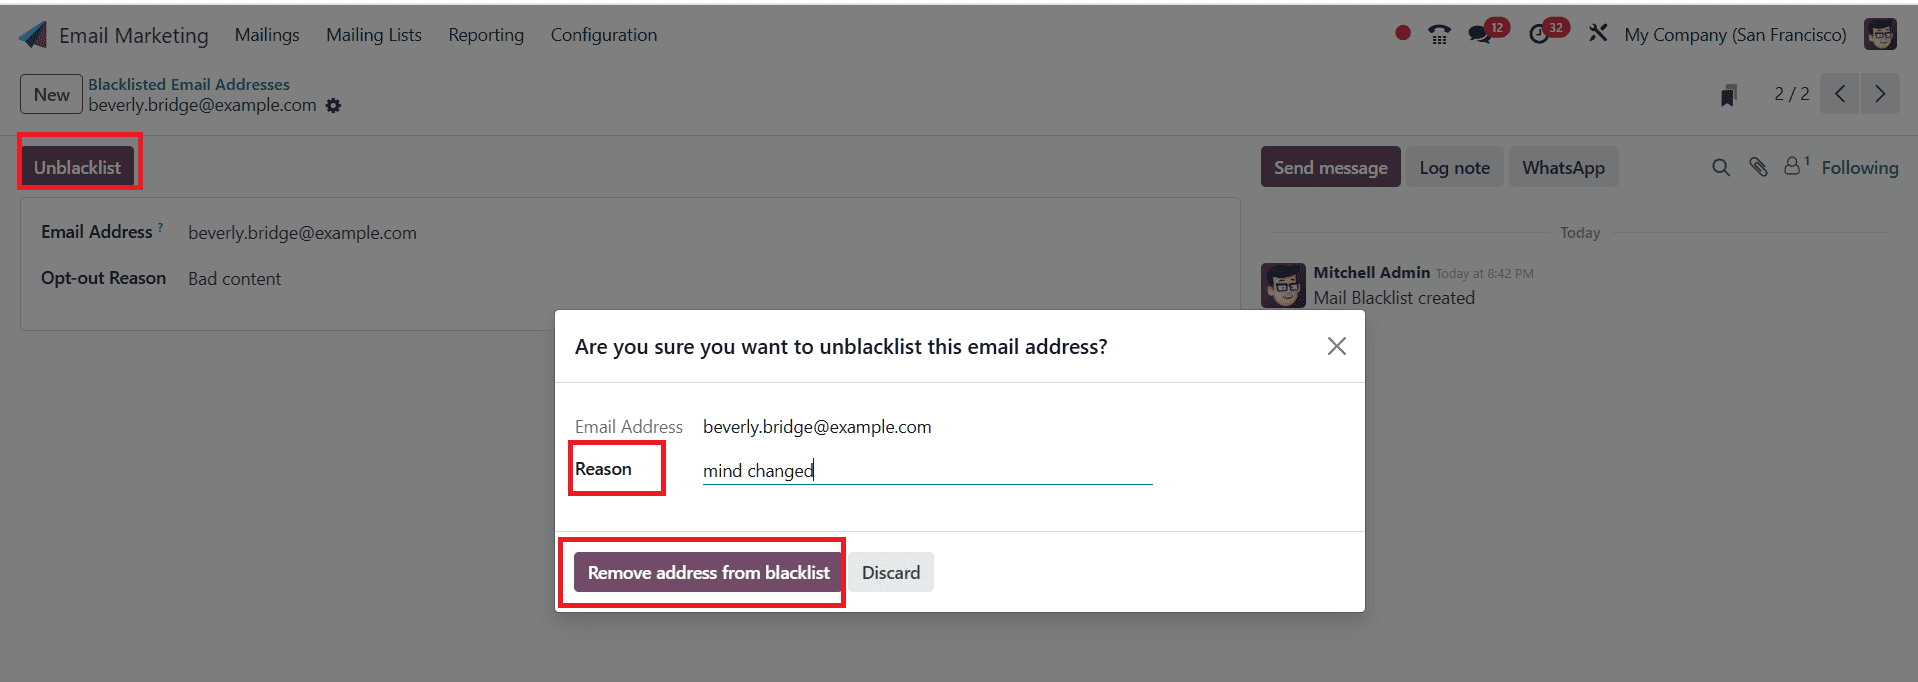
Here, you can see the email address was removed when you unblacklisted.

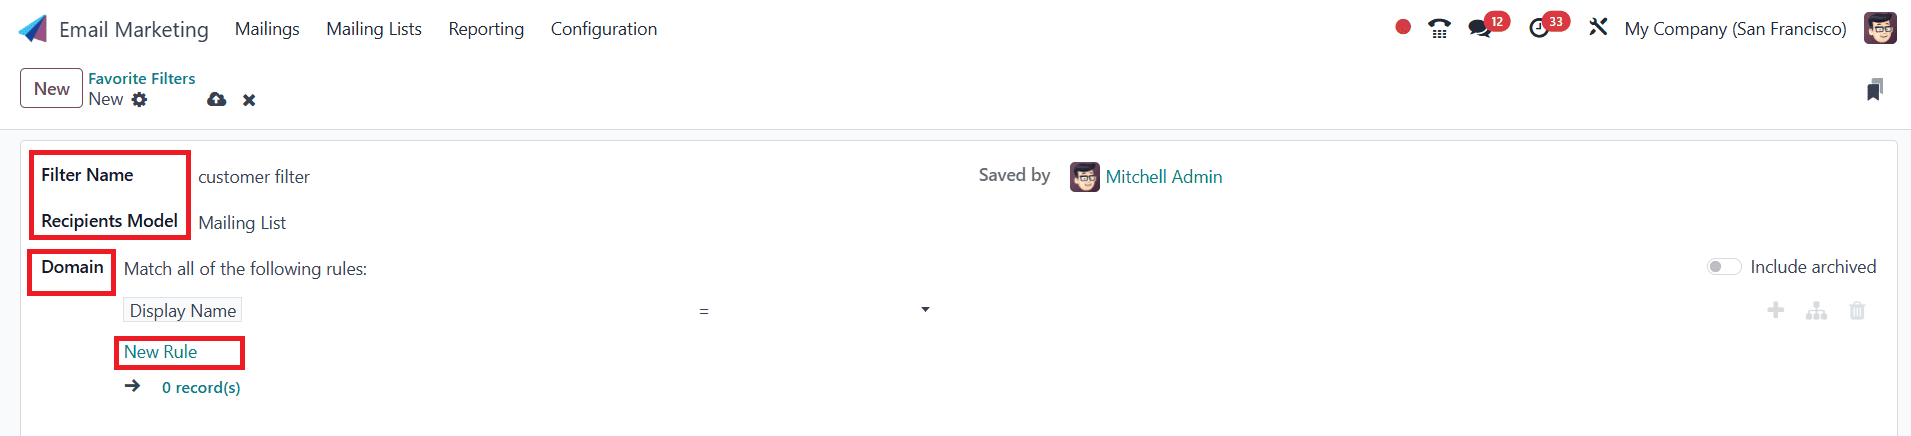
Navigate to Configuration > Favorite Filters, then click on the New button as shown below:

Here, you can add a Filter Name and select Recipient Model as Mailing List. Then click on the New Rule option, and you can choose new rules from the list. You can also add a filter after selecting the new rule. Then save it. If any contact meets this filter, you can apply it to that contact.
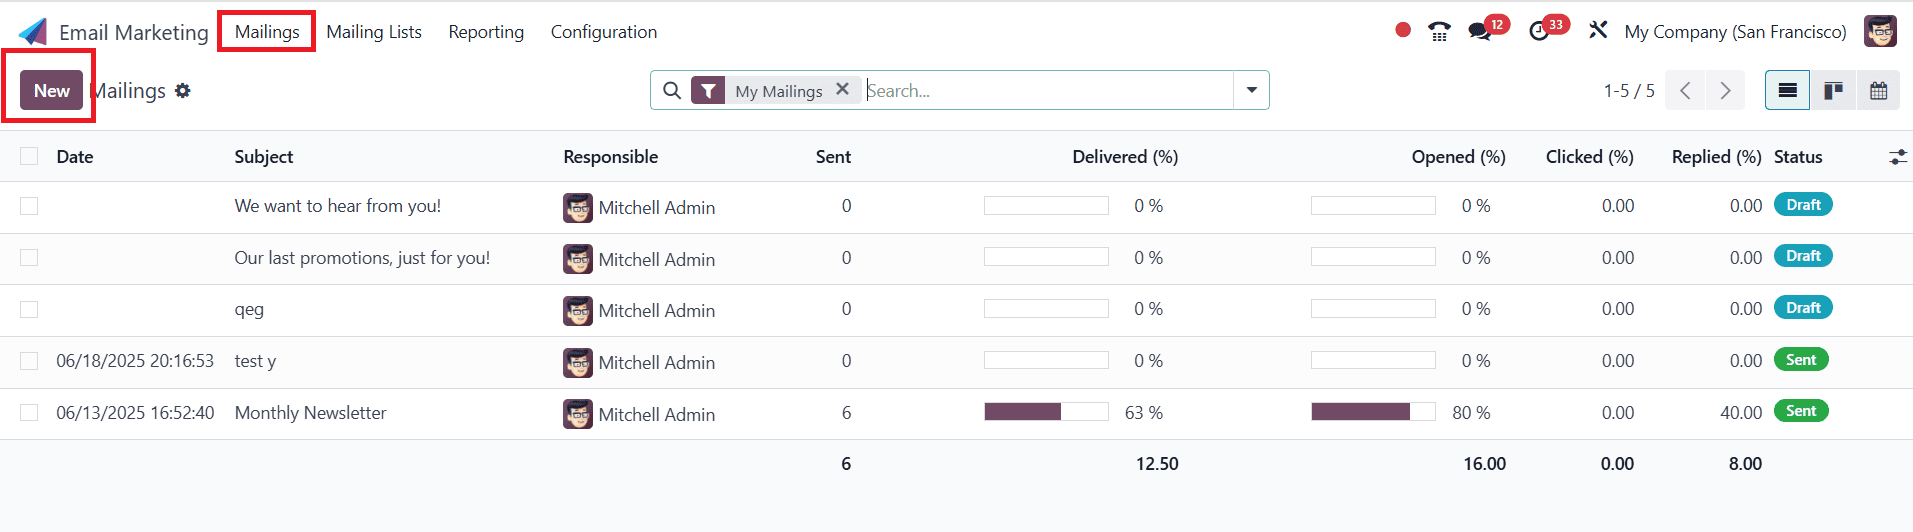
Mailings:
To create a new mailings, click on the New button as shown below:
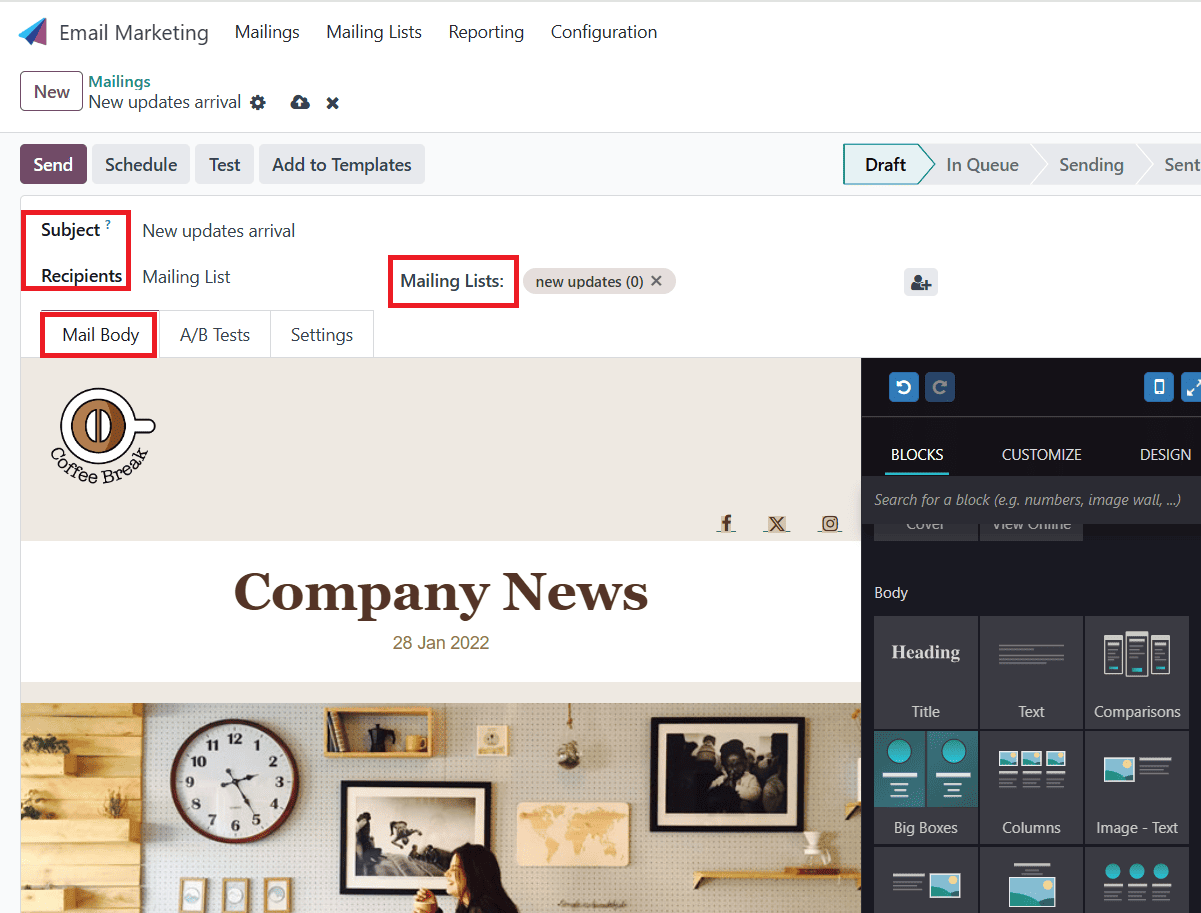
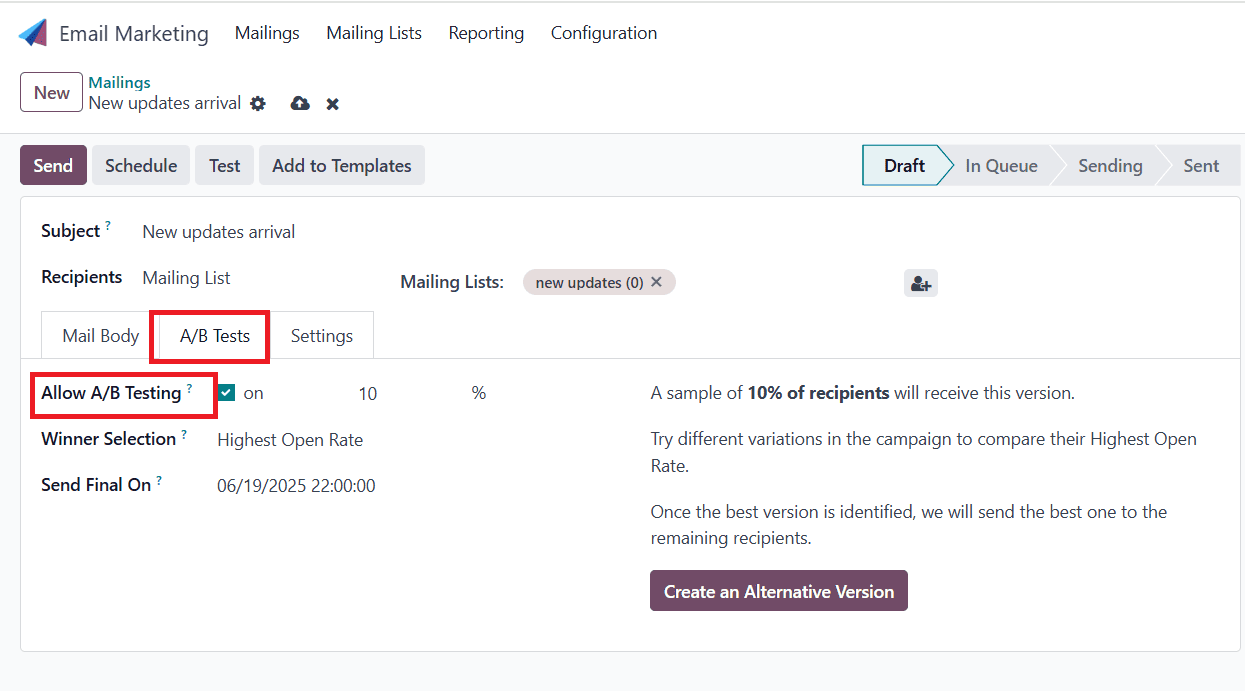
Here, you can add the Subject for the mail and select the Mailing List. Under the Mail Body tab, you can select any suitable mail body.
Under the A/B Tests tab, you can enable Allow A/B Testing, which allows multiple versions of the email to be sent to a set of people on the mailing list and track their responses. This helps identify the type of mail that receives more responses from recipients. You can also see the percentage of tests and criteria for Winner Selection. By using A/B Testing, you can achieve the highest open rates for the emails sent to the list of people.
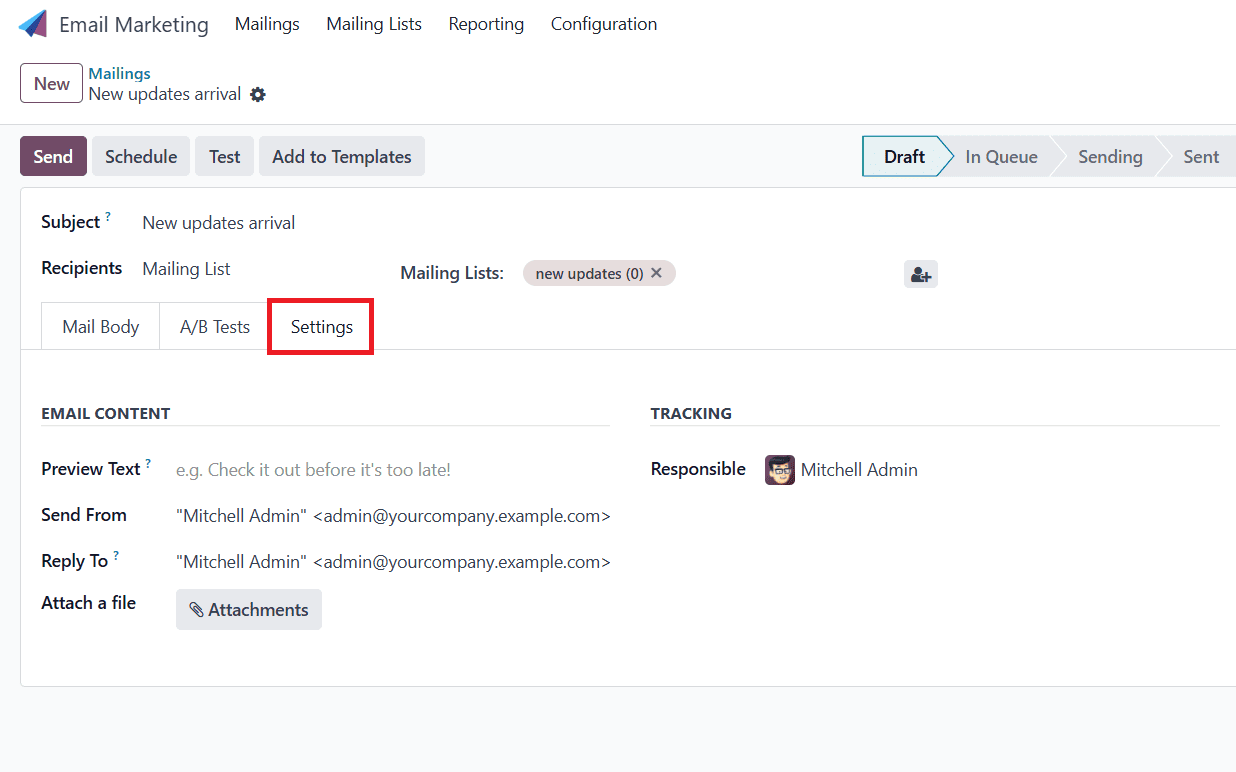
Under the Settings tab, you have a preview text option, which is used to highlight the preview sentence and encourage you to open this email. This can be seen near the subject of the mail. You can keep the Preview Text option empty to see the first character of the email. You can also add a Send From email, a Reply To email, a Responsible Person, and attach a file if needed.
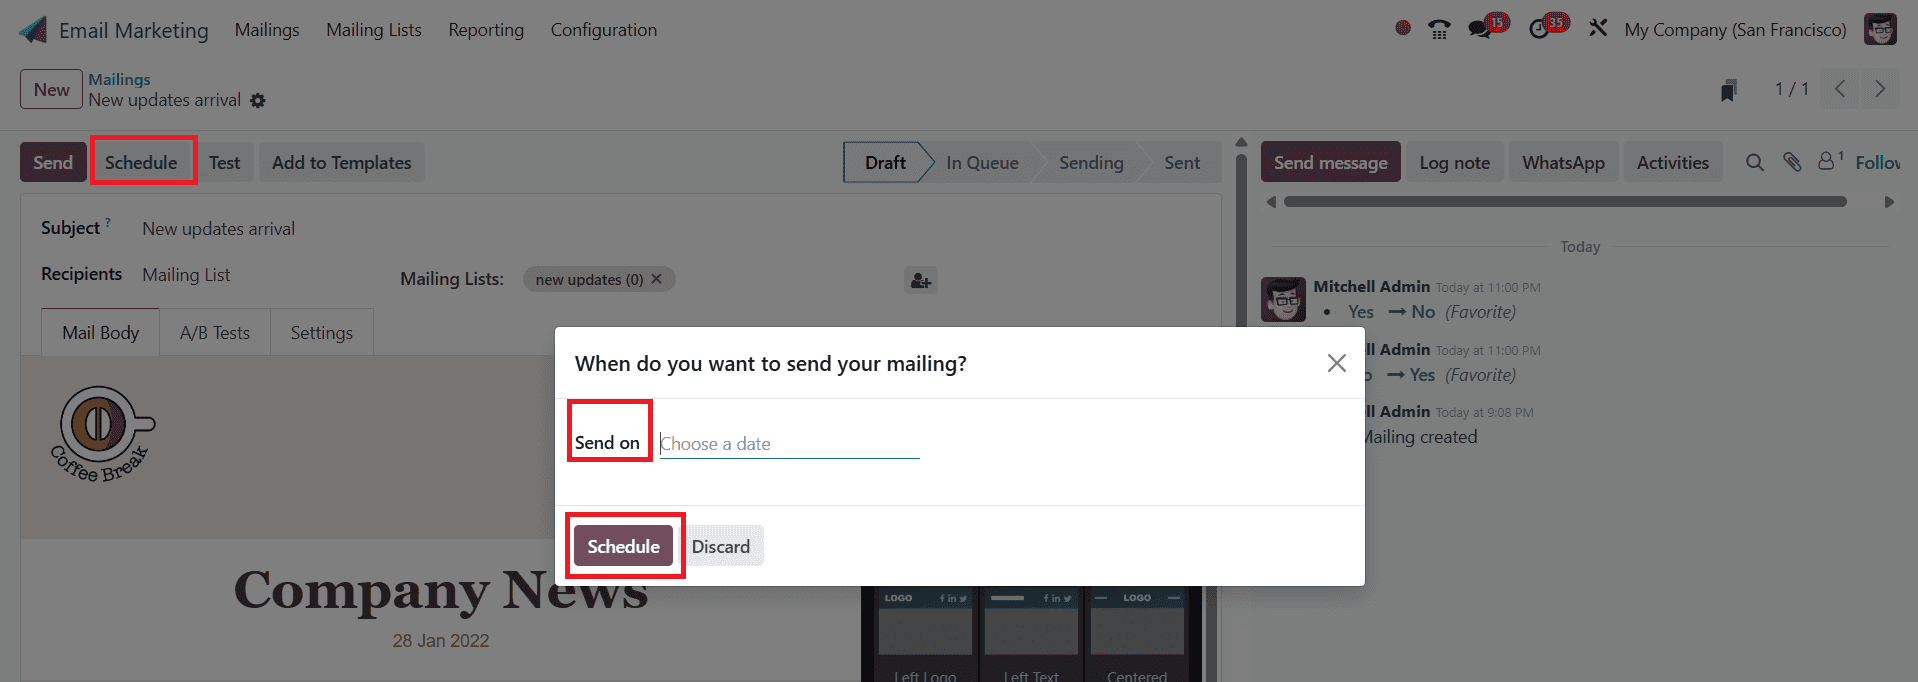
In the Schedule option, a new pop-up window will appear, where you can schedule when to send the mail. By clicking Add to Template, you can reuse this template repeatedly.
Click on the Test option, and a new pop-up window will appear. Following that, you send the recipient a test email message.

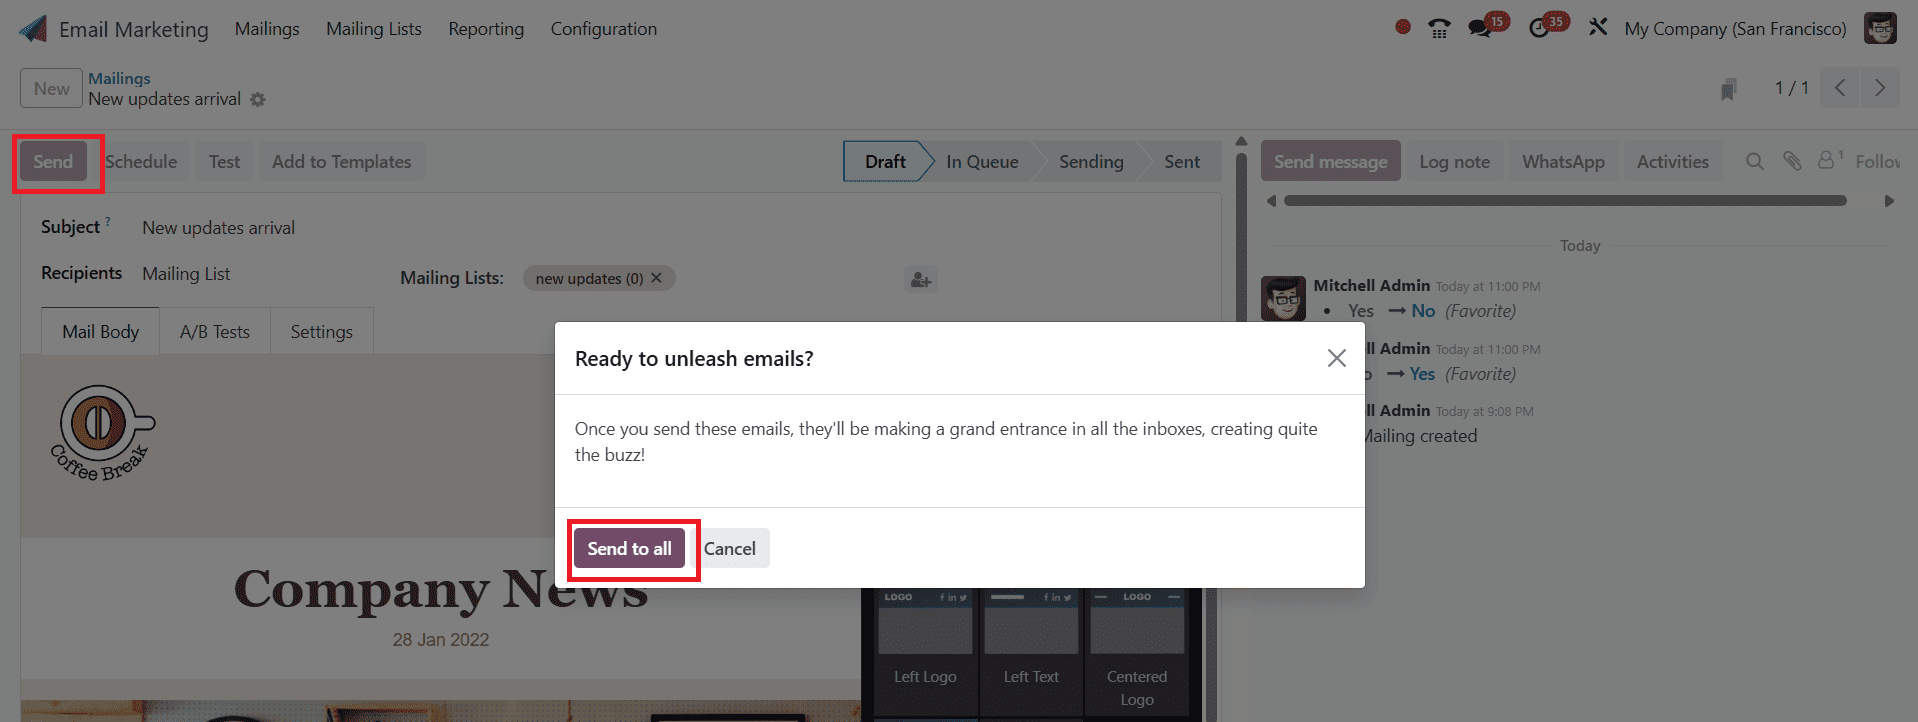
On clicking on the Send option, a pop-up window will appear where you can send this message to all contacts by clicking Send to all, as shown below:
Now the mail is in the Sent state. If the receiver opens the mail, you can see the percentage of opened emails, the percentage of replied emails, and the percentage of clicked emails. The number of quotations created can be seen under Opportunities. You can also see how invoiced and received. By clicking the More option, you can access the details about Bounced and Link Trackers.

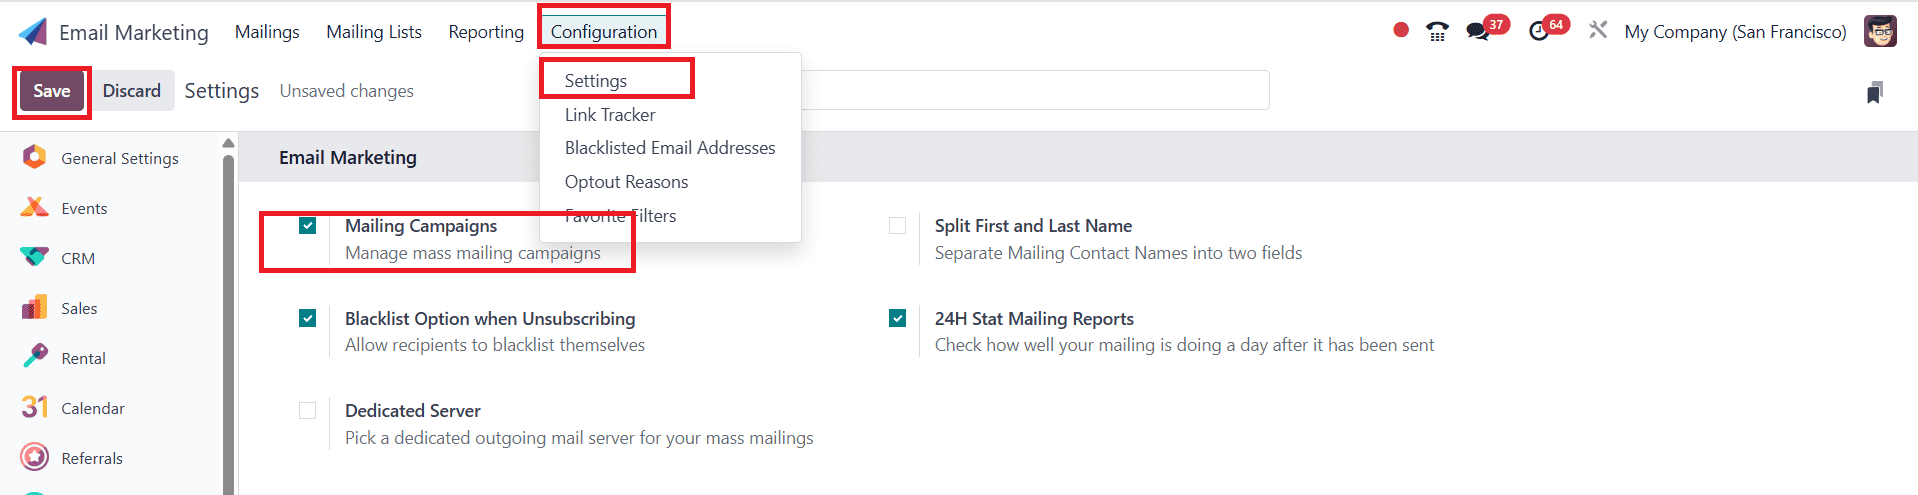
Mailing Campaigns:
To enable Mailing Campaigns, navigate to Configuration > Settings, then allow the Mailing Campaigns and click on the Save button as shown below:
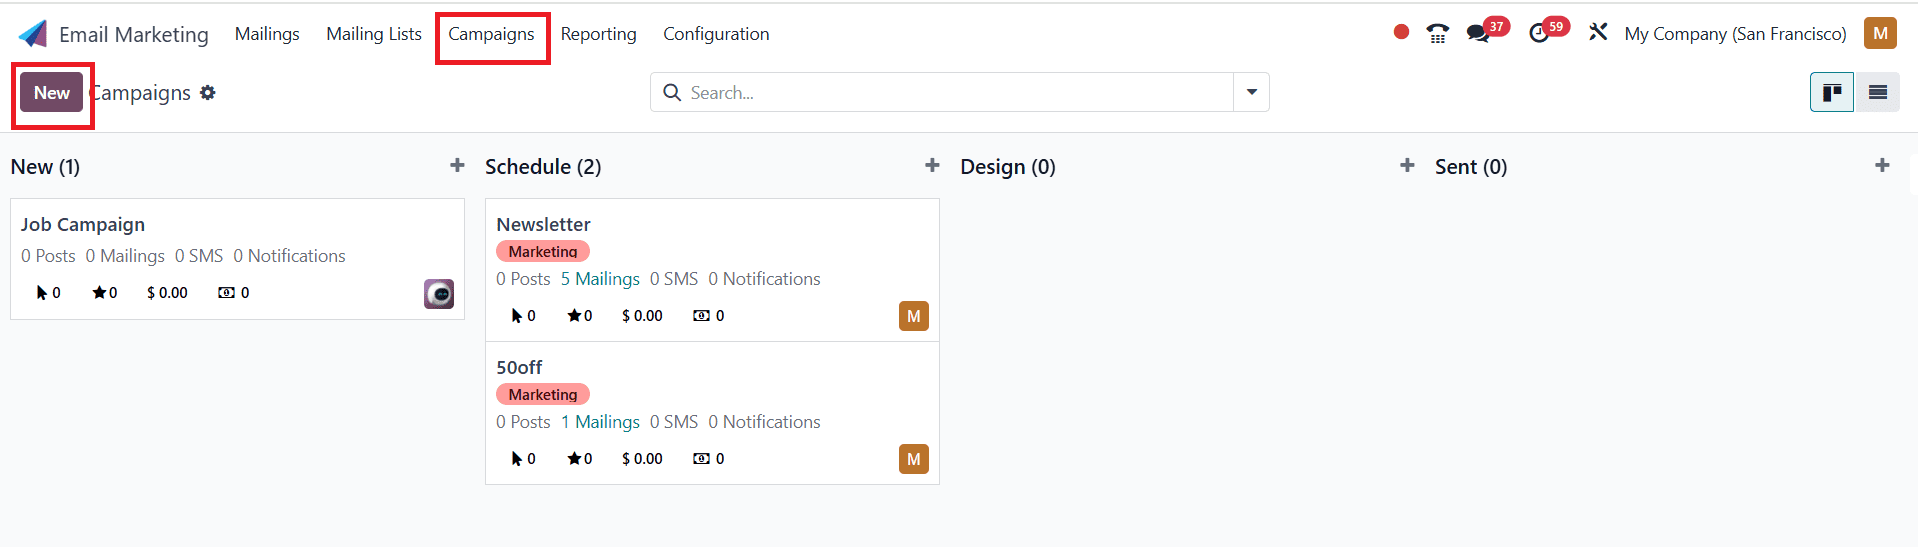
Here, you can see the new Campaigns menu in the top bar. You can see different campaigns in the pipeline view. Click on the + button with the stage option to create a new campaign. You can also drag-and-drop campaigns from one stage to another. Click on the New button to create a new campaign as shown below:
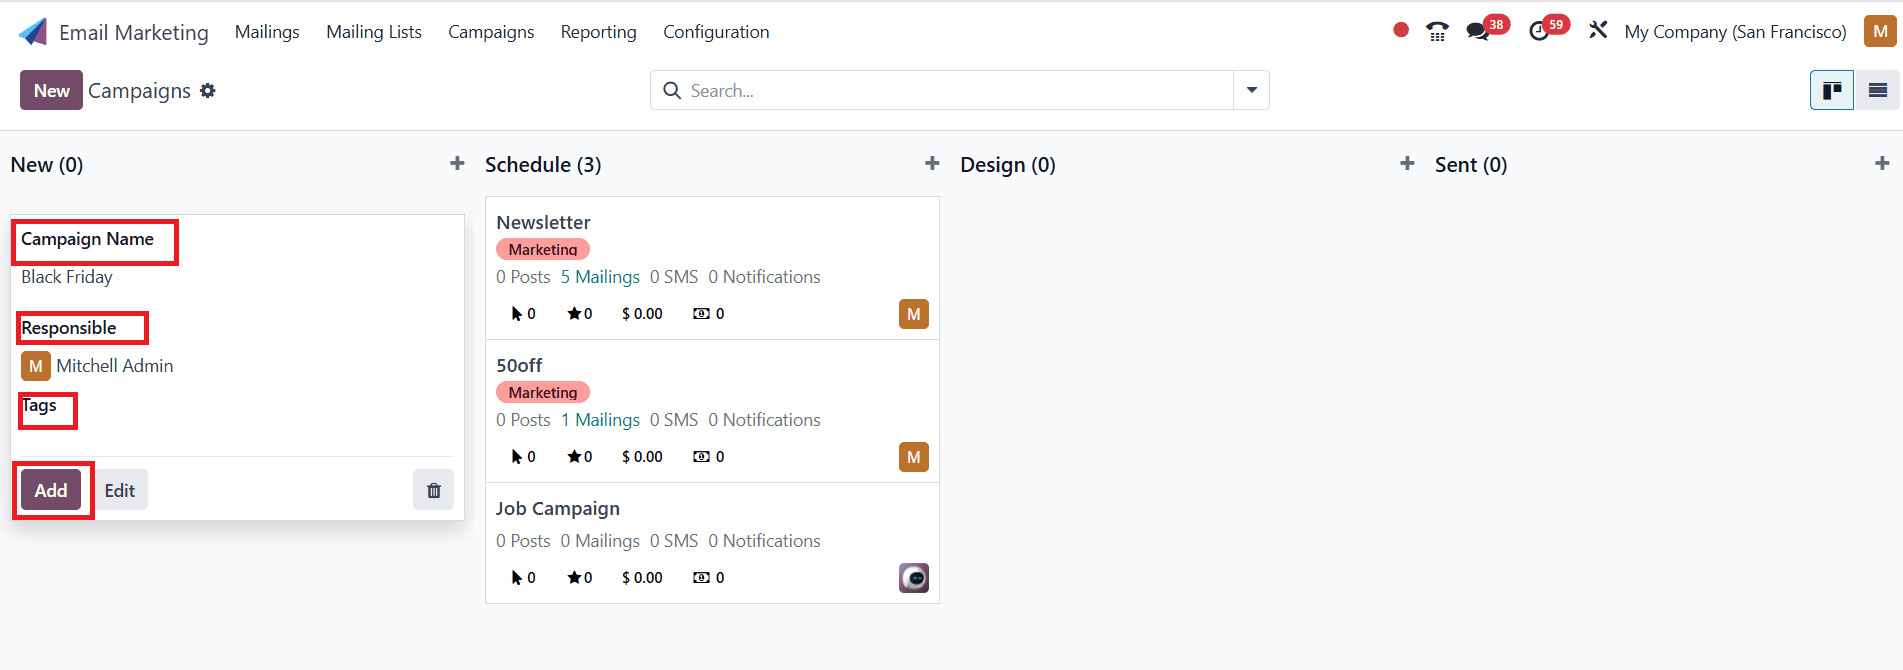
Here, you can add Campaign Name, Responsible, Tags, and click on the Add button as shown below:
When you click on the newly created campaign, you can view its details and status.

Then, go to Configuration > Campaign Tags. Here, you can view the existing campaign tags. To create a new campaign tag, click on the New button, add a new campaign tag, and save it as shown below:

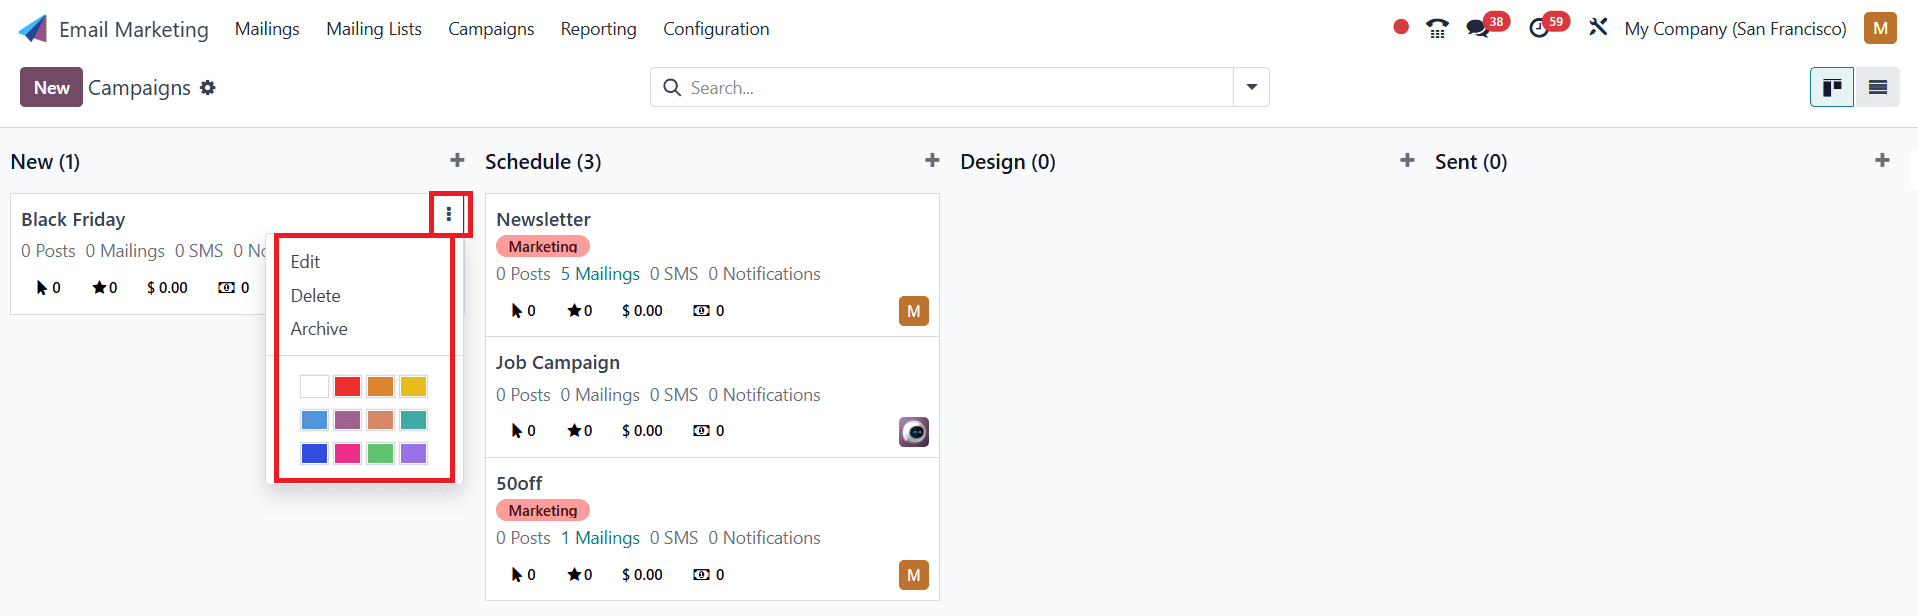
By clicking on the three-dotted icon, you can edit, delete, Archive, and add colors to the campaigns.
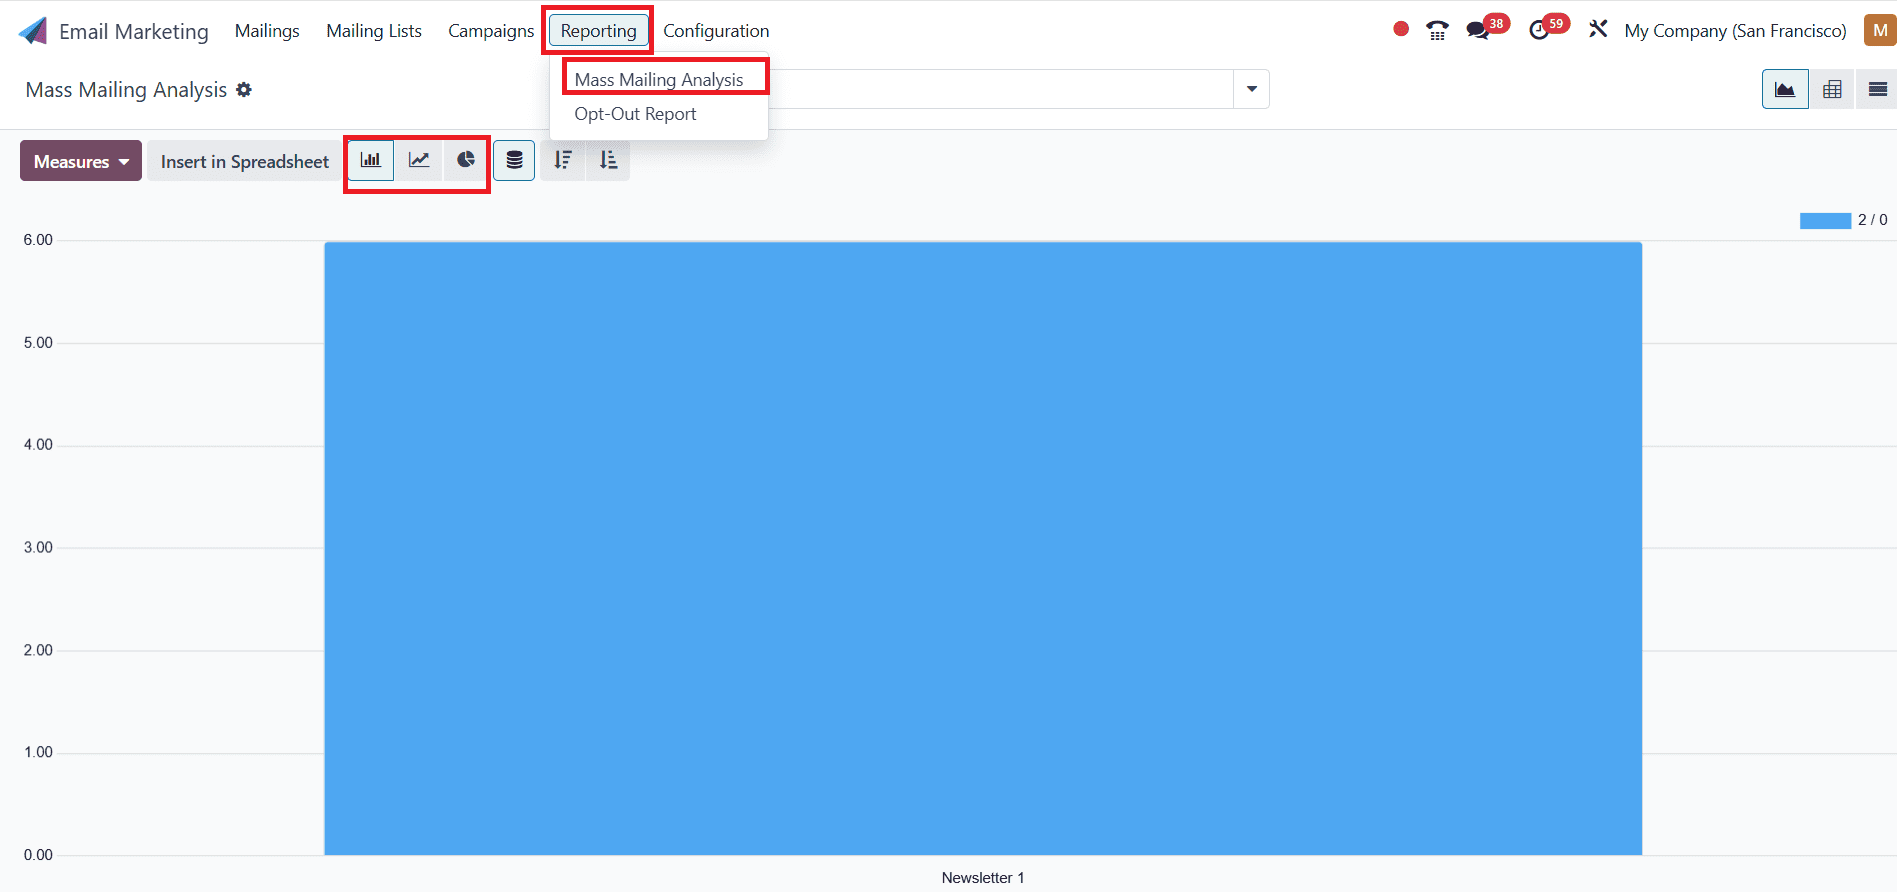
Reporting:
Under the Reporting option, you have Mass Mailing Analysis and Opt-out Report. Upon clicking the Mass Mailing Analysis, you can view the mails sent from each mailing list, which will be displayed here. Different colors are provided for various mailing lists. The Mass Mailing Analysis can be viewed in multiple formats, including bar charts, line charts, and pie charts.
Upon clicking the Opt-out Reasons, you can view the various opt-out reasons and the emails that use these reasons.

Conclusion:
The email marketing module in Odoo 18 enables companies to launch effective, targeted, and successful campaigns. Marketers can increase engagement and conversions by leveraging capabilities such as audience segmentation, A/B testing, and interaction. Blacklisted management, link trackers, and real-time analytics are utilized to ensure maximum deliverability and ongoing optimization. Campaigns' efficacy is further increased by timely scheduling and personalization. By these features, you can be confident that every email helps build your brand and keep customers.
To read more about An Overview of Email Marketing in Odoo 17, refer to our blog An Overview of Email Marketing in Odoo 17.