The Point of Sale (POS) user interface in Odoo18 is simplified by native integrations with sales, inventories, and customers. It features a highly dynamic and flexible frontend, heavily reliant on JavaScript elements for interface logic. In this blog, we will illustrate how to override one of the components of the POS module in order to inject custom behavior, a crucial technique to tailor the POS system to meet specific business needs.
Odoo Point of sale is built from a modern JavaScript framework in which each visible or interactive element of the user interface, like buttons, popups, or screens, is managed by a component. Components in Odoo are linked to templates (XML) and specify how the UI reacts as the user interacts with the system.
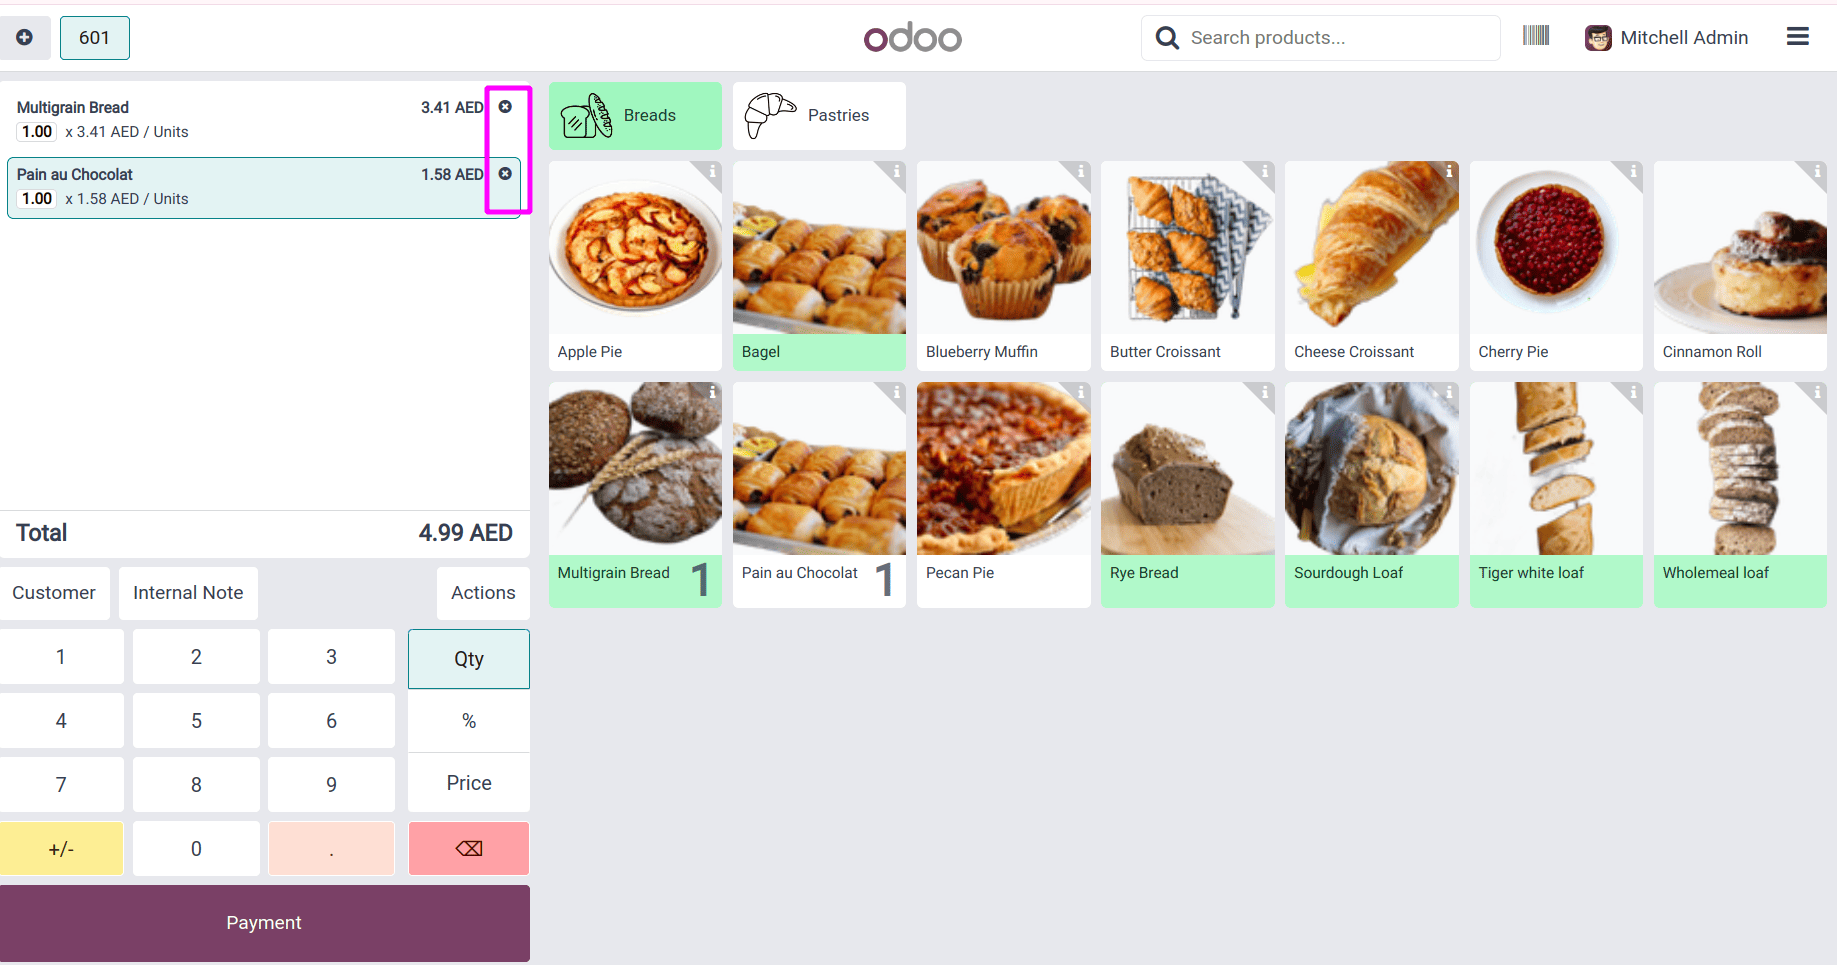
To modify or extend the default behavior of these elements, we utilize the patch() function offered by Odoo's core utility. This enables us to override methods or implement new logic without changing the underlying source. Here, we’ll walk you through how to override a component in the Odoo POS using an example: adding a “Clear/Delete” button to each POS order line. This feature enables cashiers to remove items from the order with ease by clicking on the tiny “×” button next to every order line.
Extend the Orderline Template
To add a custom button (in this case, a delete icon), we’ll extend the Orderline component's template using XML.
<?xml version="1.0" encoding="UTF-8"?>
<templates id="template" xml:space="preserve">
    <t t-inherit="point_of_sale.Orderline" t-inherit-mode="extension">
        <xpath expr="//div[@t-if='props.showTaxGroupLabels']" position="after">
            <t>
                <i style="margin-left: 3%;" id="clear_icon"
                   class="fa fa-times-circle"
                   t-on-click="(el) => this.clear_button_fun(el)"/>
            </t>
        </xpath>
    </t>
</templates>
This adds a delete icon at the end of each order line.
Patch the Orderline Component
Next, we patch the Orderline component to define the action that happens when the clear icon is clicked.
/** @odoo-module */
import { useService } from "@web/core/utils/hooks";
import { Orderline } from "@point_of_sale/app/generic_components/orderline/orderline";
import { patch } from "@web/core/utils/patch";
import { usePos } from "@point_of_sale/app/store/pos_hook";
patch(Orderline.prototype, {
    setup() {
        super.setup();
        this.pos = usePos();
        this.numberBuffer = useService("number_buffer");
    },
    async clear_button_fun(ev) {
        this.numberBuffer.sendKey('Backspace');
        this.numberBuffer.sendKey('Backspace');
    }
});
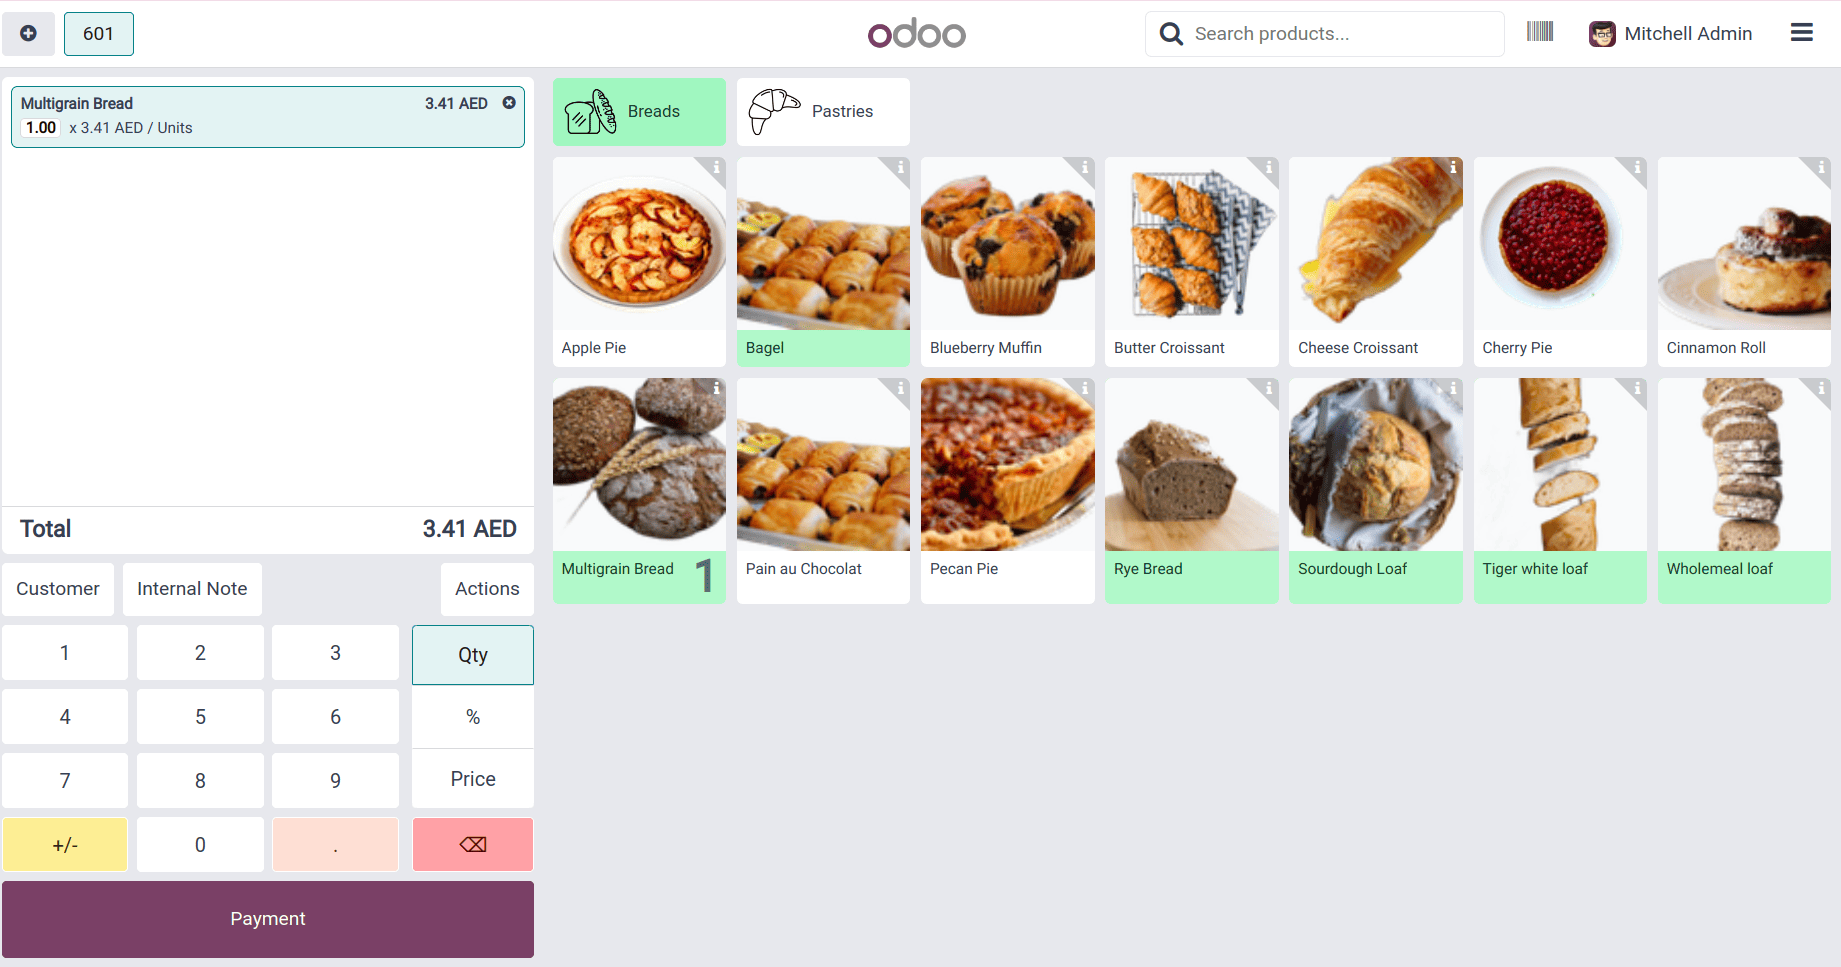
When clicked, the icon triggers a backspace action twice, effectively clearing the quantity.
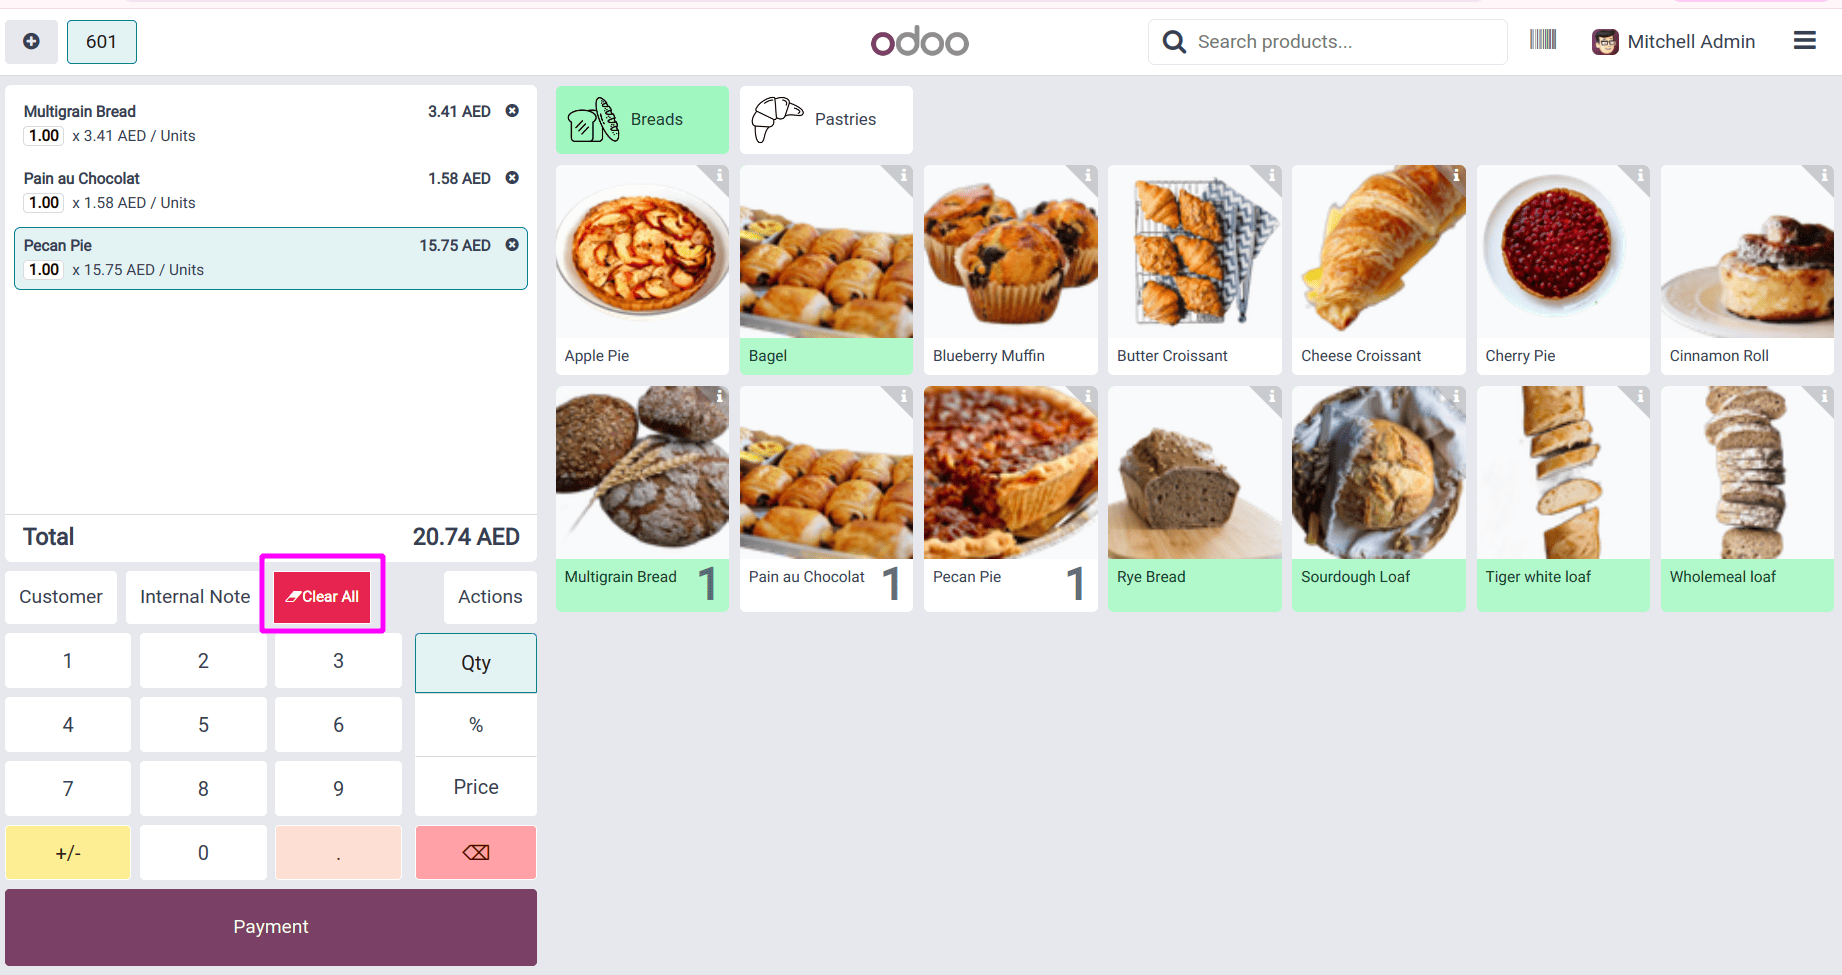
Add a “Clear All” Button
Let’s take it one step further and add a button to remove all order lines from the cart at once.
<?xml version="1.0" encoding="UTF-8"?>
<templates id="template" xml:space="preserve">
    <t t-name="pos_delete_orderline.ControlButtons"
       t-inherit="point_of_sale.ControlButtons" t-inherit-mode="extension">
        <xpath expr="//OrderlineNoteButton" position="after">
           <button class="control-button btn btn-light text-bg-danger rounded-0 fw-bolder"
                   t-on-click="() => this.onClearLines()">
               <i class="fa fa-eraser"/>Clear All
           </button>
        </xpath>
   </t>
</templates>
Define Function for “Clear All”
import { ConfirmationDialog } from "@web/core/confirmation_dialog/confirmation_dialog";
import { ControlButtons } from "@point_of_sale/app/screens/product_screen/control_buttons/control_buttons";
import { patch } from "@web/core/utils/patch";
import { _t } from "@web/core/l10n/translation";
patch(ControlButtons.prototype, {
    async onClearLines() {
        var order = this.pos.get_order();
        var lines = order.get_orderlines();
        if (lines.length) {
            this.dialog.add(ConfirmationDialog, {
                title: _t("Clear Orders?"),
                body: _t("Are you sure you want to delete all orders from the cart?"),
                confirm: () => {
                    lines.filter(line => line.get_product())
                         .forEach(line => order.removeOrderline(line));
                },
                confirmLabel: _t("Clear"),
                cancelLabel: _t("Cancel"),
            });
        } else {
            this.notification.add(_t("No Items to remove."), { type: "danger" });
        }
    }
});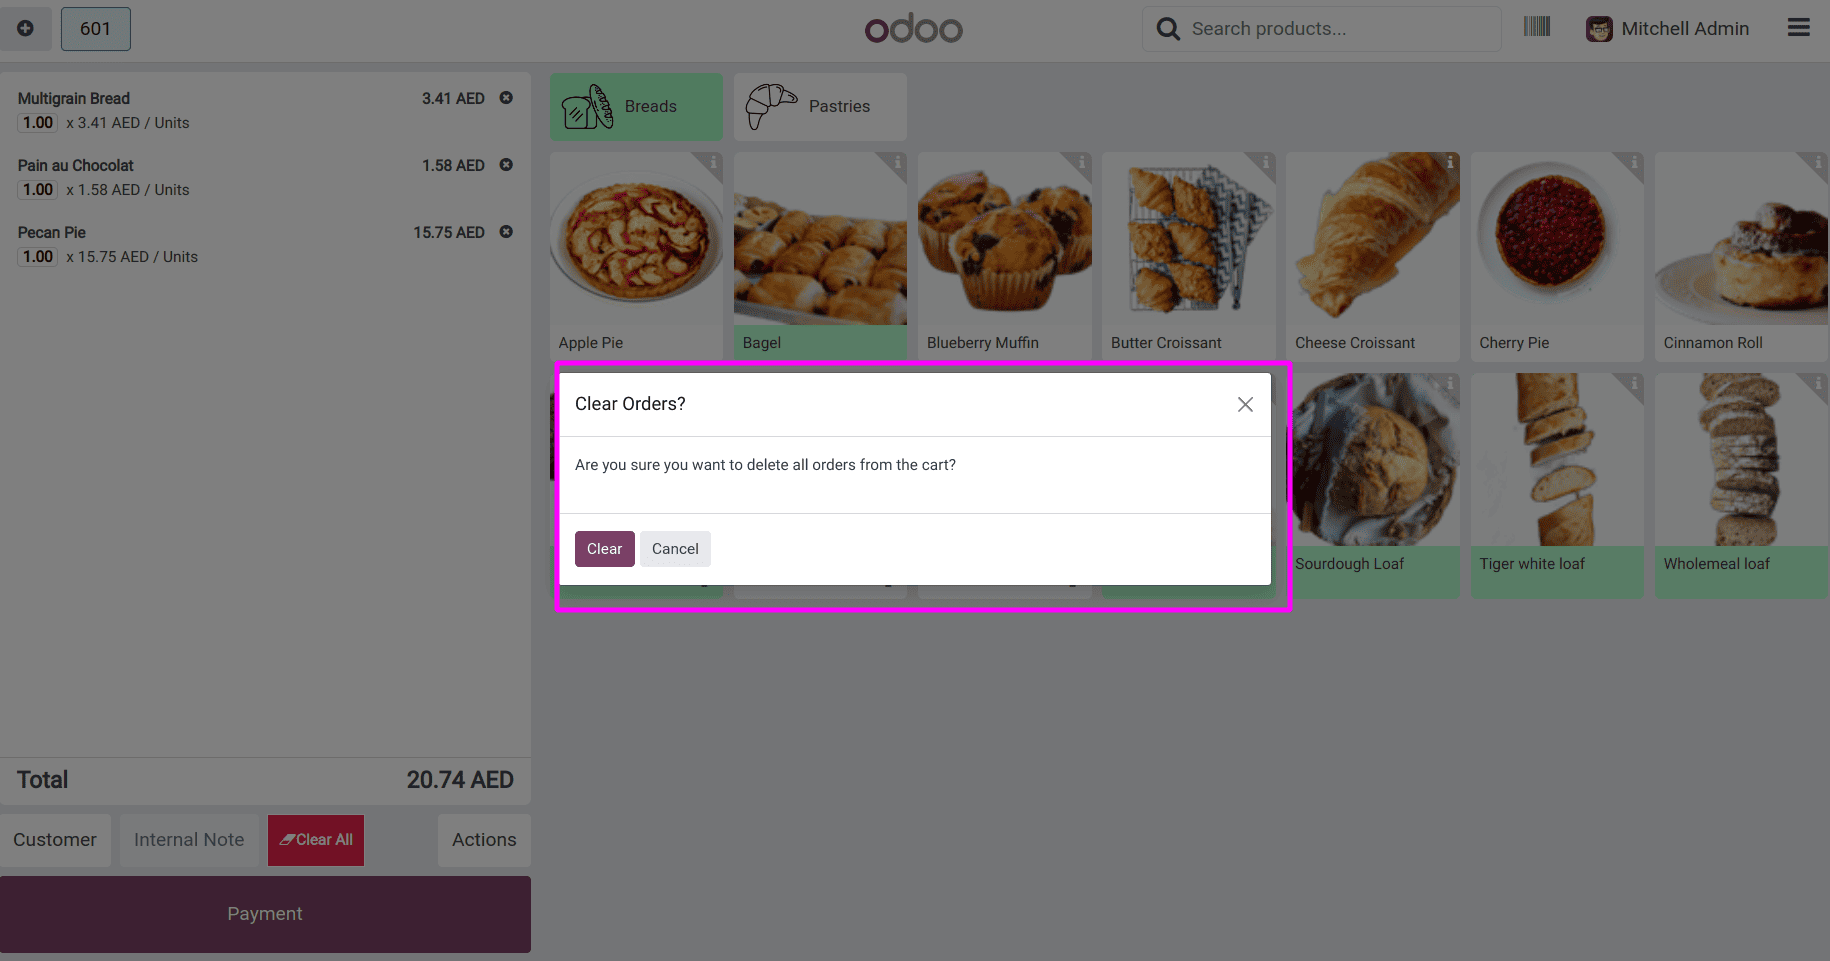
Upon clicking the clear all button, a confirmation dialogue asking to clear orders will be shown, and on confirming, the cart will be cleared.
Customizing the Odoo POS frontend in Odoo 18 is more streamlined thanks to OWL and the new modular structure. By overriding components and patching existing ones, you can introduce powerful UX features like single-line and bulk order deletion. This approach improves cashier efficiency and enhances the overall usability of your POS system.