In any ERP system, safeguarding and restoring data are essential for maintaining operational continuity and preventing data loss. Odoo 18 ERP continues to offer flexible and powerful tools for managing database backups and restoration. With slight refinements in the interface and improved backend performance, Odoo 18 makes the process even more seamless.
In this step-by-step guide, we'll walk you through how to restore a database in Odoo 18, using both the Odoo web interface and the terminal (command-line). Whether you're migrating from an older version or recovering from data issues, this guide is designed to help you perform database restoration safely and efficiently.
Step 1: Prepare Your Backup
Before you can restore anything, you need a valid backup file. Odoo 18 allows you to create backups in two formats:
From the Odoo 18 Interface
Navigate to:
https://yourdomain.com/web/database/manager
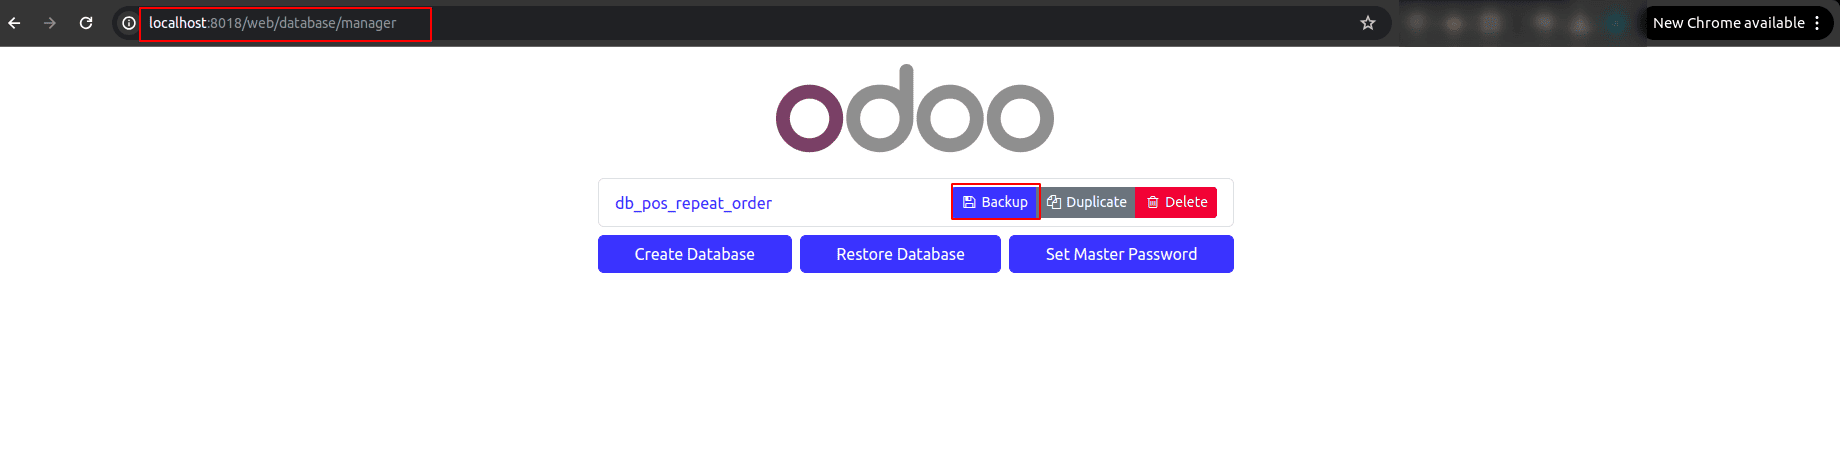
1. Click the "Backup" button.
2. Enter the Master Password.
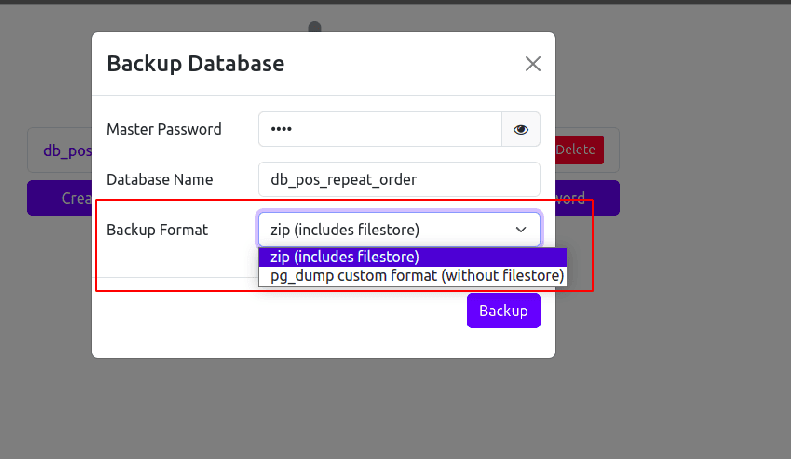
3. Choose your preferred format:
* ZIP Format (includes database, filestore, and metadata)
* Custom Dump Format (excludes filestore, ideal for CLI)
4. Click Backup, and a .zip or .dump file will download to your system.
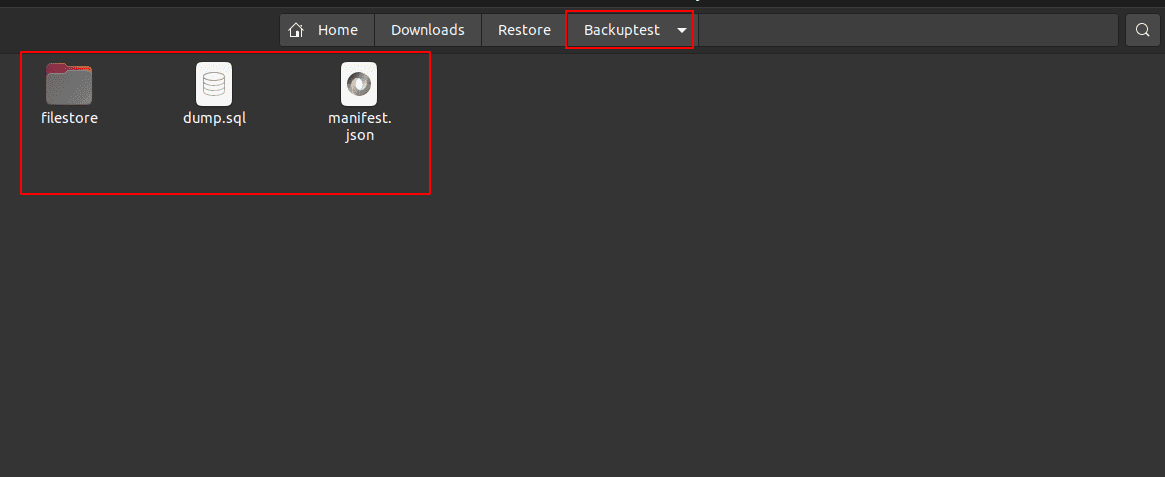
The .zip file typically includes:
* dump.sql – PostgreSQL dump
* filestore/ – binary files like images and attachments
* manifest.json – metadata for Odoo to recognize the backup
Step 2: Restore via the Odoo Interface
This is the easiest and most accessible method for most users.
Web-Based Restoration (ZIP File)
Open your browser and go to:
https://yourdomain.com/web/database/manager
1. Click "Restore".
2. In the popup:
* Enter the Master Password
* Upload your .zip backup file
* Choose a new database name
* Confirm and click "Continue"
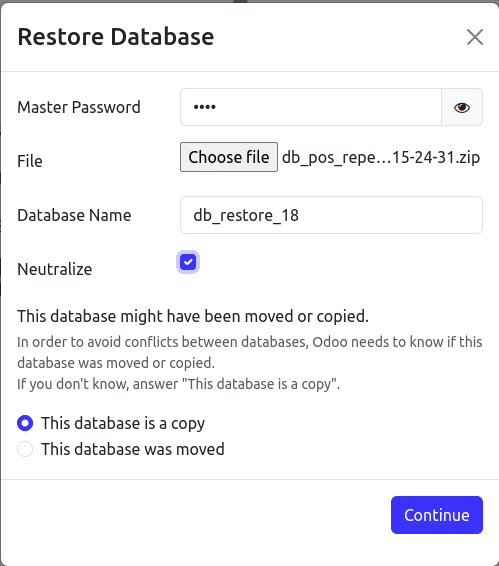
Optional: Use the “Neutralize” Checkbox
The Neutralize option is useful when you're restoring a production database into a development or staging environment.
When enabled, it helps prevent unintended behavior by:
* Removing all user email addresses (except for the admin)
* Disabling outgoing emails
* Turning off automated actions like scheduled tasks (cron jobs)
Use this when you want to safely test or debug a copy of your live system without affecting real users or sending actual emails.
Odoo will unpack the contents, recreate the database, and restore your data automatically.
Important: The database name must not conflict with an existing one. Choose a unique name to avoid overwriting.
Step 3: Restore Using the Terminal (Advanced Users)
For developers and sysadmins, restoring from the terminal offers more control, especially in staging or production environments.
A. Restore from a .zip Backup
1. Unzip the file:
unzip backup_odoo18.zip -d restore_folder
2. Switch to PostgreSQL superuser:
sudo su postgres
3. Create a new database owned by the Odoo user:
createdb -U postgres -O odoo_user database_name
4. Restore SQL data:
psql -U postgres -d database_name -f dump.sql
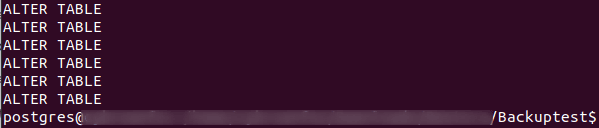
If the process is working correctly, you will see several lines in the terminal output that look like this:
ALTER TABLE
ALTER TABLE
ALTER TABLE
...
Make sure the restored database is referenced correctly in your odoo.conf (if needed).
B. Restore from a .dump File (Custom Format)
Restoring a .dump file (created using the pg_dump custom format) is ideal when your backup doesn't include attachments or filestore data.
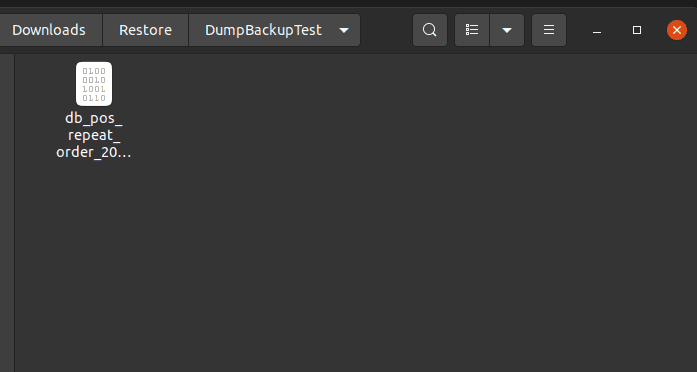
Step 1: Save and Navigate to the Dump Folder
Move or save your .dump file in a dedicated folder, for example:
Step 2: Switch to the PostgreSQL User
Open your terminal from the folder
Enter the PostgreSQL superuser environment:
sudo su postgres
Step 3: Create a New Blank Database
Create a new blank database and assign it to your Odoo user:
createdb -U postgres -O odoo_user database_name
Replace odoo18 with your actual Odoo PostgreSQL user if it's different.
Step 4: Restore Using pg_restore
From the same directory where the .dump file is located, run:
pg_restore -d database_name dump_file_name.dump
Example like this:
pg_restore -d odoo18_restored db_pos_repeat_order_2025-06-02_09-48-04.dump
Common Issue: Permission Denied on dump.sql
Even if your dump.sql file is readable, PostgreSQL must also have permission to access all parent directories leading to the file. This is especially relevant when running the psql command as the postgres user.
Check Directory Permissions
Run the following commands to check each directory in the file path:
ls -ld /path/to/your/home
ls -ld /path/to/your/home/Downloads
ls -ld /path/to/your/home/Downloads/restore_folder
You should see the x (execute) permission in the output — this allows the postgres user to traverse the directory.
Fix Missing x (Traverse) Permissions
If any of the directories are missing x, run:
chmod +x /path/to/your/home
chmod +x /path/to/your/home/Downloads
chmod +x /path/to/your/home/Downloads/restore_folder
Replace /path/to/your/... with your actual directory path.
Final Checks
Access the restored database in your browser:
https://yourdomain.com/?db=odoo18_restored
Conclusion
Restoring a database in Odoo 18 ERP is a streamlined process, whether you're working through the browser or the terminal. With careful attention to the backup format and database configuration, you can easily recover or replicate any environment.
If you're a developer, admin, or functional consultant—this guide ensures you're ready to bring your database back online with confidence!
To read more about How to Restore a Database in Odoo 16 ERP, refer to our blog How to Restore a Database in Odoo 16 ERP.