The authorities in charge of controlling tax income and public spending are known as fiscal countries. Every state and nation has unique legislation that mandates particular tax rates and exchange rates. Businesses operate internationally, and each country has its own set of restrictions. Managing fiscal situations and nations is made simpler by ERP software, like Odoo 17. Tax problems can be avoided by users by generating fiscal situations depending on a particular nation. Accounting data, balance sheets, journal entries, payments, clients, and goods are just a few of the things that ERP software can handle. In a US firm, fiscal position configuration is a straightforward procedure.
Let’s check the procedure of setting a fiscal country inside the new Enterprize Edition of the Odoo 17 Accounting Module.
Configuring Fiscal Country
By choosing the “Settings” menu on the “Configuration” tab and going to the “Fiscal Country” option under the “Taxes” section, users of Odoo 17 may set up their home nation for accounting purposes as depicted in the screenshot below.
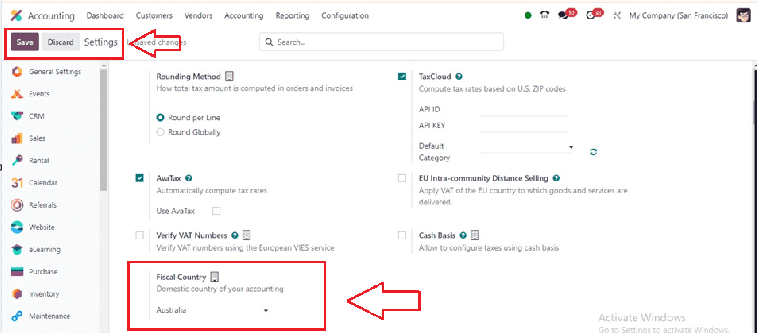
Choose the domestic nation to the United States in the “Fiscal Country” field in Odoo 17 Accounting. After selecting it and saving the adjustments to create fiscal positions for the country Australia. Accurate accounting in Australia will be made possible by this. Now, create a Fiscal Position
Creating Fiscal Positions
Task management is made easier with fiscal positions inside the Odoo 17 Accounting Module. This can be accessed from the “Fiscal Positions” option available in the “Configuration” menu which shows all generated fiscal positions in the Fiscal Positions box. As illustrated in the screenshot below, users may obtain information about the Fiscal Position and Company.

A new configuration form where you may establish a new fiscal position will open when you click the "New" button.
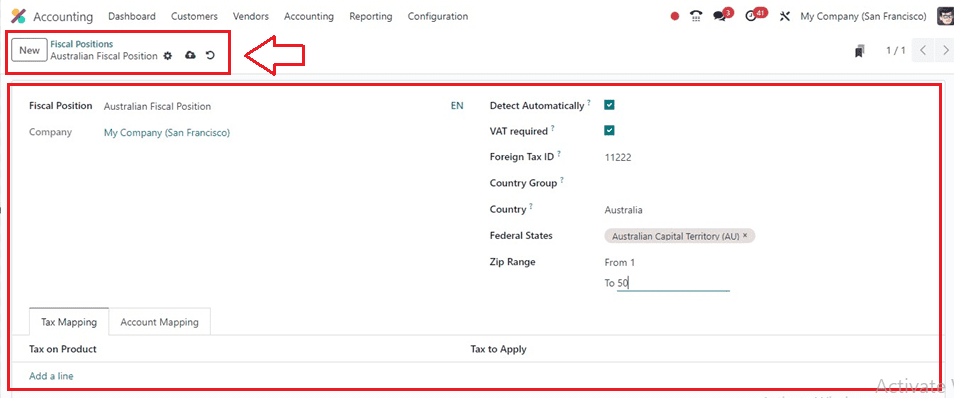
Here, edit the name of the “Fiscal Position” in the designated field and also, mention the company. Enabling the “Detect Automatically” button will auto-apply the tax and account mappings based on the VAT and Country settings. Enable the “VAT Required” field to apply for the fiscal positions only if the partner has a VAT Number. Provide your company’s tax ID inside the “Foreign Tax ID” field to be mapped by this fiscal position.
Then choose the “Country Group,” and “Country” inside the designated fields. After providing the Country details, a new field to choose the “Federal States” will appear. Enter the federal states and “Zip Range” inside the respective fields.
Tax Mapping Tab
By choosing the “Add a line” button in the Tax Mapping Tab, users may configure product tax, inside the “Tax on Product” and “Tax to Apply” fields respectively, as shown in the screenshot below.
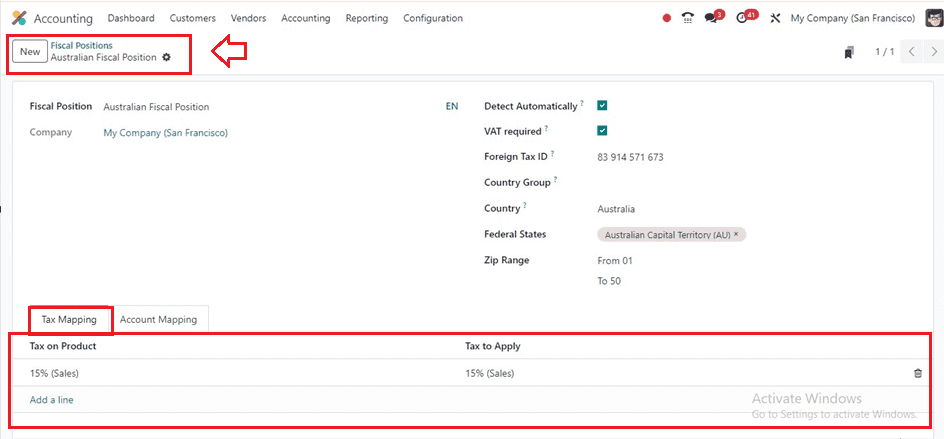
Rules for a product tax that is linked to another tax called the Tax on Product can be created in the open area. For their financial situation, users can design a new tax option or select from the preset ones.
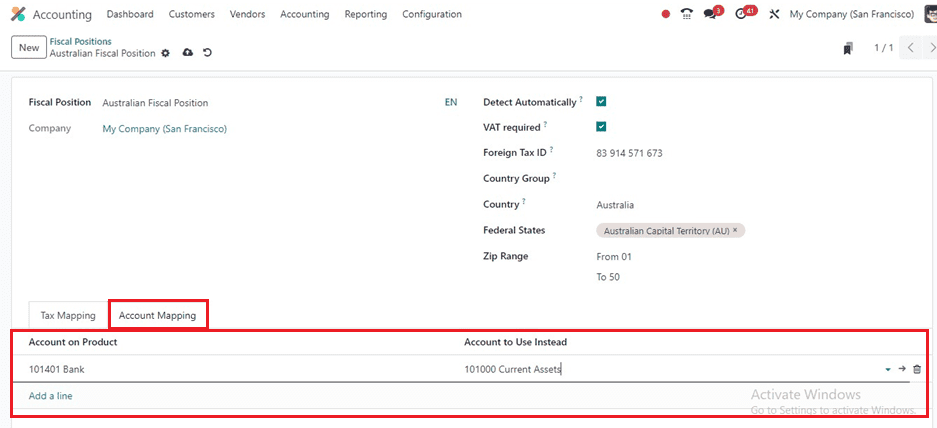
Account Mapping Tab
To apply for an account on a product in the Odoo 17 Accounting Application, users can click on the “Add a line” option in the “Account Mapping” Tab section. Save the fiscal position data once the required information has been entered.
Setting Fiscal Position in Customer Invoices
In Odoo 17, users must produce new customer information by clicking on the "New" button in the Customers window and apply the fiscal position for the customer data in the "Customers" menu in order to set a fiscal position on a customer invoice.

Inside the new customer details configuration, edit the customer data including the Name, Address, Phone, Mobile, Email, Website, etc. This form view has some tab sections including “Contacts & Addresses,” “Sales & Purchases,” “Accounting,” “Internal Notes,” “Partner Assignment,” and “Membership.”
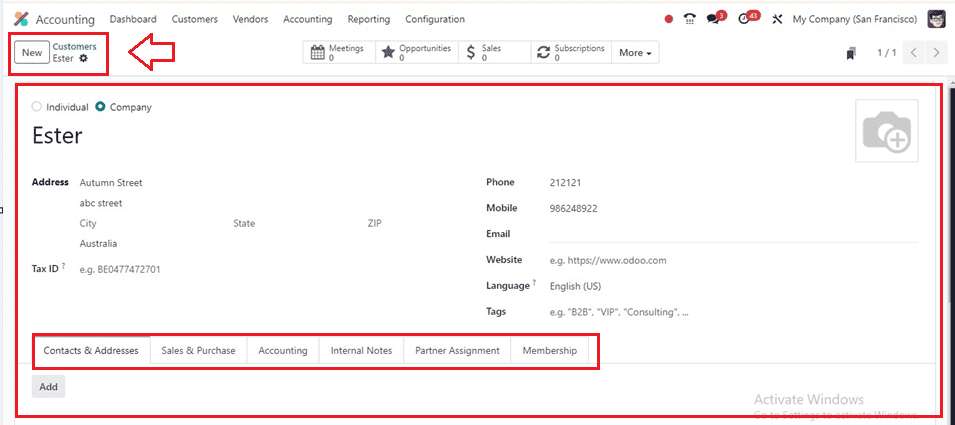
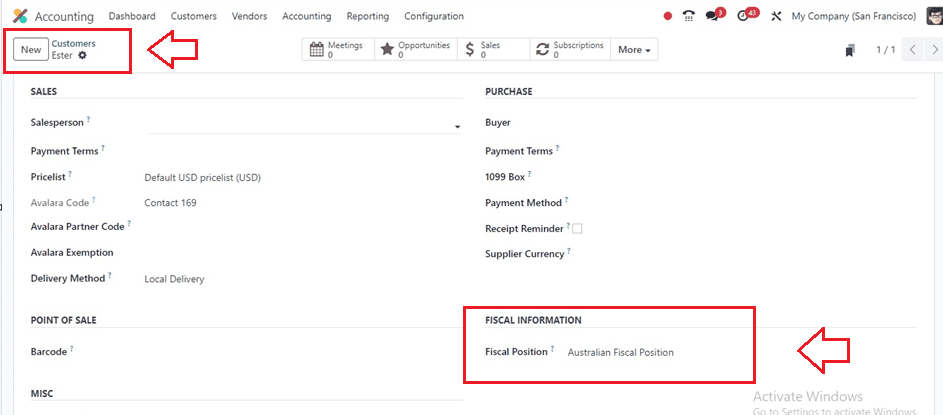
After editing the basic customer details, you can set the fiscal positions inside the “Sales & Purchase” tab as illustrated below. Choose the recently created Fiscal position inside the “Fiscal Position” field provided under the FISCAL INFORMATION Tab.
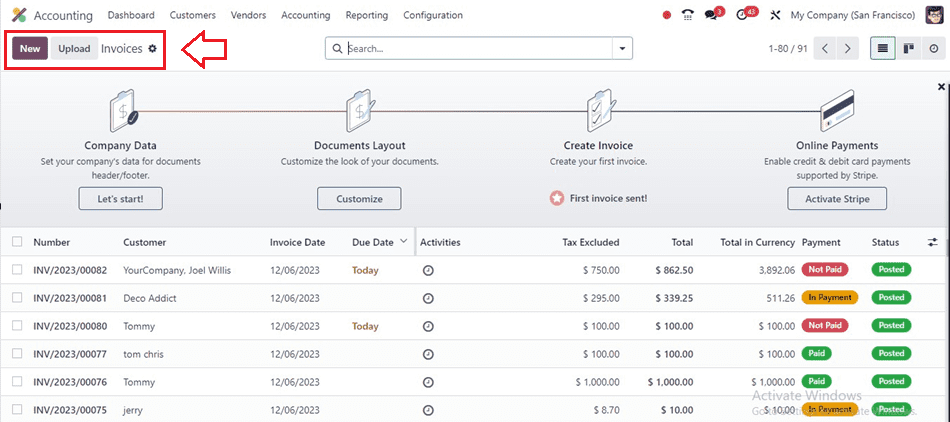
Once the necessary data has been entered, use the "Save" icon to save the details. Now, Let’s check the procedure for creating invoices for the above customer inside the Odoo Accounting Module to check the functionality of Fiscal Position.
To generate a customer invoice in Odoo 17, click the “Invoices” option from the “Customers” tab. This window will show the record of all invoice details, including Number, Due Date, Total, Status, and more, as shown in the screenshot below.
The "New" button can be used to start a new client invoice. Subsequently, complete the invoice data inside the visible form view.
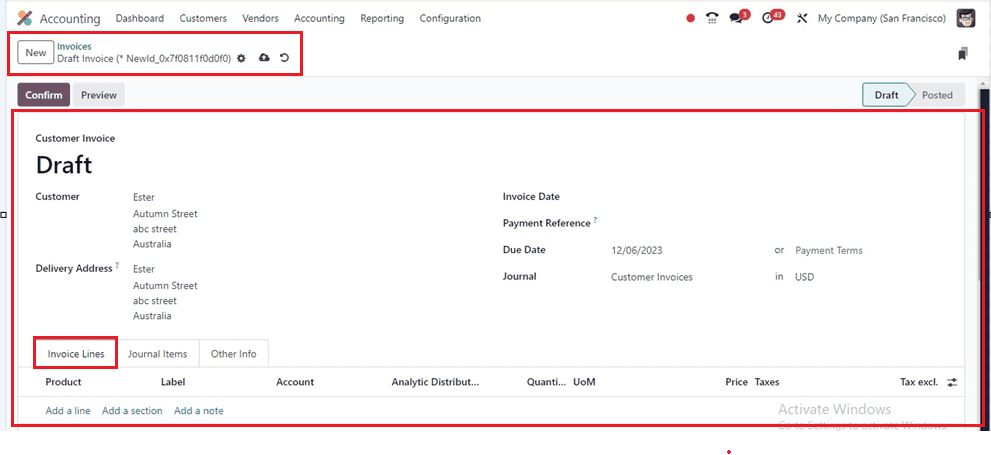
After providing the customer name in the “Customer” field will automatically fill in the other customer details like Delivery Address, Due Date, and Journal details. The "Add a line" button that is available inside the "Invoice Lines" tab area can also be used to add items.
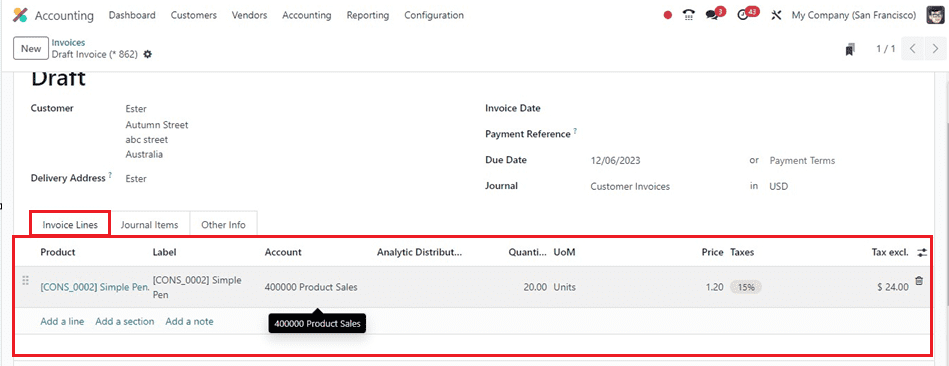
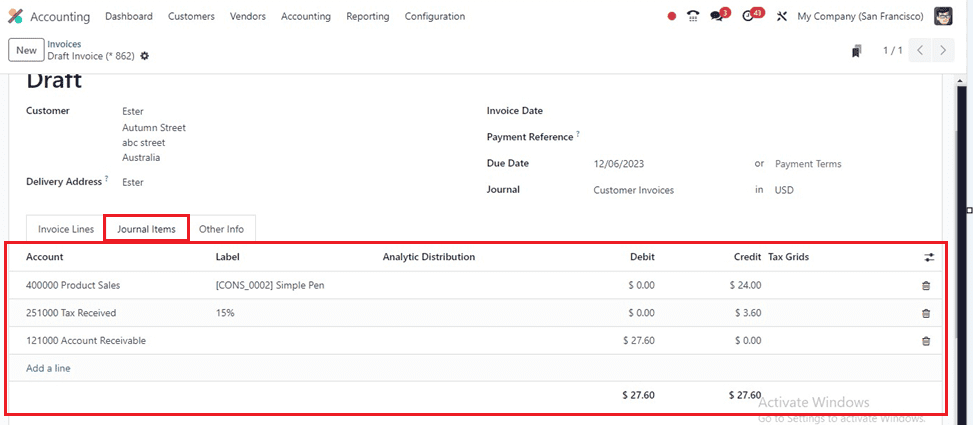
The “Journal Items” tab will show the details of each journal items such as the product and other taxes.
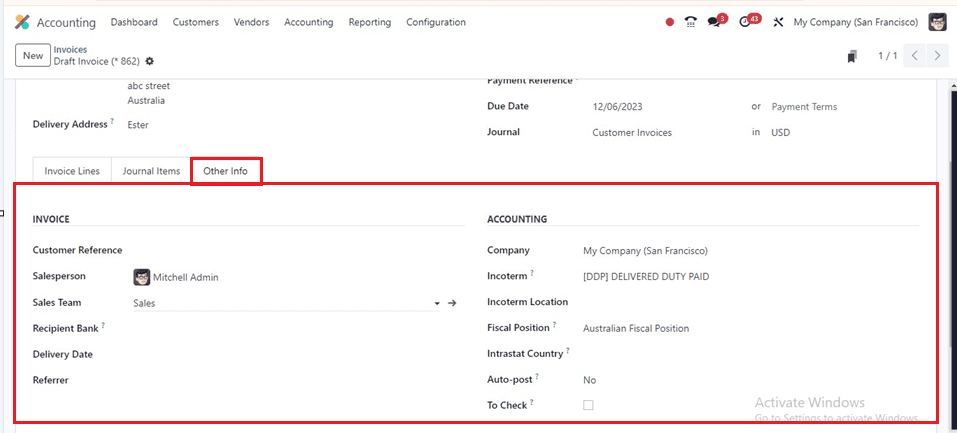
We already configured the Fiscal Position for the Australian Customer for an Australian firm in the previous section, therefore we can set the customer account details under the ACCOUNTING area of the “Other Info” Tab section. Here, you can set the Fiscal Position for the Australian company inside the “Fiscal Position” field and it will be applied immediately after saving them.
After saving the form data, click the “Confirm” button on the Invoices form page to confirm an order. Customers will get an invoice as a result, which will simplify the processing of a fiscal situation inside an Odoo 17 Accounting client invoice.

Then, using the "Register Payment" button from the form view, you may continue with the payment procedure.
For your fiscal administration needs, the Odoo 17 Fiscal Localization Packages are nation-specific modules that install pre-configured taxes, fiscal positions, a chart of accounts, and legal declarations on your accounting system.