Accounting journals are crucial records for transactions ordered by date, including customer invoices, credit notes, purchase invoices, and bank transactions. Each journal has a specific display and order of fields, with the default sequence determining automatic numbering for accounting entries. Default credit and debit accounts allow the software to generate counterpart entries automatically, but some journals require debit and credit accounts. To avoid manual counterpart creation, an associated bank account should be placed in default debit and credit accounts. One way to create a centralized credit and debit line for every entry is to declare a journal as centralized, which permits global counterpart entries for that particular journal and time. Posting beginning entries in a scenario diary can benefit from this.
Configuring Journal Entries
In the Odoo 16 Accounting module, select the ‘Journal’ option from the ‘Configuration’ menu dropdown list in order to establish and maintain Journals. After selecting Journals from the Accounting section, a page with preloaded Journals in Odoo will show up with their respective
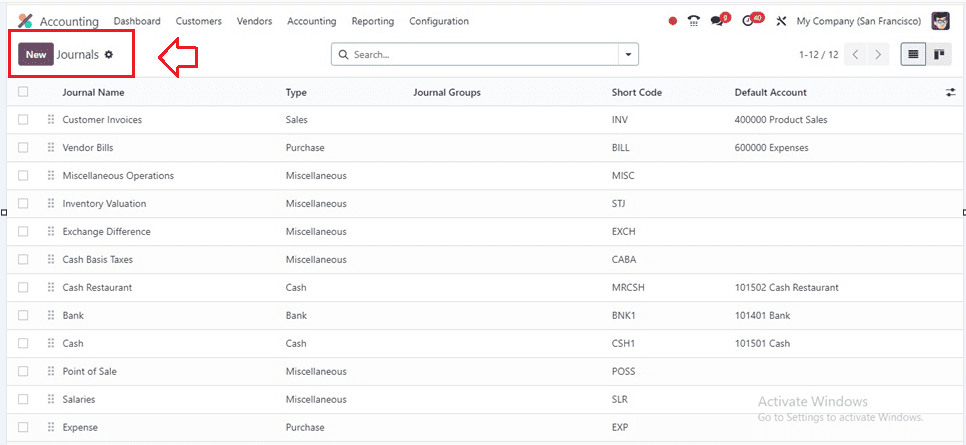
You may add and create a new journal in Odoo using this Journal Configuration form page. The journal name should identify the items it will manage. Journal administration is made simpler by allowing you to select the desired journal type from the list of options in the 'Type' box. This list includes Sales, Purchases, Cash, Bank, and Others.
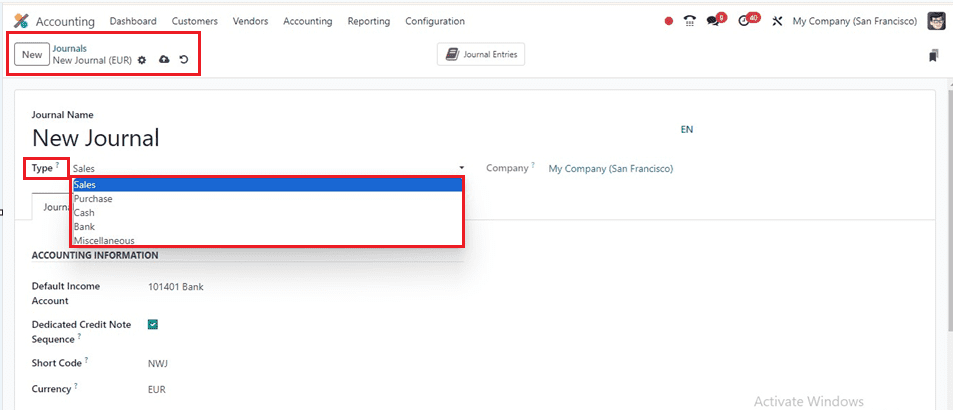
The Sales Journal manages customer invoices, the Purchase Journal posts vendor bills, the Cash Journal tracks daily transactions and payments, the Bank Journal posts bank statements, and Miscellaneous Journals apply to other entries. These journals are essential for efficient tracking and updating of transactions in various financial systems.
Choosing the desired journal type will change the configurations accordingly. The Journal Entries and Advanced Settings tab sections will also change with the chosen type. For example, if the Sales journal type is selected, the configuration will be displayed.
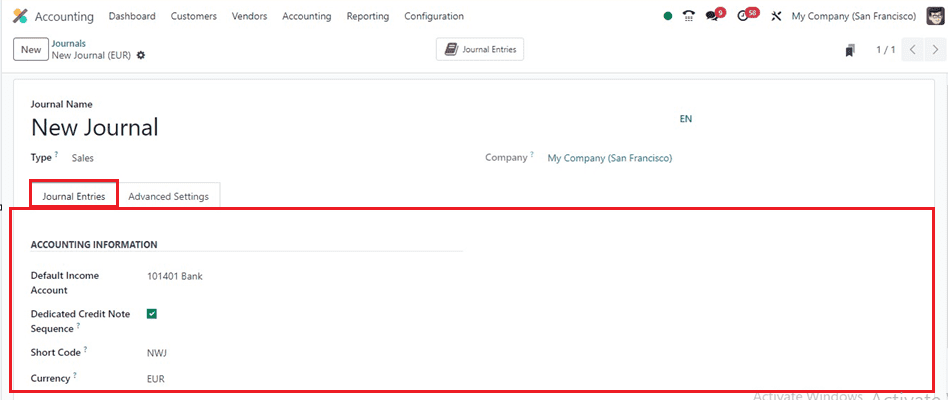
Journal Entries
Choose the ‘Default Income Account’ and click on the Empty field next to it to specify accounting information for a specified Journal Type. The ‘Dedicated Credit Note Sequence’ option can be enabled if you don't want to share the same credit notes and invoices from this journal. Additionally, you may choose a ‘Shortcode’ for the Journal and a currency from the ‘Currency’ area, as shown in the example screenshot below.
Advanced Settings
Once the adjustments are finished, navigate to the Advanced Settings tab area. You can set the CONTROL ACCESS, CREATE INVOICES UPON EMAILS, ELECTRONIC DATA INTERCHANGE, PAYMENT COMMUNICATIONS, and FOLLOW CUSTOMER PAYMENTS options.
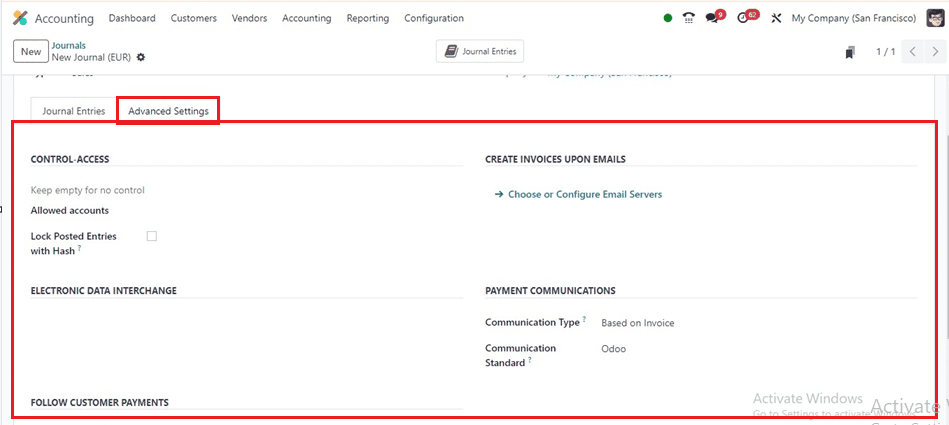
This configuration space allows for scheduling follow-ups for customers, automatically sending them if they missed the payment date. Users can set an Activity user and create an Activity summary to maintain cash flow. You may select the Communications type in the PAYMENT COMMUNICATIONS area. The options are 'depending on Invoice' and 'Configure the Email Servers' depending on the county. Configuring CREATE INVOICES UPON EMAILS helps maintain cash flow in the business.
After editing the required form fields, save the details using the save icon so your new journal data will be saved inside the Odoo Accounting database. Then, we can check the process of creating an invoice using the above journal and its functionalities.
Creating an Invoice
To create an invoice, navigate to the Accounting module dashboard and choose the ‘Invoices’ window of the 'Customers' menu. A list of invoices will appear, and you can open a new configuration form using the appropriate button.
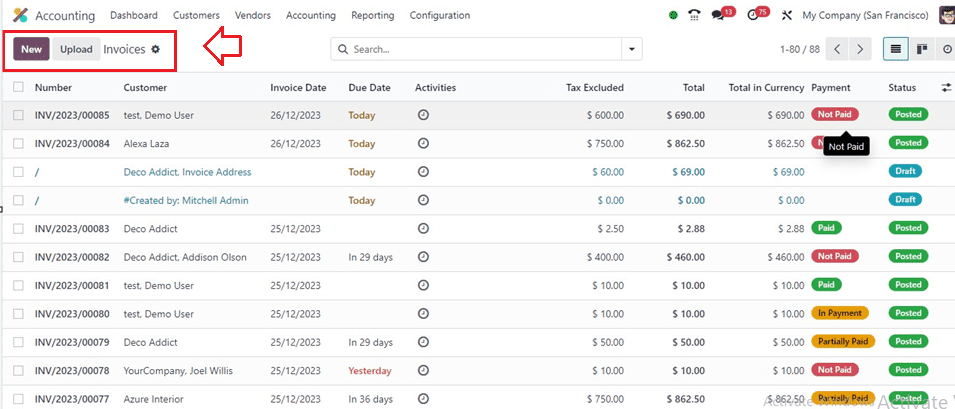
Inside the invoice creation window, fill in the required fields with the Customer Name, Delivery Address, Invoice Date, Payment Reference, Due Date, and Journal. Use the external link to view journals for an overview.
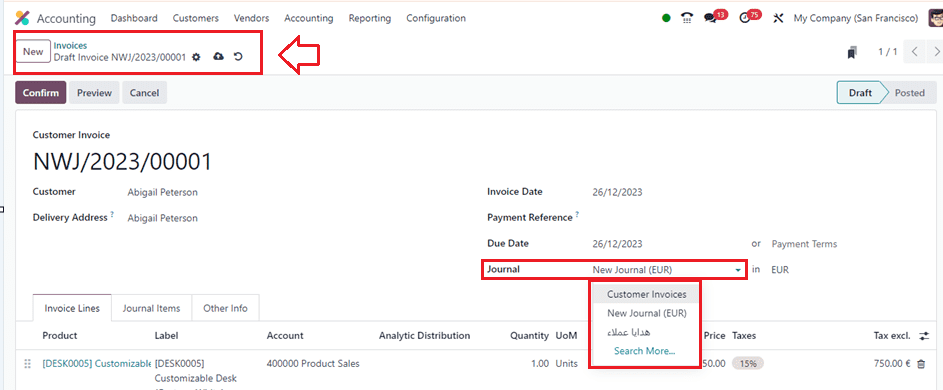
Then, add your products inside the ‘Invoice Lines’ tab and the journal details can be shown under the ‘Journal Items’ tab and also the other details can be viewed inside the ‘Other Info’ tab. After editing the required fields, save the data and confirm the invoice using the ‘Confirm’ button.
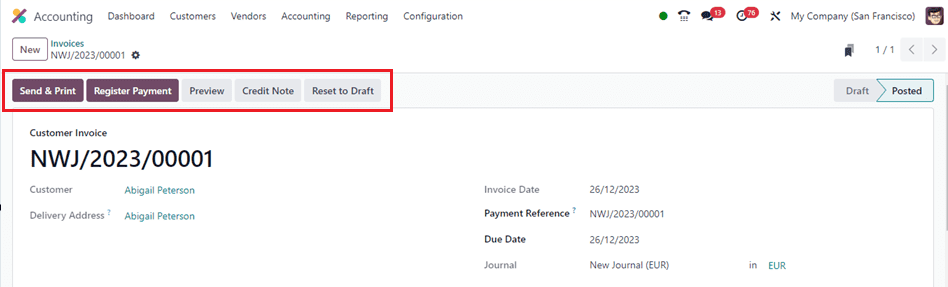
Registering the Payments
After confirming the payment, we will get a ‘Register Payment’ button that can be used to pay the invoice bills.
Clicking on the ‘Register Payments’ button will show another payment registration wizard that can be used to view or alter the Journal, Payment Method, Payment Date, Memo, etc as shown below.
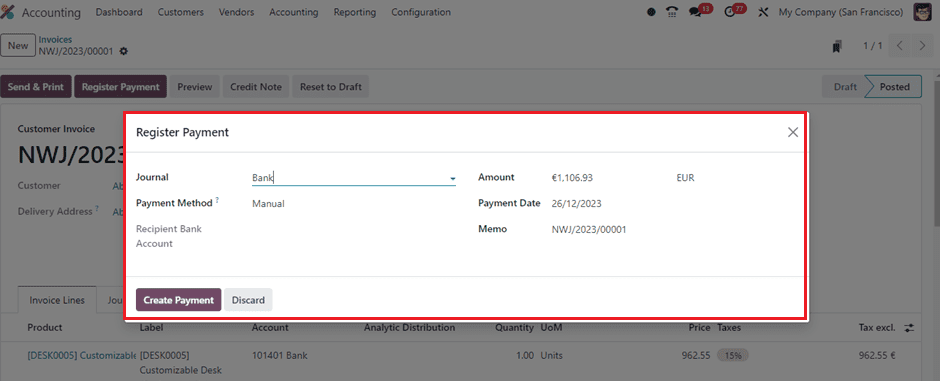
After setting the payment data, confirm the payment using the ‘Create Payment’ button, and the window will show an ‘IN PAYMENT’ ribbon to denote the payment status of the particular invoice.
Sales Journal Review
You can see all of your journal entries from the ‘Journal Entries’ window. To access the Sales Journal details that we have performed above, go to the ‘Accounting’ menu and choose the ‘Journal Entries’ option. Then, group the dashboard data based on ‘Sales’ under the ‘Group By’ section and filter the Journal section. The entry related to the invoice will be listed in the chosen journal, as illustrated in the screenshot below.
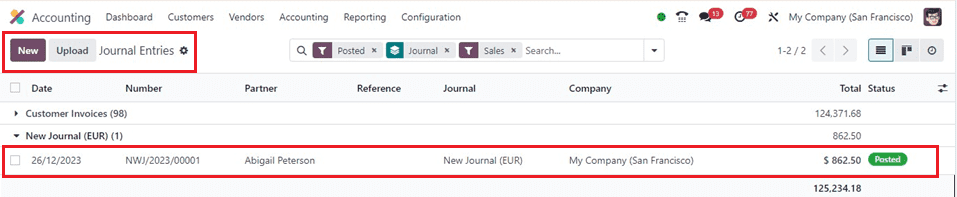
In the event that you have selected further journals, the entry will be noted under those journals. You may do invoicing actions with the remaining Journal kinds, just like you would with the Sales Type.
Journal Reports
The Journal Reports platform allows you to access or generate various accounting reports for different journals that are specified in your Accounting module. This can be shown inside the ‘Journal Reports’ window of the ‘Reporting’ menu. You will find the report of the related journal entries under each journal, together with information on the Name, Invoice Date, Account, Label, Debit, Credit, Taxes, etc, as shown below.
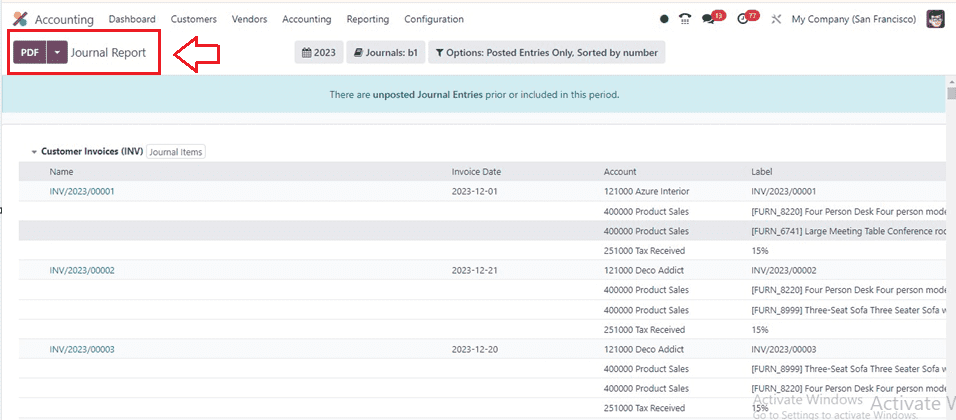
You can sort the journal reports based on the current Month, Quarter, and Financial Year as well as the last Month, Quarter, and Last Financial Year. Also, you can filter and sort the reporting
This feature of the Odoo 17 Accounting module's Journals section offers a comprehensive overview of entries, allowing for easier management and reduction of journal clutter, thereby enhancing the efficiency of the accounting process.