Testing is an essential aspect of software development, helping developers address various types of bugs. In software development, several methods are available for software testing, with static and dynamic methods being two prominent approaches.
Static testing involves evaluating the software application without executing the code. The primary objective is to ensure code quality by identifying bugs or errors in the early stages of development.
Dynamic testing, also referred to as functional testing, requires code execution and analysis of the software's functionality under different conditions.
SonarQube is a comprehensive code quality analysis tool that combines both static and dynamic analysis tools to examine the source code and generate reports on the code quality of your project. It identifies bugs in the code by scanning the project and notifies developers to address them. To implement SonarQube, you need to install the tool and, subsequently, install a scanner and create projects for scanning.
Install SonarQube on Ubuntu 20.04LTS
1. Prepare your Ubuntu server.
sudo apt update
sudo apt upgrade -y
2. Install OpenJDK 11
sudo apt install -y openjdk-11-jdk
3. Install and Configure PostgreSQL
* Add a PostgreSQL repository.
sudo sh -c 'echo "deb
http://apt.postgresql.org/pub/repos/apt/ `lsb_release
-cs`-pgdg main" >> /etc/apt/sources.list.d/pgdg.list'
Add PostgreSQL signing key.
wget -q https://www.postgresql.org/media/keys/ACCC4CF8.asc -O - | sudo apt-key add -
* Install PostgreSQL.
sudo apt install -y postgresql postgresql-contrib
* Enable DB server to start automatically on reboot.
sudo systemctl enable postgresql
* Start DB server.
sudo systemctl start postgresql
* Change the default PostgreSQL password.
sudo passwd postgres
* Switch to the postgres user.
su - postgres
*Create a user named sonar.
createuser sonar
* Log into PostgreSQL.
psql
* Set a password for the sonar user. Use a strong password in place of my_password.
ALTER USER sonar WITH ENCRYPTED password 'my_password';
* Create a SonarQube database and set its owner to sonar.
CREATE DATABASE sonarqube OWNER sonar;
*Assign full privileges on the SonarQube database to the user sonar
GRANT ALL PRIVILEGES ON DATABASE sonarqube to sonar;
Exit PostgreSQL.
\q
Return to your non-root sudo user account.
exit
4. Download and Install SonarQube
* Install the zip utility, which is needed to unzip the SonarQube files.
sudo apt install -y zip
Locate the latest download URL from SonarQube official download page.
https://binaries.sonarsource.com/Distribution/sonarqube/sonarqube-9.0.1.46107.zip
Download the SonarQube distribution files.
sudo wget hhttps://binaries.sonarsource.com/Distribution/sonarqube/sonarqube-9.0.1.46107.zip
Unzip the downloaded file.
sudo unzip sonarqube-9.0.1.46107.zip
Move the unzipped files to /opt/sonarqube directory
sudo mv sonarqube-9.0.1.46107 /opt/sonarqube
5. Add SonarqubeGroup and Group User.
* Create a sonar group
sudo groupadd sonar
Create a sonar user and set /opt/sonarqube as the home directory.
sudo useradd -d /opt/sonarqube -g sonar sonar
Grant the sonar user access to the /opt/sonarqube directory.
sudo chown sonar:sonar /opt/sonarqube -R
6. Configure SonarQube
Edit the SonarQube configuration file.
sudo nano /opt/sonarqube/conf/sonar.properties
Step 1: Find the following lines.
#sonar.jdbc.username=
#sonar.jdbc.password=
Step 2: Uncomment the lines, and add the database user sonar and password my_password you created in Section 3.
sonar.jdbc.username=sonar
sonar.jdbc.password=my_password
Step 3: Below those two lines, sonar.jdbc.url
sonar.jdbc.url=jdbc:postgresql://localhost:5432/sonarqube
Step 4: Save and exit the file.
Edit the sonar script file.
sudo nano /opt/sonarqube/bin/linux-x86-64/sonar.sh
Step 1: About 50 lines down, locate this line.
#RUN_AS_USER=
Uncomment the line and change it to
RUN_AS_USER=sonar
Save and exit the file
7. Setup Systemd Service
Create a systemd service file to start SonarQube at system boot.
sudo nano /etc/systemd/system/sonar.service
Step 1: Paste the following lines to the file.
[Unit]
Description=SonarQube service
After=syslog.target network.target
[Service]
Type=forking
ExecStart=/opt/sonarqube/bin/linux-x86-64/sonar.sh start
ExecStop=/opt/sonarqube/bin/linux-x86-64/sonar.sh stop
User=sonar
Group=sonar
Restart=always
LimitNOFILE=65536
LimitNPROC=4096
[Install]
WantedBy=multi-user.target
Step 2: Save and exit the file.
Enable the SonarQube service to run at system startup.
sudo systemctl enable sonar
Start the SonarQube service.
sudo systemctl start sonar
Check the service status.
sudo systemctl status sonar
8. Modify Kernel System Limits
Edit the sysctl configuration file.
sudo nano /etc/sysctl.conf
Step 1: Add the following lines
vm.max_map_count=262144
fs.file-max=65536
ulimit -n 65536
ulimit -u 4096
Step 2: Save and exit the file.
Reboot the system to apply the changes.
sudo reboot
9. Access SonarQube Web Interface
Access SonarQube in a web browser at your server's IP address on port 9000. For example:
http://localhost:9000
After logging in with the username 'admin' and password 'admin,' SonarQube will prompt you to update your password."
10. Make SonarQube more secure.
After logging in, you can change the username and password. Generate a token for a specific user by clicking the button in the Security column and giving it a name. Remember to keep this token secure, as you'll need it when you run the code scanner.
11. Setting Up the Code Scanner
Create a directory for the scanner
sudo mkdir /opt/sonarscanner
Enter into that directory
cd /opt/sonarscanner
Download the SonarQube scanner for Linux using wget
sudo wget https://binaries.sonarsource.com/Distribution/sonar-scanner/sonar-scanner-4.6.2.2472-linux.zip
Extract the scanner
sudo unzip sonar-scanner-4.6.2.2472-linux.zip
Delete the zip archive file
sudo rm sonar-scanner-4.6.2.2472-linux.zip
Afterwards, you will need to adjust a few settings to configure the scanner for your server installation. Open the configuration file for editing.
sudo nano sonar-scanner-4.6.2.2472-linux/conf/sonar-scanner.properties
Step 1: Initially, specify to the scanner where it should submit the code analysis results. Uncomment the line that begins with 'sonar.host.url' and configure it with the URL of your SonarQube server
sonar.host.url=http://127.0.0.1
Step 2: Save and close the file.
Make the scanner binary executable:
sudo chmod +x sonar-scanner-4.6.2.2472-linux/bin/sonar-scanner
Establish a symbolic link for convenient access to the scanner without needing to specify the full path.
sudo ln -s /opt/sonarscanner/sonar-scanner-4.6.2.2472-linux/bin/sonar-scanner /usr/local/bin/sonar-scanner
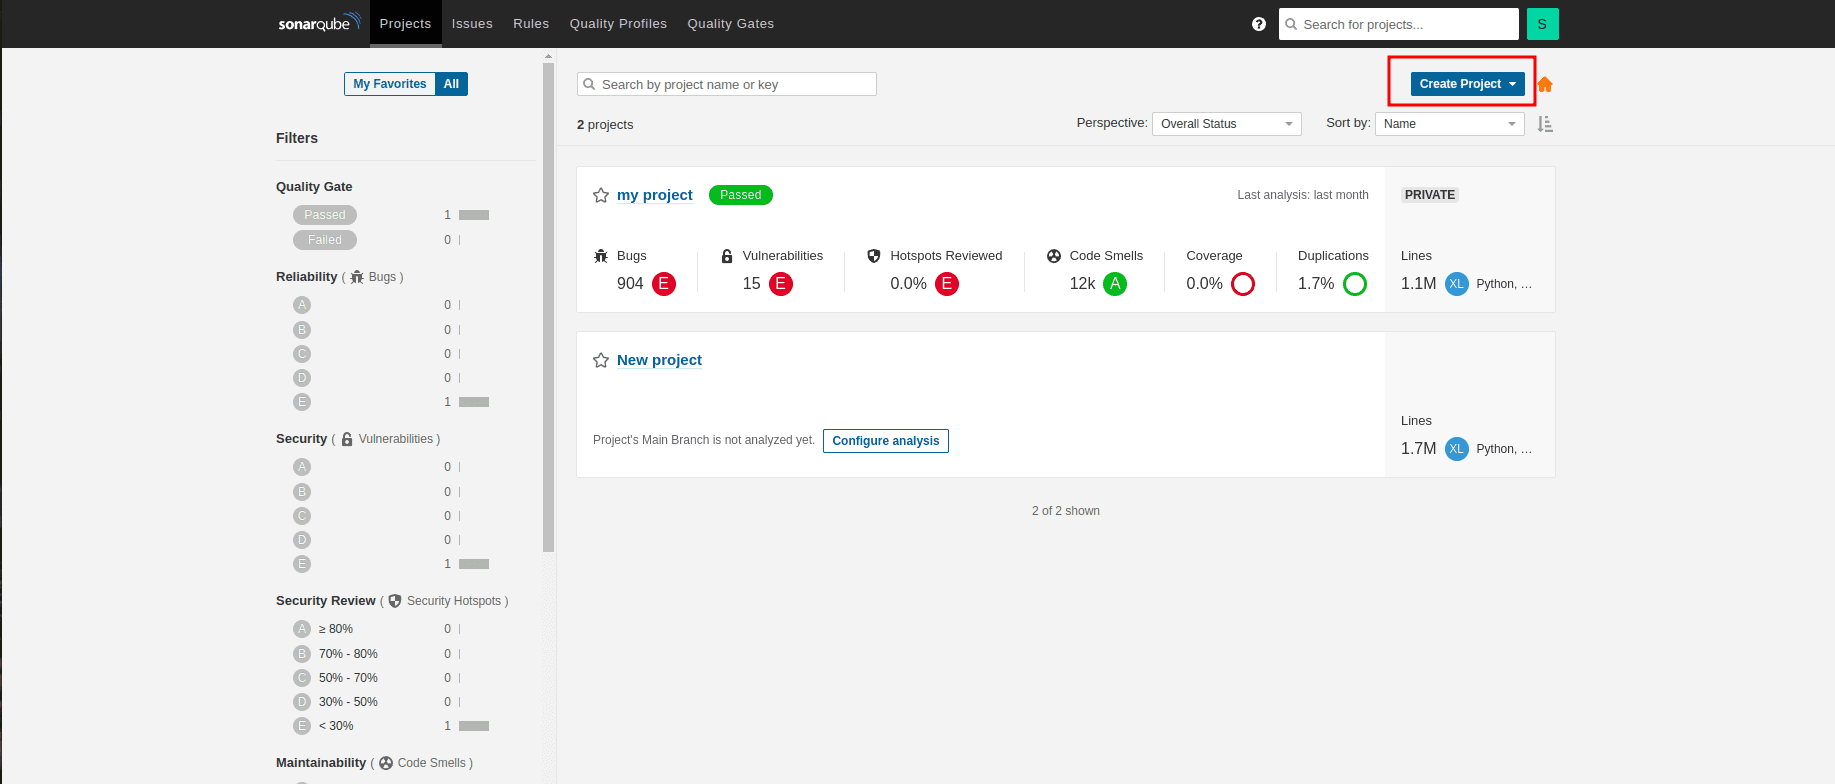
12. Run a scan on your code.
Create a new project.
Create a token after creating the project. Further, you will get a window like this showing the generated token:
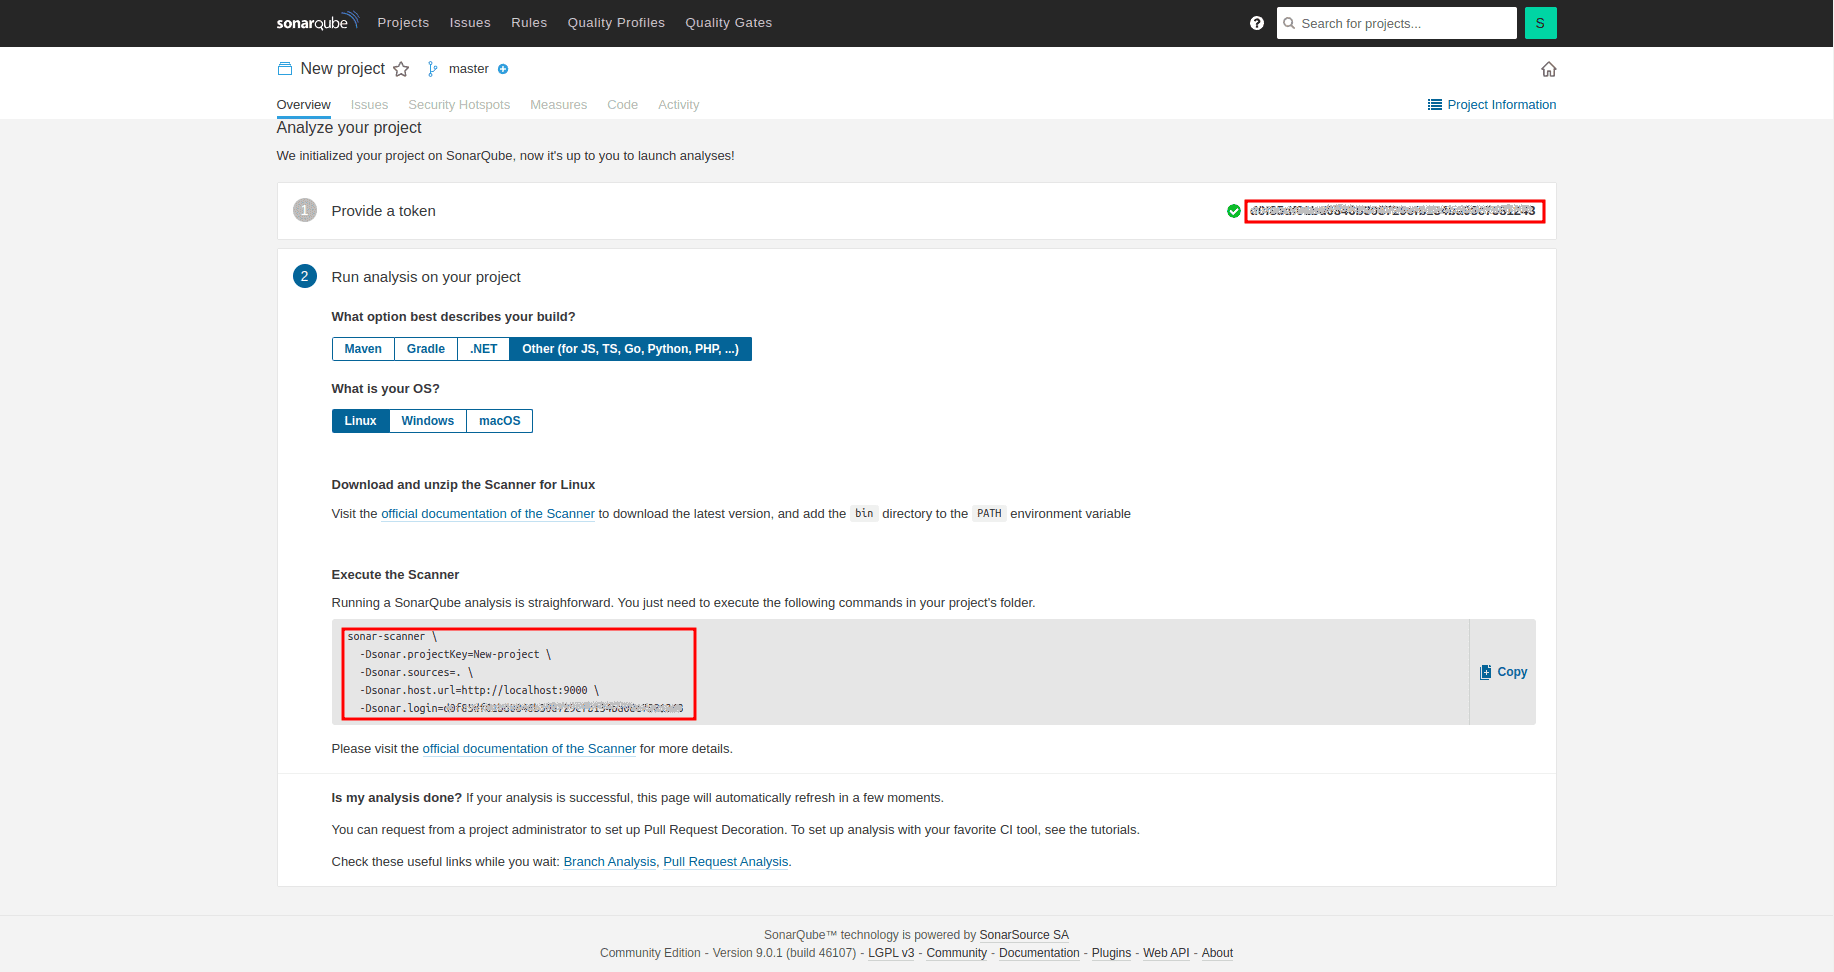
You’re ready to run a code quality analysis on your own code. Run sonar-scanner again, passing your token. For this, you can paste commands shown in the window onto your project terminal.
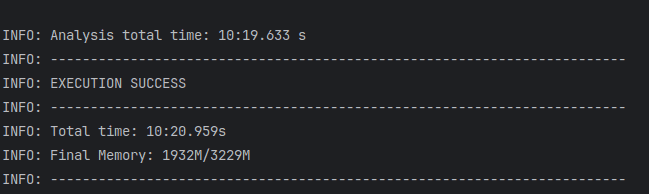
Once the scan is complete, you’ll see a summary screen similar to this:
* A scanned report of the project will be available in the dashboard.
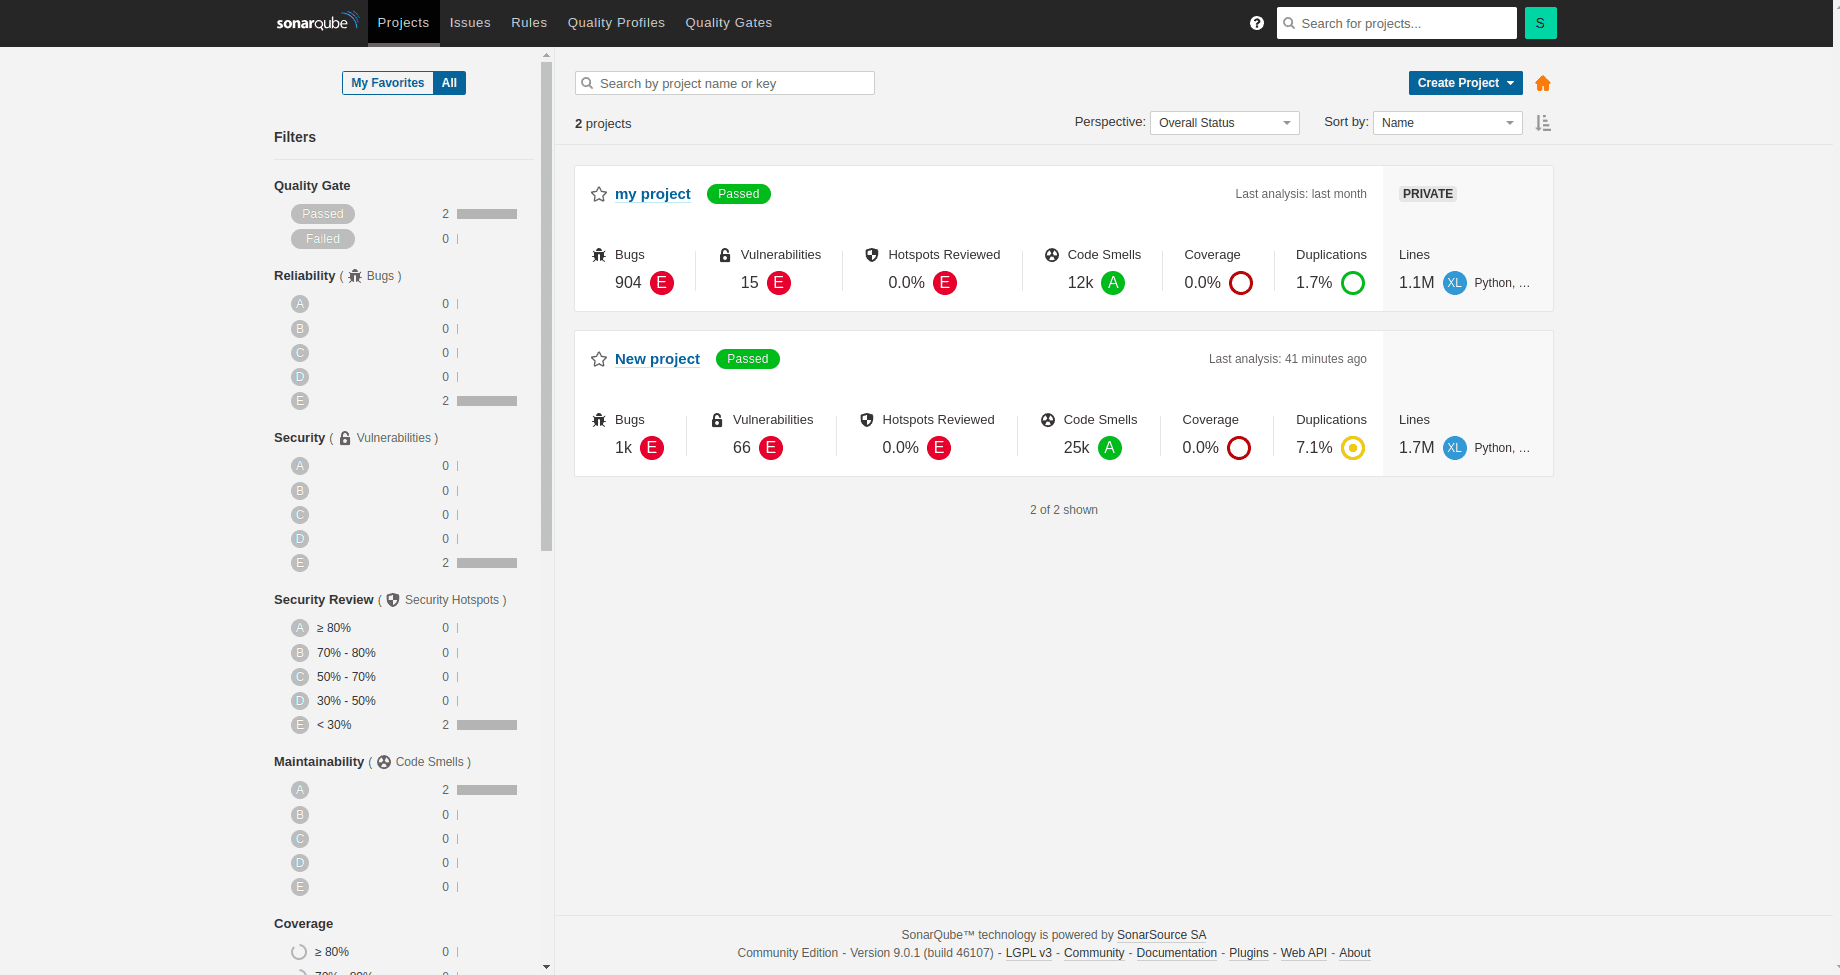
You can view the line of codes on which errors or warnings occurred in the issues column. Rules and coding standards of different languages are available in the rules column.