The eLearning app allows you to easily upload content, define learning objectives, manage attendees, assess students’ progress, and even set up rewards. Engaging participants in a meaningful learning experience enhances their attentiveness and fosters heightened productivity. The Odoo 16 eLearning Module offers the ability to design online courses, allowing users to enroll in and finish them according to guidelines set out when the course was designed. Additionally, this module offers features like the ability to configure quizzes, badges, a lovely dashboard for users who are presently signed in, the status of any courses the user has enrolled in, badges, and rank and profile data.
When you access the Odoo 16 eLearning module, you will be shown the dashboard, which describes all of the Courses created. It details the course name, reviews, views, duration, sales, content, participation numbers, amount completed, and tags assigned. Filtering and grouping tools are available in the menu and can be configured. In connection with the creation of a new course, you can select the existing option Create. Also, if you need to change the current course, select yourself and the Course menu, then select the Show Course option available.

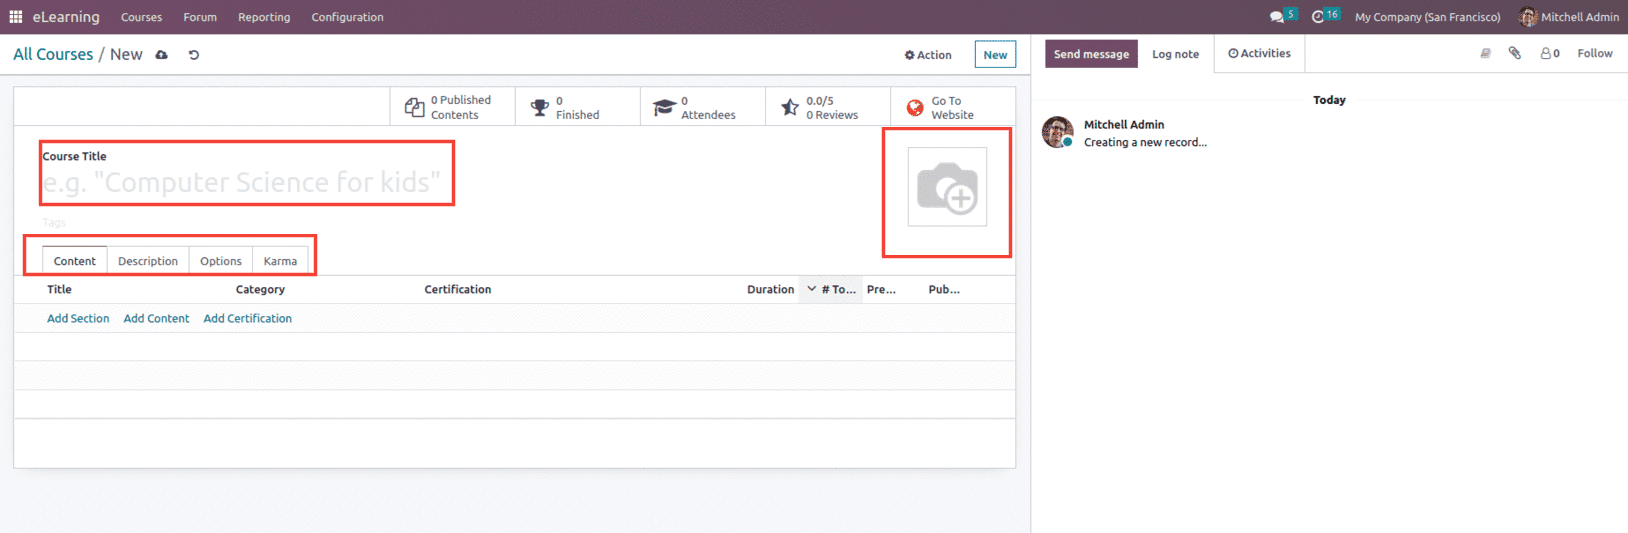
To create a new course, click on the New button. When the page opens, you can add a course title and one or more tags to describe your course. You can also add an image to illustrate the course. Besides that, we have four tabs that allow you to further customize the course: Content, Description, Settings, and Karma, as shown below.
Following the addition of the Sections, the corresponding Contents may be added to the unique section by choosing the Add Content option. To add the Contents, you will be presented with the following description box, where you may specify the Content Title as well as the Tags assigned. Additional content types include documents, videos, webpages, presentations, and quizzes. A link or URL can also be included so that users can view the Content. If the content is a video or an audio, the Uploaded By the responsible person and the Duration of the Content will be listed. The Allow Preview option can be specified if the Content Preview is intended to be shown to the applicants.

The user can add a Description, Additional Resources, and Quizzes within the Content. Additionally, a thorough, useful description may be included in the explanation tag of the relevant Content, first presenting the candidates.
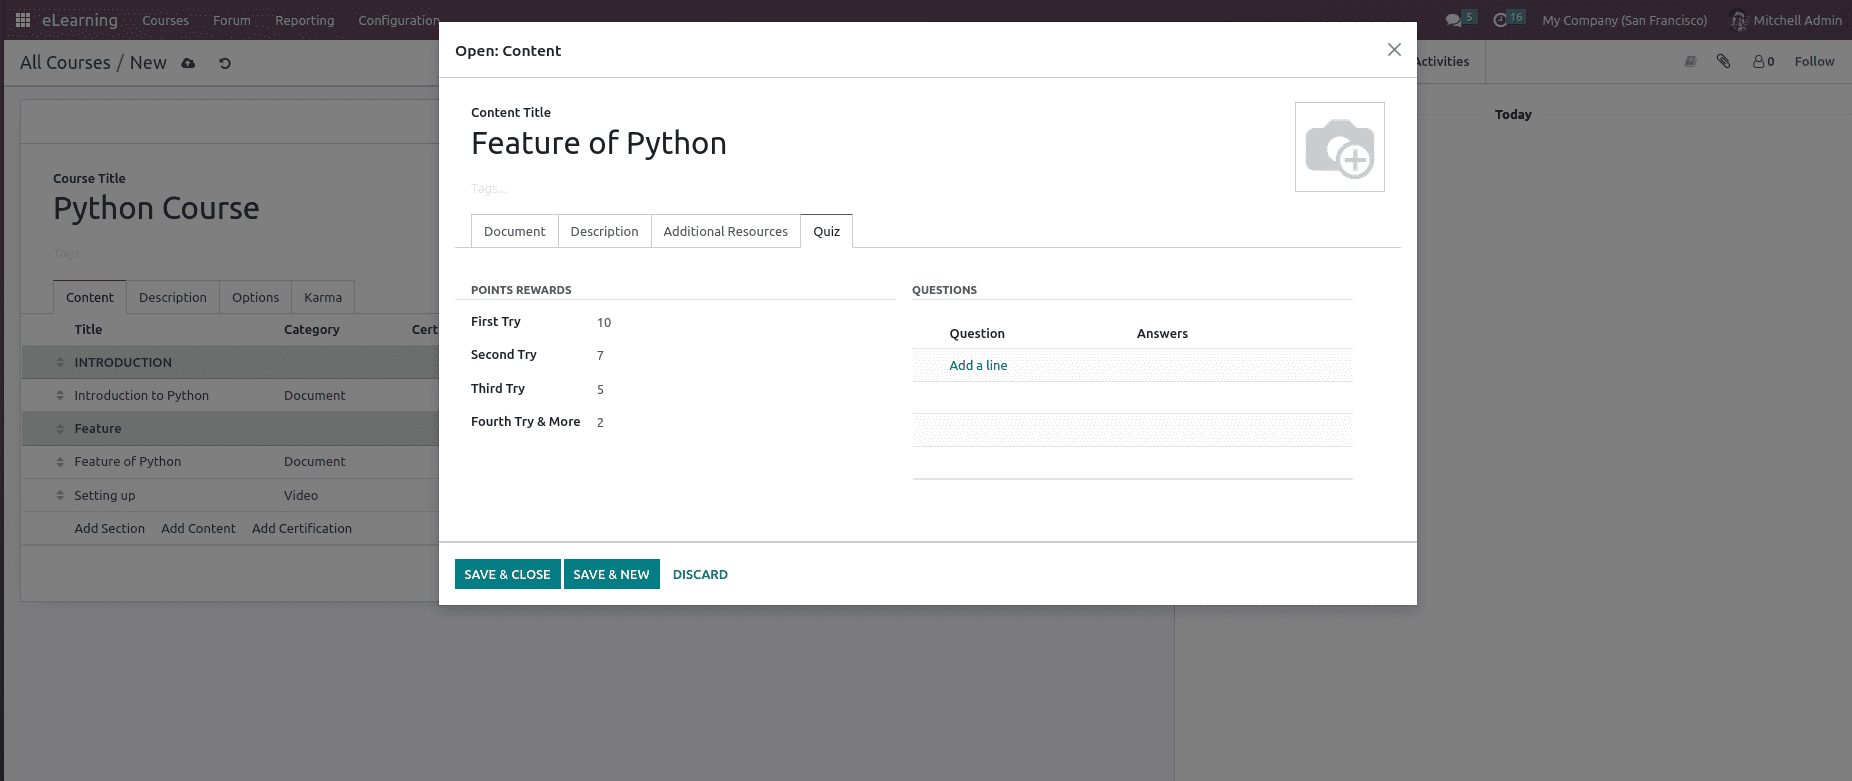
The tab where external links and resources are provided can be used to determine how additional resources should be configured with reference to content. Selecting the Add a Line option will allow you to set the External Link Title and the Link. The identical Add a line option is likewise accessible in the case of the Resources. The Quiz page contains a definition of the Question and Rewards. Here you may read about the Rewards for the First, Second, Third, and Fourth attempts.
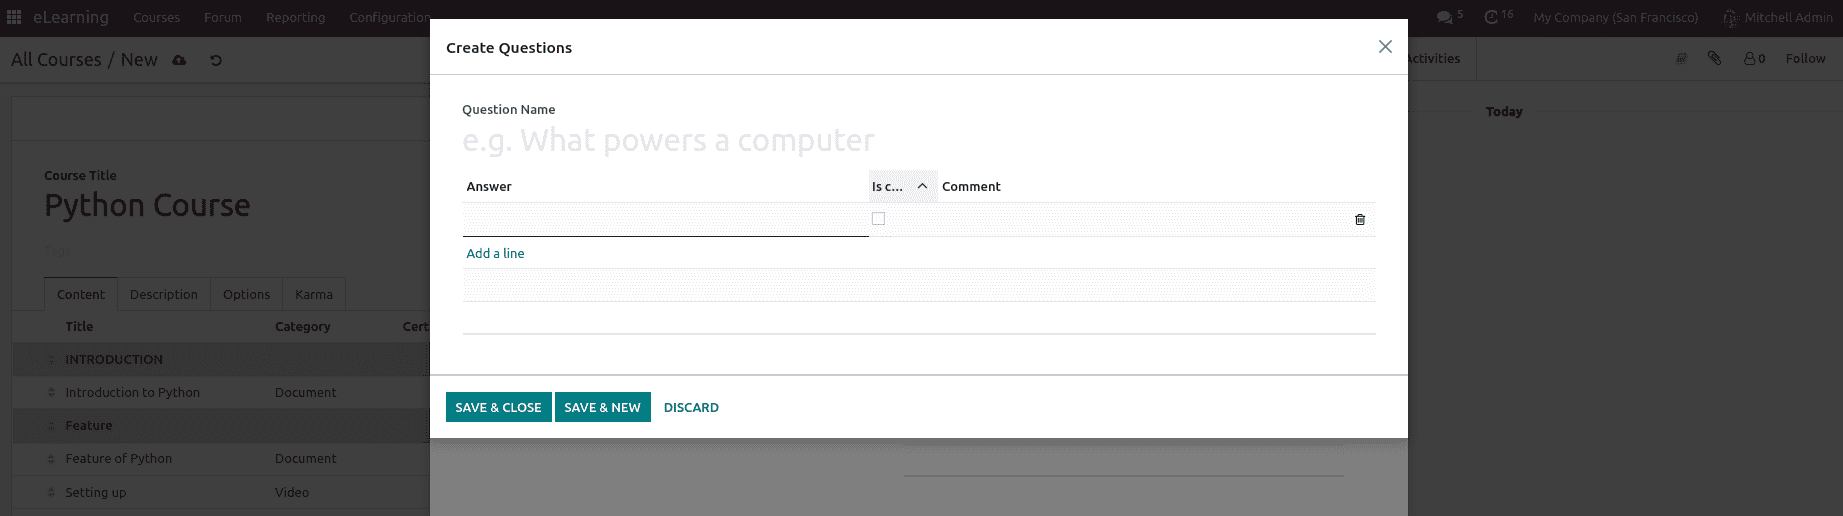
The next picture shows the Question setup panel after choosing to add a Question using the Add a line option. Here, it is possible to define the Question Name and the Answers. The option can be activated if the corresponding responses given are accurate.
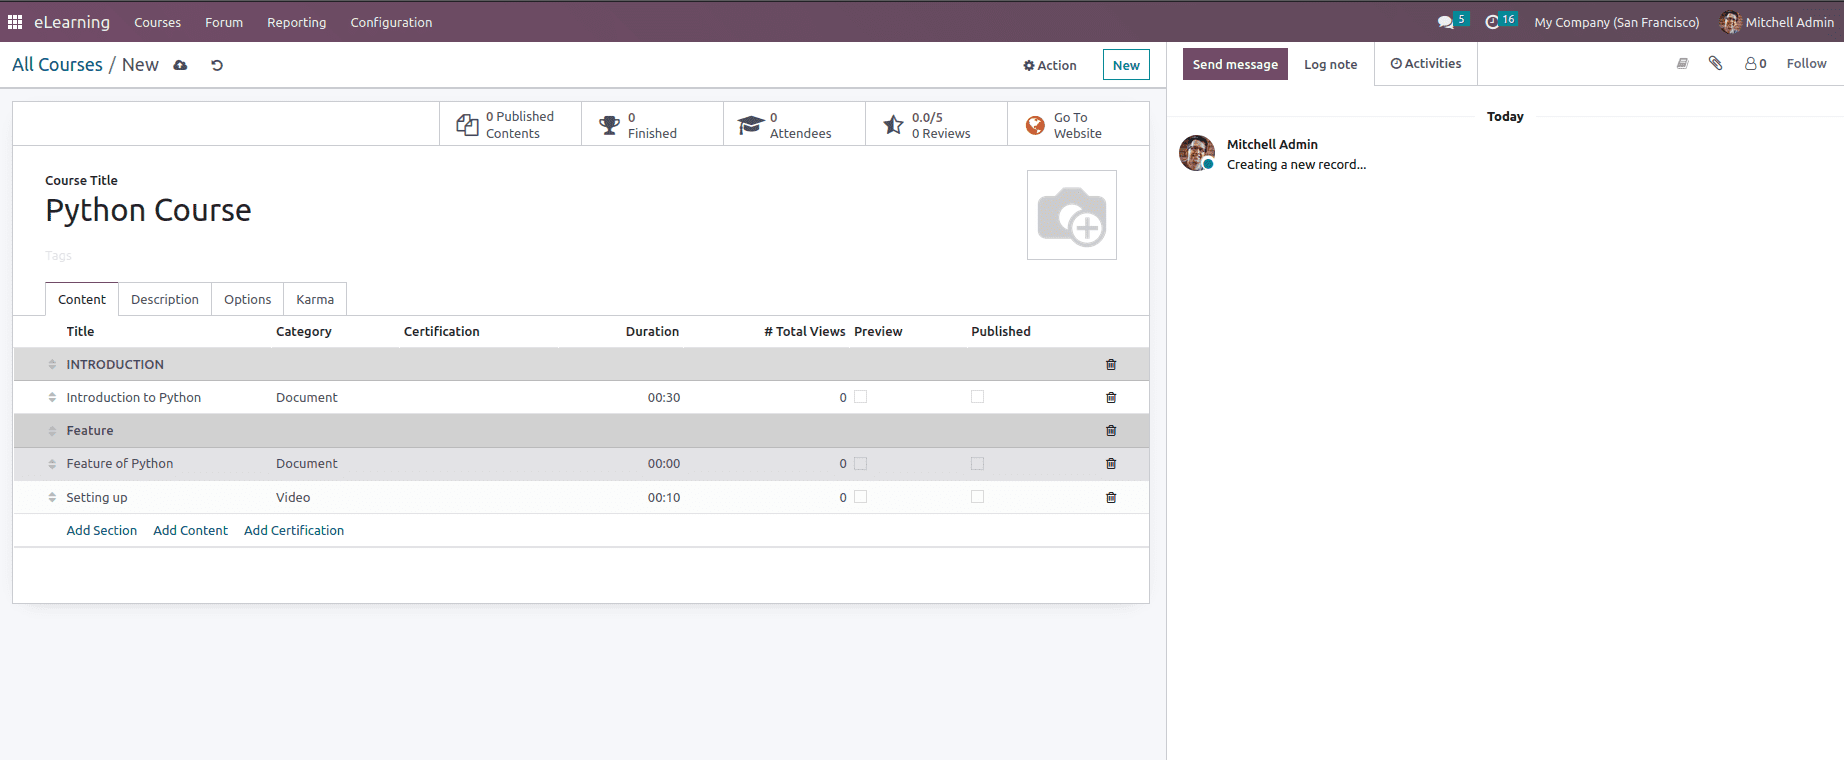
Once the Contents have been described, they will all be displayed in the Content menu of the appropriate Course being established, as seen in the picture below.
The course descriptions that will be shown to candidates can be customized under the description menu. Additionally, depending on the language choice made on the platform, the Course material can be described in any language.
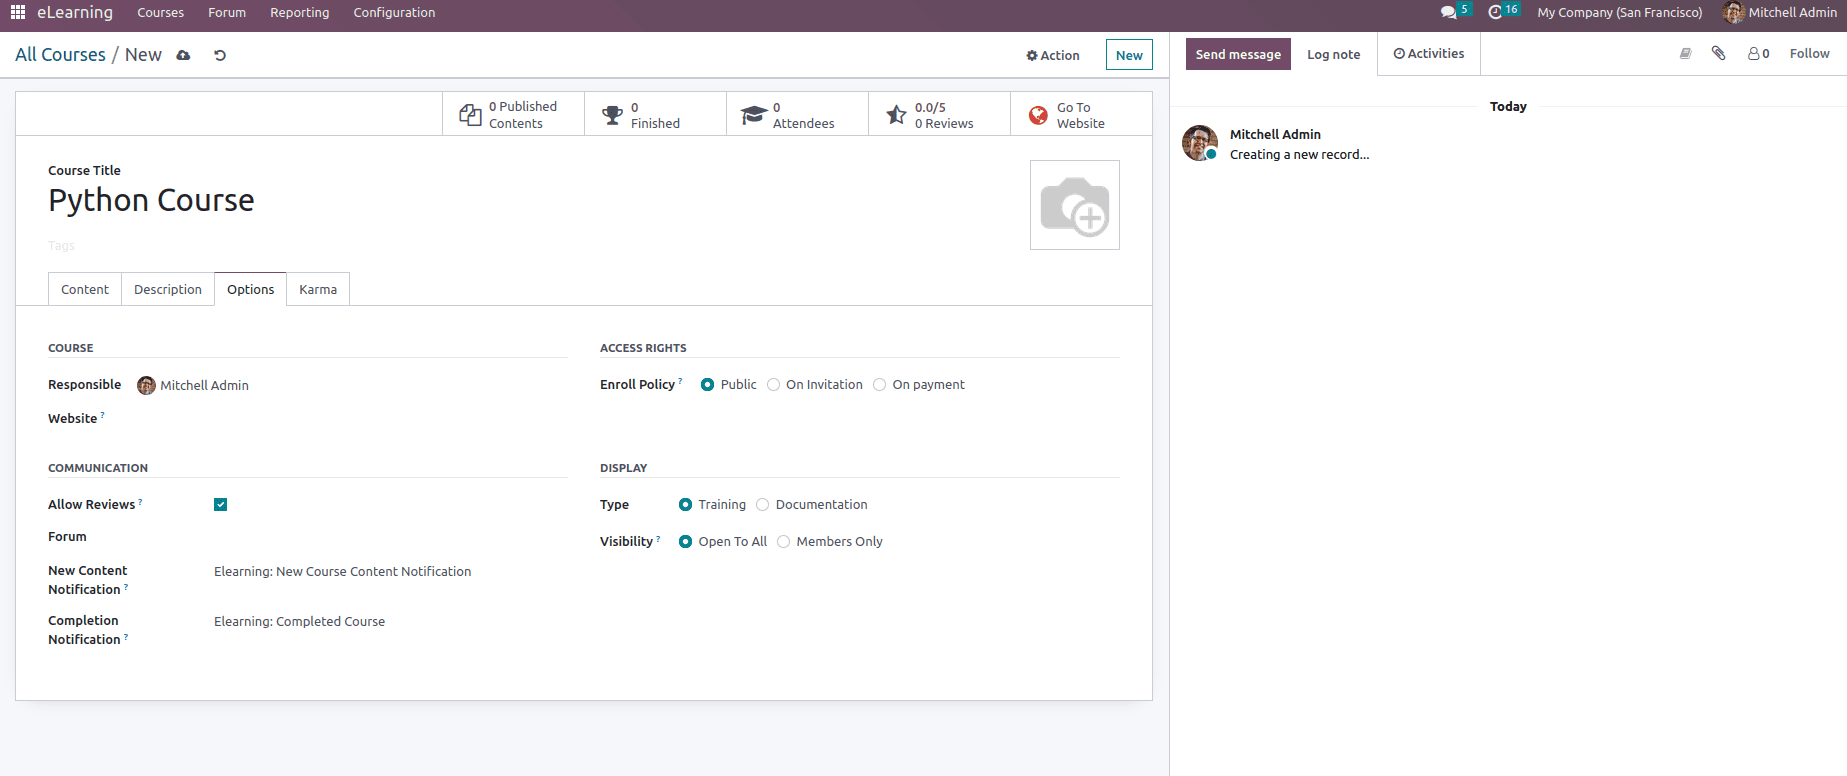
The Options menu for course configuration includes the Responsible Person, and the website where the course should be established may be found under the Options tab of the course creation, as seen in the picture below. Furthermore, communication elements such as the Allow Rating option, as well as the Forum in which the specific Course should be discussed, may be activated and disabled. Furthermore, the Completion Email and the New Content Email may both be identified. The Enroll Policy can also be set to be Public, On Invitation, or On Payment under the Access Rights choices. Enroll Policy: specify how people will enroll in your course, and they include options such as:
Open: if you want everyone to be able to take your course;
On Invitation: Only persons who have been invited to your course can enroll. If chosen, complete the Enroll Message describing how to enroll in the course. This message shows on your website under the course title;
On Payment: Only the individuals who purchased your course may attend it. The Paid Courses feature must be activated for this option to be available. For your course, you must add a Product if you choose On Payment.
Under the Display options, it can be either defined as Training or Documentation.
Training: The courses must be done in the suggested order, and the course content must be presented as a training program.
Documentation: You can access the information in any order. By utilizing the Featured Content box, you can specify which page should be highlighted on the course homepage if you select this option.
Moreover, the Visibility can be either set as Public or Members only.
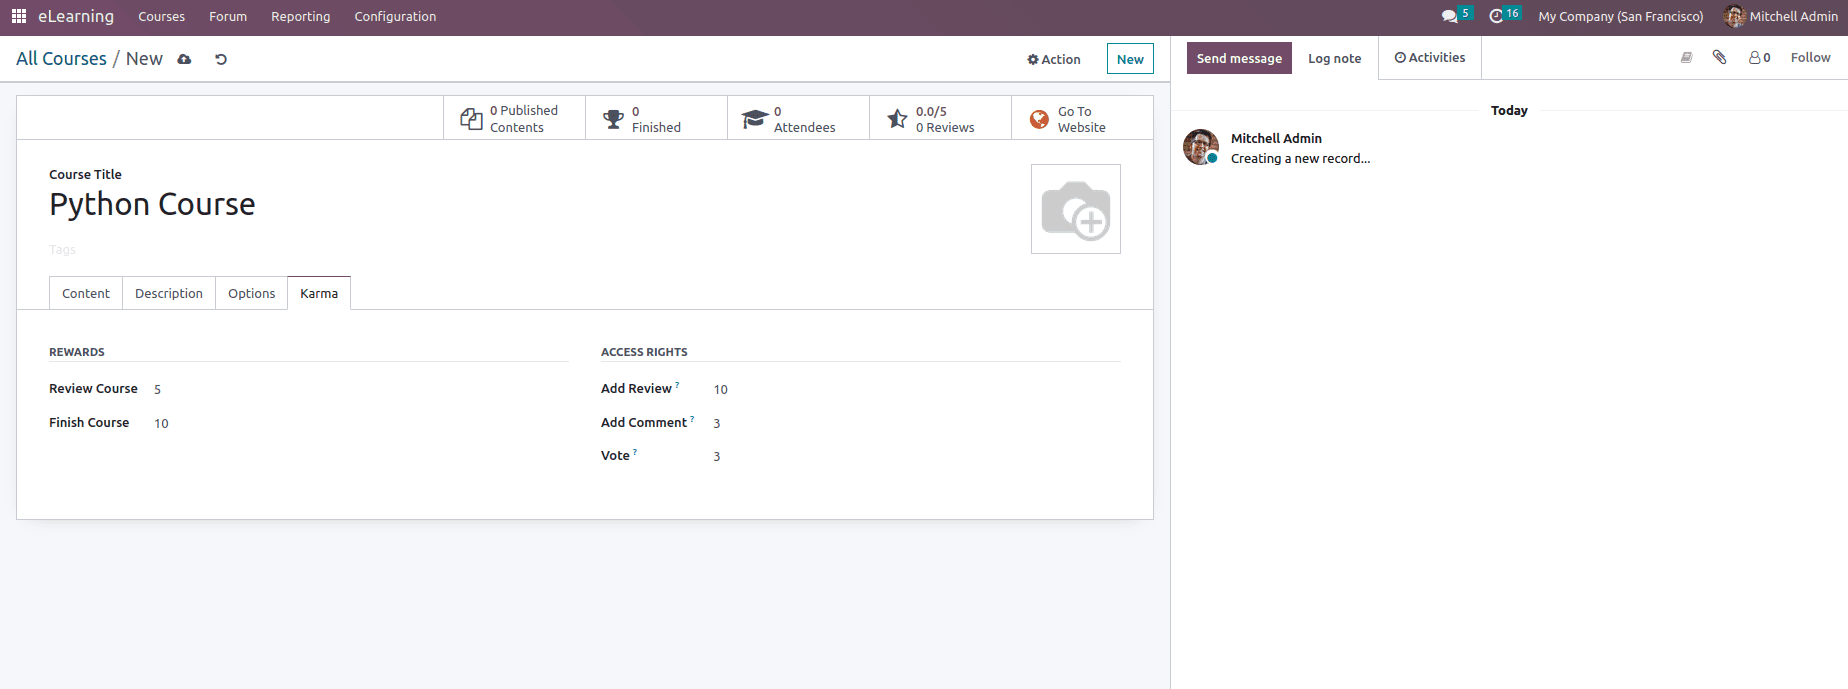
Additionally, under the Karma menu, where the Rewards for Review Course and the Finish Course information may be configured, the Karma choices for the Course Takers can be defined. Additionally, it is possible to establish Access Rights, such as the Add Review, Add Comment, and the Reward for Votes.
Once all the course content and other details are added, the User also has the option to add a Certificate to the course. The Certifications defined can be used to evaluate the many applicants who have participated in the course. Moreover, these certifications may take the form of surveys that may ask questions of a candidate even if they are not enrolled in any of the specified courses. You may access the Certifications menu under the Courses tab if the Certification option has been activated in the eLearning module's settings menu. All operation certifications are included in the menu with the number of correct answers, the total number of certified individuals, and the certification's success rate.
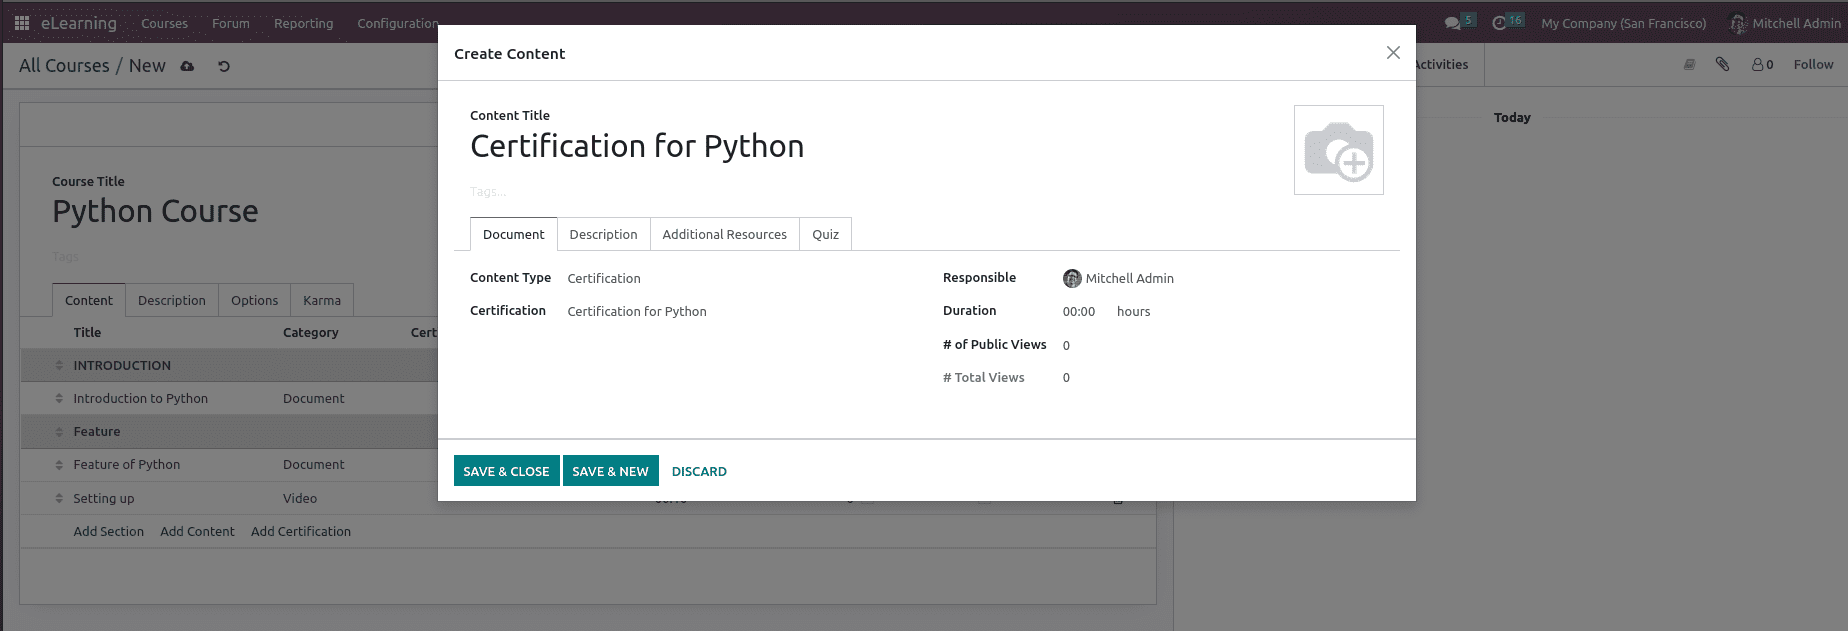
To create a new Certification, go to the Certifications window and pick the Create option, or with the Course itself, you get the option to add the existing certificate or can create a new certificate. For the Certifications to be defined, you must first supply a Name and the Responsible Person. Additionally, the Questions Tab should define the Questions for the Certifications. Here, you may add Sections by selecting the Add a Section option, and you can add the Questions that go with each Section by selecting the Add an available question option.
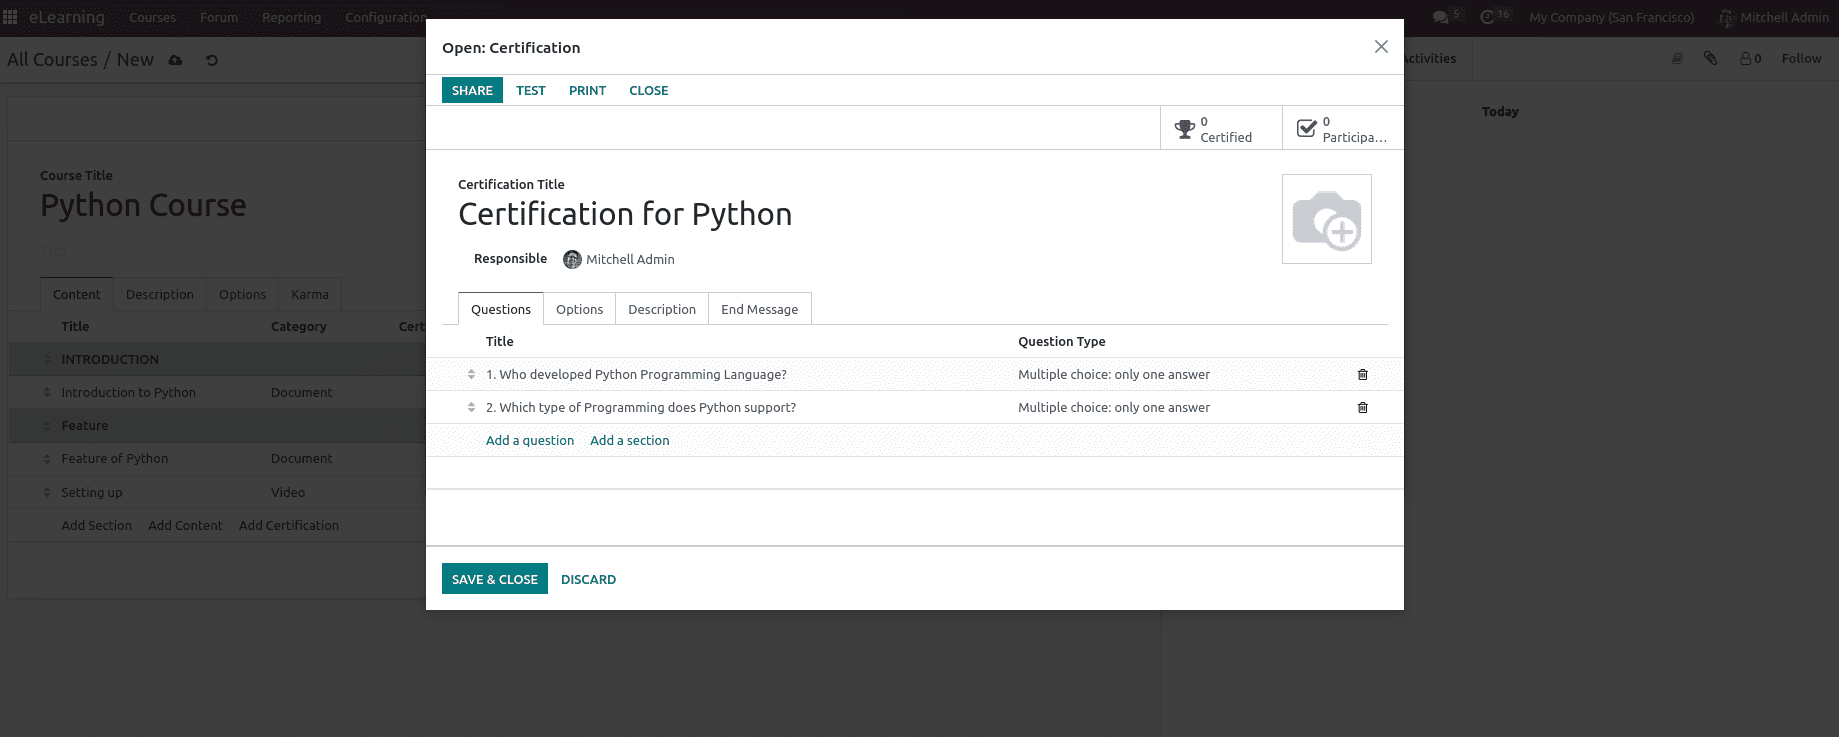
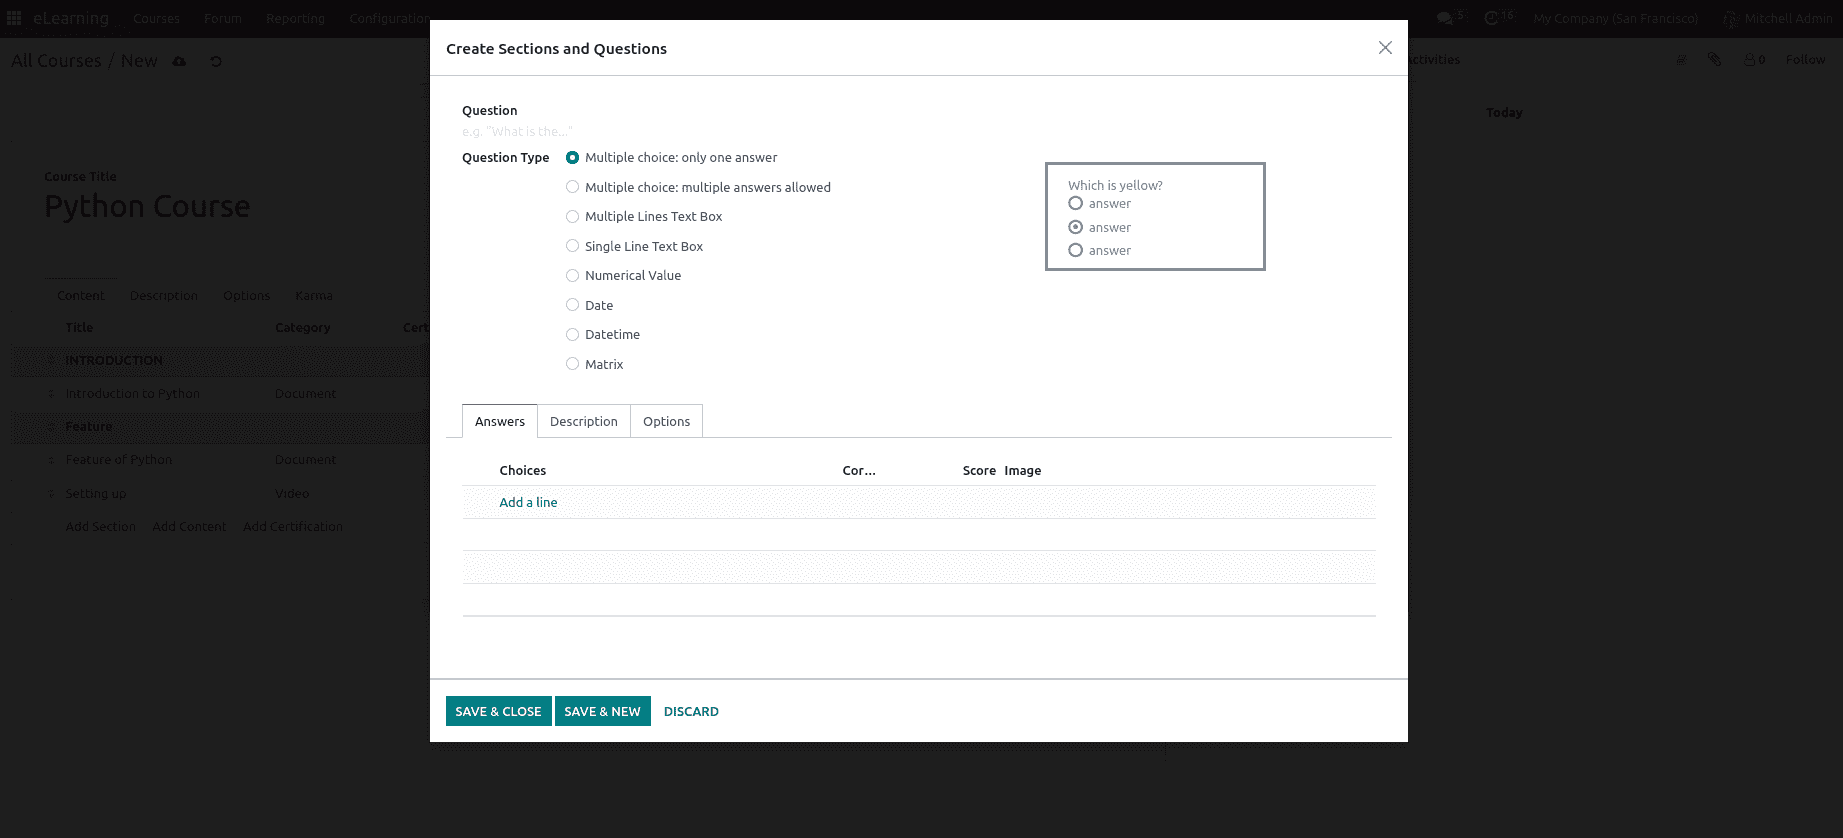
When you choose to add a Question, you will be presented with the Question Creation window shown in the screenshot. Name the question and specify the question type here. Multiple Lines Text Box, Single Line Text Box, Numerical Value, Date, and Datetime are the available question types. One response per multiple choice, multiple answers permitted, or as a matrix. Additionally, the Answers for the relevant Question are of the option type; details about the choice may be found in the Answers tab.
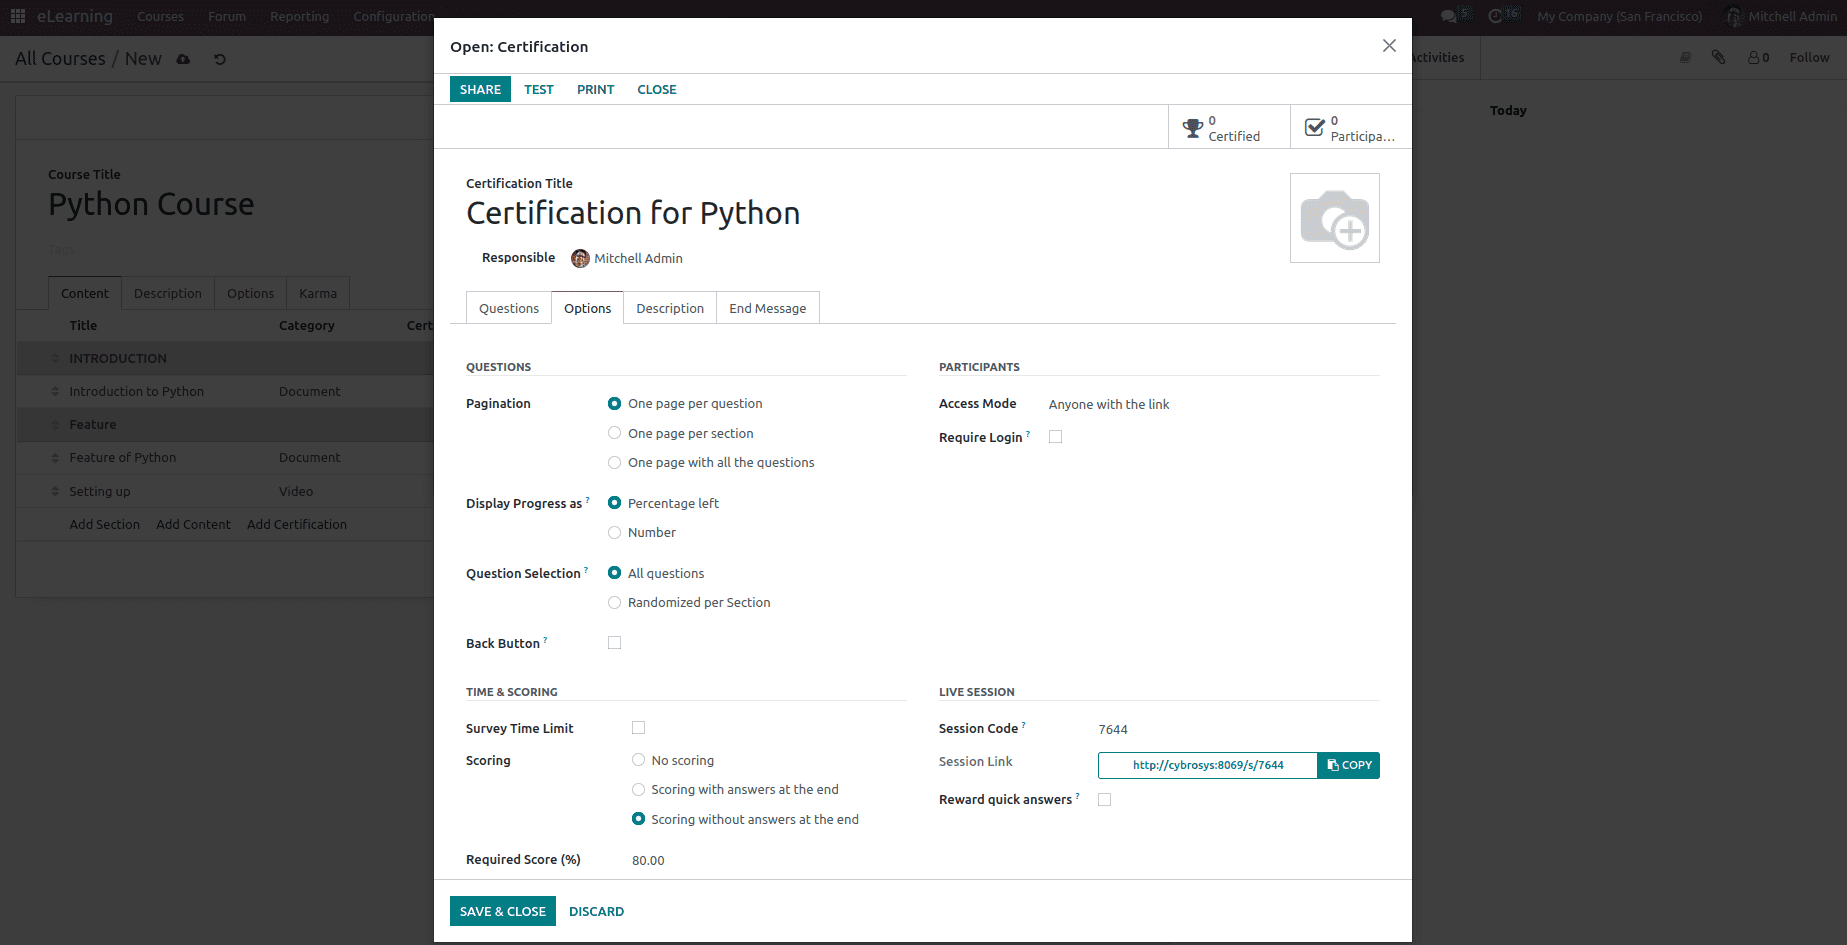
In the Options menu of the certificate, its functional options can be configured here. The layout option can be described as One page with all questions, One page per section, or One page per question. Additionally, progress status can be described in percentages or numbers. The time limit for the investigation can be set. The selection option can be set to All Questions or Random per section. There are three types of scoring: No scoring, scoring with answers provided at the conclusion, and scoring without answers. Additionally, you may enable or disable the Candidates Access mode and the Login Requirement option. The Reward Quick Answer and Session Code may both be permitted during Live Sessions.
Once the certification is complete, save the course and publish the same into the website.

Everything created in the backend must be published by the front end. Unpublished content will always appear on your website, but it still needs to be published to be available to your audience. To publish your material, you must be logged into the front end of your website. To achieve this, select the Publish option in the right-hand corner after selecting the Go To Website smart button. Now, let's go to the website and check how this course can be viewed and accessed from the website.
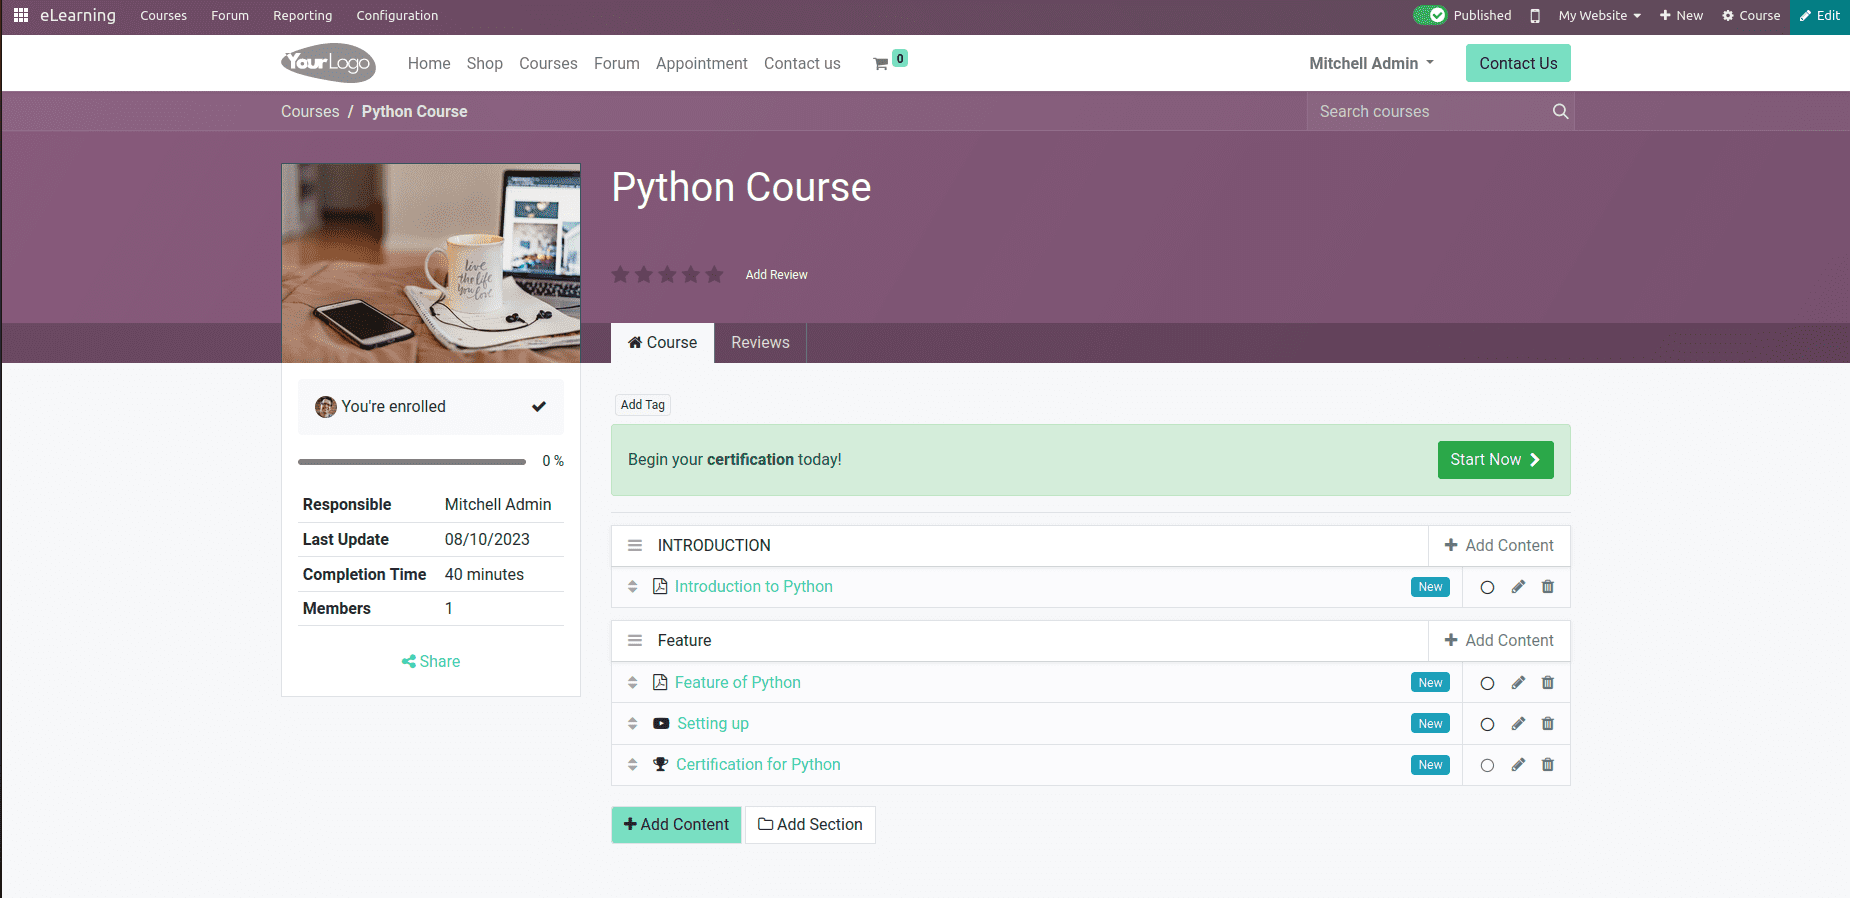
After selecting the courses, the User can access all the course details along with the certification, and after completing the topic, the progression count increases as the user marks the course as done, as shown below.
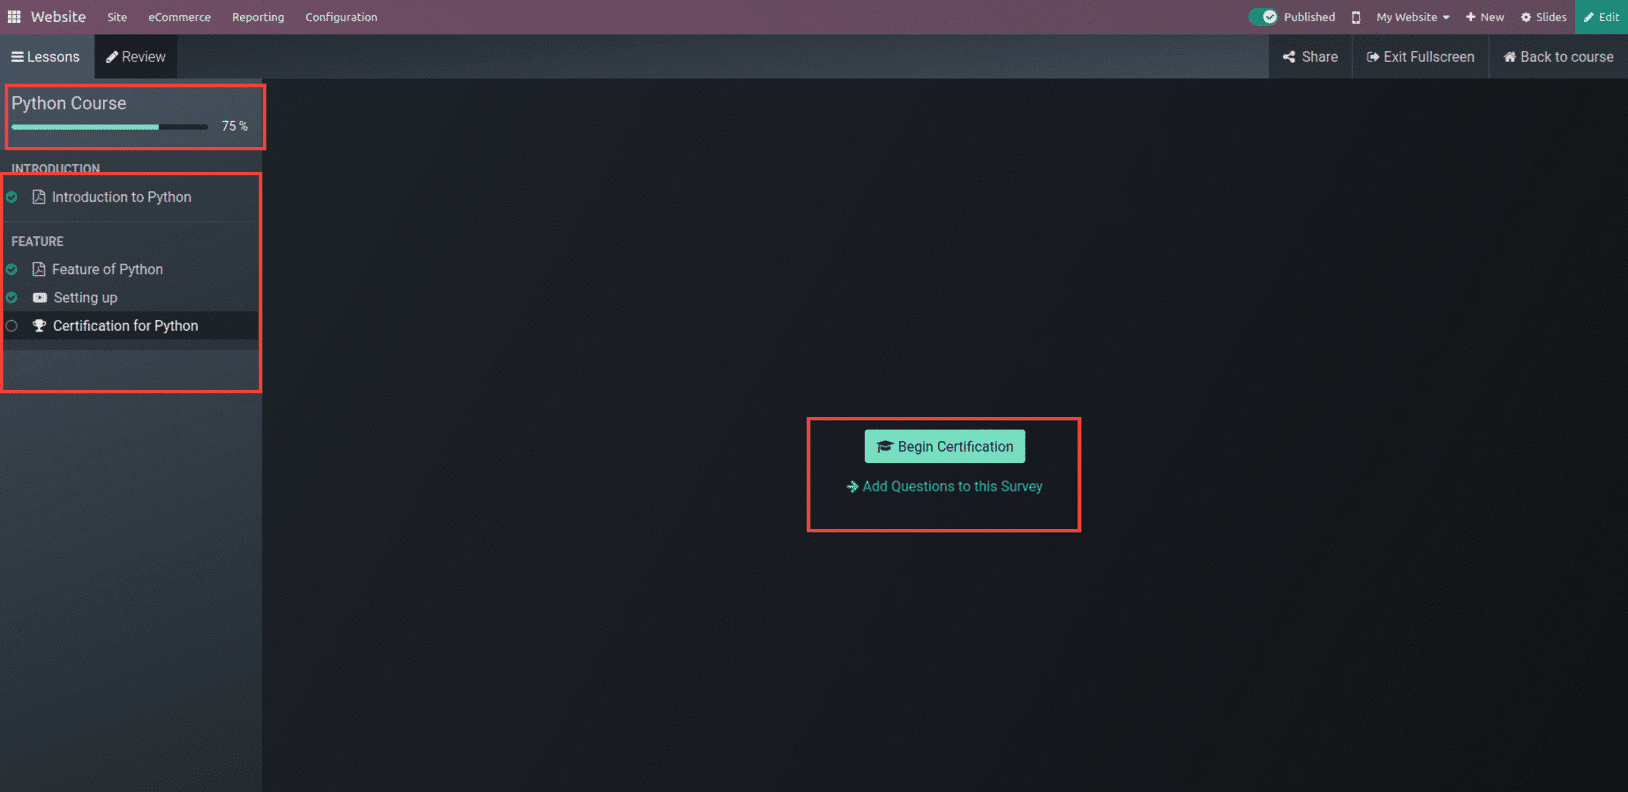
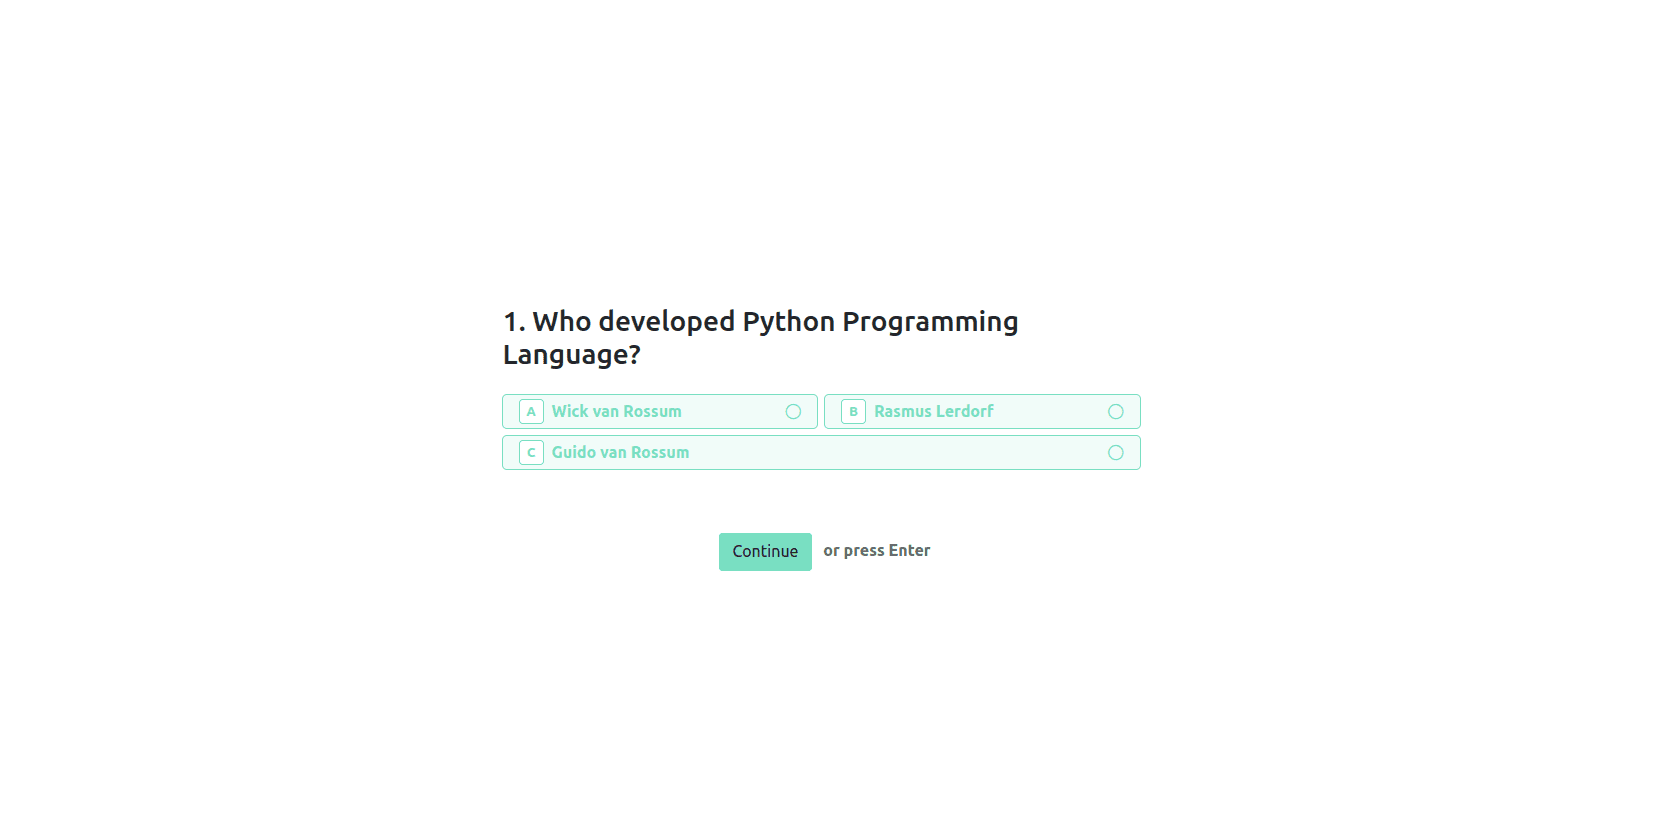
And when clicking on Begin Certification, the question appears with the choices as mentioned while creating the questions.
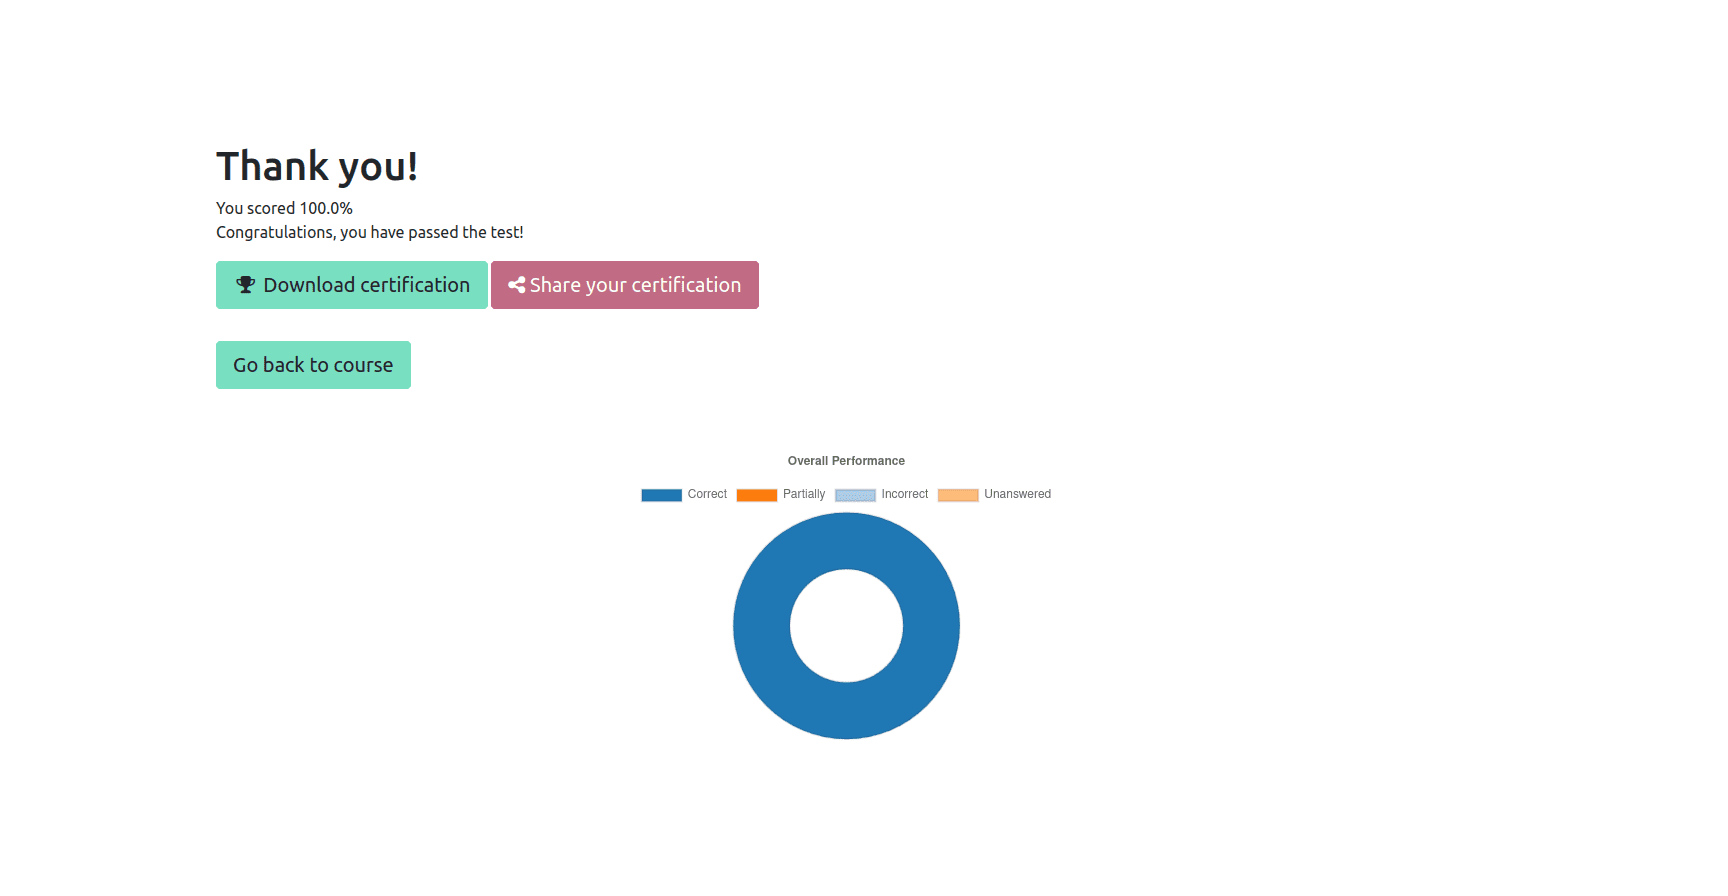
Once the certification is complete, it brings up the completion window, as shown below.
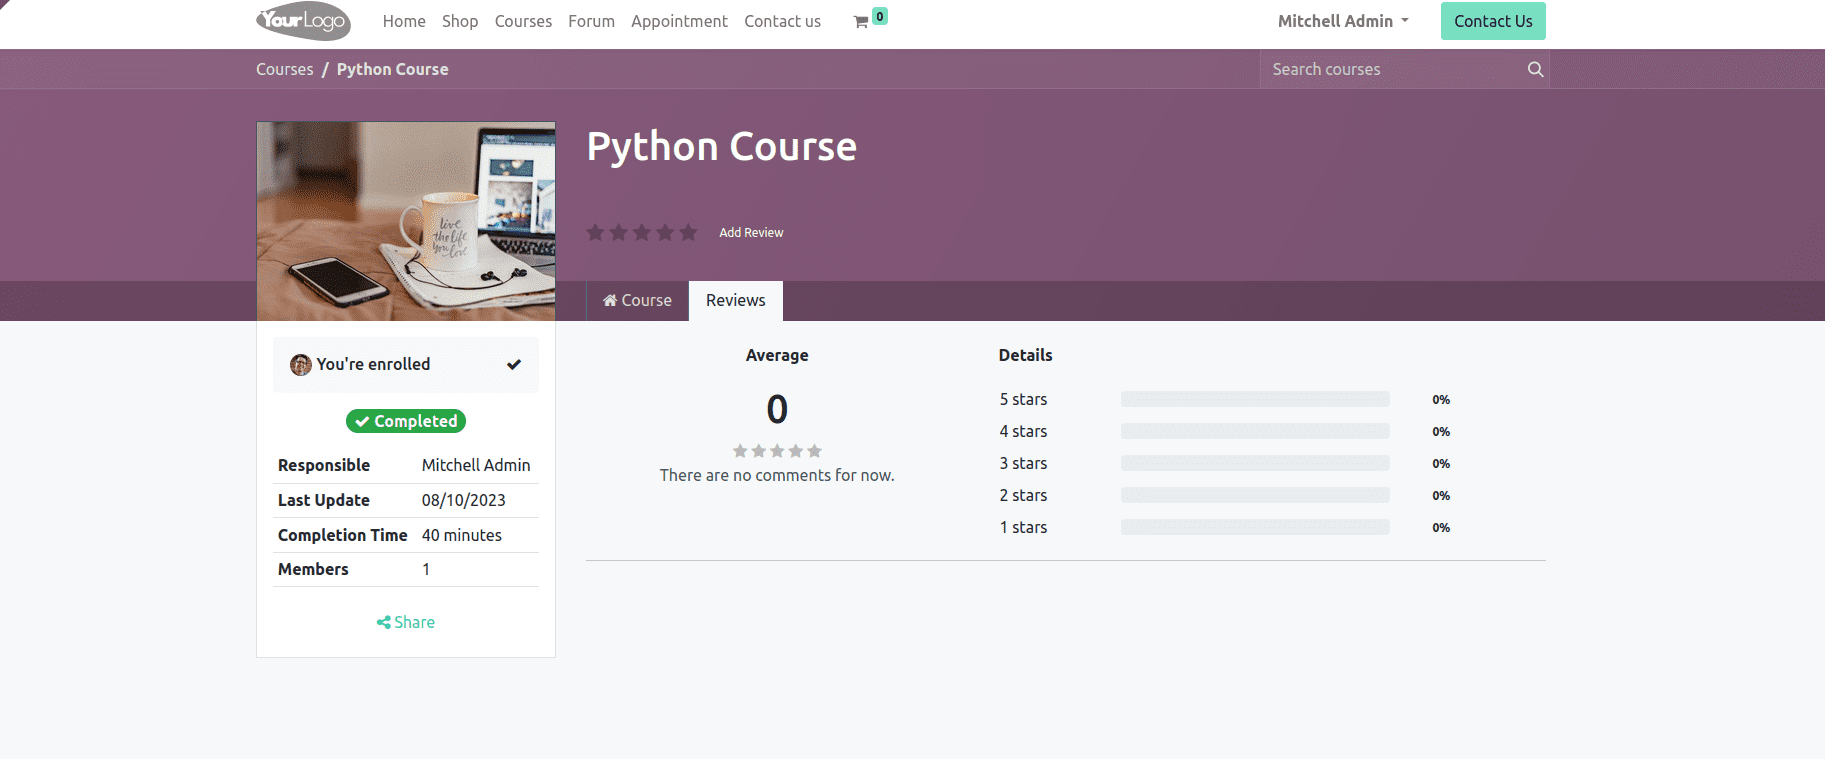
It also allows the user to add on the review the courses, which helps to get the reviews from the users, and if necessary, we can modify the courses as shown below.
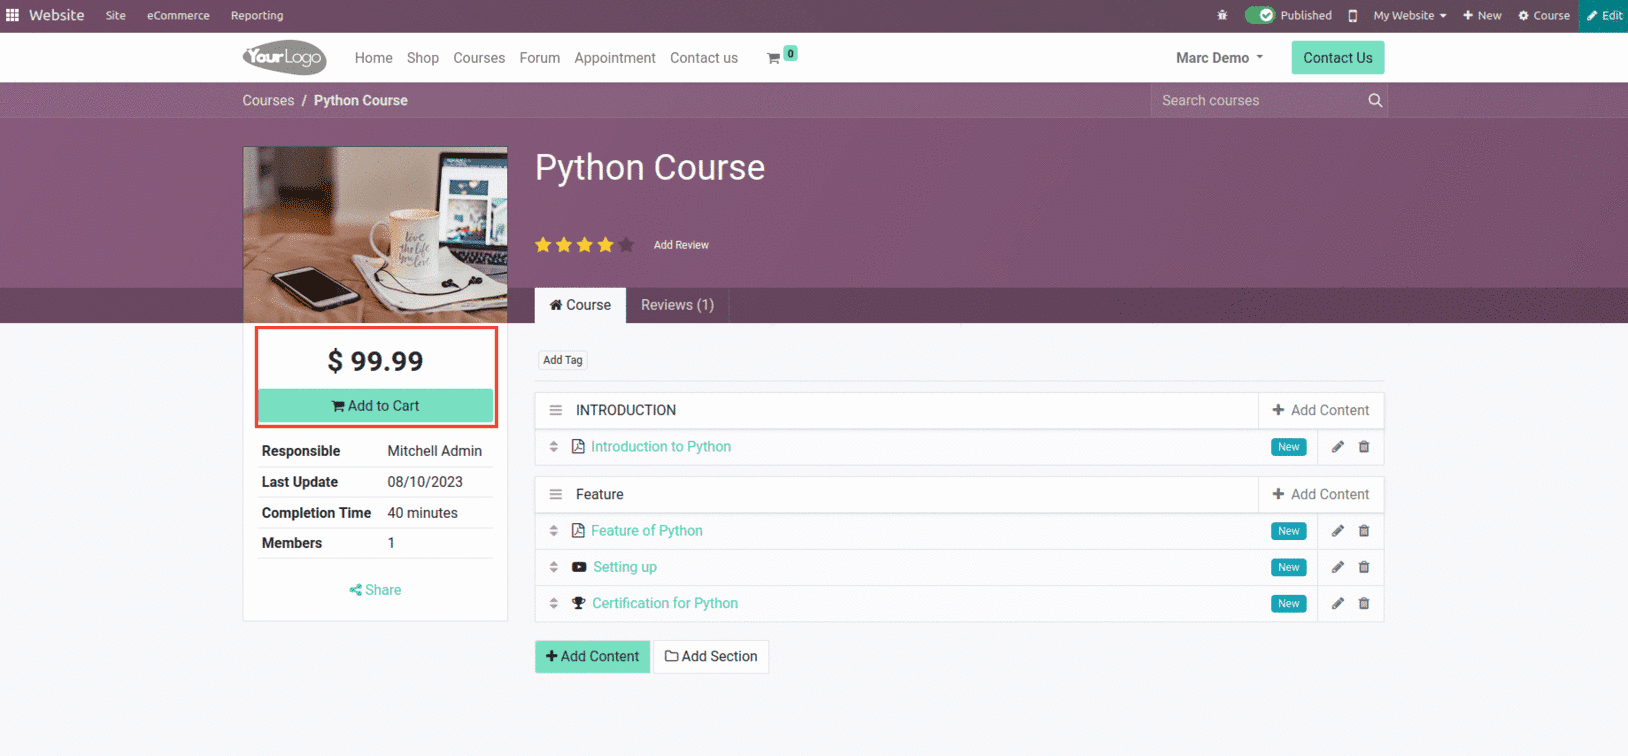
If we need to sell these courses online, then we have to choose the option as On Payment under the access rights during course creation. Then the user will get the option to add the course to the cart, as shown below.
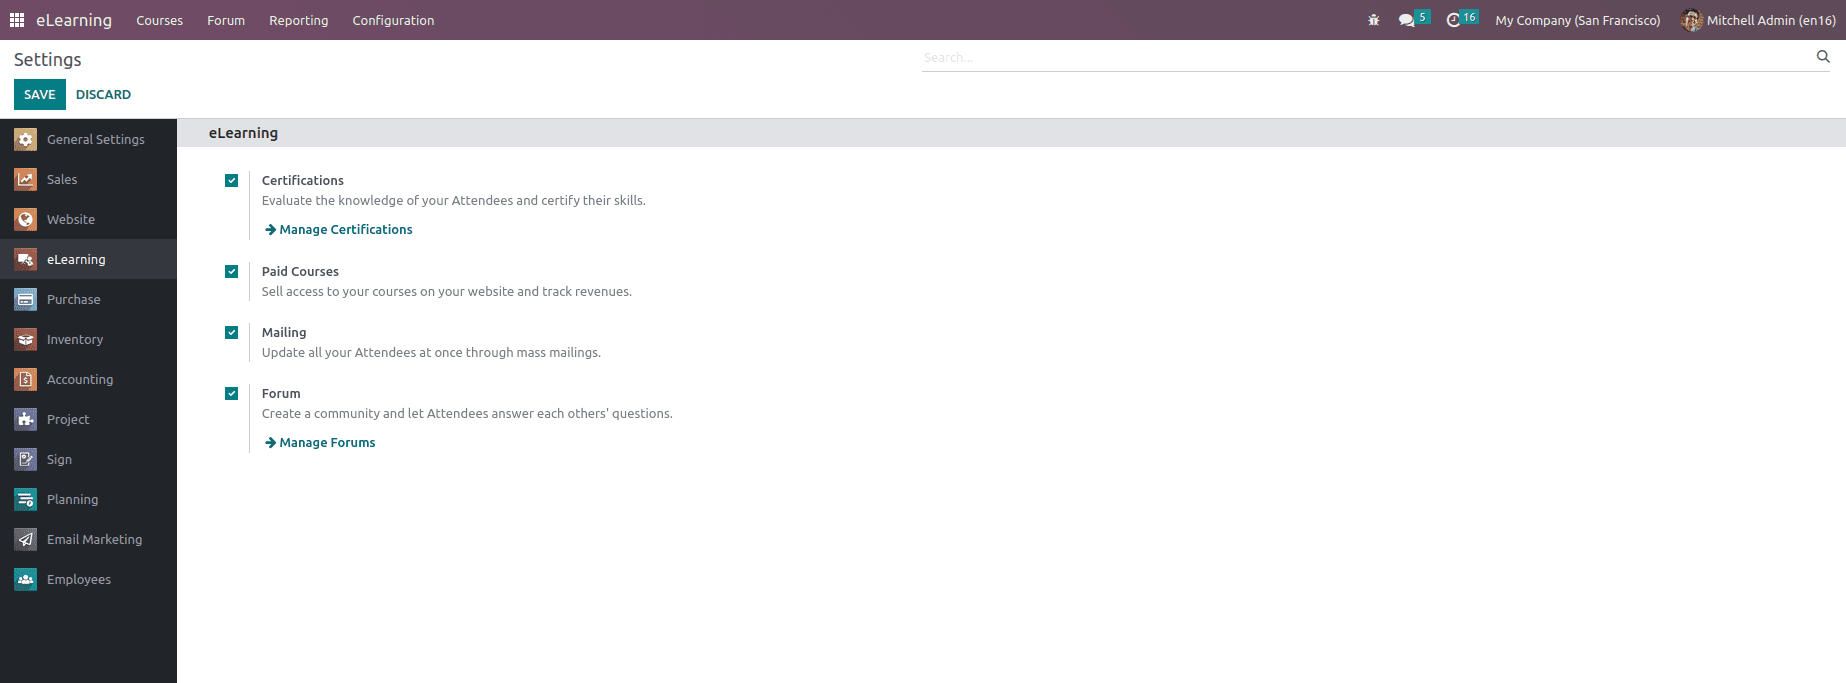
The eLearning module has a specified Settings menu under the Settings tab where the different eLearning processes may be enabled, disabled, and adjusted. Depending on the functional requirements, options like forums, mailings, certification, and selling on eCommerce can be activated or removed. You will be shown the Forum menu to define the courses after authorizing the forum settings. Additionally, the Mailing option makes sure that the applicants may be reached by bulk mail. You will be able to establish several Certification programs for the defined courses using the inline certification option. Additionally, by turning on the Sell on eCommerce options, and Preview option, the defined courses can be shown as being for sale in the company eCommerce platform run by Odoo.
This is how you can effectively manage Odoo 16 eLearning module.
To read more about creating a forum for your e-Learning course with Odoo 16, refer to our blog How to Create Forum for Your e-Learning Course With Odoo 16