While discussing the topic of testing, it is an inevitable stage that can provide precise, objective kinds of independent information about the software, about its quality, the failure points, and its causes. In the case of Odoo modules, testing is also one of the compulsory steps that ensures the work performance and quality. For the better improvement of the Odoo modules, the manual tests can be run, but obviously, the automated test cases can eliminate the need for repeated manual testing and save time and effort, especially for large projects.
To test Odoo modules, Python unit tests, Javascript unit tests, and integration and performance testing are usually done. In this blog, let’s discuss how the Python test cases are run in Odoo 18 with proper examples. This is done using the unit test library of Python, which is the primary programming language of Odoo. The library helps ensure that individual units of code (classes, their attributes, methods, etc.) work and produce results as expected.
Creating a test directory and files
For our custom module, say ‘college_record’, all the test case files with the naming standard ‘test_filename.py’ are saved under the directory named tests inside the module directory. As we arrange for models and controllers directories, a Python file named __init__.py is also kept here, and all the test files are imported here.’
For our example module, the structure of the module is as follows:
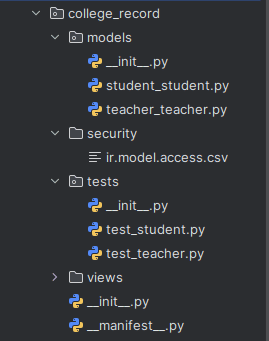
The module just contains two models for holding the student and teacher information under the ‘models’ directory. We see the ‘tests’ directory with ‘__init__.py’ and the test case files ‘test_student.py’ and ‘test_teacher.py’ over there.
The __init__.py has
from . import test_student
from . import test_teacher
For writing the test cases, there are some points to be taken care of as per the Odoo coding standard, and a better understanding and running of the codes. They are:
* The tests must extend at least one Odoo action class. They are actually the tests for simulating the UI actions. Action tests are usually written with the help of classes like TransactionCase or SavepointCaseWithUserDemo.
* The test Python files must be included in the ‘tests/__init__.py’ file of the module.
* The test files must be saved with the name in the format ‘test_filename.py’, where ‘filename can be the name of the model for which the test records are getting created.
* The test class must be named with the starting ‘Test’ and in camel case. Eg: TestSaleOrder.
Now, let’s take any one of them to see how the test cases are defined.
from odoo.tests.common import TransactionCase

class TestStudent(TransactionCase):
  @classmethod
  def setUpClass(cls):
      # Create a common record for all test methods in the class
      super(TestStudent, cls).setUpClass()
      cls.student = cls.env['student.record'].create({
          'name': 'Sam',
          'class_name': 'XI',
          'roll_no': '101',
          'state': 'new'
      })
  def test_field_values(self):
      # Test the values of fields
      self.assertEqual(self.student.name, 'Sam',
                       "Name field value is incorrect")
      self.assertEqual(self.student.class_name, 'XI',
                       "Class field value is incorrect")
  def test_function_output(self):
       result = self.student.calculate_marks()
       # To test the output of a function,
       # self.assertEqual(result, (add expected_value here), "Function output is incorrect")

  def test_other_function(self):
      # Define another test method here

  @classmethod
  def tearDownClass(cls):
  # Define this for cleanup operations, such as releasing resources
      super(TestStudent, cls).tearDownClass()
We can write the test cases like this.
Here, the ‘TestStudent’ is a test case class that extends TransactionCase from Odoo's testing framework. This is where we define our test logic for our custom model named ‘student.student’. The ‘setUpClass()’ creates the test environment for the tests we need to perform. In this example, the test methods we use are test_field_values(), test_function_output, etc. The tearDownClass() method ensures the proper deletion of the student record using cls.student.unlink().
For these test methods to function, we use the assert methods, which help us to make sure that the expected outputs actually match with the actual outputs. These methods help ensure that our code behaves as we expected.
Let us discuss some common assert functions and their uses now.
assertIs(a, b, msg=None):
The syntax is
self.assertIs(a, b, msg=None)
This assert method checks the identity of two objects. That is, two objects specified in the first two parameters are compared in terms of both their type and memory reference. If the comparison fails, the error message to be shown is passed in the third parameter.
assertIsNot(a, b, msg=None):
The syntax is
self.assertIsNot(a, b, msg=None)
This method does the direct opposite operation of the assertIs() method. It verifies that the objects a and b do not refer to the same object. If the comparison fails, the error message to be shown is passed in the third parameter.
assertEqual(a, b, msg=None):
The syntax is
self.assertEqual(a, b, msg=None)
Here, it checks whether the first two parameters, a and b, are matching. If they are equal, the method returns true. The display message can be given as the third parameter if the assertion fails.
assertNotEqual(a, b, msg=None):
The syntax is
self.assertNotEqual(a, b, msg=None)
Here, it checks whether the first two parameters, a and b, are not matching. It works quite the opposite of assertEqual(). The error message can be set inside the ‘msg’ parameter.
Extending from Python’s unit testing framework, there are different types of test cases or classes. Some of them are:
1. TransactionCase:
This ensures that the test is executed in a single database transaction that can be rolled back after each test method to its original state.
2. SingleTransactionCase:
This works similar to TransactionCase but the change is that it does not roll back to the original state once the test method
3. SavepointCase:
This is somewhat similar to the TransactionCase but uses the savepoints for the better performance of the system in the large cases. This can be useful in cases when multiple test cases need to share the same large database.
4. HttpCase:
These test cases are used when we need to test the Odoo controllers and the corresponding web responses.
To run the test cases in the Odoo environment, we use the command with the syntax
/odoo-bin -i {module name} --test-enable -c {conf path}The test_enable parameter is used to enable the execution of the test. The name of the module to be tested can be typed with a prefix -i to load it. Also, the conf file’s path can be typed with the prefix -c, which specifies the configuration file for Odoo to use.
From the linux terminal, use the command with the syntax
/odoo-bin -c {conf path} -d {your_database_name} -u {module_name} --test-enable, where we can specify the database name also in which we need to carry out the test.
In conclusion, writing Python test cases in Odoo 18 is a fundamental step toward building reliable and maintainable modules. By leveraging Python's built-in unit test framework, developers can automate the validation of their code, ensuring that functionalities behave as expected and reducing the risk of regression with future updates. Automated testing not only improves code quality but also accelerates the development process by minimizing the need for manual verification. As Odoo continues to evolve, incorporating robust testing practices into your workflow becomes increasingly important for delivering high-performing and error-free business applications.
To read more about How to Write Test Case in the Odoo 17 ERP, refer to our blog How to Write Test Case in the Odoo 17 ERP.