Batch and wave picking processes are essential tools that help reduce manual effort, minimize transportation costs, and accelerate order fulfillment. These methods enable warehouse staff to process multiple orders simultaneously, improving productivity while ensuring accuracy. Whether handling delivery orders, receipts, or internal transfers, Odoo's batch and wave transfer features empower businesses to manage inventory operations precisely and quickly.
Batch Transfer In Odoo 18
Instead of completing one order at a time, batch picking involves a single picker gathering things for several orders at once. This method combines similar orders into a single picking list, which drastically cuts down on warehouse travel time.
Once picked, the entire batch is brought to an output location, where products are sorted into their respective deliveries. This method suits businesses with a few high-demand products, allowing them to fulfill more orders with less effort.
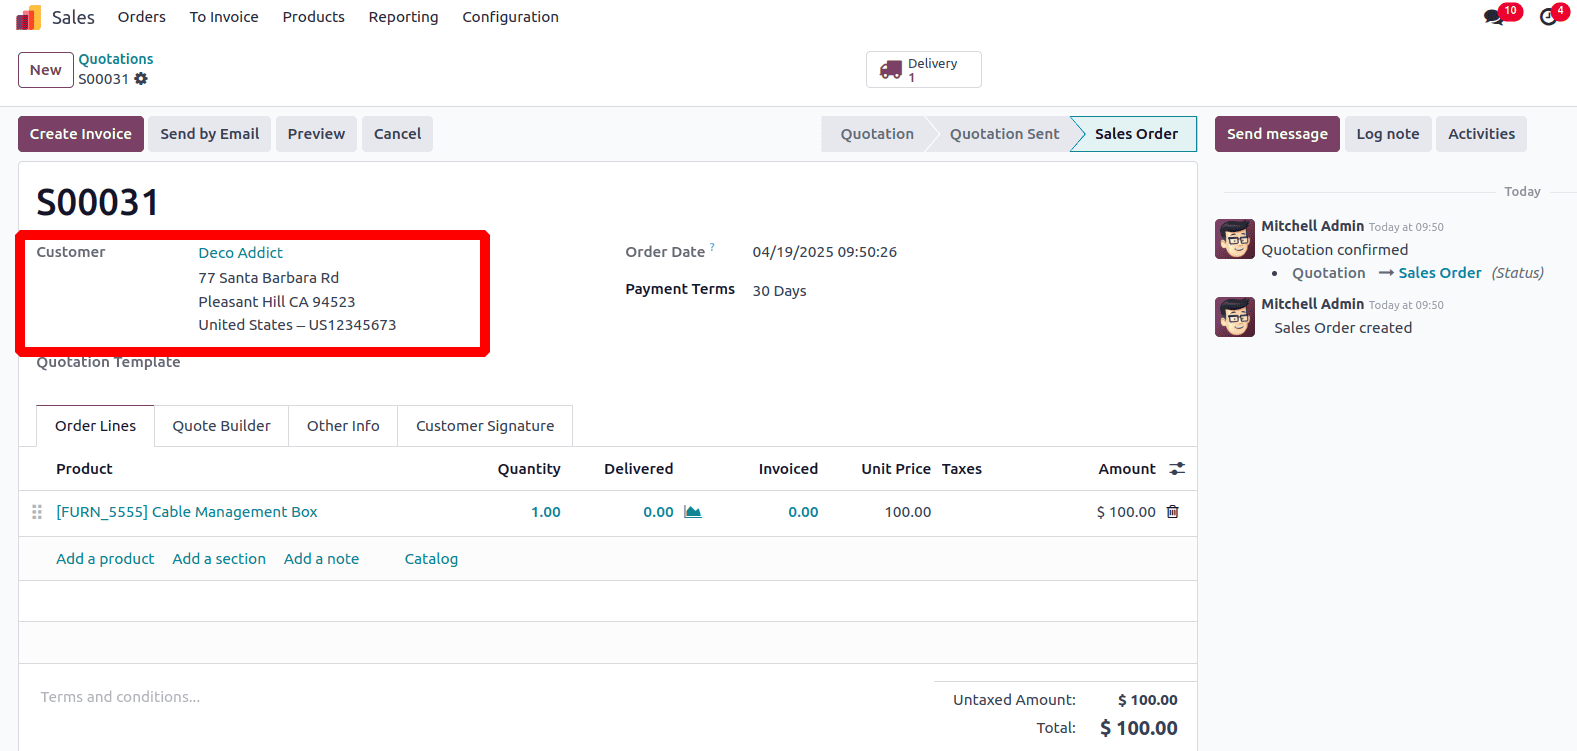
In an online business platform, there may be a large number of sales orders generated daily. When it's time to deliver the items to customers, handling each sales order individually can be inefficient, especially when multiple orders share the same delivery location.
For instance, suppose 10 different sales orders are to be delivered to the same customer or location. Instead of processing each delivery separately, the company can group them into a single batch transfer. This allows them to manage and track the delivery as a single operation, saving time and effort.
Let’s see how Odoo 18 handles batch transfers.
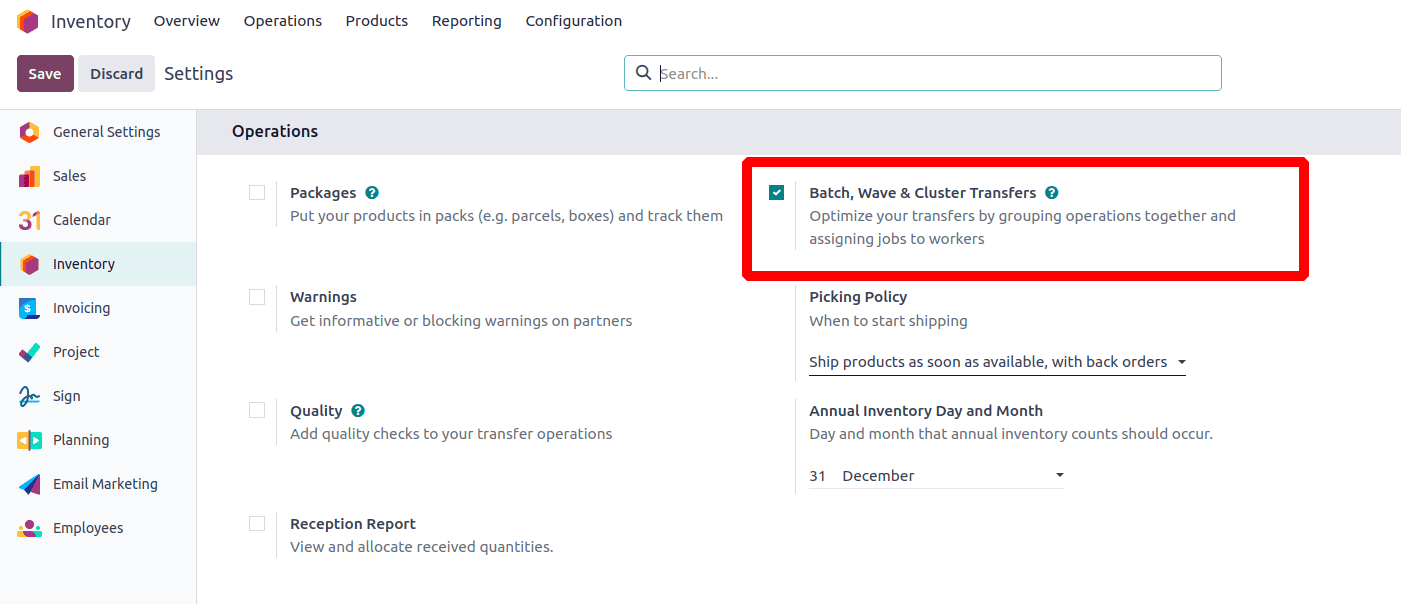
To enable batch picking, navigate to the Inventory app, then go to Configuration > Settings. Under the Operations section, check the 'Batch, Wave & Cluster Transfers' option.

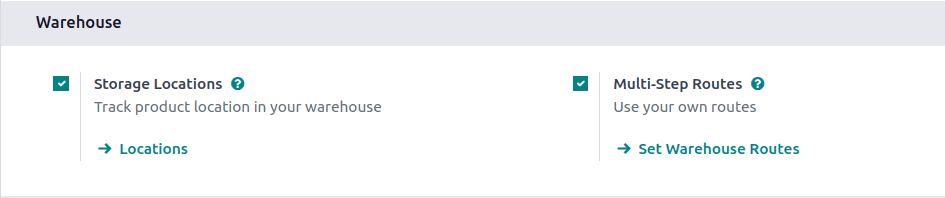
Since batch picking helps optimize picking operations in Odoo, you’ll also need to enable 'Storage Locations' and 'Multi-Step Routes' under the Warehouse section on the same settings page. Don’t forget to click Save once you're done.
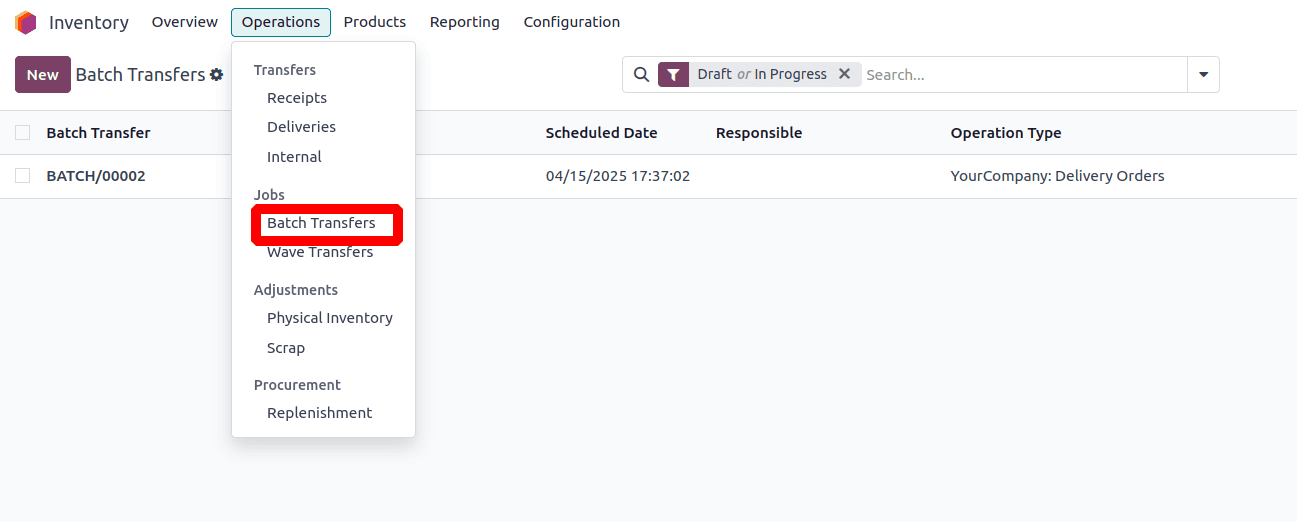
You can manually generate batch transfers by accessing the Inventory app, navigating to Operations, and selecting the Batch Transfers option.
After selecting Batch Transfers, you'll be directed to a new page where you can create batches. Click the 'New' button to start a new batch.
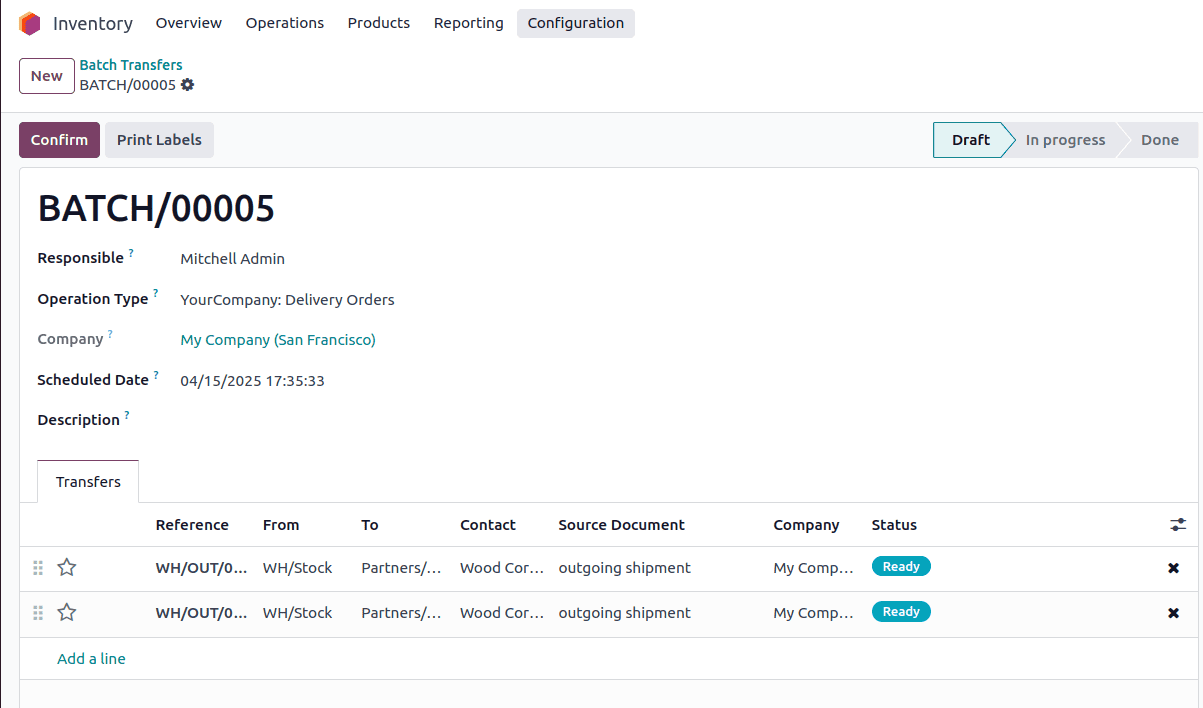
Accordingly, complete the following fields on the batch transfer form:
1. Responsible
2. Operation Type
3. Scheduled Date
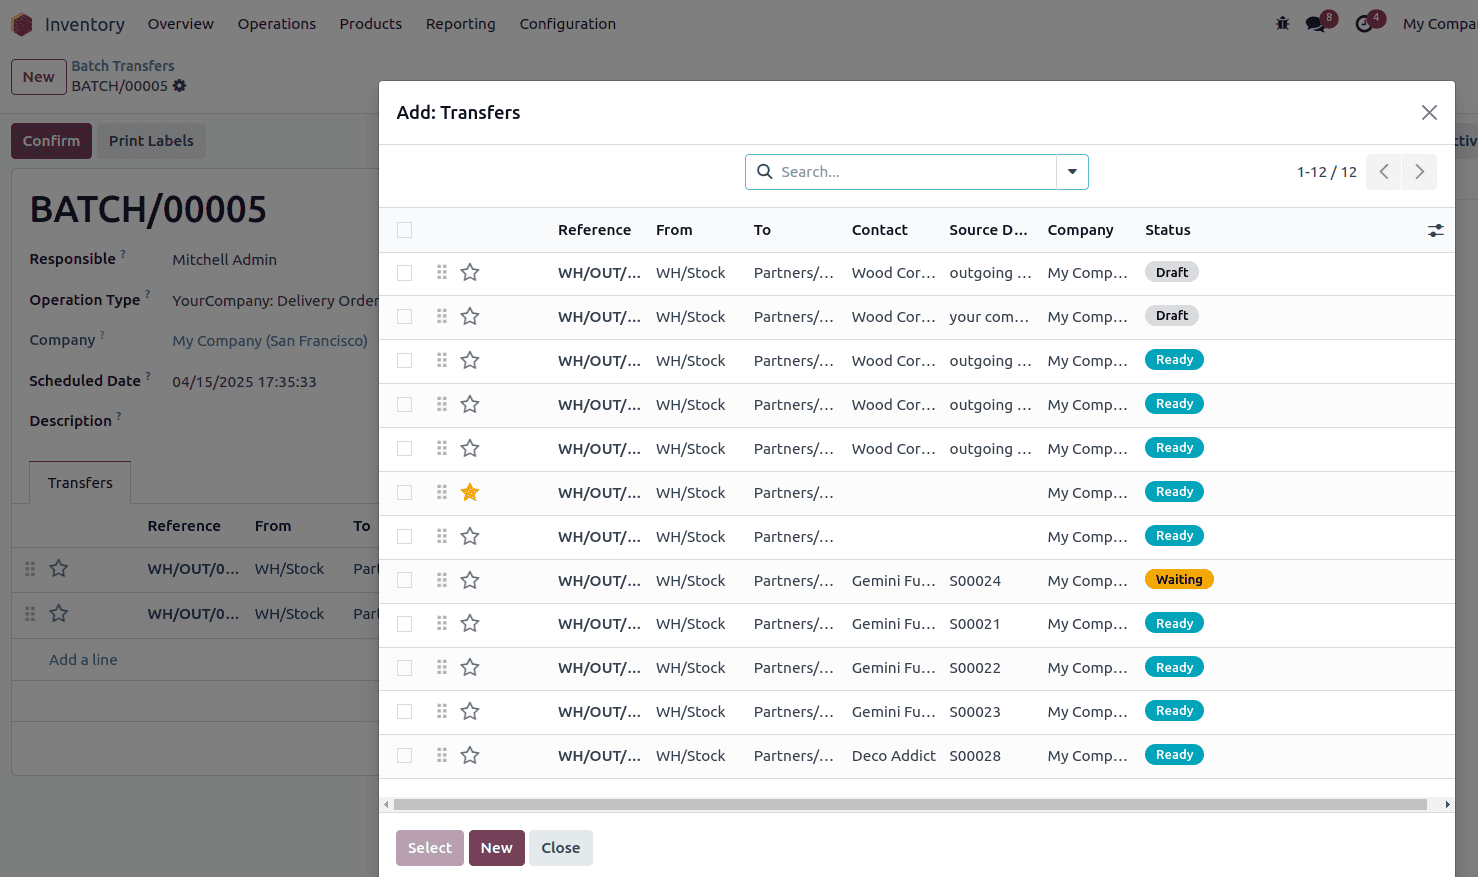
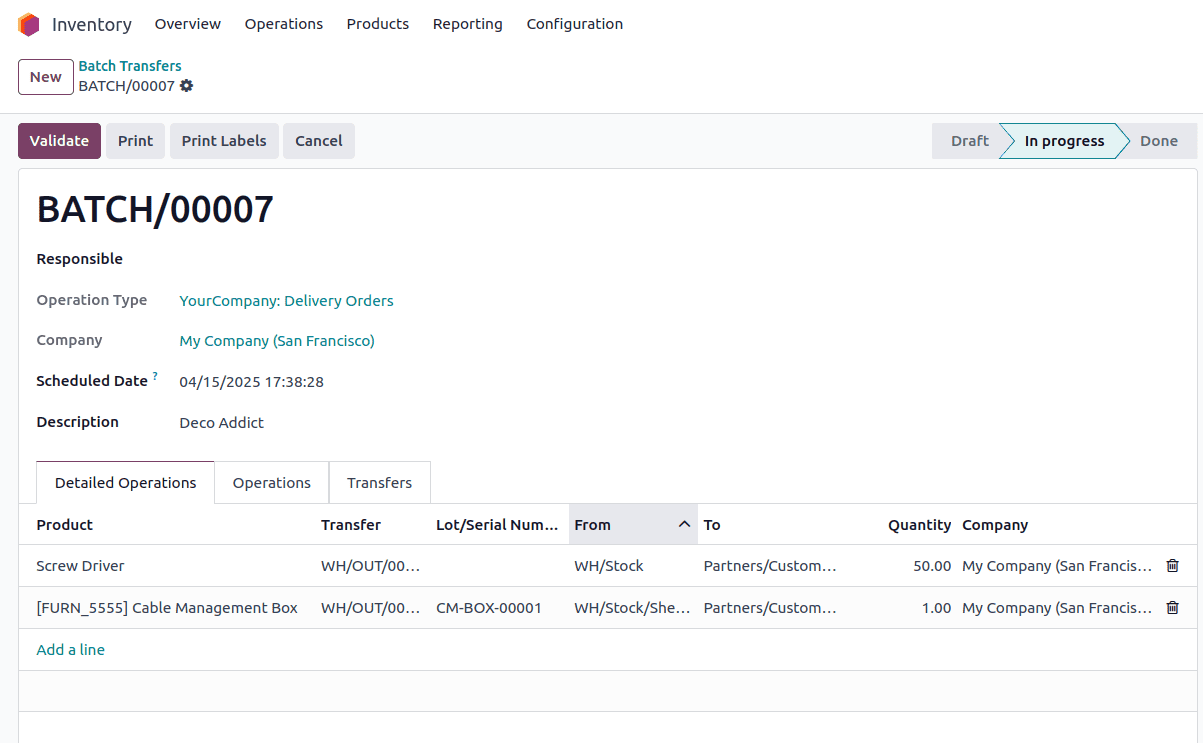
Adding operations to batches is an option under the Transfer tab. A pop-up window containing a list of procedures will show up when you select the Add a Line option. From this list, you can choose which processes to include in the batch.
Click the Confirm button to confirm the batch transfer, and the state of the batch will change to "In Progress."
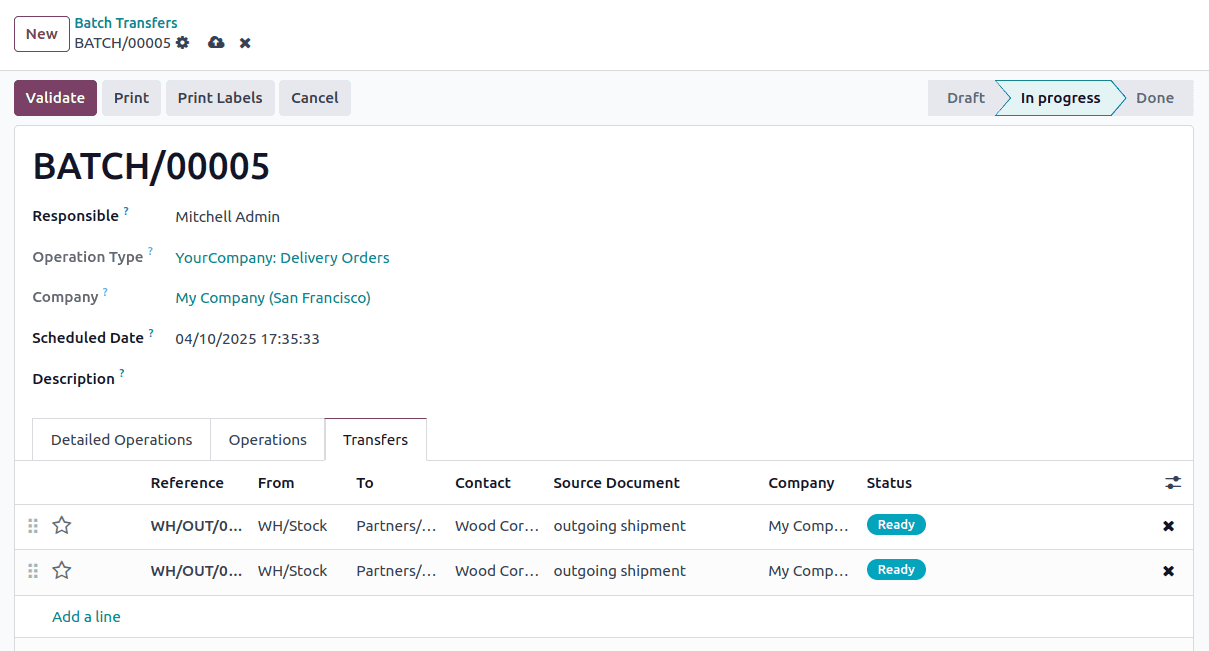
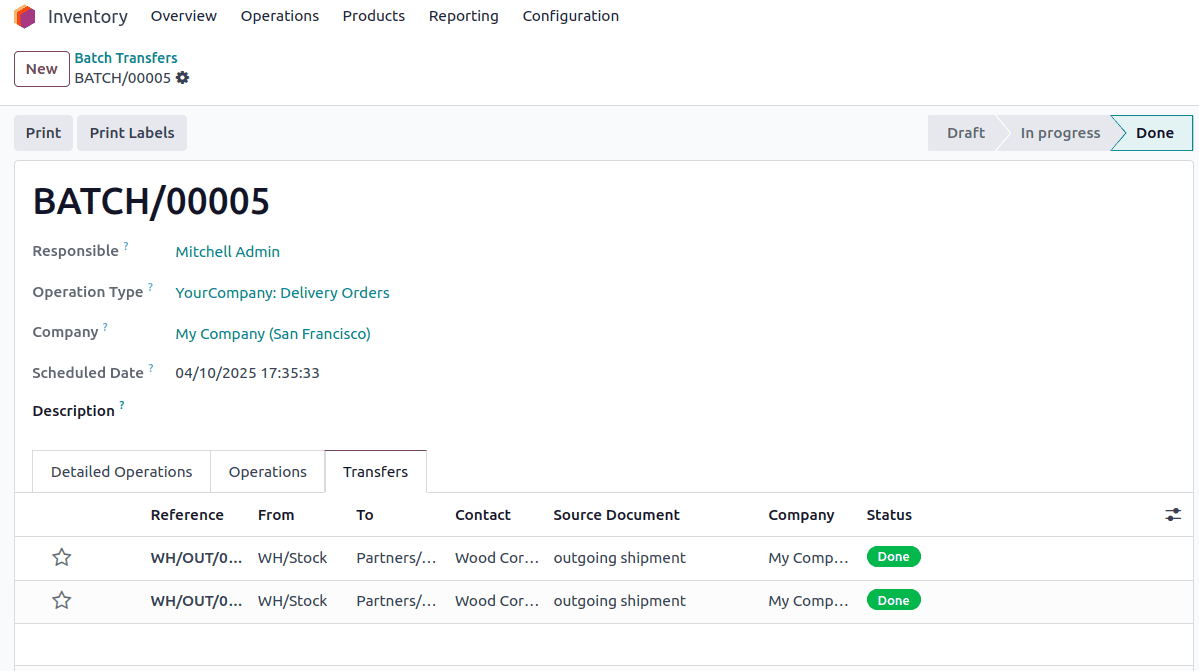
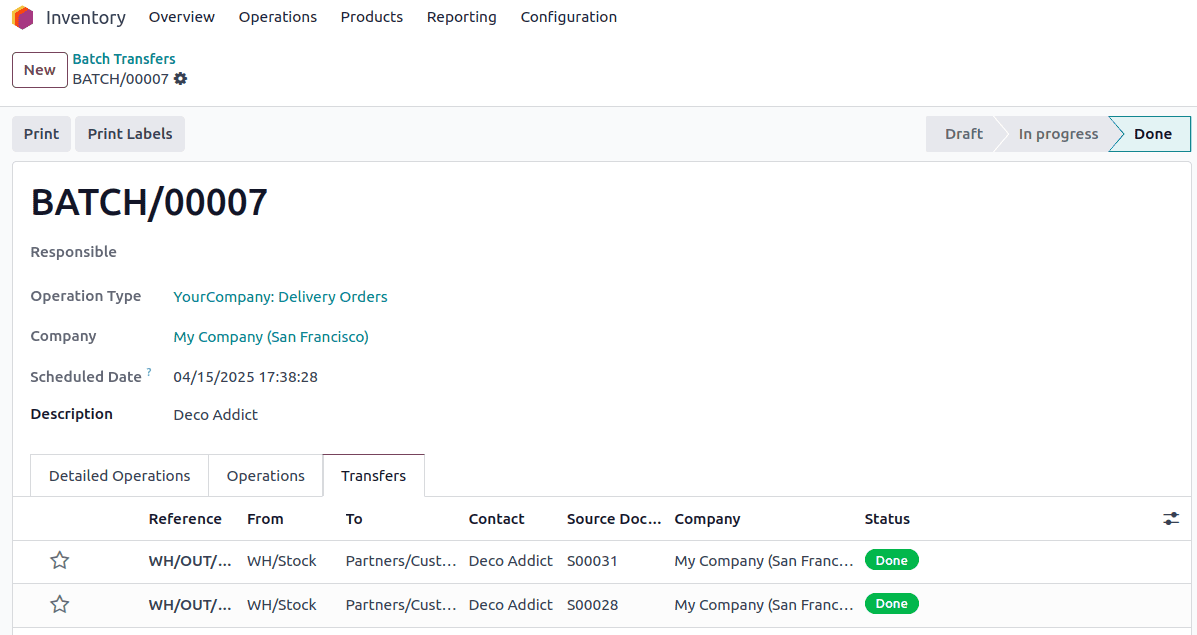
Then, click the Validate button to validate the batch transfer, and its state will be updated to "Done."
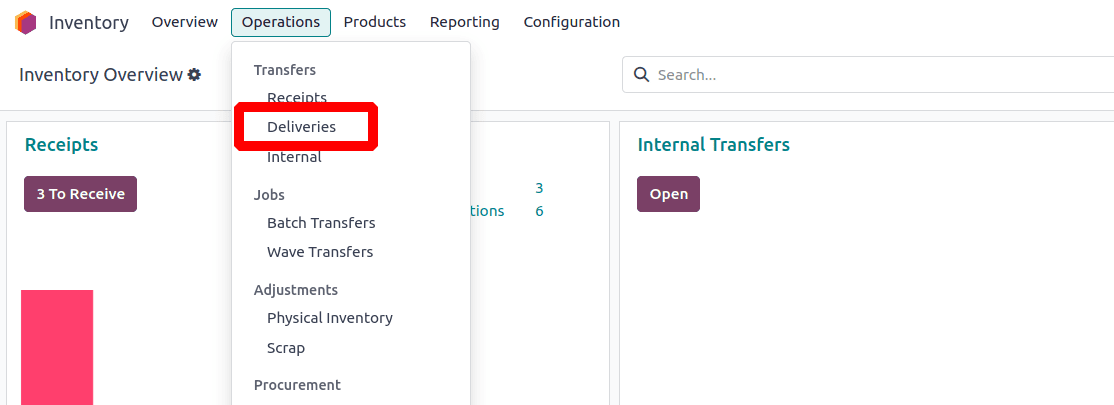
Another method for creating batch transfers is by using the Add to Batch option available in a list view. To access it, navigate to the Inventory app, open the Operations drop-down menu, and select any of the Transfers to view a filtered list of transfers.
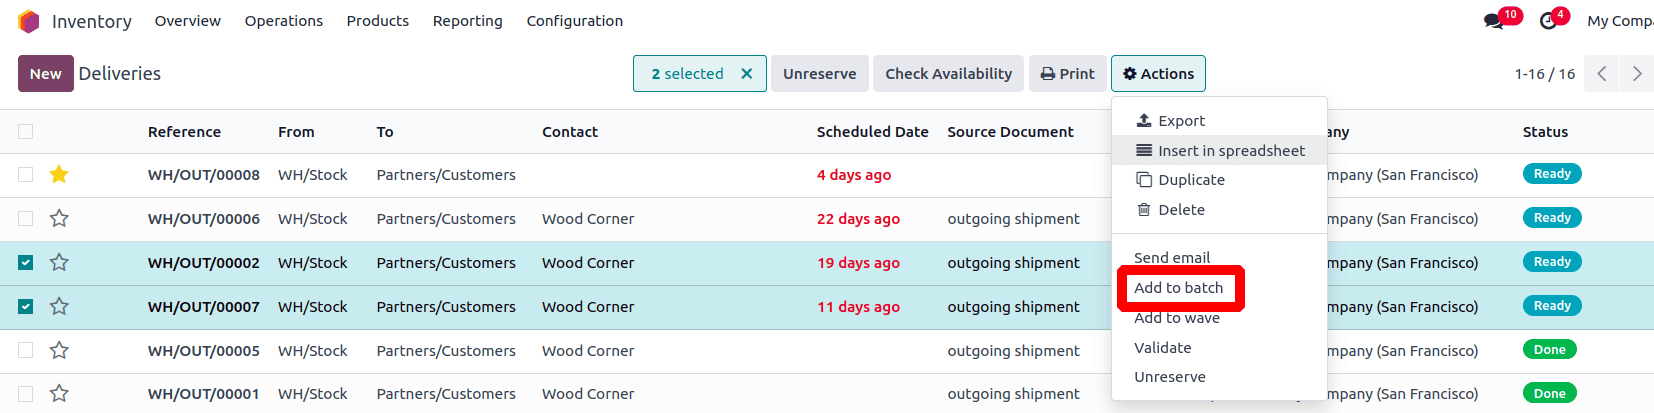
In the transfers list, select the checkboxes next to the transfers you want to include in a batch. Then, click the Actions button and choose Add to Batch from the drop-down menu.
A pop-up window will appear, offering the option to either add the selected transfers to an existing batch or create a new batch transfer. Select the Add a New Batch option and assign a responsible person. To create the batch in draft status, make sure to check the Draft option.
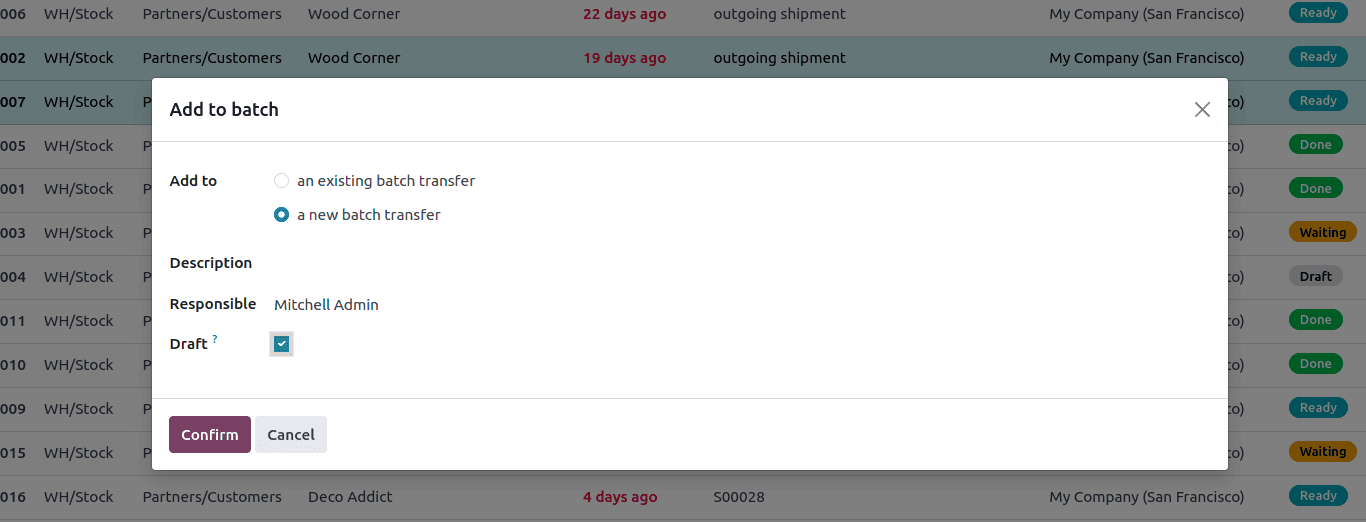
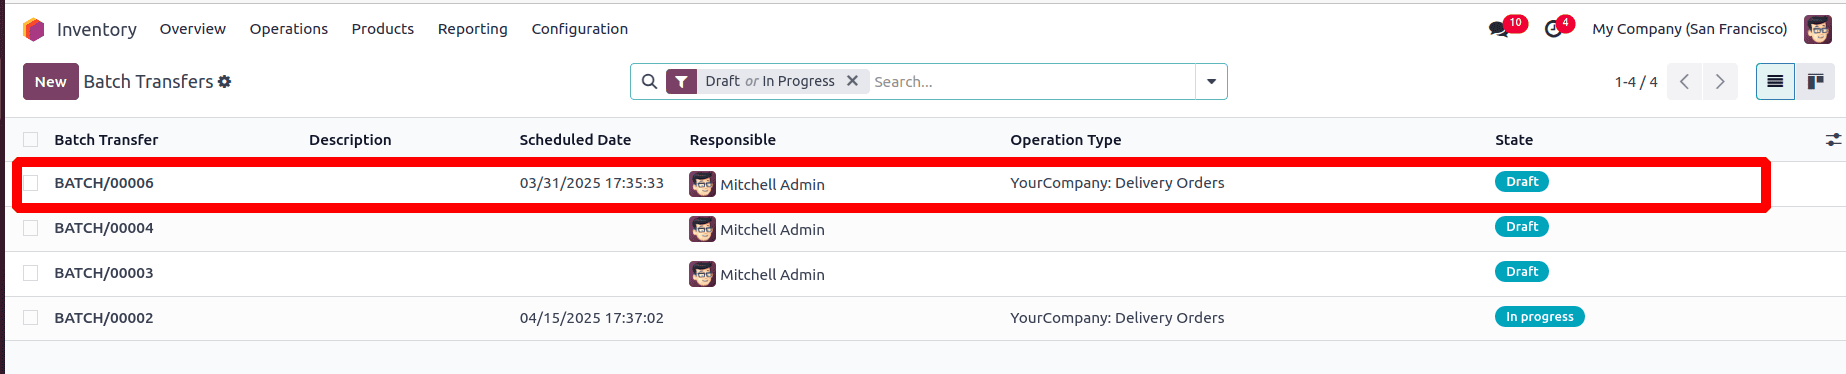
Click the Confirm button in the pop-up window to create the new batch. To view the newly created batch, navigate to the Operations menu under the Inventory tab and select the Batch Transfers sub-menu. There, you'll find the new batch.
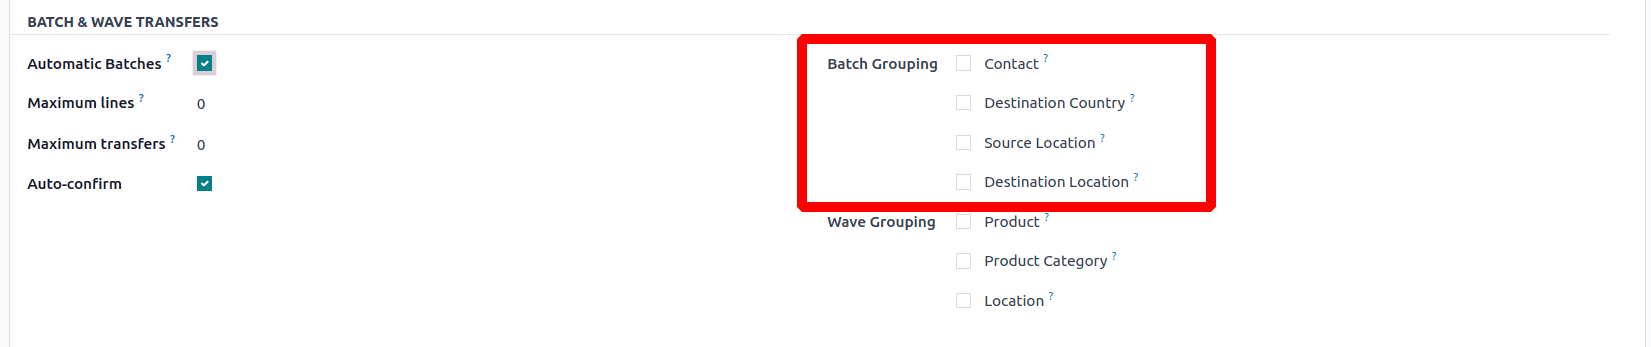
Batches can be automatically created and assigned based on specific criteria defined at the operation type. To enable automatic batching, go to the Inventory app, then navigate to Configuration > Operation Types, and select the desired operation type (e.g., Delivery, Pick, etc.). Afterward, choose one or more batch grouping criteria by checking the relevant checkboxes. Even if multiple grouping options are selected, only one batch will be created.
Batches can be automatically created based on the following conditions:
* Contact
* Destination Country
* Source Location
* Destination Location
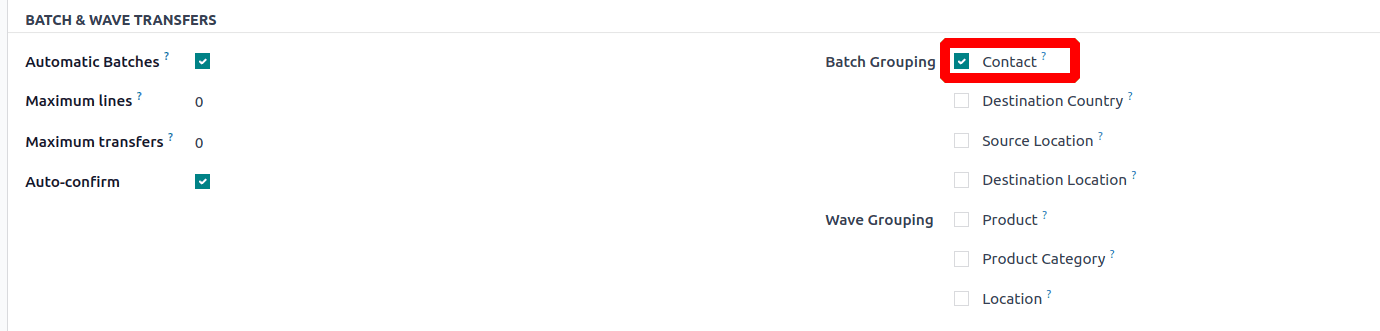
Let’s walk through an example using the Contact criterion:
By enabling Automatic Batching and selecting the Contact checkbox, Odoo will automatically group transfers assigned to the same customer into a single batch.
Next, create two sales orders for the same customer. Once these orders are confirmed and the corresponding deliveries are generated, Odoo will automatically group them into a single batch, based on the Contact criterion selected earlier.
After confirming the two sales orders, navigate to the Batch Transfers submenu under the Operations menu in the Inventory app. There, you will see that a batch transfer has been automatically created based on the selected customer, as per the Contact grouping criterion.
The batch transfer will be in the In Progress state initially. Once the batch transfer is validated, it and all the corresponding individual transfers will be moved to the Done stage.
Wave Transfer In Odoo 18
Wave transfers, like batch transfers, allow you to process multiple transfer orders simultaneously. However, wave transfers are typically used in large-scale operations where there is a high volume of orders and a diverse range of products.
This method is especially effective when handling orders that belong to a specific product category or when retrieving items located in the same warehouse area. By grouping only the relevant parts of different transfers, wave transfers help streamline picking operations, reduce travel time within the warehouse, and boost overall efficiency.
Imagine you are managing the warehouse of a textile manufacturing company. Today, you receive a surge of online orders, resulting in multiple transfer requests. Some are for moving stock between different warehouse locations, and others are for shipping finished textile products directly to customers. To handle this efficiently, you use the wave transfer feature in Odoo. You group these transfers into waves based on factors like product location, delivery deadlines, and order priority. For example, all orders containing cotton fabrics stored in the same warehouse section and scheduled for shipment today are bundled into one wave. This way, warehouse staff can pick, pack, and validate all those orders together, instead of processing each transfer separately. Performing wave transfers in Odoo 18 helps streamline operations, reduce handling time, and ensure timely delivery to customers.
Let’s see how Odoo 18 handles wave transfers.
To activate wave picking, open the Inventory app and go to Configuration > Settings. In the Operations section, enable the option labeled Batch, Wave & Cluster Transfers by checking the corresponding box.
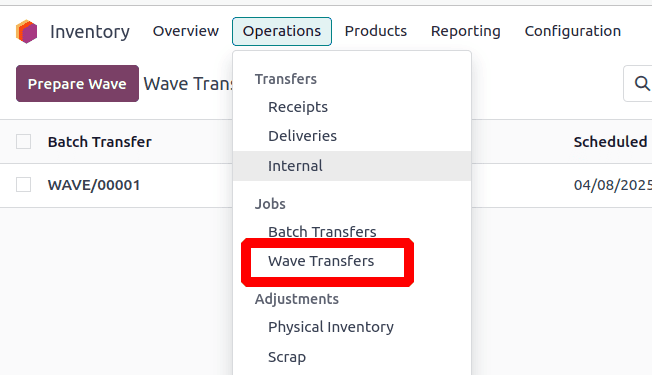
Wave transfers can be manually created by accessing the Inventory app, then selecting Operations, followed by the Wave Transfers option.
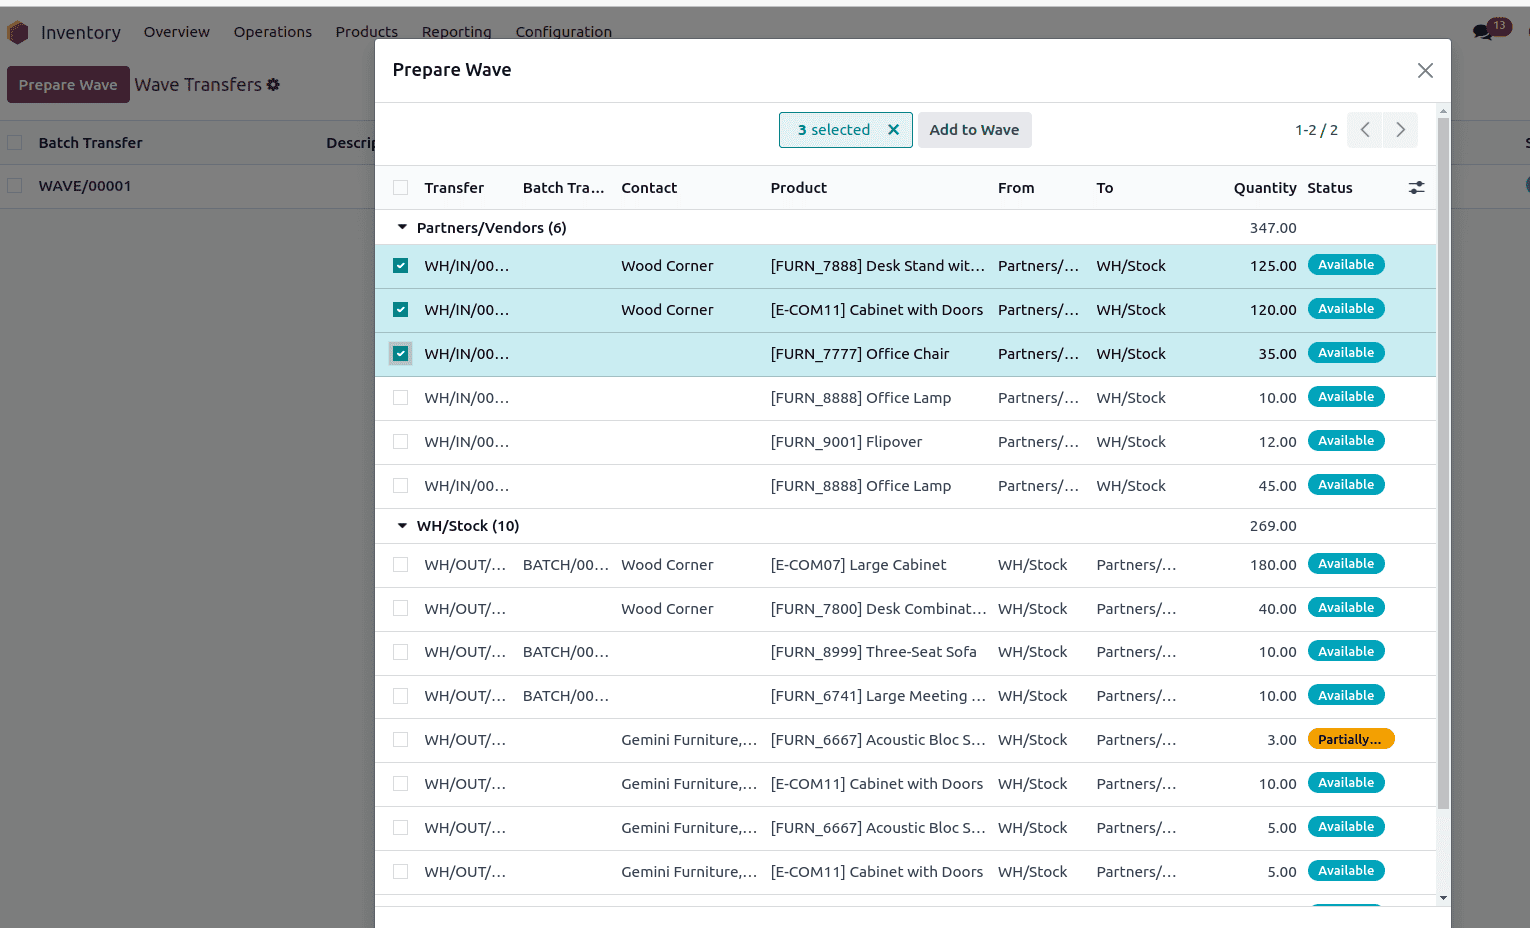
Click the Prepare Wave button to create a new wave transfer. Then, a transfer window will open, allowing you to select the transfers you want to include in the wave.
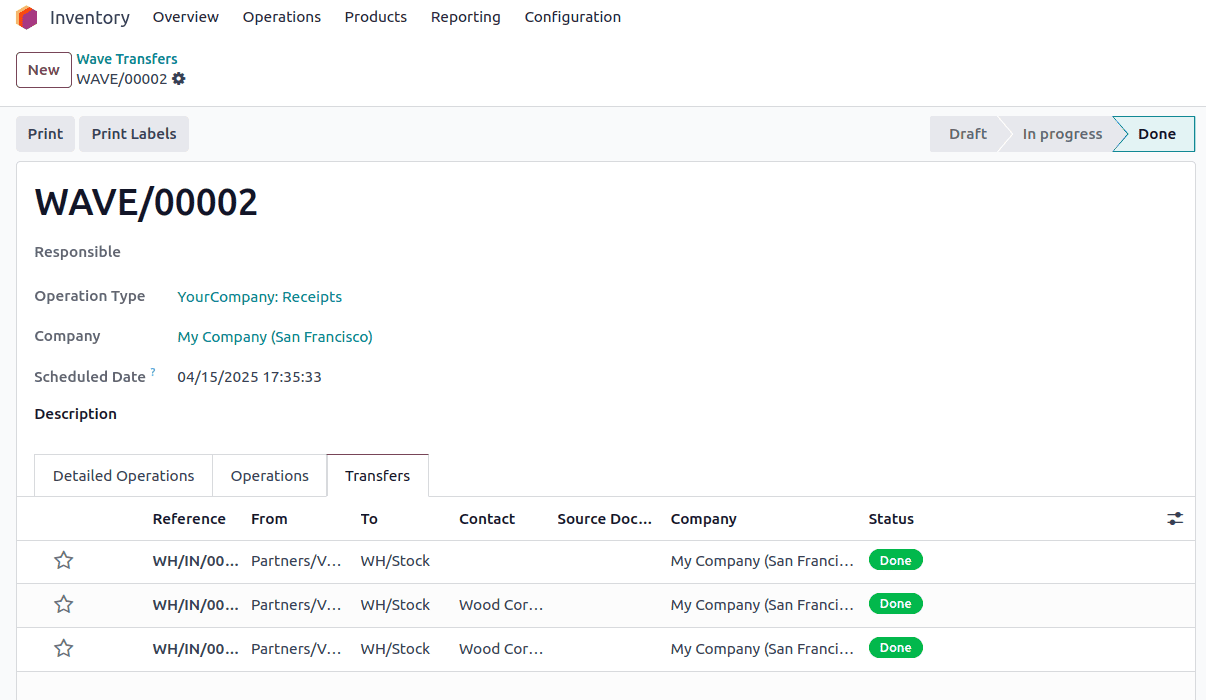
The wave transfer will be in the In Progress state. After clicking the Validate button, the wave and its corresponding transfers will be moved to the Done state.
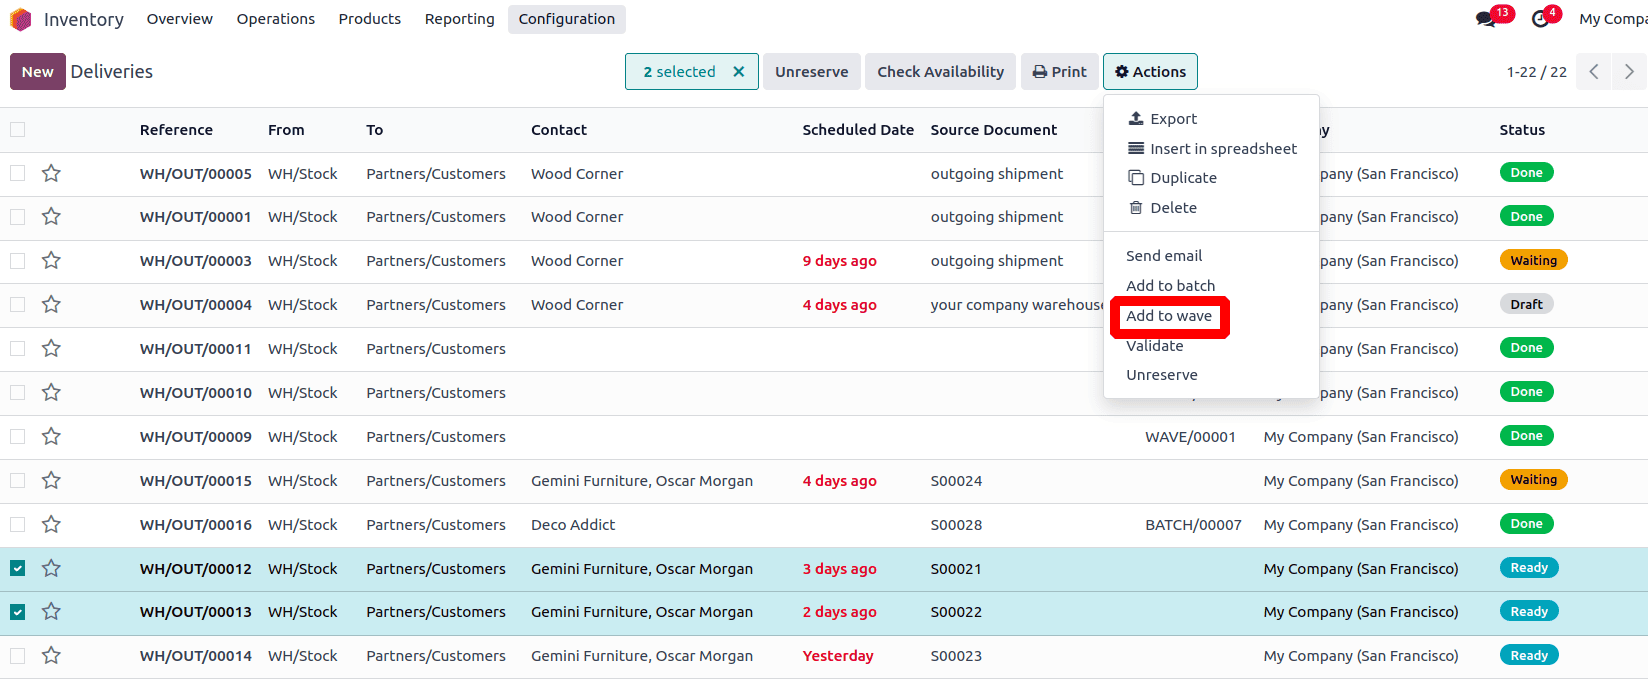
An alternative way to create wave transfers is by using the Add to Wave option available in the list view. To do this, go to the Inventory app, expand the Operations menu, and select any of the Transfers to display a filtered list of transfers.

From the transfers list, select the checkboxes next to the transfers you want to include in a wave. Then, click on the Actions button and choose Add to Wave from the drop-down menu.
A pop-up window will appear, allowing you to either add the selected transfers to an existing wave or create a new wave transfer. Choose the New Wave Transfer option and assign a responsible person.
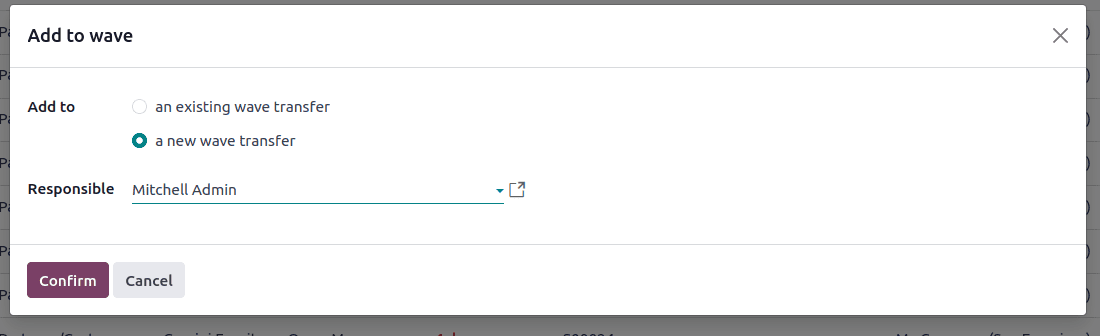
Click the Confirm button in the pop-up window to create the new wave. To view it, go to the Operations menu in the Inventory app and select the Wave Transfers submenu. The newly created wave will be listed there.

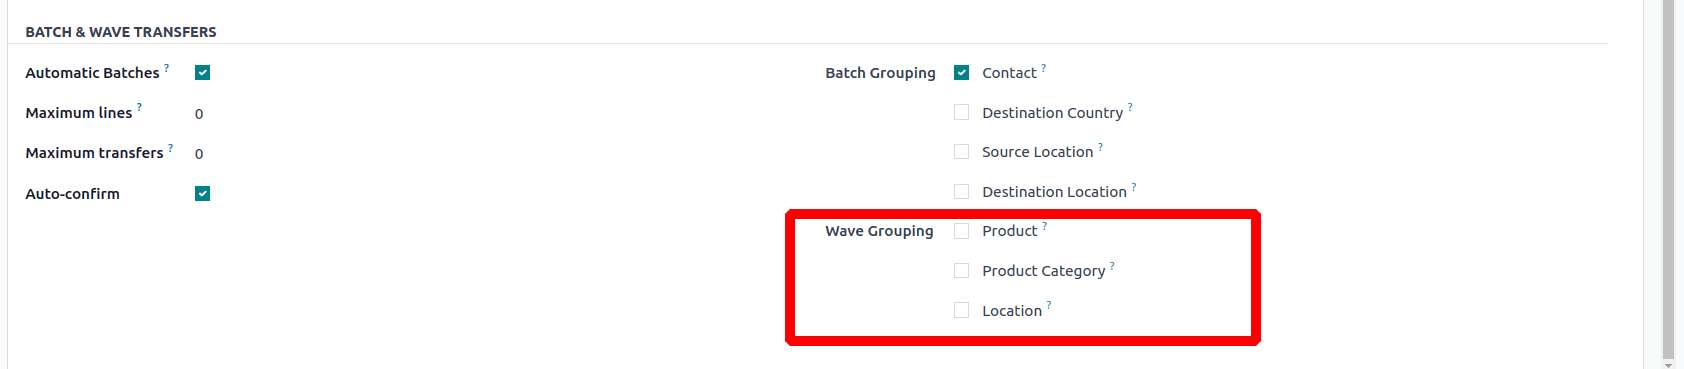
Odoo allows waves to be automatically generated and assigned based on specific grouping criteria. This is managed through the Automatic Batches setting, which can be configured individually for each operation type.
To set this up, open the Inventory app and go to Configuration > Operation Types. Choose the operation type you wish to configure (such as Delivery, Pick, etc.). Under the Batch & Wave Transfers section, enable the Automatic Batches option.
Then, define the Wave Grouping rules by selecting one or more criteria using the available checkboxes. Even if you choose multiple grouping options, Odoo will generate just one wave per matching set of rules.
Wave transfer can be automatically created based on the following conditions:
* Product
* Product Category
* Location
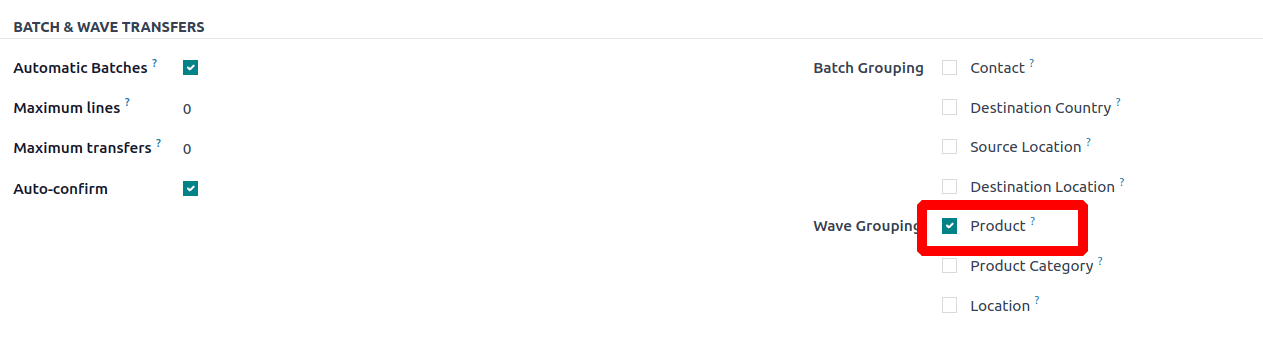
Let’s walk through an example using the product criterion:
When Automatic Batching is enabled and the Product checkbox is selected, Odoo will automatically group transfers containing the same product into a single batch.
Next, create two sales orders for the same product. Once both orders are confirmed, Odoo will automatically generate a wave transfer that groups the transfers based on the product.
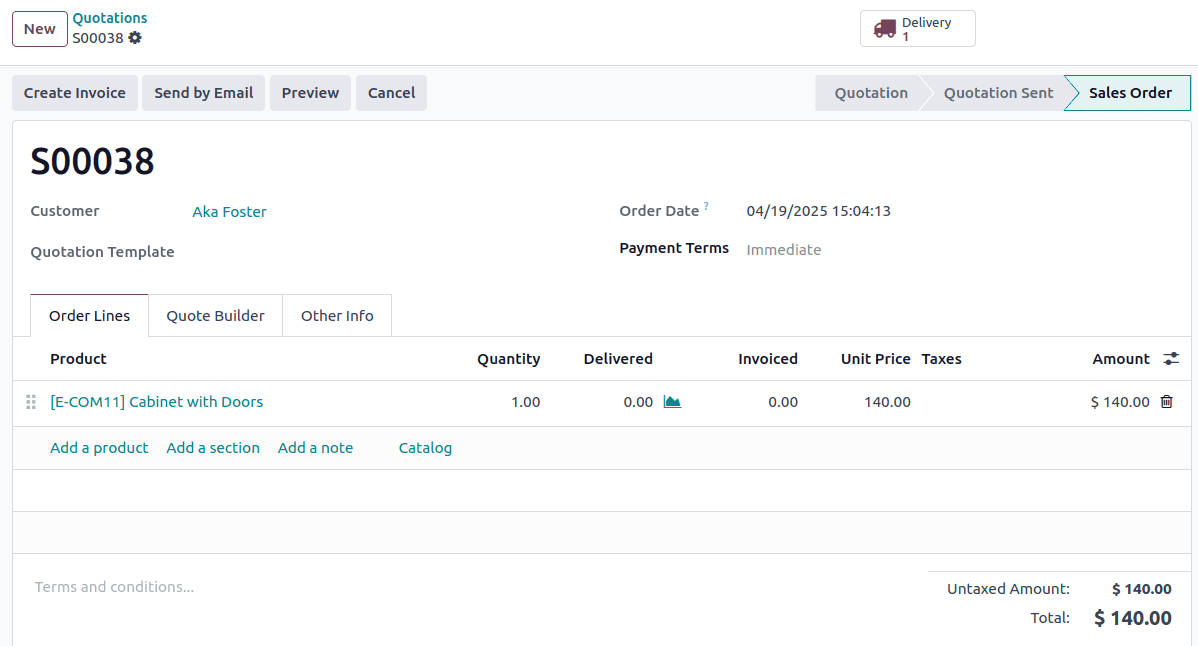
You can view the created wave transfer by navigating to the Wave Transfers submenu under the Operations.

In this blog, we explored Batch Transfers and Wave Transfers in Odoo in detail.
Both features serve as powerful solutions to streamline warehouse operations by grouping multiple transfers for smoother processing. While Batch Transfers combine complete pickings for efficient execution, Wave Transfers offer enhanced flexibility by allowing parts of different transfers to be grouped based on specific criteria like product, location.
These tools help minimize manual effort, increase accuracy and speed, and optimize resource usage, making them particularly valuable for businesses dealing with high volumes of orders and intricate logistics.
To read more about An Overview of Batch Transfer, Wave Transfer, & Cluster Picking in the Odoo 17 Inventory, refer to our blog An Overview of Batch Transfer, Wave Transfer, & Cluster Picking in the Odoo 17 Inventory.