The food supply system is maintained easily with the help of an ERP system. Odoo 15 Lunch module provides advance order requirements. All worries about food supply can be avoided by installing the Odoo Lunch module, which is helpful for the organization. This application assists in managing the delivery, orders, and needs of employees in a company. Odoo 15 Lunch module ensures checking prices, advance order booking, and tracking of payments.
This blog helps you understand basic menus and an overview of Configuration in the Odoo 15 Lunch Module.
Odoo 15 Lunch Module
You should install the Odoo Lunch module from Odoo Apps. After installation, you can see the module in the Odoo dashboard. A dashboard is visible to the user after entering the Odoo Lunch Module
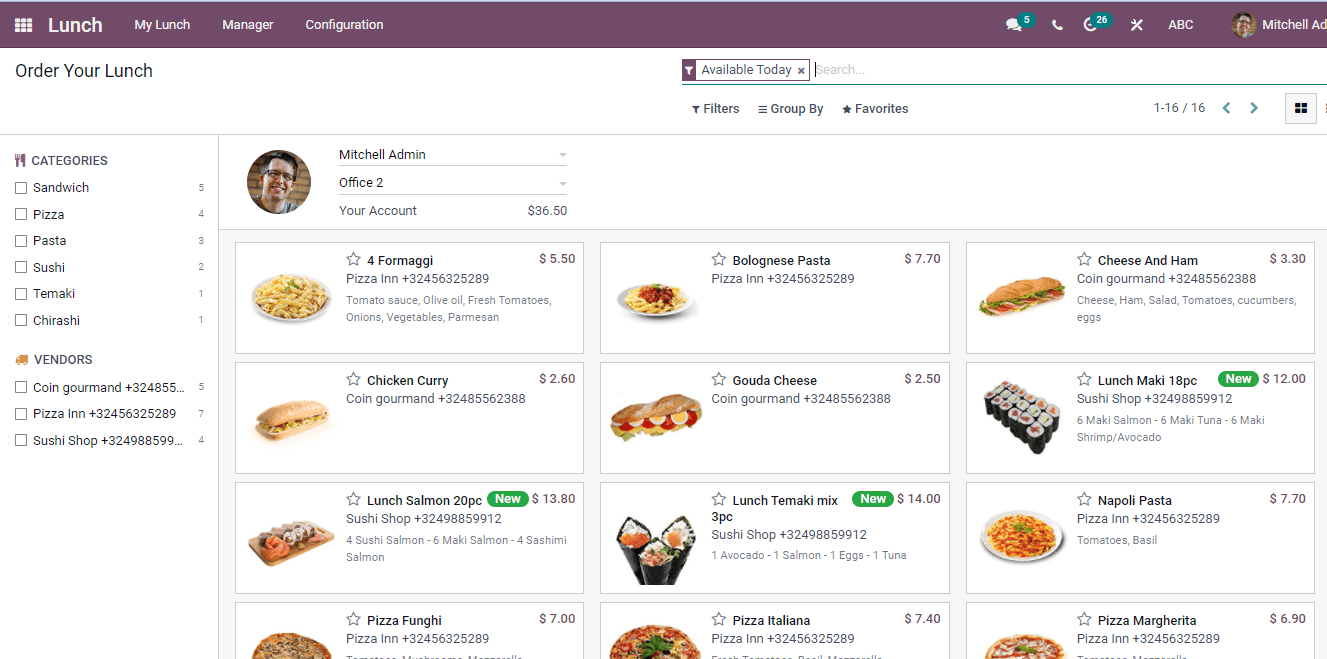
The dashboard page provides details of orders generated by the employee. It is possible to categorize food items and choose the vendors list. All these sorting options give on the left side of the Lunch window.
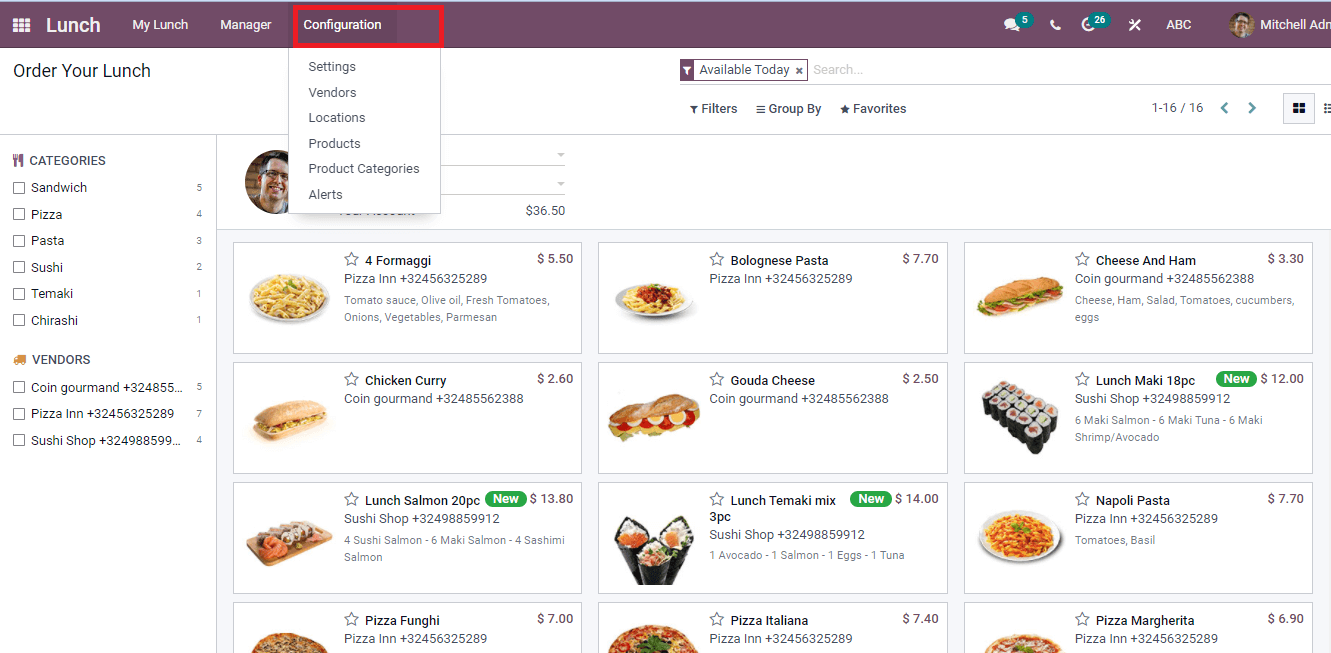
Configuration
Odoo Lunch Module contains Configuration tab deal with several menus like Settings, Vendors, Locations, Products, Products Categories, and Alert.
Settings
The Setting menu is visible under the Configuration tab of the Odoo Lunch Module. You can add maximum overdraft to reach employees through the option Lunch Overdraft.
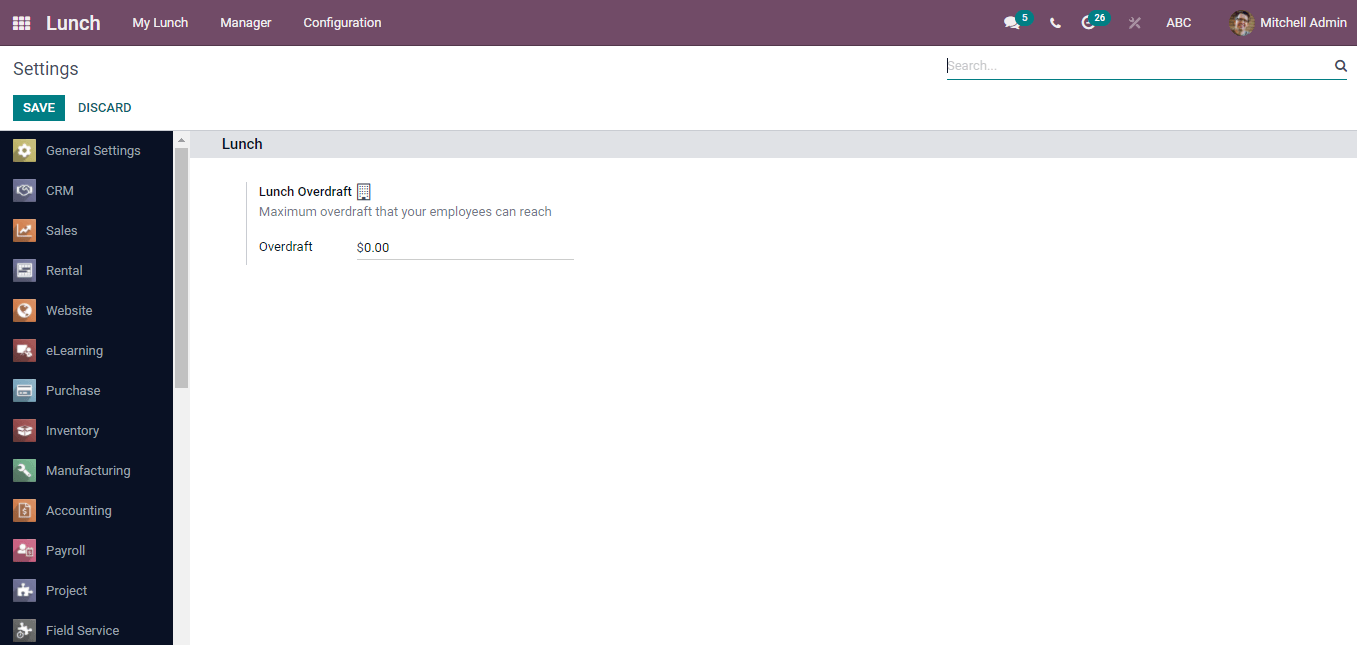
After entering the Overdraft amount, save the draft using the Save button.
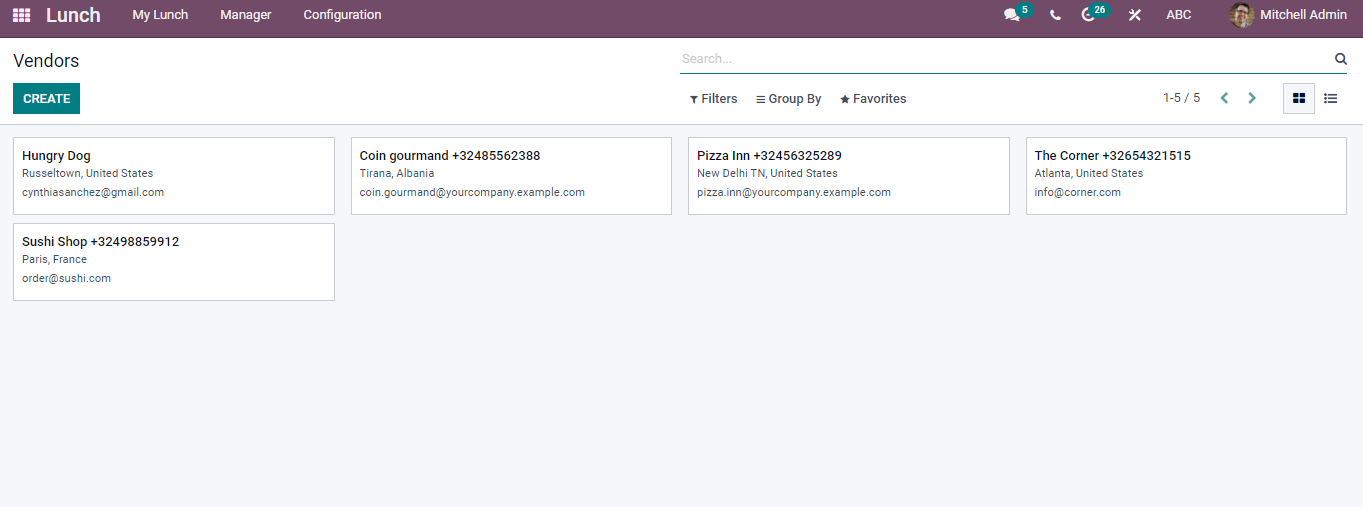
Vendors
Select the Vendors menu in the Configuration tab to create new Vendors. We can see the details of existing vendors in the window.
We can see the detailed information of the Vendor and order by clicking on the title of the Vendors name.
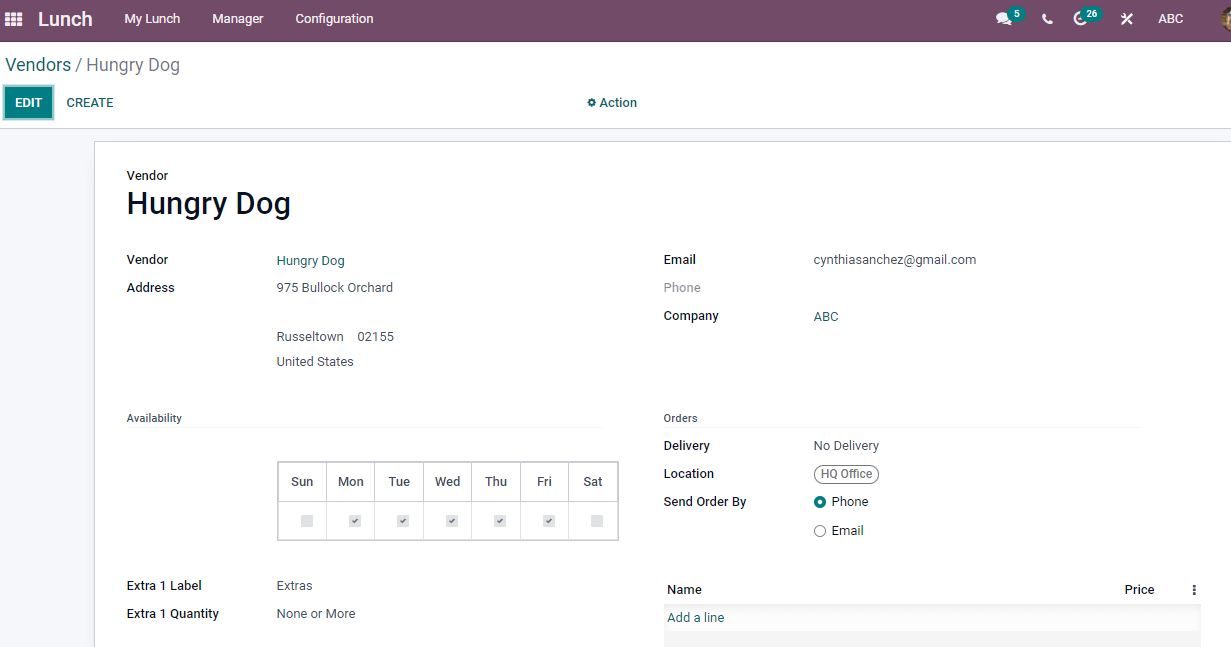
The new window denotes the Vendor's Name, Address, Email, and Company. Under the Availability option, we can see the Quality and label of an item on each day of the week. The orders section depicts the details of Delivery, Location, and Send Order By through phone or email. Edit button helps to edit the relevant information.
To create a new Vendor
The Create icon aid to produce a new Vendor. A new Vendor dashboard opens after selecting the Create button depicted in the screenshot below.
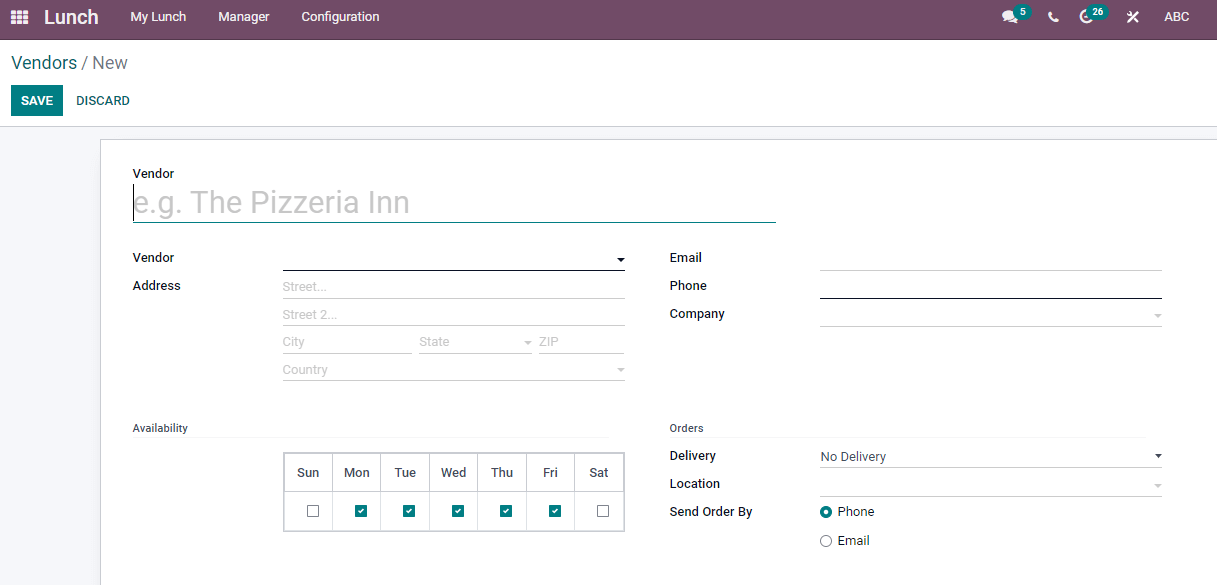
The new window consists of Vendor title, Name, Address, Email, Phone, and Company. It is necessary to mark the Availability of Product, Label, and Quantity, and the Orders option helps us know about product Delivery, Location, and Sending Orders through Phone or Email. We can mention the Price and Name of the Product in the Orders section. After entering all details, save your changes by clicking on the Save icon.
List View
The List view at the right end of the window gives personal information about the Vendor
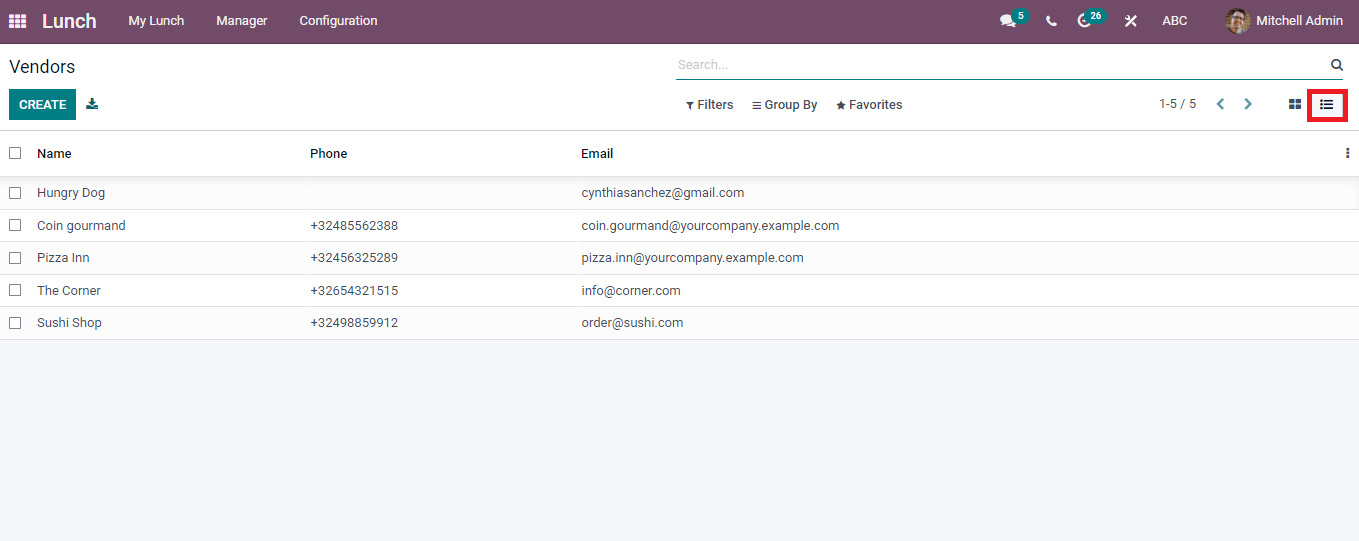
You can see the Name, Phone number, and Email of the Vendor. The Export icon near to Create option helps to download the details of Export. We can add Custom Filter and Group By using Filter and Group options.
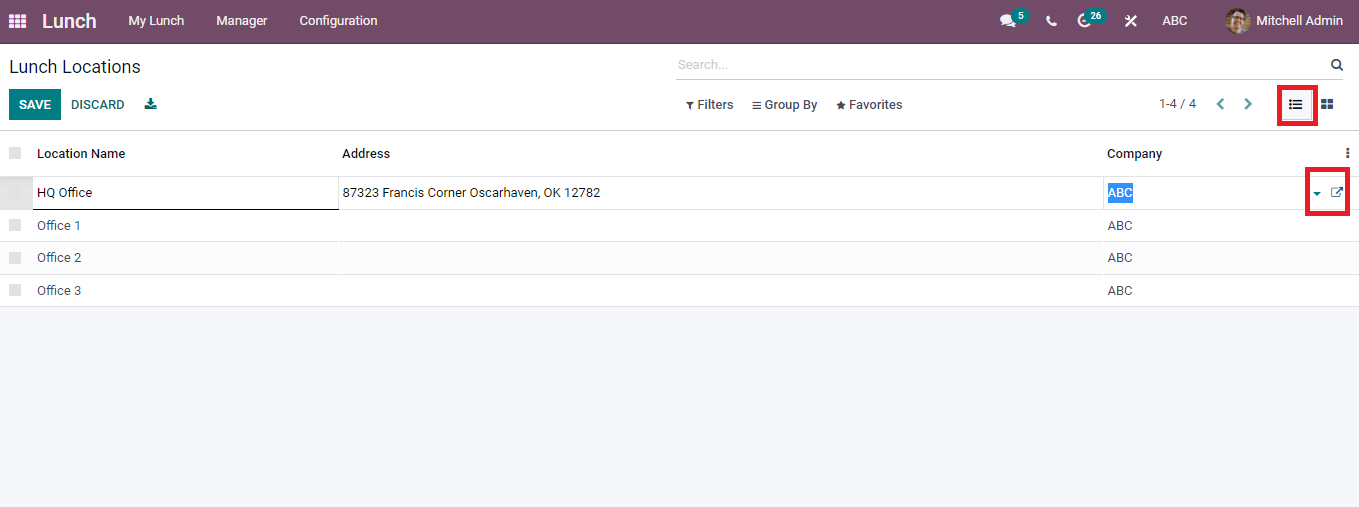
Locations
We can configure the Lunch Locations using the Location menu under the Configuration tab. The Lunch Location window displays the Location Name, Address, and Company.
Information about the company is viewable by clicking on the External Link option near the Company name. We can see the firm's General information and VAT Units in the new window.
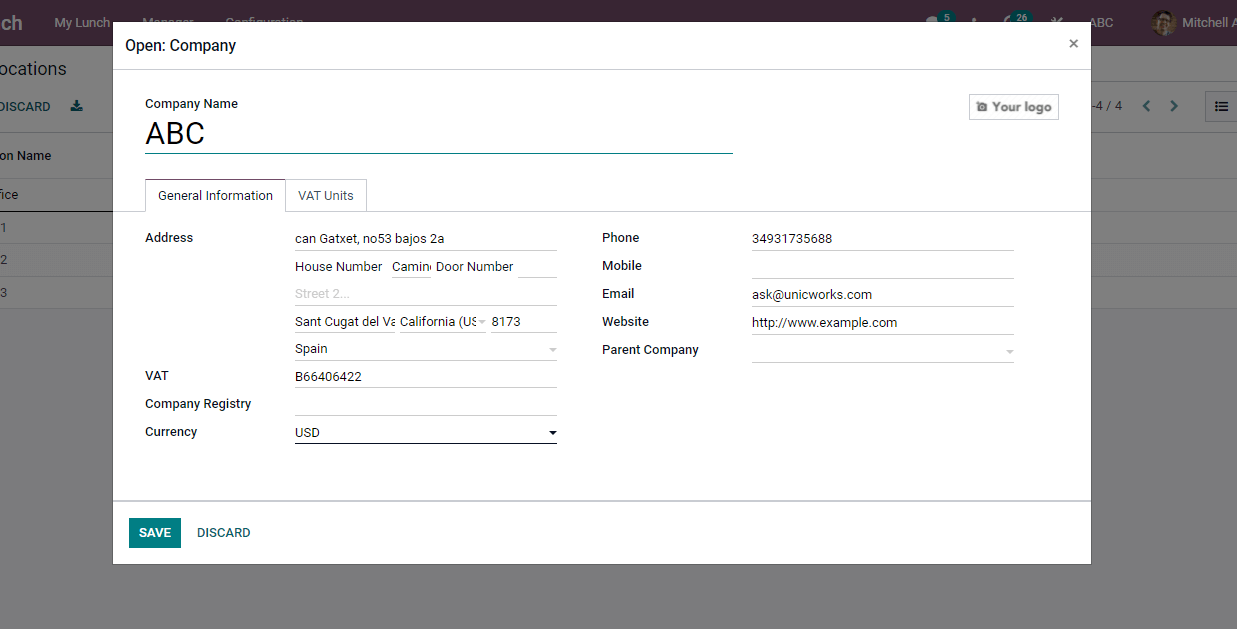
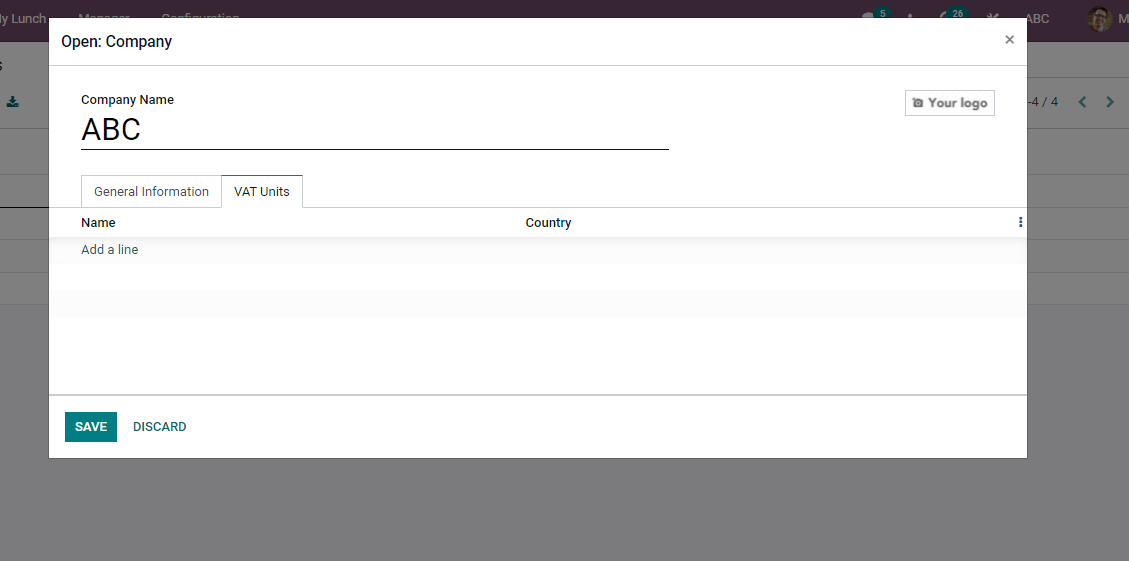
The Address, Phone number, Email, Website, and currency details are visible under the General Informations of the company. You can save the changes while adding the details of your firm. The VAT Units assist in adding the Name, Country of your company denoted in the screenshot below and are essential to save the changes
Kanban View
The Kanban View shows details of Lunch locations of created companies. We can edit the company Address by clicking on the firm's title.

A new Lunch Location is created by clicking on Create button in the Lunch Locations window.
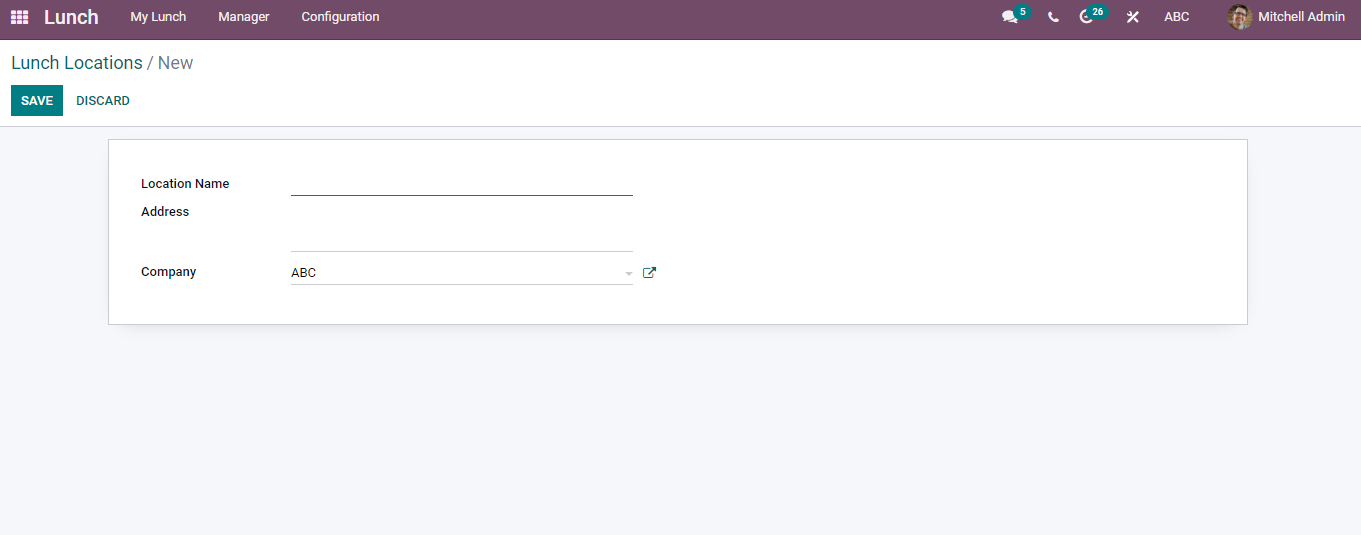
You can add location, Address, and Company name to create a new lunch location. Press on the Save button after specifying the location details. We can see the newly formed location of the company in the Lunch Locations window and companies.
Products
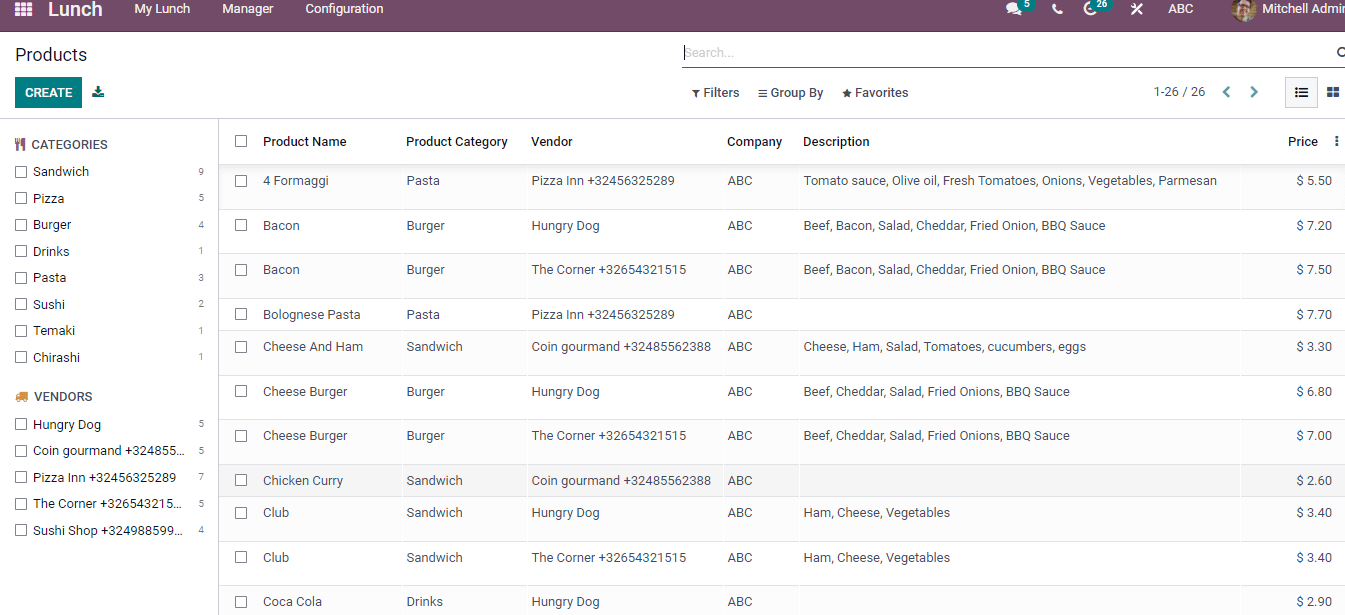
The Products option from the Configuration tab provides details of commodities sold as food orders. Kanban, List view of ProductProduct viewable for all, and the left side of the page depicts the Categories/Vendors. We can sort out the details by applying Custom Filters and Group. Name of Product, Category, Vendor, Company, Description, and Prize visible in this window.
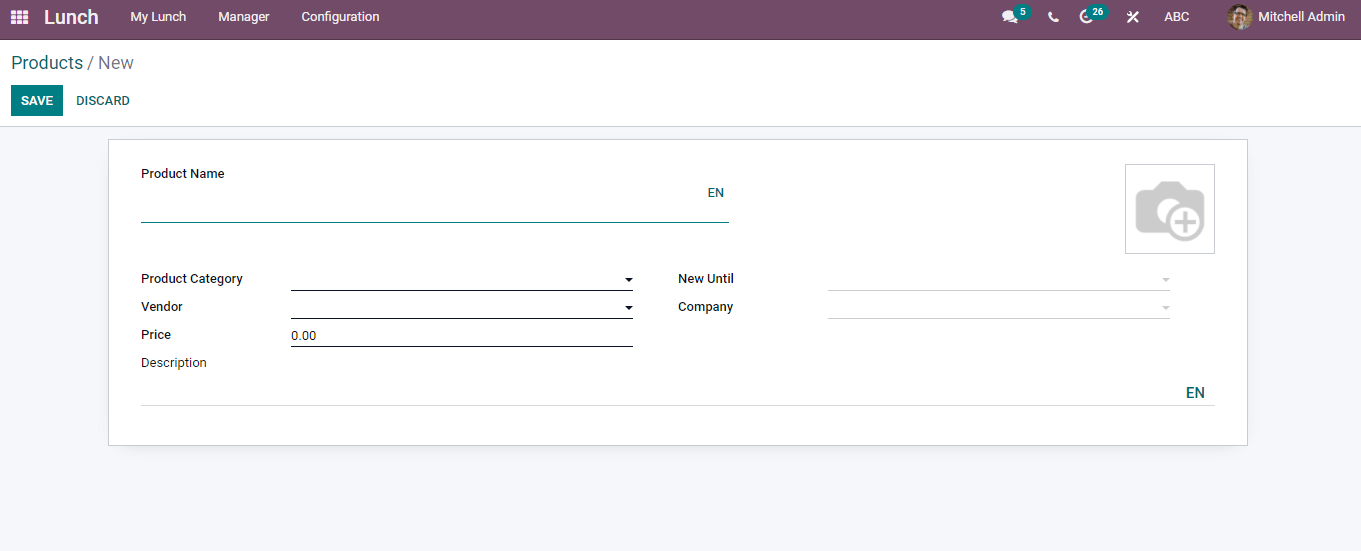
A new product adds to the list by clicking on Create icon. We can see details such as Name of Product, Category, Vendor, Price, Until date, and company on the displayed page. It is possible to add an image and description of the Product in a separate window.
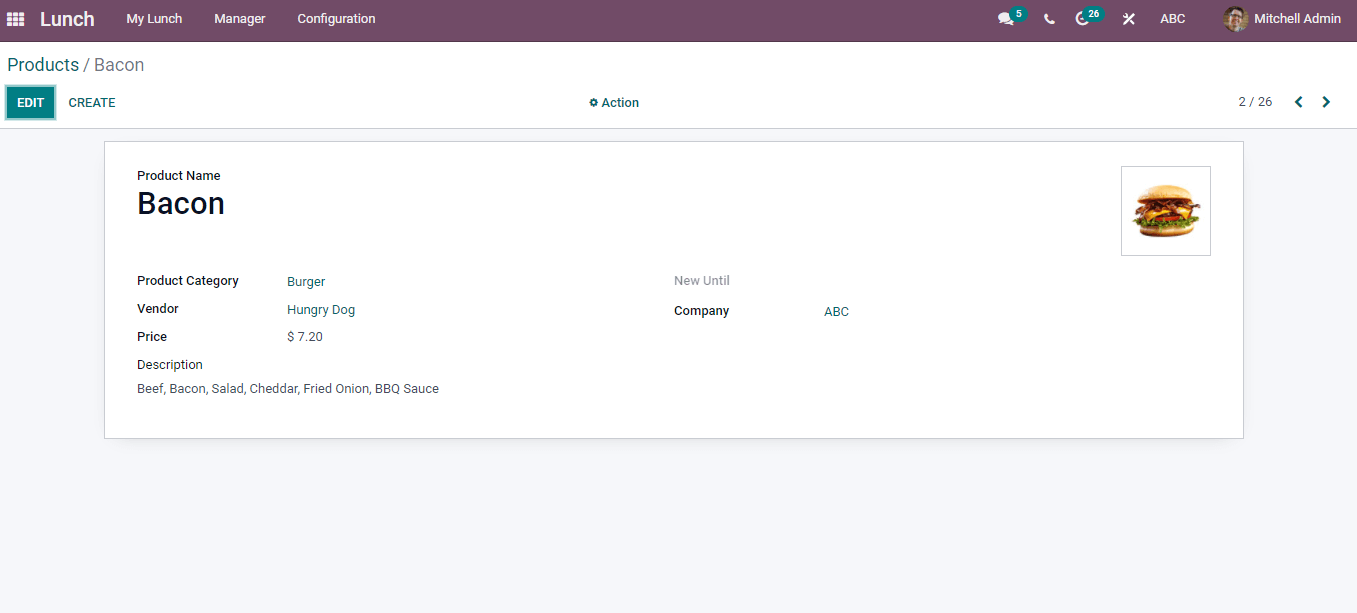
The expanded view is available by clicking on the Product title Name. You can see the Product Name, Category, Price, Vendor, Company, and image in this window. The Edit icon helps to make changes in the details of the Product.
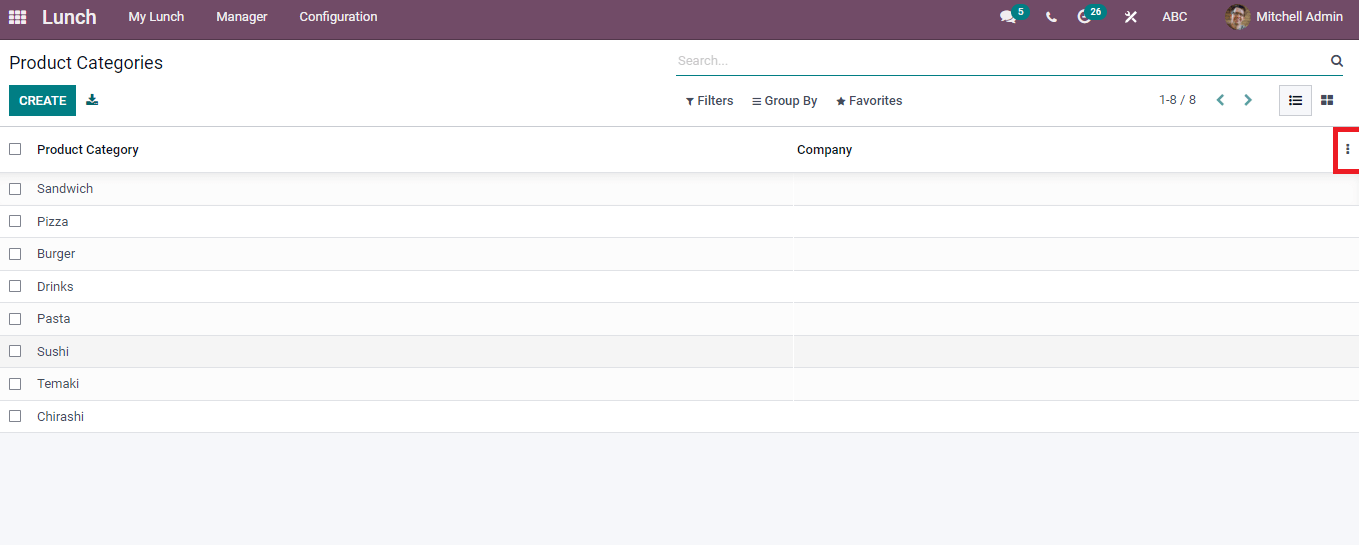
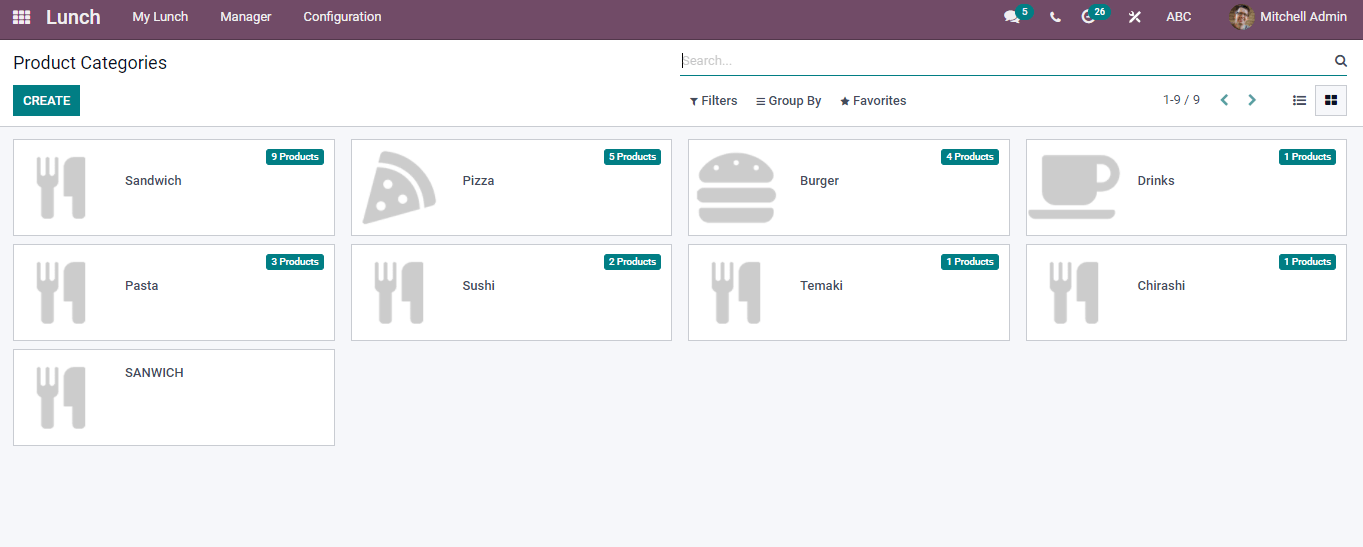
Product Categories
The Product Categories menu in the Configuration tab helps configure the grouping of items. Each Product occupies a different category at the time of order. Company Name lists with each product category. The three-dot button at the right side of the window helps add a Custom field along with existing categories.
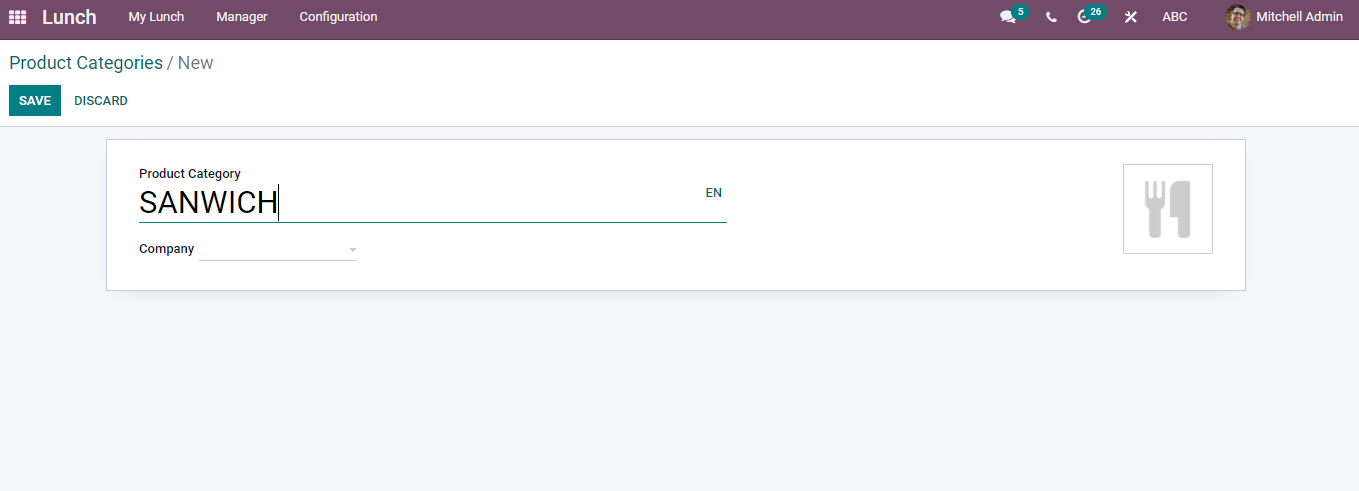
Create button enables to add a Product Category. You can enter the Product Category, Company name and insert an image in the new window. A new Product Category creates by pressing the Save button and is visible in the list.
The Kanban view shows the details of each Product Category. We can see the number of total products under each category and create a new one.
Alerts
We can create a Lunch Alert using the Alerts option under the Configuration tab. The Lunch Alerts window is visible in both Kanban and List views. By clicking on Create button, you can schedule a Lunch Alert.
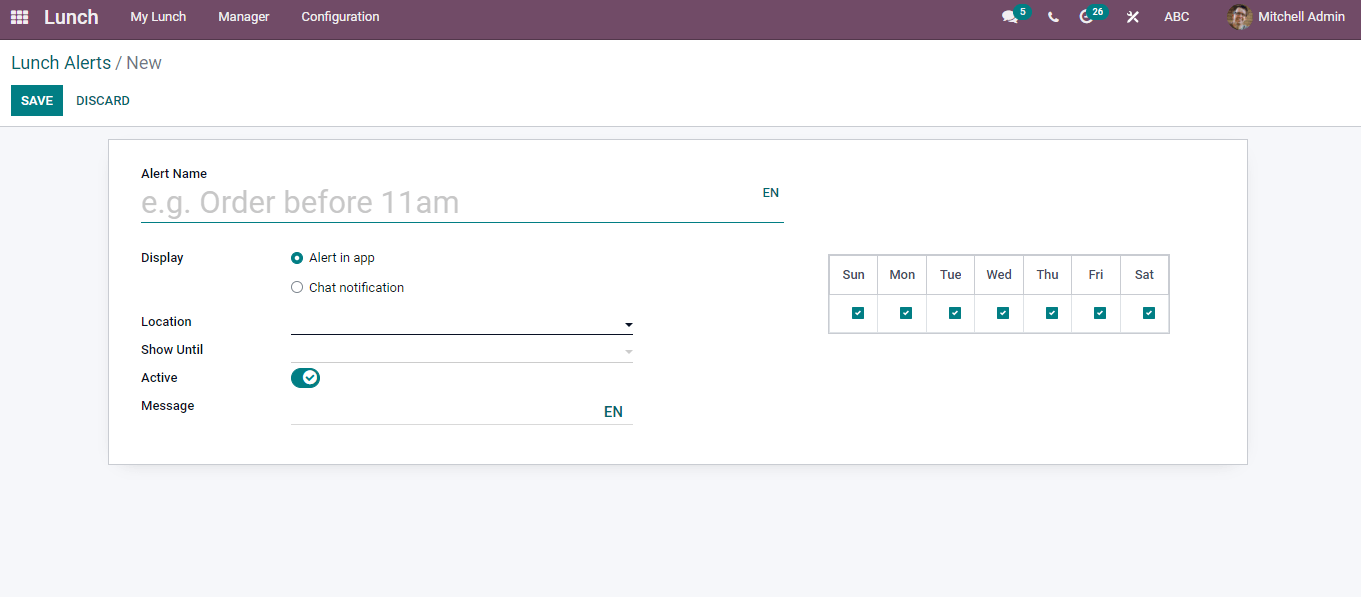
You can enter Alert Name, Location, Until date, Activeness, and Display alert through an app or chat notification. The Message option assists in entering the alert command and marking the days of signals with Notification Time. After saving the changes, an alert activates in the Lunch Alerts window.