In this blog, let's discuss the important updates to Odoo Owl when it comes to Odoo 20. Odoo comes with major updates in every aspect in its new version. Let’s discuss some of the new features.
1. Signals
A signal is the most basic reactive primitive. It holds a value that can be read and updated. In a component, signals can be used directly as class properties, and signals are one of the reactive primitives and can be directly bound to a custom view using the t-model. In the example below, let's see how we can use a signal in our custom component.
Define your form_component.js.
import { Component, signal } from "@odoo/owl";
class Form extends Component {
   static template = "example.Form";
   number = signal(0);
}
Define your form_template.xml as.
<templates>
<t t-name="example.Form">
   <h2>Form</h2>
   <div>Number: <input t-model="this.number"/></div>
 </t>
</templates>
Signals can be imported using the import syntax.
import { Component, signal } from "@odoo/owl";2. computed value
A computed value is a lazily-evaluated derived value. It tracks its dependencies automatically and only recomputes when accessed and at least one dependency has changed. Dependency tracking is dynamic and read-only by default; to make it writable, we can provide the set function.
Below is a simple demonstration of providing a custom set function to make a computed value writable.
const s = signal(3);
const triple = computed(() => 3 * s(), {
  set: (value) => s.set(value / 3),
});
triple(); // returns 9
triple.set(6); // sets s to 2
s(); // returns 2
triple(); // returns 6
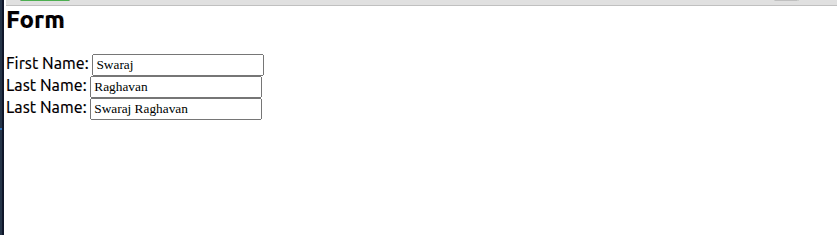
Let’s see an example of how to use computed on our custom component.
Define your form_component.js.
import { Component, signal, computed} from "@odoo/owl";
class Form extends Component {
   static template = "example.Form";
   fName = signal('');
   lName = signal('');
   setup() {
       this.FullName = computed(() => this.fName() + ' ' + this.lName());
   }
}
Define your from_template.xml.
<templates>
<t t-name="example.Form">
   <h2>Form</h2>
   <div>First Name: <input t-model="this.fName"/></div>
   <div>Last Name: <input t-model="this.lName"/></div>
   <div>Last Name: <input t-model="this.FullName"/></div>
 </t>
</templates>
This above is a simple explanation of a computation in the custom component.
3. Proxy
The proxy function creates a reactive proxy for an object. Proxy is not a hook it can be called anywhere, It works with objects, arrays, Maps, Sets, and WeakMaps and proxy is one of the four reactive primitives.
Let’s see a simple demonstration to bind a proxy to the form.
Define your form_component.js.
import { Component, proxy} from "@odoo/owl";
class Form extends Component {
  static template = "example.Form";
   setup(){
       this.state = proxy({'fName': '', 'lName': ''});
  }
}
Define your form_template.xml.
<templates>
<t t-name="example.Form">
  <h2>Form</h2>
  <div>First Name: <input t-model.proxy="this.state.fName"/></div>
  <div>Last Name: <input t-model.proxy="this.state.lName"/></div>
  <div>Last Name: <span t-out="this.state.fName + ' ' + this.state.lName"/> </div>
</t>
</templates>
4. Effect
An effect is a function that subscribes to reactive values and re-runs whenever its dependencies change. It is executed immediately on creation, and subsequent re-runs are batched after a microtask.
The return value of effect() is a cleanup function that stops the effect. Effect reacts to signals, computed values, and proxies; when working with components, use the useEffect hook instead of effect; it is automatically cleaned up when the component is destroyed.
Let's see a simple demonstration of how the effect hook works in Odoo 20 in our custom component.
import { Component, proxy, mount, effect, signal } from "@odoo/owl";
class Form extends Component {
  static template = "example.Form";
   setup(){
       this.fName = signal('')
       this.result = signal('')
       const cleanup = effect(() => {
           this.fName();
           this.result.set('User Input is' + ' ' + this.fName())
       });

  }
}
<templates>
<t t-name="example.Form">
<h2>Form</h2>
<div>Name: <input t-model="this.fName"/></div>
<div><span t-out="this.result()"/></div>
</t>
</templates>
5. Plugins
Plugins are independent building blocks designed to manage shared state and application logic. They offer a more type-safe and flexible alternative to Owl 2's environment and services.
A plugin can manage reactive data using signals and computed values, handle side effects, and establish dependencies on other plugins. It can also be shared across a specific component hierarchy or made available throughout the entire application. Its lifecycle consists of two main stages: initialization through setup() and cleanup through destroy().
To create a plugin, define a class that extends the Plugin base class. The reactive state can be declared directly as class fields, while the setup() method handles the initialization process.
Every plugin class has a static `id` property that serves as its unique identifier. By default, the class name is used as the ID, but developers can override it by assigning a custom value to the static `id` property.
Let’s see how we can create a simple clock widget using plugins.
import { Plugin} from "@odoo/owl";
class ClockPlugin extends Plugin {
   now = signal(new Date());
   setup() {
      const id = setInterval(() => this.now.set(new Date()), 1000);
       onWillDestroy(() => clearInterval(id));
   }
}
6. usePlugin
The usePlugin() function imports a plugin instance. It can be used in a component class or in the setup(). The return value is the plugin instance with full type information except the setup methods.
A simple example of using a plugin inside a custom component is defined below:
import { registry } from '@web/core/registry';
import { SaleListRenderer } from '../sale_onboarding_list/sale_onboarding_list_renderer';
import { saleFileUploadListView } from '../sale_file_upload_list/sale_file_upload_list_view';
import { Dashboard } from '../../js/dashboard/dashboard';
import { usePlugin } from "@odoo/owl";
import { BusPlugin } from "@bus/services/bus_plugin";
export class DashboardListRenderer extends SaleListRenderer {
   static template = 'sale.ListRenderer';
   setup(){
       super.setup();
       const bus_plugin = usePlugin(BusPlugin);
   }
   static components = {
       ...SaleListRenderer.components,
       Dashboard,
   };
}
export const dashboardListView = Object.assign(Object.create(saleFileUploadListView), {
   Renderer: DashboardListRenderer,
});
registry.category('views').add('sale_dashboard_list', dashboardListView);
In the above example, we can see that using the usePlugin BusPlugin has been used in the above component, and the BusPlugin is a class that is created by extending the plugin class. To use the BusPlugin, we should also import it in our custom JS file because this BusPlugin is created in another module, not in the same js file.
Providing Plugins
App-level plugins
Pass a plugins array when mounting the application. These plugins are available to all components:
await mount(RootComponent, document.body, {
  plugins: [NotificationManager, RouterPlugin],
});
Component-level plugins
Use providePlugins() in a component's setup() to make plugins available only to that component and its child components.
class FormView extends Component {
  static template = xml`<FormRenderer/>`;
  setup() {
    providePlugins([FormModel, FormValidator]);
  }
}
Plugins provided at the component level are destroyed when the component is destroyed.
7. Props
In Owl, props (short for properties) are objects which contain every piece of data given to a component by its parent.
The useProps function must be called at the top level of the component class body (or inside setup). It returns an object with getters for each declared prop. Reading one of these getters is reactive: templates, computed values, and effects that read this.props.someProp subscribe to that prop and are notified when the parent applies a new value.
useProps was previously named props; props remains available as a deprecated alias.
For a better understanding, we can see the below example of how props are passed to the productCard component.
import { Component, useProps, t } from "@odoo/owl";
export class ProductCard extends Component {
   static template = "example.ProductCard";
   props = useProps({
       name: t.string(),
       price: t.number(),
       image: t.string().optional(),
   });
}
import { Component, mount, xml } from "@odoo/owl";
import { ProductCard } from "./product_card";
class Root extends Component {
   static components = { ProductCard };
   static template = xml`
       <div class="product-grid">
         <t t-foreach="this.products" t-as="p" t-key="p.id">
           <ProductCard name="p.name" price="p.price" image="p.image"/>
         </t>
       </div>`;
   products = [
       { id: 1, name: "Wireless Headphones", price: 79.99, image: "??" },
       { id: 2, name: "Mechanical Keyboard", price: 129.99, image: "??" },
       { id: 3, name: "USB-C Hub", price: 49.99 },
       { id: 4, name: "Webcam HD", price: 59.99, image: "??" },
   ];
}
In the above example, we can see that the product card template receives the name, price, and image as props from the parent component named Root.
Props validation
It is easy to send the wrong props into a component, either by refactoring a component or one of its parents. To solve this problem, we specify the type of the props.
- The useProps function accepts an optional schema as its first argument.
- Props are validated whenever a component is created or updated.
Props validation can be implemented as described below:
class ProductList extends Component {
  static template = xml`...`;
  props = useProps({
    count: t.number(),
    name: t.string(),
    age: t.number().optional(),
    color: t.string().optional("red")
  });
}
In the above example, we can see that count should be typed as a number when passed from the parent component, and name is typed as a string, and the default values are declared in the schema itself by giving a value to the .optional() method of the type. When a prop is not provided by the parent (or is undefined), the default value is used instead.
8. Registry
A Registry is an ordered, reactive key-value map. It is useful when items need to be looked up by name - for example, a component registry, an action registry, or a view-type registry.
Registries support:
- sequencing: entries can be given a sequence number to control ordering
- scoped lifetime: in components and plugins, entries can be automatically removed when the owner is destroyed
- type validation: values can be validated against a schema on insertion
Creating a Registry
const views = new Registry()
Both constructor options are optional:
const views =  new Registry({
	name: "views",
	validation: t.constructor(Component),
)};
The name appears in error messages, and validation is applied on every insertion.
Adding entries
add(key, value, options?)
Adds an entry permanently. Returns the registry for chaining.
views.add("list", ListComponent);
views.add("form", FormComponent, { sequence: 10 });
views.add("a", A).add("b", B); // chainable
If the key is already registered, add() throws. Pass { force: true } to explicitly overwrite:
views.add("list", ListComponent);
views.add("list", OtherComponent); // throws
views.add("list", OtherComponent, { force: true }); // ok, overwrites
options.sequence defaults to 50. Entries are sorted ascending by sequence in entries() and items(). The expected range is 1-100, with 50 sitting in the middle so callers can insert entries.
items() and entries()
Both are reactive computed values, sorted by sequence. items() returns values; entries() returns [key, value] tuples.
const r = new Registry();
r.add("a", "first", { sequence: 10 });
r.add("b", "middle"); // sequence 50
r.add("c", "last", { sequence: 100 });
r.items(); // ["first", "middle", "last"]
r.entries(); // [["a", "first"], ["b", "middle"], ["c", "last"]]
Type validation
When a validation option is passed to the constructor, values are checked on every add(), addById(), use(), and useById():
const views = new Registry({
  name: "views",
  validation: t.constructor(Component),
});
views.add("list", ListComponent); // ok
views.add("oops", "not a component"); // throws validation error
Summary of the Registry
| Method / Property | Description |
| new Registry({ name?, validation? }) | Create a registry. |
| add(key, value, { sequence?, force? }) | Add permanently. Chainable. Throws on duplicate key unless force: true. |
| addById(item, { sequence?, force? }) | Add under the item. id. Chainable. Throws if item.id is empty or a duplicate key unless force: true. |
| use(key, value, { sequence?, force? }) | Add for the lifetime of the current component/plugin. Chainable. Throws outside a context, or on duplicate key unless force: true. |
| useById(item, { sequence?, force? }) | Scoped variant of addById. Chainable. |
| get(key, defaultValue?) | Look up by key. Throws OwlError if missing and no default. |
| clear() | Remove every entry. Returns void. |
| delete(key) | Remove. Chainable. |
| has(key) | Test key presence. |
| items() | Reactive computed returning values sorted by sequence. |
| entries() | Reactive computed returning [key, value] tuples sorted by sequence. |
9. Resource
A Resource is an ordered, reactive collection of items (no keys). It is useful for collections where multiple parts of the application contribute items - for example, systray entries, error handlers, keyboard shortcuts, or menu sections.
Resources support:
- sequencing: items can be given a sequence number to control ordering
- scoped lifetime: in components and plugins, items can be automatically removed when the owner is destroyed
- type validation: items can be validated against a schema on insertion
Creating a Resource
const commands = new Resource();
Both constructor options are optional:
const commands = new Resource({
  name: "commands", // for error messages
  validation: t.object({ label: t.string(), run: t.function() }),
});
name appears in validation and debug error messages. validation is applied on every insertion (add() and use()).
Type validation
When a validation option is passed to the constructor, items are checked on every add() and use():
const commands = new Resource({
  name: "commands",
  validation: t.object({ label: t.string(), run: t.function() }),
});
commands.add({ label: "Save", run: save }); // ok
commands.add({ label: 123 }); // throws validation error
Summary of the Resource
| Method / Property | Description |
| new Resource({ name?, validation? }) | Create a resource. |
| add(item, { sequence? }) | Add permanently. Chainable. |
| use(item, { sequence? }) | Add for the lifetime of the current component/plugin. Chainable. Throws outside a context. |
| delete(item) | Remove by reference equality. Chainable. |
| clear() | Remove every item. Returns void. |
| has(item) | Test membership by reference equality. |
| items() | Reactive computed returning items sorted by sequence. |
In this blog, we have discussed some of the new features and changes when it comes to Odoo 20; we have discussed an overview of the signals, computed, useState, effect, Plugin, usePlugin and providePlugins, props, registry and collection. We have seen the important updates when it comes to properties from the parent to child component and how env and services are handled in the new version of Odoo 20 with plugins and validations we include in useProps. In this blog, we also discussed how signals and proxies are handled and how they are directly bound to a component from views.
To read more about Introduction to Signals in OWL 3: An Upcoming Feature in Odoo 20, refer to our blog Introduction to Signals in OWL 3: An Upcoming Feature in Odoo 20.