In this blog, we are going to explain the practical implementation of signals in Odoo. Signals are the basic reactive primitive. This can hold a value that can be read and updated. Signals were released in the latest version of OWL and are expected to be available in the upcoming Odoo 20.
The new version of OWL introduces signals, which can be used as class properties that can be directly used in OWL templates. Let’s see how we can use the signal through the demonstration below. However, this can only be implemented on Odoo 20 or the latest Odoo 19 SaaS addons from the Odoo GitHub.
Create a module named custom_client_action and create a custom_dashboard.js component in your custom module's static/src/js directory.
import { Component, signal } from "@odoo/owl";
import { registry } from "@web/core/registry";
export class CustomDashboard extends Component {
   static template = "custom_client_action.CustomDashboard";
   setup() {
       this.input = signal(0);
   }
   onDecrement() {
       this.input.set(this.input() - 1);
   }
   onIncrement() {
       this.input.set(this.input() + 1);
   }
}
registry.category("actions").add("custom_dashboard", CustomDashboard);
Create your custom_dashboard.xml in your static/src/xml directory as defined below.
<?xml version="1.0" encoding="utf-8"?>
<templates xml:space="preserve">
   <t t-name="custom_client_action.CustomDashboard">
       <div class="o_custom_dashboard d-flex flex-column align-items-center justify-content-center h-100 bg-light">
           <!-- Header -->
           <div class="o_custom_dashboard_header text-center mb-5">
               <h1 class="display-4 fw-bold text-primary">
                   <i class="fa fa-tachometer-alt me-2"/>
                   Custom Dashboard
               </h1>
               <p class="lead text-muted">
                   A simple OWL component client action.
               </p>
           </div>
           <!-- Card -->
           <div class="card shadow-sm p-4" style="min-width: 400px;">
               <div class="card-body d-flex flex-column gap-3">
                   <!-- Demo heading -->
                   <div class="mb-1">
                       <h4 class="fw-bold text-primary mb-1">
                           <i class="fa fa-layer-group me-2"/>
                           Demo Section
                       </h4>
                       <p class="text-muted small mb-0">
                           <t t-out="this.input()"/>
                       </p>
                       <hr class="mt-2 mb-0"/>
                   </div>
                   <!-- Buttons -->
                   <div class="d-flex justify-content-end gap-2">
                       <button
                               class="btn btn-primary"
                               t-on-click="this.onIncrement"
                       >
                           <i class="fa fa-check me-1"/>
                           Increment
                       </button>
                       <button
                               class="btn btn-primary"
                               t-on-click="this.onDecrement"
                       >
                           <i class="fa fa-check me-1"/>
                           Decrement
                       </button>
                   </div>
               </div>
           </div>
       </div>
   </t>
</templates>
Create the actions to view the created component and signal demonstration inside the views directory with the file name actions.xml
<?xml version="1.0" encoding="utf-8"?>
 <odoo>
       <!--  Client Action  -->
       <record id="action_custom_dashboard" model="ir.actions.client">
           <field name="name">Custom Dashboard</field>
           <field name="tag">custom_dashboard</field>
           <field name="target">current</field>
       </record>
       <!--  Menu item -->
       <menuitem
           id="menu_custom_dashboard_root"
           name="Custom Dashboard"
           action="action_custom_dashboard"
           sequence="100"
       />
</odoo>
Install the module and go to the Custom Dashboard menu to view the component we created.
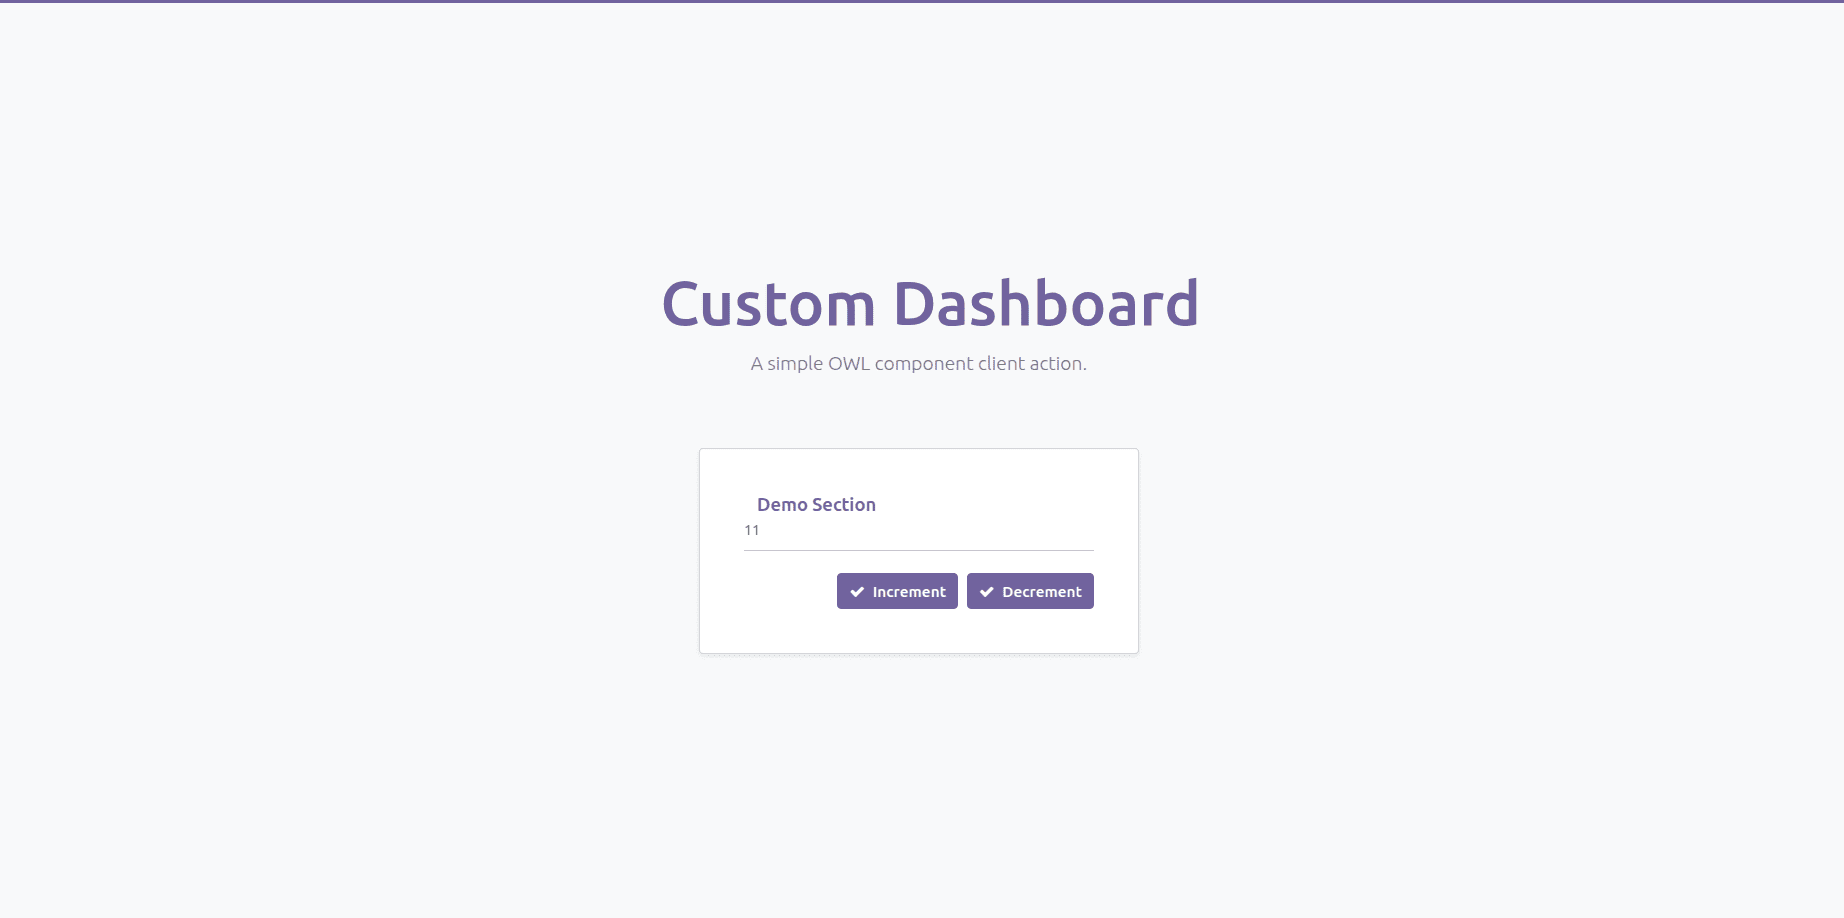
Values to the signals can be assigned by calling this.input.set(arg) and can be read by calling this.input()
In this blog, we discussed the practical implementation of signals in OWL 3, one of the simple and powerful reactive primitives. Implement this in custom development for creating simple and smooth reactive components.
To read more about Odoo 20 Roadmap Explained: Key Updates and Future Expectations, refer to our blog, Odoo 20 Roadmap Explained: Key Updates and Future Expectations.