Migrating data into Odoo is one of the most important steps when starting a new database, moving from another ERP, or reorganizing your business workflows. Bringing in key records such as products, customers, vendors, categories, variants, sales orders, purchase orders, invoices, and bills ensures your operations continue smoothly without missing links or inconsistencies. Each of these data types plays a vital role in keeping your sales, purchase, inventory, and accounting processes connected and functioning as they should. Whether you're implementing Odoo for the first time or cleaning up an existing setup, well-prepared and accurately formatted import files are the foundation of a successful migration. In this blog, we’ll walk through why these records matter, how they work within Odoo’s ecosystem, and the best practices to follow from preparing your Excel or CSV sheets to handling relational fields to help you achieve a seamless, error-free data migration experience.
Before importing products, it’s important to first load all the necessary categories and attributes. This ensures that when you bring in your product data, each item can be correctly classified into its respective category, and any required variants can be added without issues.
Import product categories:
Product categories form the backbone of an organized product catalog in Odoo. They help define how items are grouped, how inventory is managed, and how accounting rules are applied. Before importing your actual products, it’s crucial to set up these categories correctly so every product can be placed in the right structure from the beginning. In this section, we’ll walk through how to export existing categories, update or create new ones in Excel, and import them back into Odoo to build a clear and efficient product hierarchy.
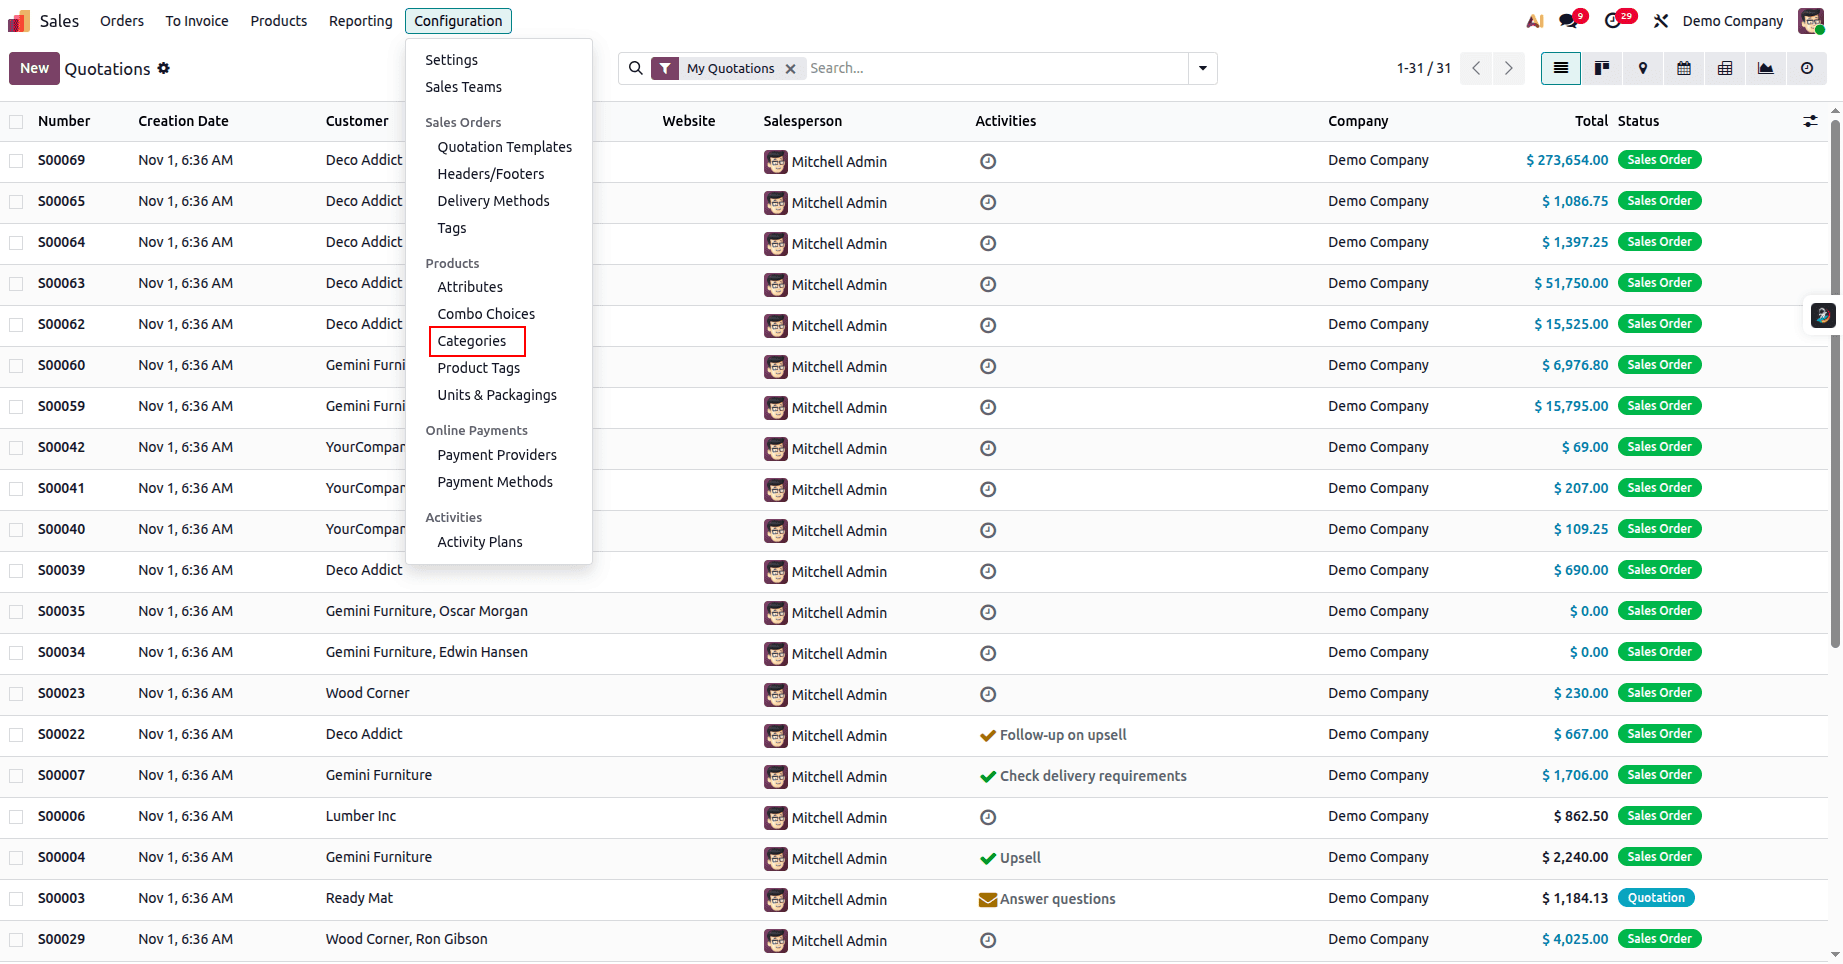
Open the Sales module and go to Configuration > Products > Categories.
Select any category from the list view. Once selected, you’ll see a gear icon labeled “Action” at the top. Click on it, and from the dropdown menu, choose Export.
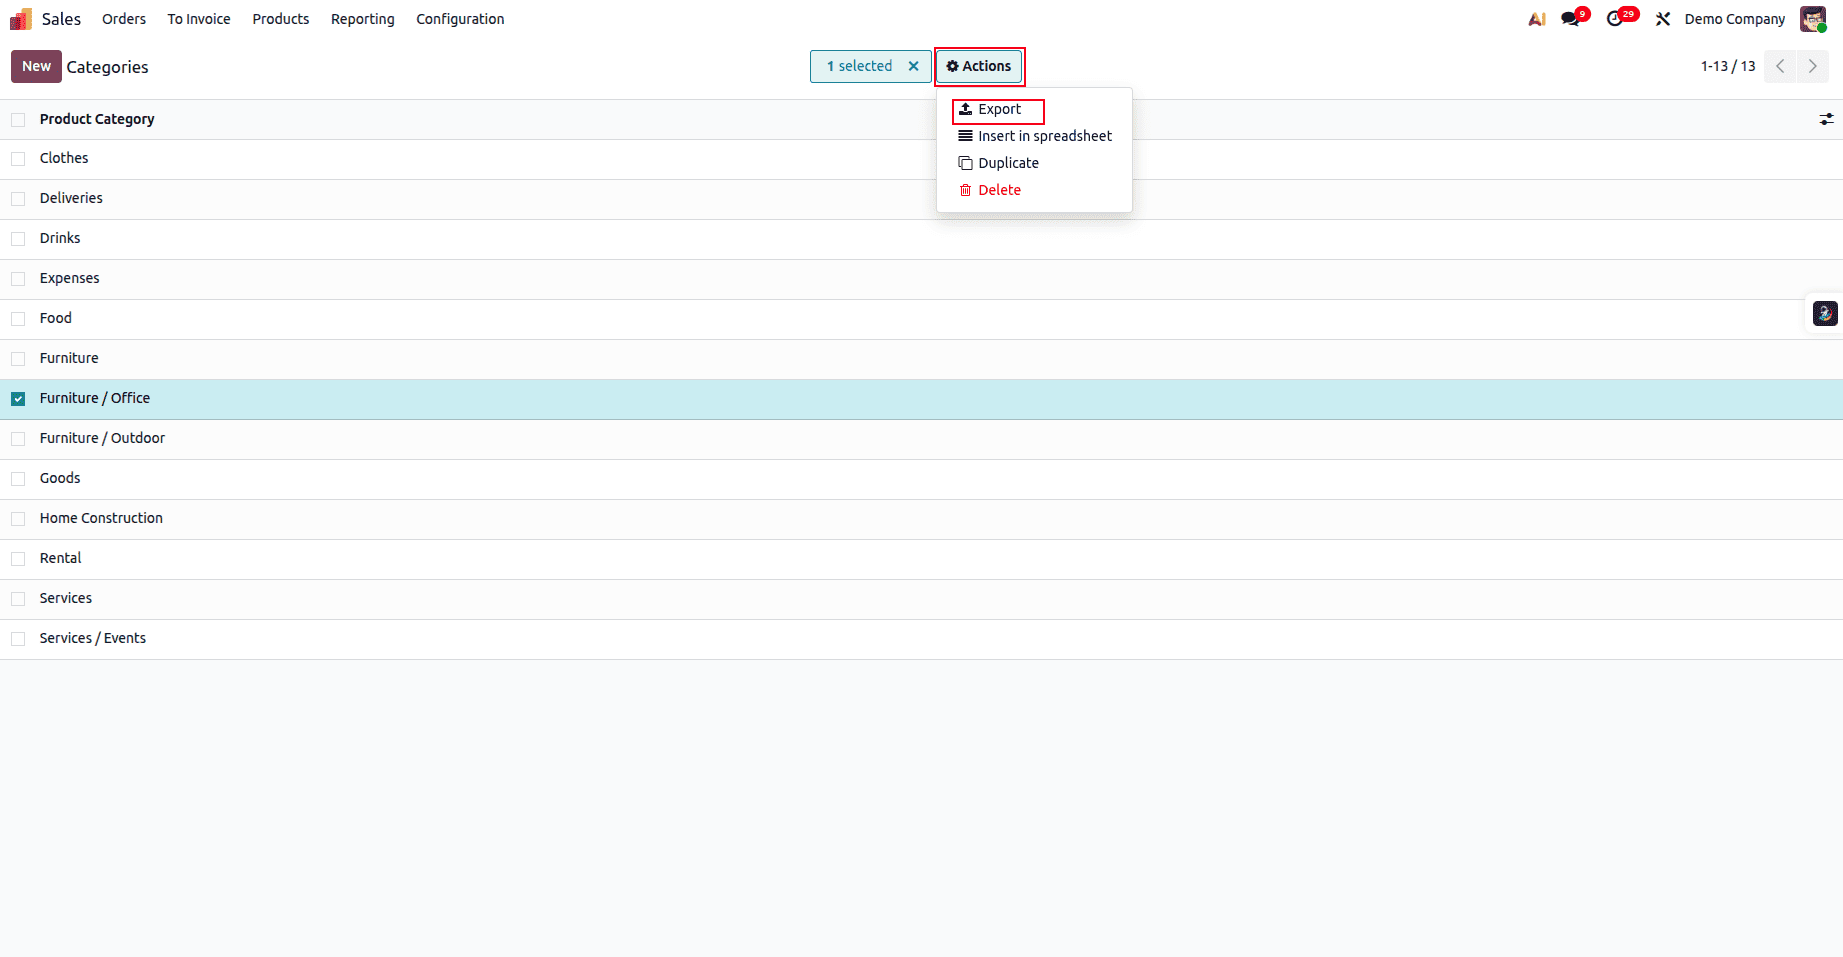
After you click Export, a pop-up window will appear. On the left, you’ll find the Available Fields, and on the right, the Fields to Export. To add a field to your export list, simply click the plus (+) icon next to the field on the left. This will move it to the right side, indicating that it will be included in the exported file.
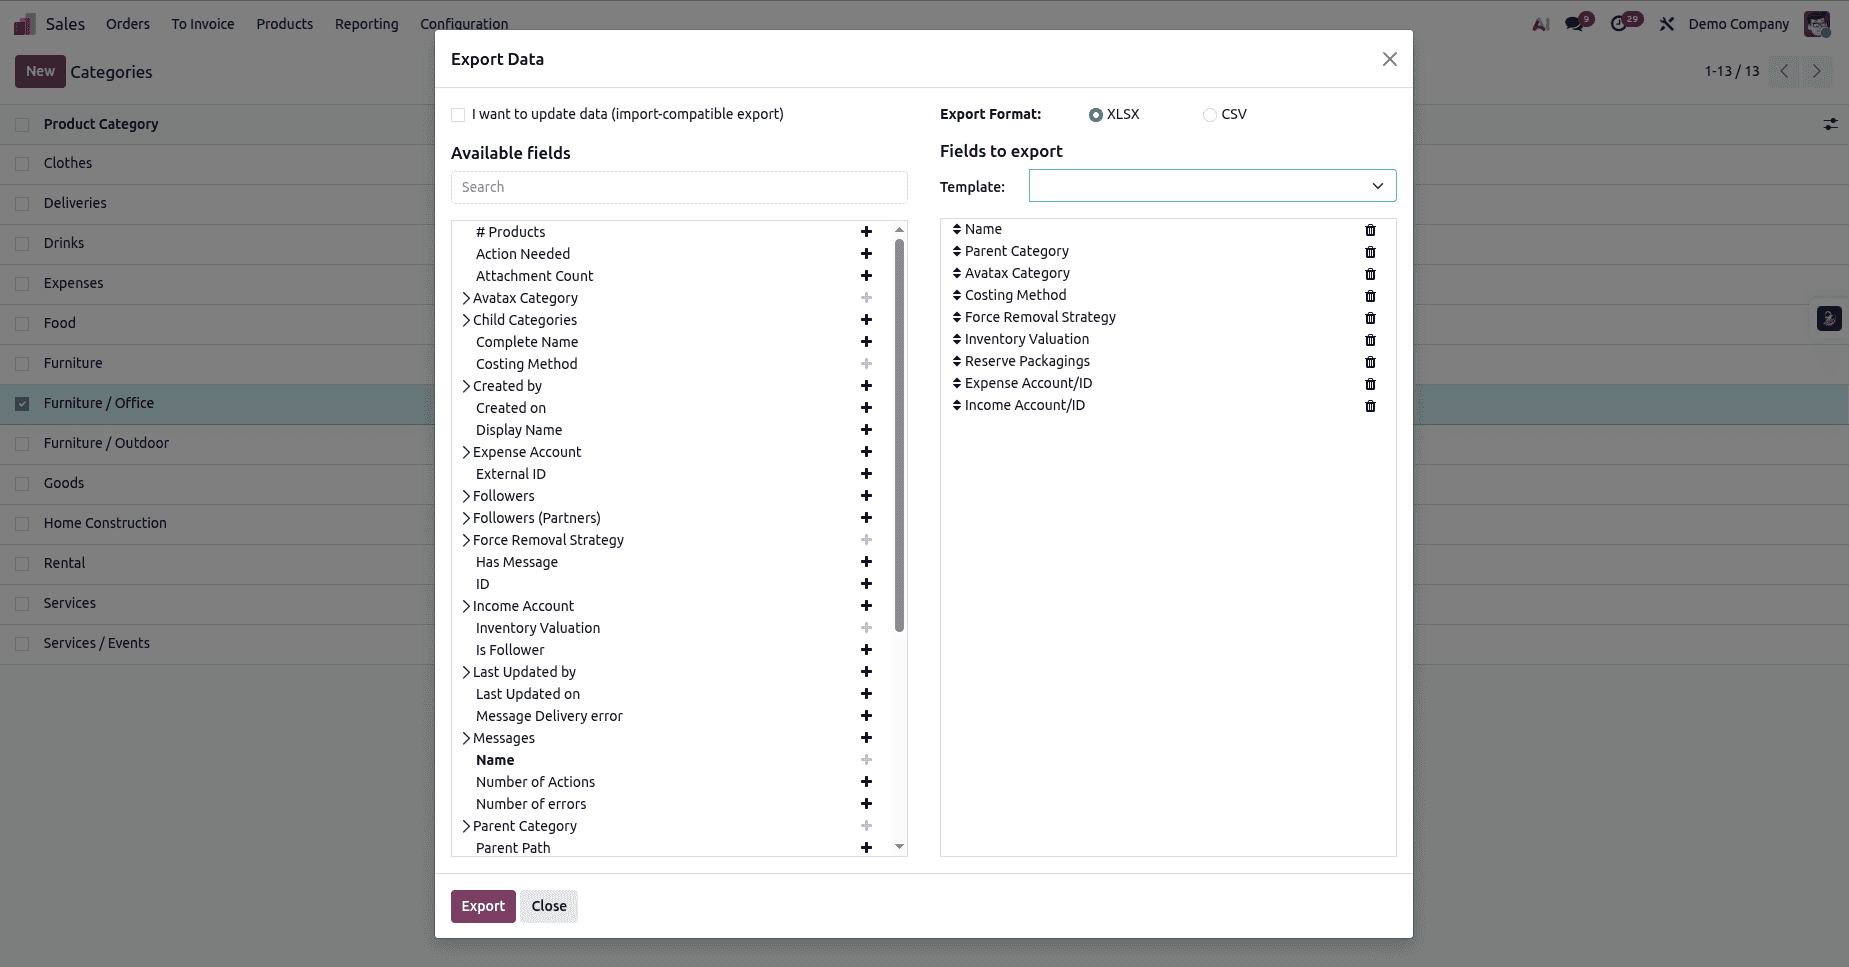
Open the Excel file you downloaded — it will look similar to the one shown. Now, you can start editing it to add your product categories.
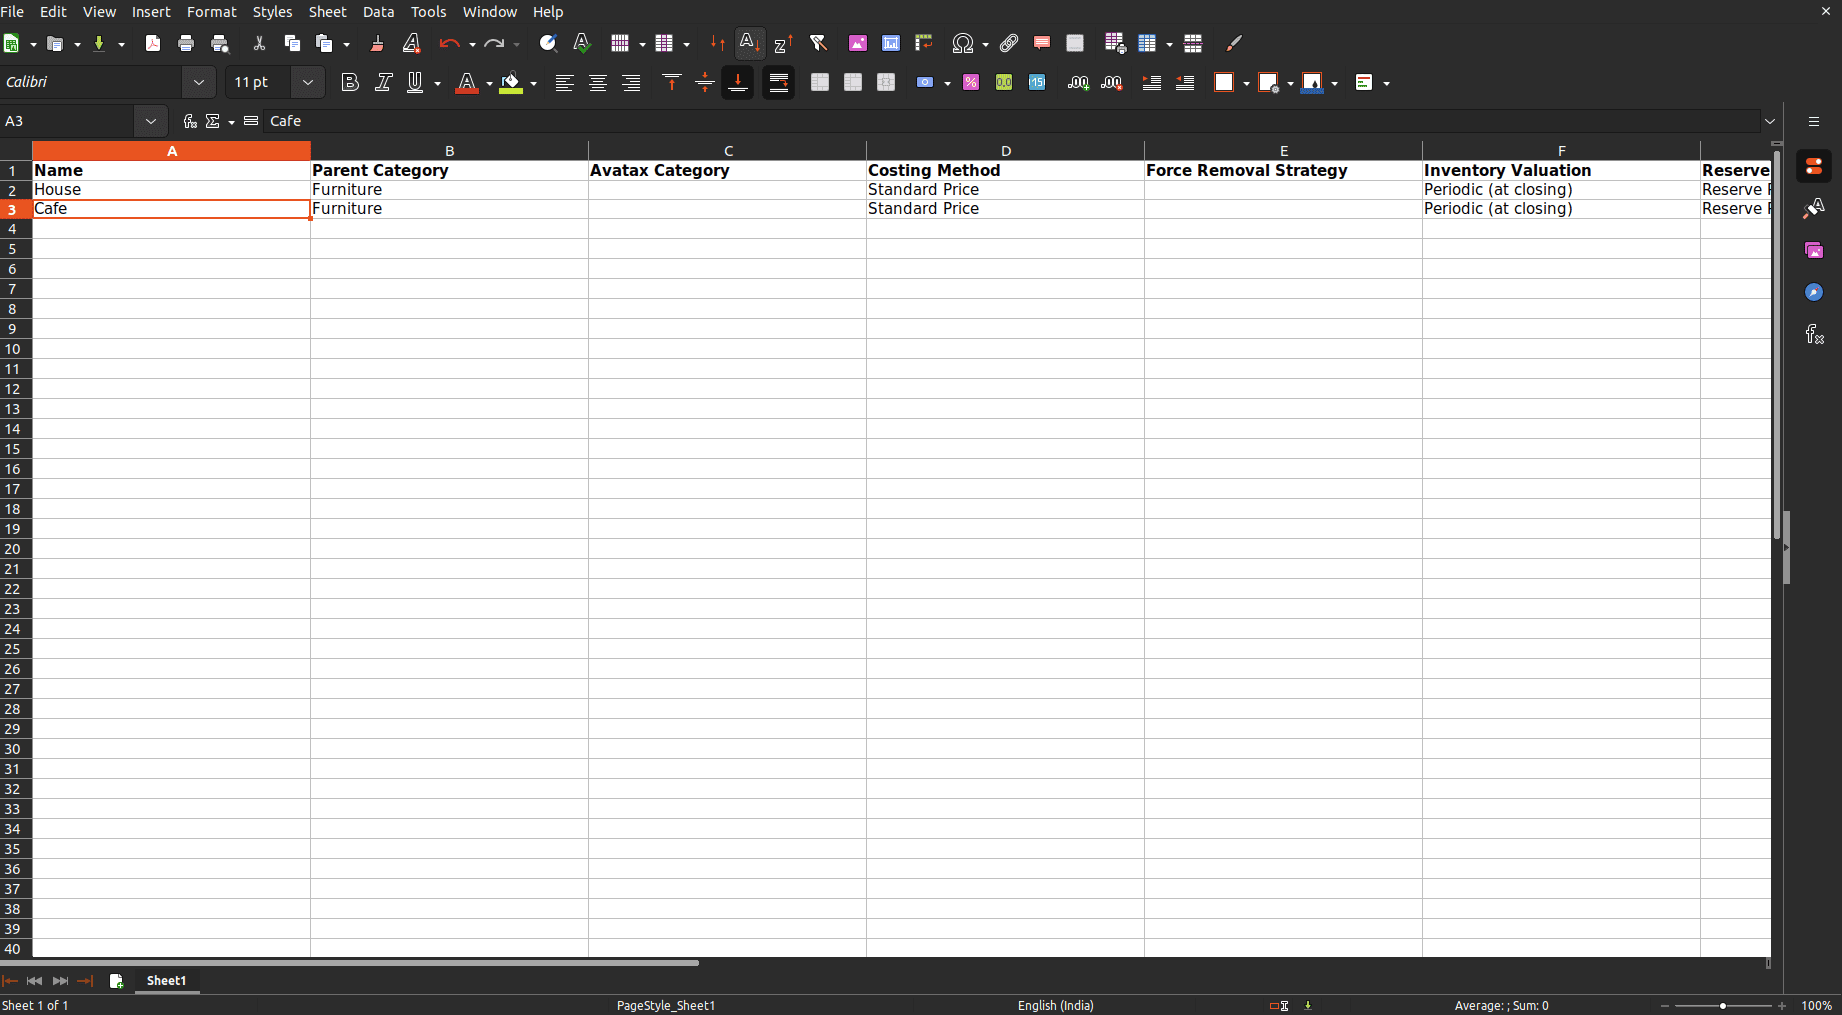
Add the new category along with its parent_id and any other required details, then save the file.
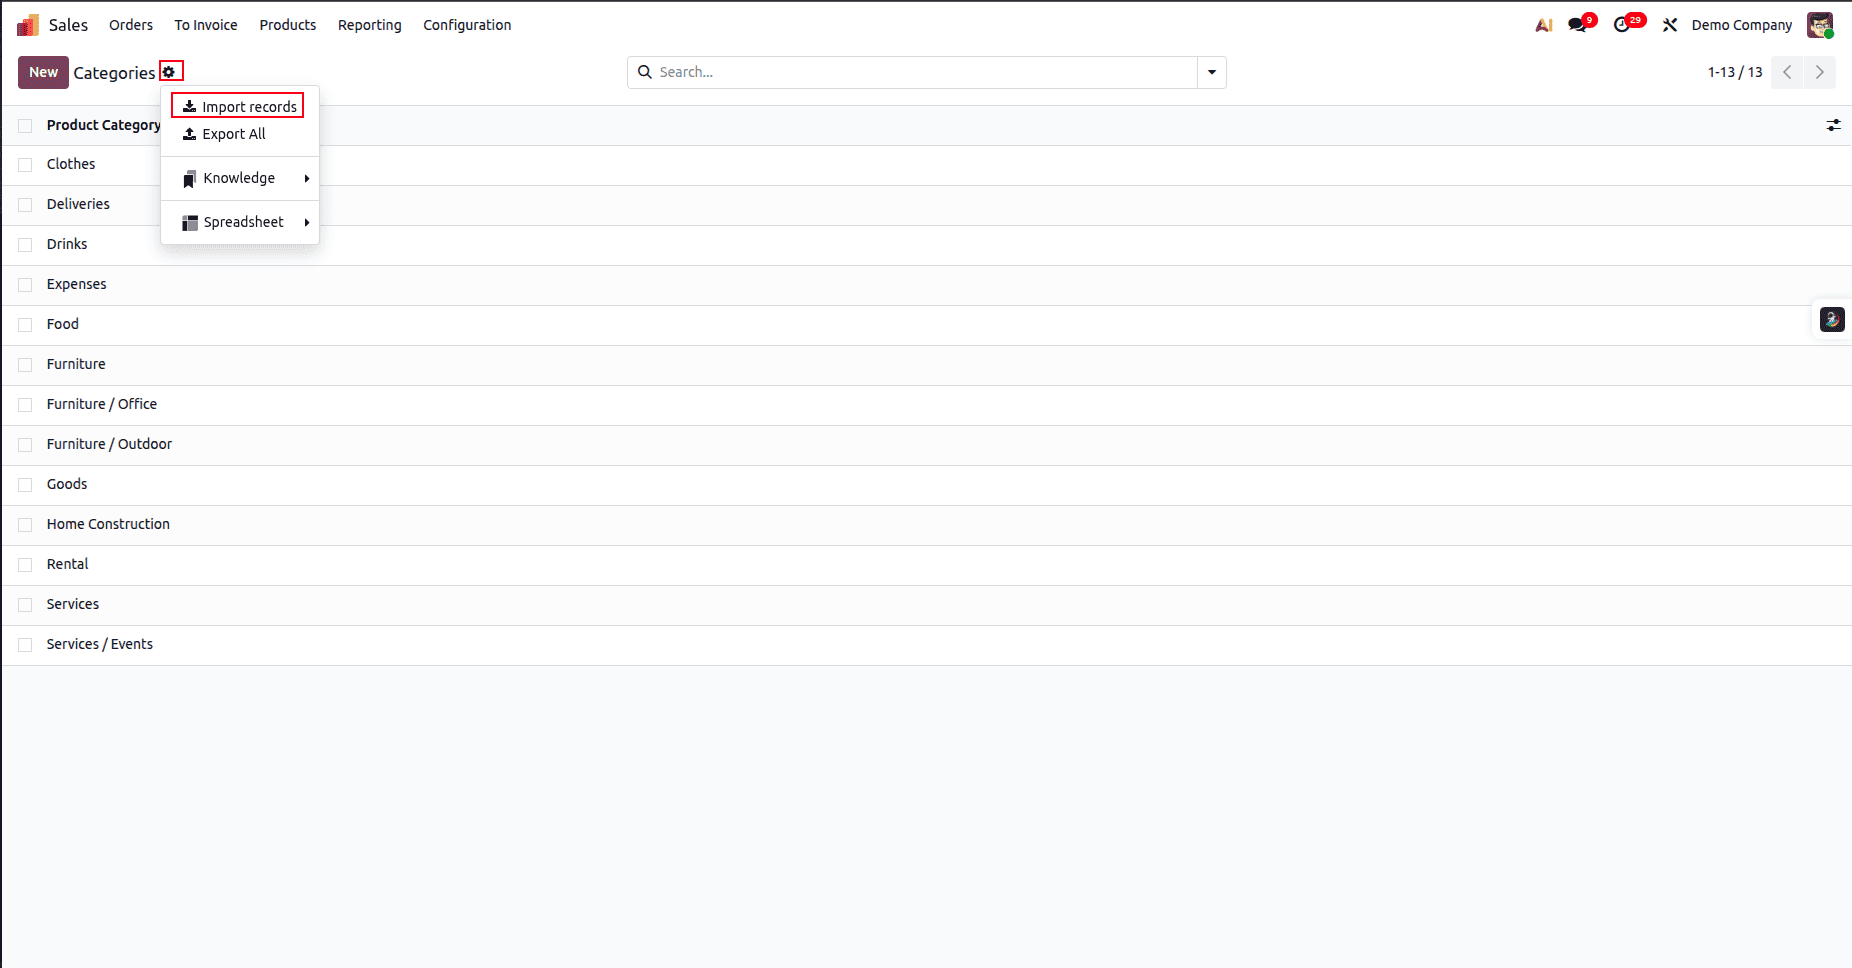
To import the categories back into Odoo, go to the Categories menu again. Click the gear icon, and from the dropdown, choose Import Records.
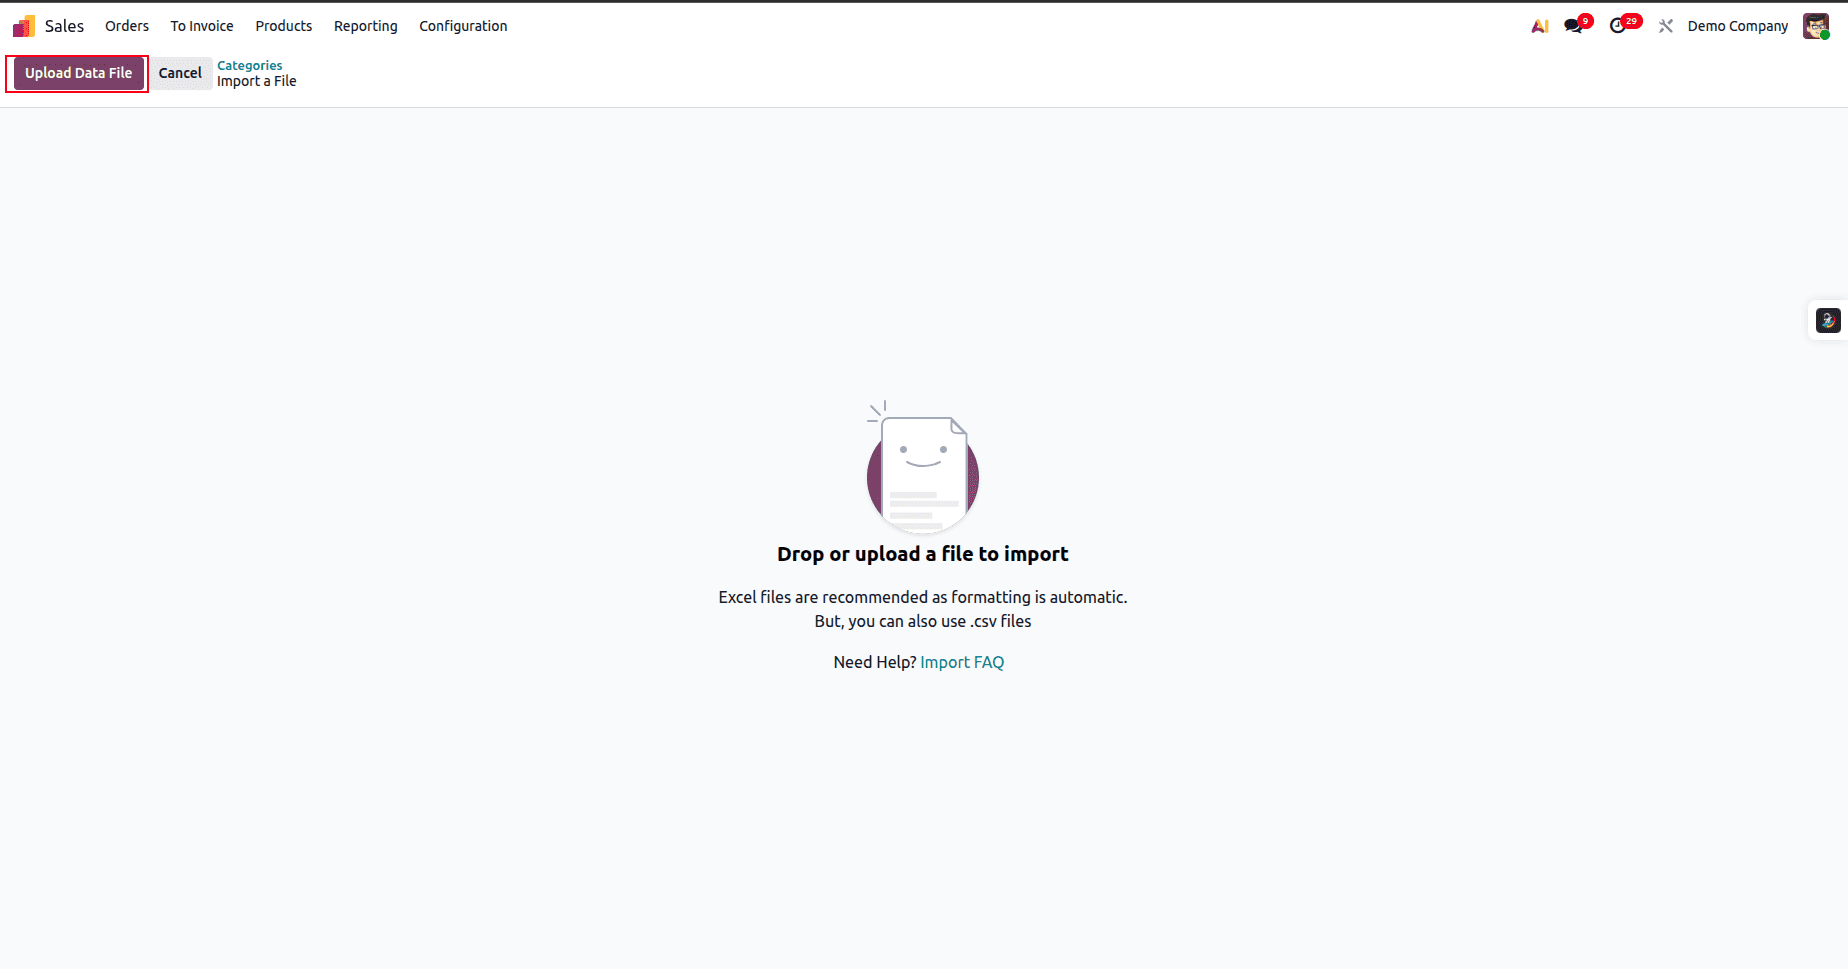
Click Upload File, select your updated Excel sheet, and upload it.
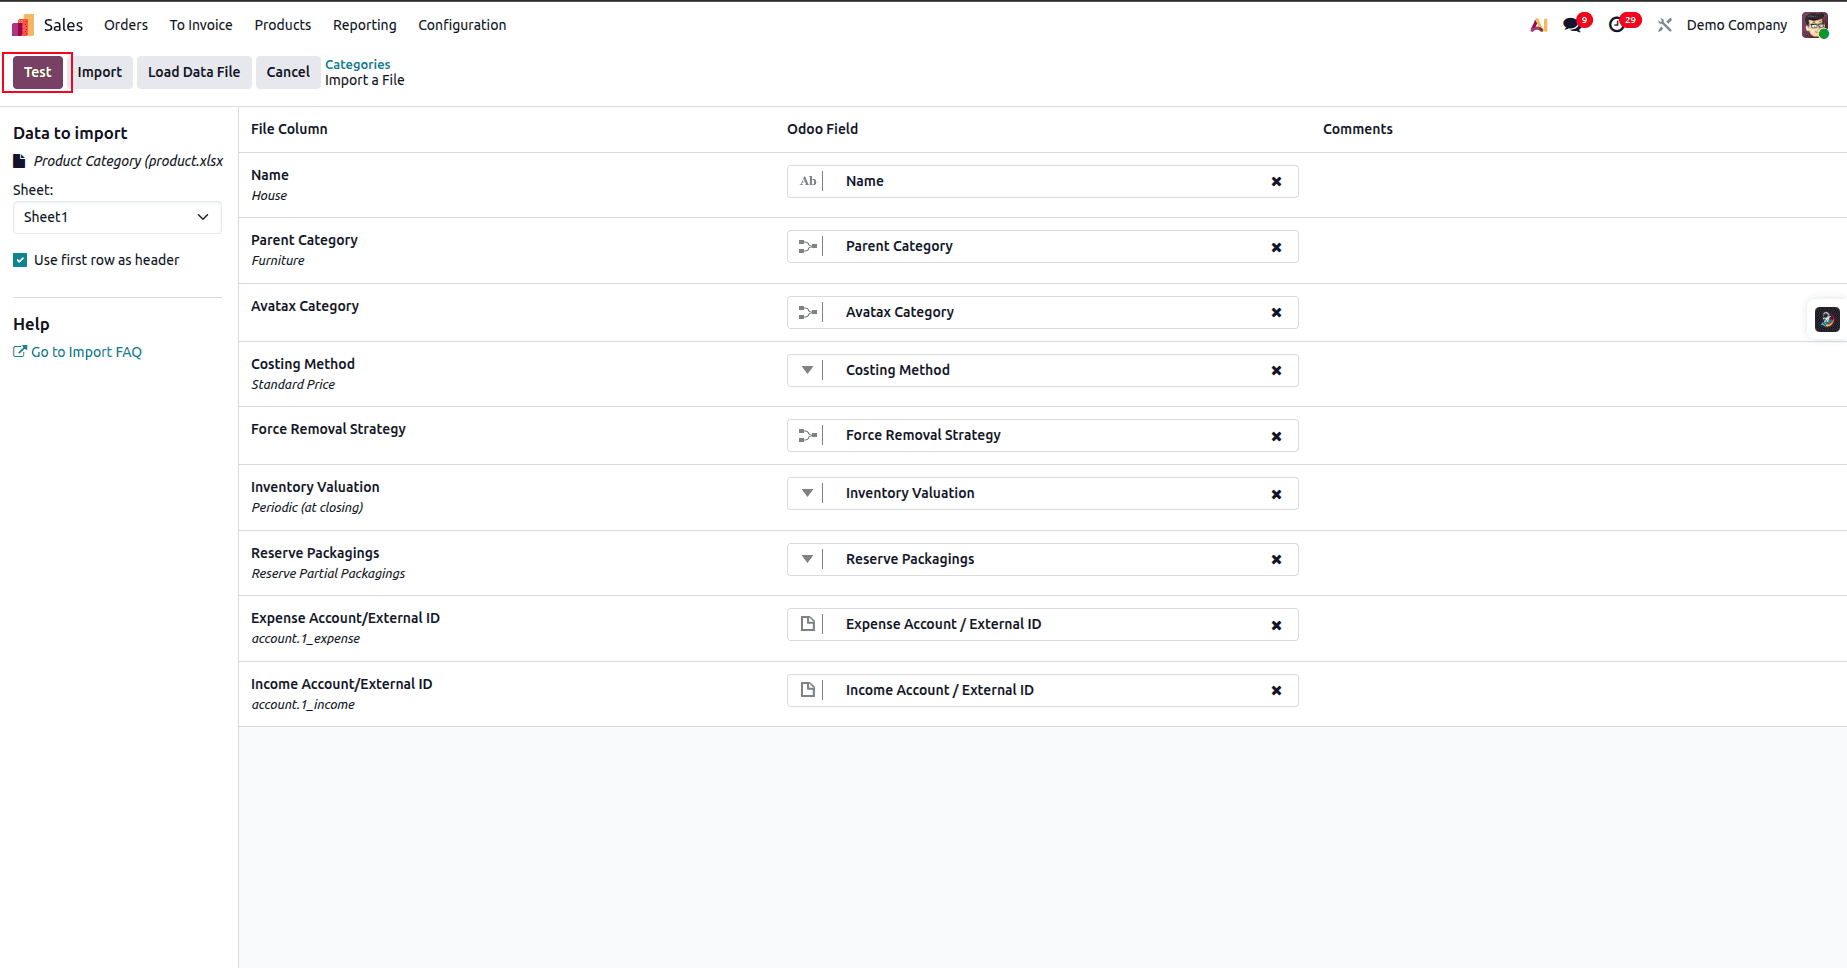
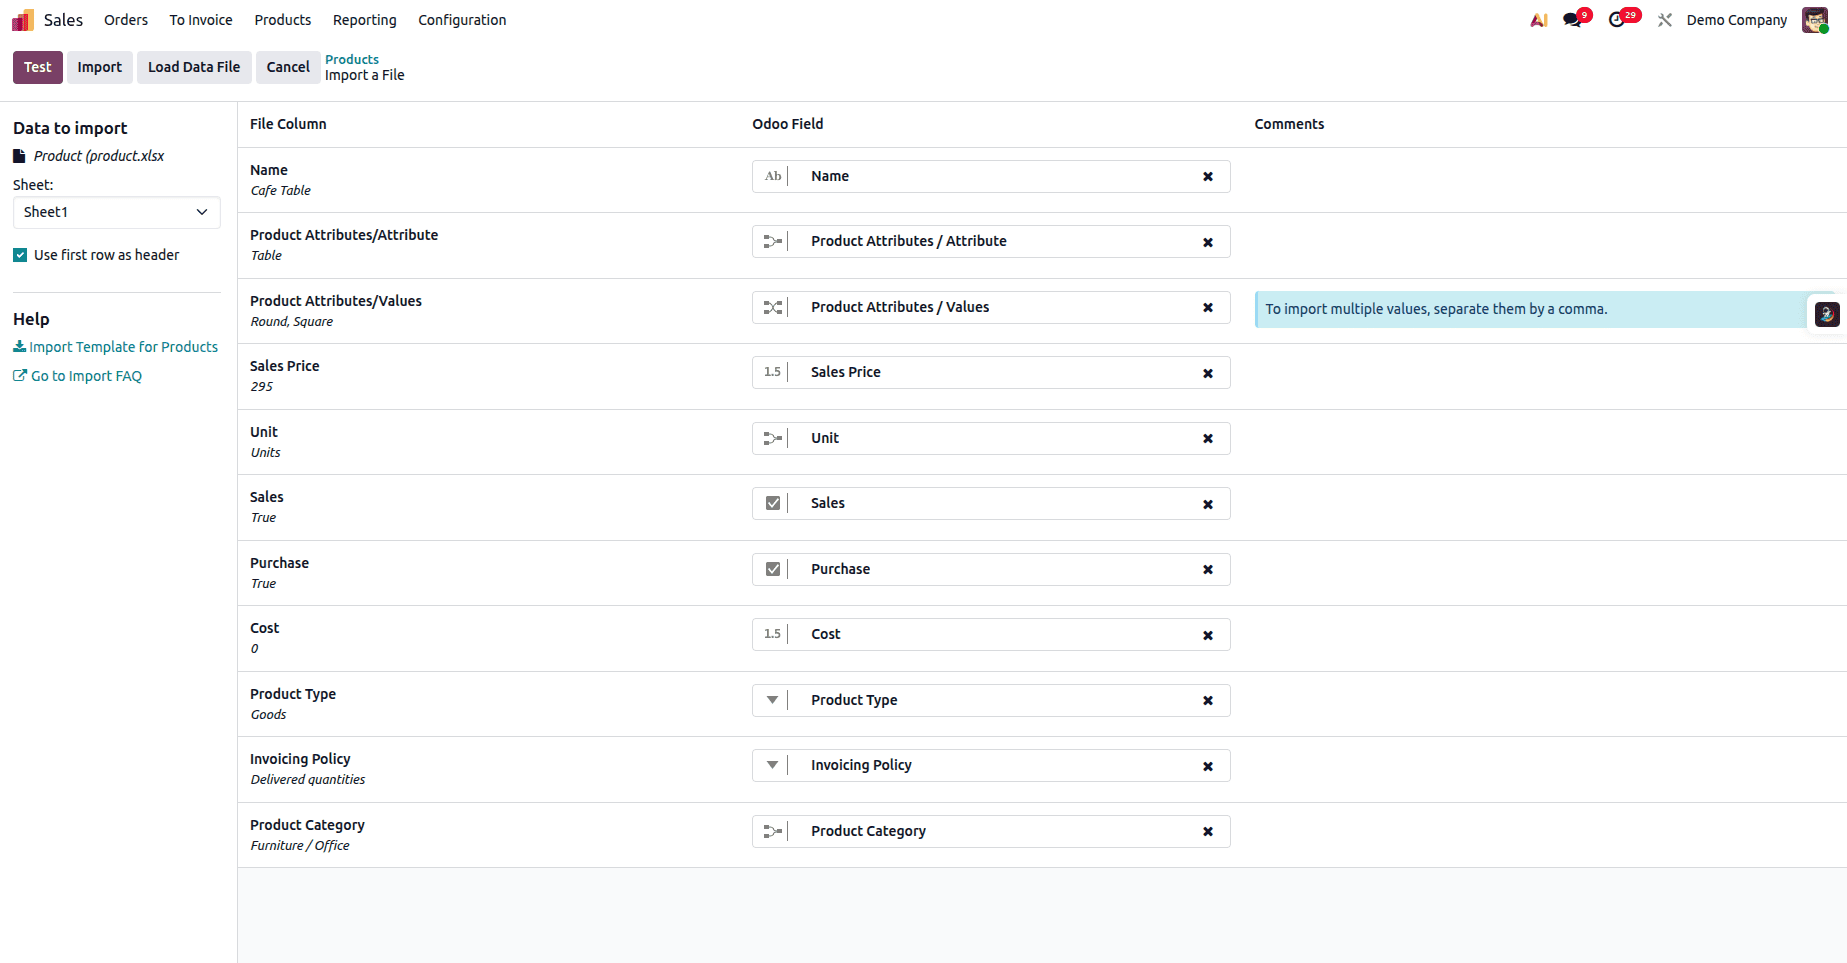
After uploading the file, you’ll be taken to the preview page where Odoo loads the data for validation. Once the file finishes loading, click the Test button to verify the data before importing.
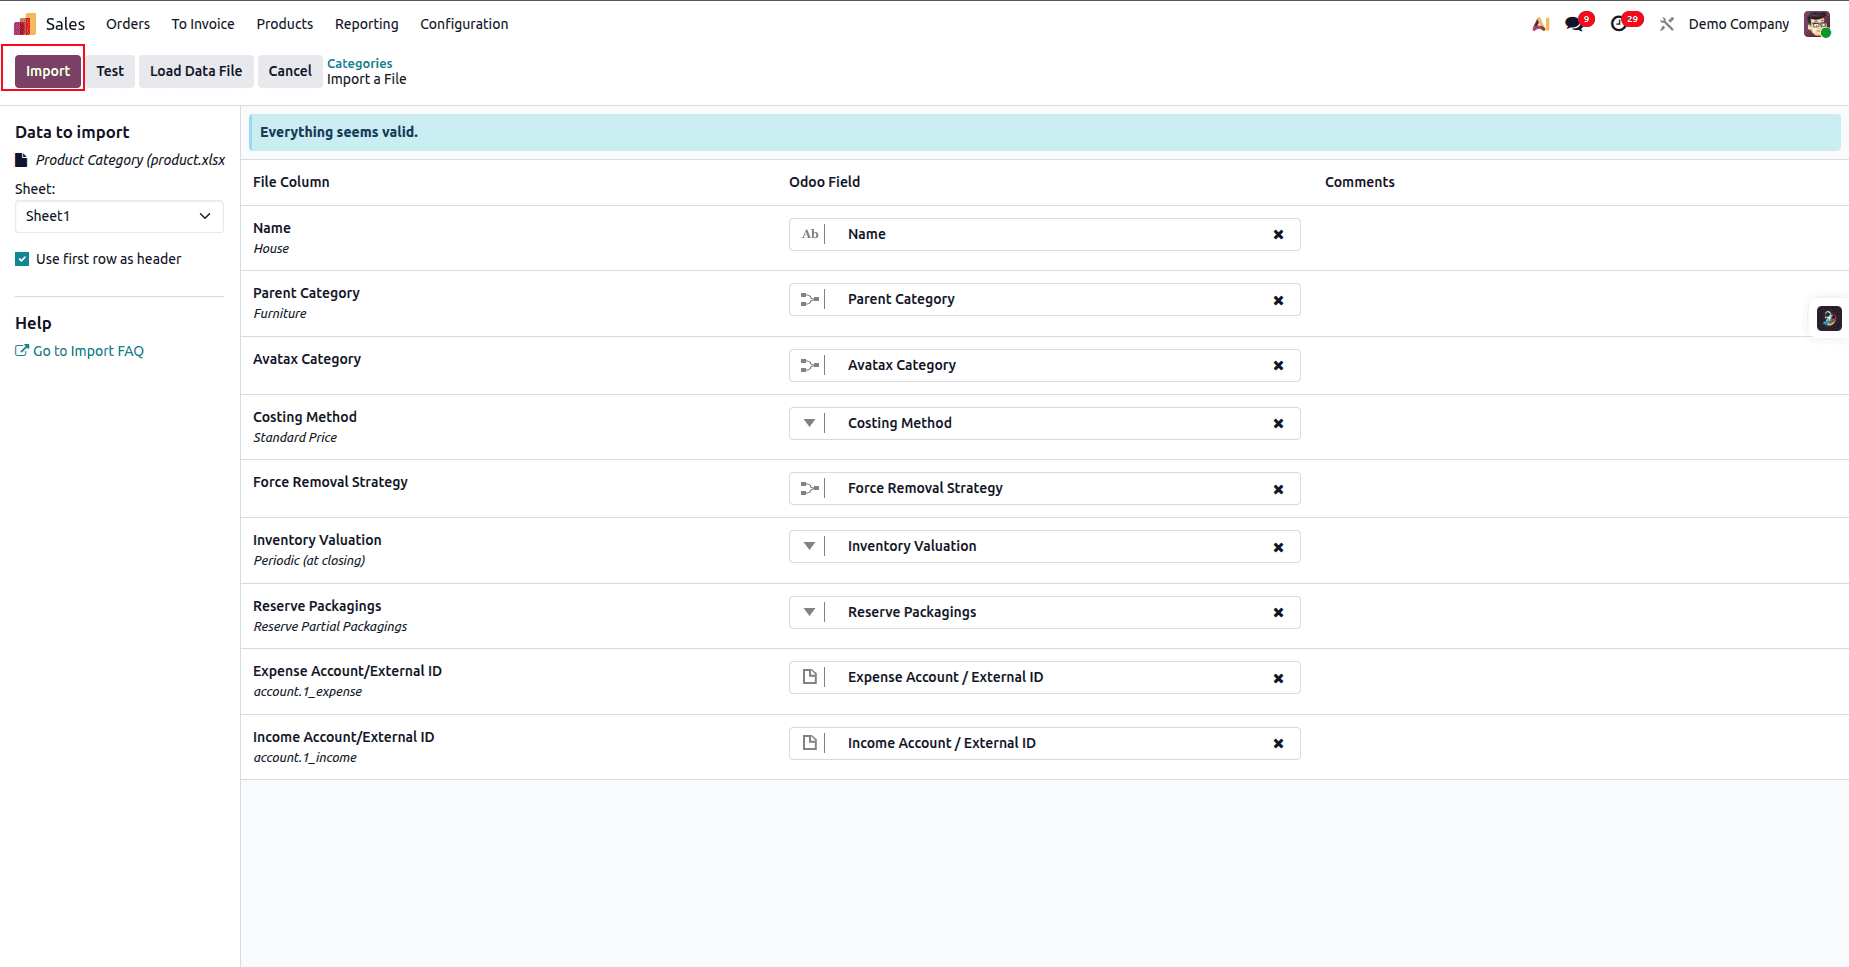
Once the test is successful, you’re ready to import the data into Odoo. Simply click the Import button to complete the process.
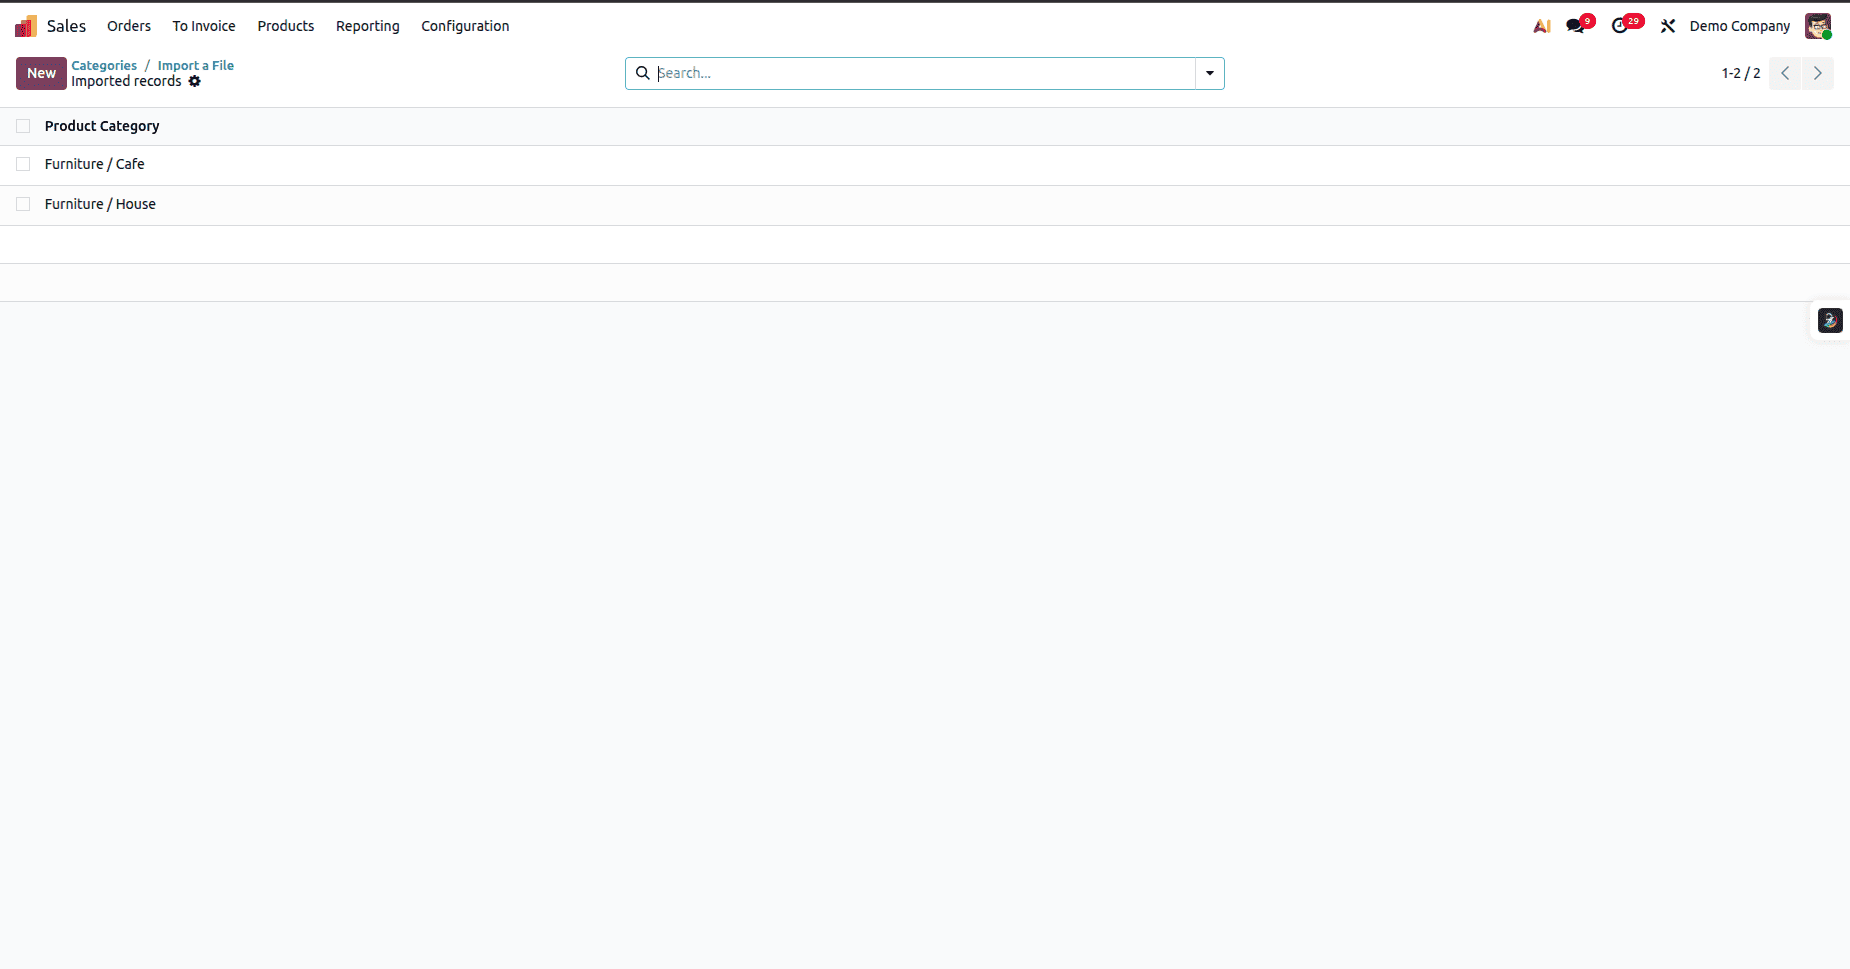
After the import is completed, you’ll be able to see that the categories have been successfully added to Odoo.
Import Product Variants:
Importing product attributes is a crucial step to complete before bringing in your products. If the products you plan to import require attributes that don’t already exist in Odoo, you must add those attributes first. Only after the attributes are in place can you successfully import products along with their variants.

To import product attributes, open the Sales module, go to the Configuration menu, and select Attributes under the Products section. This page will display all the active attributes currently available in Odoo.
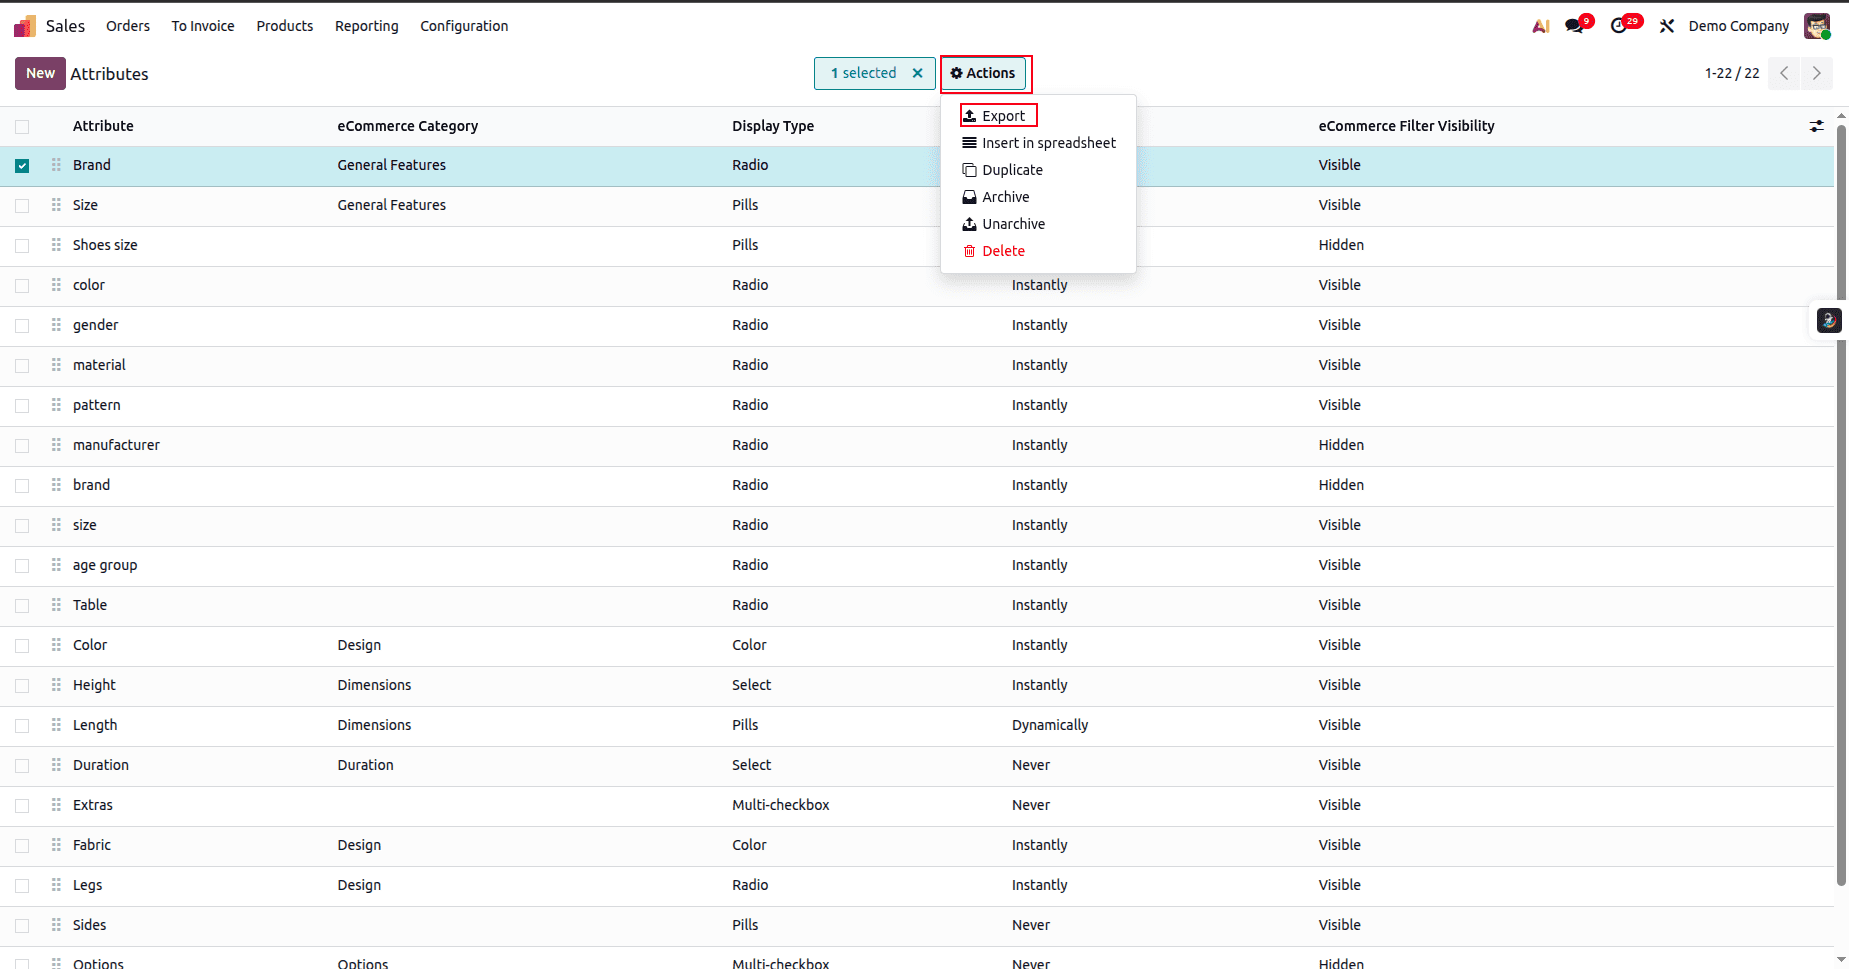
Select any attribute from the list, then click Actions and choose Export from the dropdown menu.
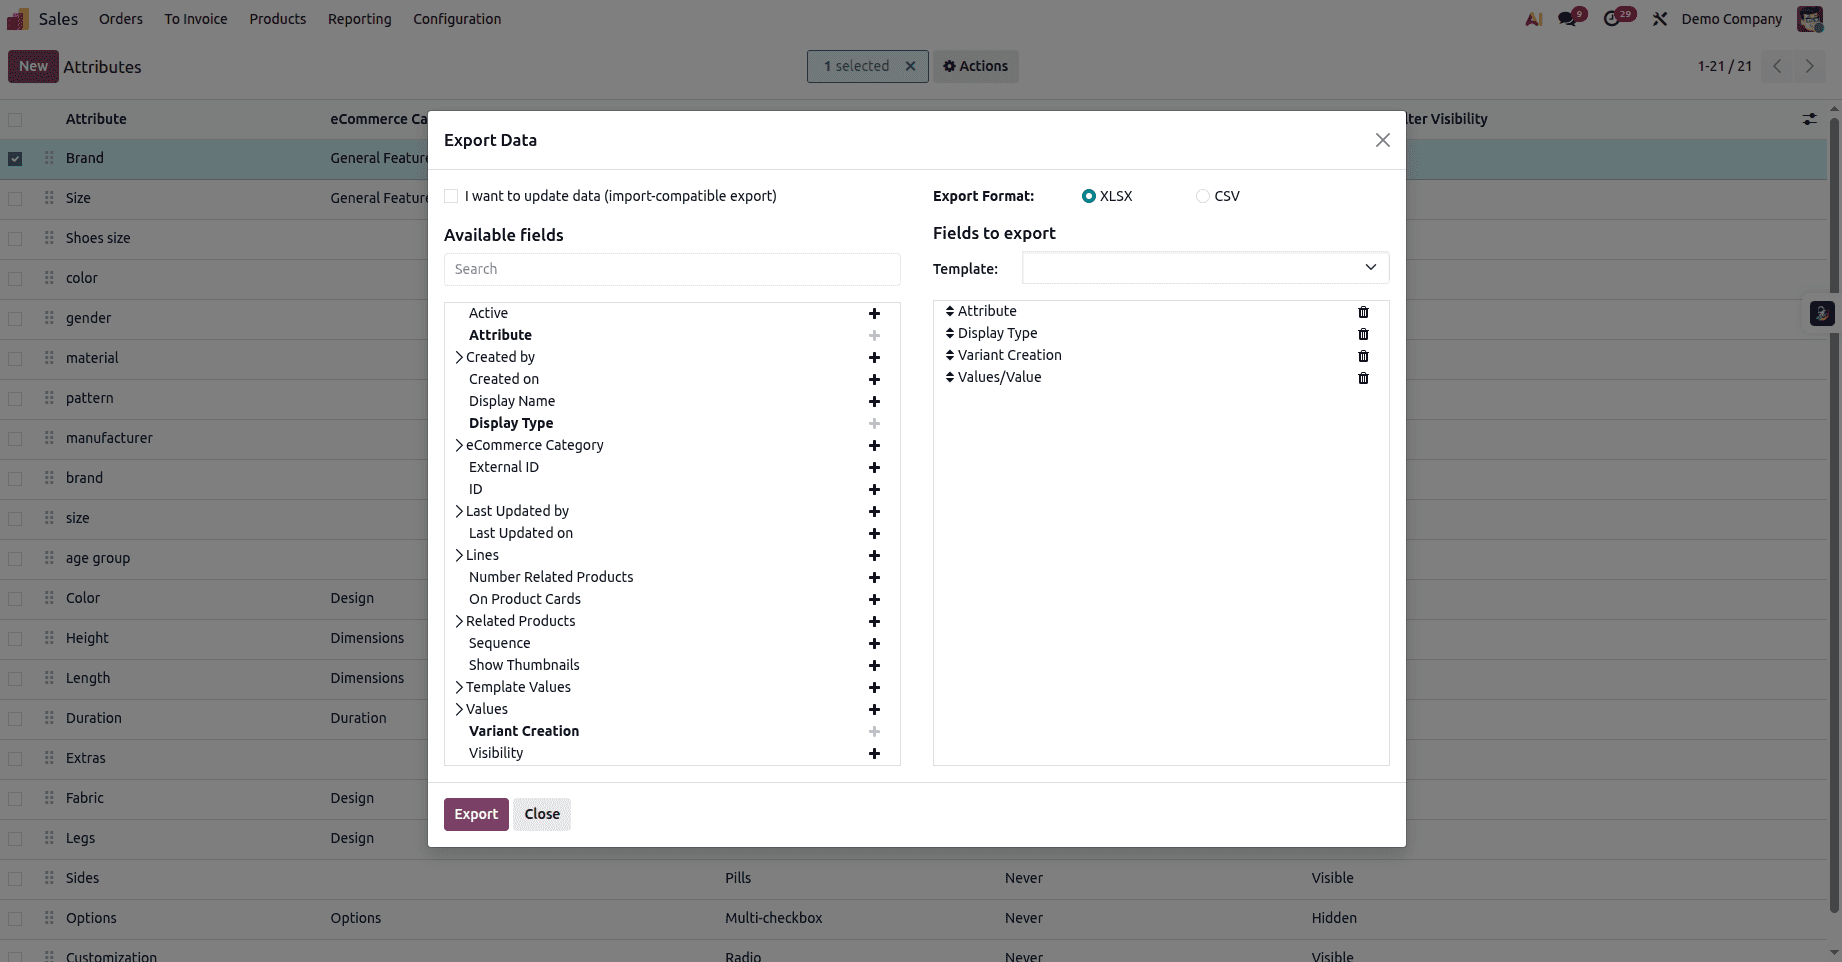
Click the + icon next to the fields you want to export in the Available Fields list. This will add them to the export list. Then click the Export button to download the XLSX file.

The downloaded Excel file will look similar to this. Update the column values to create a new attribute, set its display type, define the variant creation mode, and add the corresponding attribute values.
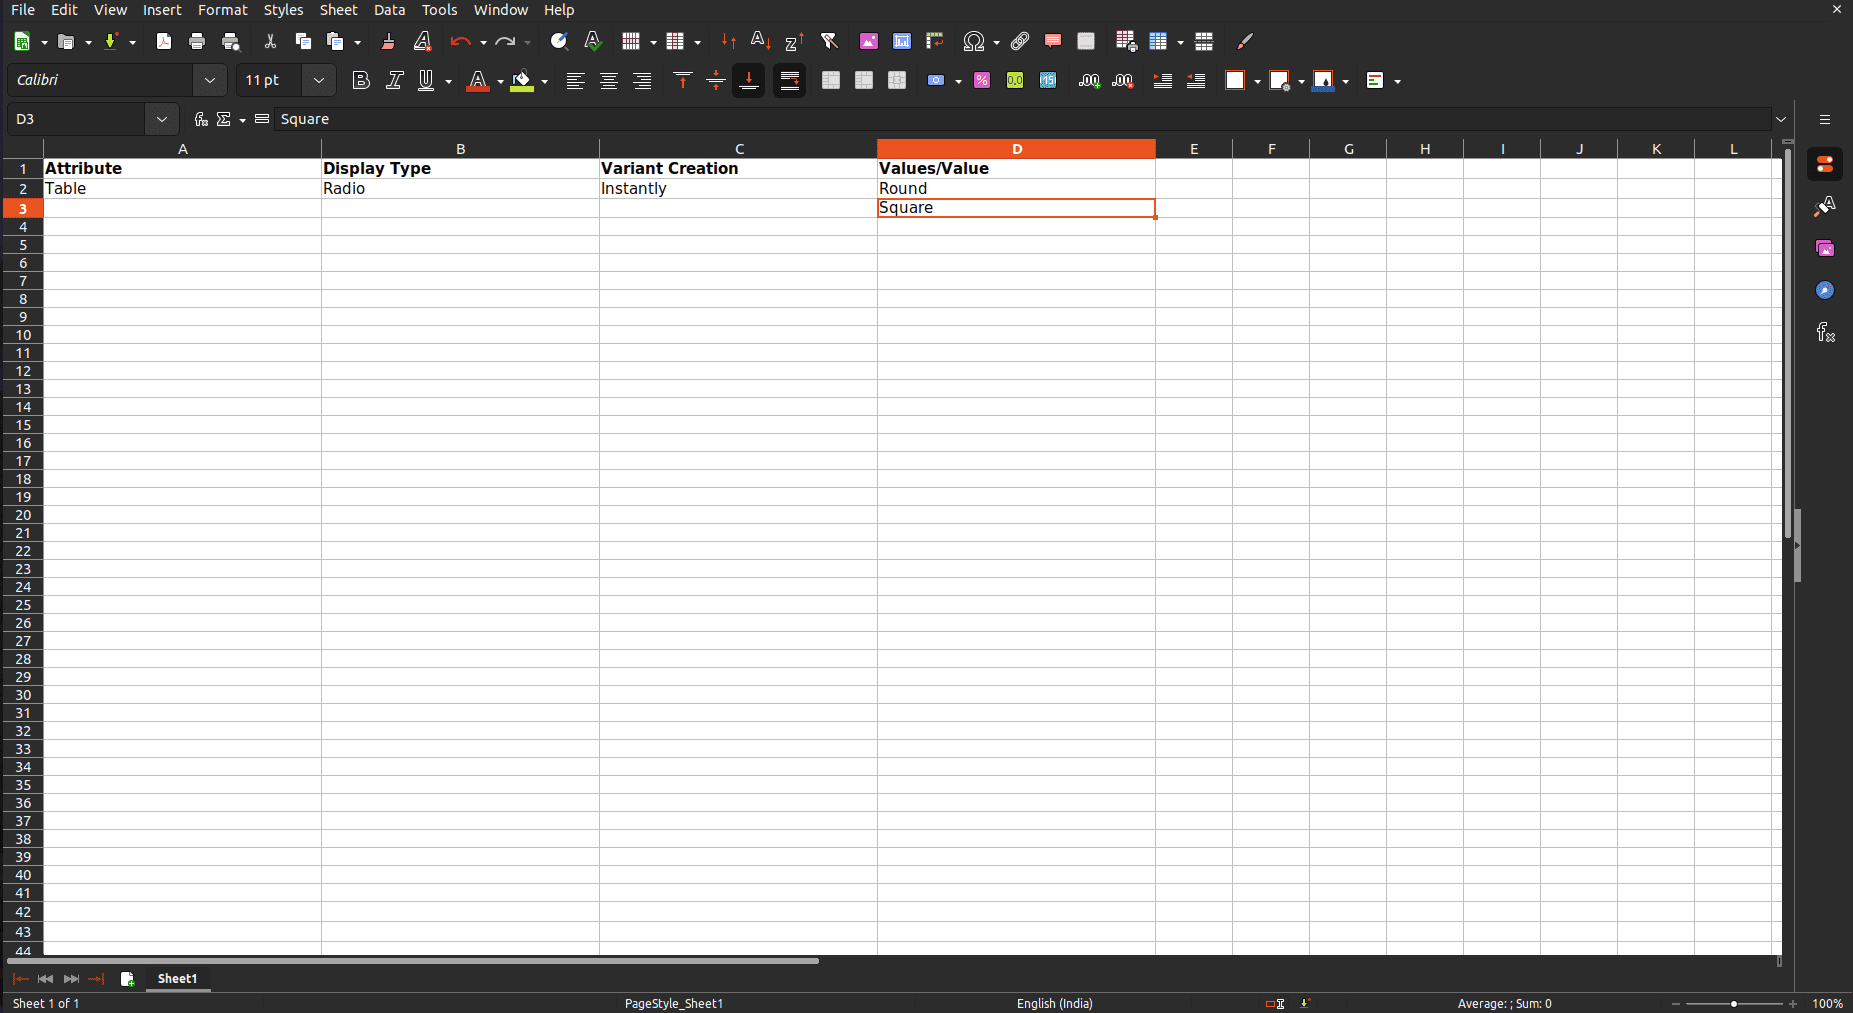
Created a new attribute entry with the values Round and Square added to the attribute table.
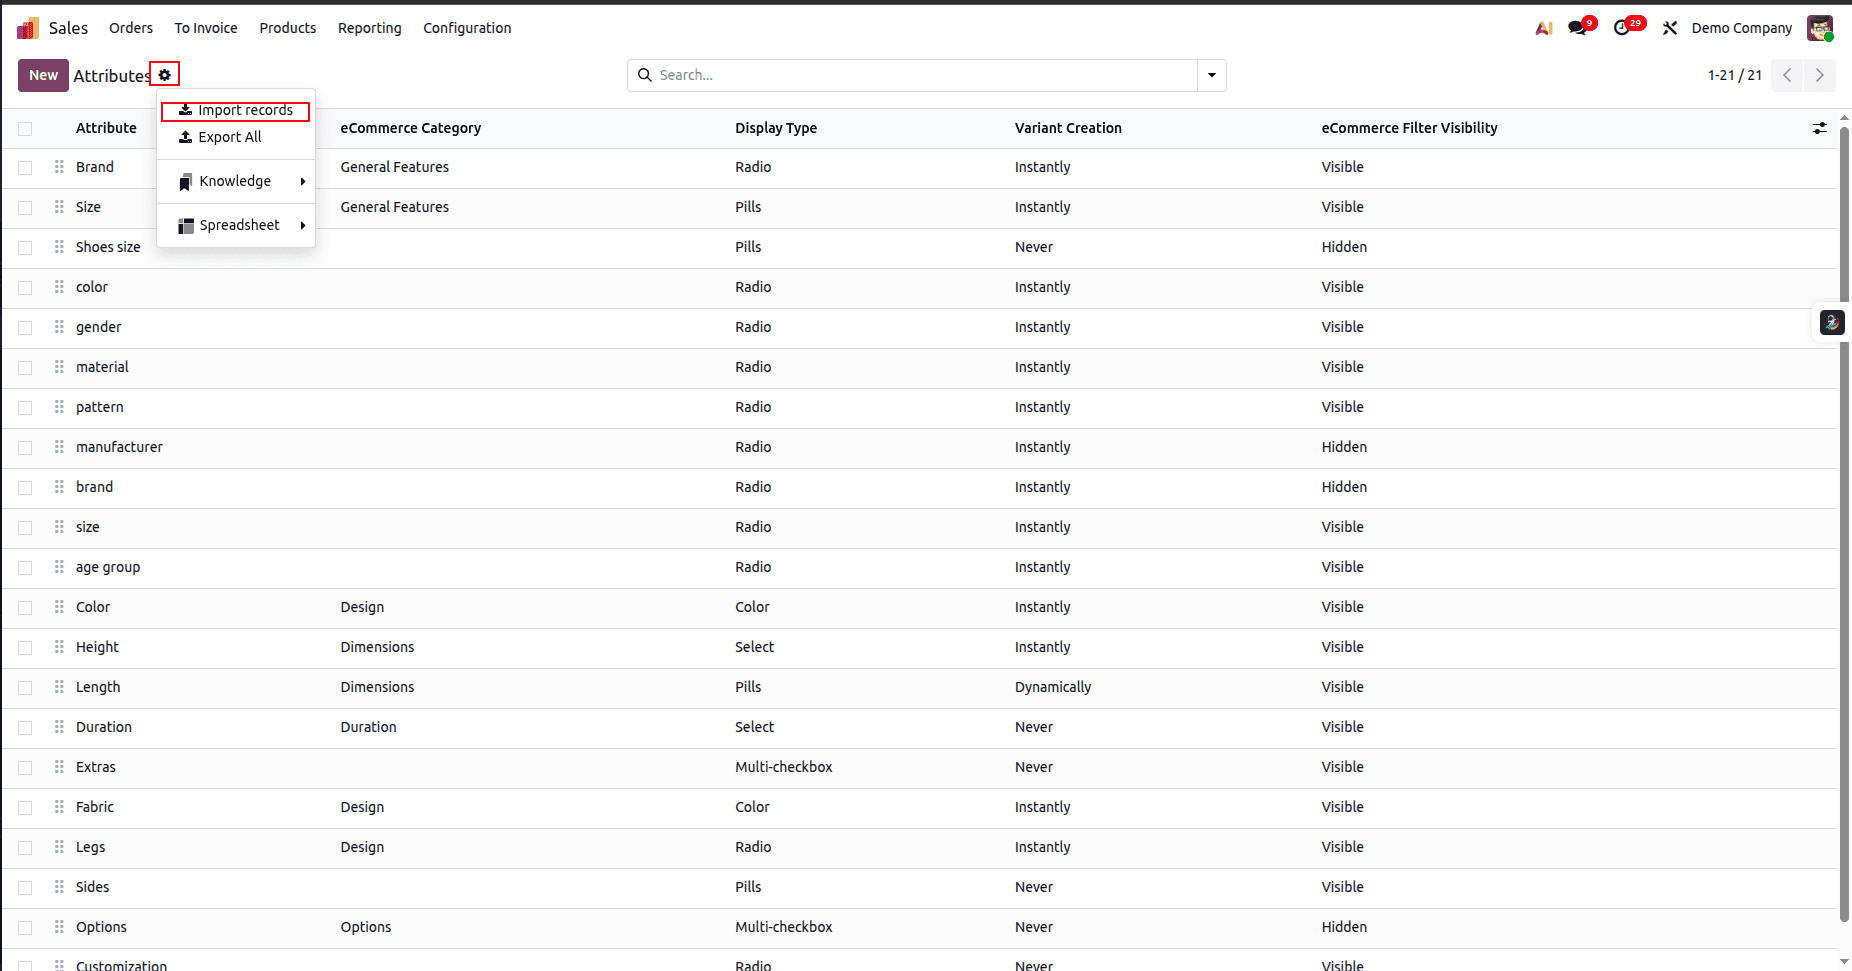
Click the gear icon, choose Import Records from the dropdown, and upload the newly saved Excel file.

Test the uploaded file by clicking the Test button.
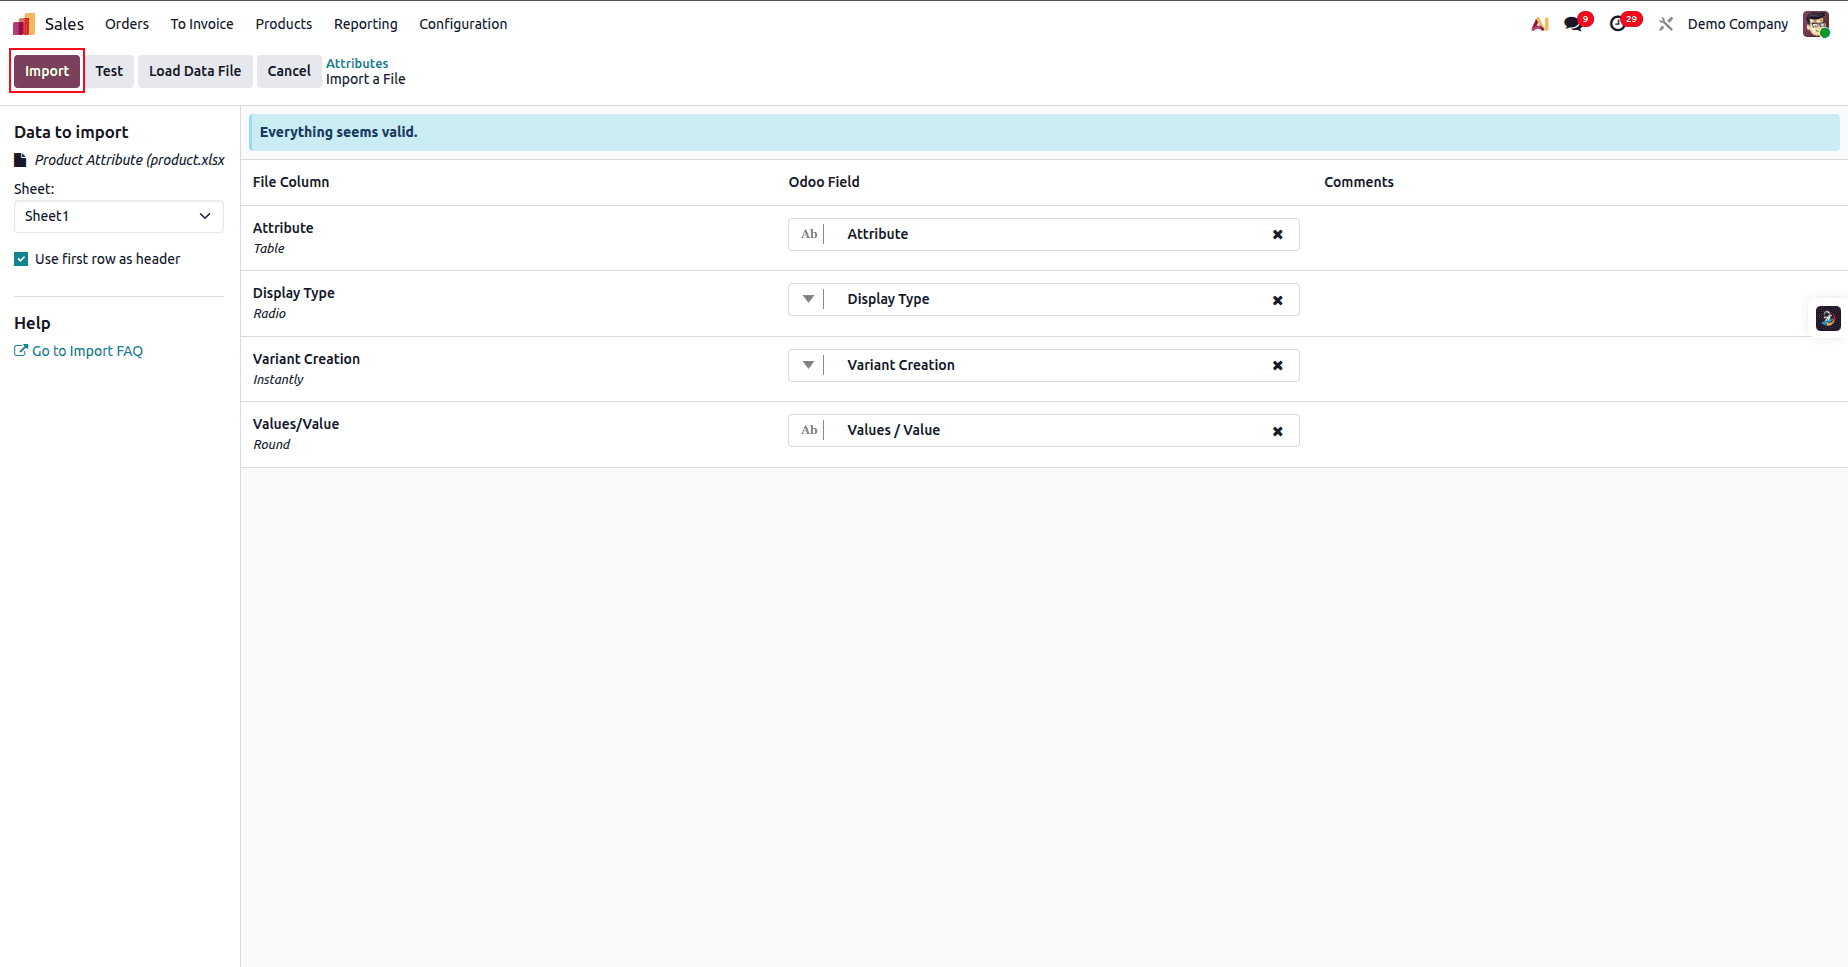
Once the test is completed successfully, click the Import button to import the newly added attribute into Odoo.
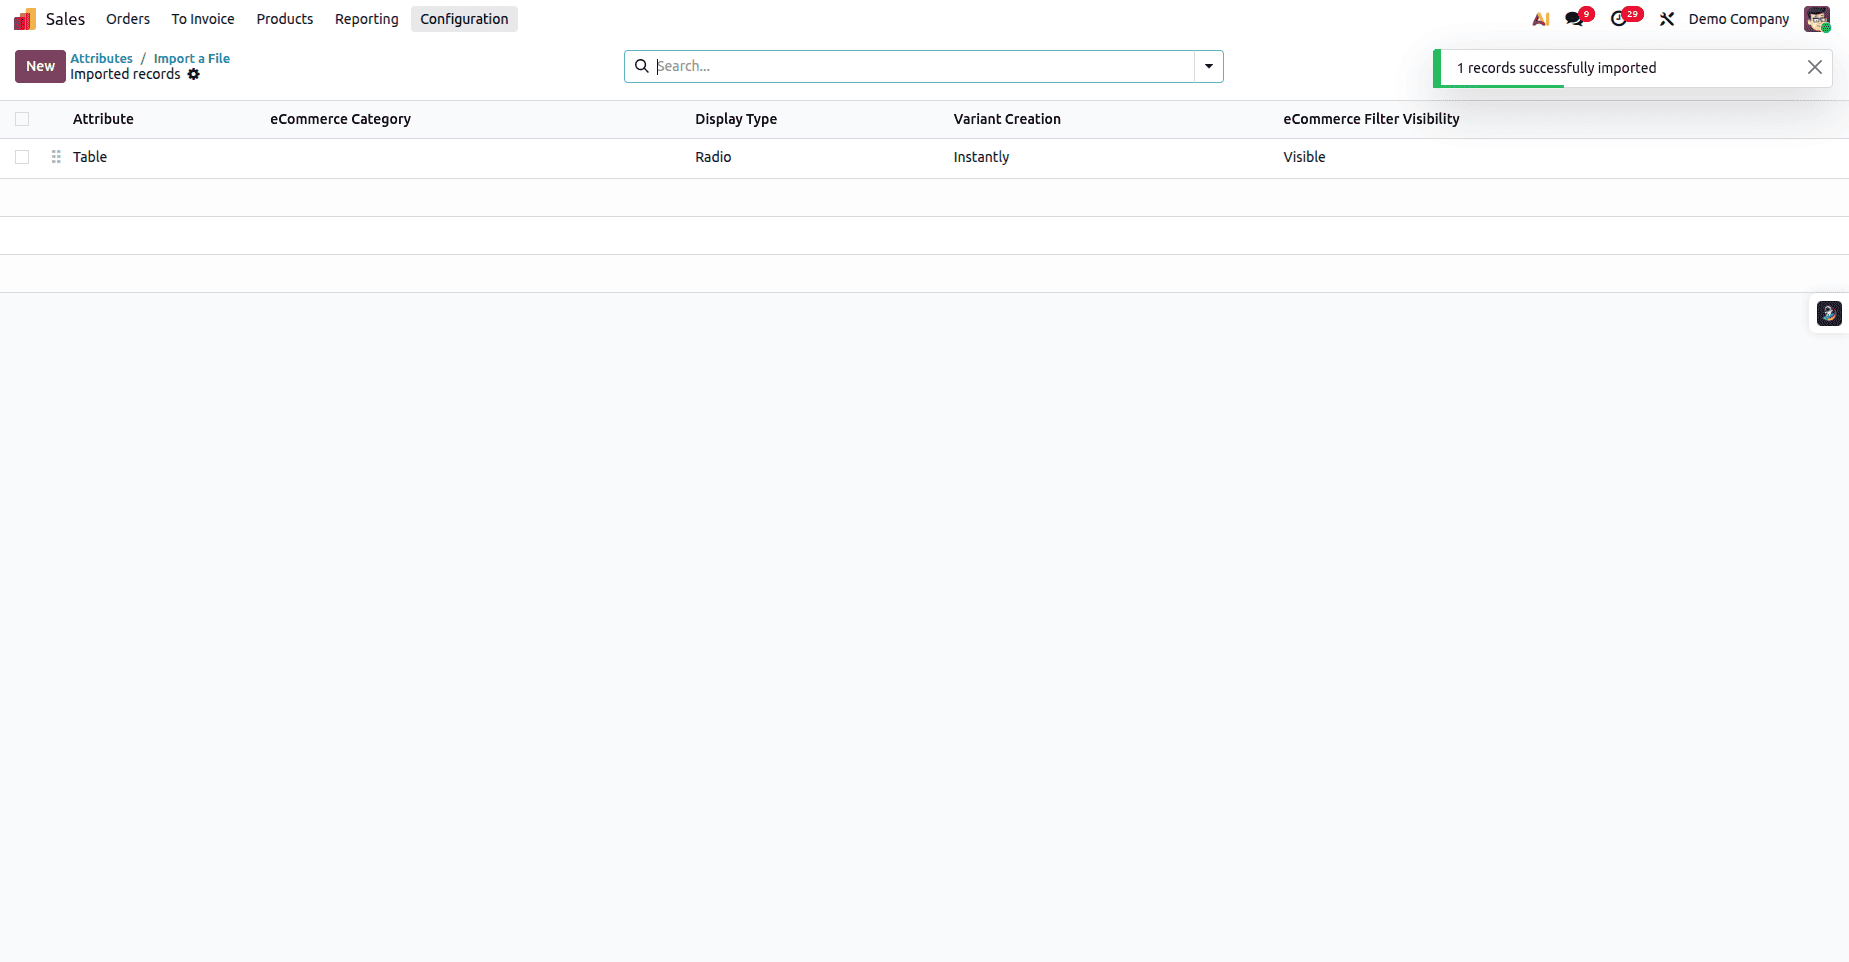
After the import is complete, you’ll see the newly added attribute in Odoo along with a success message.
Import Product:
Once your product categories and attributes are properly set up, you’re ready to import the actual products into Odoo. Product import is a key step in building your catalog, ensuring every item is accurately defined with the right details, variants, pricing, and classifications. By exporting a template, updating it with your product data, and importing it back into Odoo, you can quickly create a clean, structured, and scalable product list. In this section, we’ll walk through the step-by-step process of preparing, editing, and importing product records efficiently and without errors.
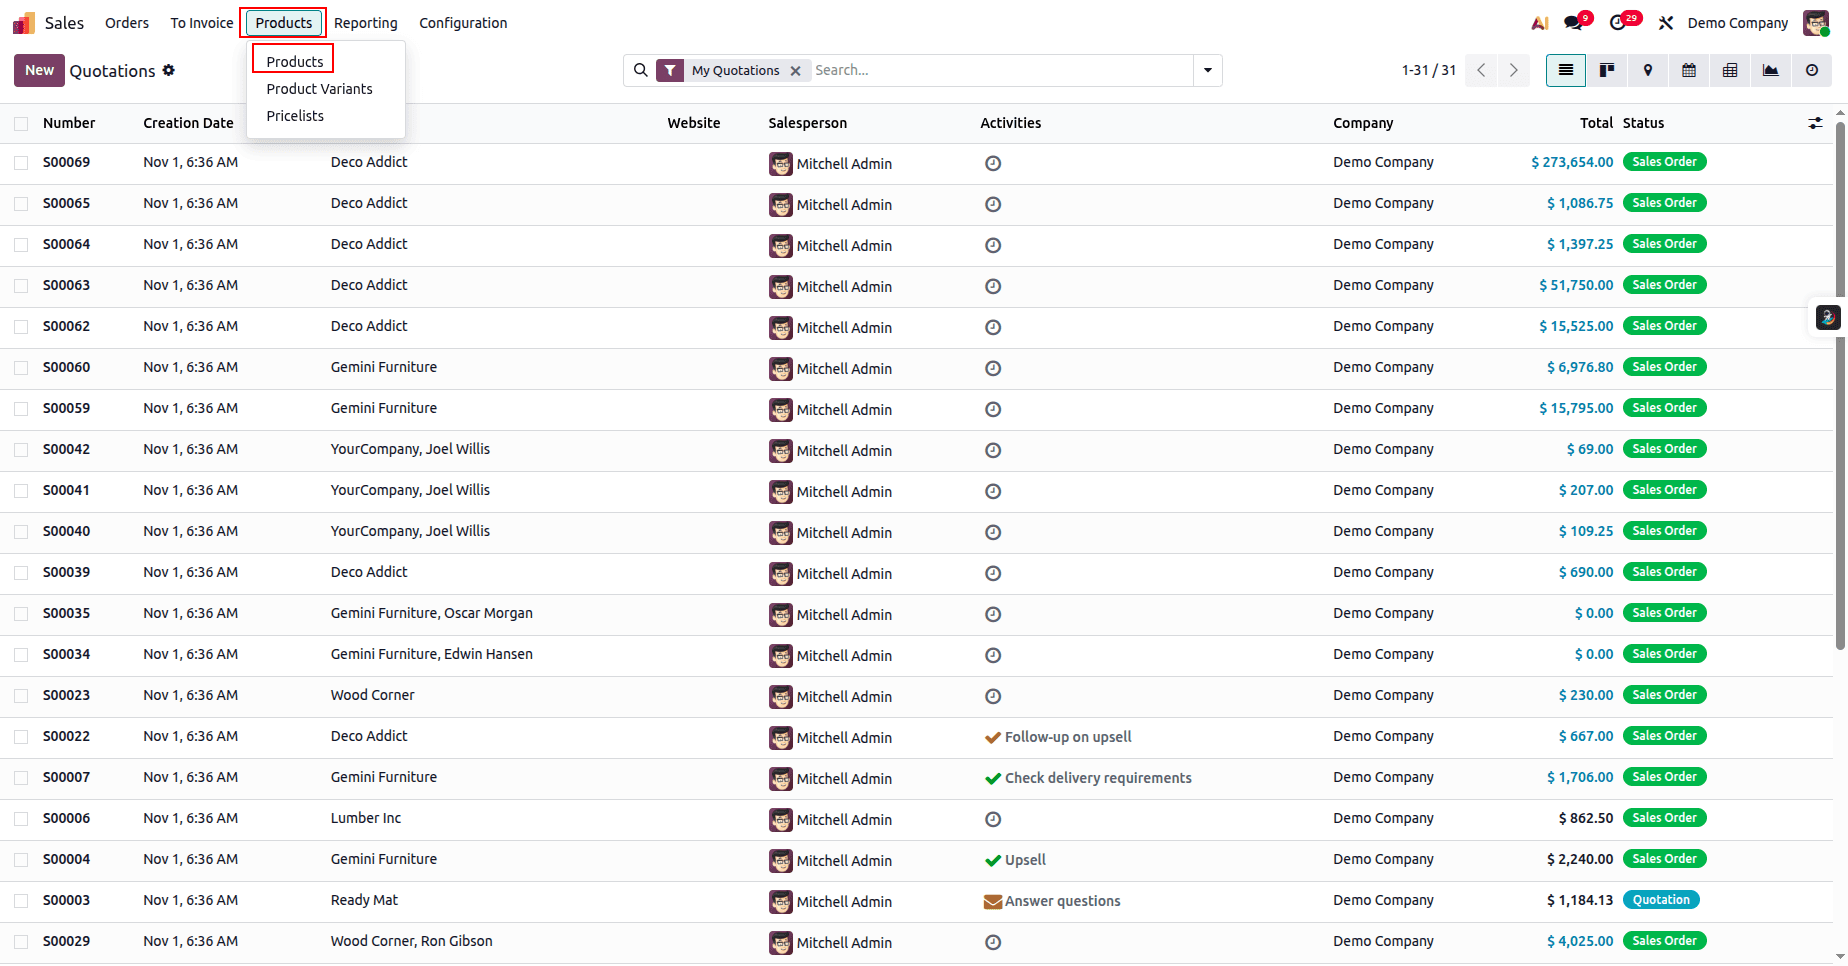
To import products, open the Sales Management module, select the Products menu, and choose Products from the dropdown.
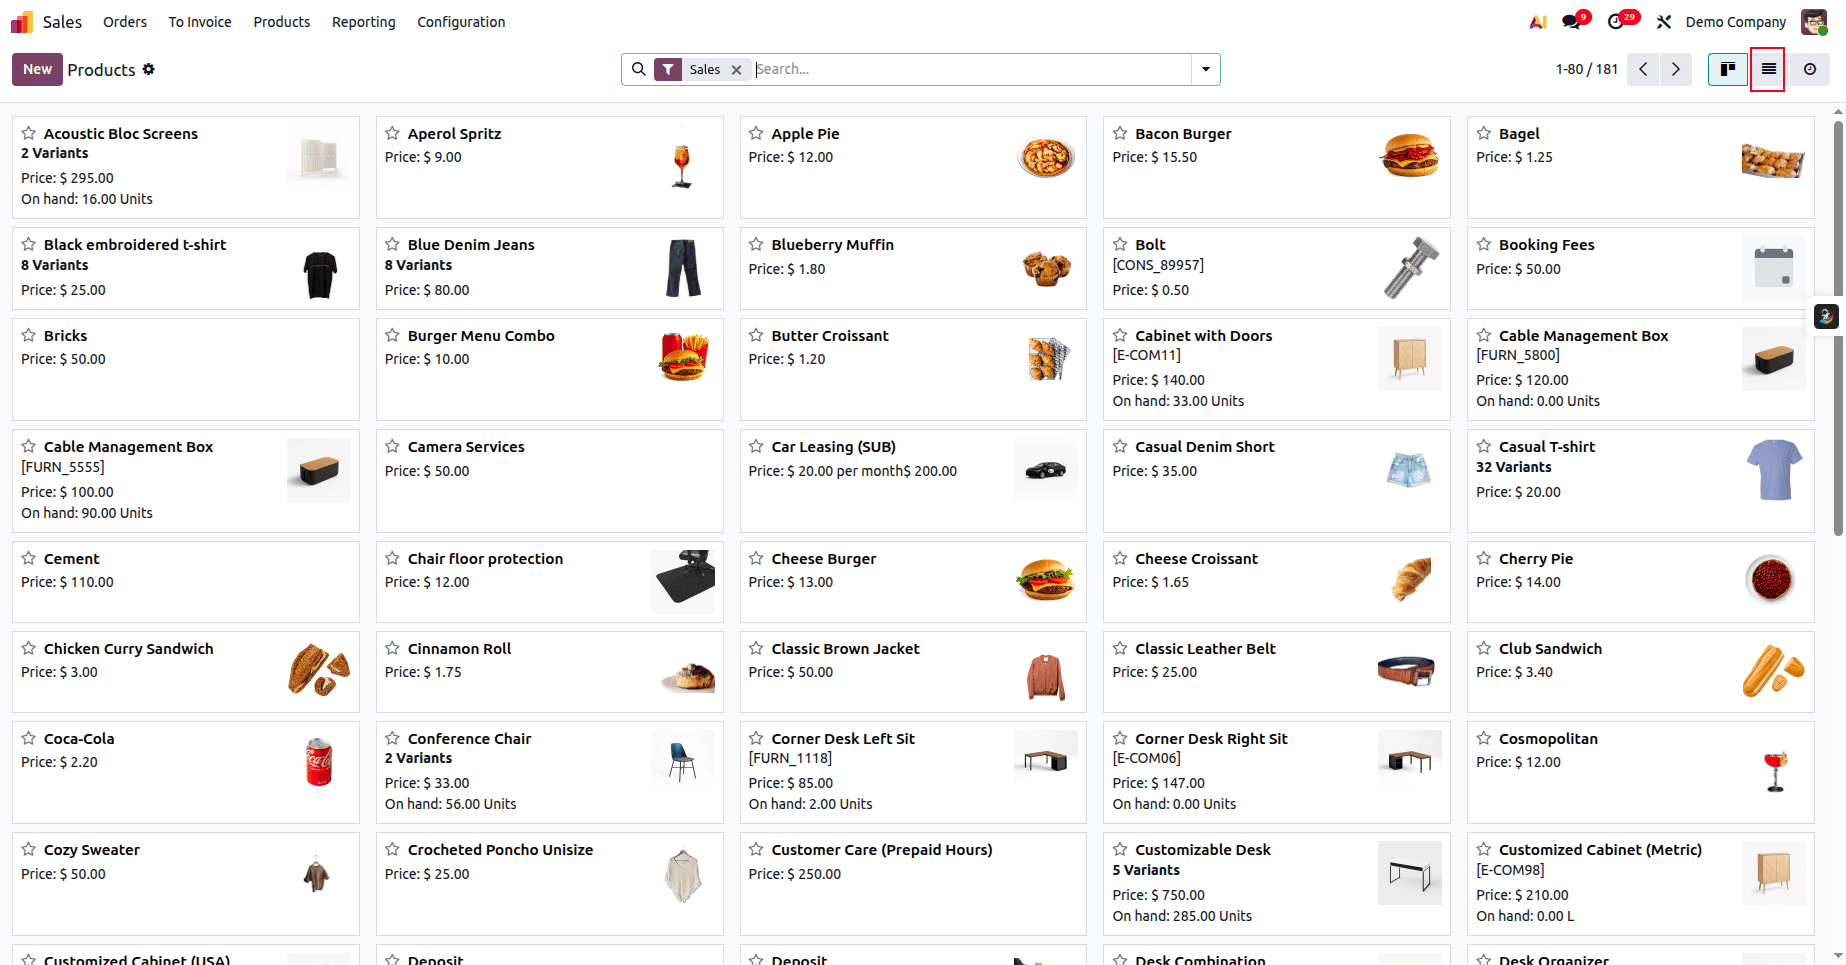
The products will initially appear in Kanban view. Click the three horizontal lines in the top-right corner of the screen to switch to List view.
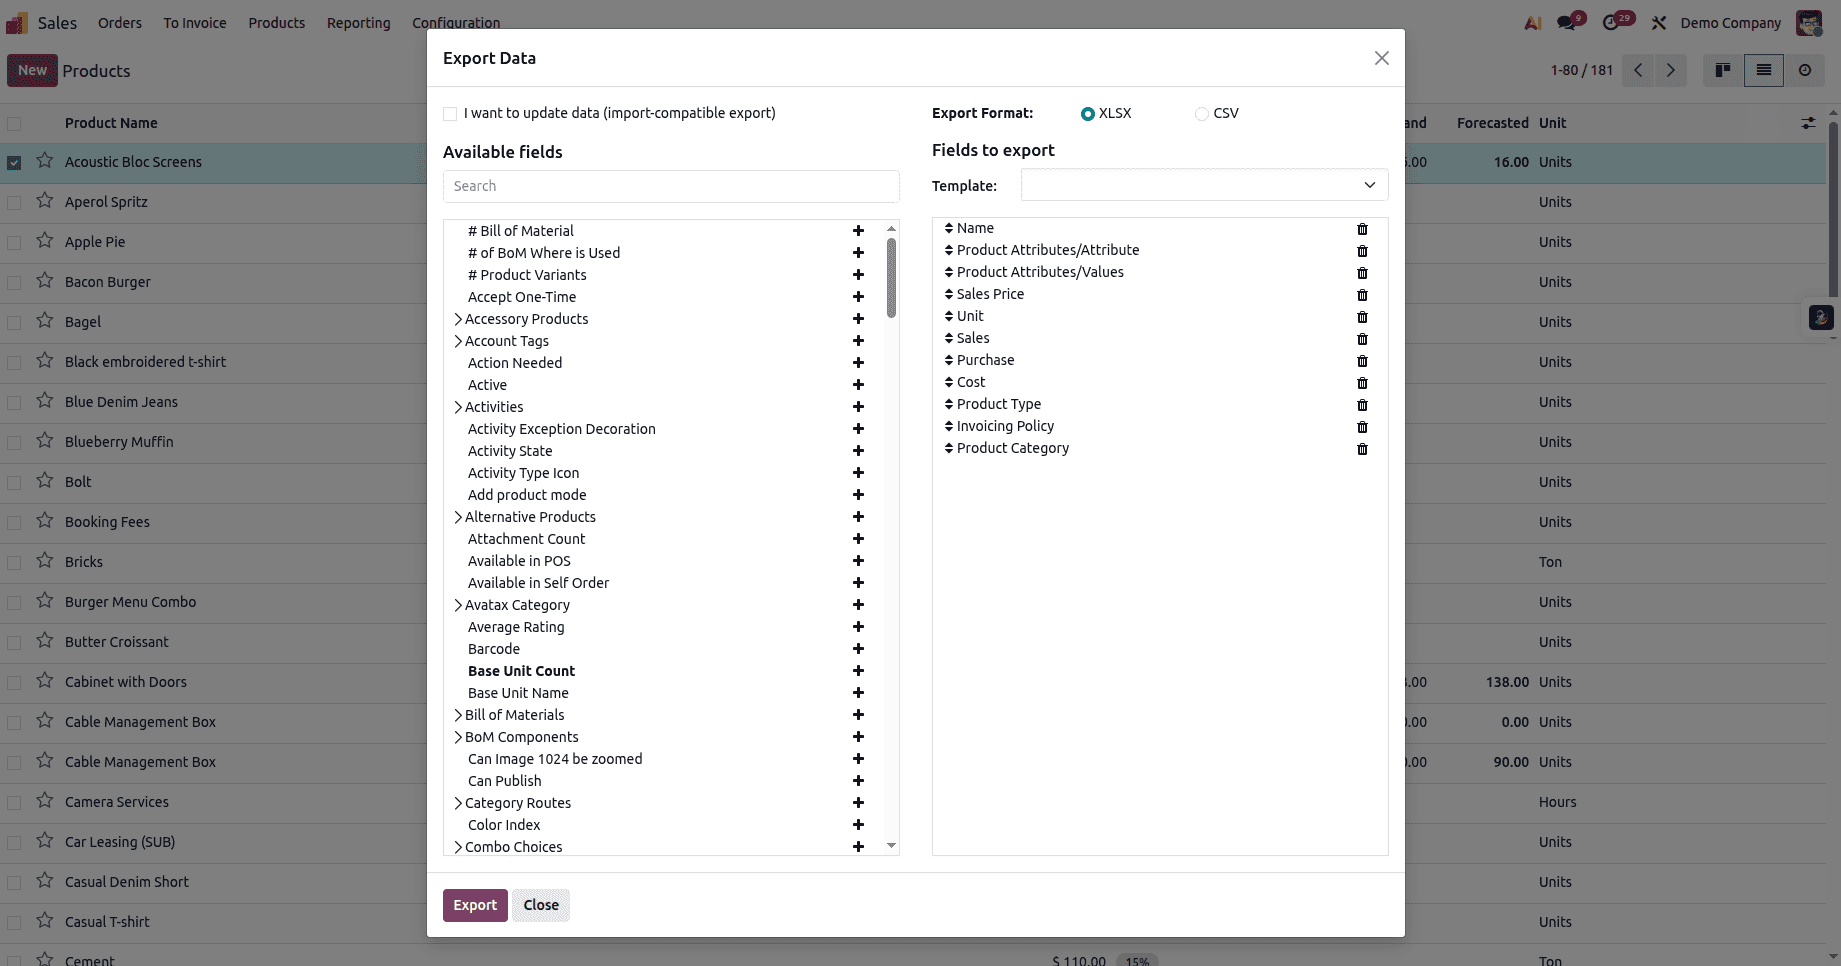
Add the required fields to the export list, then click the Export button.
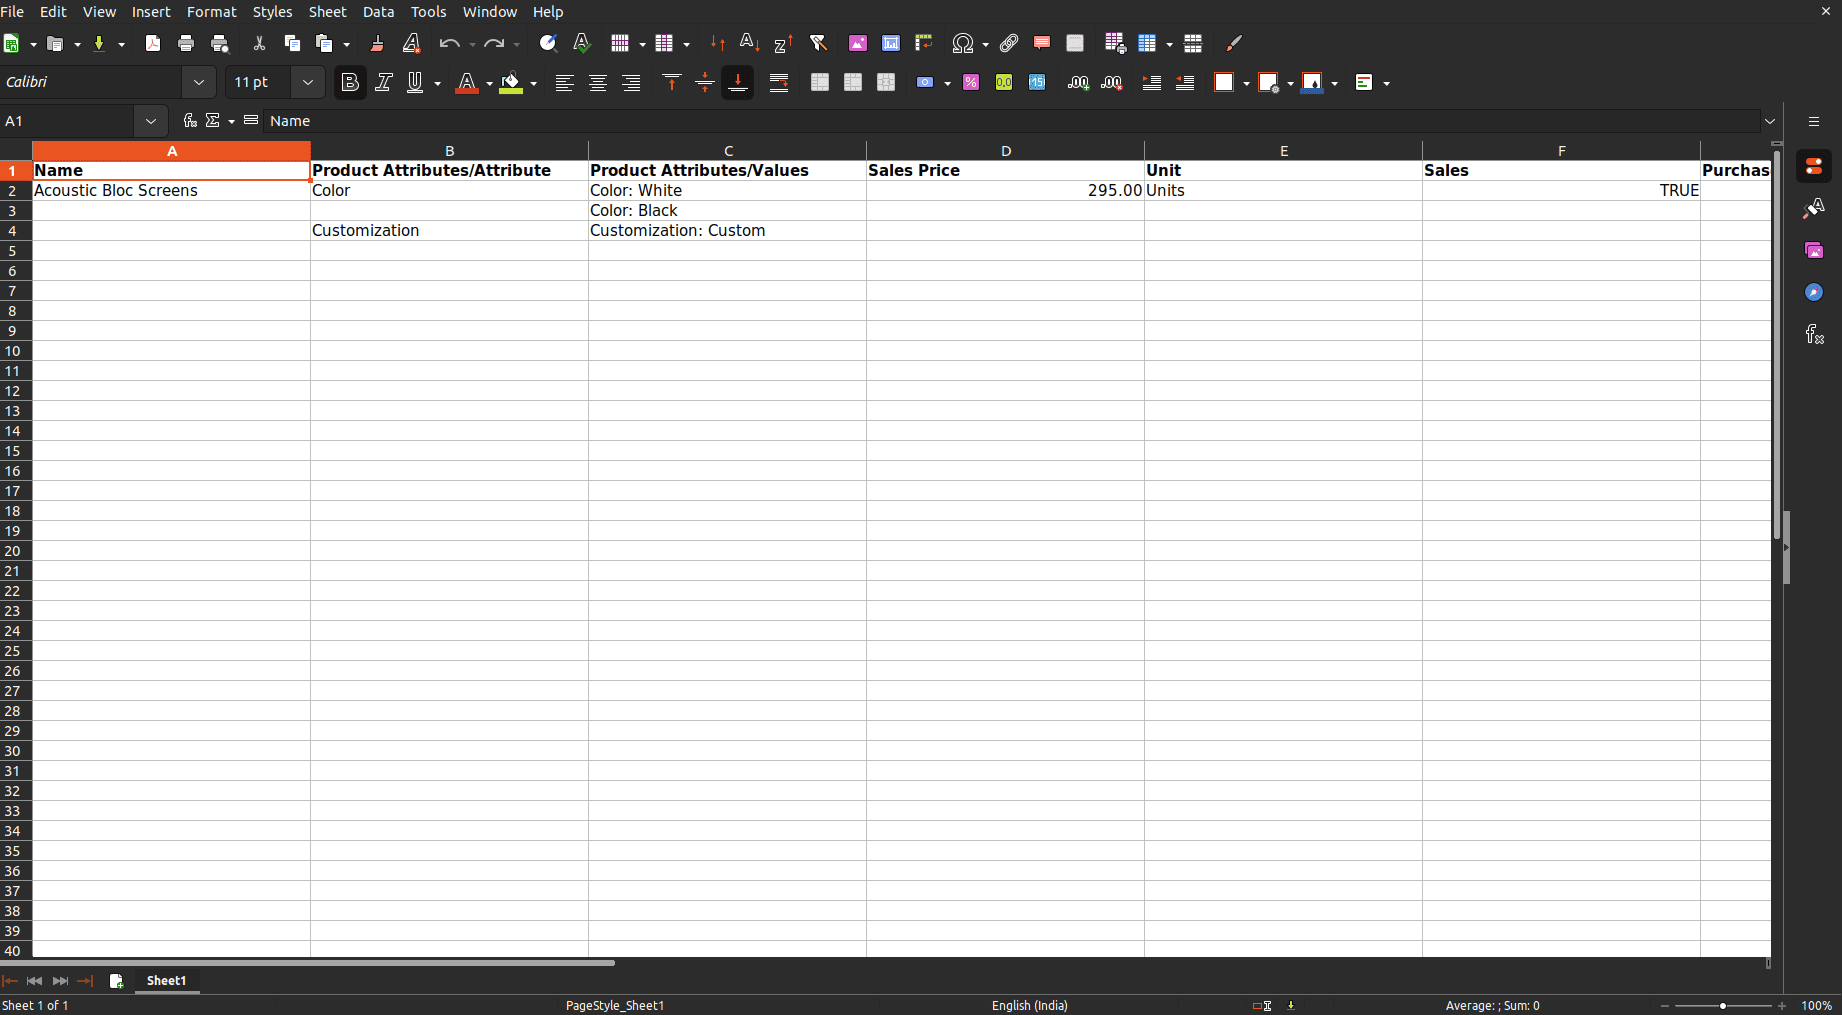
The downloaded Excel file will contain the details of the exported products. You can modify this file to add new product entries.
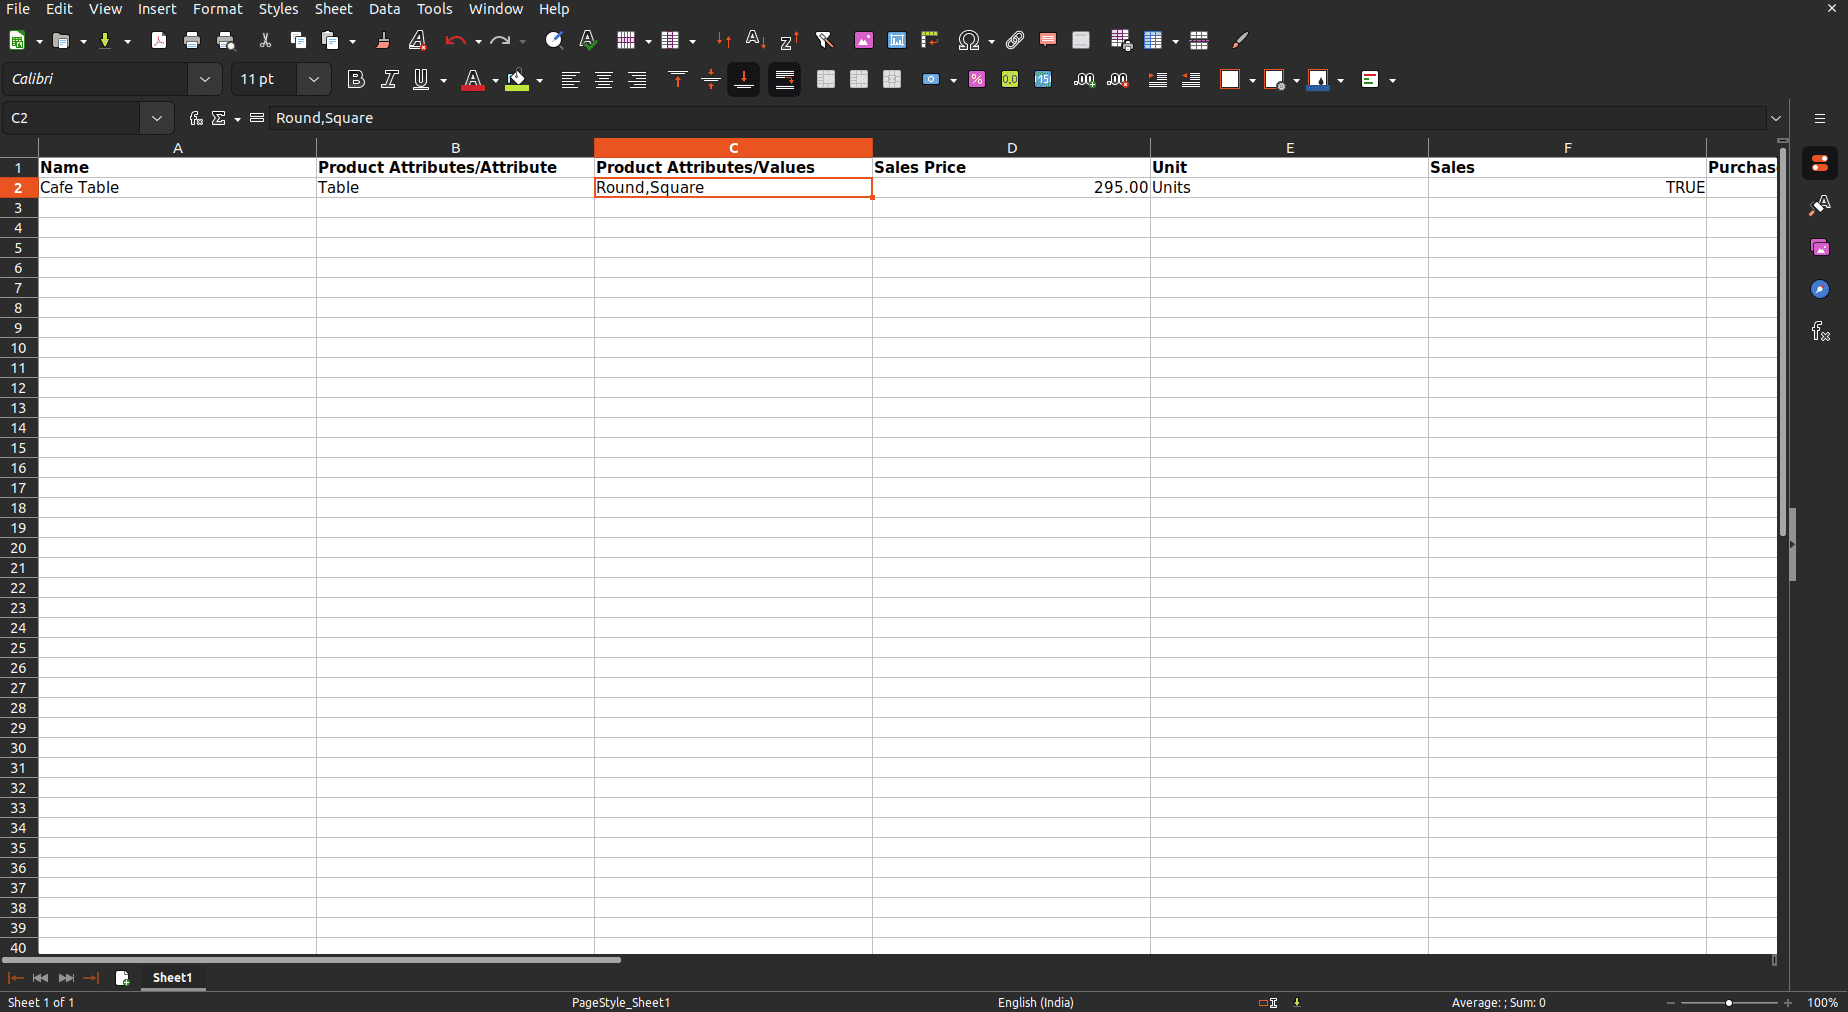
In the downloaded Excel file, you may see attribute values formatted like Color:White. Update these as needed, and if you want to add multiple attribute values, list them in the same cell separated by commas. Make sure there are no spaces before or after the commas. After making the changes, save the file.
Repeat the same process to import the updated file—upload the data file and run the test to validate it.

Once the test is successful, click the Import button to import the product.
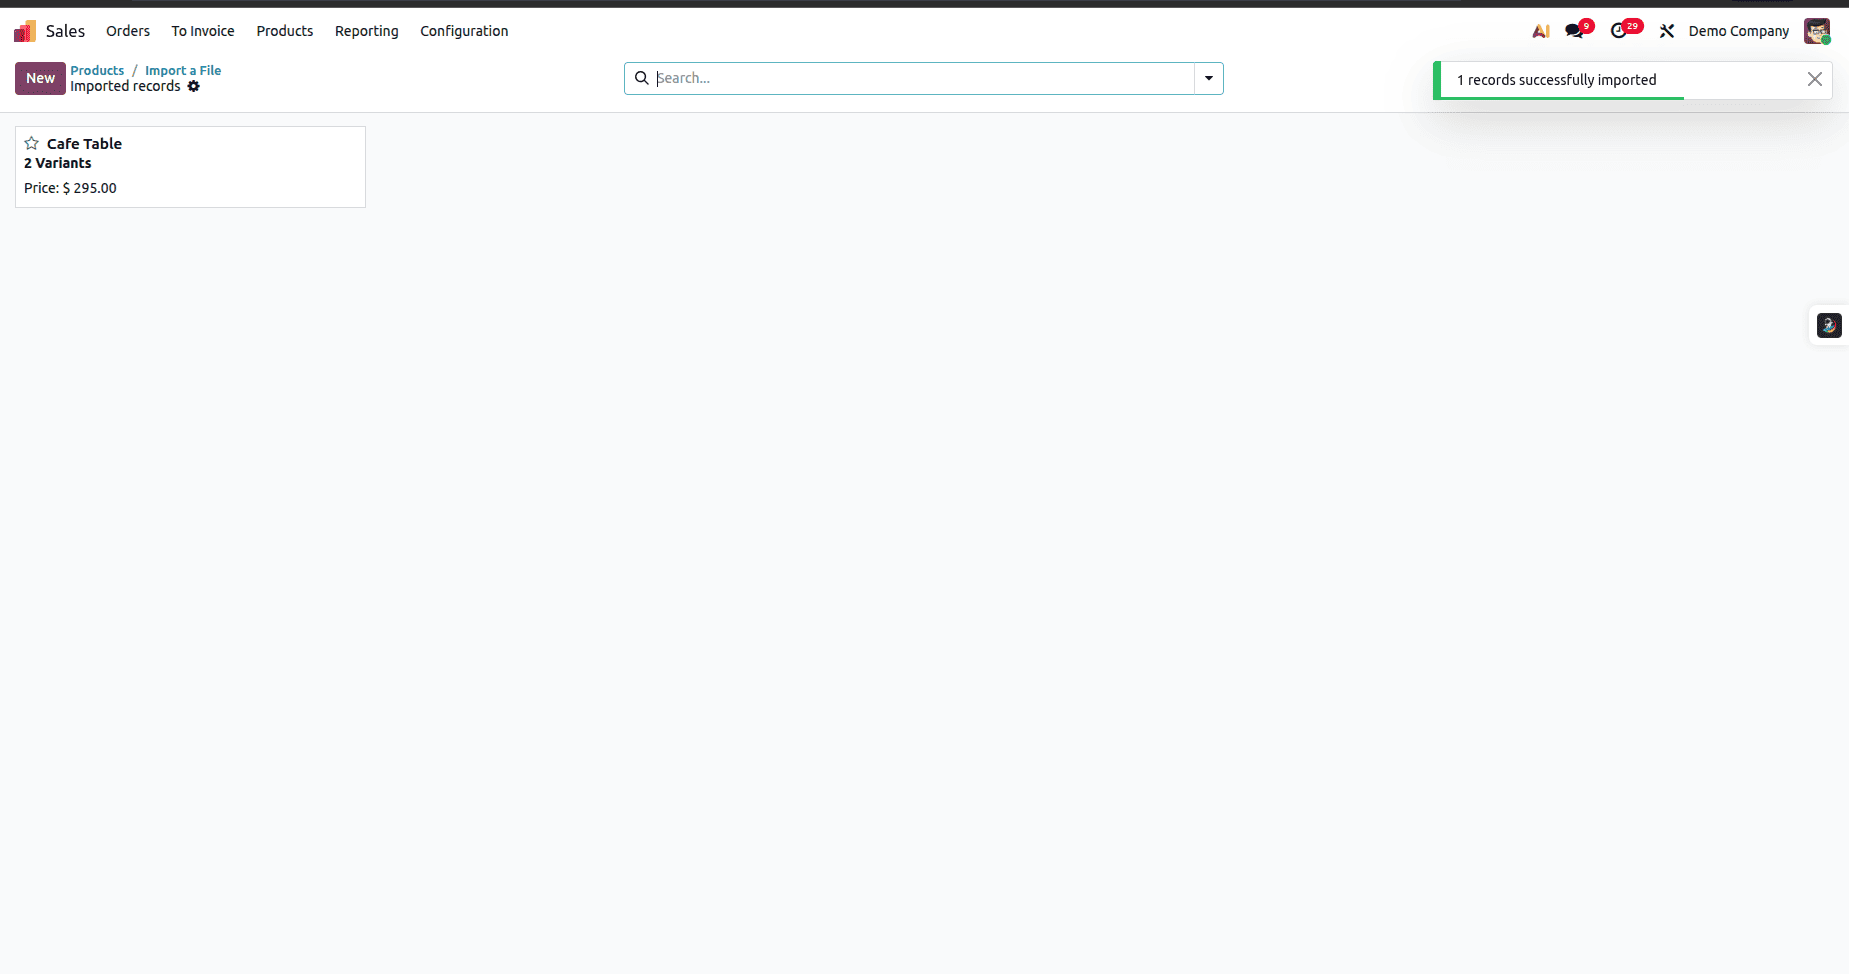
You will now see that the product has been successfully imported.
Import Customers Or Vendors
Importing customers and vendors follows the same process, since both are managed under the Contacts model in Odoo. The only difference between them comes from how they are used in sales and purchase workflows.
If you have only the Sales module installed, open the Sales app and select Customers from the Orders dropdown.
If you have only the Purchase module installed, open the Purchase app and select Vendors from the Orders dropdown.
From there, you can continue with the contact import process by selecting any record from the list view and following the same steps used for importing customers or vendors.
So let’s import contacts
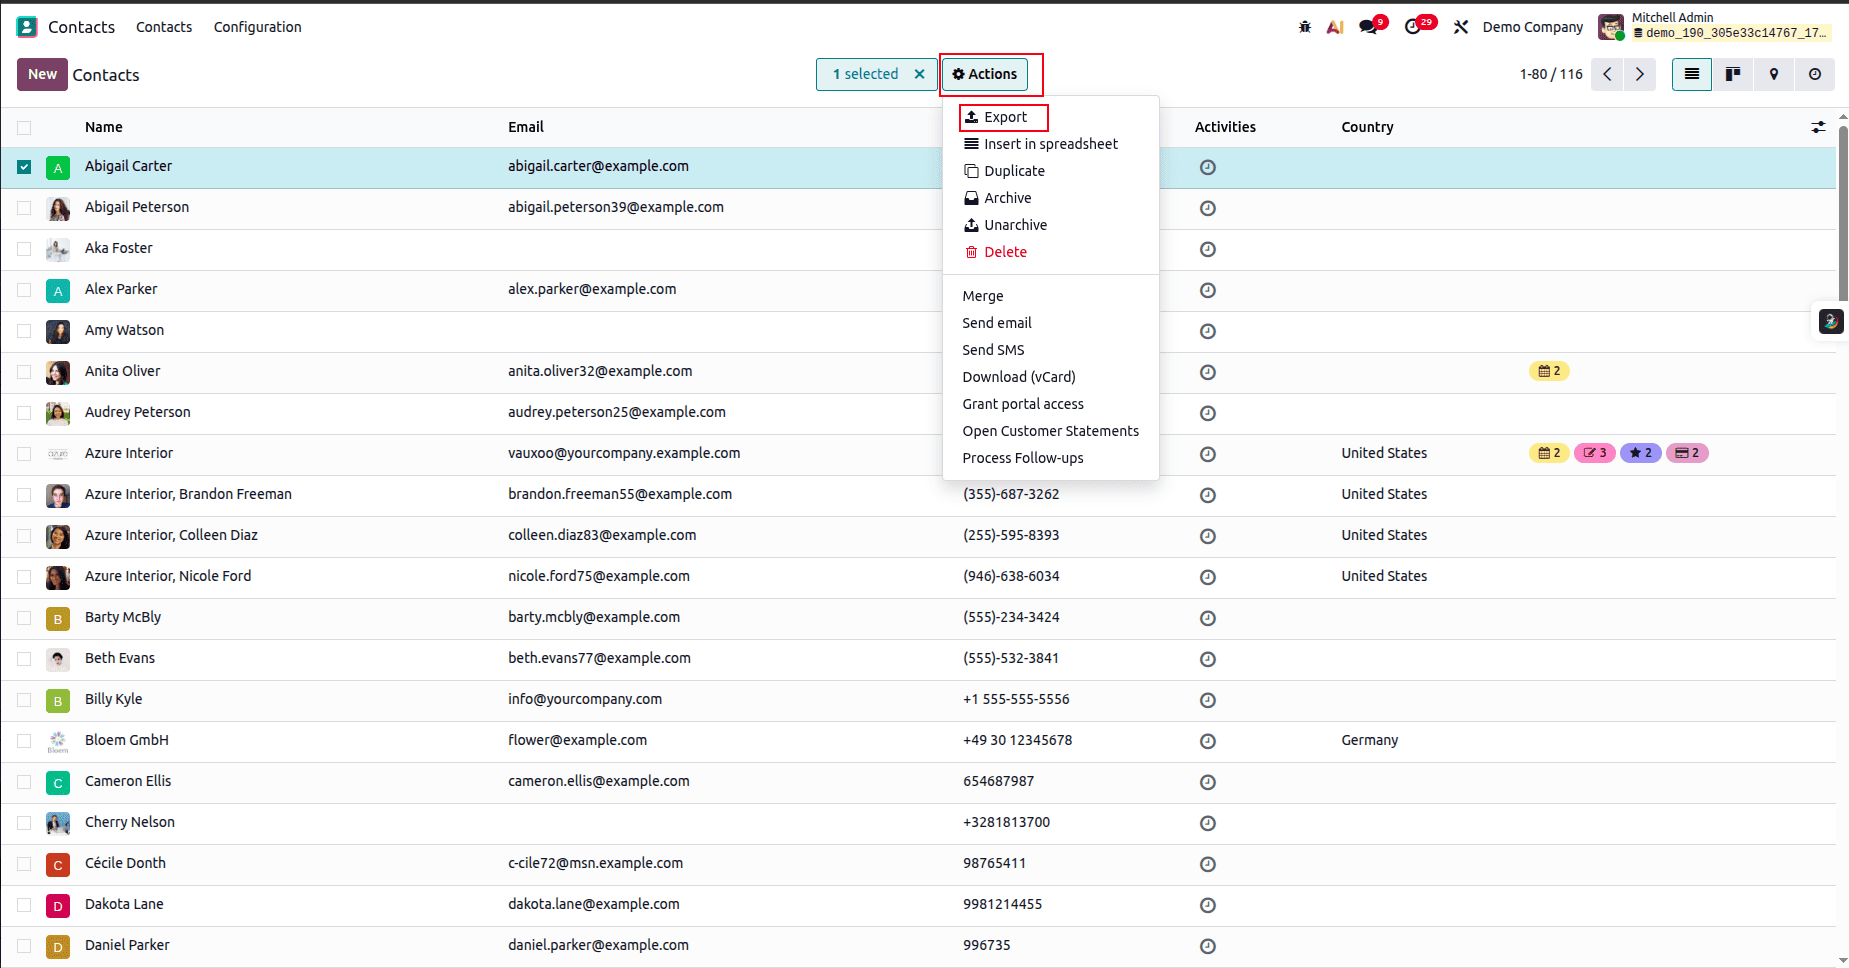
Open the Contacts module, select any contact from the list, then click Action to open the dropdown and choose Export.
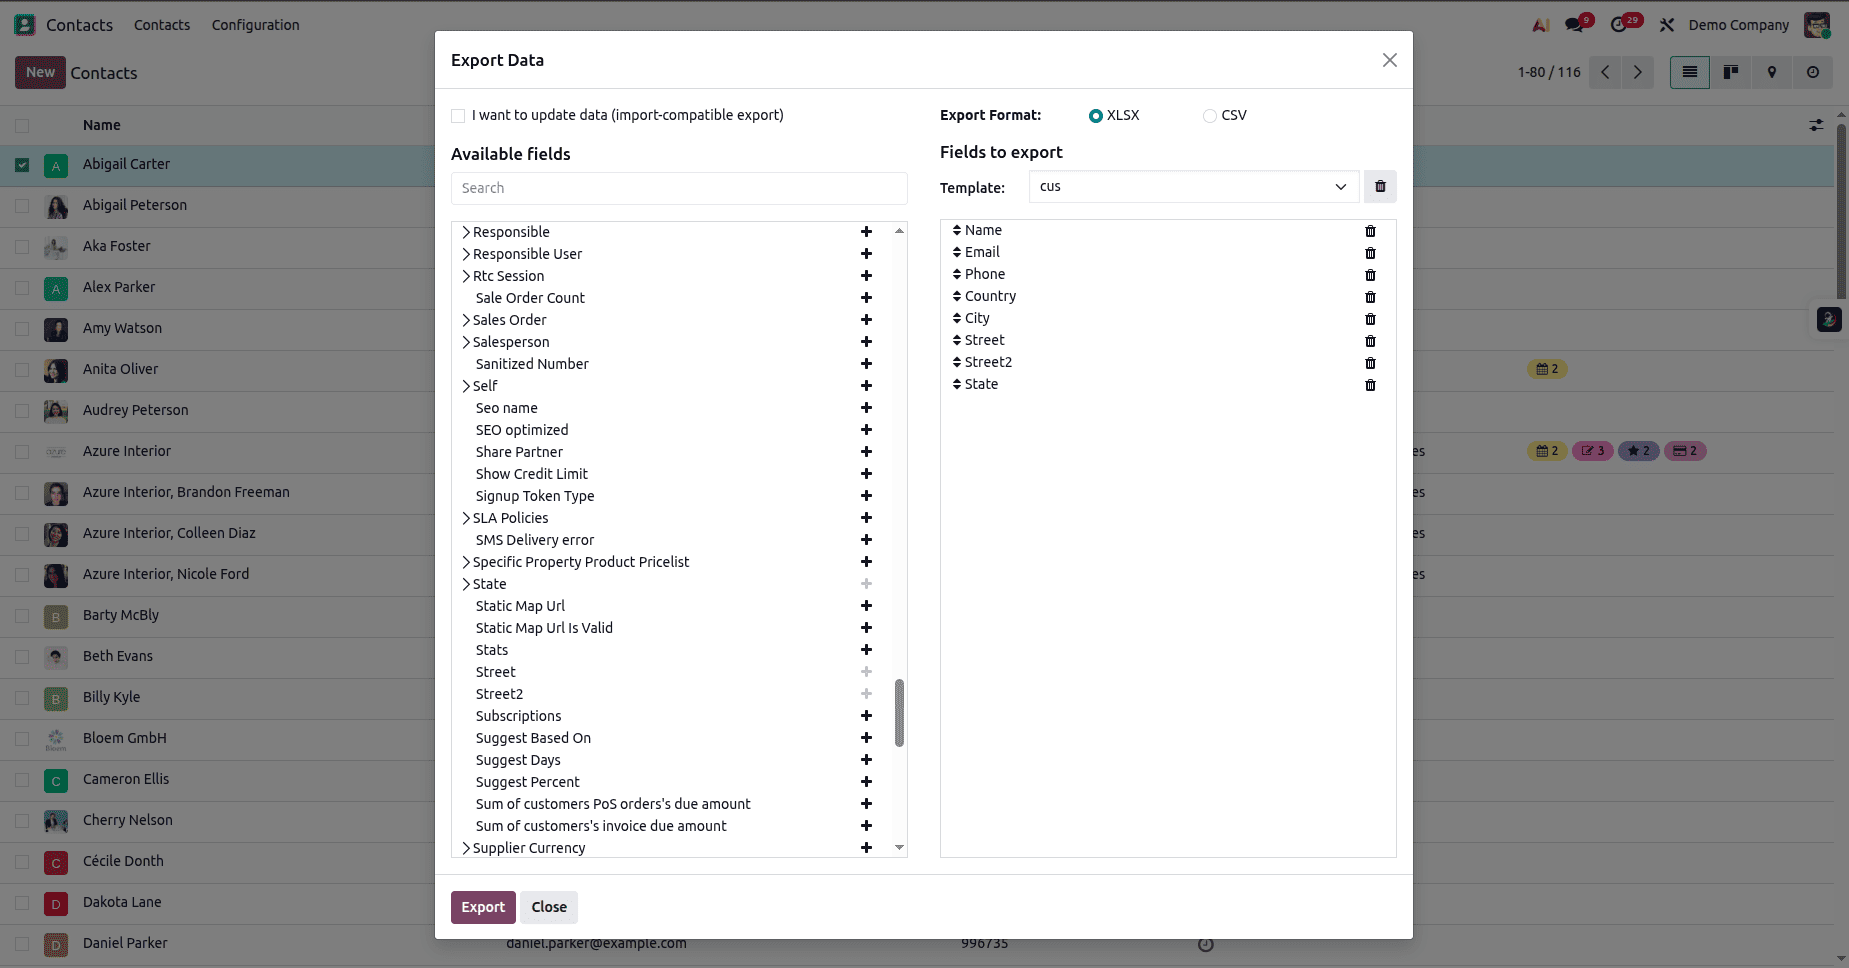
Add the required fields from the Available Fields section to the Fields to Export list, then click Export.
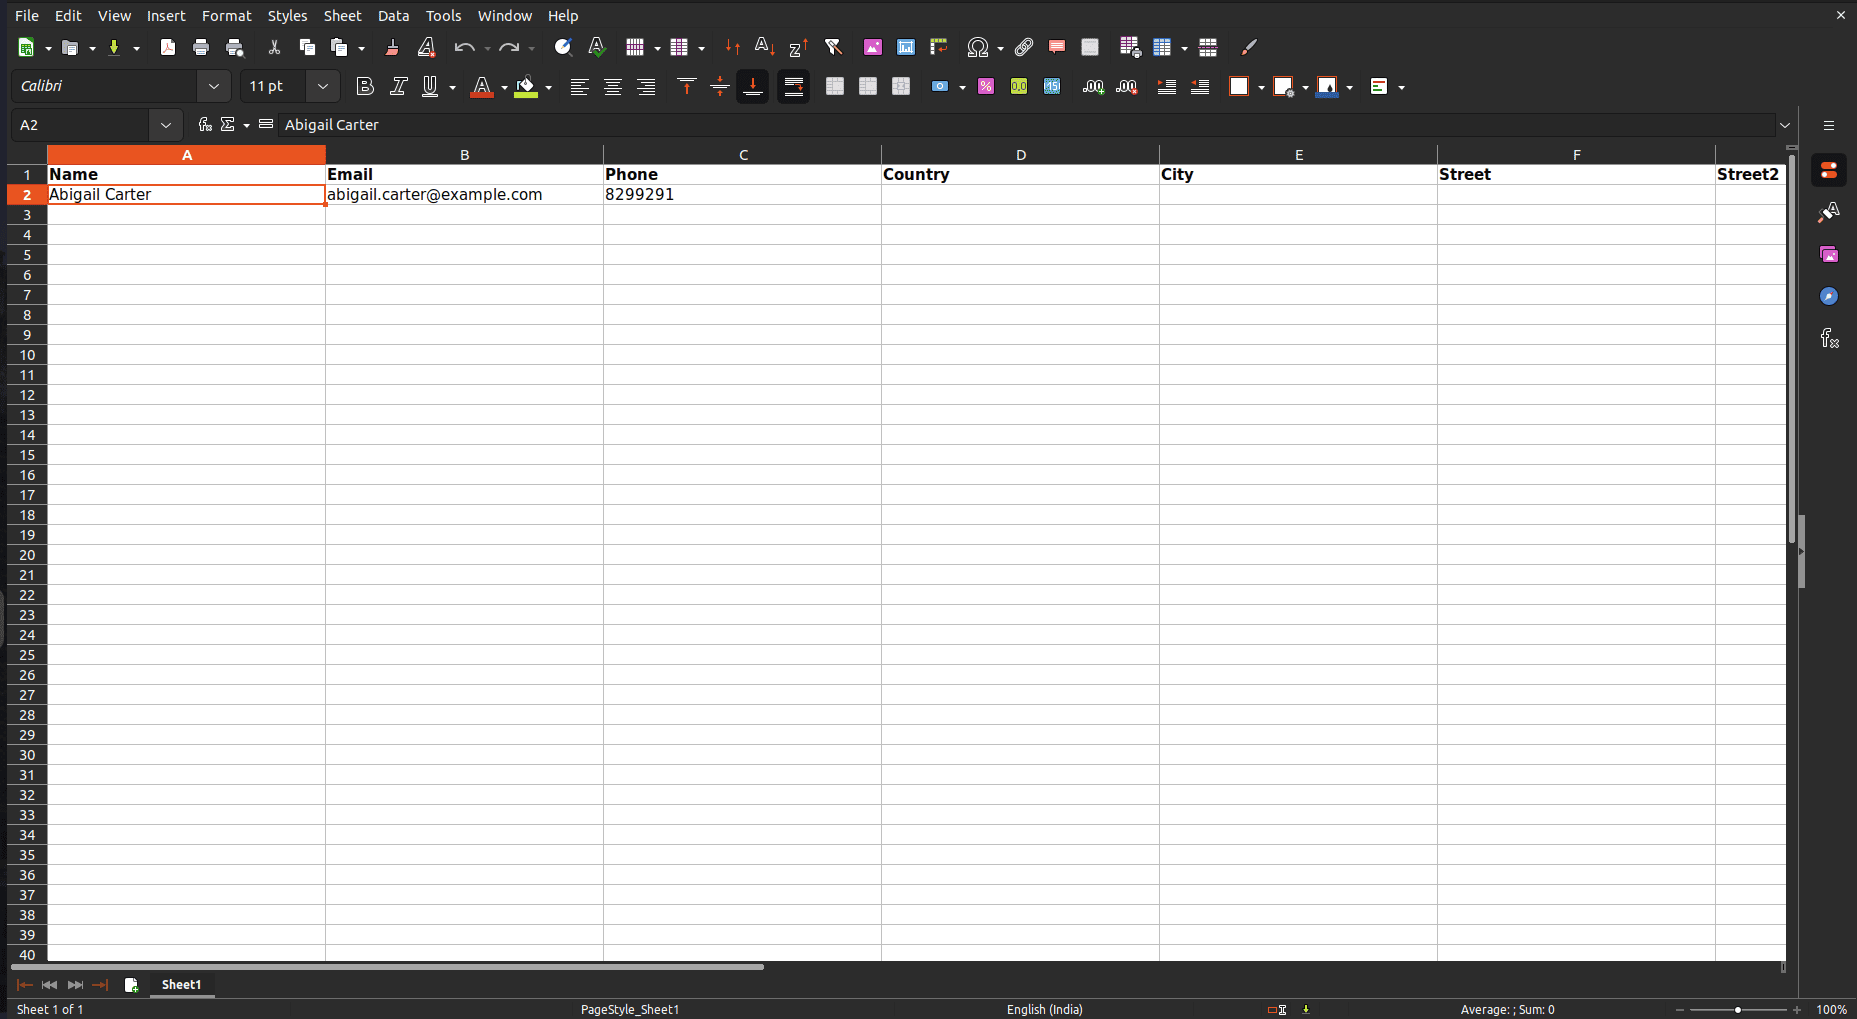
Open the downloaded Excel file, then replace or add new values to the relevant fields as needed.
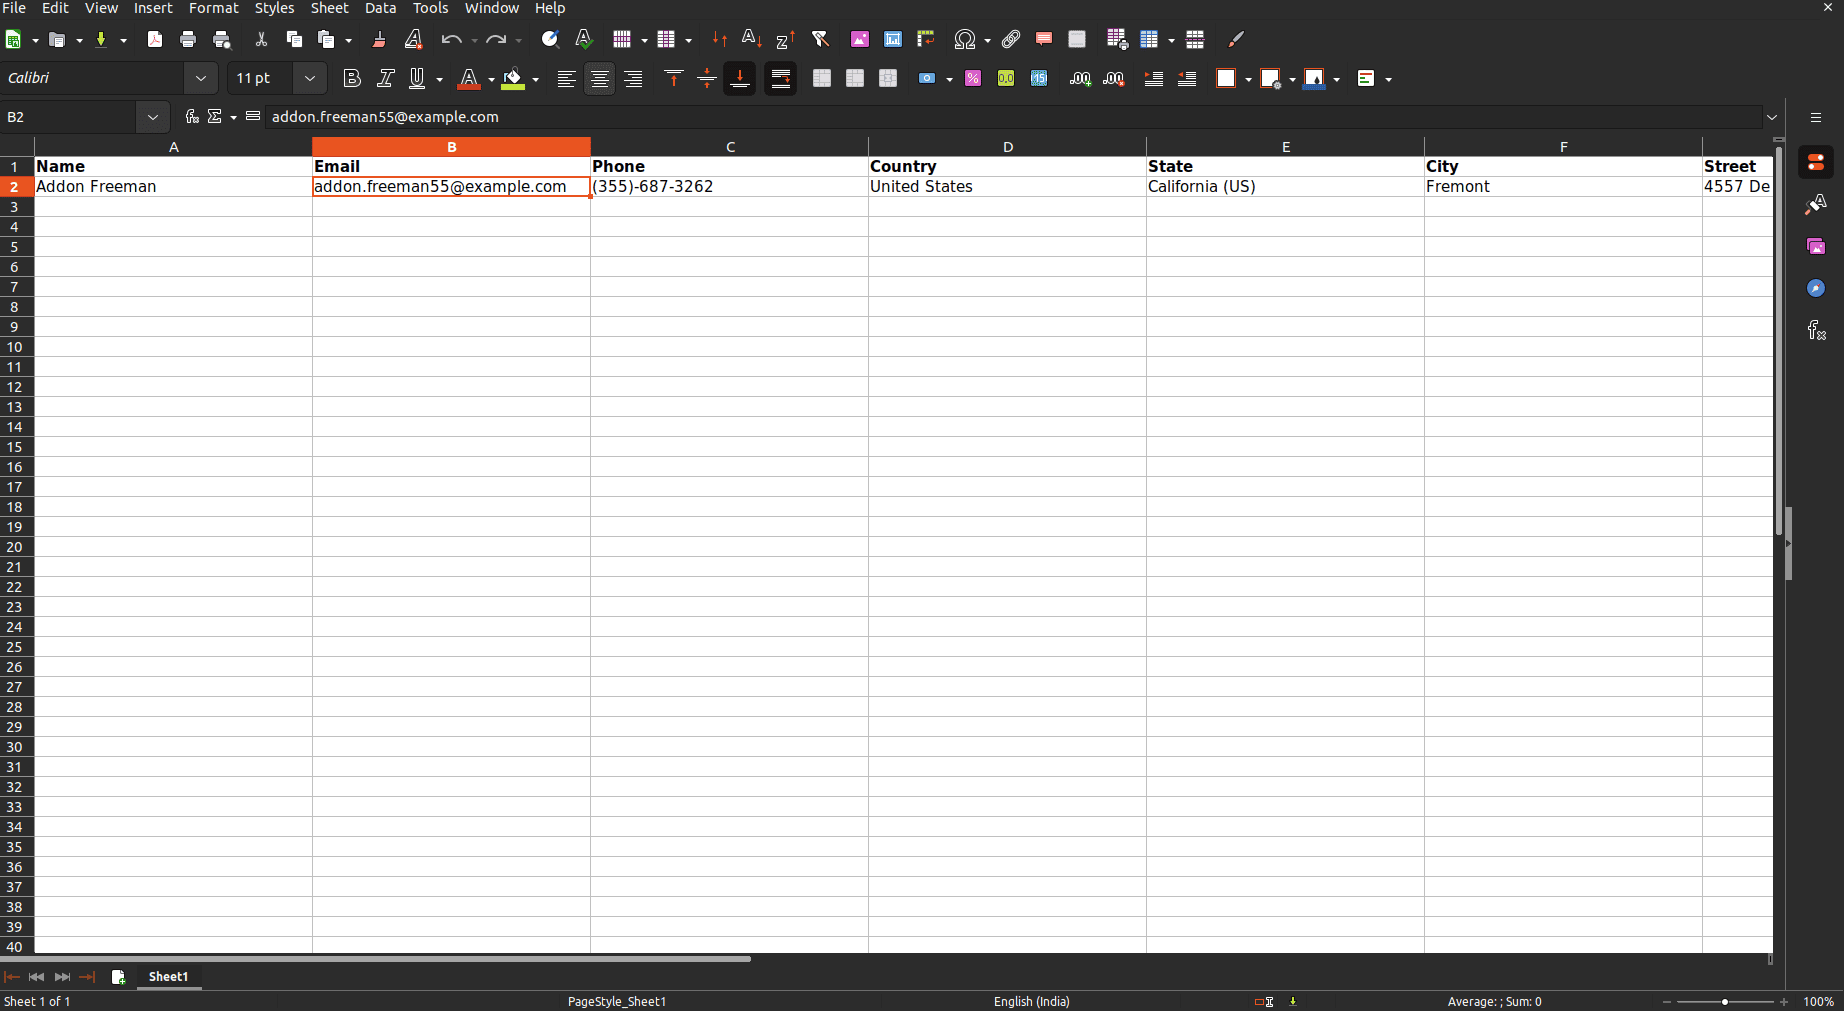
Added a new contact with all the necessary details.
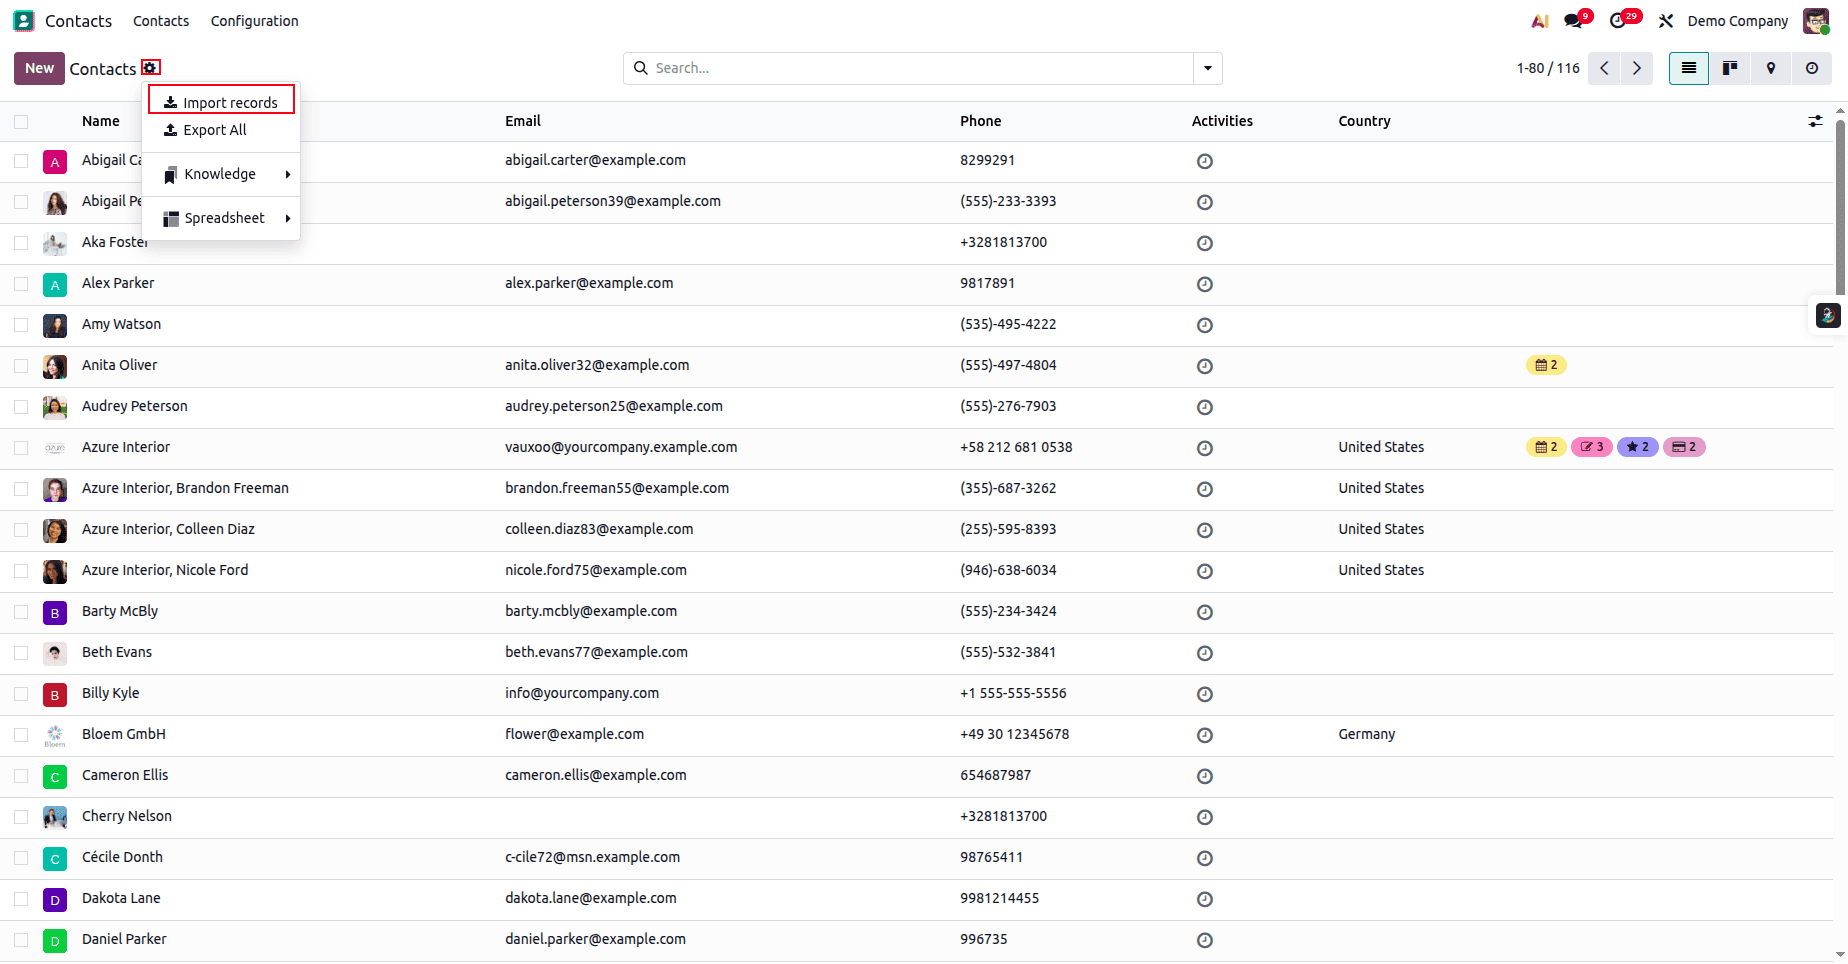
Click the gear icon, select Import Records, and upload the data file for testing.
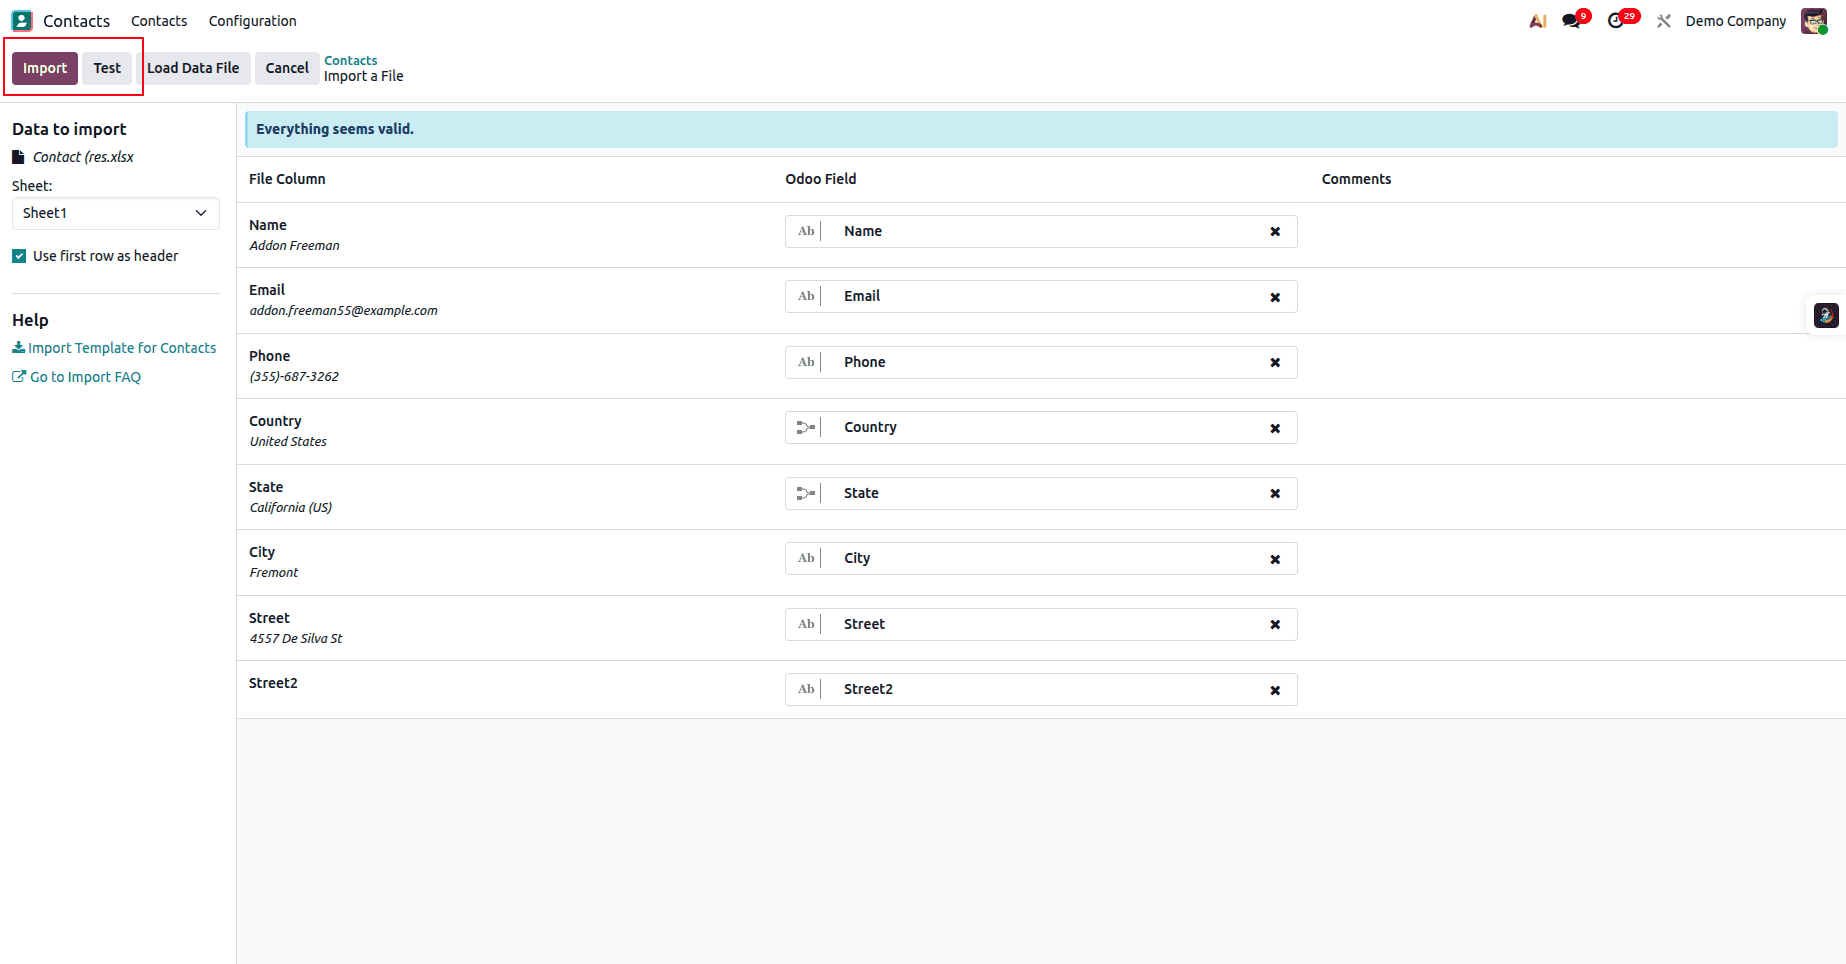
After the test is successful, click the Import button to complete the import.
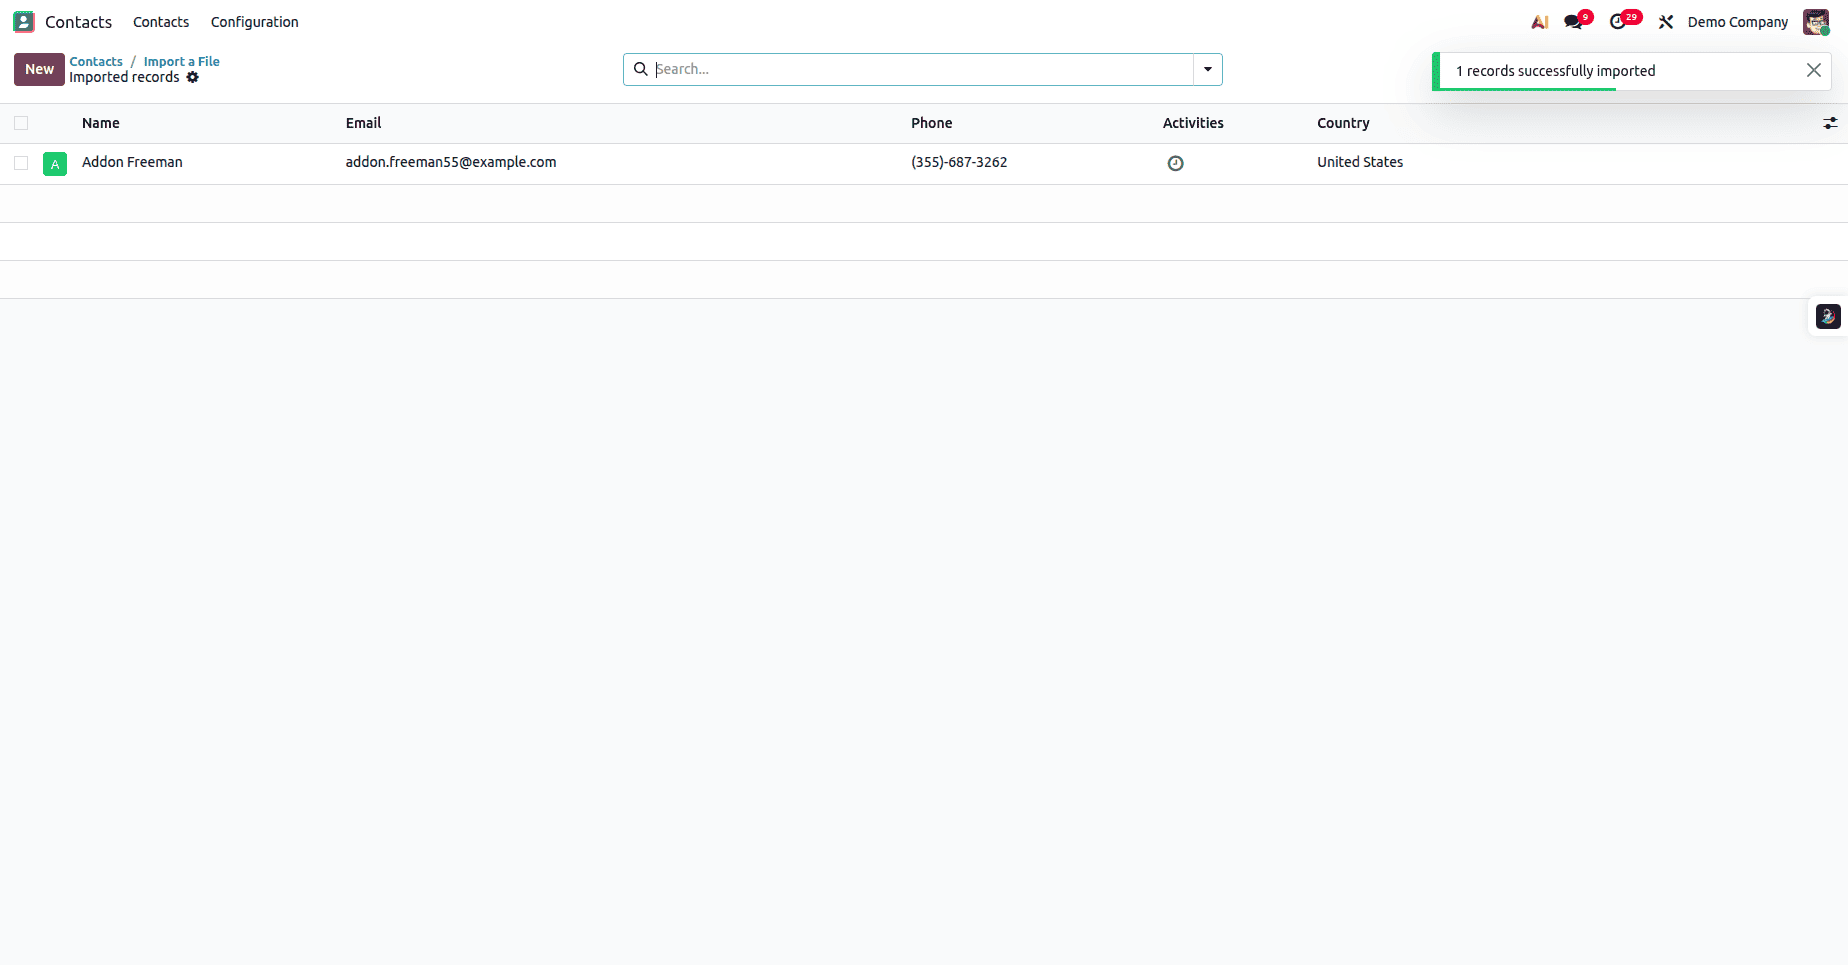
The new contact has been successfully imported.
Import Sale Order
Importing sales orders is an essential step when migrating your sales workflow into Odoo. Whether you're transitioning from another system or setting up a new database, bringing in existing sales orders helps maintain continuity, preserve customer history, and ensure accurate reporting. Odoo allows you to export a sample template, update it with your own data, and import it back seamlessly. In this section, we’ll guide you through the complete process of preparing, editing, and importing sales orders so you can efficiently rebuild your sales pipeline without manual data entry.
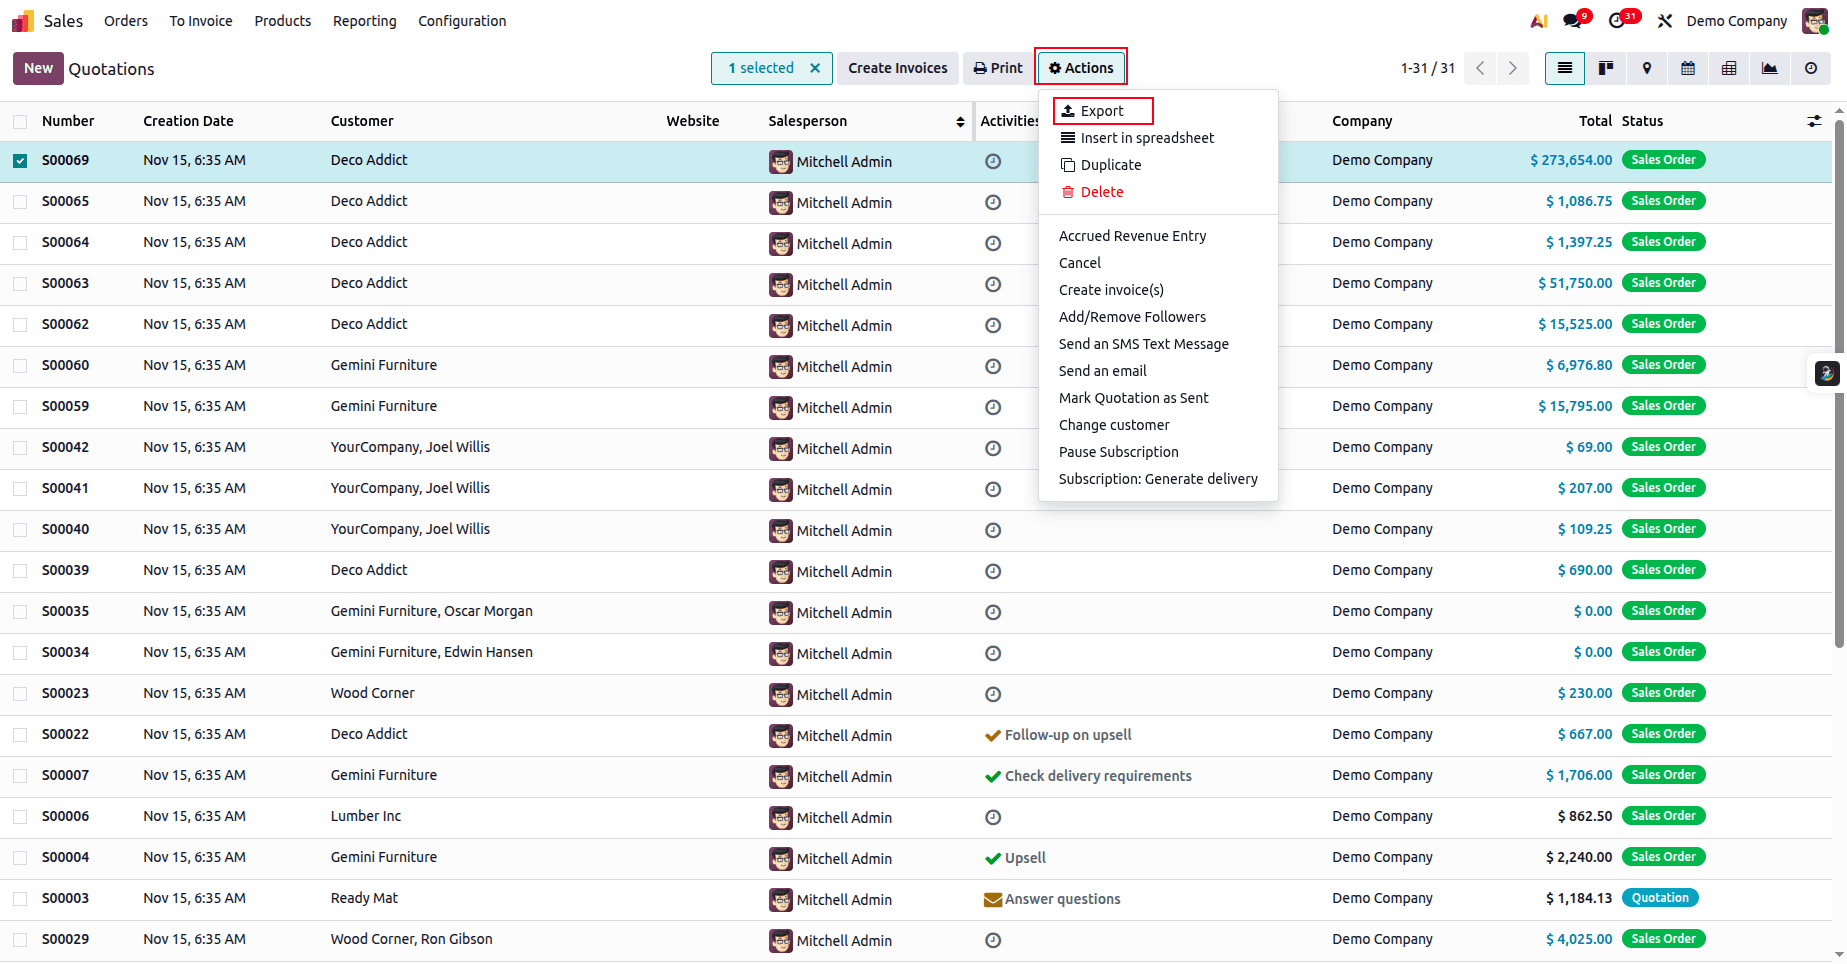
Open the Sales module, select any sales order from the list, then click Action and choose Export.
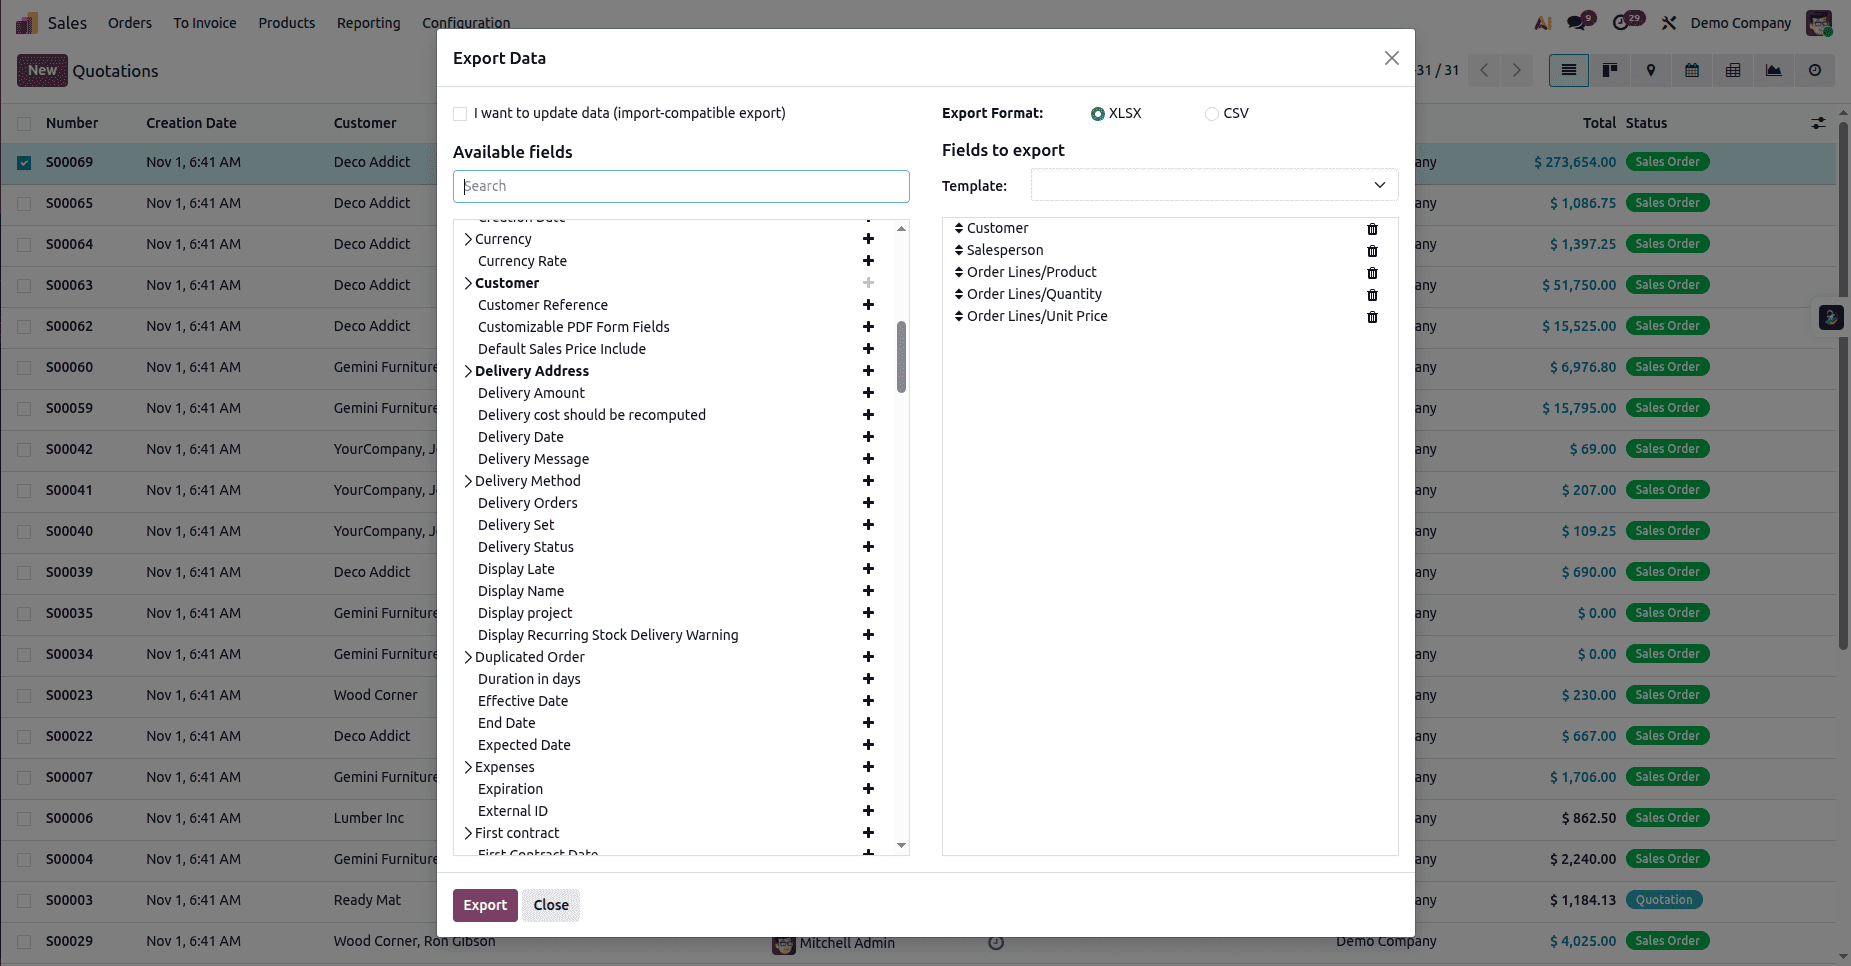
Add the required fields to the export list, then click Export to download the Excel file.
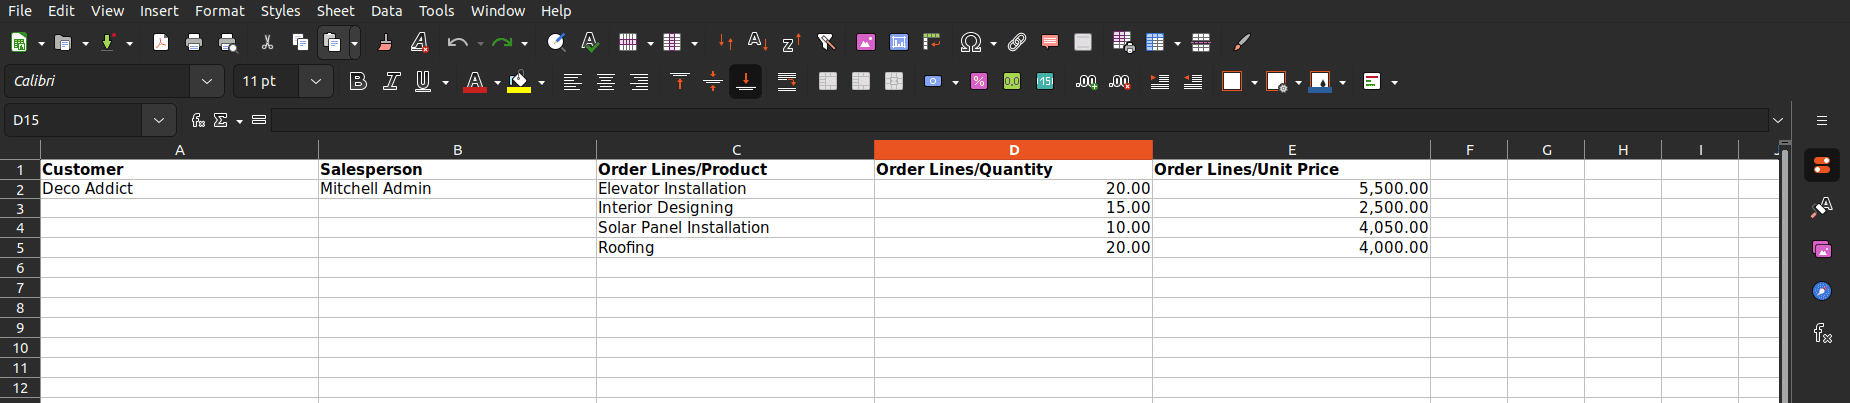
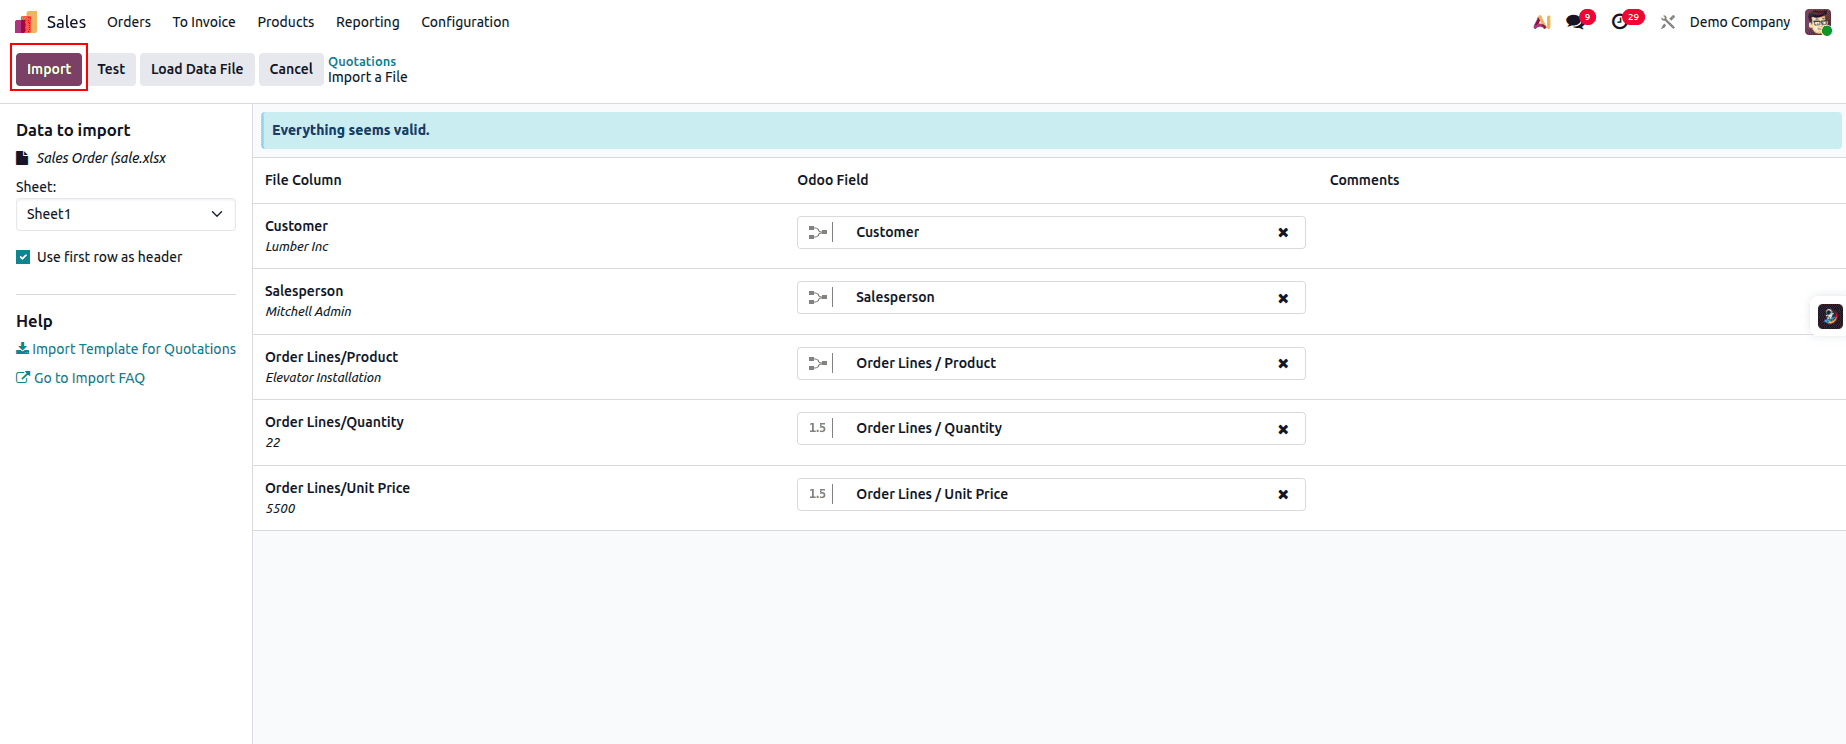
This is how the exported file will look.
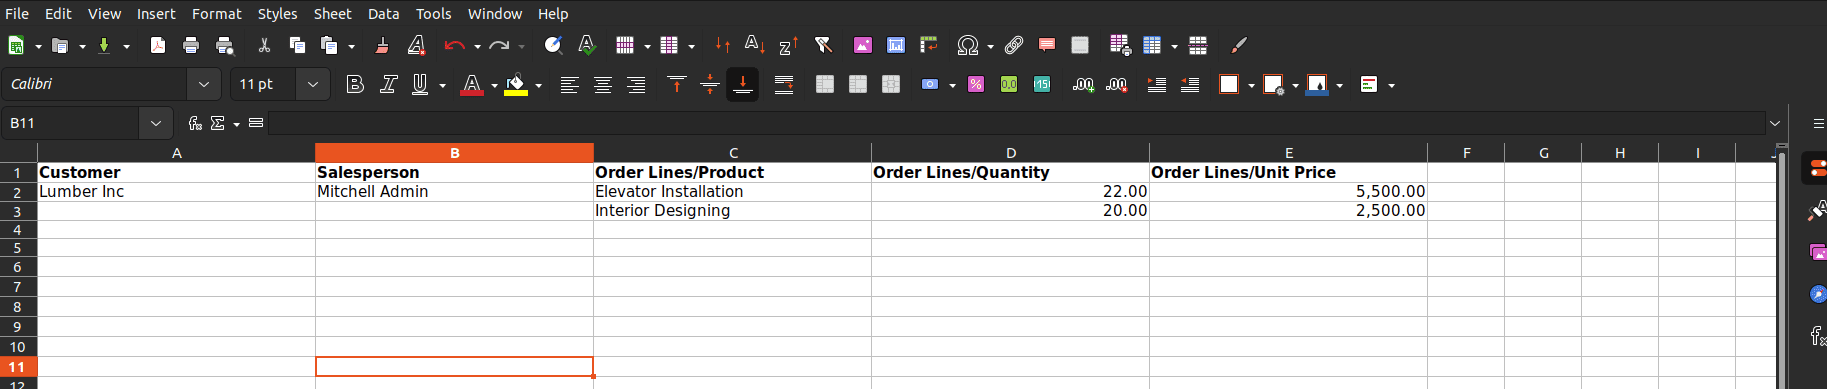
Updated the field values, added a new customer Lumber Inc, and modified the products accordingly.
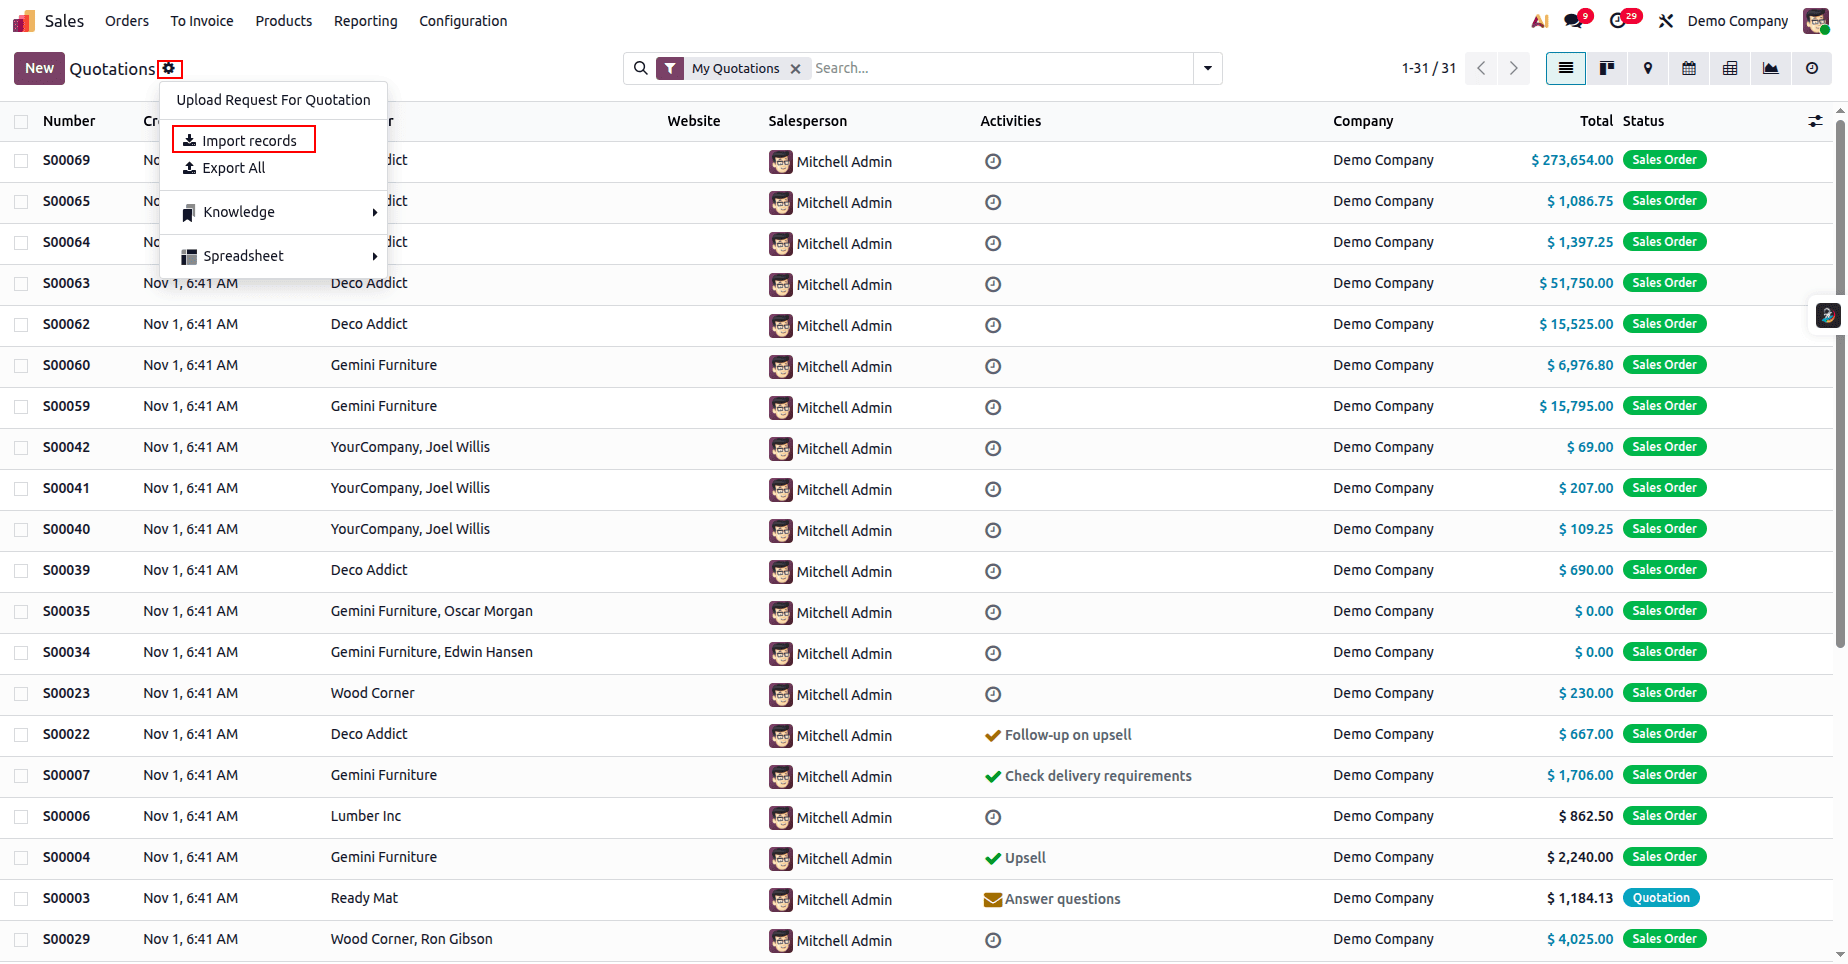
To import the record, click the gear icon in the Sales Orders view, select Import Records, and upload the data file for testing.
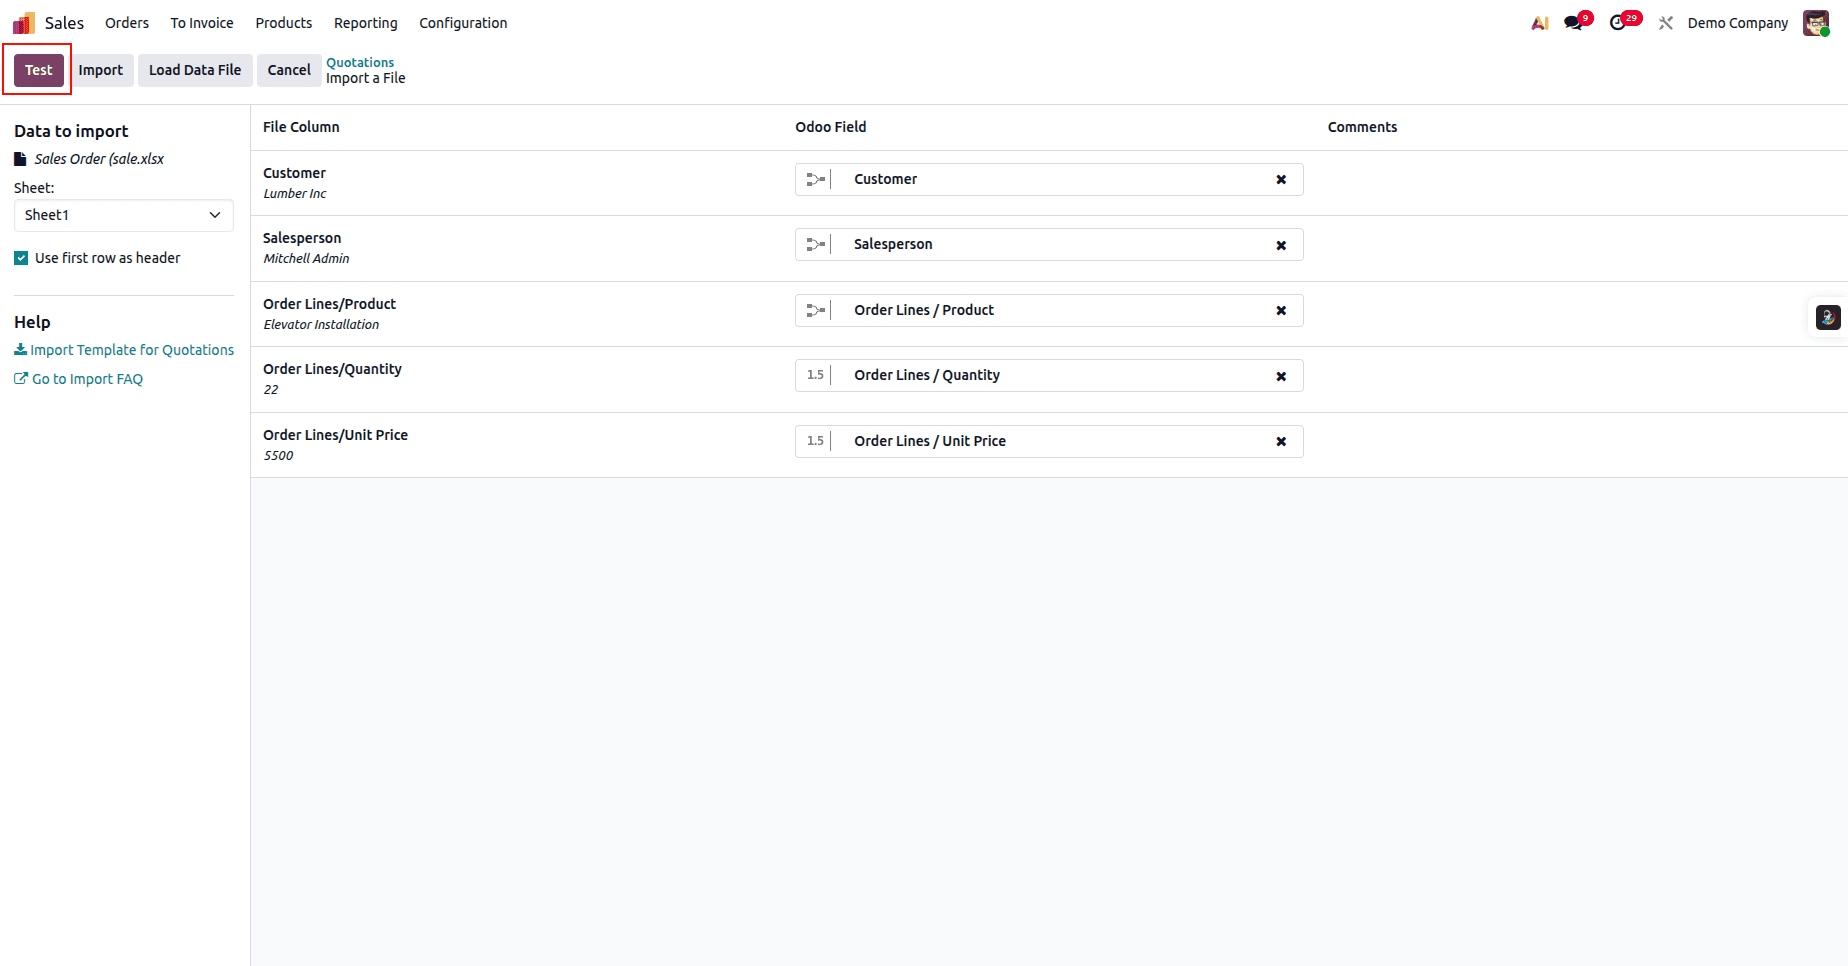
Click the Test button to validate the data file.
Once the test is successful, click Import to import the sales orders.

The sales order has now been successfully imported into Odoo.
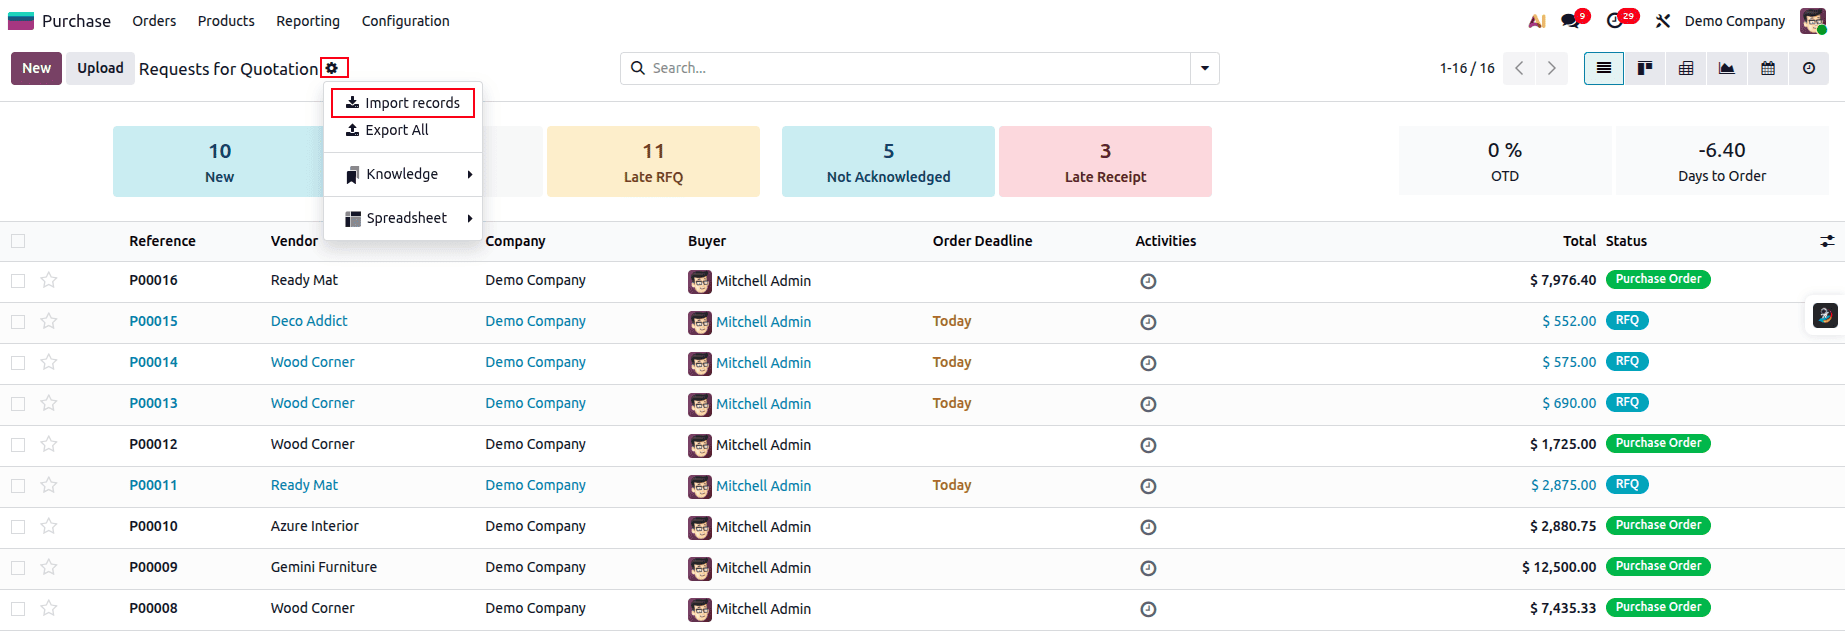
Import Purchase Order
Importing purchase orders is a key part of migrating your procurement data into Odoo. Whether you’re moving from another ERP or setting up a new environment, bringing in existing purchase orders ensures that vendor interactions, product receipts, and financial records remain consistent and traceable. Odoo’s import feature allows you to export a sample template, update it with your own PO data, and seamlessly import it back into the system. In this section, we’ll walk through each step of preparing, editing, and importing purchase orders so you can rebuild your procurement workflow accurately and efficiently.
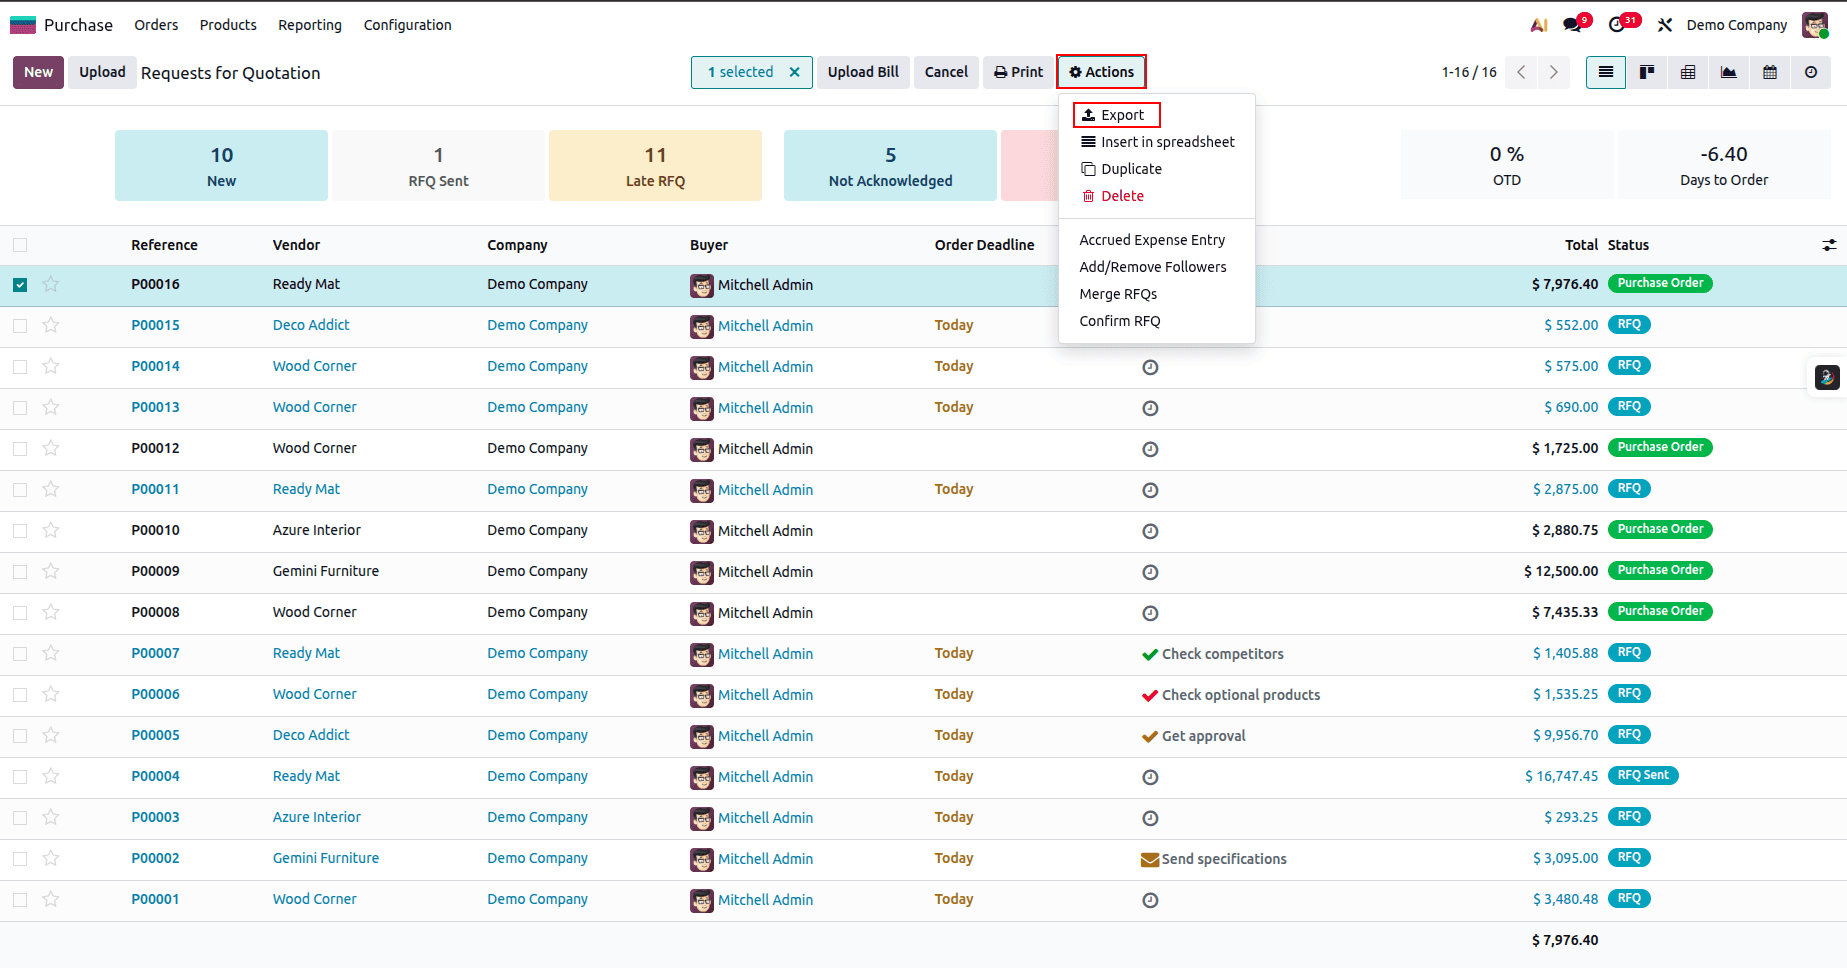
Open the Purchase module, select any purchase order from the list view, then click Actions and choose Export.

Add the required fields to the export list, then click the Export button.
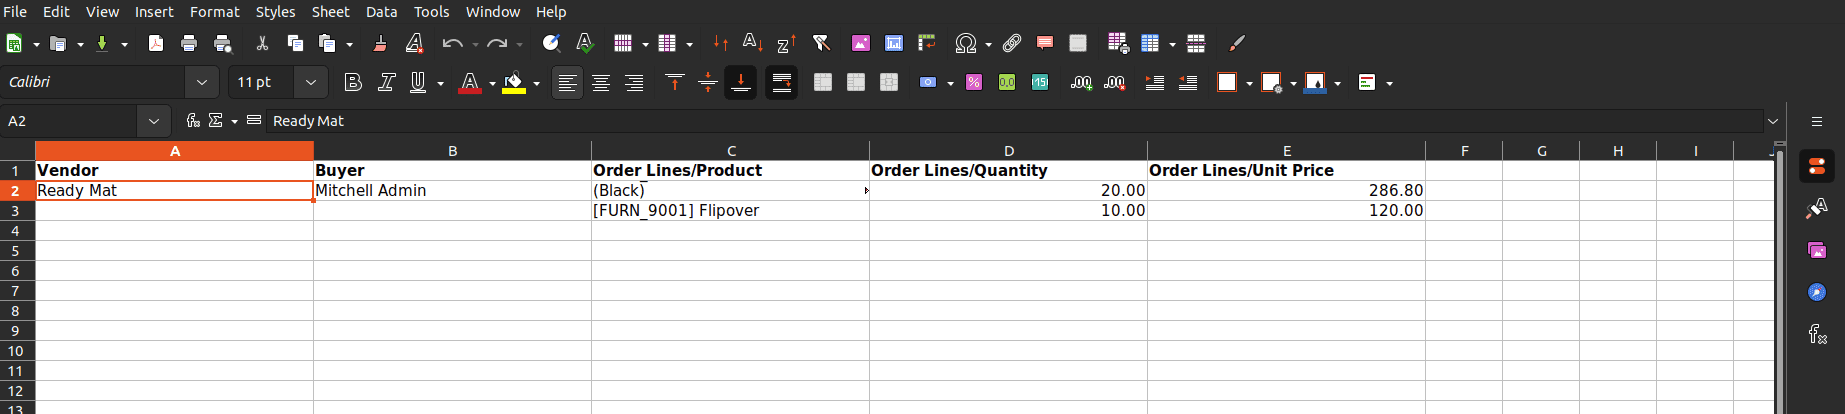
This is the data inside the downloaded excel
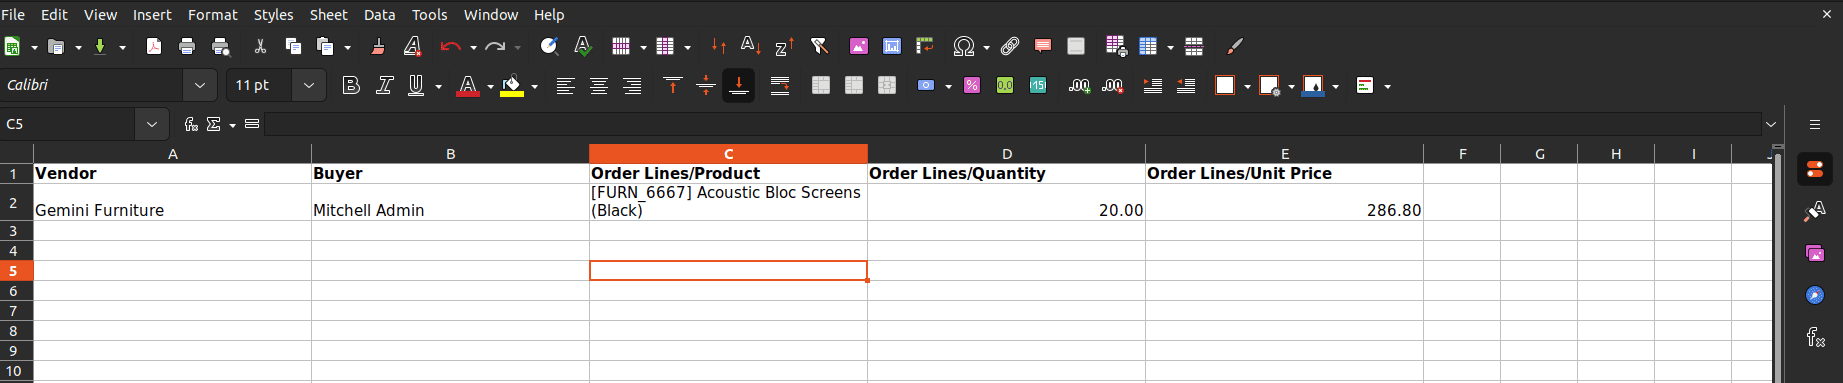
Updated the Excel sheet to add a new purchase order.
Click the gear icon, select Import Records, and upload the data file for testing.
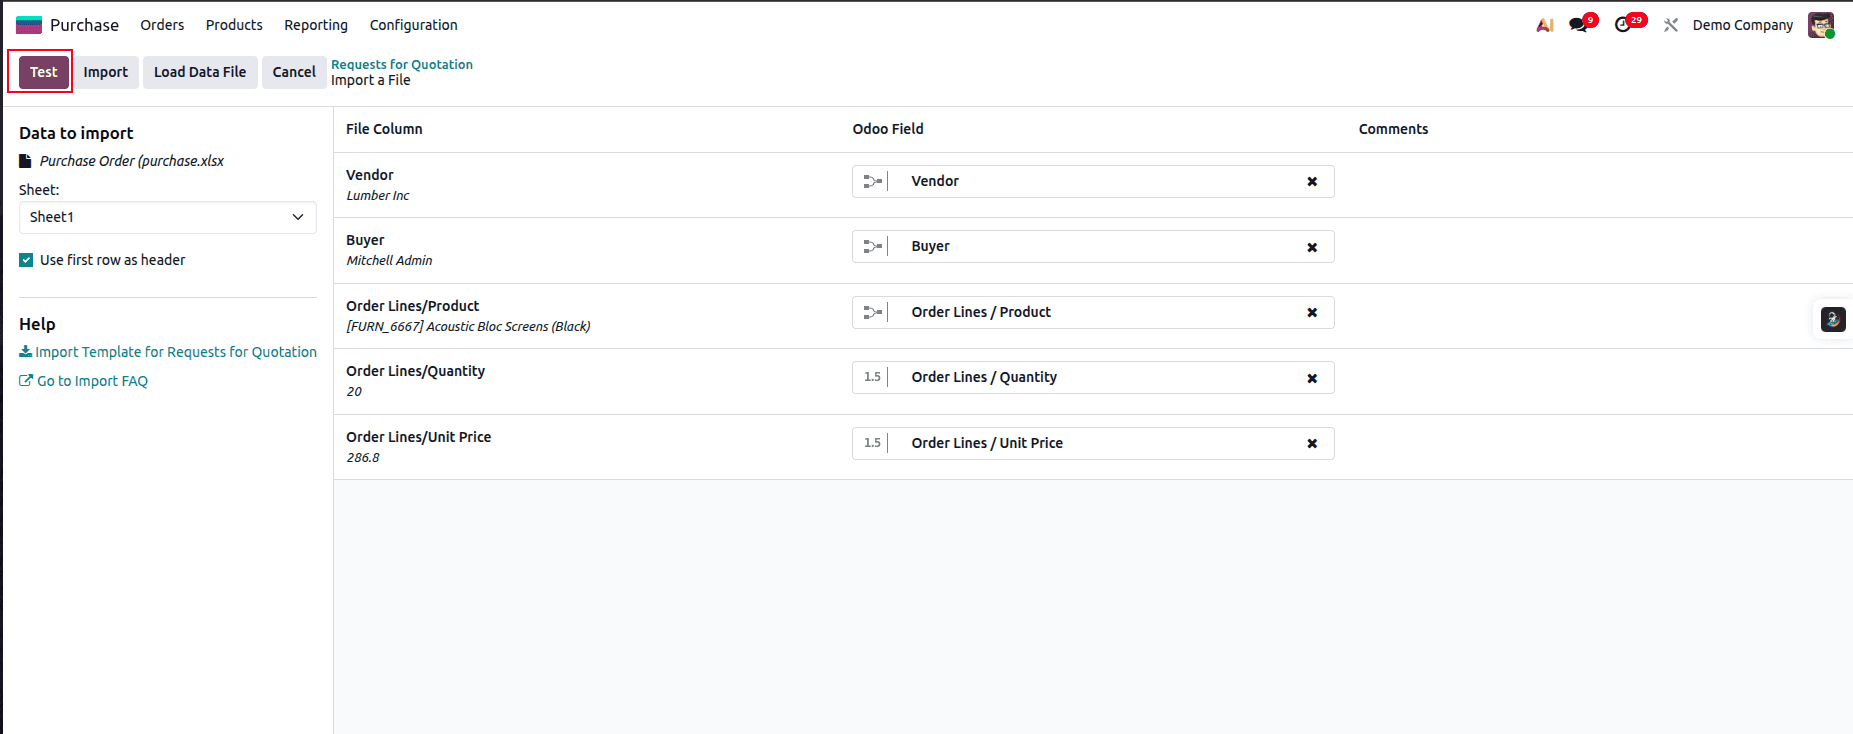
Test the data file by clicking the Test button.
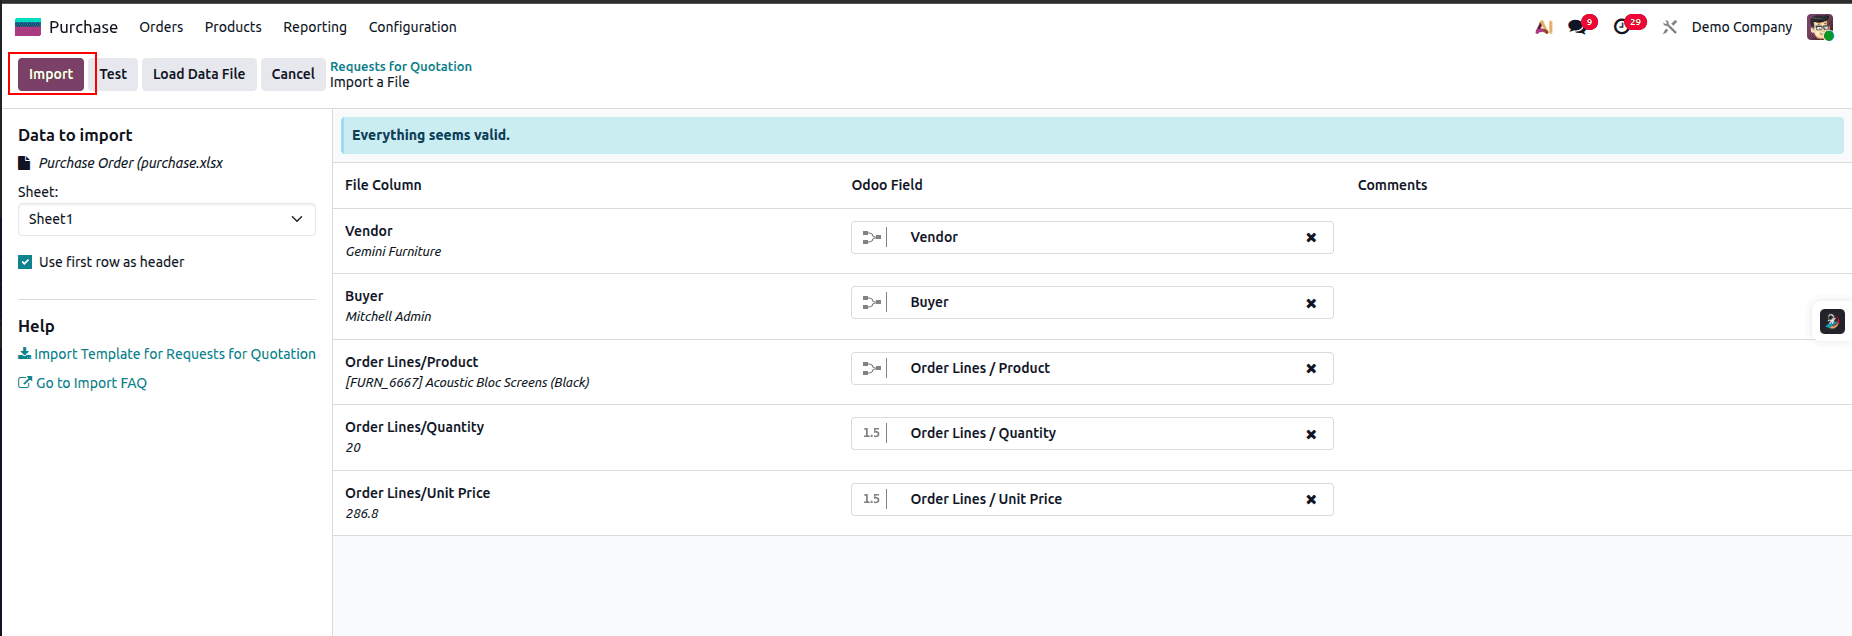
Click Import after the test is completed successfully.
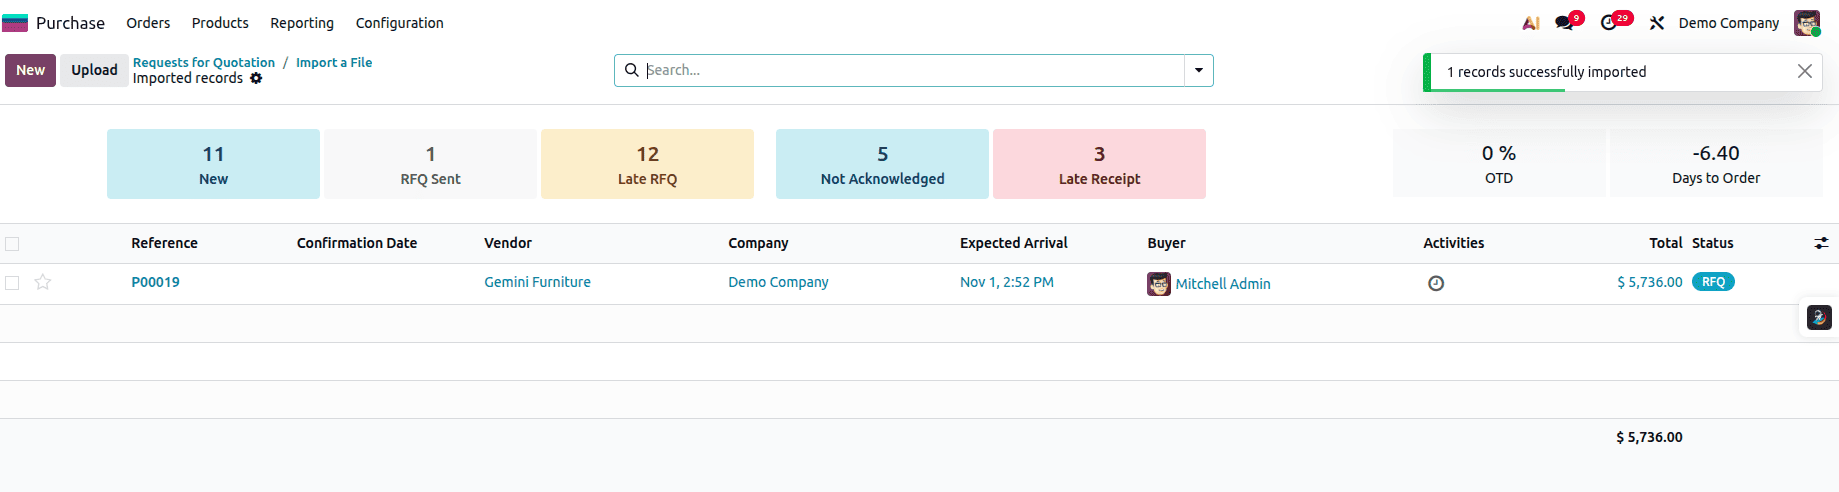
You will now see that the purchase order has been successfully imported.
Import Invoices
Importing invoices is an important step in maintaining accurate financial records when migrating to Odoo. By bringing in your existing customer invoices, you ensure continuity in accounting, reporting, and customer history. Odoo makes this process simple by allowing you to export a template, update it with your invoice details, and import it back seamlessly. In this section, we’ll walk through the steps to prepare, edit, and import invoices into Odoo with ease.
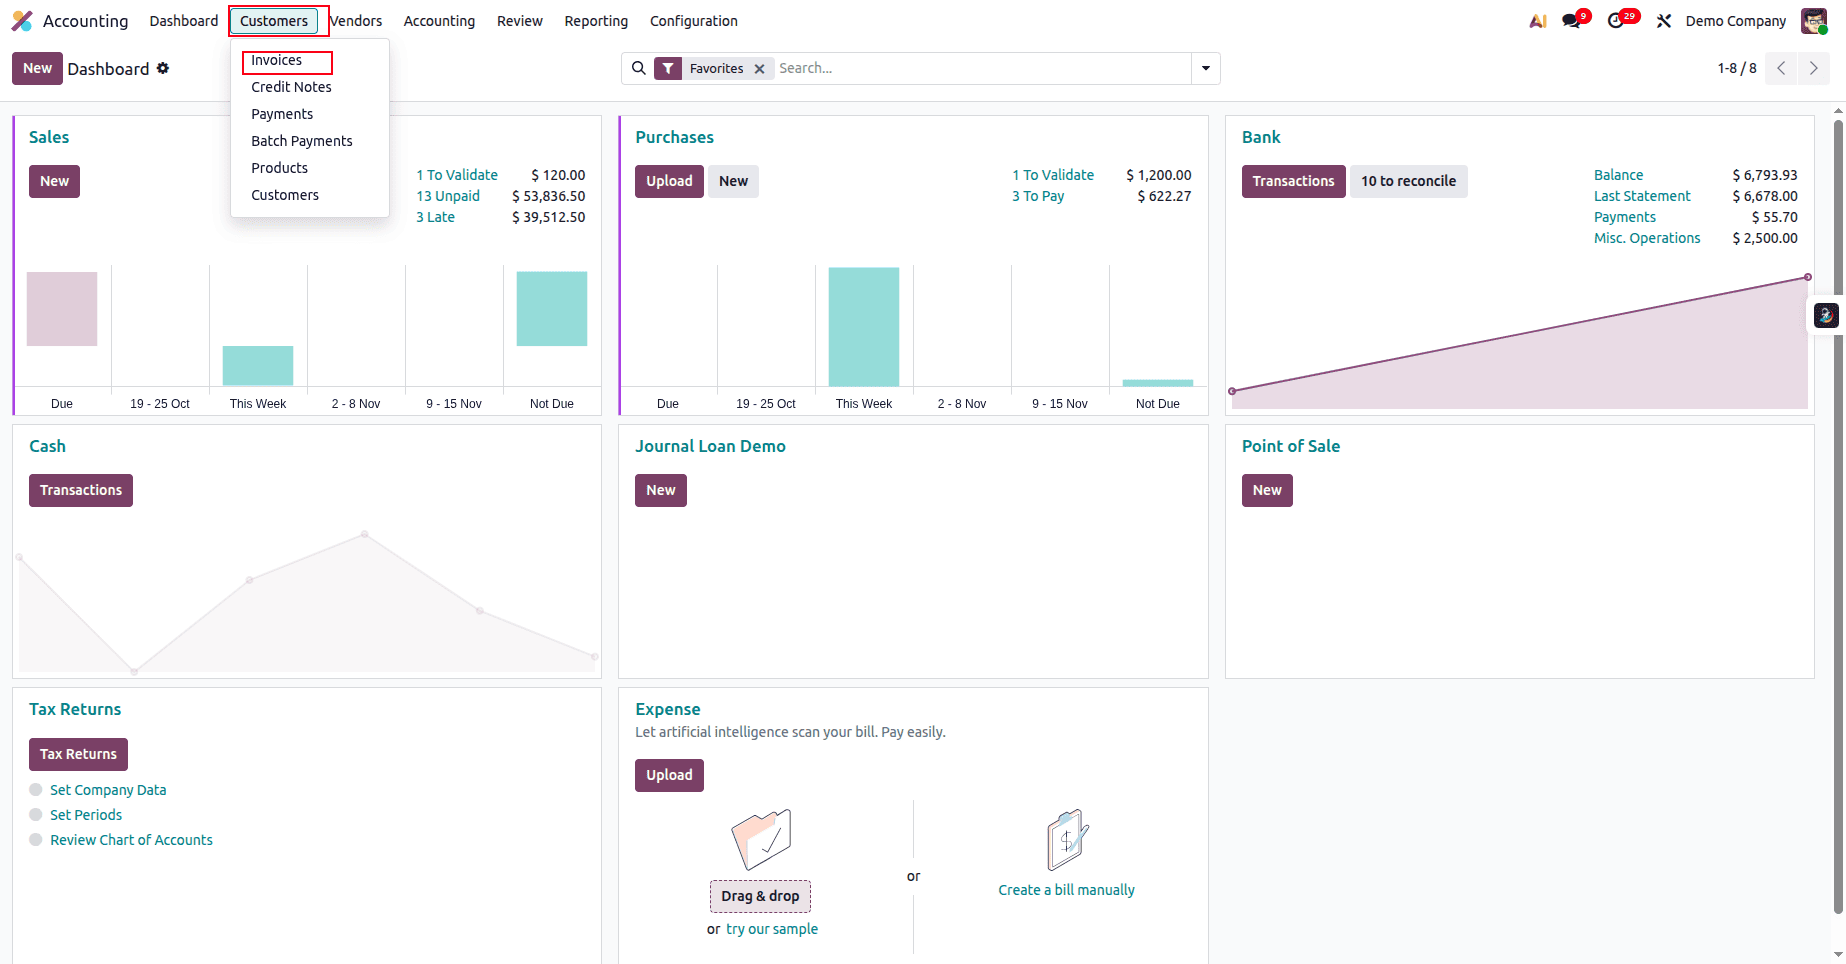
Open the Accounting module and select Invoices from the Customers menu.
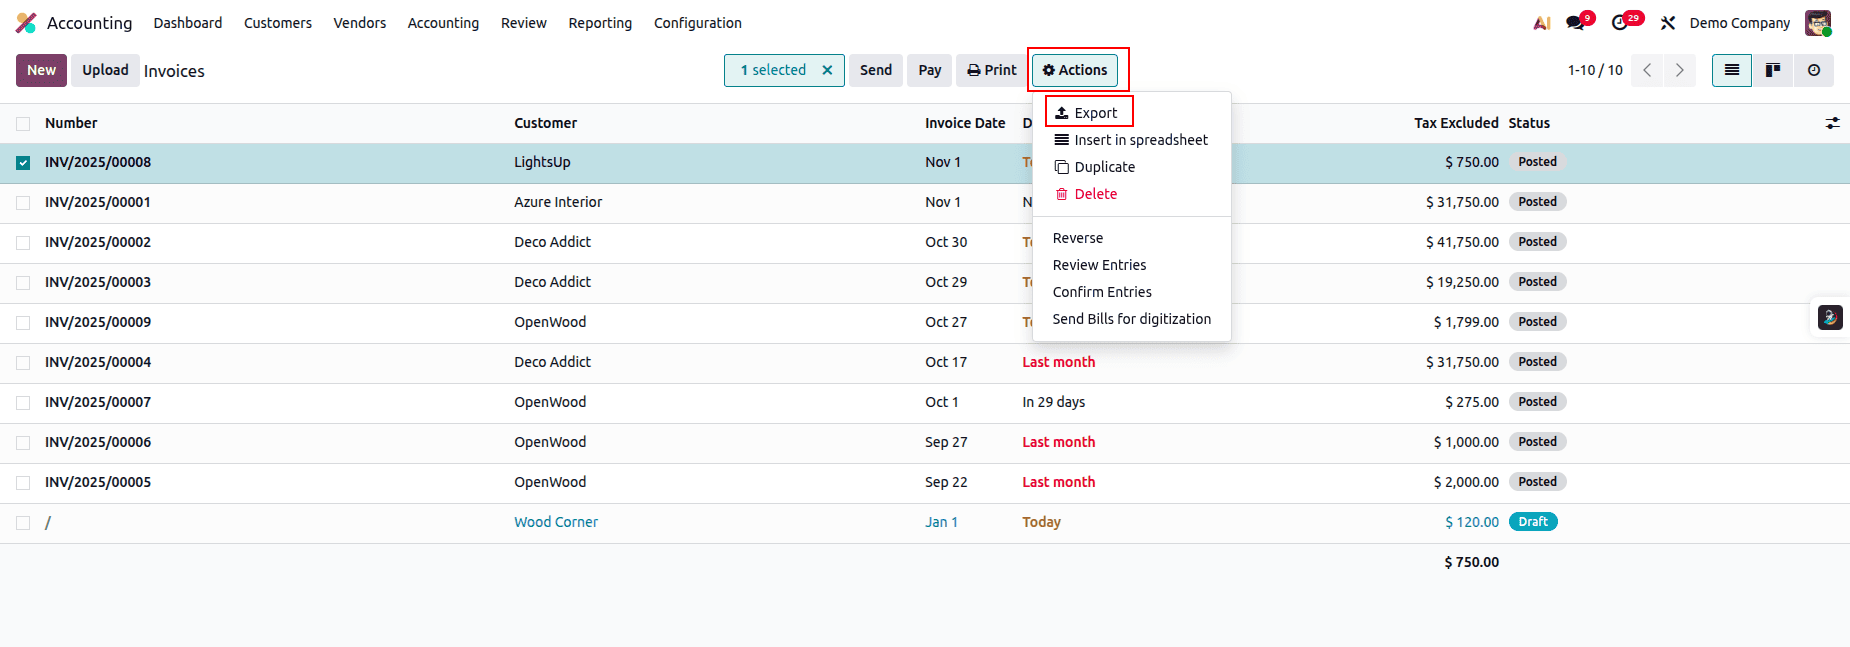
This will take you to the Invoices page. Select any invoice from the list, then click Action and choose Export to select the fields you want to export.
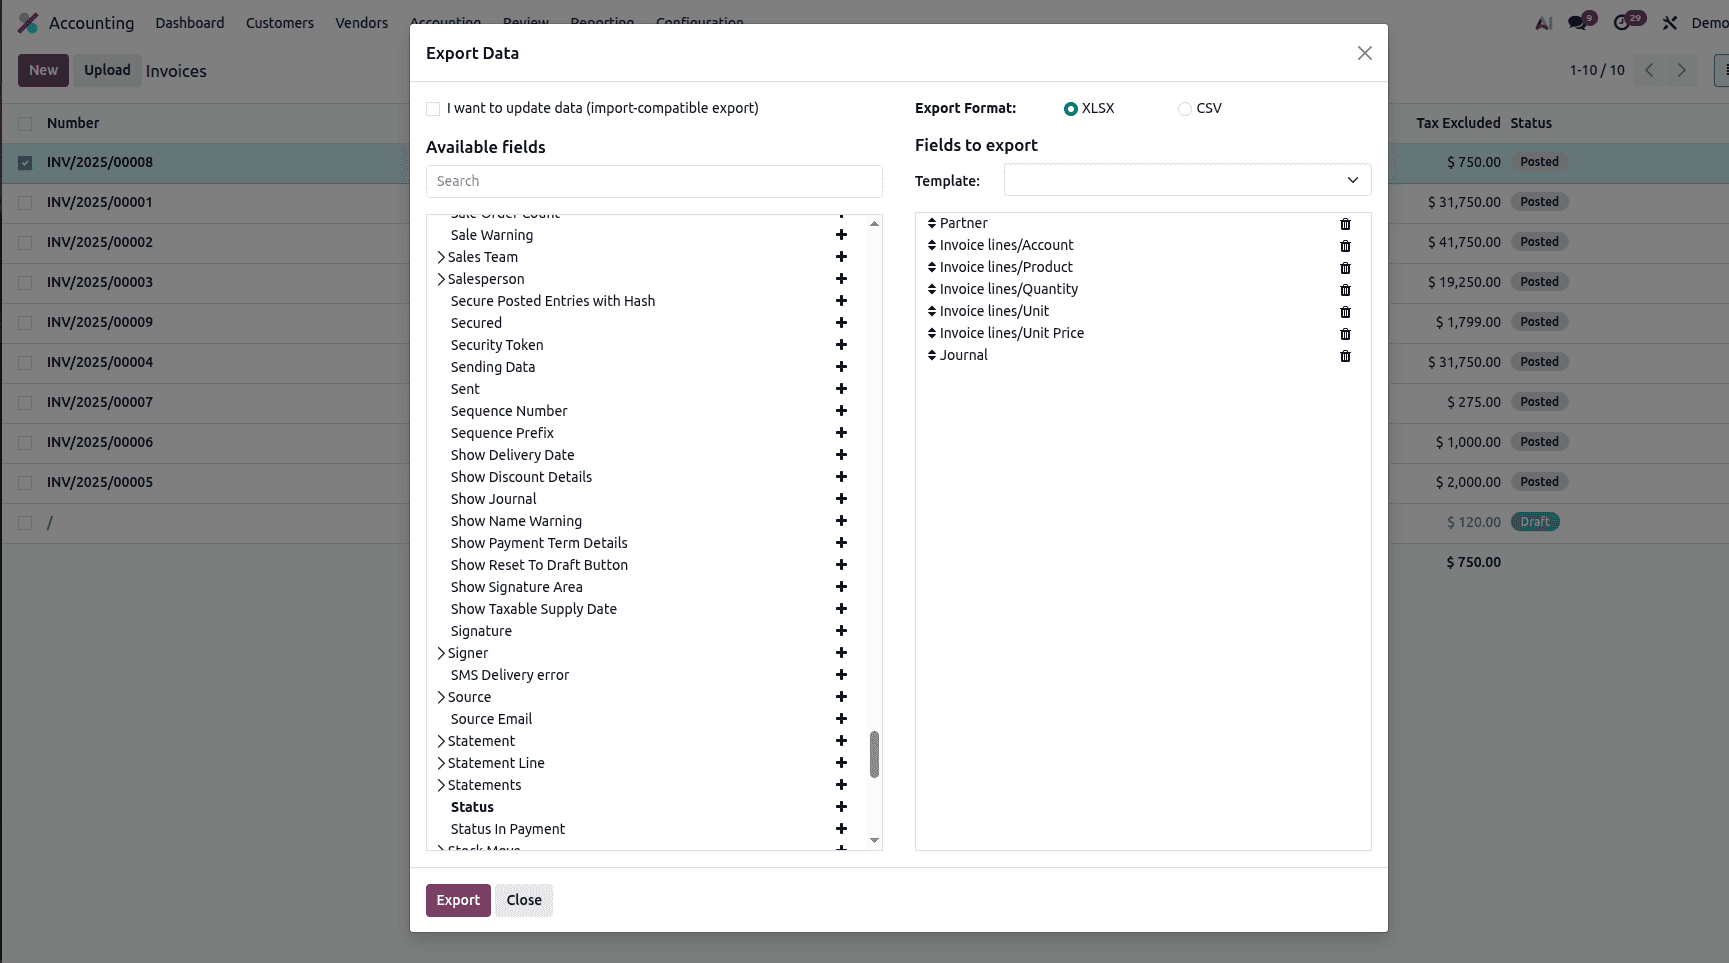
Once you’ve selected the required fields and moved them to the Fields to Export section, click the Export button.

This is the downloaded Excel file before making any edits.

Replaced the existing partner and added a new partner to prepare the invoice for import.
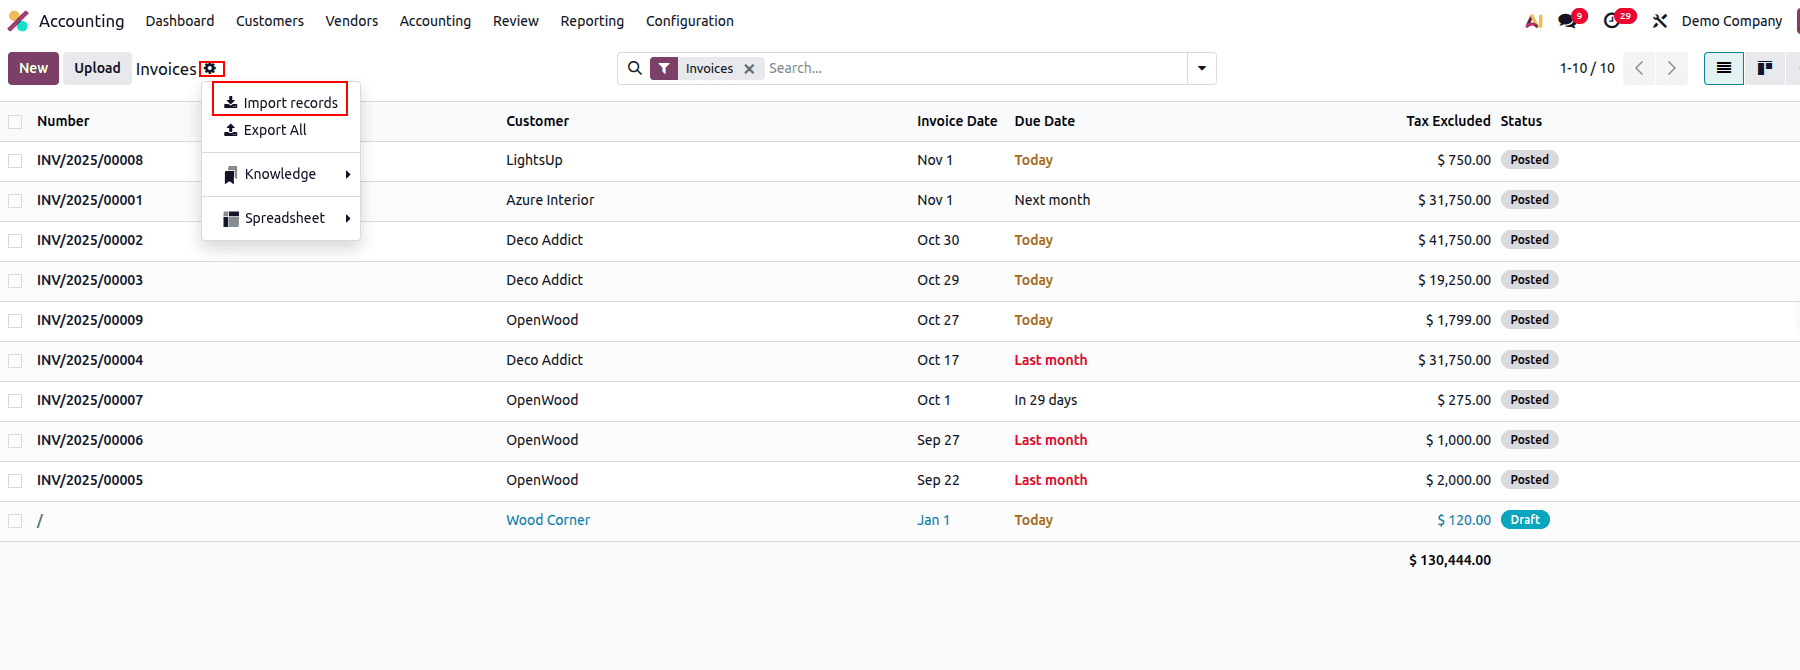
Select Import Records from the gear icon on the page and upload the data file for testing.
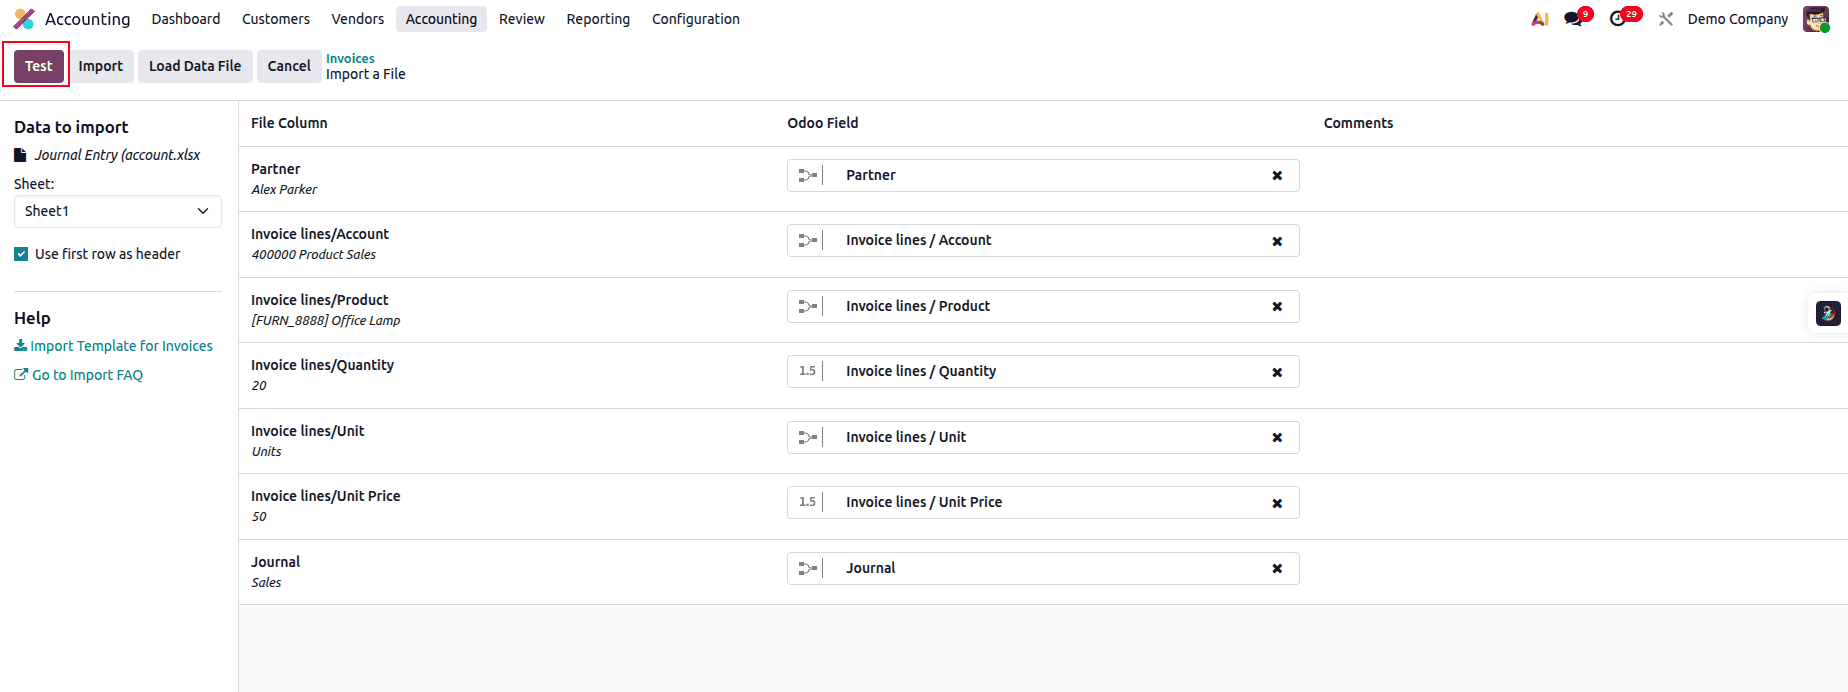
Test the file before proceeding with the import.
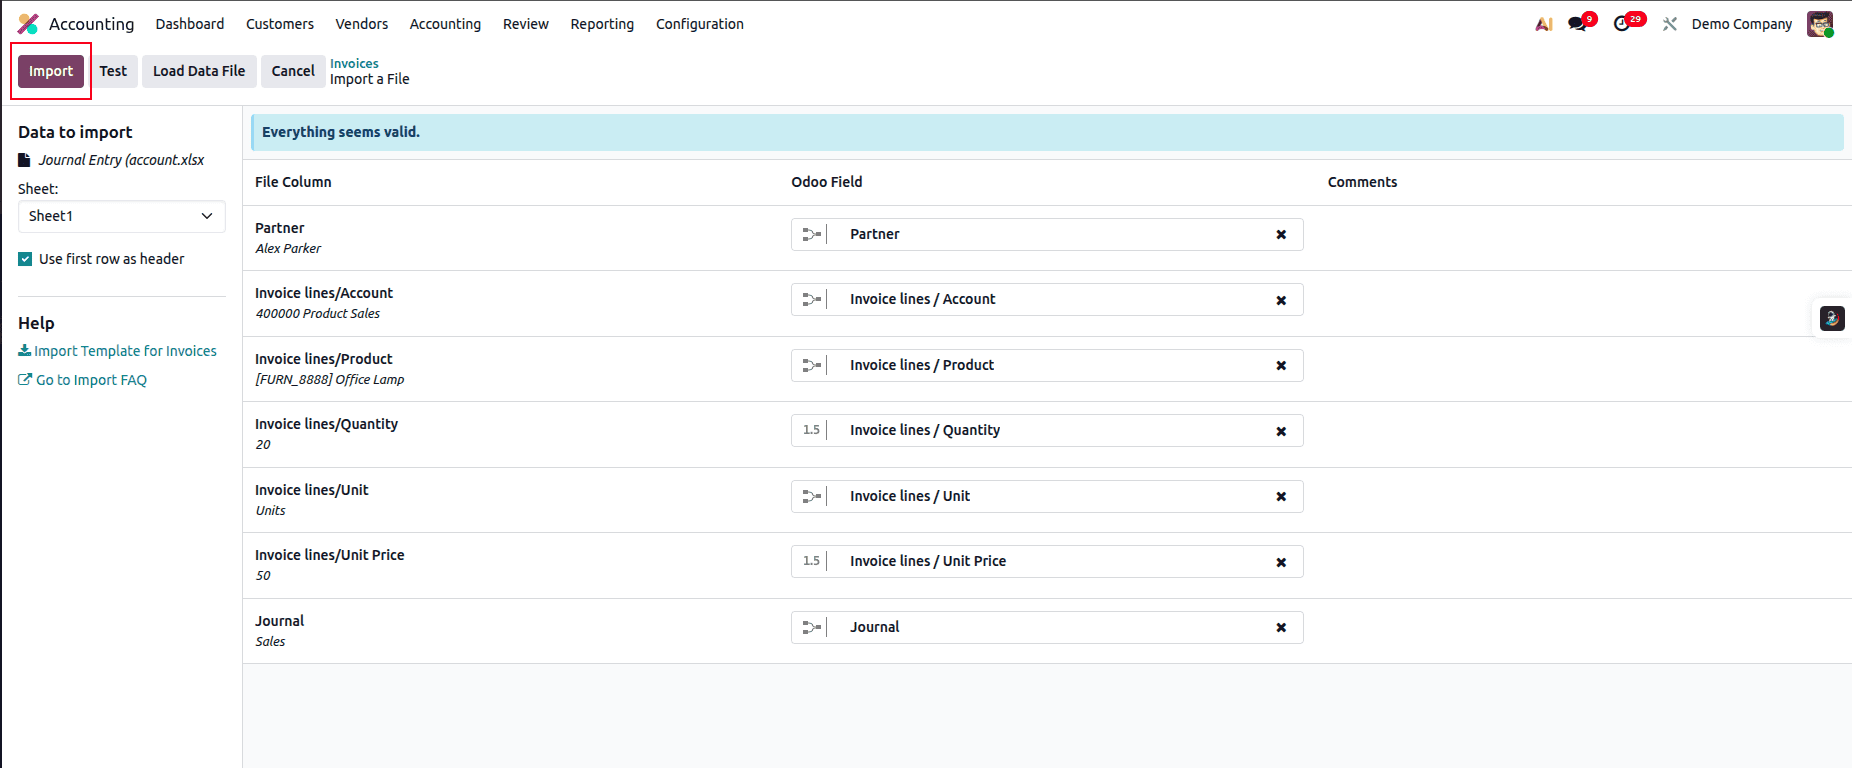
After the test is successful, click Import to import the invoice.

You can now see the imported record. Since the invoice is in Draft state, an invoice number has not been generated yet.
Import Vendor Bills
Importing vendor bills is an essential part of migrating your accounting data into Odoo. It helps maintain accurate payables, vendor history, and financial continuity as you transition from another system or set up a new database. Odoo’s import feature lets you export a sample layout, update it with your bill details, and import it back with ease. In this section, we’ll walk through the steps to prepare, edit, and successfully import vendor bills into Odoo.
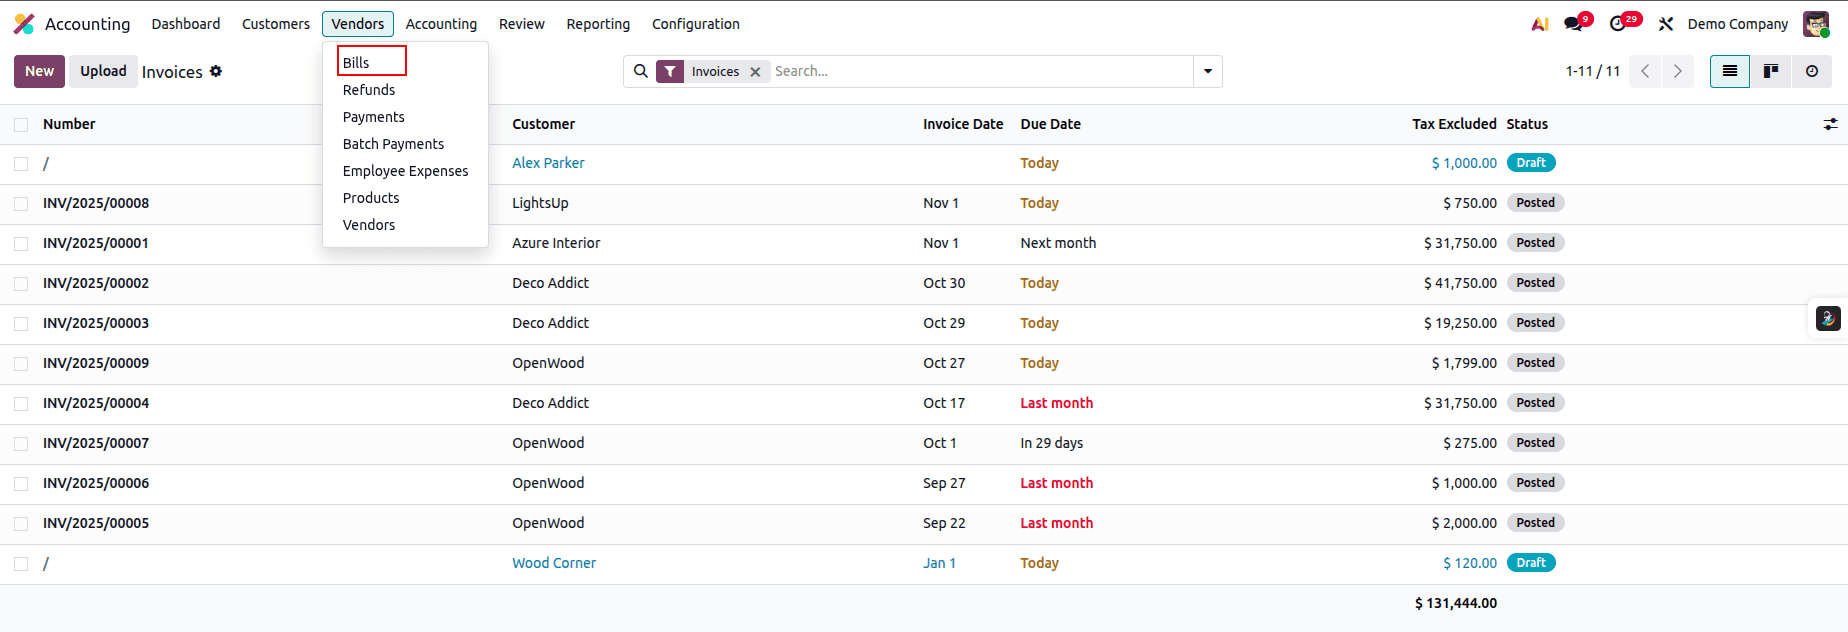
Select Bills under the Vendors menu in the Accounting module.
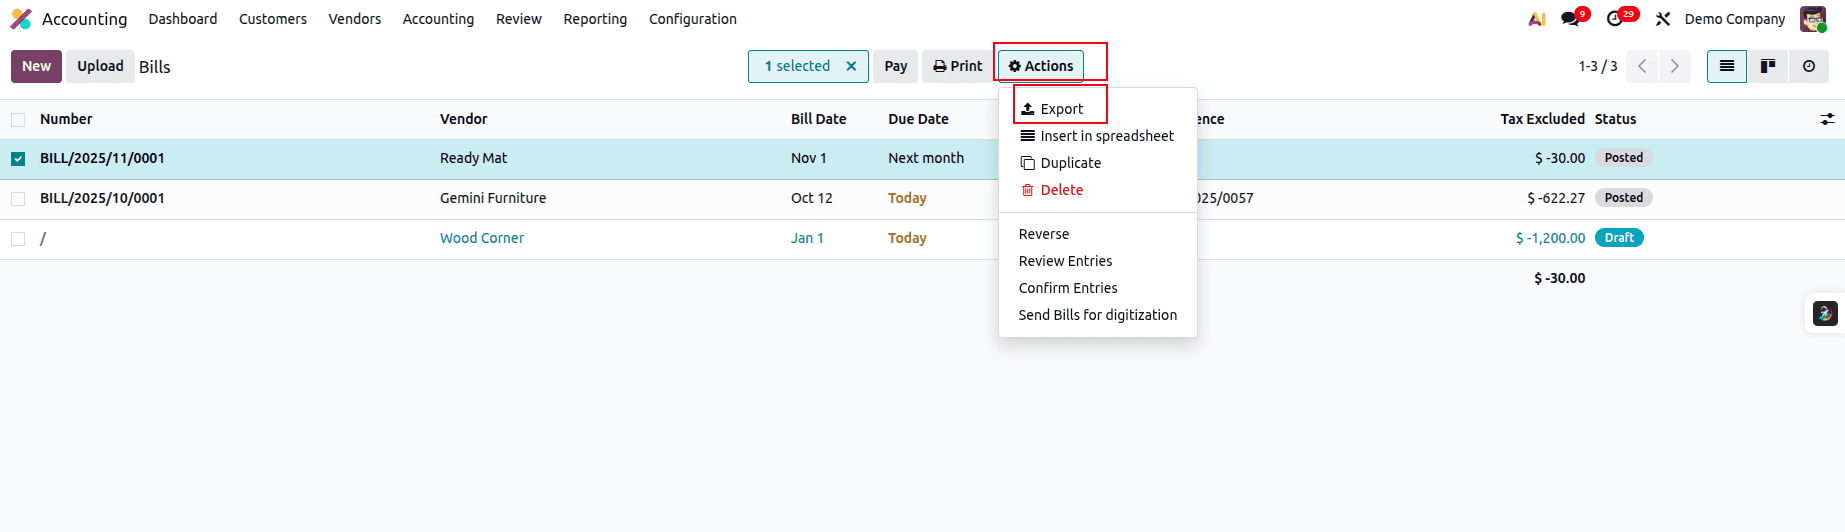
Select any bill from the list, then click Action and choose Export.
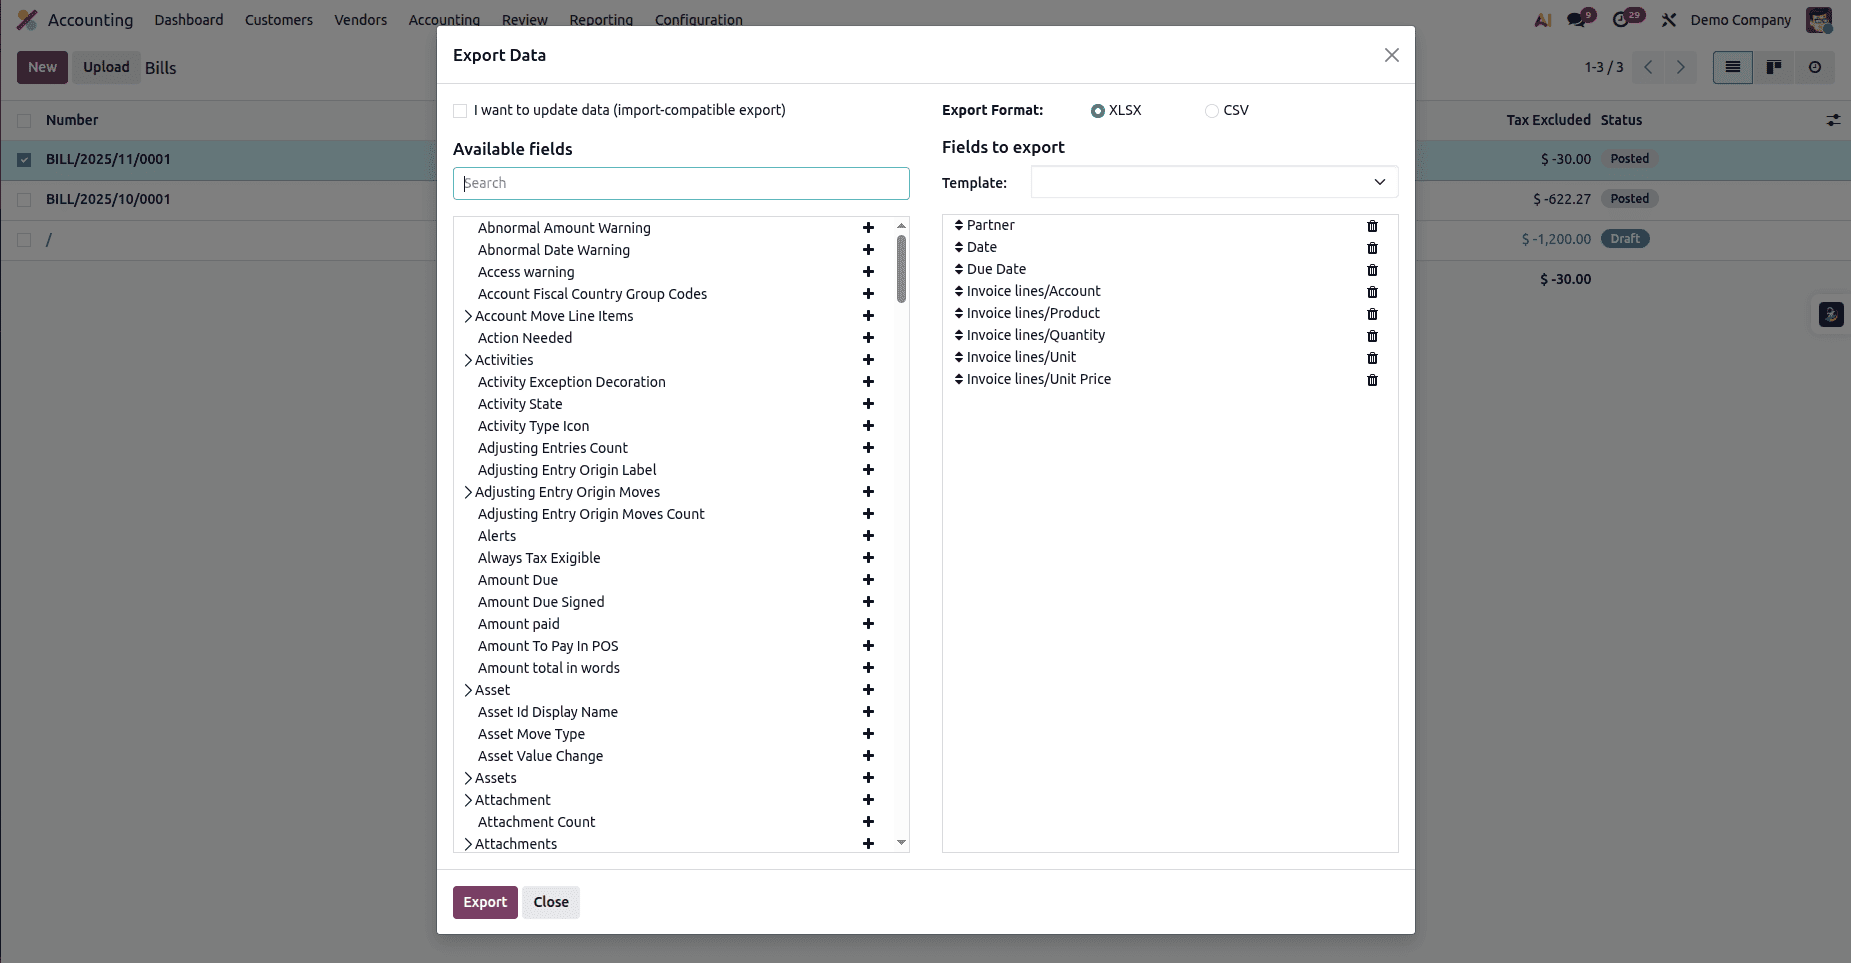
Add the required fields from the Available Fields list to the Fields to Export section, then click Export.

This is the file we exported. Now, update the partner and any other necessary details to prepare it for importing a new bill.
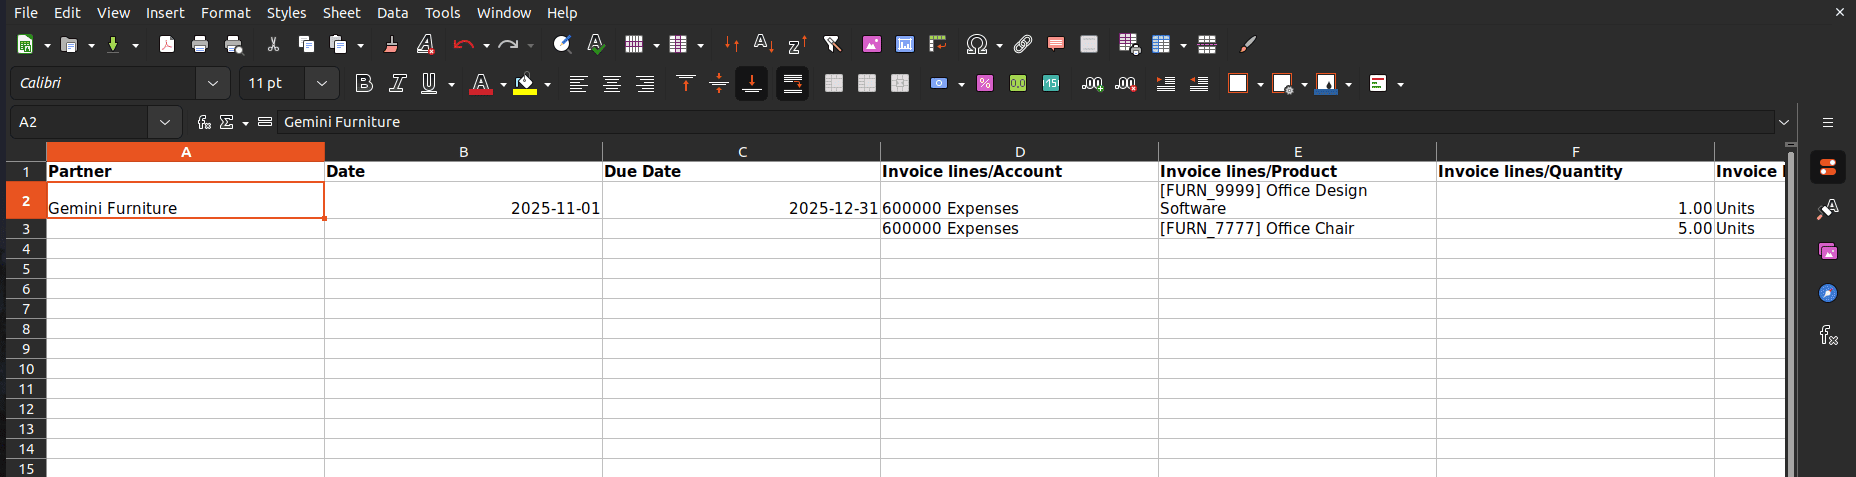
Updated the Excel sheet with the new data.
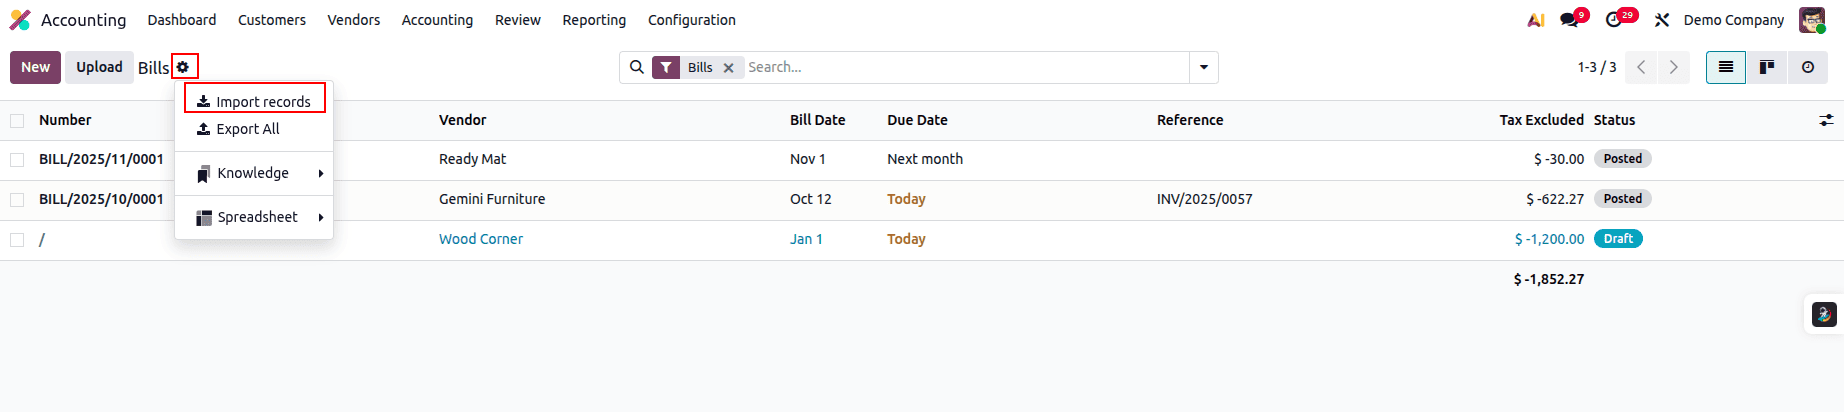
Click Import Records under the gear icon, then upload the data file for testing.
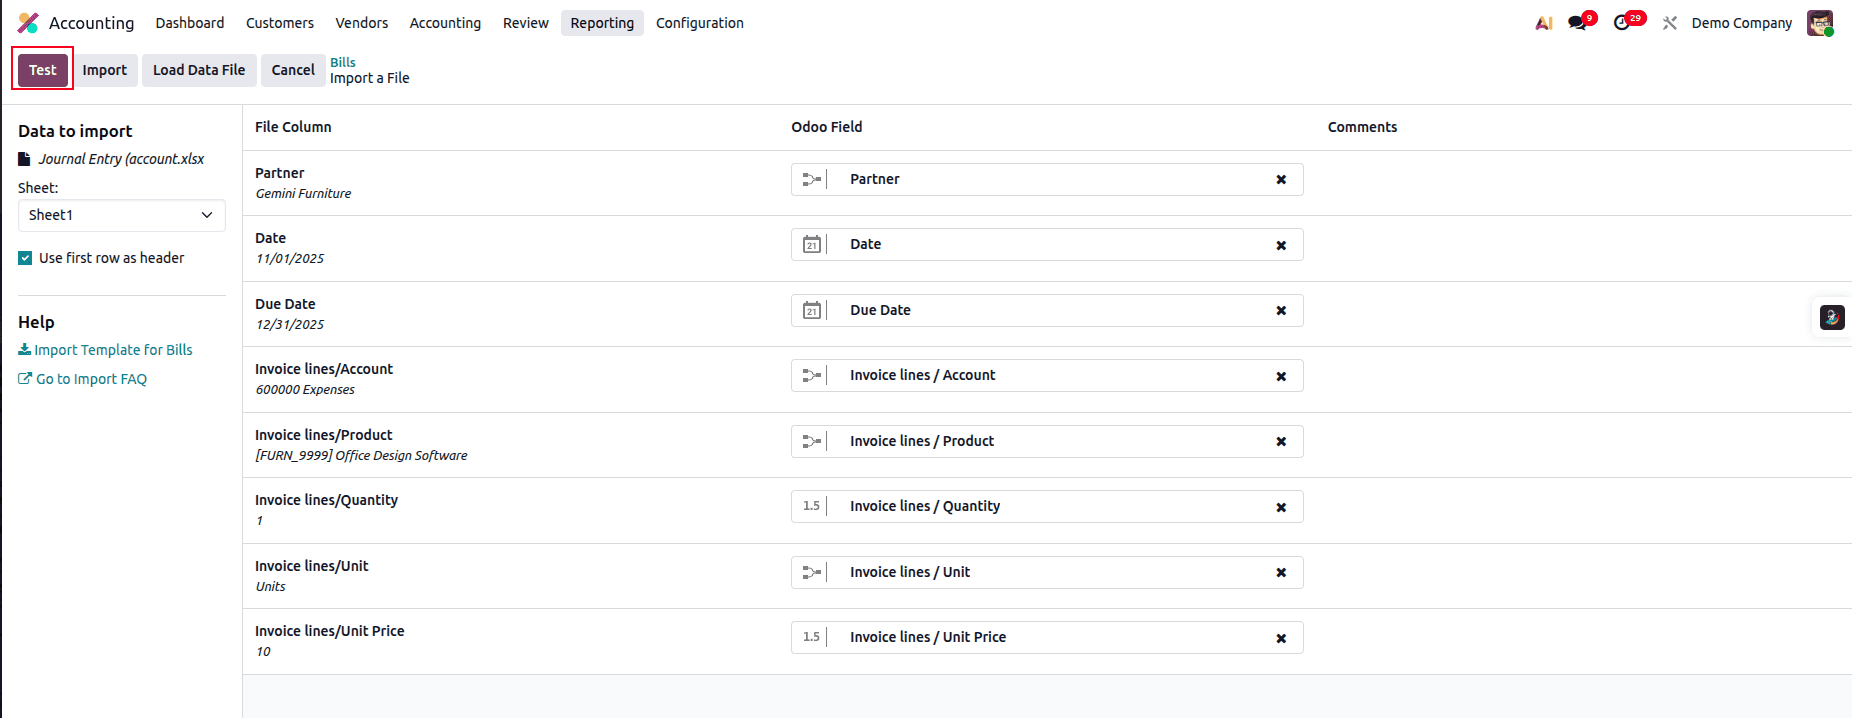
Click the Test button to validate the data file.
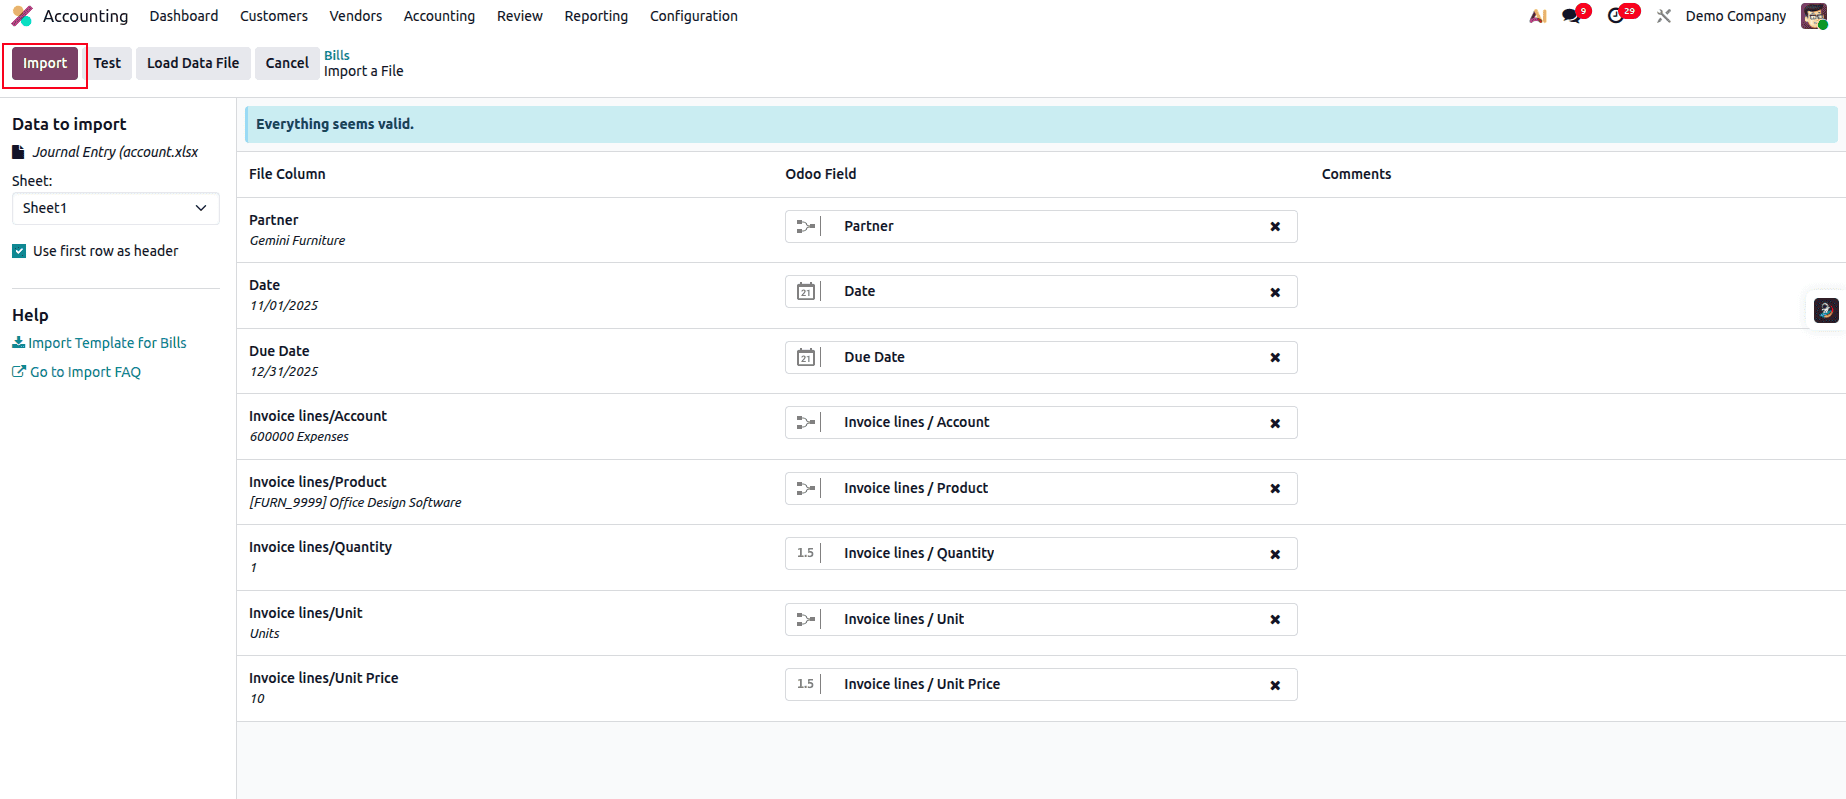
After the test is successful, click the Import button to import the data file.
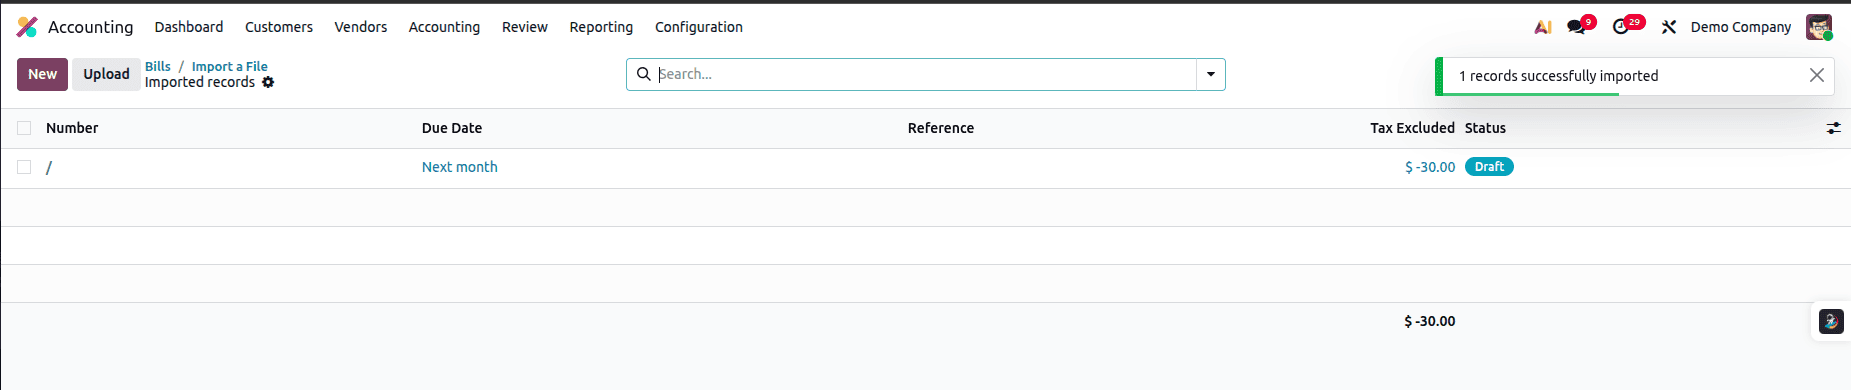
The bill has been successfully imported.
Data migration is one of the most crucial steps when setting up or transitioning to a new Odoo environment. Whether you’re importing product categories, attributes, products, customers, vendors, sales orders, purchase orders, invoices, or vendor bills, each step plays an important role in ensuring a smooth and reliable operational workflow. By following a structured approach—exporting templates, preparing clean and accurate Excel files, validating your data, and importing it systematically—you can significantly reduce errors and streamline your setup process.
Odoo’s powerful import tools make it easy to bring in large volumes of data while maintaining consistency across modules such as Sales, Purchase, Inventory, and Accounting. With careful preparation and attention to relational fields, you can build a well-organized, fully functional database that supports your business from day one.
A well-executed data migration not only saves time but also lays the foundation for accurate reporting, efficient processes, and long-term scalability. By mastering Odoo’s data import and export features, you're setting your organization up for a smooth start and continued success.
To read more about The Ultimate Guide to Odoo 19 New Features and Enhancements, refer to our blog The Ultimate Guide to Odoo 19 New Features and Enhancements.