To add buttons that perform specific actions in Odoo 18 Studio, we can use the Studio module. Unlike other features that rely entirely on a graphical interface, creating custom buttons requires a small amount of XML coding.
Start by enabling debug mode. You can do this either from the general settings or by appending ?debug=1 to the URL right after /web, as shown in the example below. This mode allows access to advanced configuration options, including the XML editor for customizing button actions.

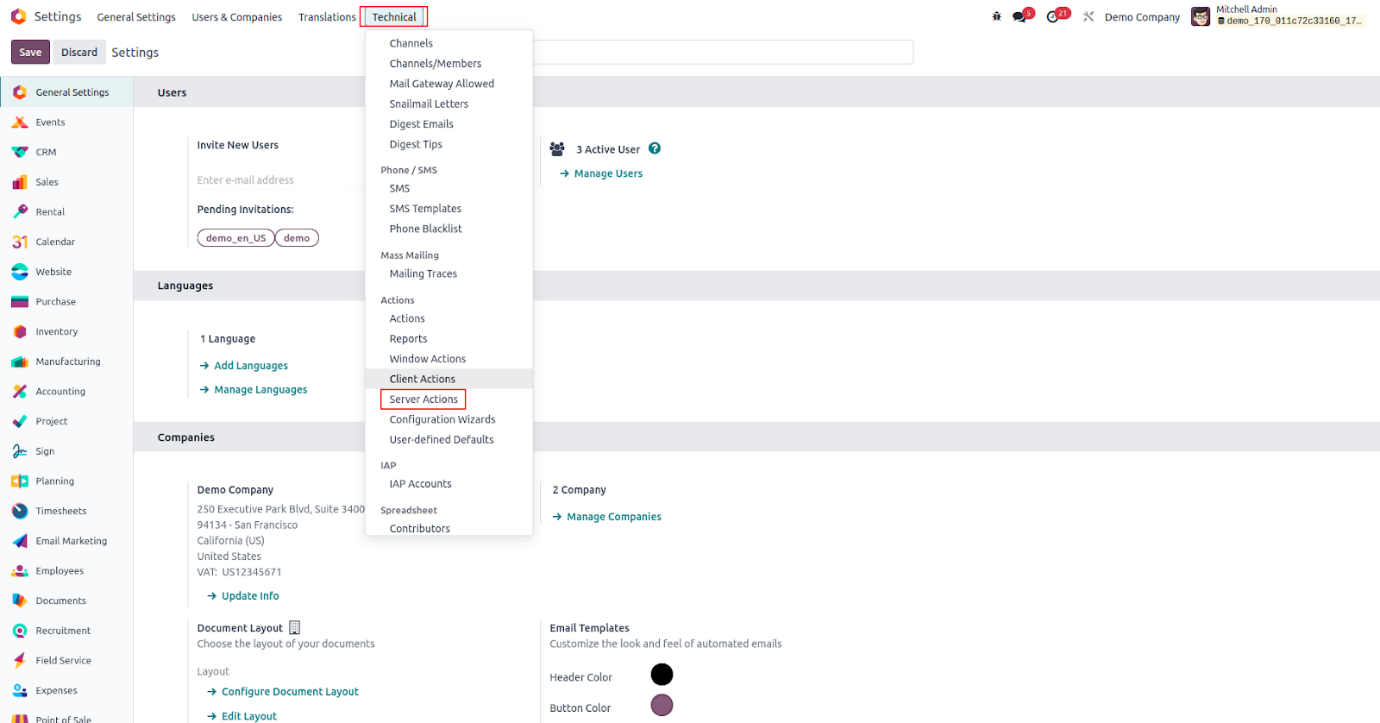
Once debug mode is activated, the next step is to create a Server Action that will execute a specific function when the custom button is clicked.
To do this, go to Settings > Technical > Actions > Server Actions. This section is only accessible when developer mode is enabled. Here, you can define the server-side logic that the button will trigger, such as updating a record, sending an email, or executing a Python function.
Click on the 'New' button to start creating a new Server Action. Then, fill in the required details such as the Action Name, select the appropriate Model, and specify the action to be executed—whether it's Python code, triggering another action, or updating records—based on your desired functionality.
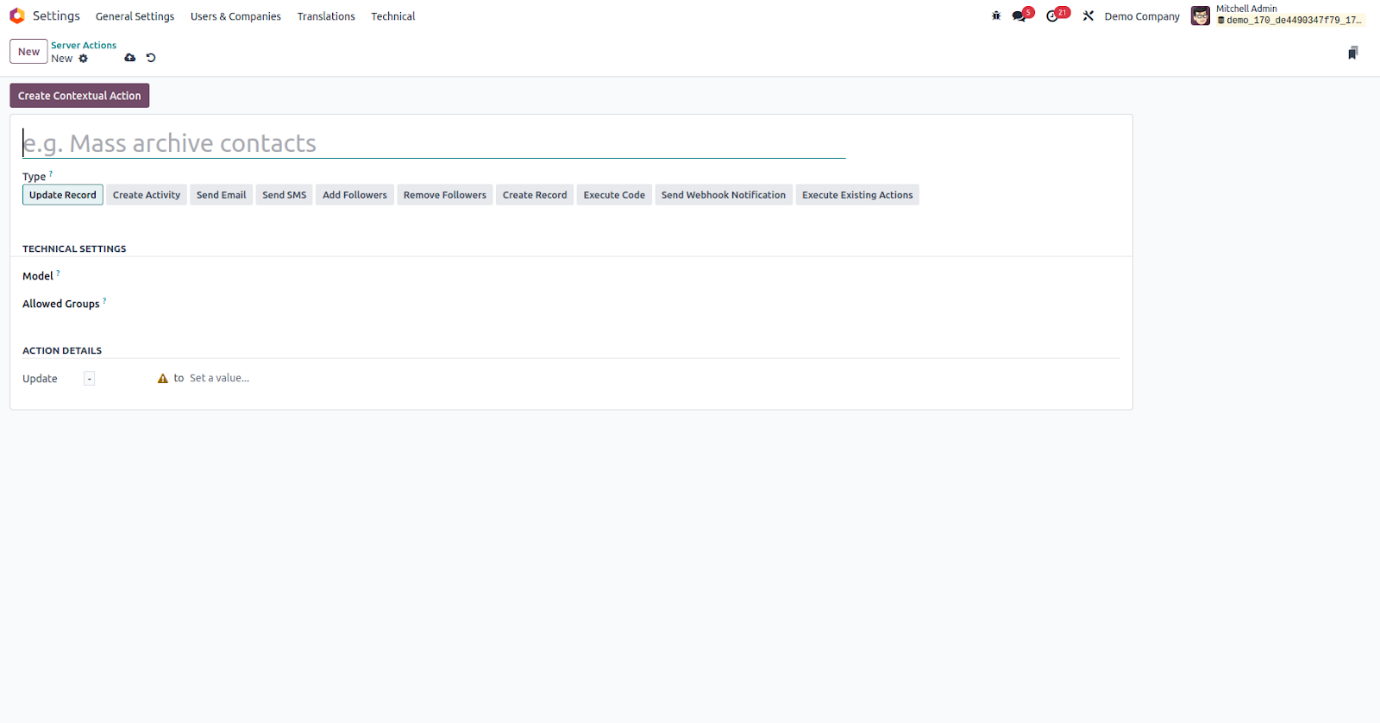
Here are the fields you'll encounter while configuring a Server Action in Odoo 18:
- Action Name: Provide a clear and concise name that reflects the purpose of the server action.
- Type: Choose the type of action you want to perform. The available options include:
- Update Record: Use this when you want to modify a specific field value in the selected record. You’ll need to define which field is being updated and with what value.
- Create Activity: Select this to automatically add an activity (like a task or follow-up) when the button is clicked.
- Send Email: Use this option to send an email. You must specify the Email Template and the Send Email As user.
- Send SMS: Triggers an SMS message. You'll need to define the SMS Template and the Send SMS As user.
- Add Followers: Adds followers to the current record. You’ll specify which users or partners to add.
- Remove Followers: Removes followers from the record. You’ll define which users or partners to remove.
- Create Record: Automatically generates a new record in a specified model. You'll be asked to provide the model, record name, and the link field if applicable.
- Execute Code: Use this to run custom Python code for advanced operations or logic, such as calculations or record manipulations.
- Send Webhook Notification: Sends a POST request to an external service (webhook). You must define the target URL and the necessary data payload to be sent.
- Execute Existing Actions: Select this to chain multiple existing server actions. You’ll choose the related server actions that should run in sequence
- Model: Choose the model (e.g., res.partner, sale.order, etc.) where the action should be applied.
- Allowed Groups: Define which user groups are permitted to execute this action. Leaving this field blank will make the action available to all users.
These configurations ensure that your server action performs the desired task securely and efficiently when triggered by a custom button.

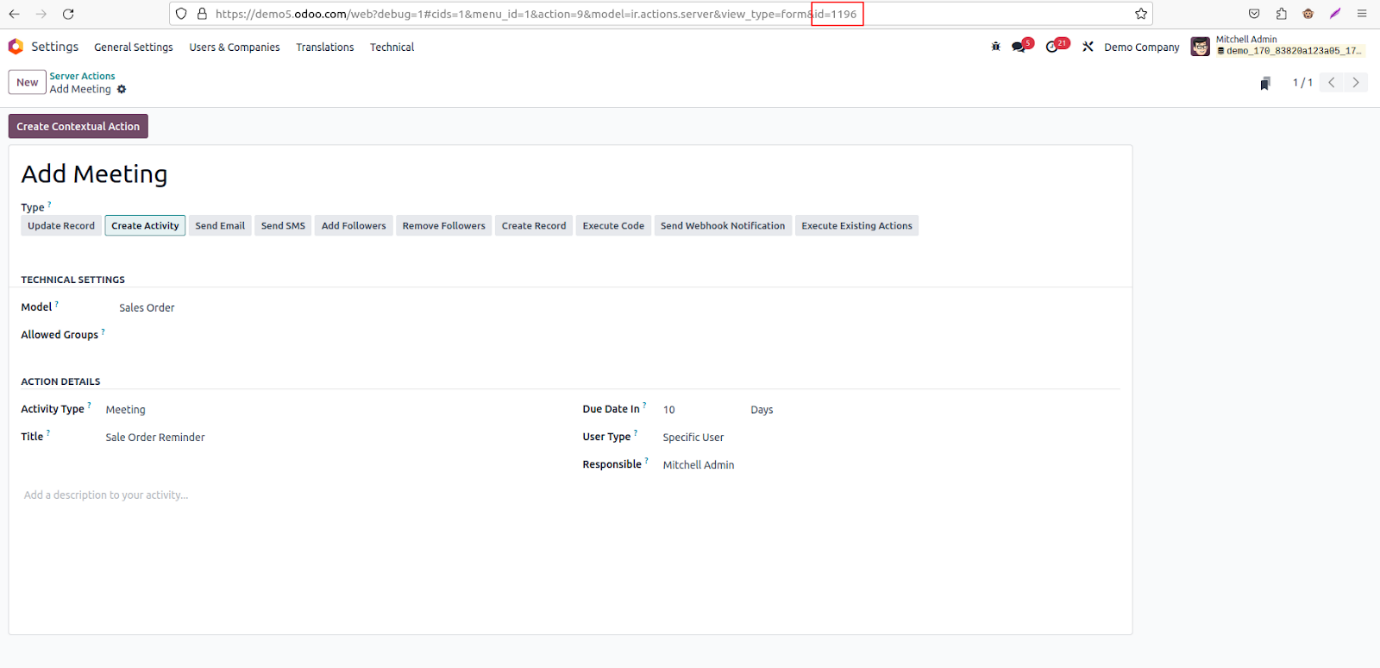
Once all the necessary fields are filled out, go ahead and save the server action. To retrieve the Server Action ID, check the URL in your browser after saving—it's typically displayed at the end of the URL as a numeric value. This ID will be important when linking the action to a custom button in your view.
Copy the ID of the server action you just created. Then, go to the specific view where you'd like to add your button, for example, the Sales Order form view—and open Studio. Within the Studio interface, click on the "View" menu, and then choose the "XML" tab. This will allow you to manually edit the XML structure of the form to insert your custom button and link it to the server action using the copied ID.

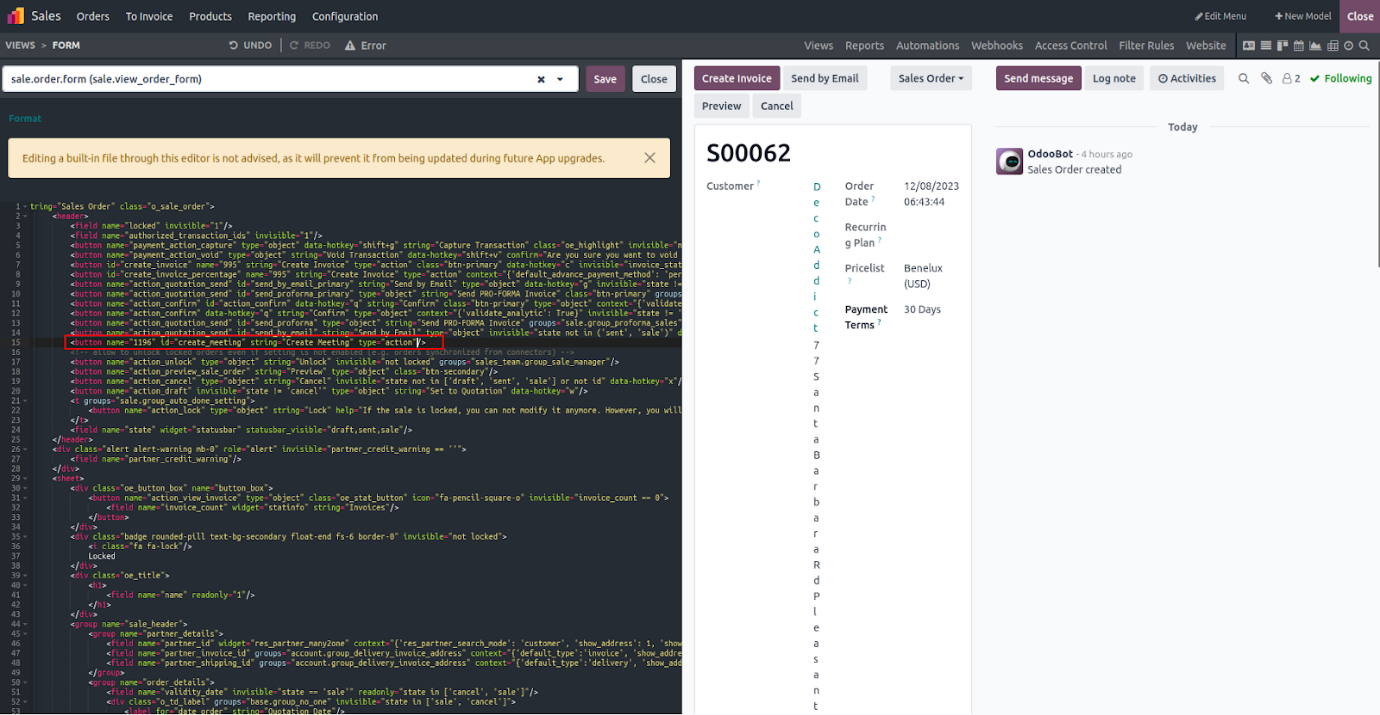
The XML structure of the selected view will appear on the left side. Inside the <header> tag, you'll see the code that defines the existing buttons for that view. This is where you can insert your custom button, linking it to the server action you created by referencing its ID.
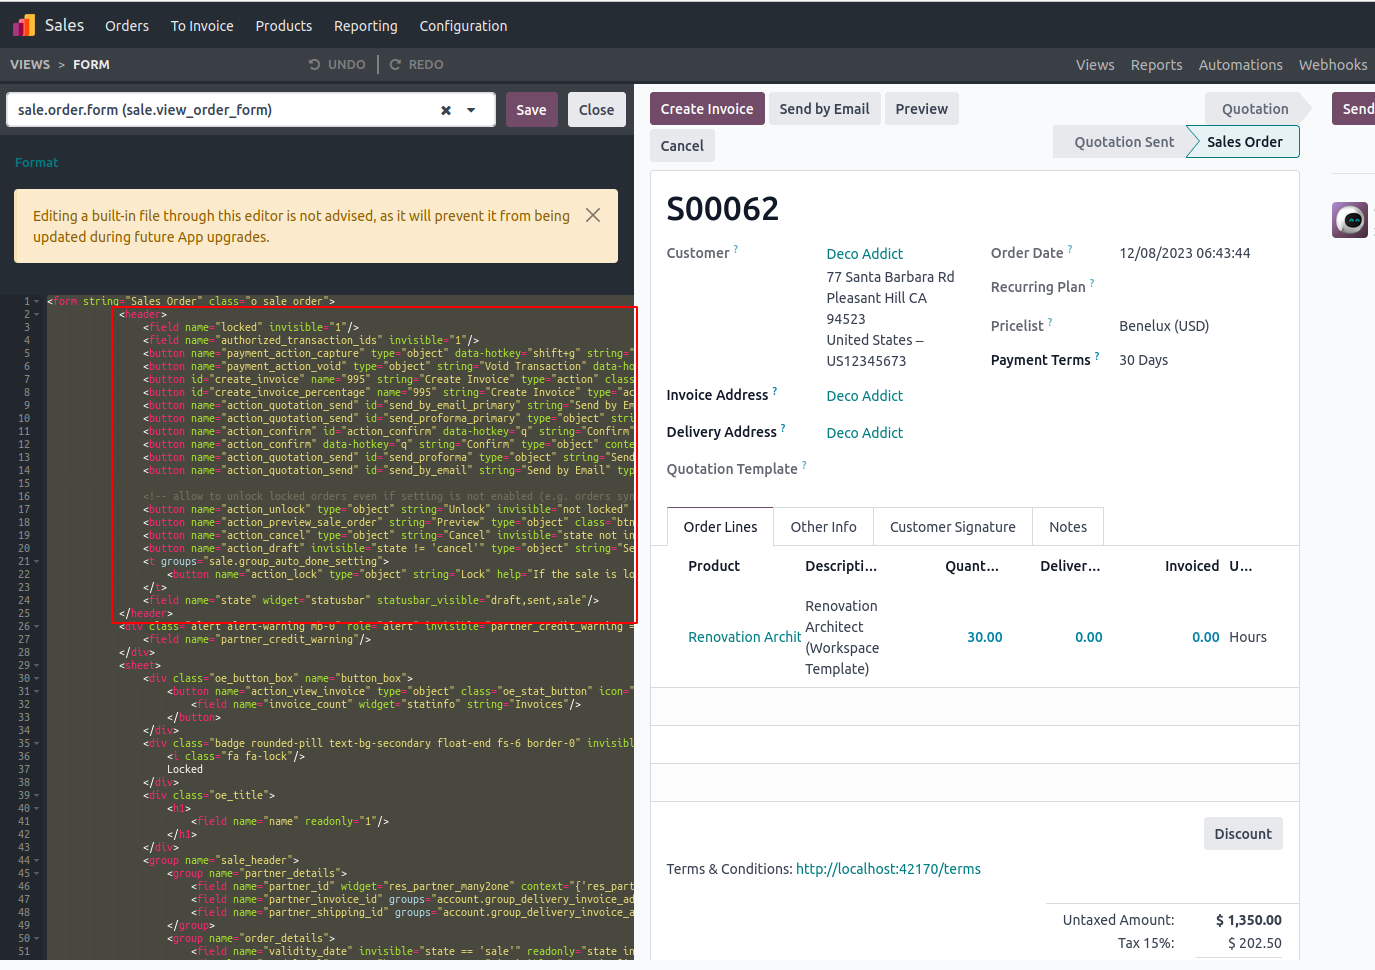
Add the new button inside the <header></header> section, following the format shown in the example below. Make sure to set the name attribute to the ID of the server action you created.
<button name="1196" id="create_meeting" string="Create Meeting" type="action"/>
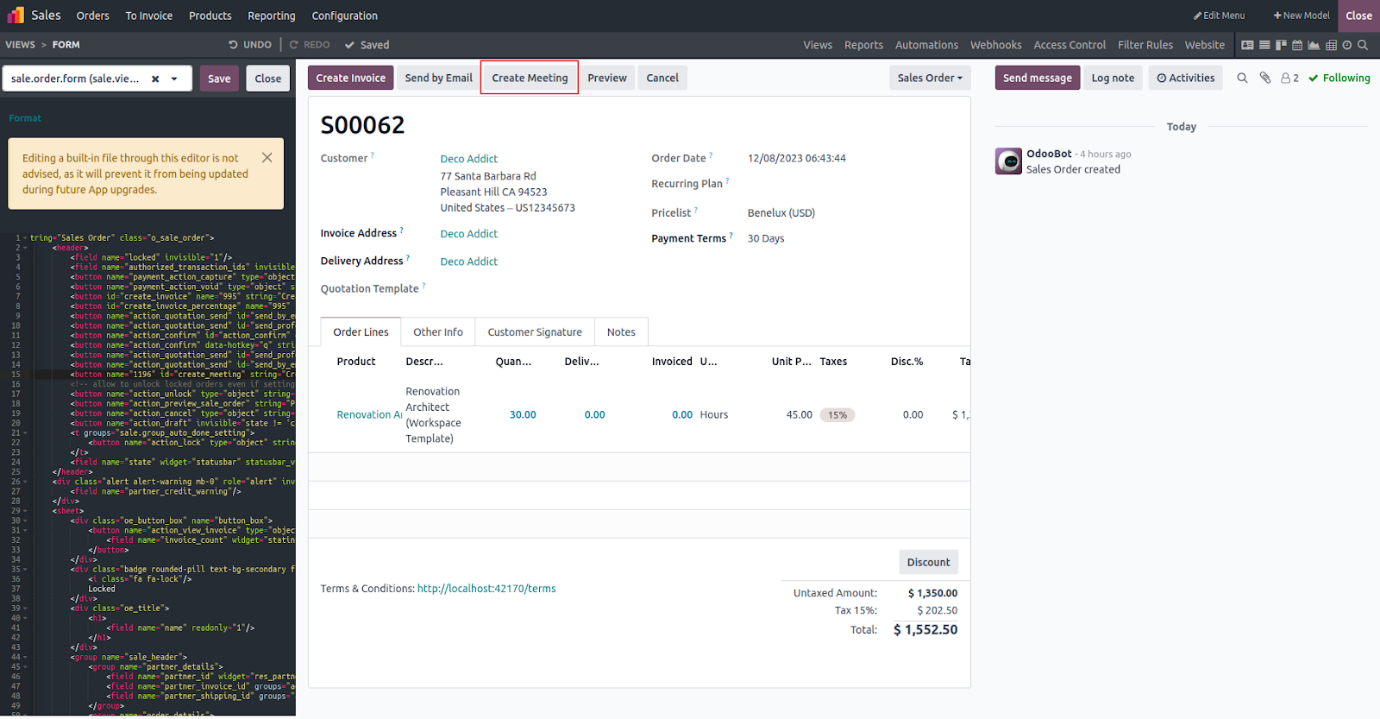
Once you’ve followed the above steps, the newly added button will appear within the form view.
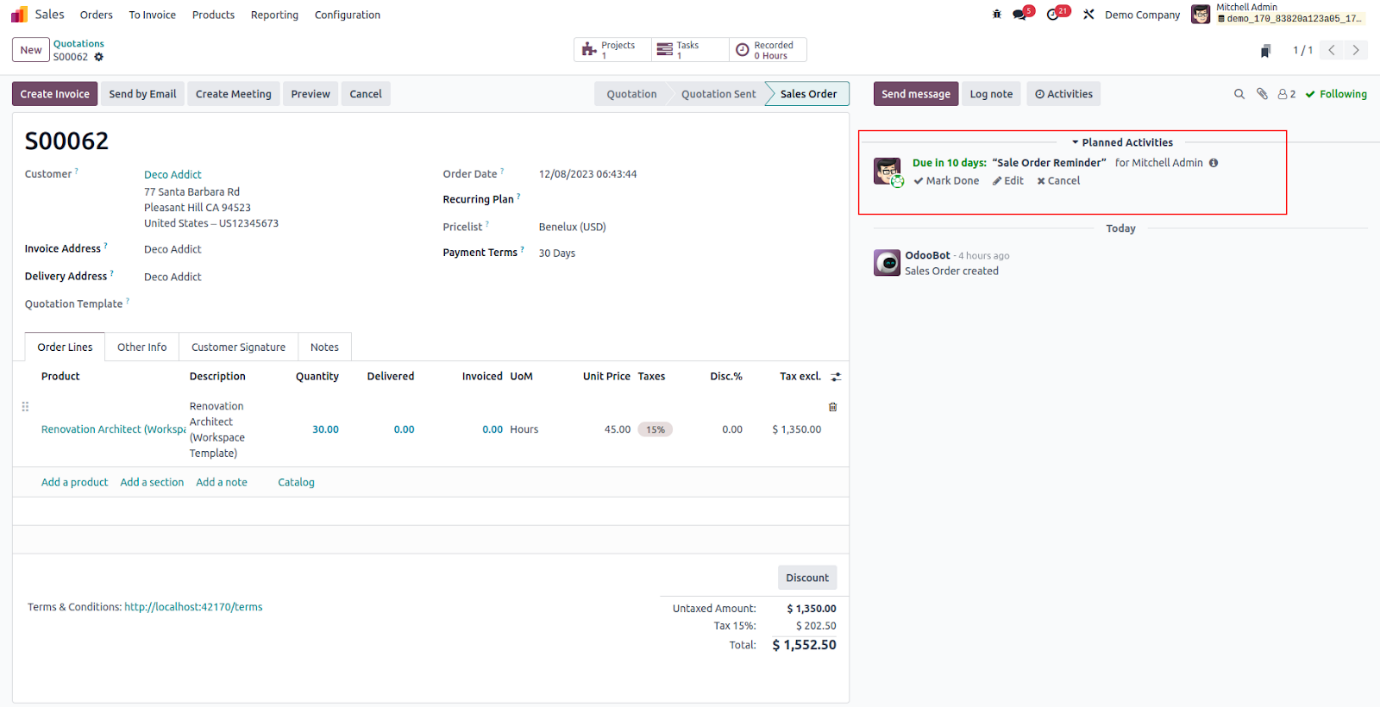
When the button is clicked, it will initiate the execution of the associated server action, as demonstrated below.
In summary, Studio Book V18 enables users to easily incorporate custom buttons using XML code, allowing for the seamless execution of specific actions within Odoo. This approach enhances both the flexibility and functionality of customised views across the platform.