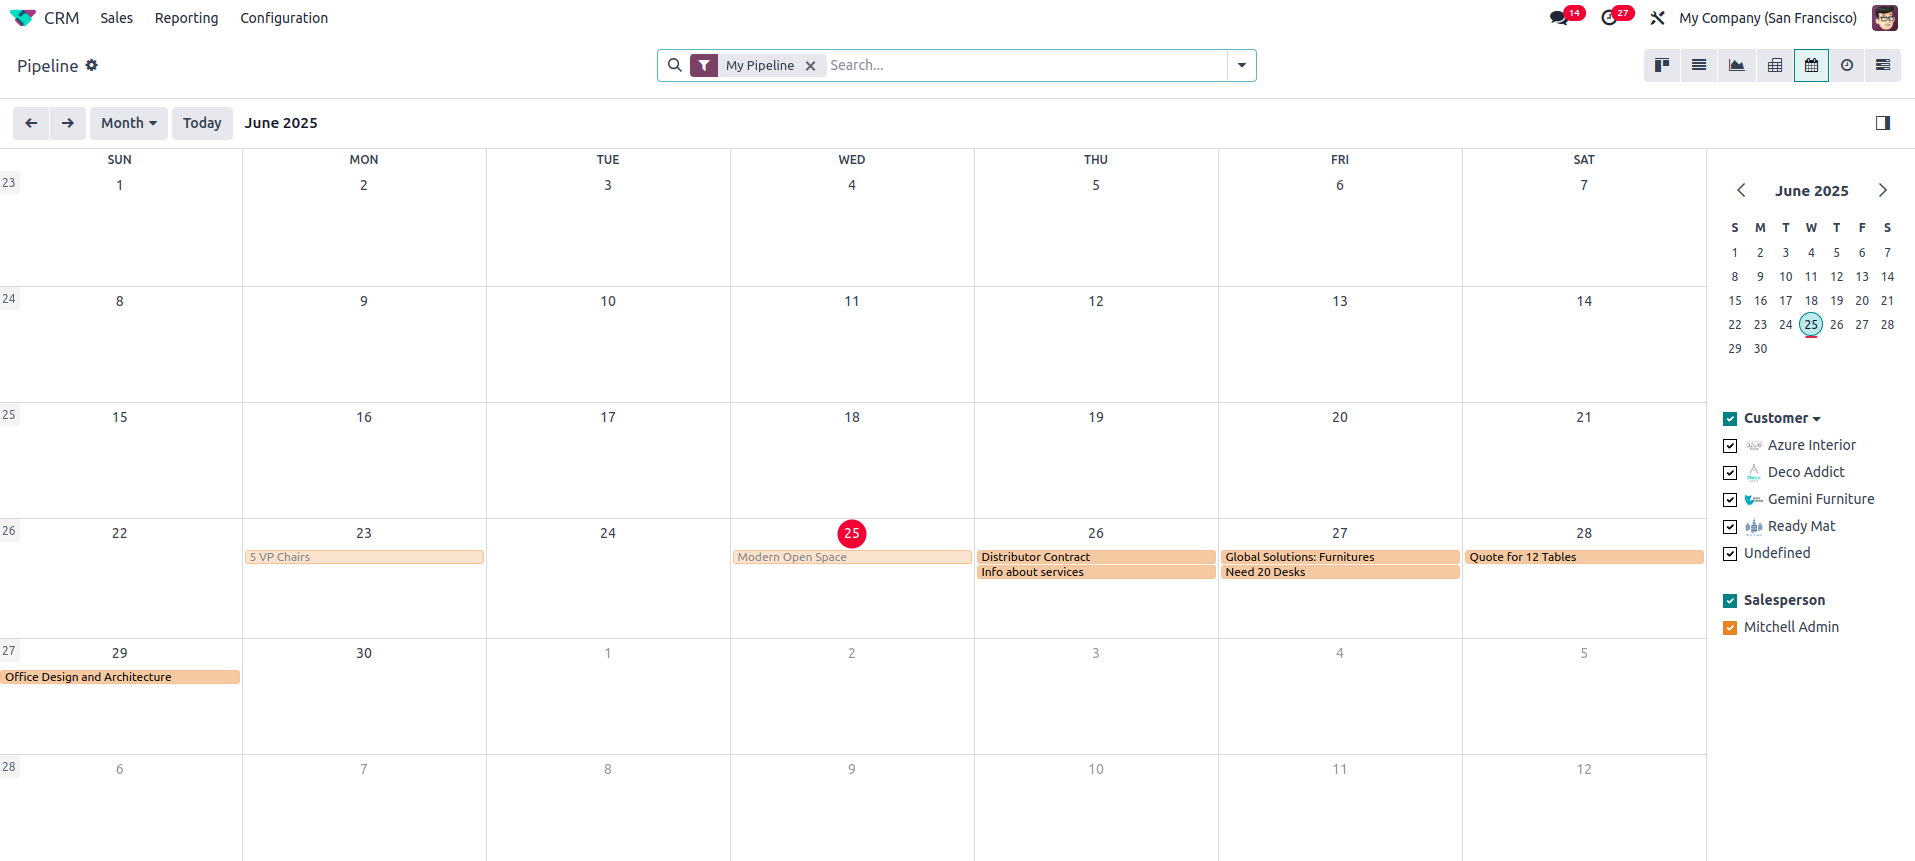
Odoo’s calendar view enables you to display events by day, week, month, or year, with the flexibility to switch between these views to suit your preferences. Additionally, you can customize the view by showing or hiding specific fields, helping you concentrate on the most relevant information.
Steps to Create a Calendar View
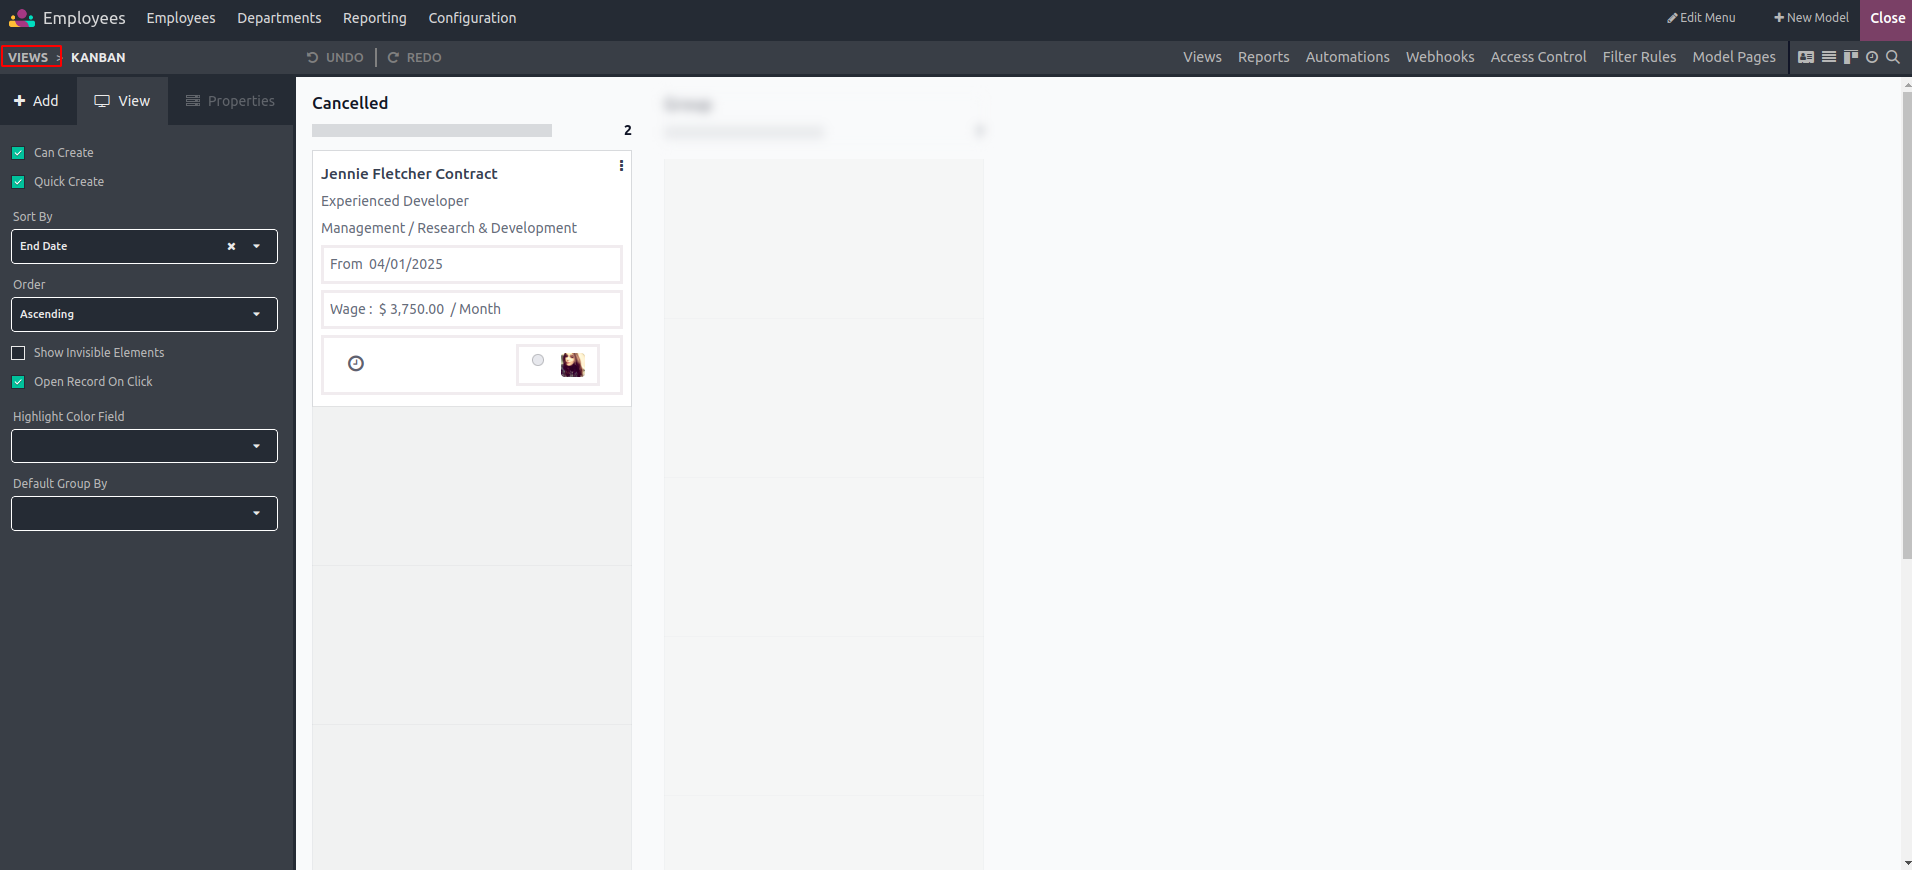
Navigate to the module where you'd like to add a calendar view, and click the Studio icon located at the top right.
Click on the "Views" button.
Choose the "Calendar" view.
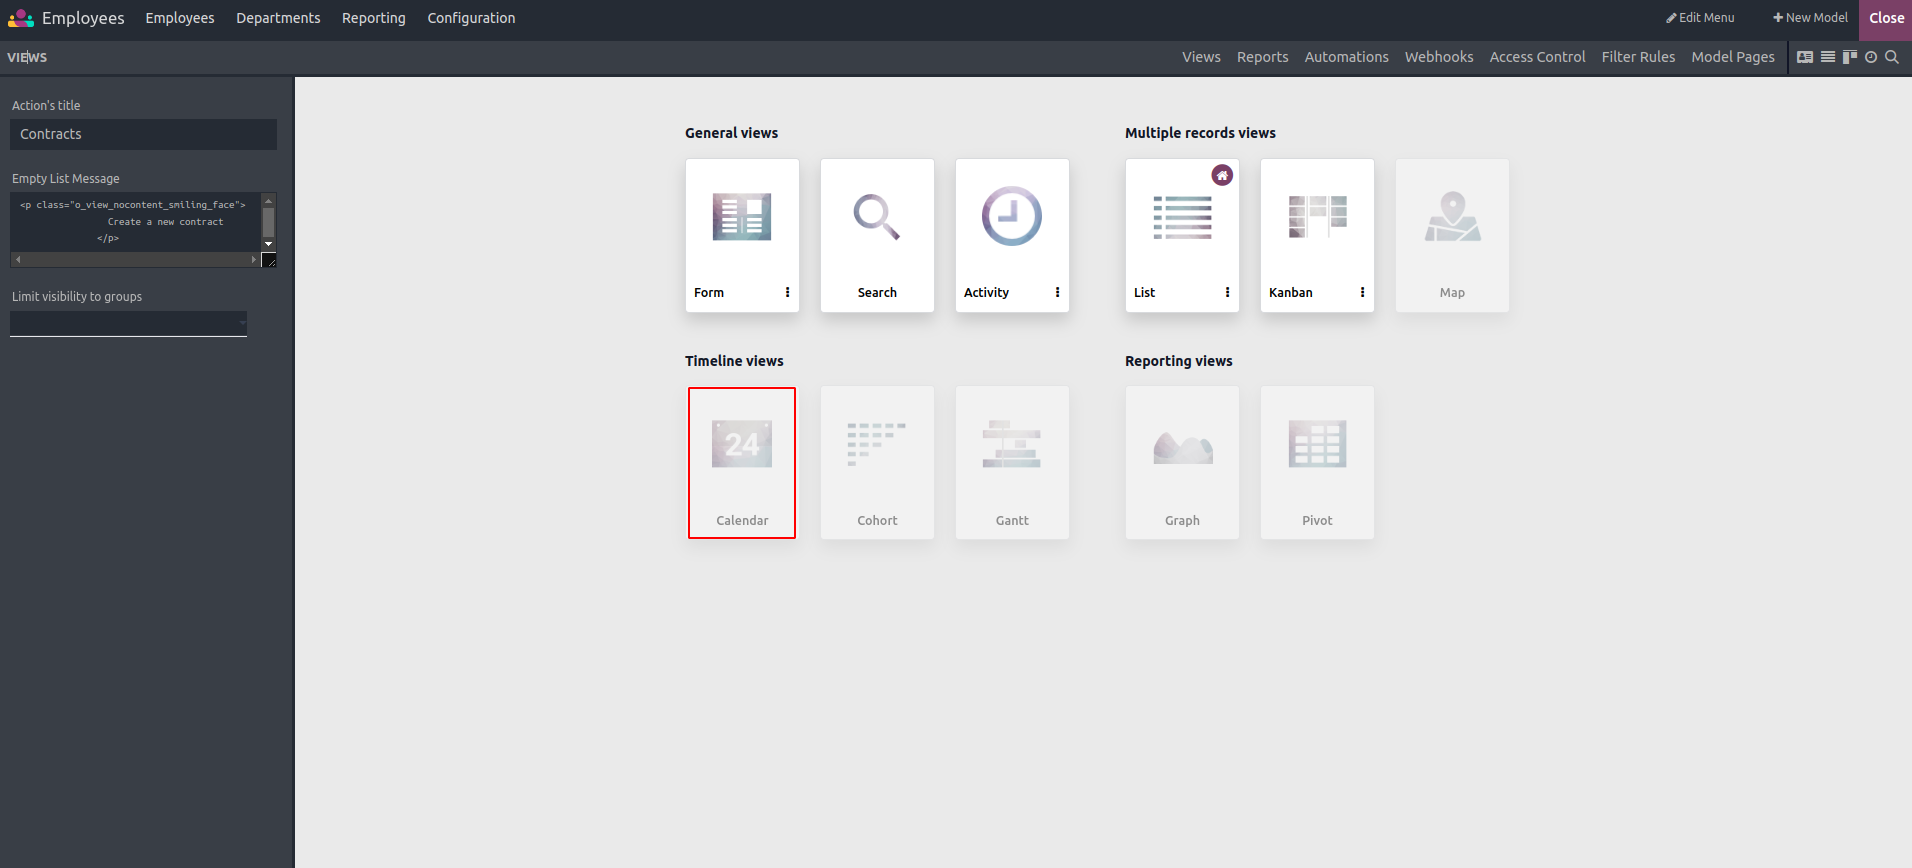
After clicking on the Calendar, the following page will be displayed.
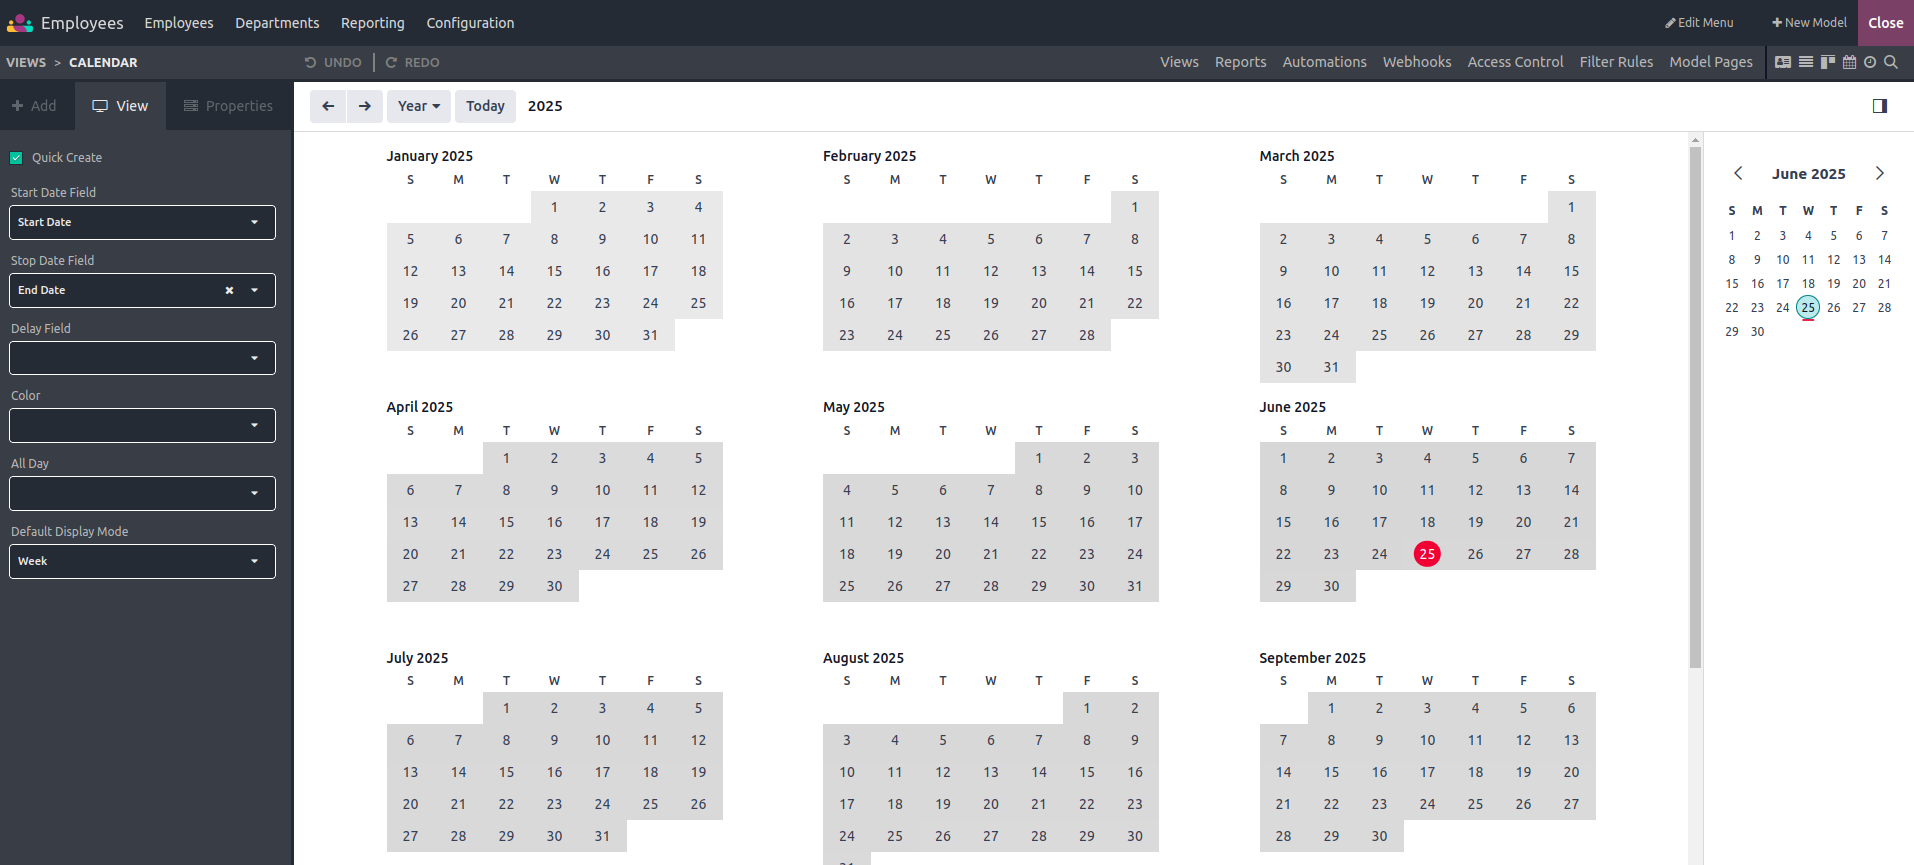
- Start Date Field: Used to define the starting date.
- Stop Date Field: Used to specify the end date.
- Delay Field: Shows the duration in hours.
- Color: Assigns a color to the calendar item.
- All Day: Specifies whether an event or task spans the entire day.
- Default Display Mode: Sets the default view for calendar items, which can be configured as Day, Week, Month, or Year.
After providing the necessary information, simply close Studio, and the calendar view will be accessible from the views section.
