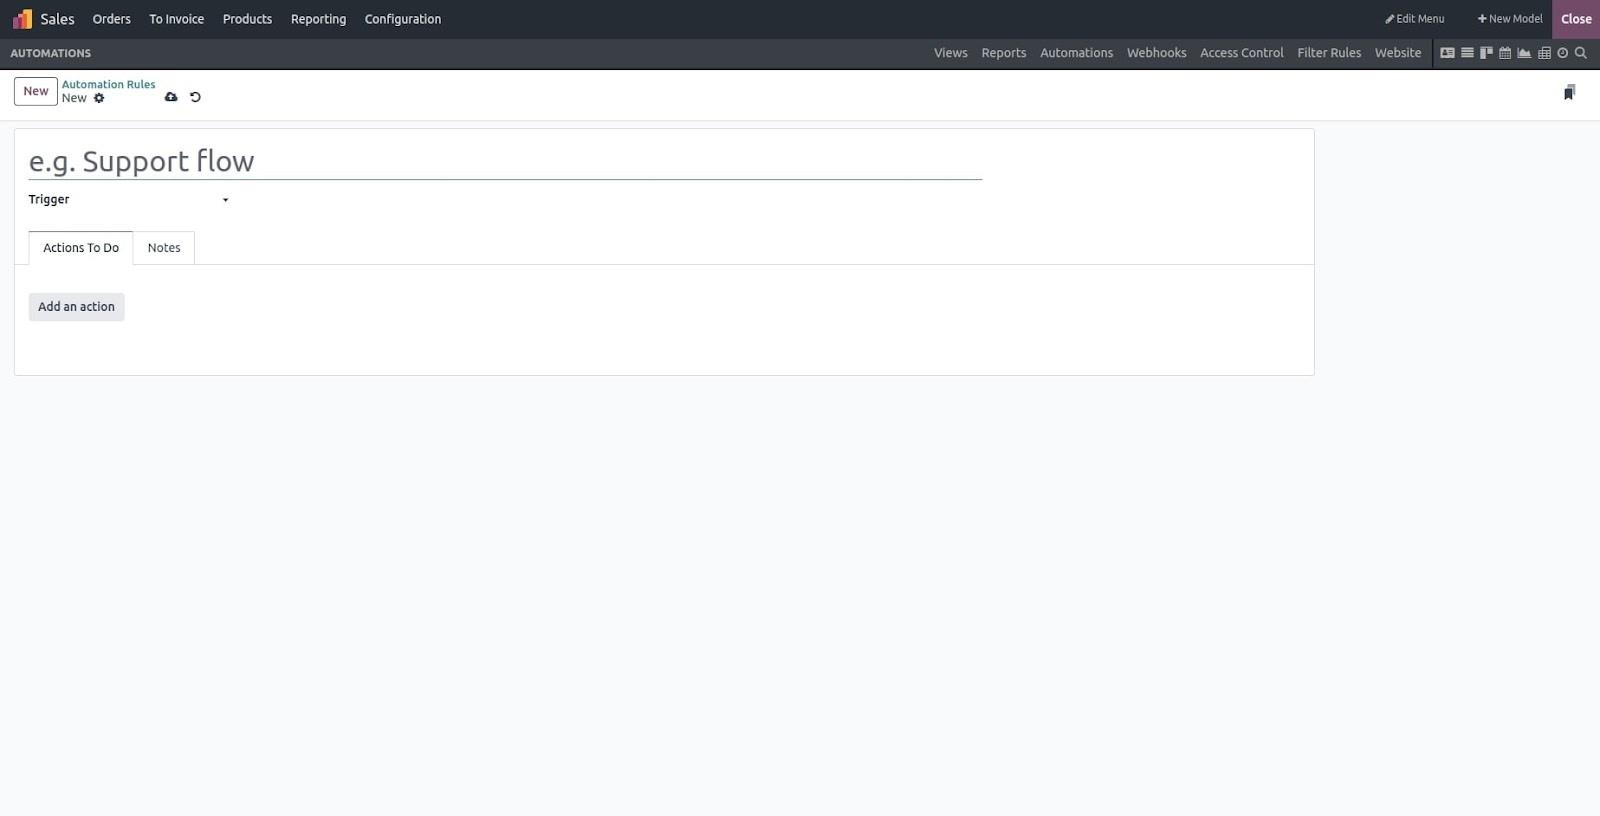
To create a new automated action, simply click on the "New" button.
This document outlines the functional specifications required for setting up an automated action within the application. To create one, begin by assigning a unique name to the action. You can easily enable or disable the automated action through the provided menu options. Additionally, it’s important to include a clear description of what the action is intended to perform.
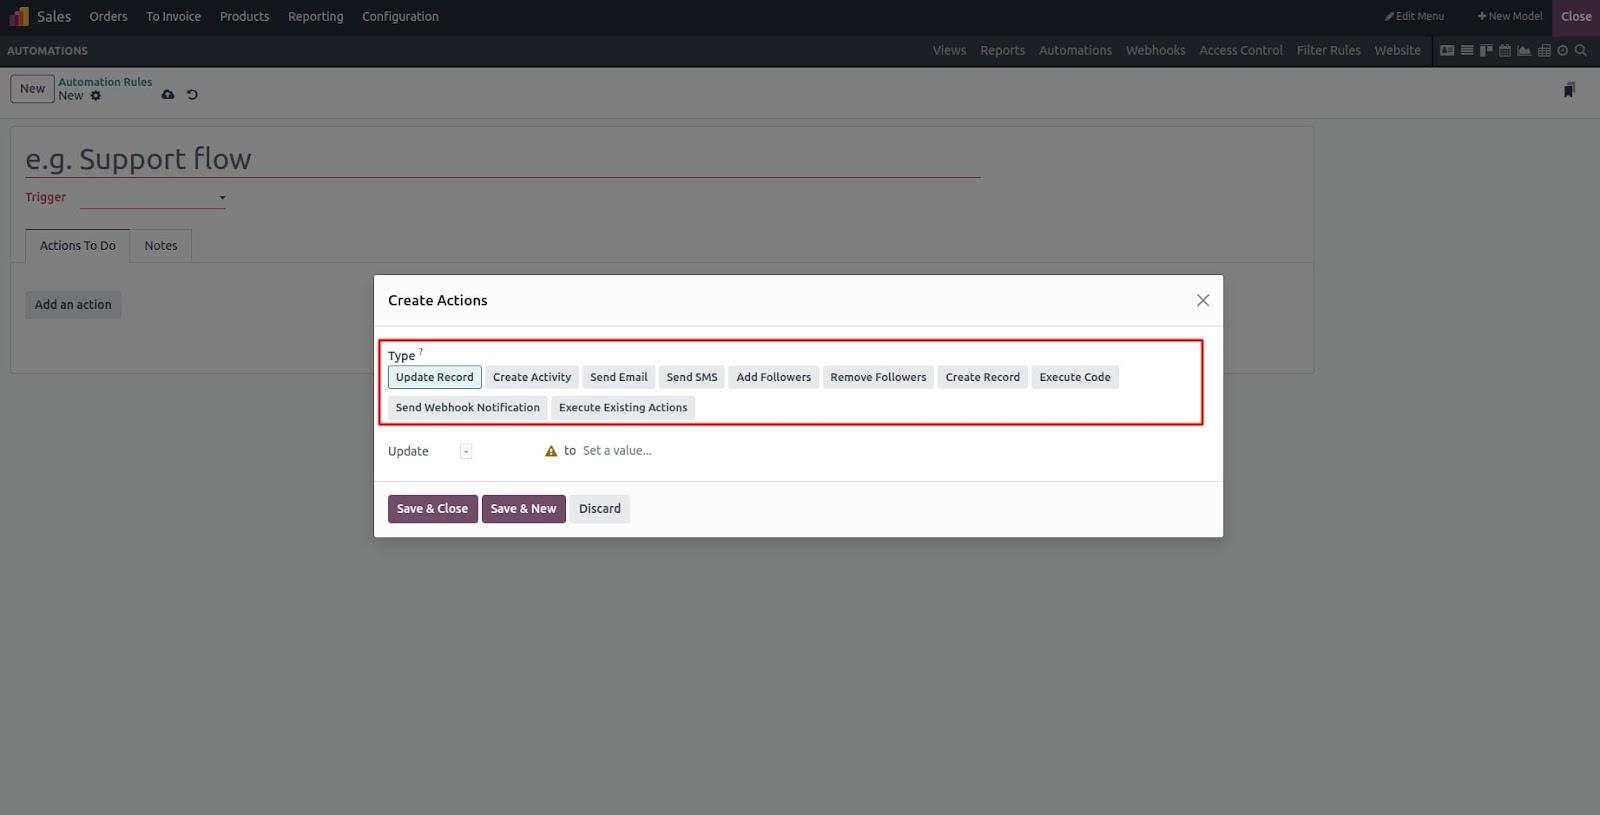
The activities available on the platform act as options for defining the behavior of the automated action. These activities specify what should happen when the action is executed.
You can also define triggers that determine when the automated action should run. These triggers activate the action based on specific events or user interactions. However, the action will only execute if the defined trigger conditions are met and the action is in an active state.
A single automated action can trigger multiple tasks. The types of actions available under the "Action To Do" section are listed below.