It would be much more useful for today's AI assistants to have secure access to practical business data available in apps where they work. The Model Context Protocol (MCP) is the standard way to connect applications powered by artificial intelligence with the outer world, including other APIs and services. This tutorial describes the development of an MCP server on the basis of FastMCP. Apart from that, the integration of the created MCP server with the GitHub OAuth API to provide secure authorization and define the users authorized to use the server will also be described here. Furthermore, we will examine the structure of FastMCP, authentication via GitHub, and exposure of business functionality as MCP tools.
Step 1: Creating a GitHub OAuth App
First of all, there needs to be an authentication process for the users who will use the MCP server. For this purpose, we authenticate our users by logging into the Github account in order to make use of the tools provided in the Odoo instance.
For this purpose, there is the GitHubProvider, which is incorporated in the FastMCP and facilitates the integration of the OAuth protocol of GitHub with the MCP server. The very first step for this purpose is the registration of an OAuth app and getting the client ID and client secret.
Log in to the Github account and proceed to the account settings menu, followed by:
Settings > Developer Settings > OAuth Apps > New OAuth App
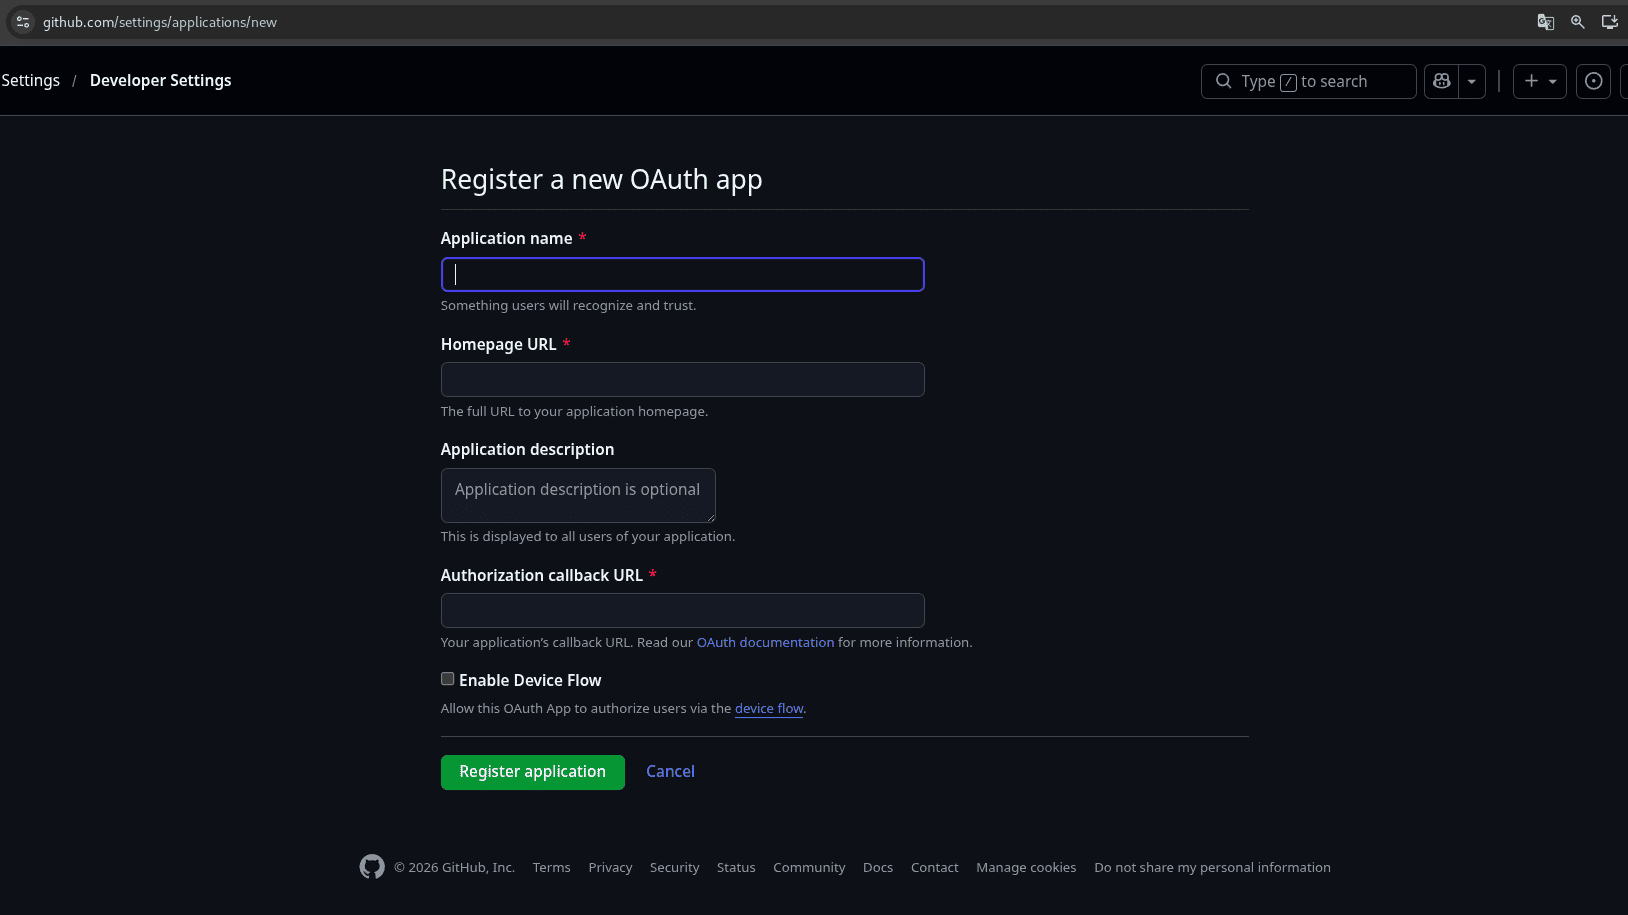
Get ready to test your domain/ngrok domain by selecting the “Homepage URL", entering “/auth/callback” in the path, and entering your domain name in the “Callback URL". Once you register your application, the Client ID will appear on Github. After that, you have to copy that and create a client secret.
Step 2: Creating the Python Project
Creating a new directory and virtual environment:
mkdir fast_mcp
cd mcp_odoo
python -m venv .venv
source .venv/bin/activate
The following files shall form part of the project:
fast_mcp/
+-- .env
+-- pyproject.toml
+-- server.py
Step 3: Set up the Dependencies
Create a file named pyproject.toml:
[build-system]
requires = ["setuptools>=61"]
build-backend = "setuptools.build_meta"
[project]
name = "fastmcp-greeting-server"
version = "0.1.0"
description = "A simple FastMCP server protected by GitHub OAuth."
requires-python = ">=3.10"
dependencies = [
    "fastmcp>=3.0.0",
    "uvicorn>=0.30.0",
    "python-dotenv>=1.0.0",
]
[tool.setuptools]
py-modules = ["server"]
Dependencies for this project are:
- fastmcp provides the server for MCP, tools, authentication, and the client.
- uvicorn runs the ASGI application.
- python-dotenv loads the environment variables from the .env file.
For installation of the project:
pip install -e .
Step 4: Set up Environment Variables
Set up .env:
# GitHub OAuth App credentials
GITHUB_CLIENT_ID=your_github_client_id
GITHUB_CLIENT_SECRET=your_github_client_secret
# Public base URL of the MCP server
BASE_URL=https://your.domain
# Uvicorn configuration
HOST=127.0.0.1
PORT=8000
Step 5: Develop the FastMCP Server
Develop server.py:
import os
import uvicorn
from dotenv import load_dotenv
from fastmcp import FastMCP
from fastmcp.server.auth.providers.github import GitHubProvider

load_dotenv()

auth = GitHubProvider(
    client_id=os.environ["GITHUB_CLIENT_ID"],
    client_secret=os.environ["GITHUB_CLIENT_SECRET"],
    base_url=os.environ["BASE_URL"],
)

INSTRUCTIONS = """
This server provides a simple greeting tool.
Use the `greet` tool when the user asks to be greeted, welcomed,
or addressed by name.
"""

mcp = FastMCP(
    "Greeting Server",
    auth=auth,
    instructions=INSTRUCTIONS,
)

@mcp.tool(
    annotations={
        "readOnlyHint": True,
        "destructiveHint": False,
    }
)
def greet(name: str = "World") -> str:
    """Return a friendly greeting for the supplied name.
    Args:
        name: The person or group to greet.
    """
    cleaned_name = name.strip() or "World"
    return f"Hello, {cleaned_name}! Welcome to FastMCP."

app = mcp.http_app()
The script above results in the creation of the FastMCP server that provides one tool accessible through an HTTP endpoint protected by GitHub OAuth. The Client ID, secret, and base URL are fetched with the help of the dotenv library. GitHubProvider is created for OAuth2 authentication so that the server’s tools can be accessed only by GitHub users. The FastMCP class is instantiated with the name and INSTRUCTIONS string that instructs the client about when to use the ‘greet’ tool. The ‘greet’ tool is annotated with the @mcp.tool and returns a string depending on the name.
The application can be run as follows:
uvicorn server:app
Step 6: Linking our MCP Server to ChatGPT Settings
For illustration purposes, we use ChatGPT settings, but our server can be linked to other AI service providers also.
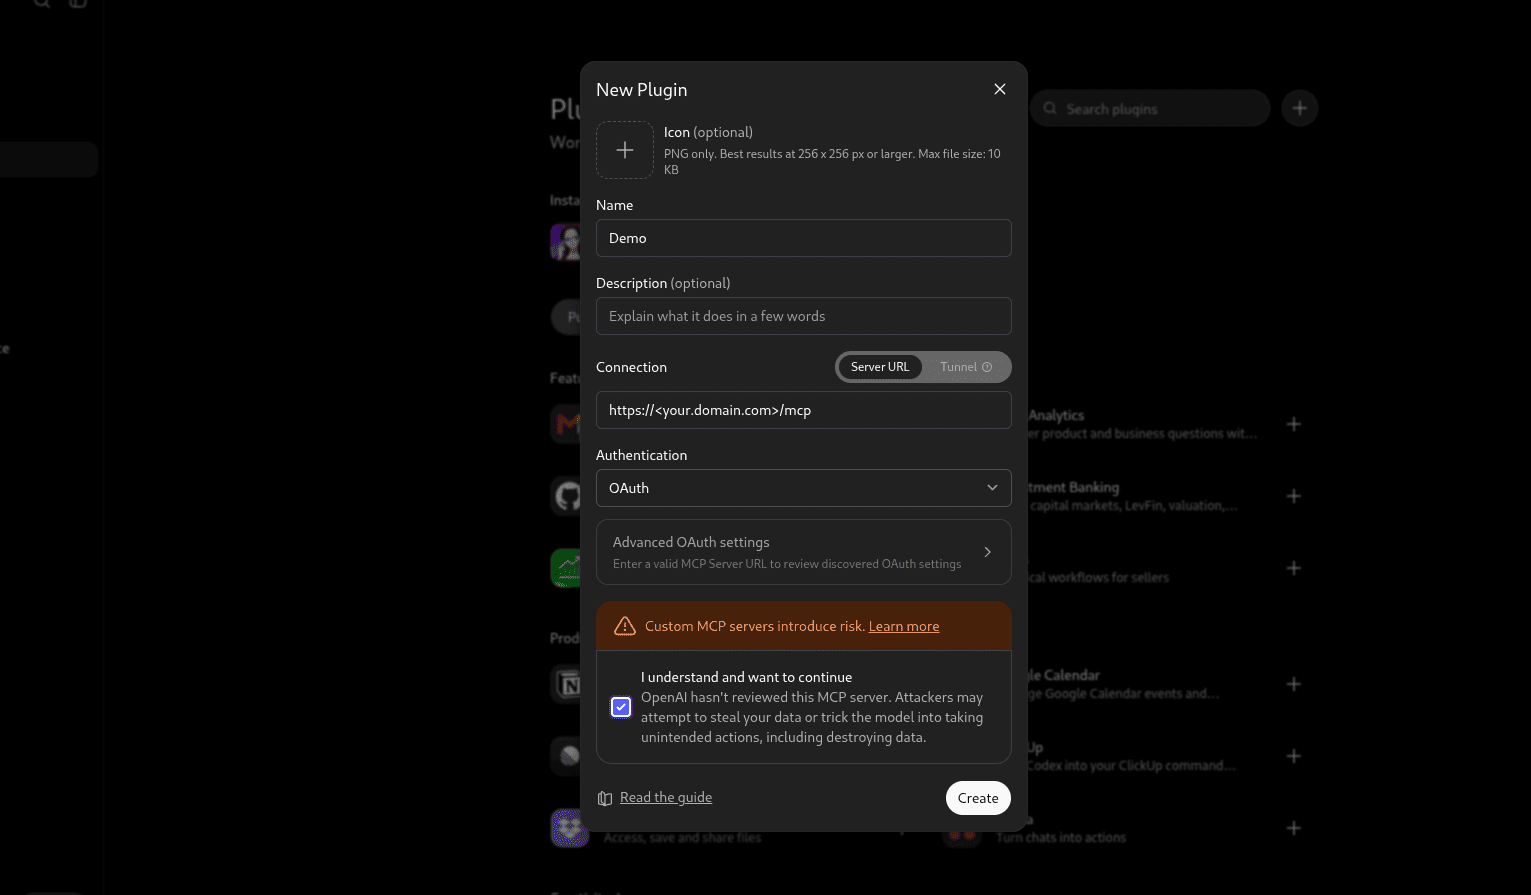
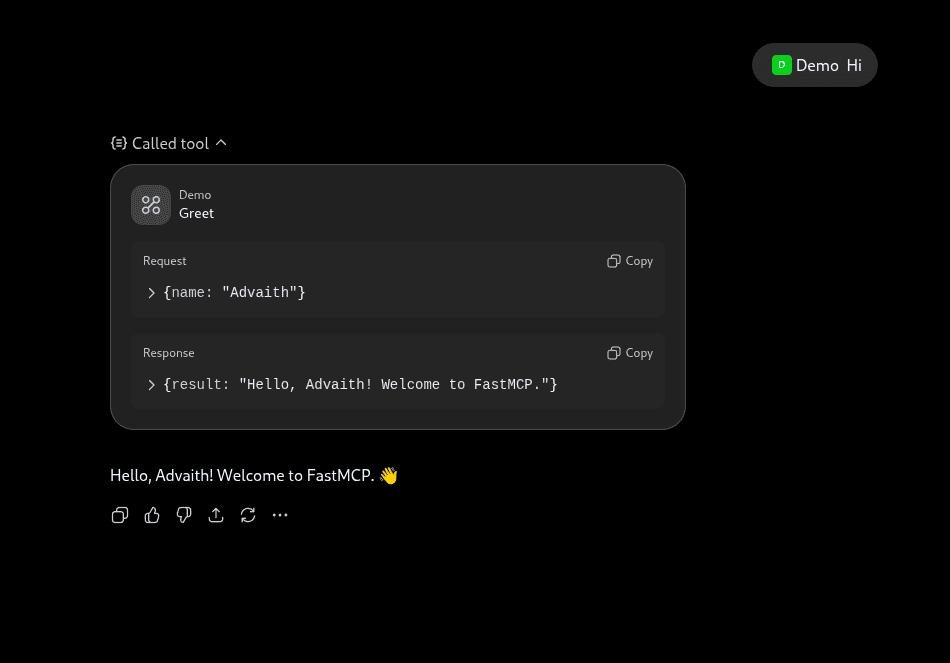
This will lead you to your GitHub account, and you will have to log in using github in order to establish the MCP connection. You can now create a test chat on the server. As you can see below, the LLM will automatically determine the function it needs to run from the list of functions available in the server.py file (so far, the greet function).
Step 7: Building Your Own Custom Tools
The greet function was intentionally kept simple. What matters here is the construction of a FastMCP tool:
@mcp.tool()
def greet(name: str) -> str:
    """Return a greeting for a name."""
    return f"Hello, {name}!"
In a similar way, it can be utilized to unlock practically any functionality of Python.
For example, one such custom-made module could be:
- Interaction with a REST API.
- Database search.
- File loading from the authorized folder.
- Sending a message via another service.
- Making calculations.
- Getting data from CRM/ERP.
- Report generation.
- Launching an internal process.
It should be noted that the entire FastMCP server was built together with GitHub OAuth and the 'greet' command. It should be mentioned that even though in this particular example the output is the greeting, the same approach can be applied to create any tool that will be working with some external API or database and using XML-RPC to connect to Odoo or another application available through Python. The most optimal approach to this problem-solving process is to begin with a simple command and then move to building the server.
To read more about How to Integrate Odoo 20 with Other Business Systems Using APIs and Connectors, refer to our blog, How to Integrate Odoo 20 with Other Business Systems Using APIs and Connectors