An approved purchase request does not become a purchase order automatically. In Odoo 20, the Create RFQ’s approval category lets employees request products, route the request to an approver, and create a draft request for quotation after approval. The user can then review the RFQ, send it to the vendor, and confirm it as a purchase order when the terms are agreed. This blog shows this flow from approval setup through RFQ creation.
Set up the Create RFQ’s Approval Category
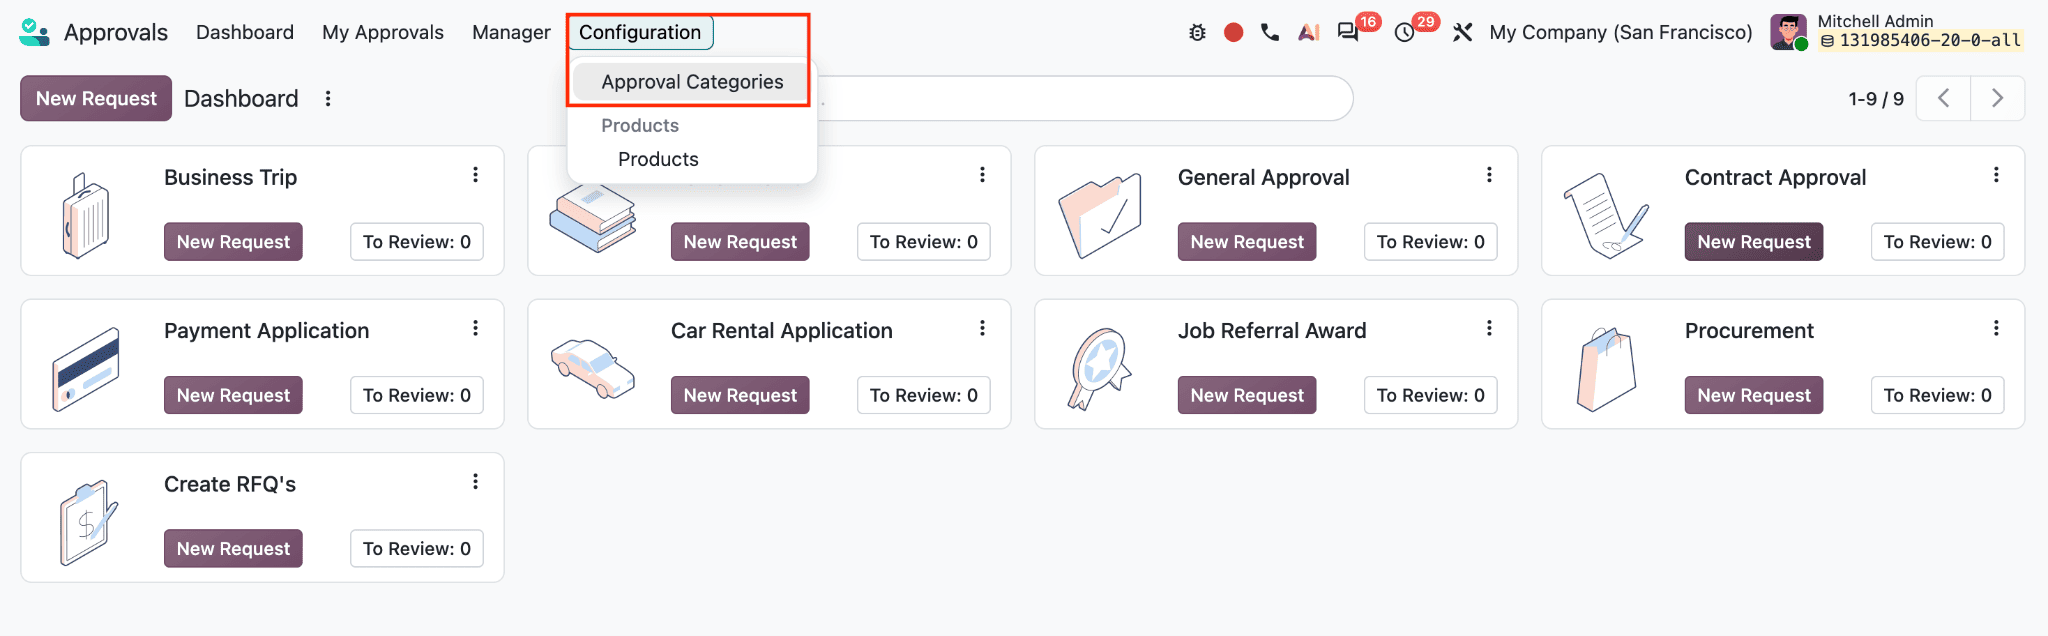
Open the Approvals app and choose Configuration > Approval Categories.
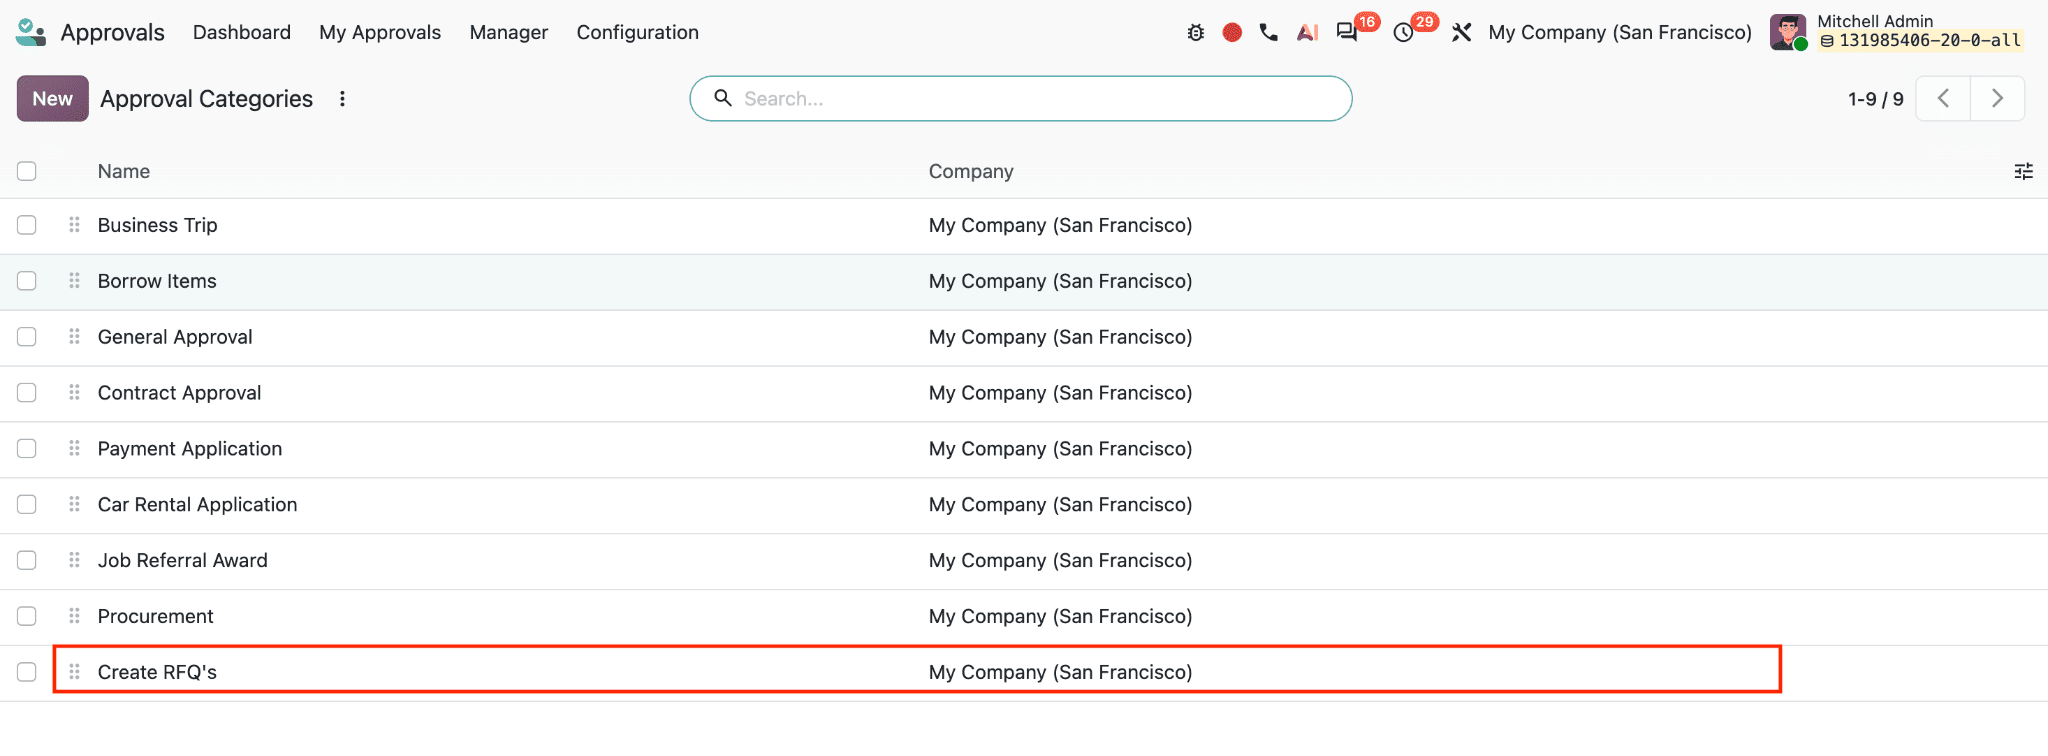
The categories list contains request types such as Business Trip, General Approval, Procurement, Create RFQ’s, and many more. Select Create RFQ’s to open its configuration.
The category form has a name and description, along with options that control the request. In the example, Create RFQ’s is enabled, so requests under this category can generate RFQs. Automated Sequence is also enabled, and the Prefix Code is set to APPR. Odoo uses the prefix and sequence to assign a reference, such as APPR00003, to each approval request. The Company field associates the category with the relevant company in a multi-company database.
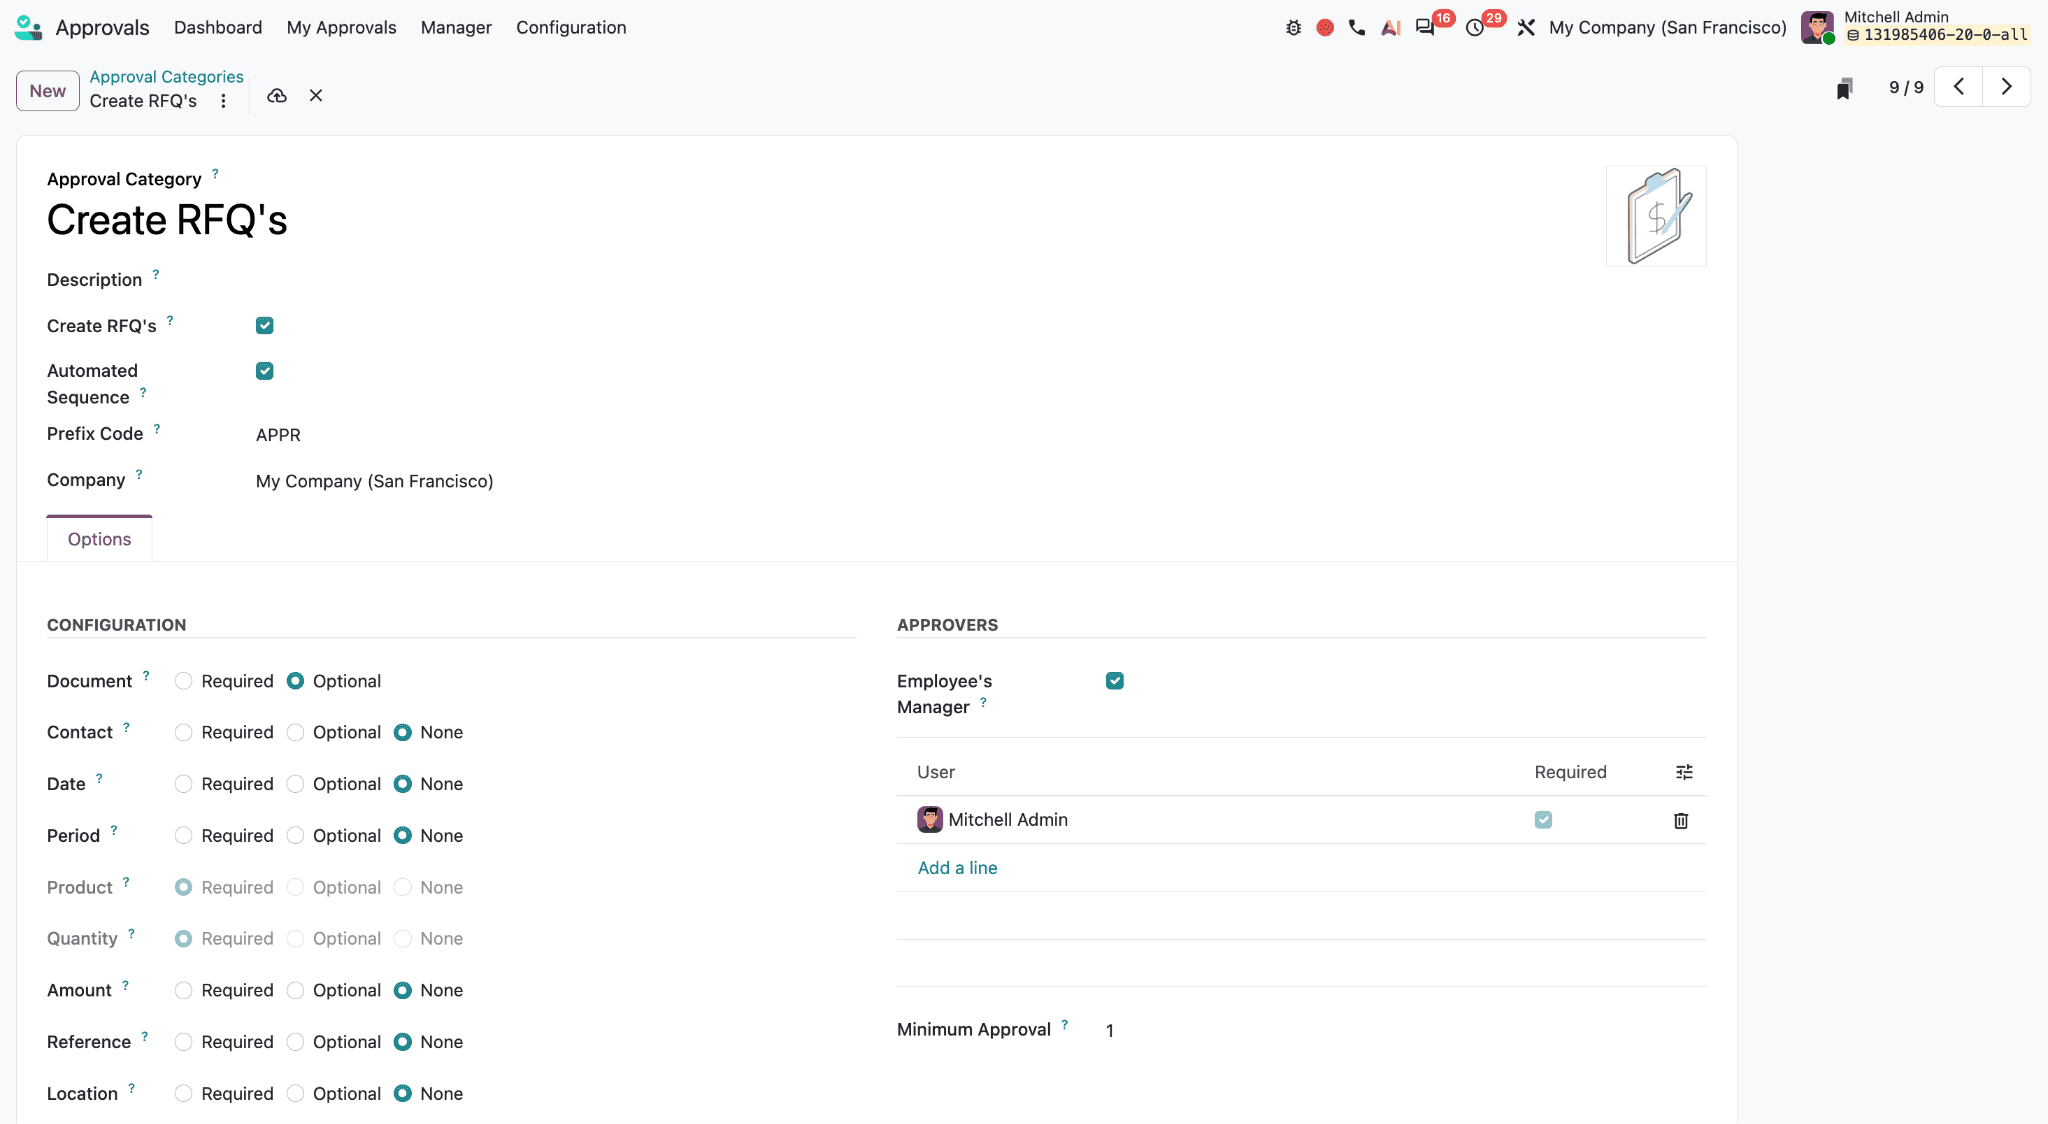
The Options tab controls which information the requester must supply. In the screenshot, Product and Quantity are set to Required, ensuring each request identifies what is needed and how much. Document is optional, so a requester can attach a supporting file without being forced to do so. Contact, Date, Period, Amount, Reference, and Location are set to None in this example. These fields are not shown as required inputs on the request form. Adjust these settings to match your purchasing policy.
The Approvers area determines who reviews the request. The example lists Mitchell Admin as an approver, with Required selected, and sets Minimum Approval to 1. This means at least one approval is needed before the request can move forward. The Employee’s Manager option is also enabled, which can add the requester’s manager to the approval flow. Assign approvers and set the minimum approval count to suit your internal process. The RFQ generation feature depends on the relevant purchase integration being installed and the user having appropriate Purchase access.
Submit a Purchase Request
Return to the Approvals dashboard. Each card represents an approval category. The New Request button on the Create RFQ’s card opens a request using that category. To Review shows the number of requests awaiting review for that category.
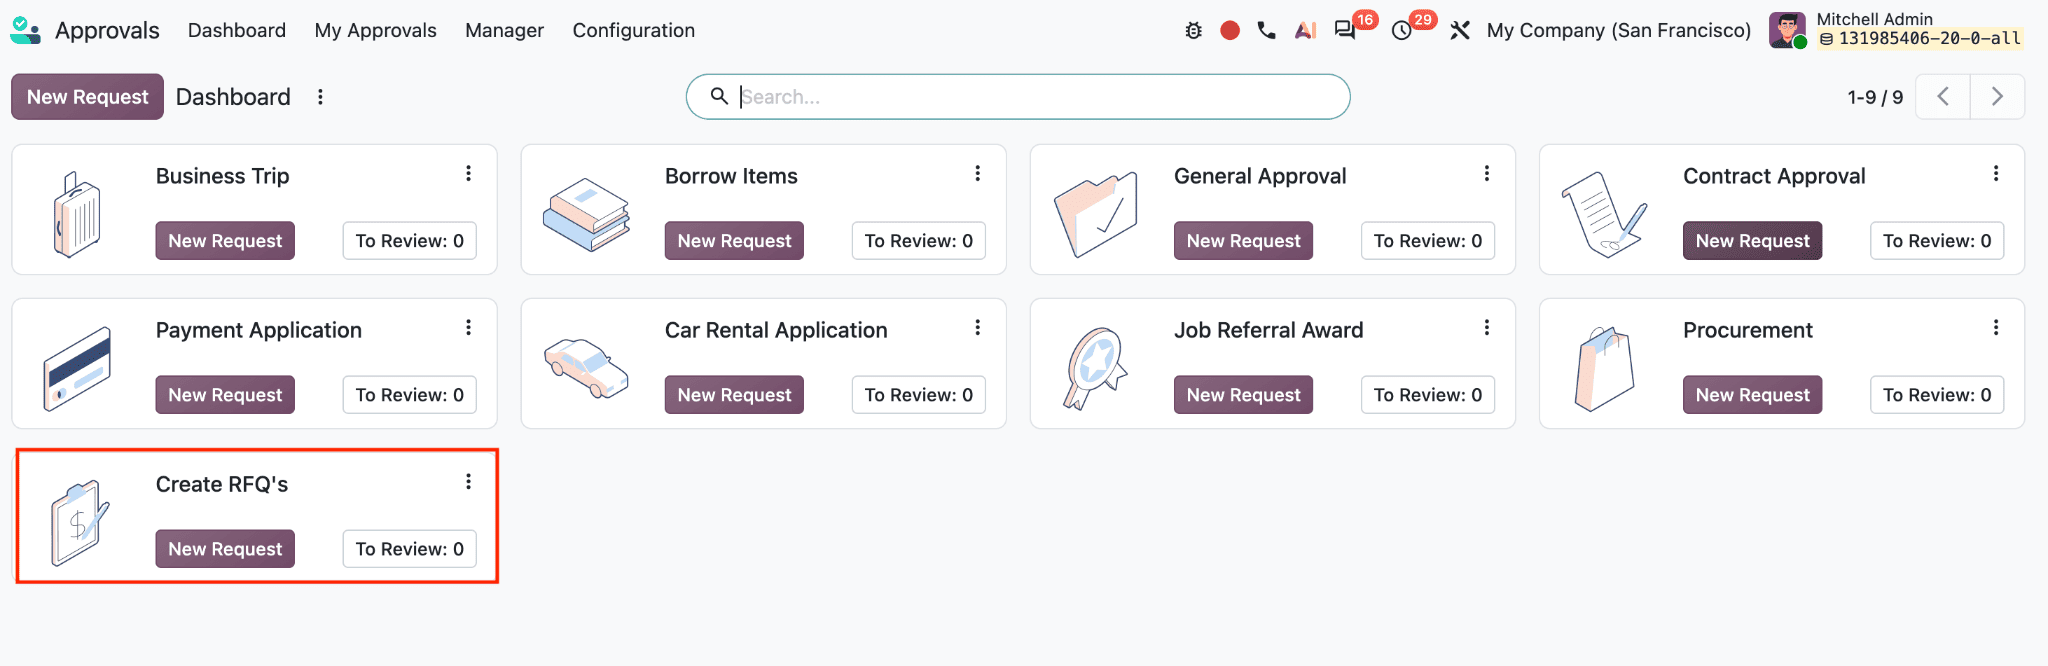
The top menu provides routes to the dashboard, My Approvals, Manager, and Configuration. Under My Approvals, users can find their own requests; under Manager, approvers can open Approvals to Review or All Approvals.
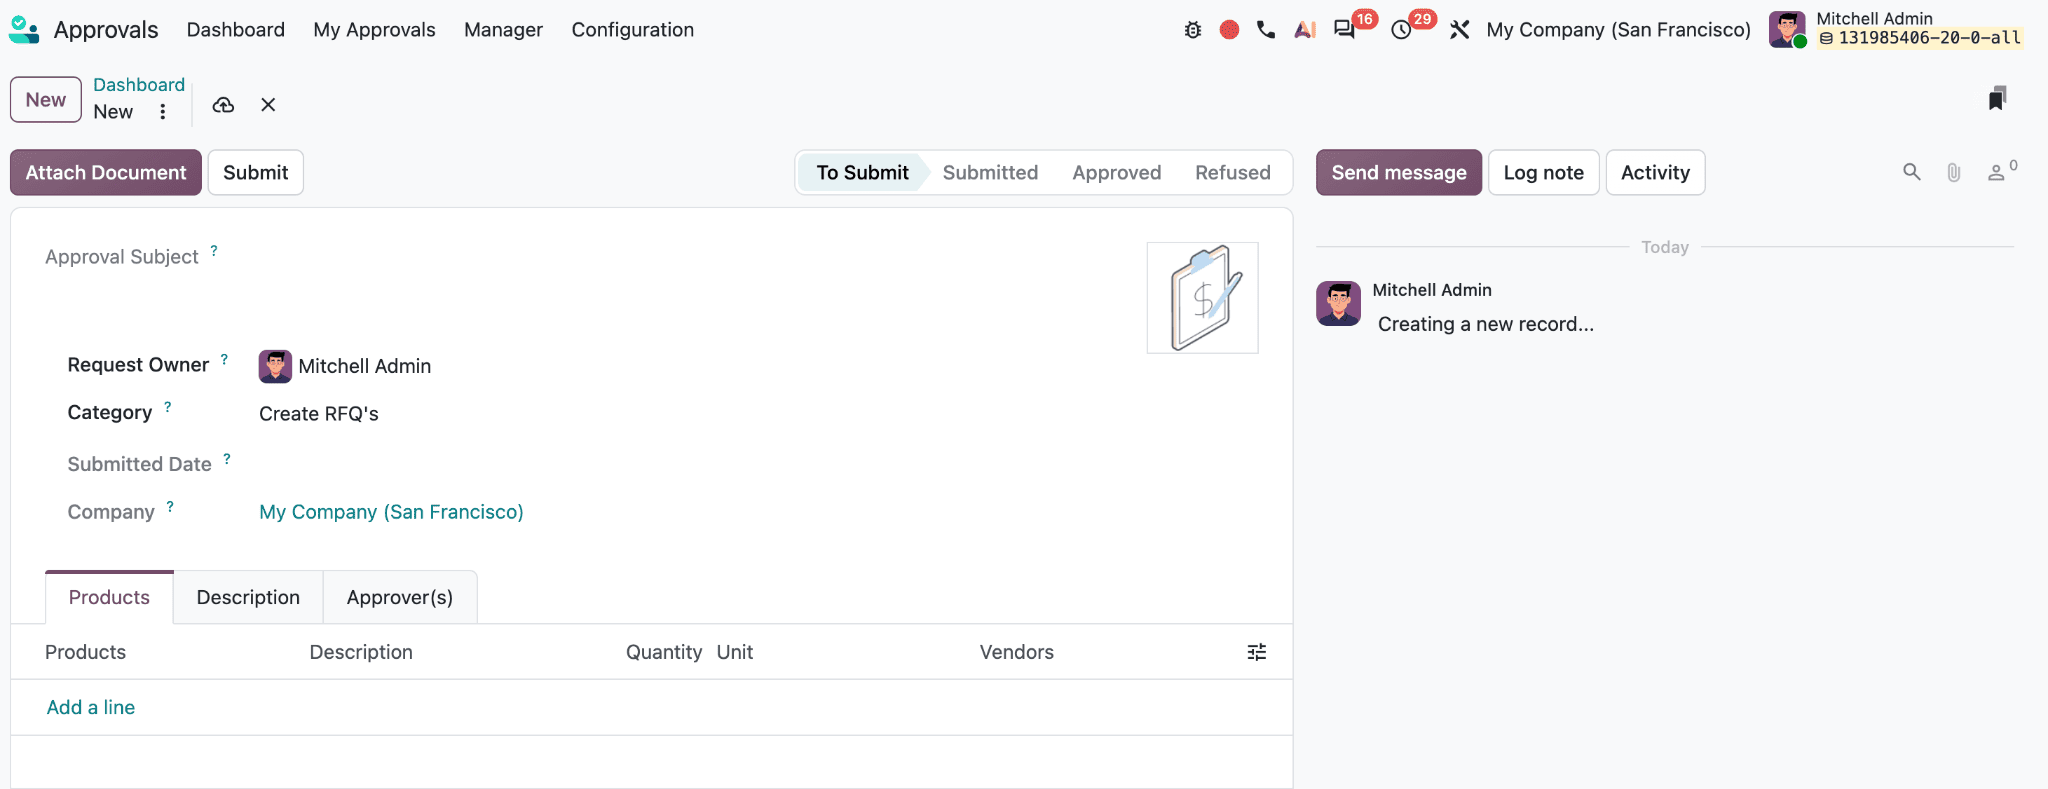
On the new request form, enter an Approval Subject that describes the purchase. The Request Owner identifies the person making the request, while Category shows the selected approval type. Submitted Date is populated when the request is submitted, and Company indicates which company owns it.
In the Products tab, click Add a line and select the product.
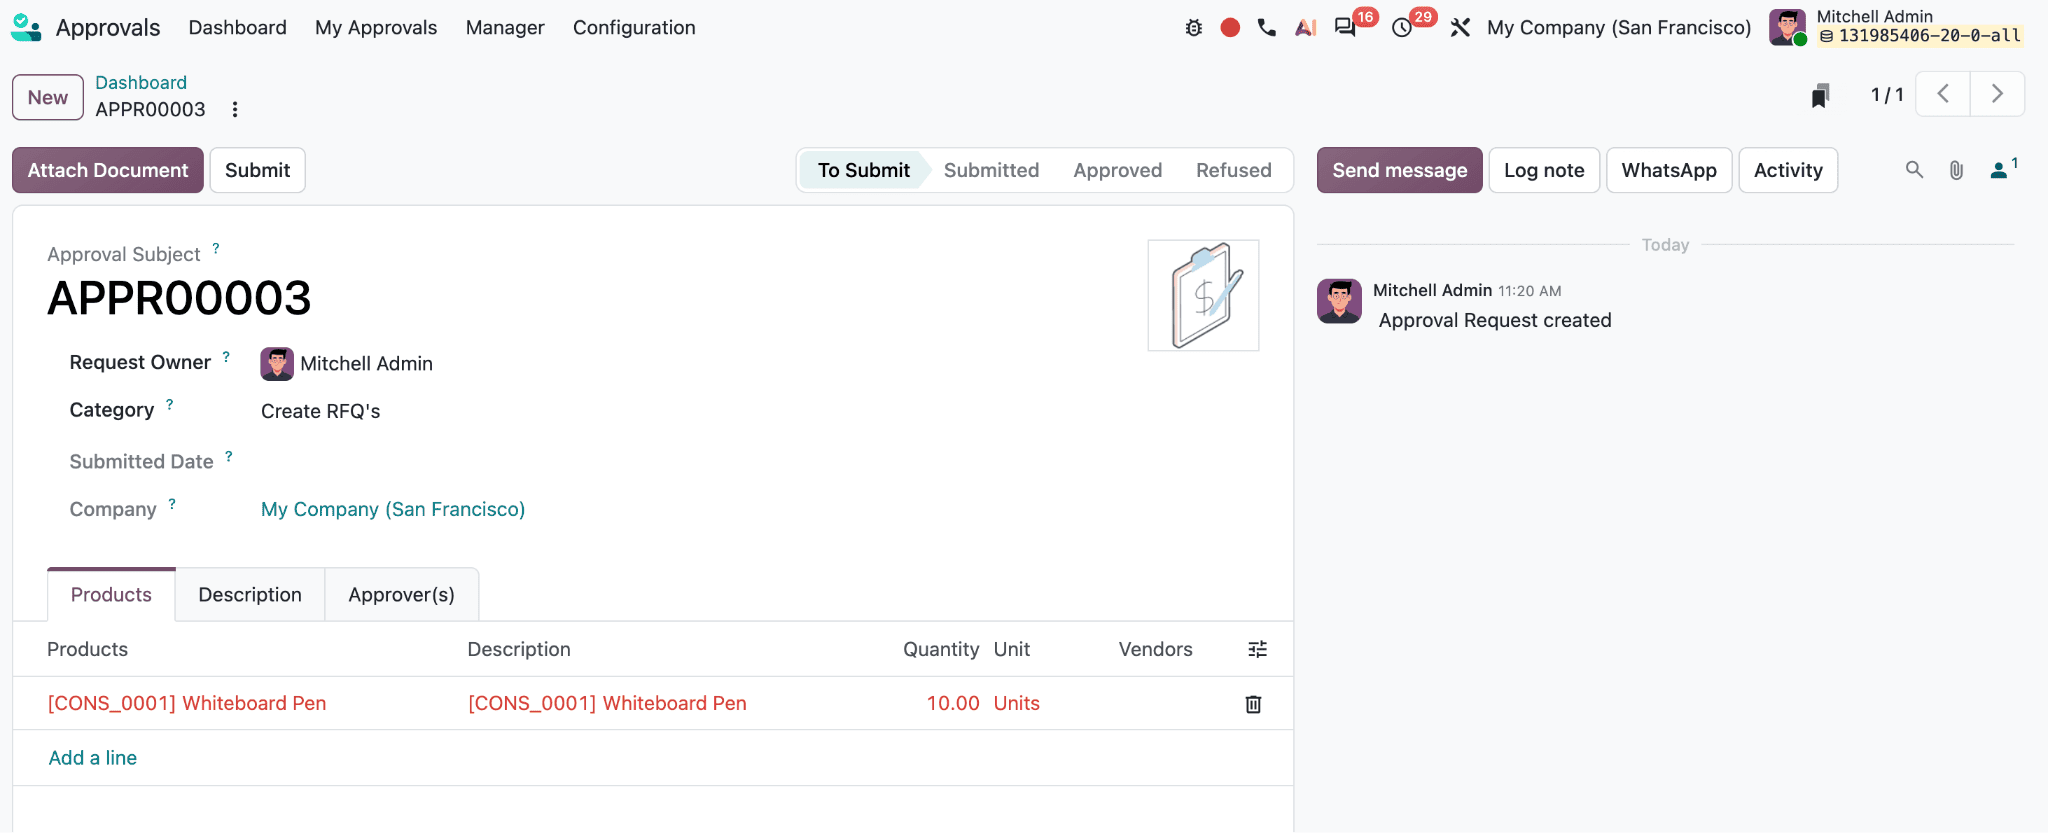
The example requests 10 units of Whiteboard Pen. The product line includes Description, Quantity, Unit, and Vendors. Check that the product is configured with a vendor: Odoo uses vendor information when creating the RFQ. The example later shows Abigail Carter as the vendor. A product without a suitable vendor may prevent the RFQ from being generated as expected.
The Description tab provides space for additional context about the request. The Approver(s) tab displays the assigned reviewers, whether each approval is required, and the approval status.
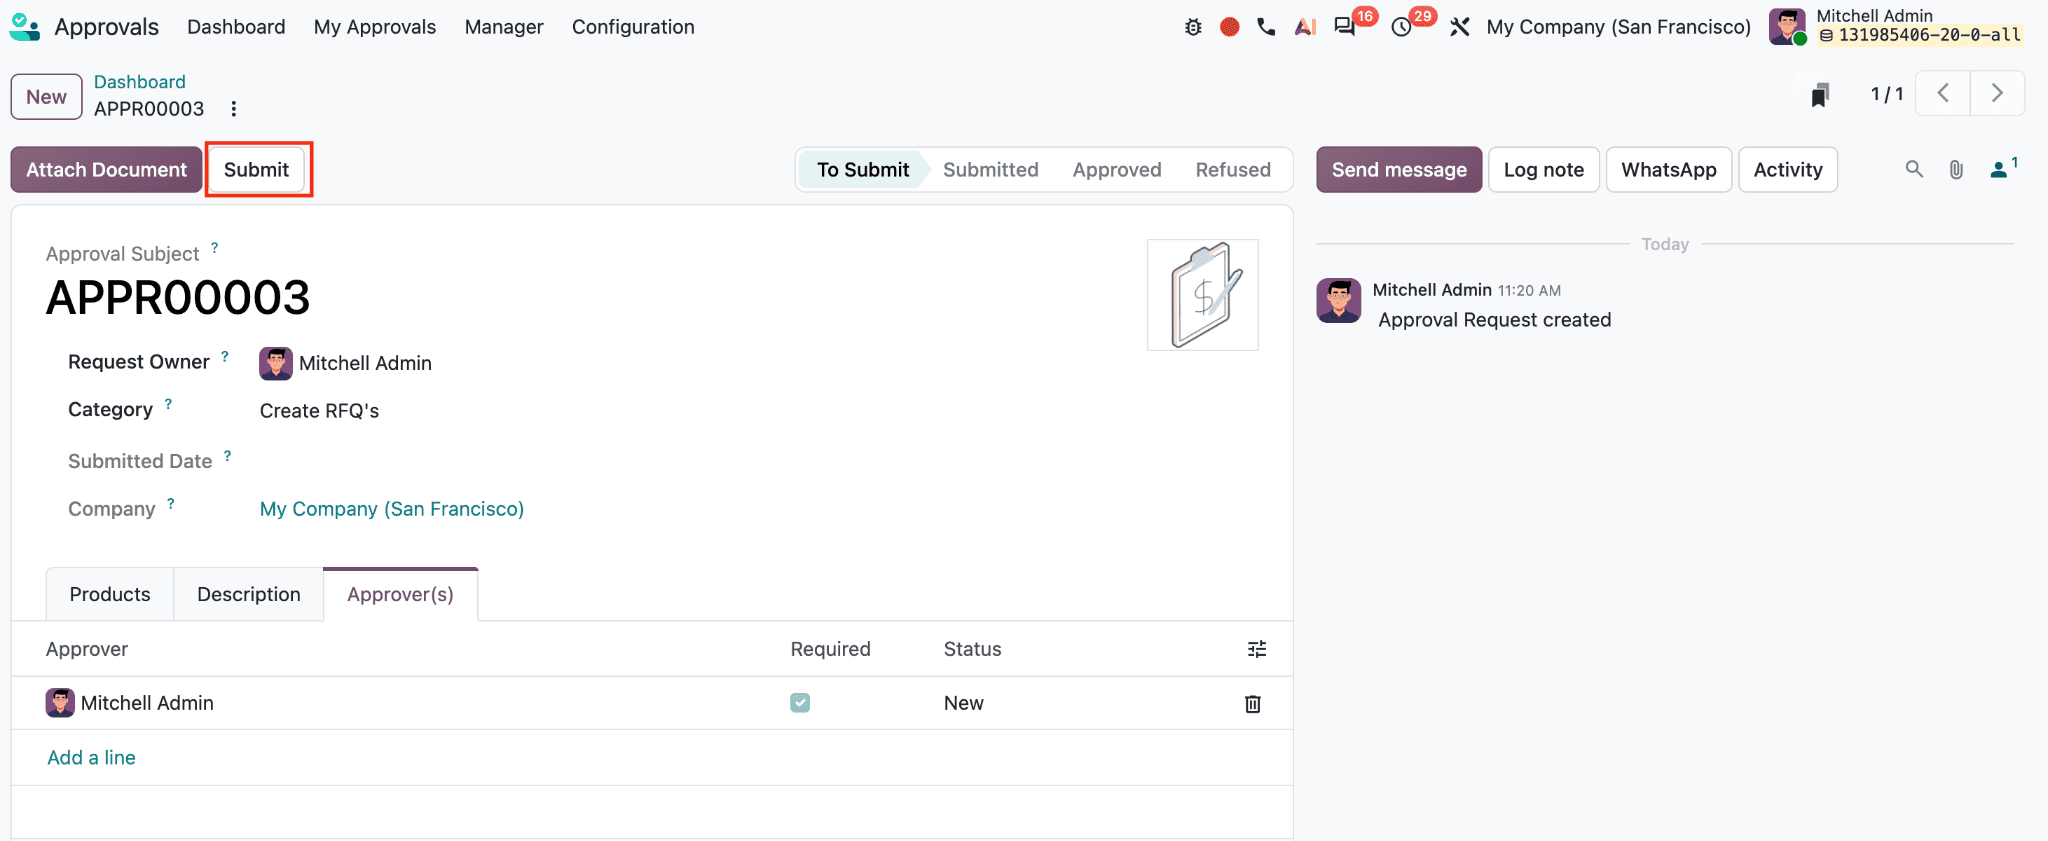
The Attach Document button adds supporting files. When the request is ready, click Submit.
Review and Approve the Request
After submission, the request moves from To Submit to Submitted. The approver can find it in Manager > Approvals to Review.

The list shows the approval subject, request owner, category, request dates, and request status, making it easier to identify what needs attention.
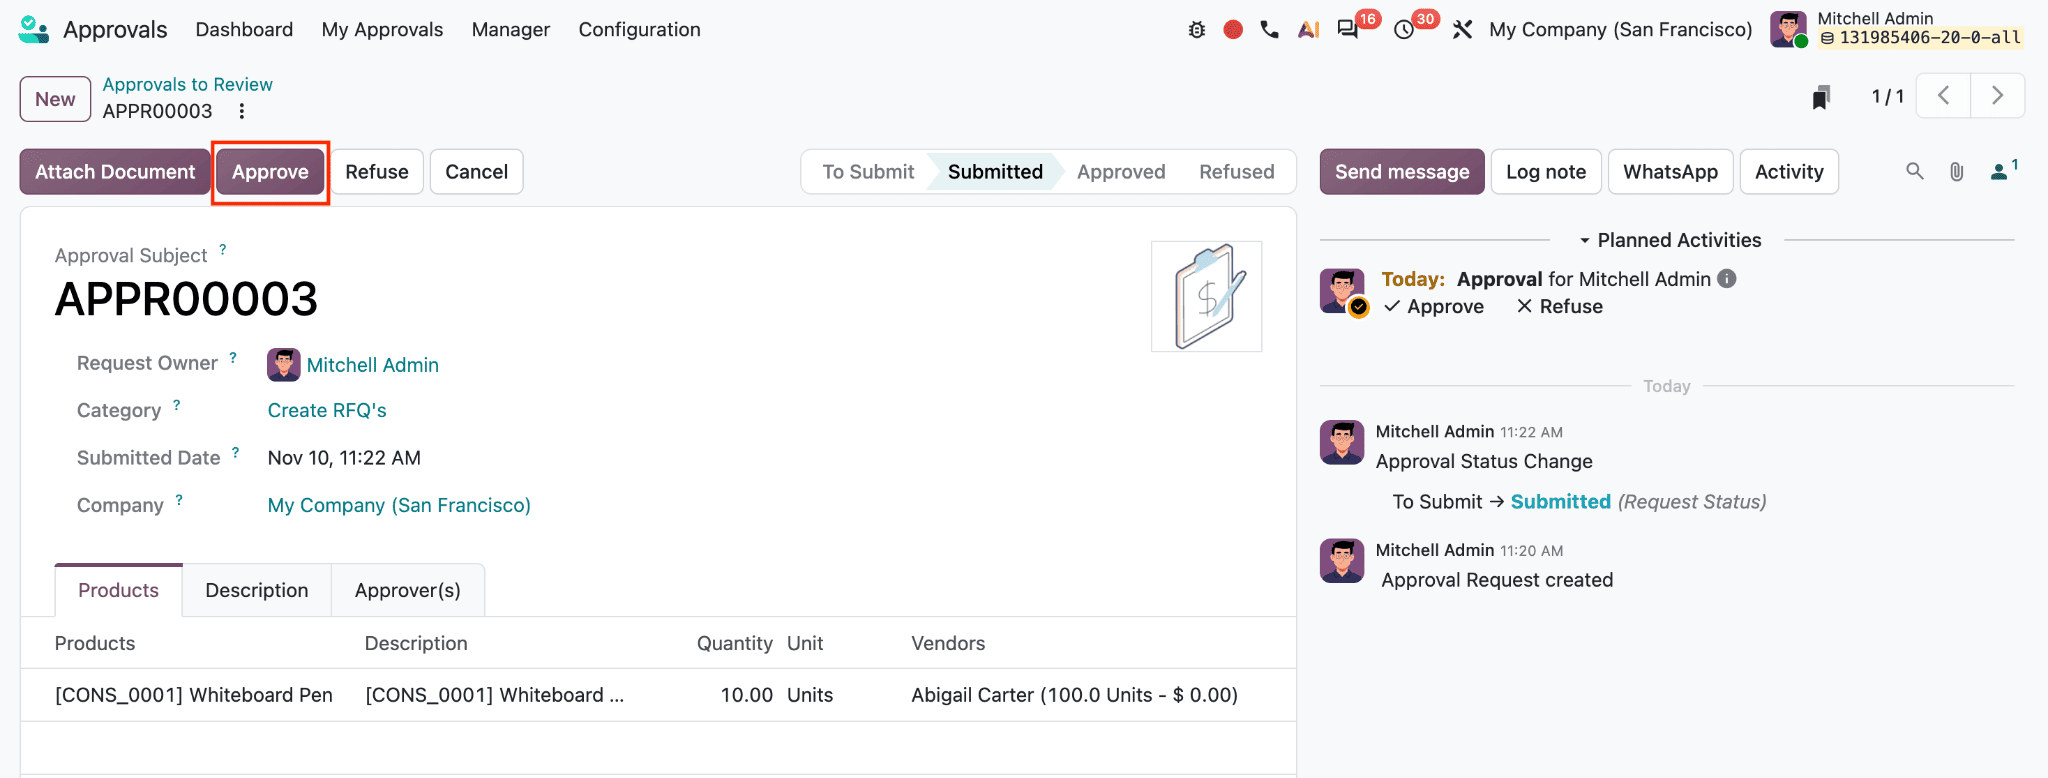
Open the request to review its product, quantity, vendor, description, and approver details. The approver can click Approve to authorize it, Refuse to reject it, or Cancel to stop the request. The status bar at the top tracks the request through To Submit, Submitted, Approved, and Refused. In the screenshot, the approver approves the request, changing its status from Submitted to Approved. The chatter on the right records status changes and other activity, giving users a visible history.
Generate and Review the RFQ
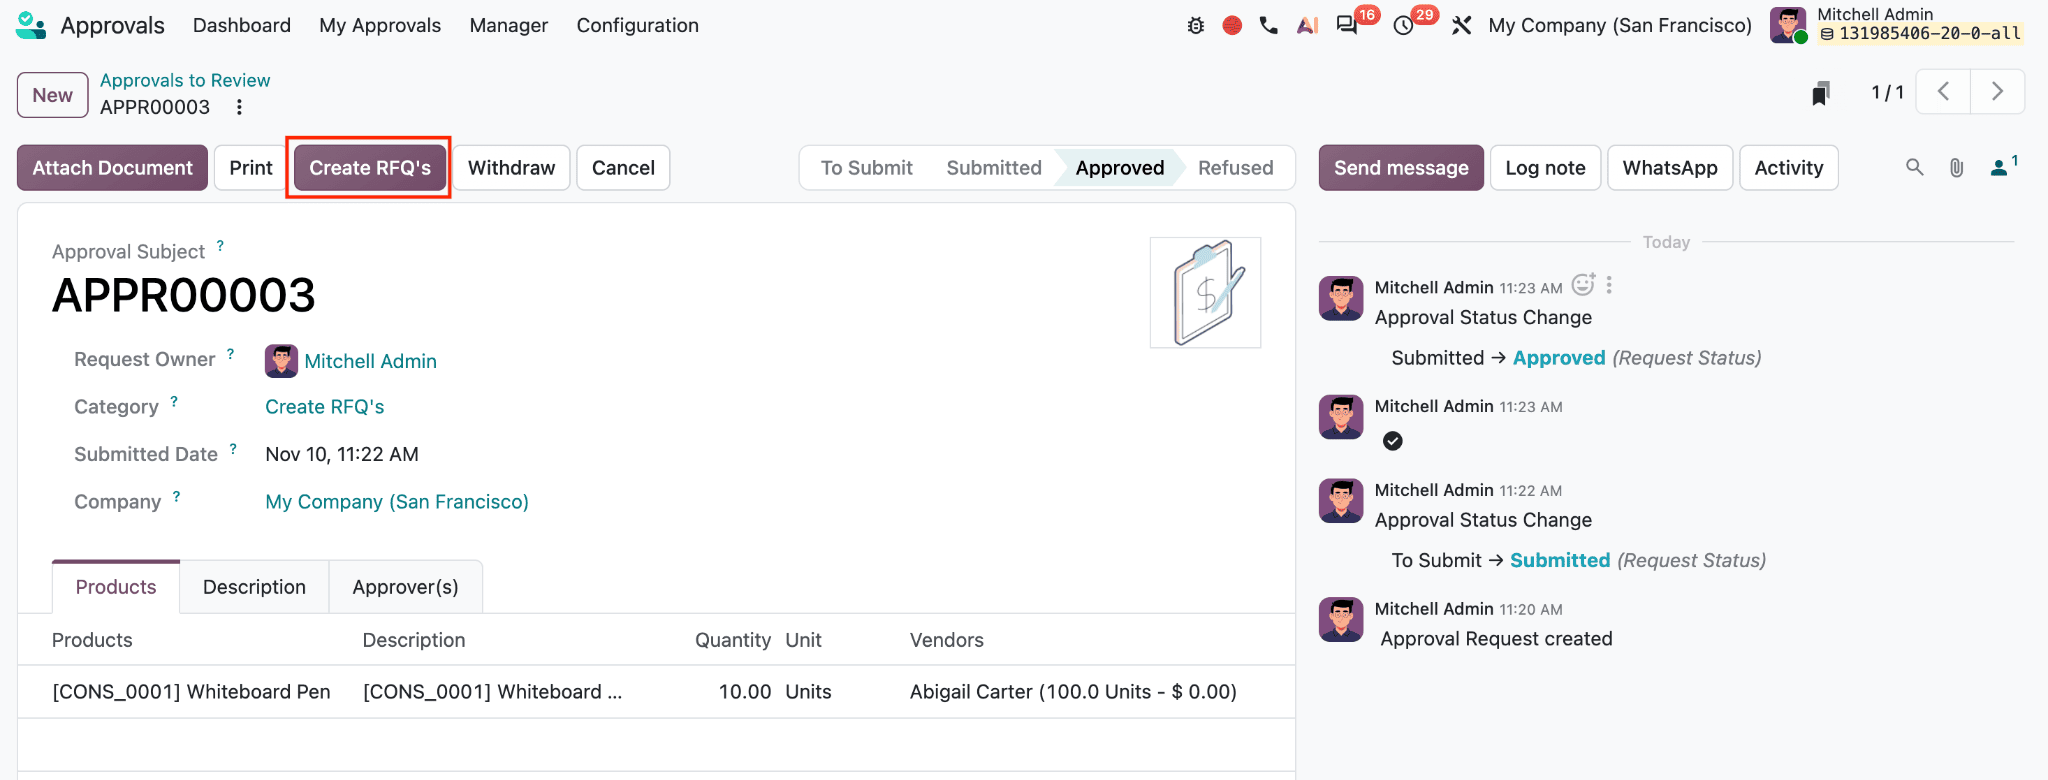
Once the request is approved, the Create RFQ’s button appears for a user with the required Purchase access.
Clicking it creates a draft RFQ from the approved product lines. The approval’s chatter records the new RFQ reference and the products added.
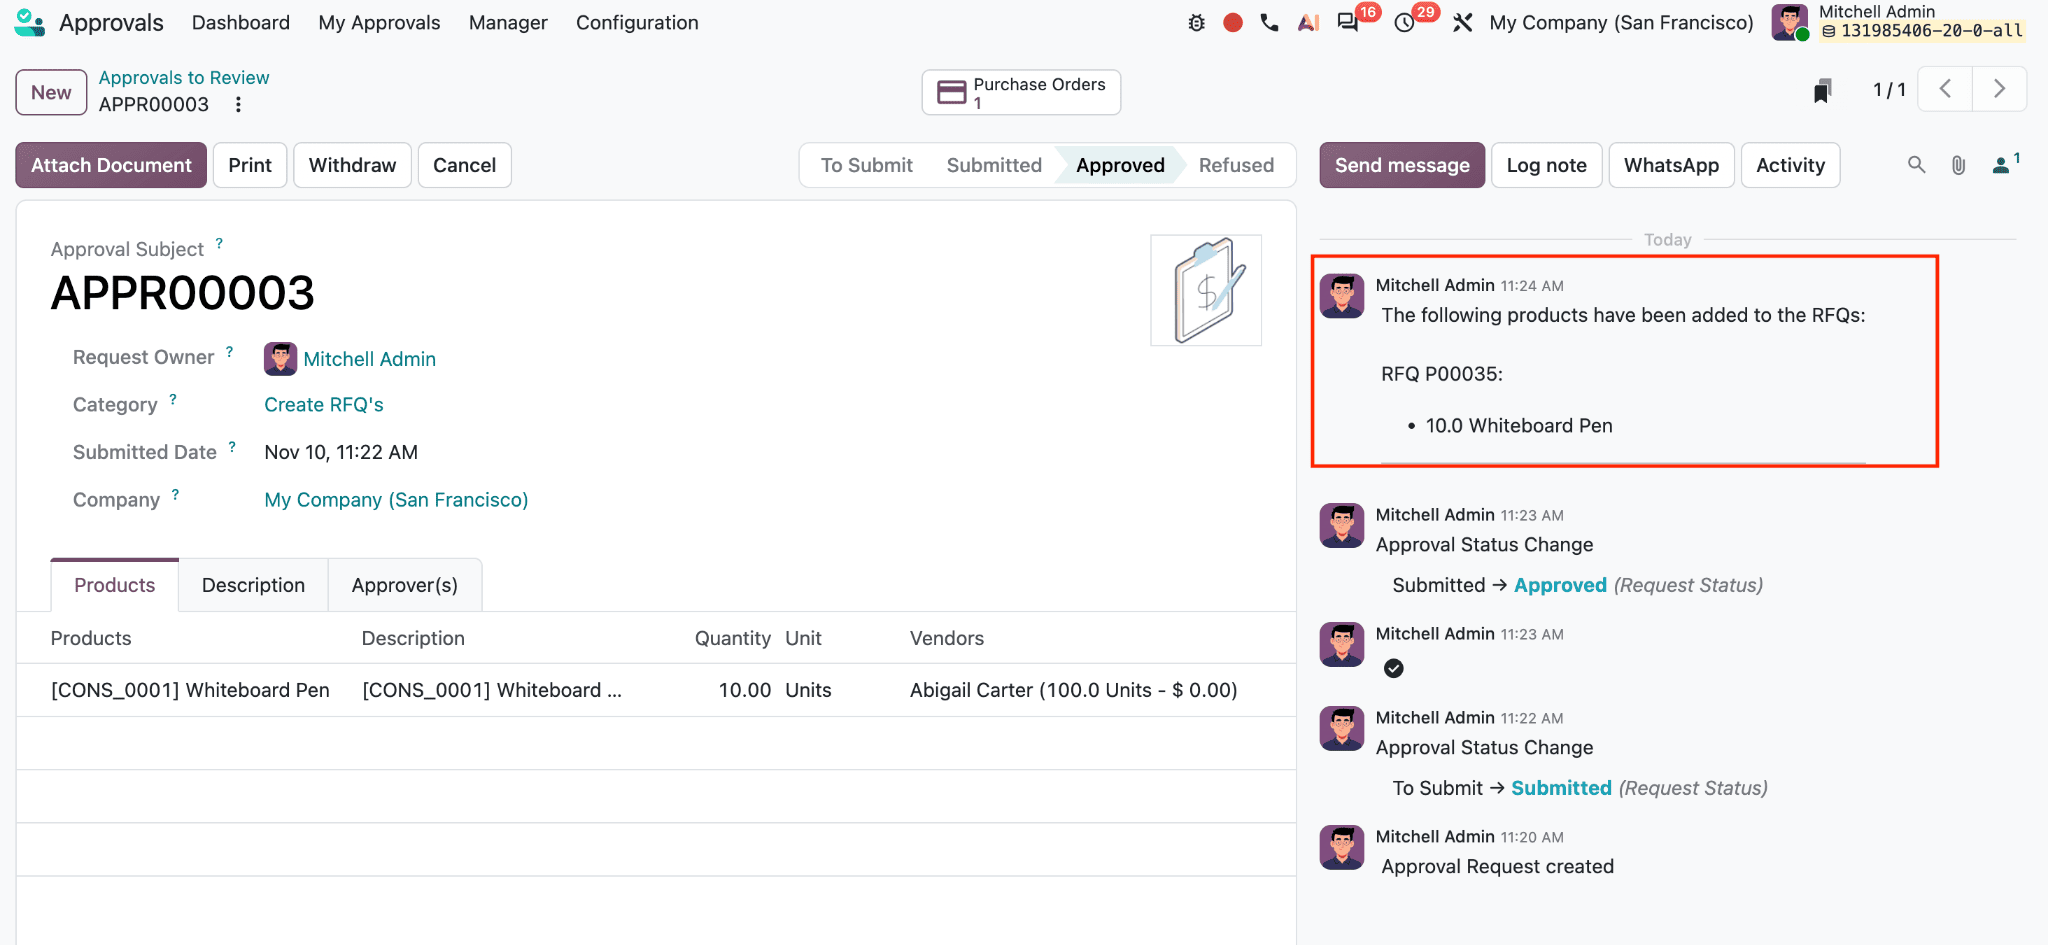
A Purchase Orders smart button also appears on the approval request, with a count linking to the related purchasing document.
Open the RFQ in the Purchase app to review it before contacting the vendor.
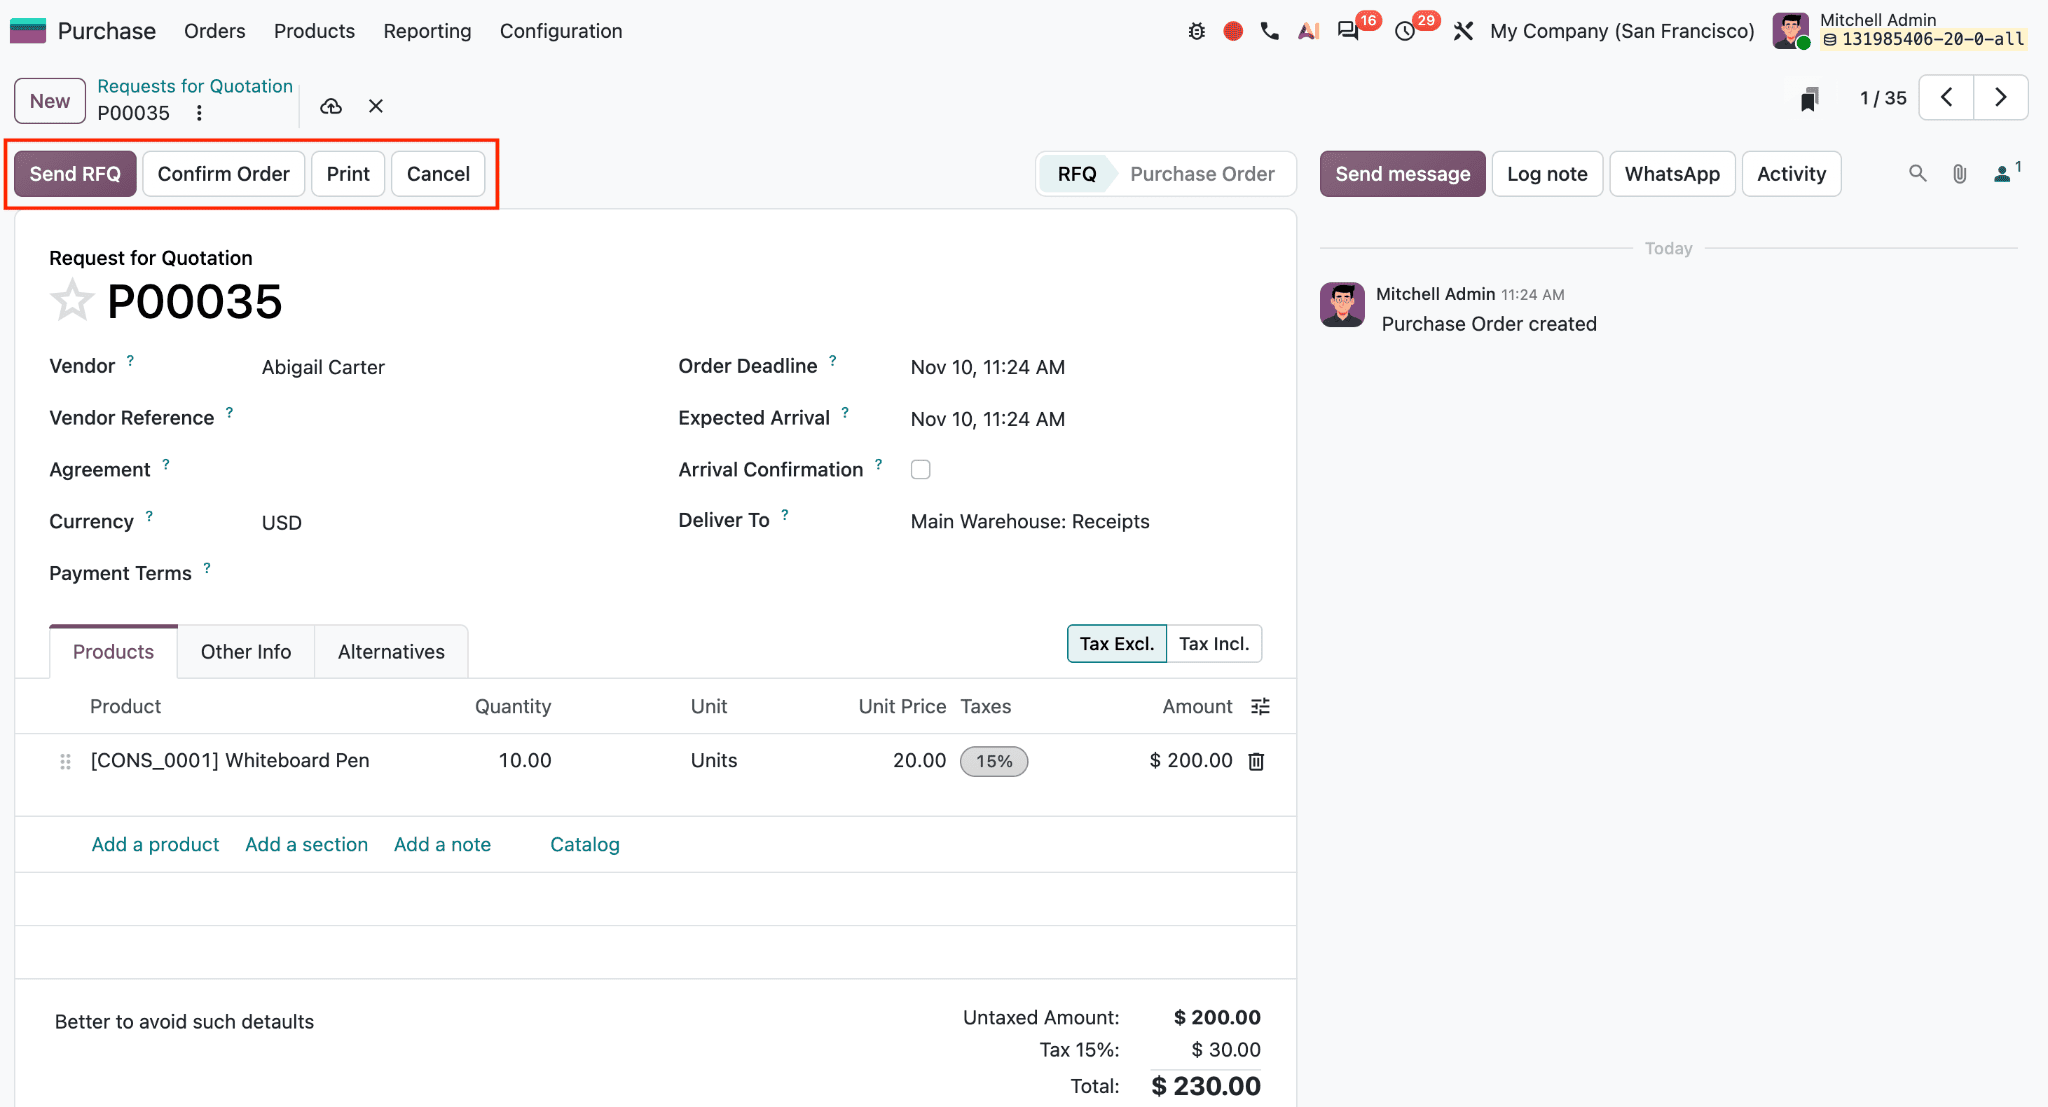
The screenshot shows RFQ P00035 for Abigail Carter. The header buttons include Send RFQ, Confirm Order, Print, and Cancel. The status bar distinguishes the RFQ stage from Purchase Order. The form also includes Vendor Reference, Agreement, Currency, and Payment Terms. On the right, Order Deadline and Expected Arrival provide dates for the quotation and delivery; Arrival Confirmation records whether the vendor has confirmed the arrival, and Deliver To indicates the receipt location.
In the Products tab, check the product, quantity, unit, unit price, taxes, and amount. Tax Excl. and Tax Incl. switch how totals are displayed. Add a product adds another line; Add a section groups lines; Add a note adds text; and Catalog opens the product catalog. Other Info and Alternatives provide additional order details and quotation options. Review the amounts and delivery information before sending the RFQ. Click Send RFQ to share the quotation with the vendor. Once the vendor’s terms are accepted and the purchase is ready to proceed, click Confirm Order.
With the Create RFQ’s approval category configured, Odoo 20 gives teams a clear path from a purchase request to a vendor quotation. Requesters provide the product and quantity, approvers review the details, and an authorized user creates the RFQ after approval. The buyer can then check the vendor, pricing, taxes, and delivery information before sending the quotation. Once the terms are agreed, confirming the RFQ turns it into a purchase order. This keeps approval and purchasing connected while preserving review at each stage.
To read more about How to Create an RFQ in Odoo 19 Purchase Module, refer to our blog How to Create an RFQ in Odoo 19 Purchase Module.