We are familiar with buttons that are used to perform different actions from the form view. The form buttons are always shown in the header part of each form which helps us to perform an action from the current record. But in some cases, we need a button in the tree view or outside a record.
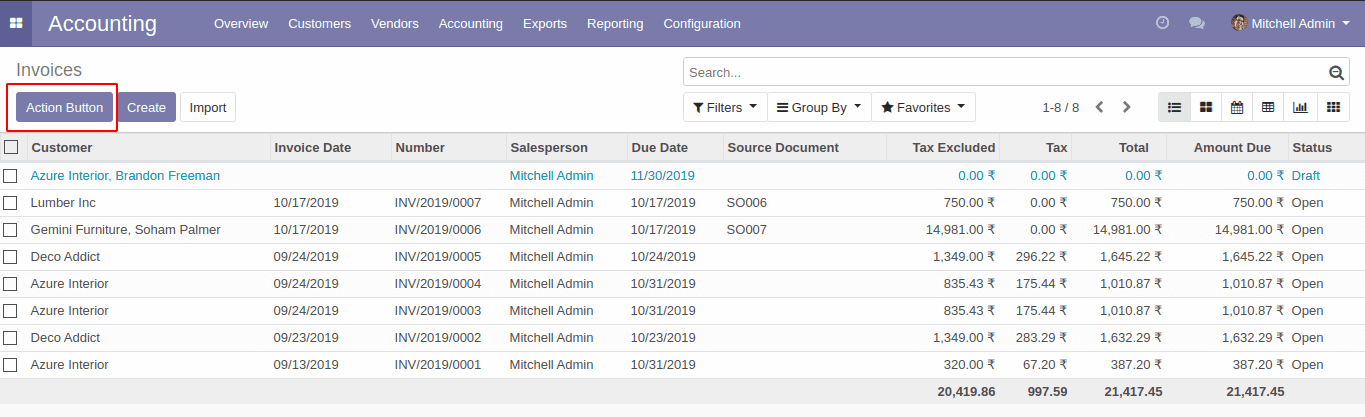
For example, you need a button to perform an action related to invoices, but it is not about a single record, in such a case, you may need to add a button in the tree view as same in the above picture.
Let’s see how we can add a button in the tree view.
Add new XML file in the following path: /static/src/xml/file_name.xml
In the manifest, specify the path in ‘qweb’ like :
'qweb': [
"static/src/xml/file_name.xml",
],
Then you need to extend the template:
<?xml version="1.0" encoding="UTF-8"?>
<template xml:space="preserve">
<t t-extend="ListView.buttons">
<t t-jquery="button.o_list_button_add" t-operation="before">
<button class="btn btn-primary oe_action_button" type="button" accesskey="f">New Button</button>
</t>
</t>
</template>
It will appear in all tree views; however, you can limit the visibility by using the template options. For example, you can restrict the visibility of the button with a model like this:
<button t-if="widget.modelName == 'account.invoice'" class="btn btn-primary oe_action_button" type="button" accesskey="f">
Now the button will be visible in the tree view. Next, we need to add functionality to the button. Usually, we write functions for the form buttons in python code. But here it is function call from the javascript. So create a js file in the path: /static/src/js/action_call.js
Don’t forget to add the file into “web.assets_backend”
<template id="button_render_js" inherit_id="web.assets_backend">
<xpath expr="." position="inside">
<script src="module_name/static/src/js/action_call.js" type="text/javascript"/>
</xpath>
</template>
Next, you need to include your function in ListController.
odoo.define('invoice.action_button, function (require) {
"use strict";
var core = require('web.core');
var ListController = require('web.ListController');
var rpc = require('web.rpc');
var session = require('web.session');
var _t = core._t;
ListController.include({
renderButtons: function($node) {
this._super.apply(this, arguments);
if (this.$buttons) {
this.$buttons.find('.oe_action_button’).click(this.proxy('action_def')) ;
}
},
The ‘oe_action_button’ is the class of the button that we specified in the XML file and the 'action_def' is the name of the function which triggers from the button click.
If you need to call the function from the model, then you can use rpc.query
action_def: function () {
var self =this
var user = session.uid;
rpc.query({
model: ‘my.model',
method: 'get_values',
args: [[user],{'id':user}],
});
},
session.uid: this will return the current user. It’s just, for example, to pass an argument to the model.
get_values: it is the method from the model you need to call.
Let’s see how you get the action window after the return function from the model or from the js function:
receive_invoice: function () {
var self = this
var user = session.uid;
rpc.query({
model: ‘my.model',
method: 'get_values',
args: [[user],{'id':user}],
}).then(function (e) {
self.do_action({
name: _t('action_invoices'),
type: 'ir.actions.act_window',
res_model: 'name.name’,
views: [[false, 'form']],
view_mode: 'form',
target: 'new',
});
window.location
});
},
This is how you add a button near the create button in Odoo 12. You can also refer our blog on How to Add a New Buttons in Odoo 13