Restaurants rapidly implement online reservation systems in response to growing customer expectations and a desire for digital convenience. The Appointment module in Odoo 18 Enterprise edition, a robust business suite, is a versatile and user-friendly tool for managing restaurant table reservations. The Appointment module is primarily designed for scheduling services like doctor visits, even though technological advancements have resulted in an adaptation for the hotel industry. In addition to simplifying internal processes like staff scheduling, seat capacity and control of peak hour, this enables restaurants to provide their customers with a flawless online reservation experience. This blog explains how to set up an entire, step-by-step setup for Odoo 18’s Appointment Module configuration for restaurant table reservation.
Configuring Floors and Tables in POS:
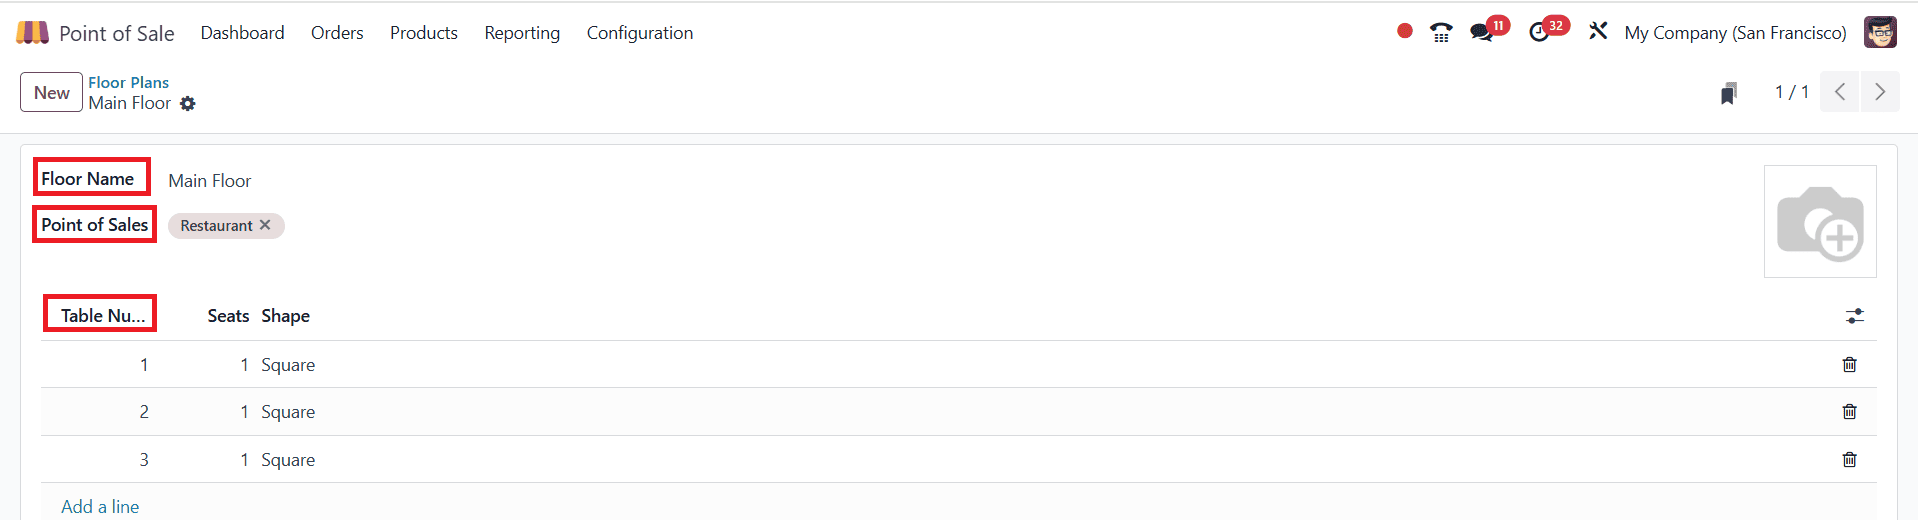
Open Point of Sale module in Odoo 18 Enterprise edition. In the dashboard, navigate to Configuration > Floor Plans and select New button to create a new floor plan as shown below:

Enter the following information, such as the Floor Name and Point of Sales. Then to choose the table name, number of seats and shape of the table, a line will be formed by clicking on “Add a line”. There you can add the above mentioned details.
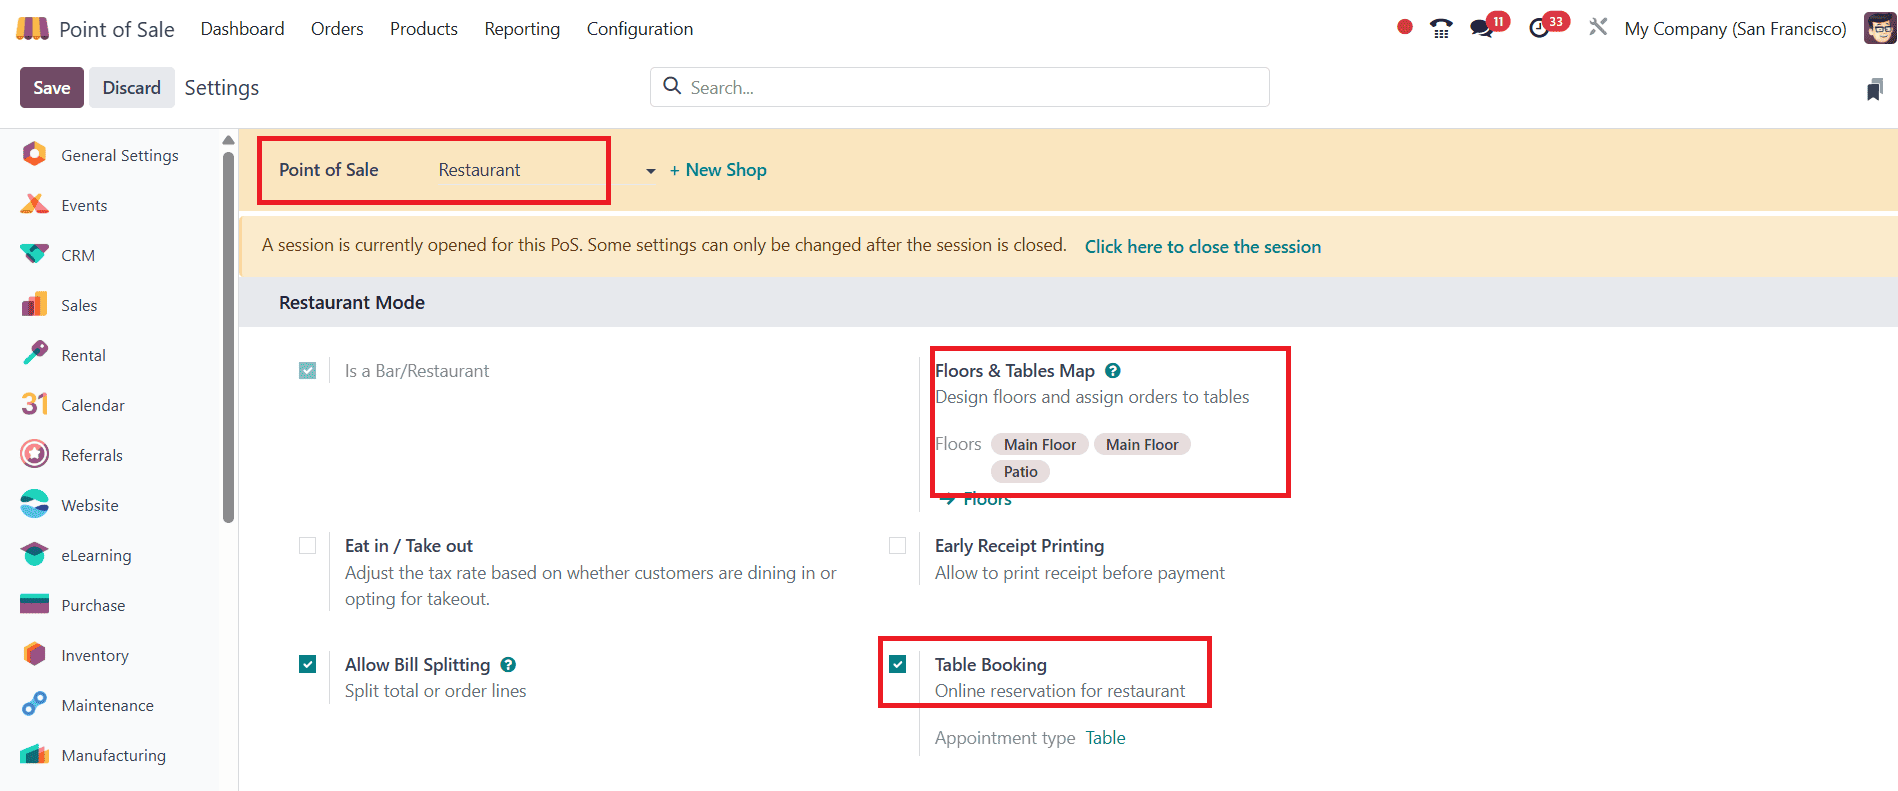
Then select the Configuration > Settings menu. In the Restaurant mode of Point of Sale, Floors & Tables Map feature helps to design floors and assign orders to tables. The newly created floors details can be seen under Floors & Tables Map as shown below:
Configure Restaurant Table Reservation in Appointments:
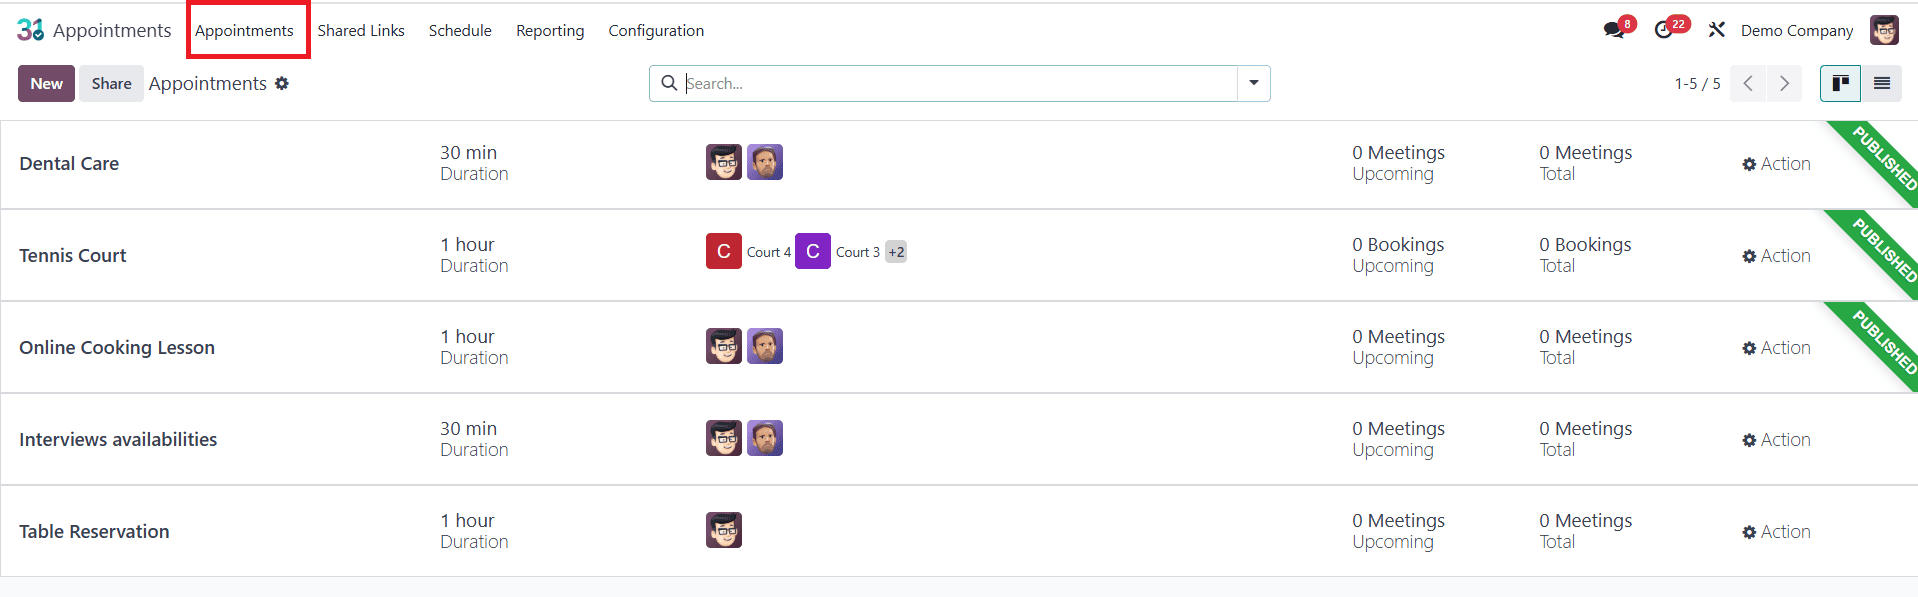
To configure Restaurant table reservation in the Odoo 18 Appointments module, go to the Appointments module and select Appointments. In Kanban view, all the created appointment details, including name, duration, and booking can be seen.
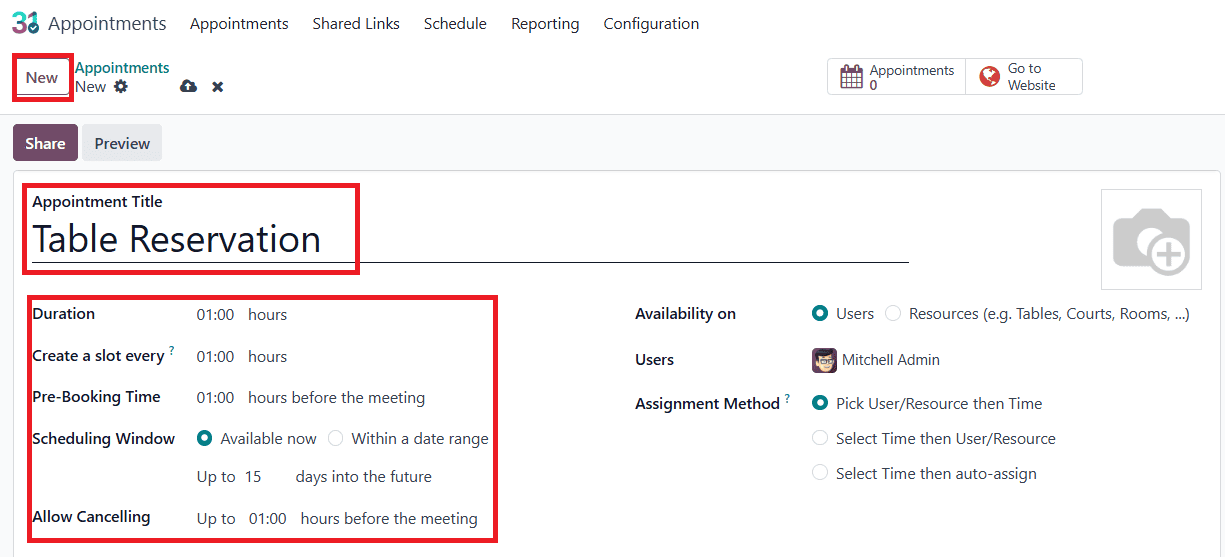
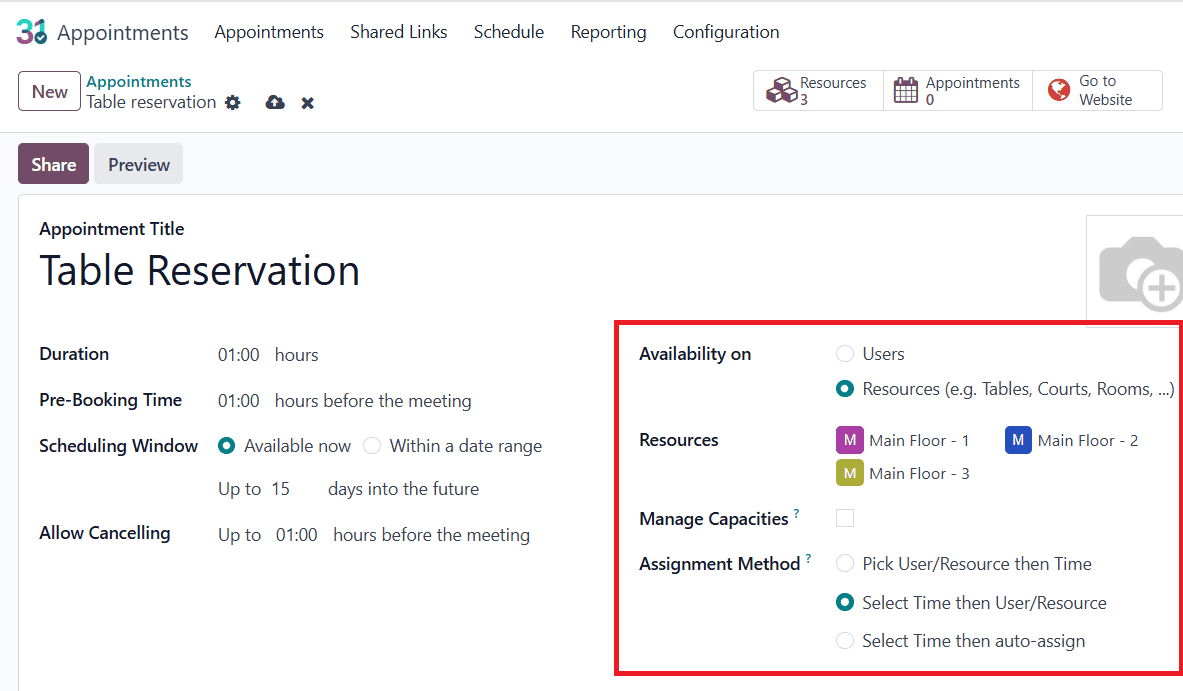
To create a new appointment, press on the New button. A new form will then show up as seen below. Add the appointment title as Table Reservation or any other appropriate one. Then fill the duration time, pre-booking time, cancellation time, scheduling window, and slot interval
The availability of the appointment can be determined based on either Users or Resources. If Resources are selected, they can be specified in the Resource field. In this example, we’re setting up an appointment system for restaurant table bookings, where availability depends on the resources (i.e., tables). The tables, configured as resources, are located on the Main Floor, and we have selected three of them for the purpose.
Next, enable the Manage Capabilities feature, which allows you to define how many individuals each resource can accommodate. After that, set the Assignment Method by selecting the time first, then the user/resource.
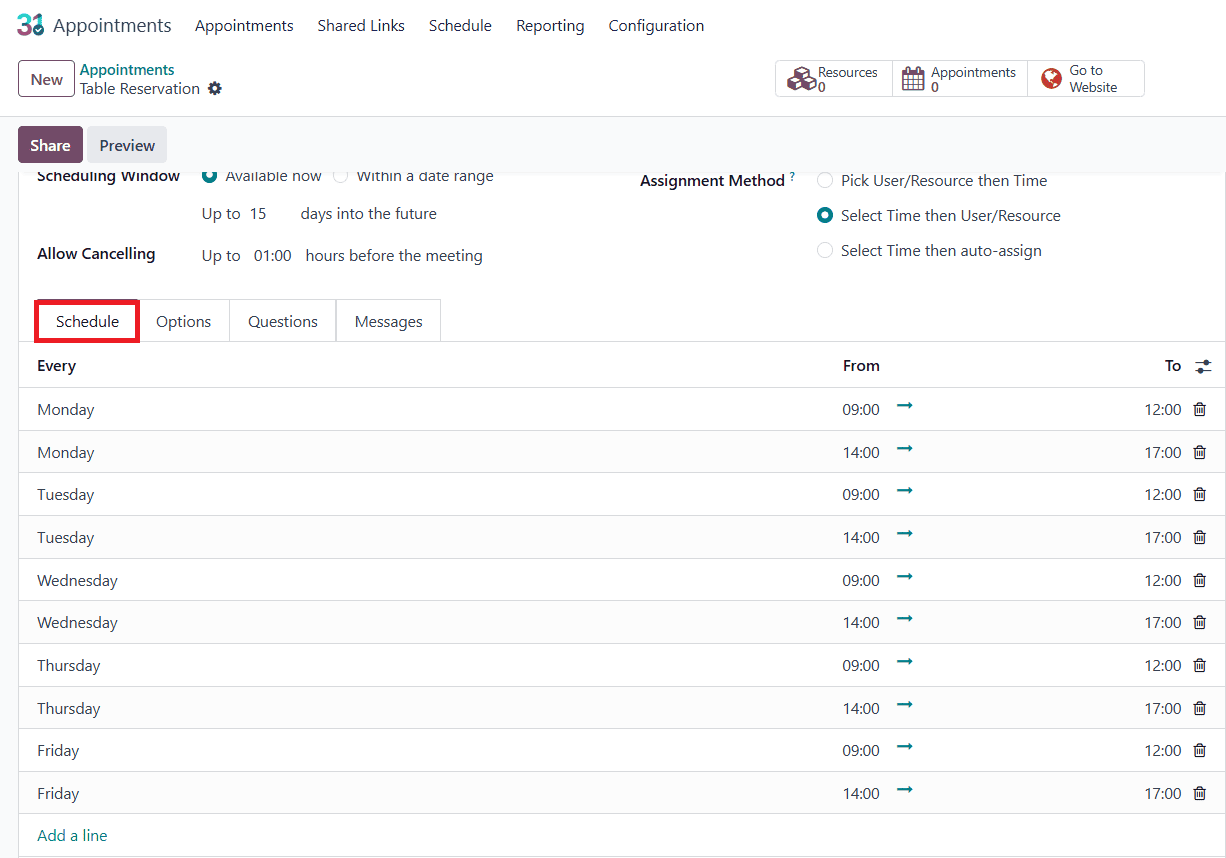
In the Schedule tab, add the day and time duration that clients can make appointments.
In the Options tab, the Front-End Display feature allows you to show a picture of the user or resource. You may also restrict access to particular websites. Next set up the appointments’s time zone and location. If needed, you can include a video conference link.
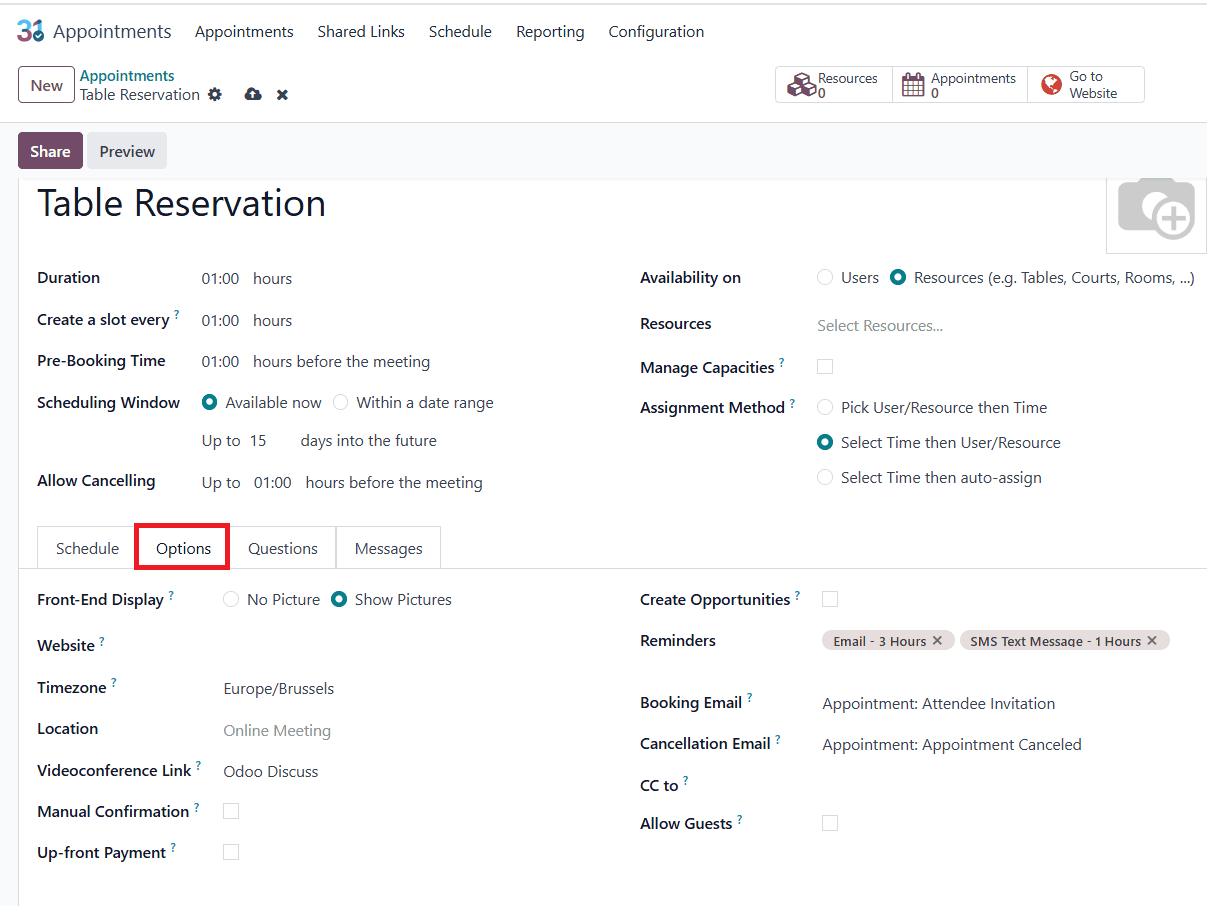
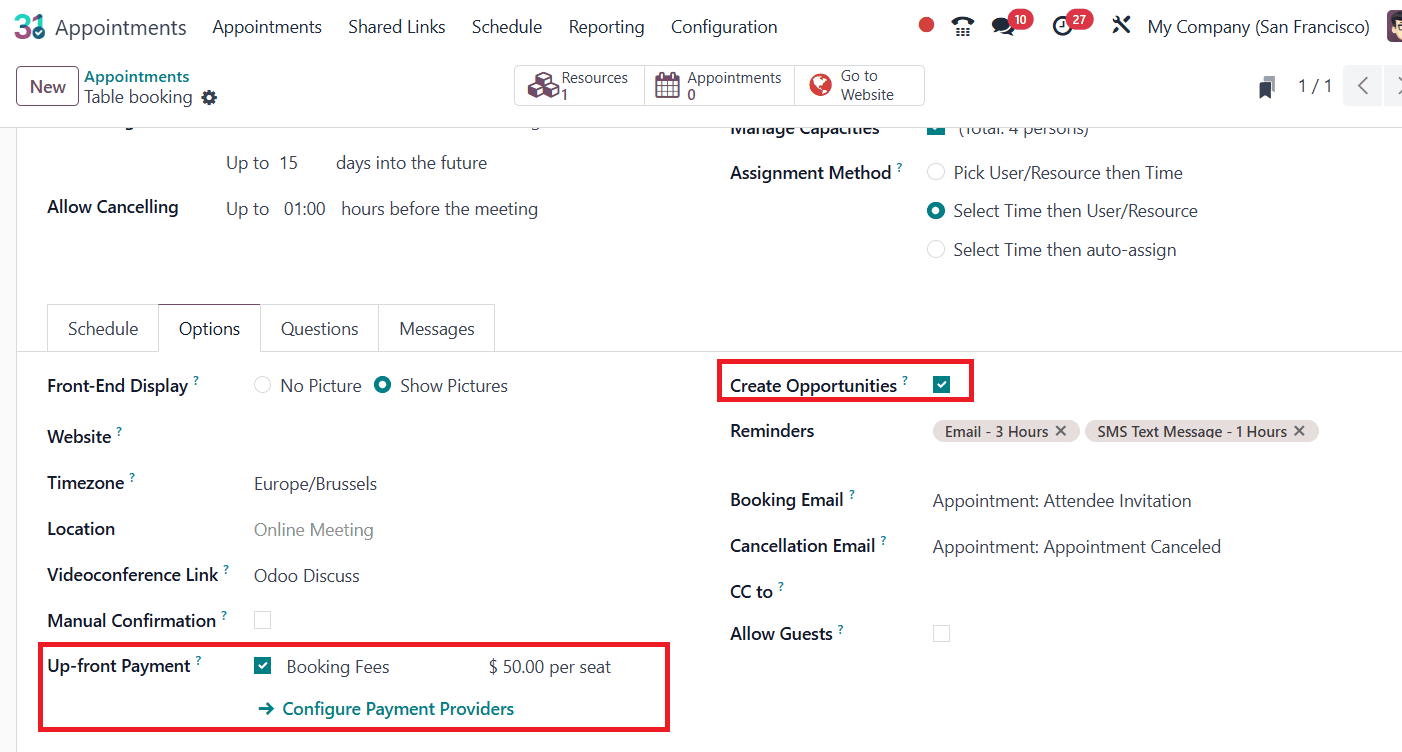
By enabling the Create Opportunity feature, users can generate a new opportunity directly from an appointment. You can also set up automated emails or SMS for reminders, confirmations, and cancellations. Enable the checkbox labelled Up-front Payment, to confirm reservation an amount is required to pay by visitors. You must also specify a service product for the payment to appear.
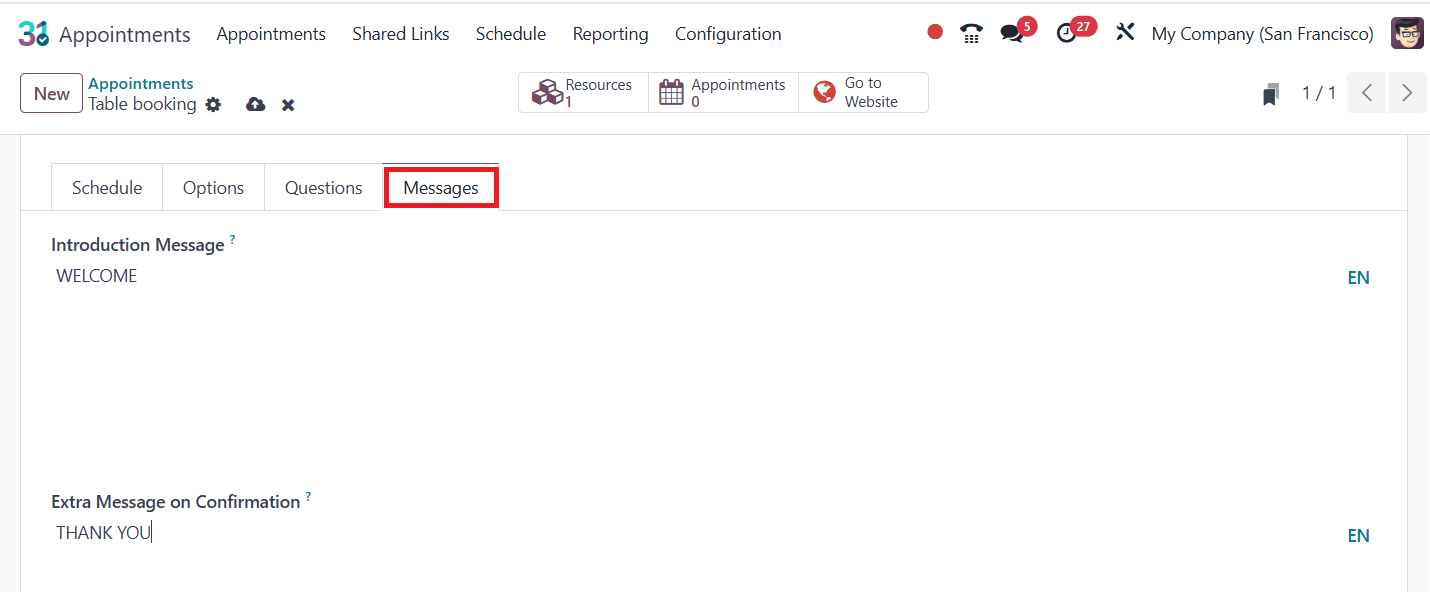
Additionally, you can add a custom introduction message and multiple confirmation message via the Message tab.
After completing the setup, save the appointment. Then, click on the Go to Website tab to open the related webpage. Enable Published to publish the appointment as shown below:

To add a new appointment type in the Restaurant Mode of Point of Sale module: navigate to POS > Configuration > Settings. Under Restaurant Mode, enable Table Booking. Choose the newly created Appointment Type and save the settings.

Configure Appointment from Website:
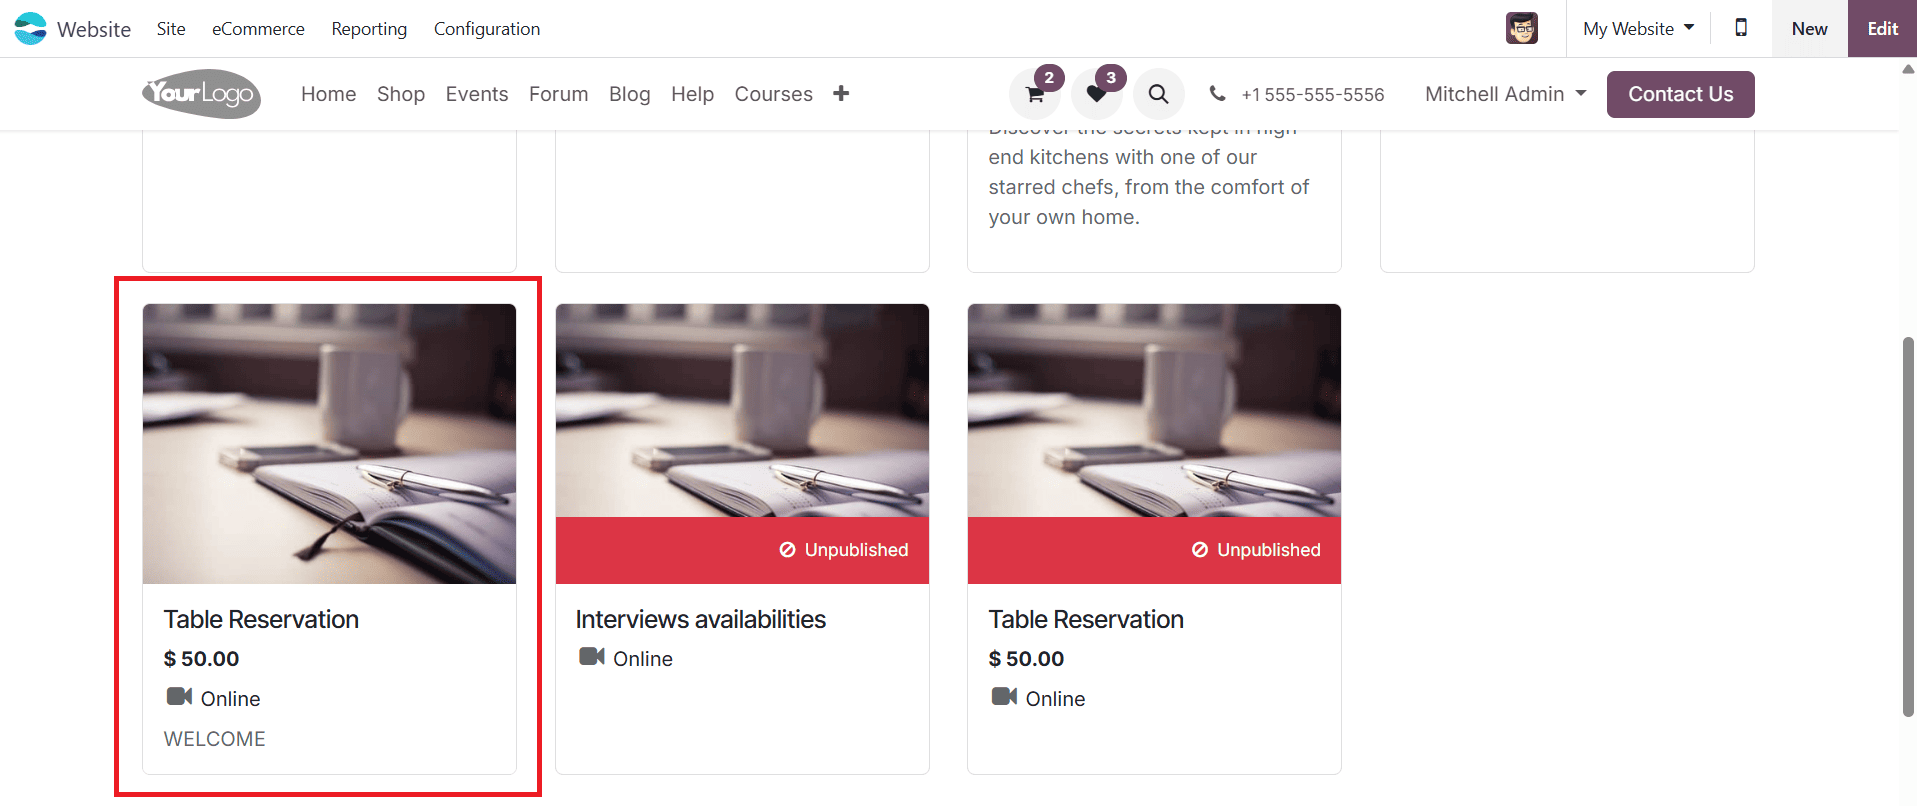
To configure the appointment from the website: Go to the Website module, click on Appointment as shown below:

Select the predefined table reservation appointment as shown below:
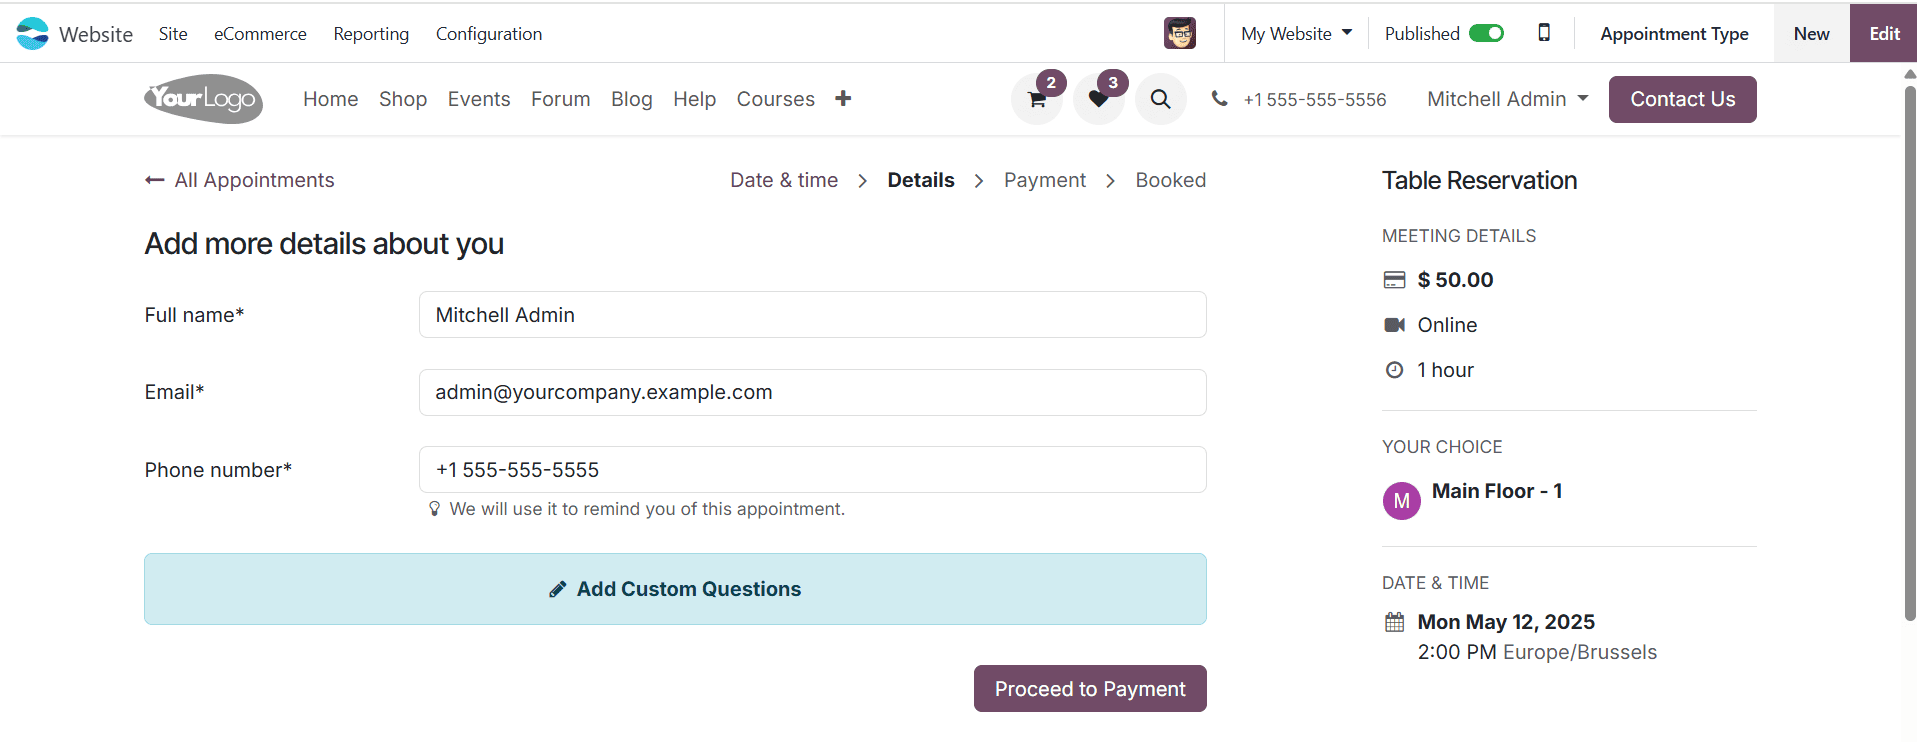
The table reservation details will appear on the right side of the screen. Choose the date and time, then select a table from the restaurant’s Main Floor and select the Confirmation button.

Provide your name, phone number, and email. Click on Proceed to Payment to complete any required pre-booking fees.
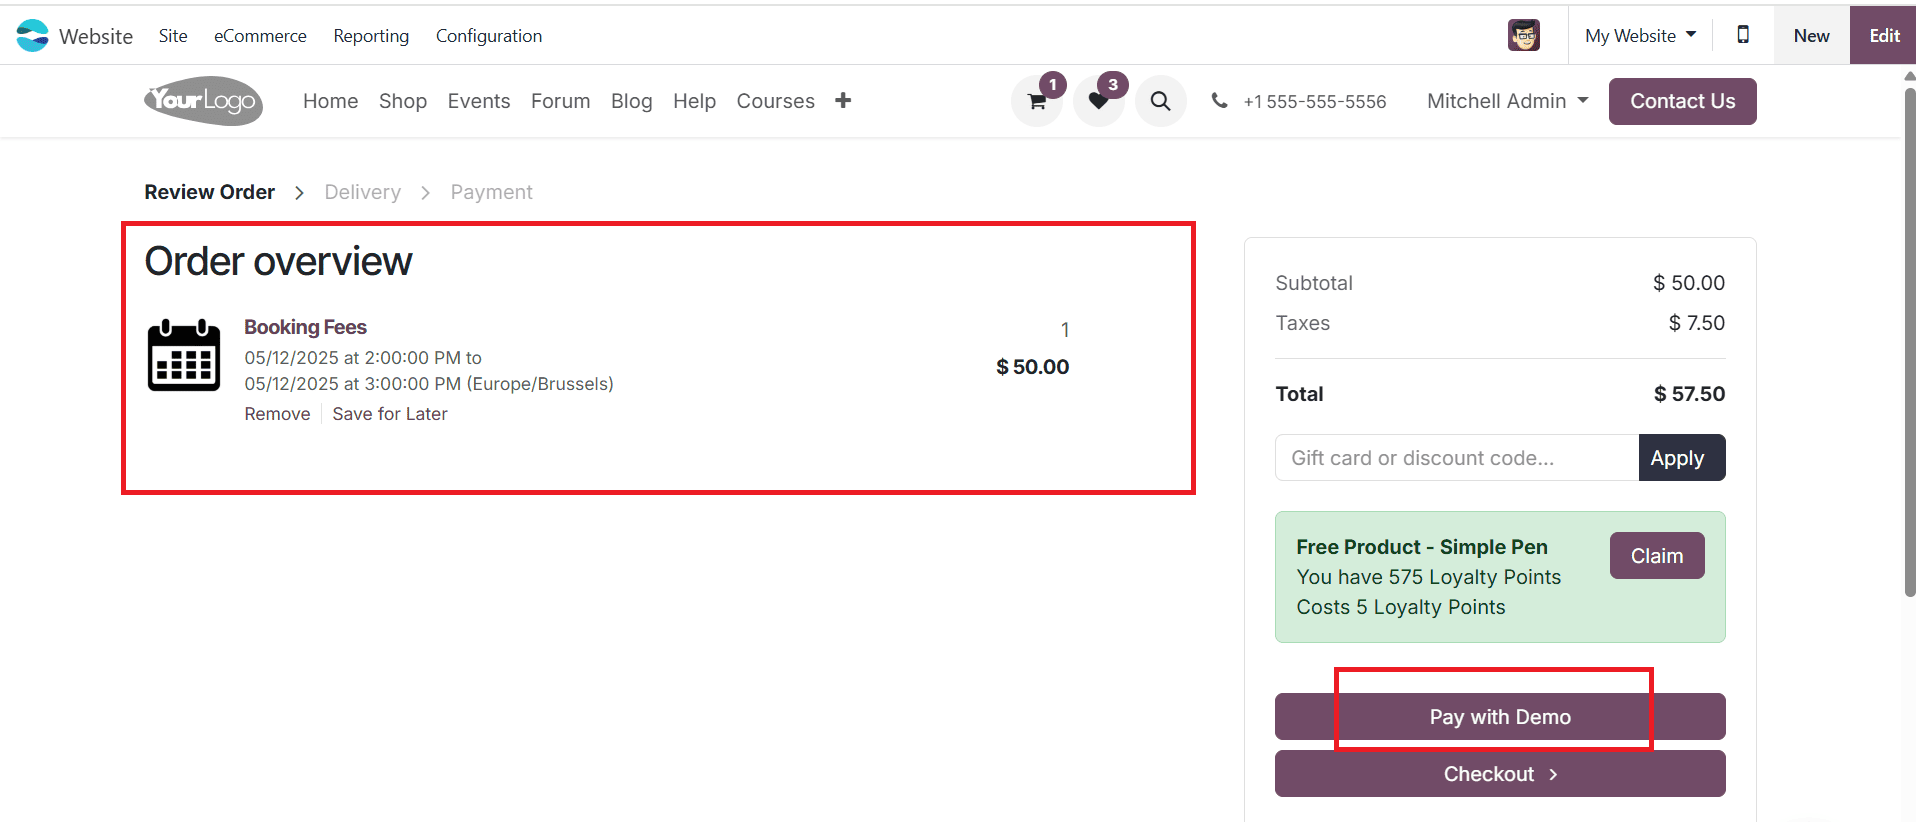
The Order Overview screen will appear. Click Pay with Demo to complete the payment.
The appointment is confirmed, when the payment is done. To review the confirmed appointments, return to the Appointment module.

In conclusion, Odoo 18’s Appointment Module offers an integrated approach for digital restaurant operations by establishing restaurant table reservation and seamlessly integrating the Point of Sale and Website modules. All of these work together to create a smooth workflow that improves staff coordination, turn-around of booked tables and customer satisfaction. Restaurants may therefore improve their operations, reduce mistakes, and promote a quick and reliable eating experience by utilizing these integrated features.
To read more about Online Table Reservation With Odoo 18 Point of Sale, refer to our blog Online Table Reservation With Odoo 18 Point of Sale.