In retail, efficiency is key. Whether you're operating a small boutique or a high-traffic supermarket, quick and accurate checkouts are essential for smooth operations and happy customers. With Odoo 17's built-in barcode functionality in the Point of Sale (PoS) module, managing this process becomes seamless and straightforward.
Barcodes are not just simple black and white lines anymore—they’re one of the most powerful tools you can use to automate the sales process. With just a single scan, you can pull up the right product, with the correct price and stock details, without touching your keyboard or screen. In Odoo 17, this functionality is built-in and works seamlessly with your existing setup.
To begin using barcodes with PoS, you first need to assign barcodes to your products. This process starts by navigating to your product list, which can be accessed either through the Sales or Inventory app. Once you select a product, you’ll see a field labeled “Barcode.” This is where you enter the unique barcode value associated with that product, usually found on the packaging or generated through barcode software. After entering the barcode, simply save the product. This step should be repeated for each product you want to enable for scanning.
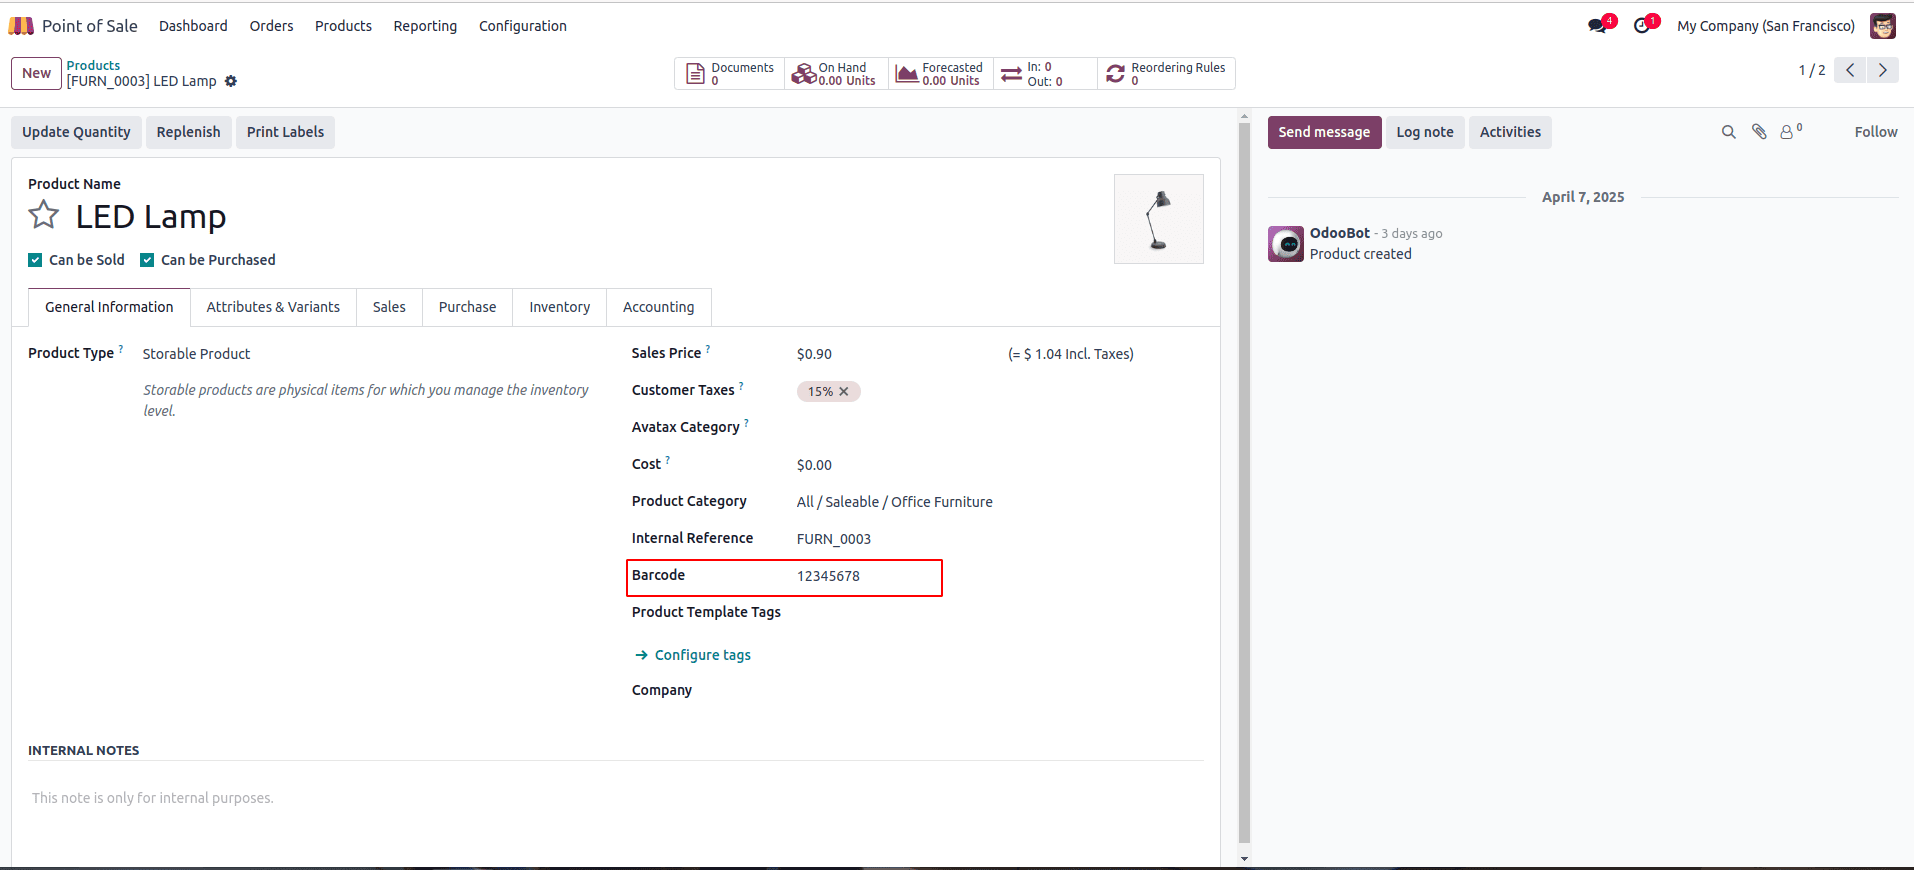
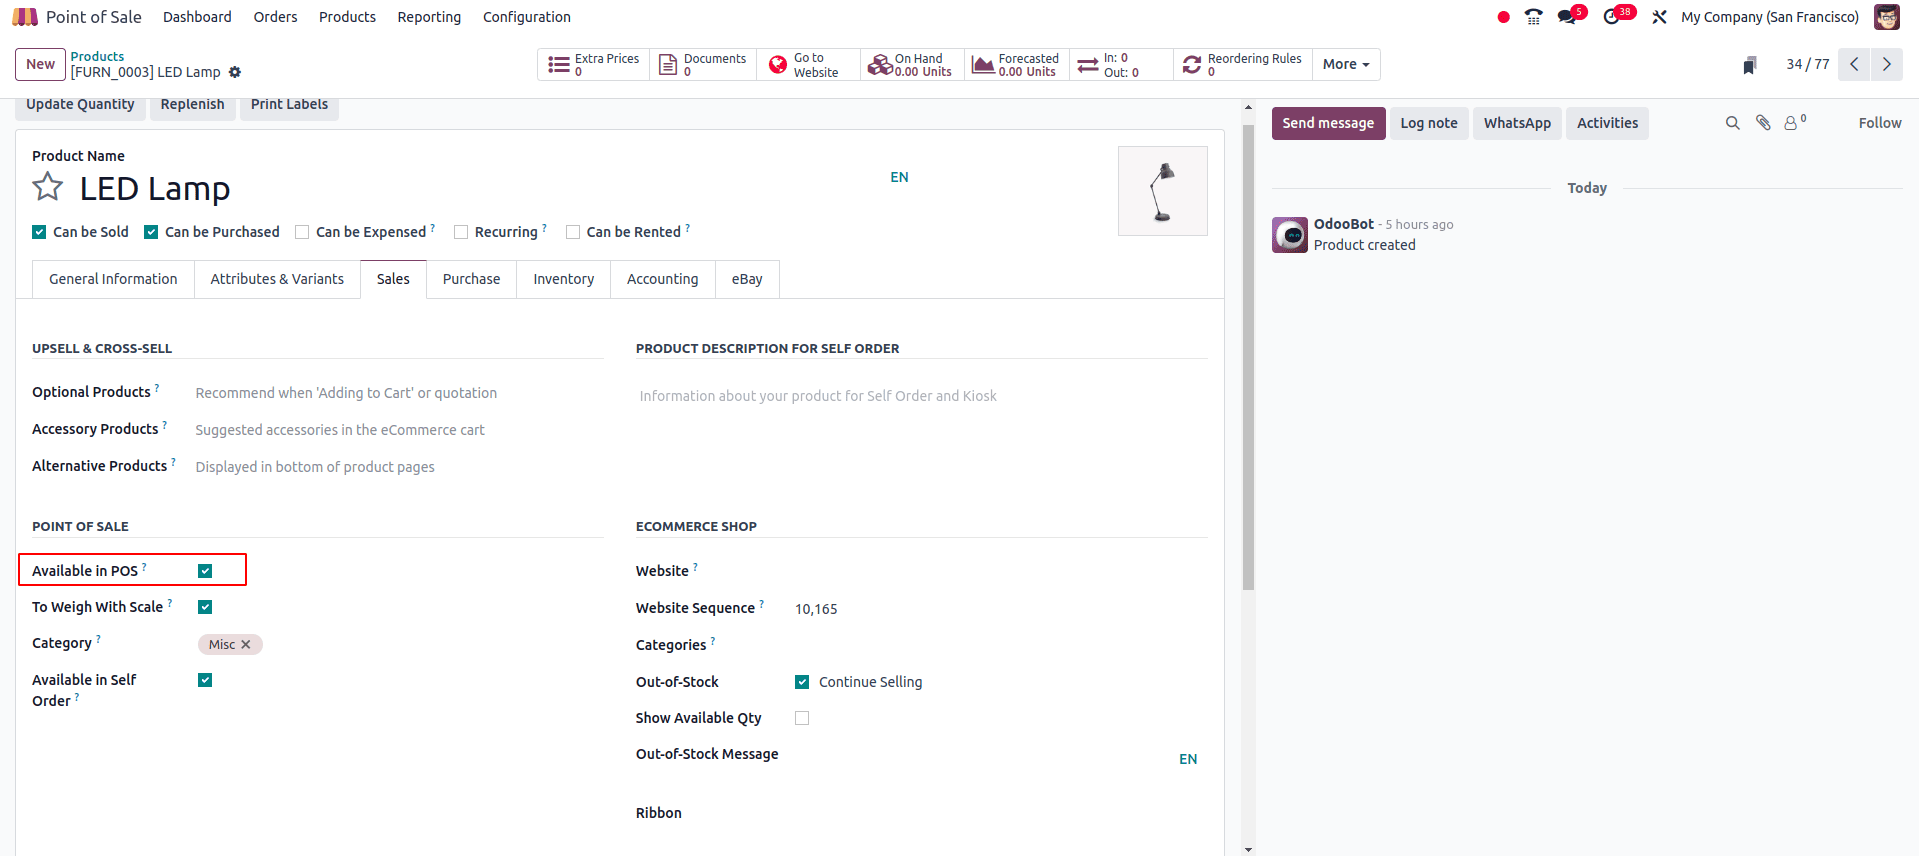
Also, please ensure that the product is properly configured to be available for sale in the Point of Sale (POS) system.
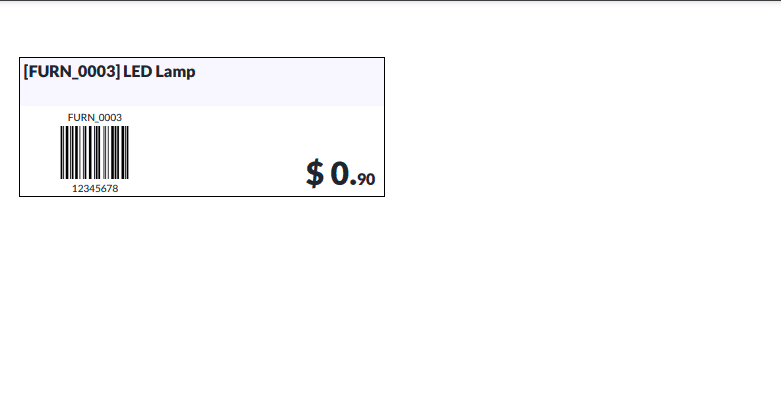
By clicking on 'Print Labels', you can view the barcode associated with the product. Once printed, you can simply scan the barcode to test or use it within the POS.
Here’s where things get practical. When you open a new PoS session, the screen looks familiar . But now it’s powered by barcode functionality. With the scanner connected, you just scan a product, and the system instantly pulls it up, adds it to the cart, and shows its name, quantity, and price. There’s no need to browse through categories or type in product names manually. This not only speeds up the process but also helps avoid mistakes. After scanning all items, you simply move on to payment, pick a payment method, and complete the sale like you normally would.

The Debug Window in Odoo 17 POS includes a dedicated Hardware Status panel that displays real-time connection information.
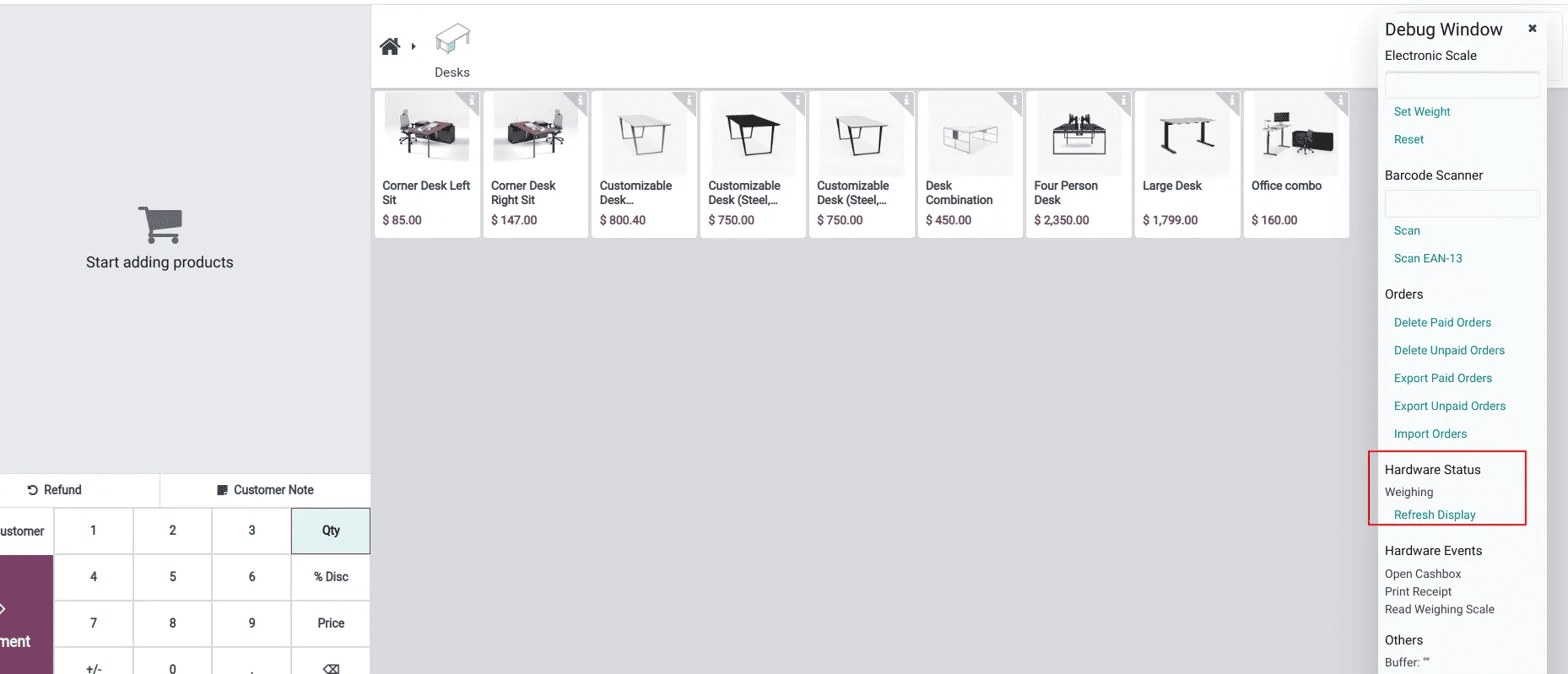
One of the standout tools available in the Debug Window is the option to manually input barcode values. This feature proves especially useful for developers and system administrators, as it allows them to simulate barcode scans without needing a physical scanner. By typing a barcode number directly into the interface, users can ensure that the system correctly identifies products, updates inventory levels appropriately, and applies pricing accurately. This kind of manual testing is particularly helpful during the initial setup of the system or when diagnosing issues related to barcode hardware.
This capability may seem minor, but it has a significant impact on retail performance. It can greatly accelerate the checkout process, particularly during high-traffic times, and makes inventory management more streamlined and reliable. With less manual input required, employees can learn the system more quickly, and the likelihood of errors such as incorrect pricing or overlooked items are substantially reduced. Best of all, with Odoo 17, barcode scanning comes built-in. There’s no need for complicated configurations or third-party integrations. It’s user-friendly, straightforward, and ready to support your business right out of the box.
In short, bringing barcode scanning into your Point of Sale workflow with Odoo 17 is a smart step forward for any retail business. It’s a simple upgrade that offers powerful results like faster service at the counter, better control over inventory, and smoother day-to-day operations. All it takes is setting up the barcodes, plugging in a scanner, and letting Odoo handle the rest.
To read more about How to Create Barcodes in Odoo 18, refer to our blog How to Create Barcodes in Odoo 18.