Invoicing is highly integrated with the Accounting module to ensure maximum efficiency in invoice and accounting management. Every aspect of the invoicing procedures can be easily managed and overviewed from the accounting module, allowing you to handle complex accounting data efficiently.
This blog will give you a detailed overview of the Follow up on Payment Terms and Follow-up levels.
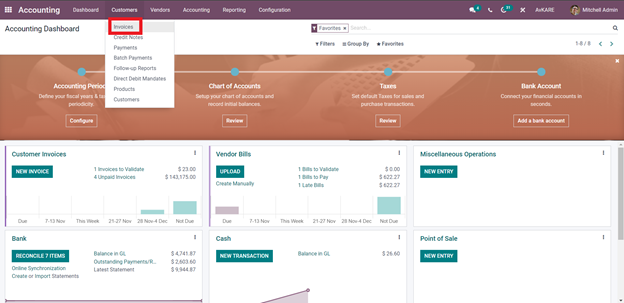
For accessing invoicing options from the Accounting module, go to the Customer tab from the module’s Dashboard and click on Invoicing from the drop-down options as shown below.
Click on the Invoice option, and Odoo will take you to a page with all of the invoices listed out if you have created any previously, as shown below.
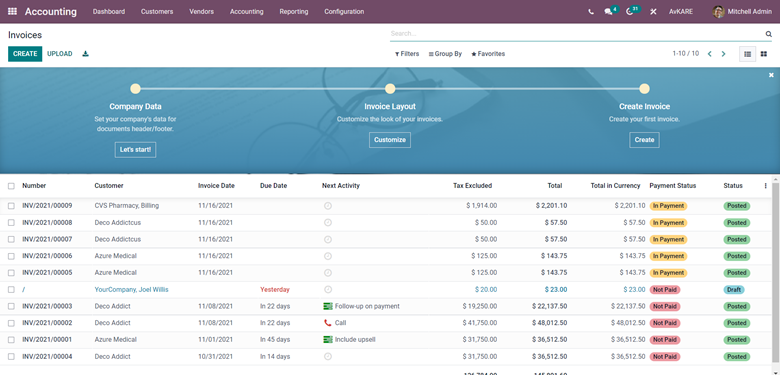
You can look at the previously created invoice from here. The Chart will help you set up Invoicing with the Accounting module. To know more about setting up, Invoice with Odoo, follow the link given.
Payment terms
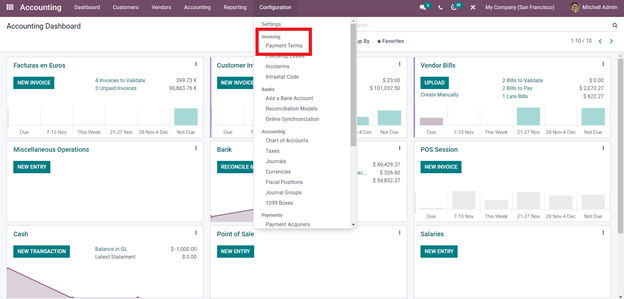
Payment Terms are rules that you can set on an invoice regarding the time allotted to the customer to pay for the product or services you have provided them or give them through invoices professionally. This often allows you to get paid faster and will help your customers to all their purchases quickly. You can easily set this feature up from the Accounting module. Click on the Configuration tab from the module’s dashboard and the drop-down under the Invoice section, click on Payment Terms as shown below.
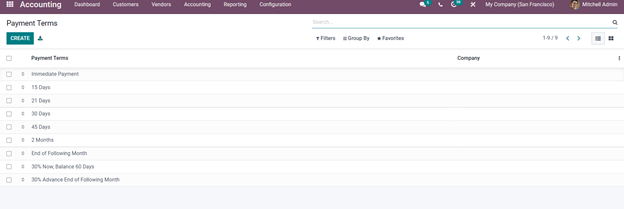
This will take you to the Payment Terms page, which will display all of the previously created payment terms to overview and use, as shown below.
From here, click on the Create button to configure and set up a new Payment Term, as shown below.
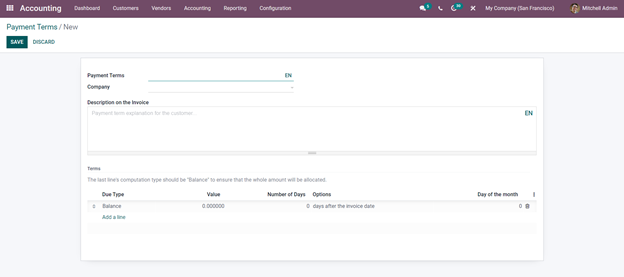
You can create a new Payment Term effortlessly from here. The first step of Creating a new Payment term is to name it. From the Payment, Terms section, enter the Term and select the Company. The Term should justify the purpose of the Payment Term. This allows you to manage the Payment Terms effortlessly. Choose the company from the Company section.
With the Description on the Invoice option, you can quickly write up a description printed with the Invoice. The description space can be used to explain the Payment Term. The report must be short and precise for the customers to understand in a single glance, or you can elongate it concerning the Payment Term. After giving the description, go to the Tab below for advanced configurations on the Payment Term. The configuration section is reserved for configuring the Due date specification on the Payment term, as highlighted in the image given below.
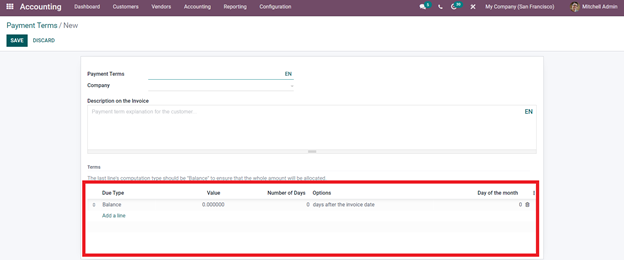
Click on the Add a line button as highlighted in the section of the image given above. This will let you set a Term. A configuration tab for configuring the term will open up as shown below.
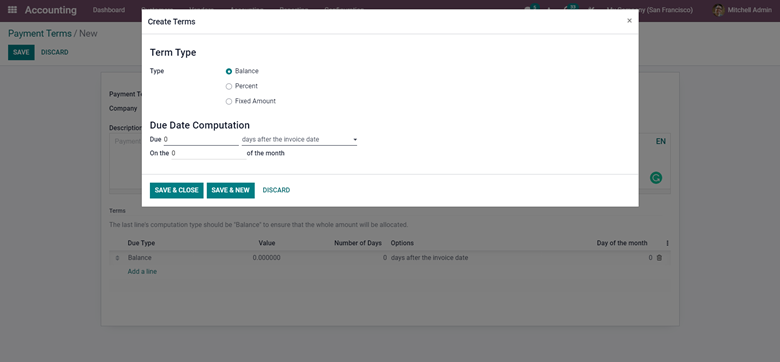
You can create a Term form here. The first step is to set the term Type. There are three options available to choose from to set the Type. Balance, Percent, and Fixed Amount. Note that for each type, the configuration changes accordingly. Select the Term type according to the nature of the invoice that you are sending. If you pick the Percent from the options, a new Value line will appear as shown below.
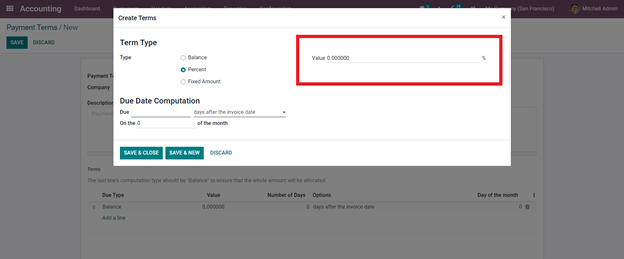
You can enter the Value in percentage here. If you choose the Fixed amount from the options, you can enter the Value in Fixed amount under the Value section. So you can type in the amount or a percentage of the total amount here.
The next step is to configure the Due date computation. The first section under the Due date computation section is the Due. Over here, you have to enter the number of days and the Due, And from the Dropdown options under the Days After the Invoice Date, choose the most appropriate option. The possibilities include Days after the End of the Invoice Month, the following month, or the Current month. After the configuration, use SAVE & CLOSE to continue making the Payment Terms.
You can find the new line under the Terms section as shown below after the configurations on them.
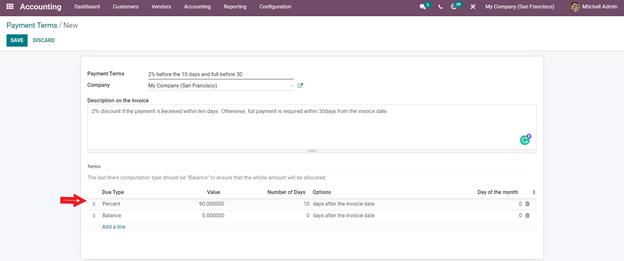
Note that you have to always keep the Balance at the low level of the line or the list. The newly created condition will be automatically placed under the balance line, drag it to the top, and ensure that the whole amount of the invoice is allocated. You can also edit the Balance, simply Click on it, and you will be taken to the configuration tab as mentioned earlier for configuration.s After the configuration, you can proceed with the invoicing process.
From the Customer tab in the accounting Dashboard, click on Invoices from the drop-down options. The CREATE button will give you a new page for Creating the invoice, as shown below.
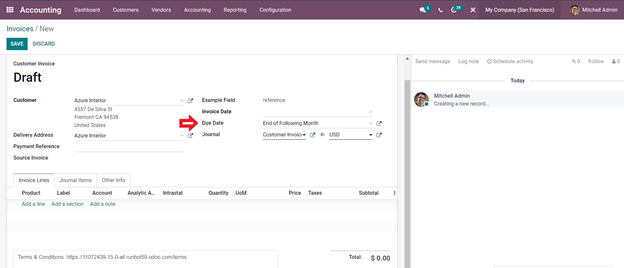
Enter the details on the Invoice, and from the Due date field as marked above, choose your payment term as shown below.
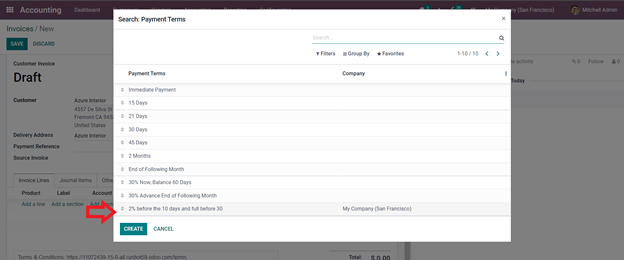
Note that Odoo allows you to create Payment terms from the Invoices instantly. Click on the CREATE button, and Odoo will give you the configuration tab as sanctioned easier for creating the new Payment Term.
As highlighted in the image given above, choose the Payment Term, and it will be automatically added to the invoice as shown below.
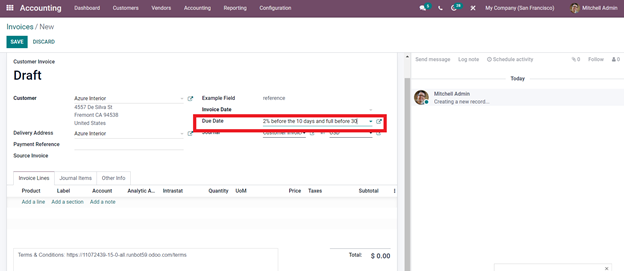
This will be displayed on the invoice so that the customer can act on the payment accordingly, as shown in the invoice preview below.
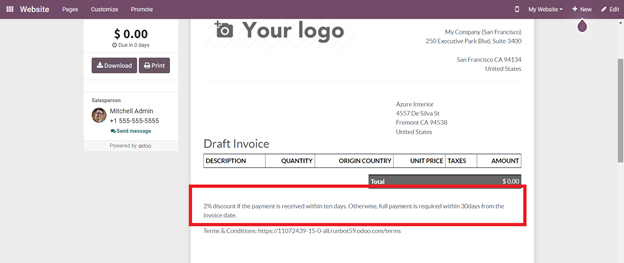
The highlighted section above shows the applied Payment Term. This allows your customers to get a quick look at the Terms and will also act as a quick reminder on the important Payments.
With Odoo you can set up unique Payment terms for individual customers. You can do this by going to the Customers options under the Customers tab on the Accounting dashboard. This will show your customers as shown below.
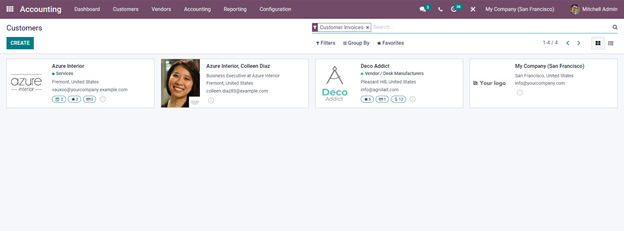
Select the customer that you want to add the Payment Terms to from the Options and the configuration page on the selected customer will open up as shown below.
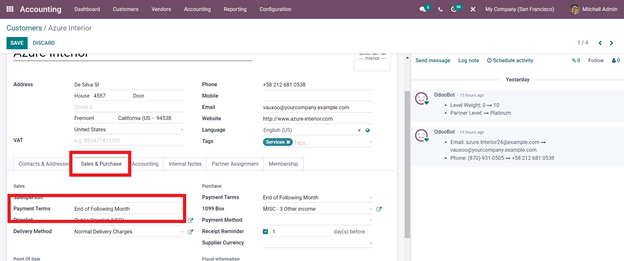
Click on the Edit button and as Marked above, under the Sales & Purchase section, you can find the Payment terms. Click on the field, and from the drop-down options select the payment term. Odoo will recognize this and include the Payment term for the future invoices to be sent to the customer.
Follow-Up Levels
The Follow-up levels option is a Payment follow-up process that you can use to remind the customers of the required payments. The Follow Payment follow-ups will help you ensure that you get paid on time and let you connect with your customers instantly. Setting the level for the Follow-Ups is essential as it plays a massive role in maintaining Cash flow in your business. Odoo Can send the reminders automatically to the customers based on the w-up levels.
Follow-up levels can be accessed from the Configuration tab, as shown below.
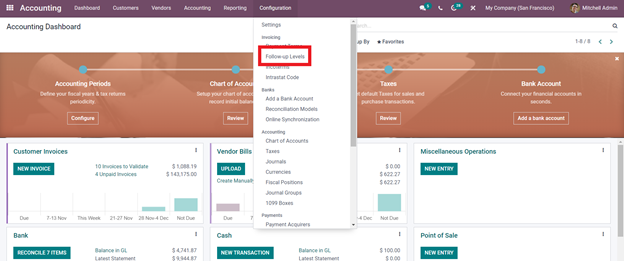
Click on it and view or create Payment follow-ups as shown below.
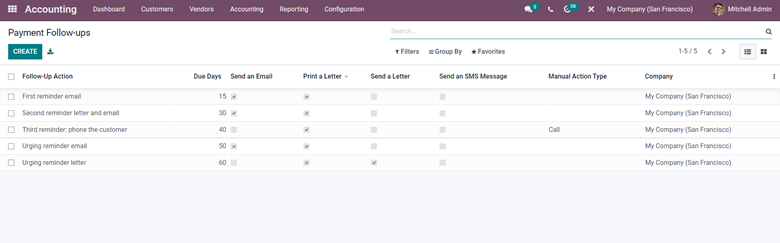
Odoo has a set of previously installed or custom Follow up as shown above. If you want to configure an existing payment, click on it from the Follow-up level list and configure it. Click on the checkboxes to activate follow-up levels easily. And if you want to create a new Follow Up, Click on the CREATE button. From the configuration page, you can create a new Follow-up
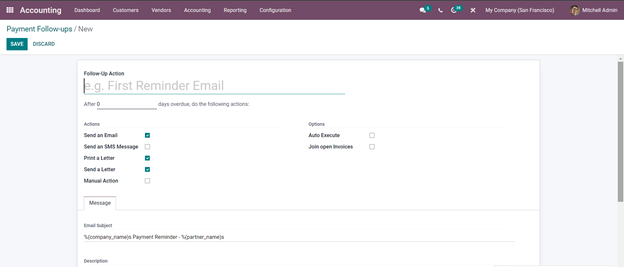
You can create the Payment Follow-up form here. Set up the name for the Follow-Up Action first. Make sure that your Follow-Up Action title is precise and to the point, for the customers to catch up quickly. Add the number of days Overdue for the action to work automatically. You can type in the message that you want to send at every level to the customers seeking important payments. You can write the letter in the message section of the Follow-up level configurations section, as shown below.
The Follow-up action will be automatically sent via Email, SMS, and many more. Look for the Actions section in the image given above for these options. After the configuration on the feature, click on the Save button, and the Payment Follow-up will be saved for Odoo to work upon.
As Odoo is highly automated, the feature will be activated and automatically applied to the invoices without any additional configurations. These follow-ups will be sent automatically on scheduled dates and times In the module of the advanced feature.
As the process is automated, Odoo will automatically recognize the Invoices and the Scheduled dates for payments and send the notifications automatically on the intervals you have chosen earlier from the Follow-up level section. Let’s create an Invoice and go through the procedures.
Using the Follow-Ups
The first step is to create an Invoice from the Accounting module and send confirmation of the invoice, as shown below.
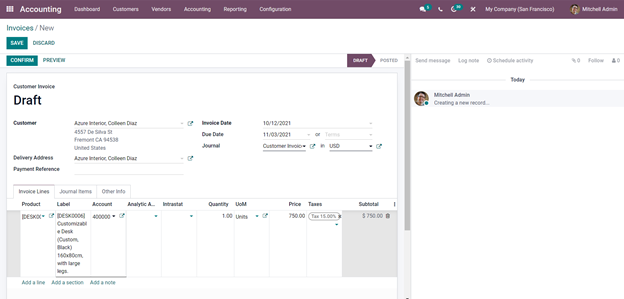
Note that in the invoice configuration given above, the invoice date and Due date are set to be Due to explain the Follow-ups easily. Click on Confirm button to confirm the Invoice, and this will allow Odoo to automatically analyze the due date and immediately set the Follow-up action.
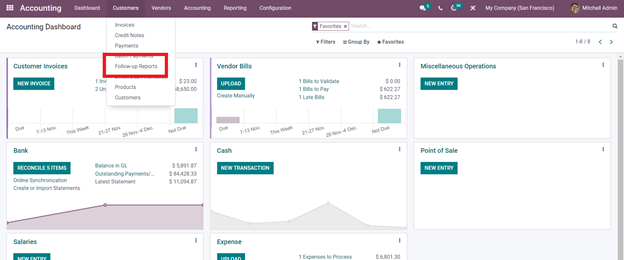
You can have real-time info on the Follow-Ups by going to the Follow-Up Reports options under the Customer tab from the Dashboard of the Accounting module, as shown below.
Click on it, and Odoo will take you to the Follow-Up Reports page, as shown below.
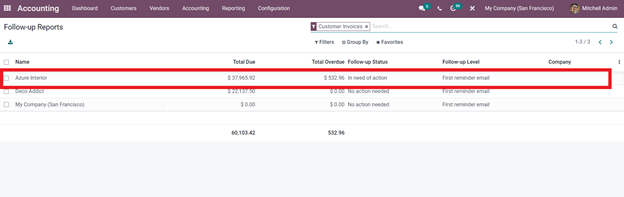
Here you can see that as the Payment is Overdue, under the follow-up section, it is notified as ‘In need of action’ along with the Overdue amount. Click on it to have a detailed view of the Customer and the due information as shown below.
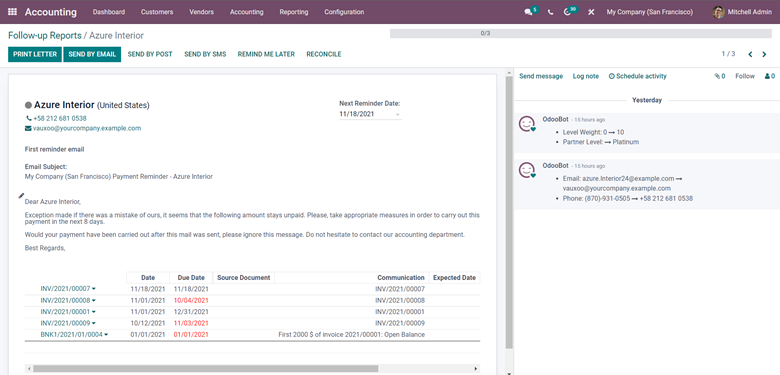
From here, you can configure the Follow-up report that must be sent to the customer. To configure the Follow-up report, click on the Pencil button or emoticon as highlighted below.
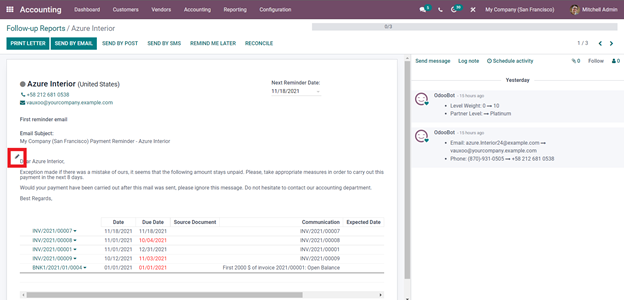
This will let you edit the Follow-up request. After the configuration on the Follow-up report, send it to the customer. You can send the request via Email, Letter, Send by Post, Send by SMS or schedule it later. Just click on the medium by which you want to send, and the configuration tab will open up if you haven’t configured the medium on the respective customer earlier.
For example, in the above-given image, the Print Letter and Send by Email buttons are lightened up as both options are accessible to the customer. You can send it by Email or by hand. For the other mediums, configurations are necessary. If you choose the Send by SMS, a tab will open up, as shown below.
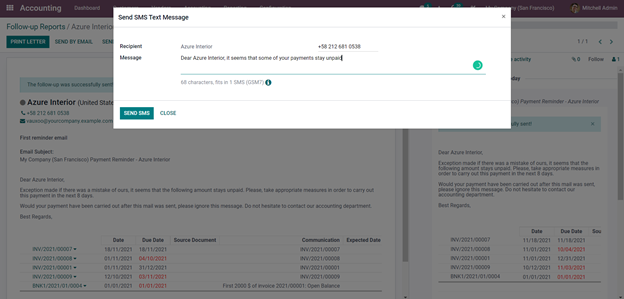
After sending the info, you can click on the Done button, which will appear as soon as the mail is sent.
Along with this, Odoo will automatically send and manage the Follow-up details according to the Follow-up levels. Each Follow-up email or notification will be sent to the customer concerning the number of days you have set in the Follow-up section earlier. The automated process will trigger itself every time you create a new Invoice, and you can easily edit and manage these advanced features to generate maximum efficiency.
This will help keep your customers constantly notified of the Payment as it is essential to preserve the cash flow. With the support of the Payment terms and follow-up levels feature, you can also establish a policy among your customers on payments that helps you get paid faster in the future. With the assistance of the feature, you can ensure proper clash flow in your business.