Making finished products out of raw ingredients is referred to as manufacturing. It goes through various production processes. Basically, it involves many processes like planning, assembling, testing, and designing to ensure that the finished product matches the expected standards and requirements. It is crucial to examine the quality of manufactured goods. Early on in the production process, it assists in locating and fixing flaws or discrepancies. Cost reductions, increased competitiveness, and a stronger market position are the results.
The complexity of the process will be reduced if the user can evaluate the quality at each stage. However, the user of Odoo 16 may do this easily by using the Odoo 16 Manufacturing and Quality modules together. Additionally, quality control reduces the need for post-production fixes or recalls.
Let's check how the quality checks happen during the production process.
For that, create a new Bill of Material for manufacturing. To create a new BoM, go to the product tab and choose Bill of Material from the list.
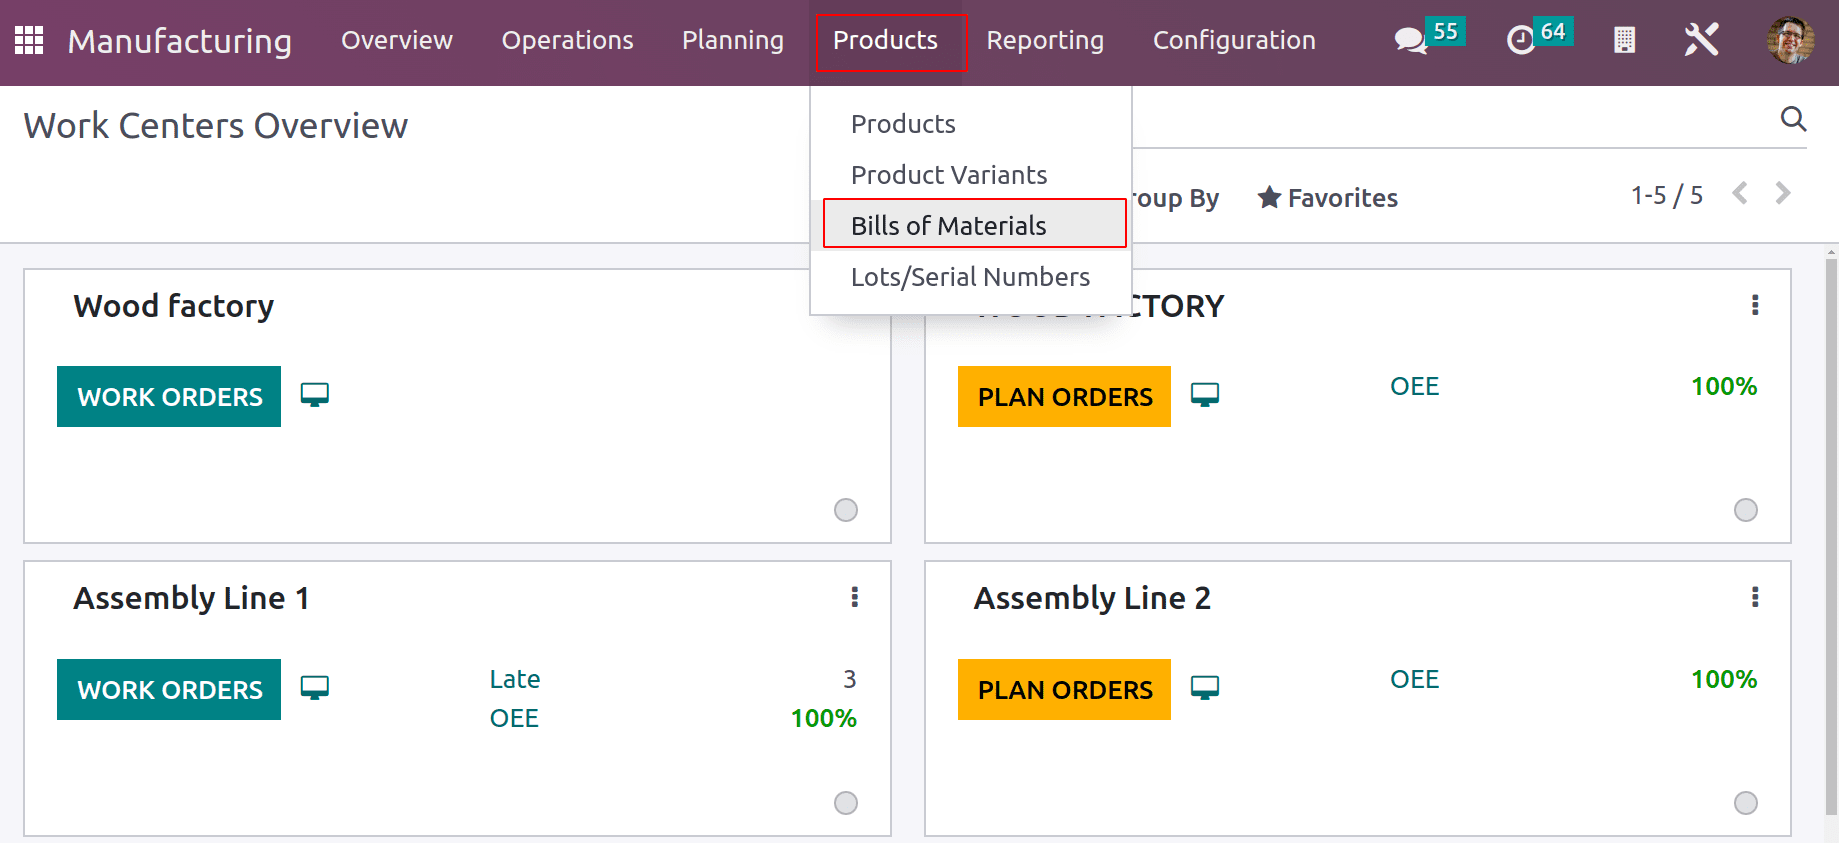
Here is the bill of material for the product Table, which is created to produce one quantity of goods. The reference added is Table (new) 1. This can be used inside the manufacturing order. The BoM Type manufactures this product. The raw materials needed for production can be added in the components tab. Table Leg, Table Top, Screw, and Bolt are the components.
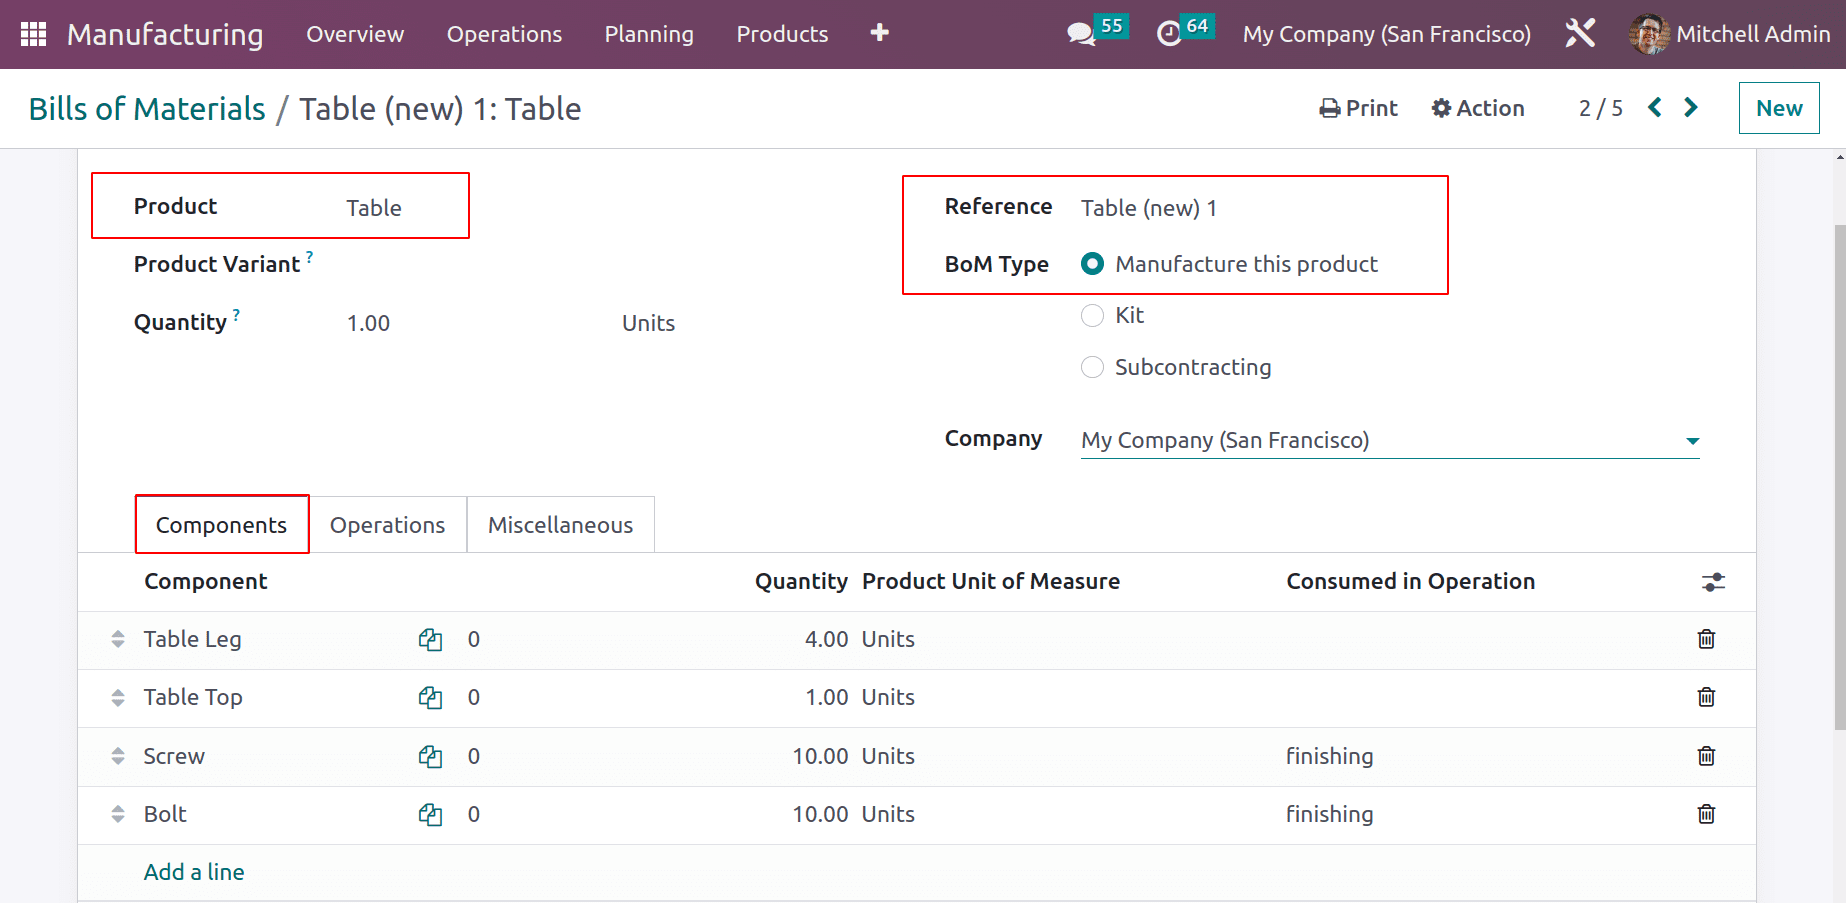
The operations performed during the production of the Table are Cutting, Finishing, and Packing are added. Here, Work order Dependencies are set.
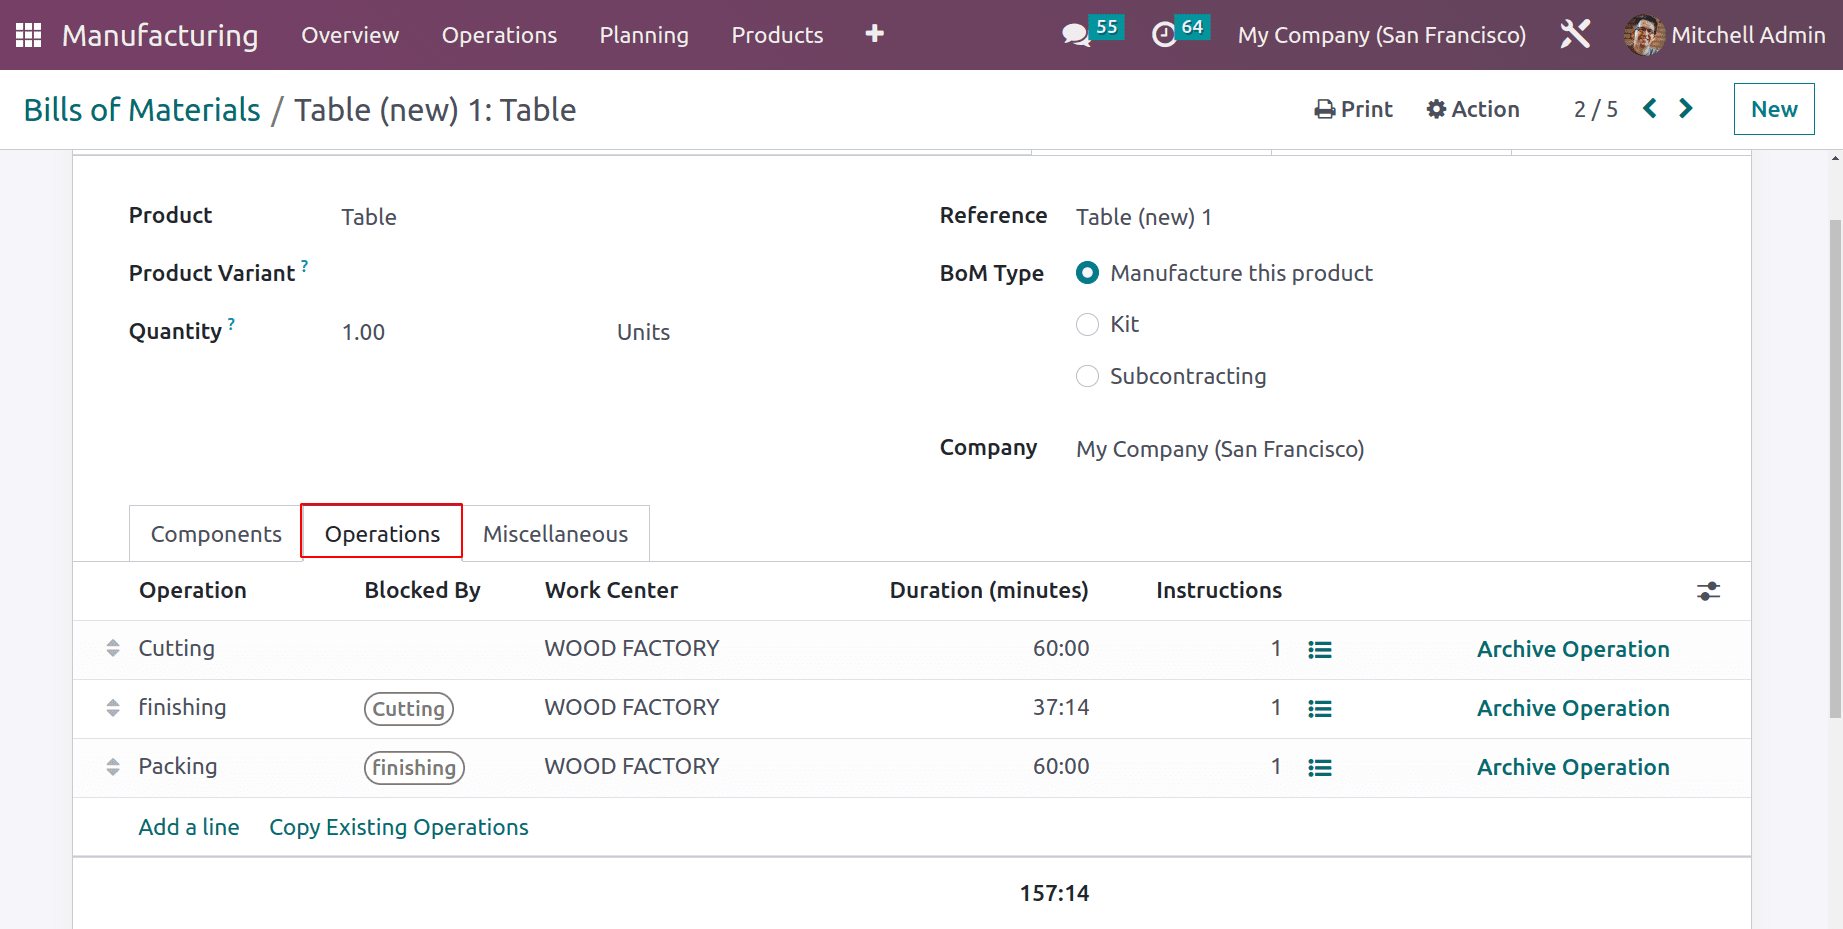
The bill of materials is ready now. To know more about the Bill of materials, refer to the previous blog about Configuring Bill of Materials in Odoo 16
Before starting the manufacturing, let's add some quality control points, which are needed for checking the quality of the product during each operation.
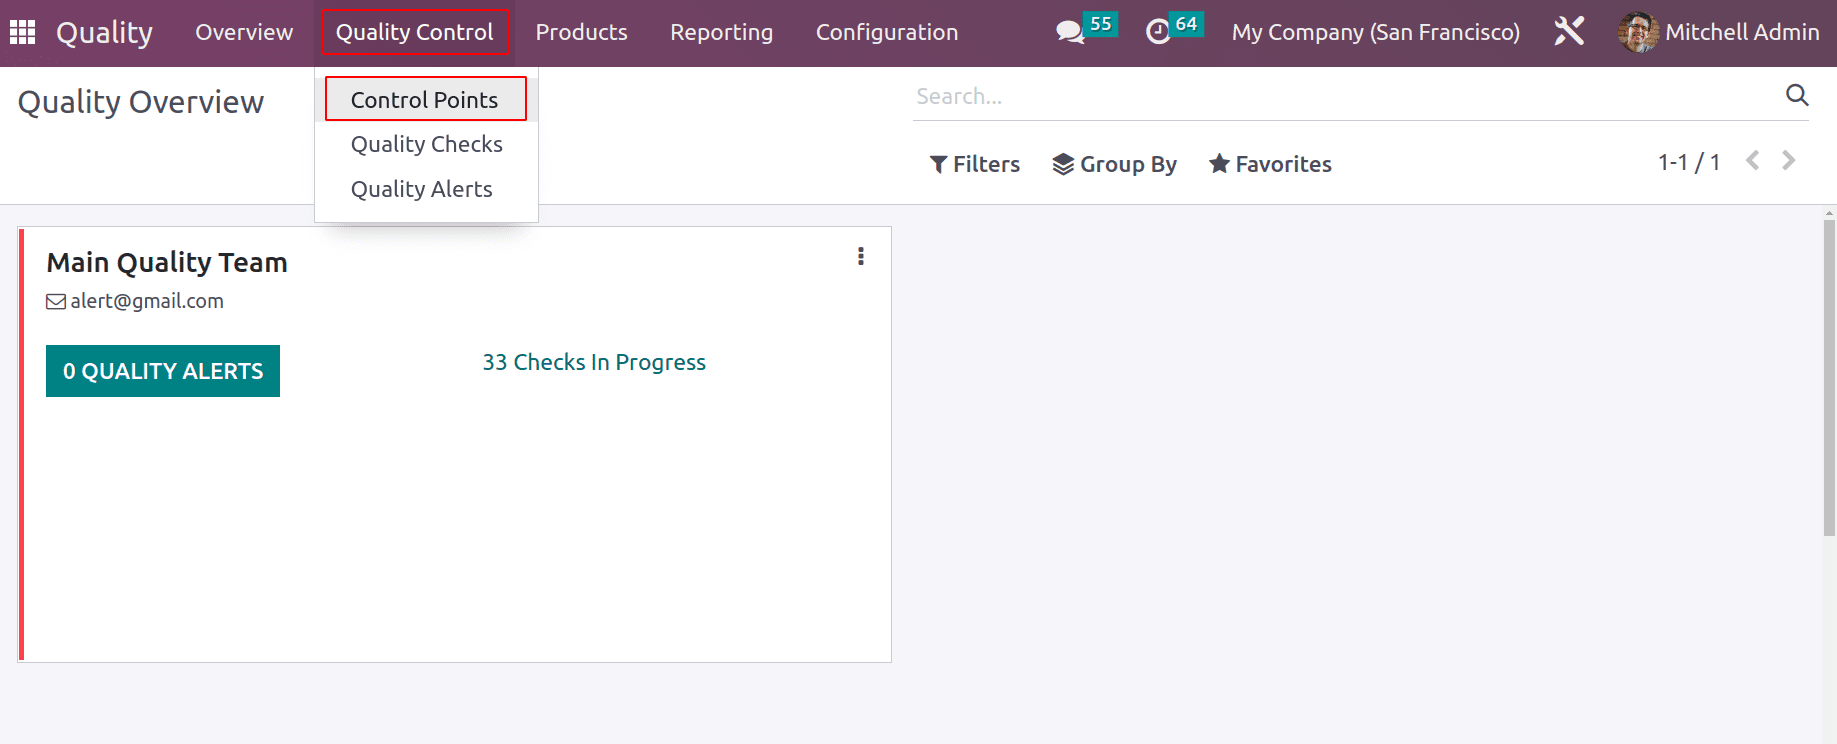
Quality modules can be used for creating the control points. For that, go to Quality Control and choose Control Points.
: Quality Control > Control Points > NEW
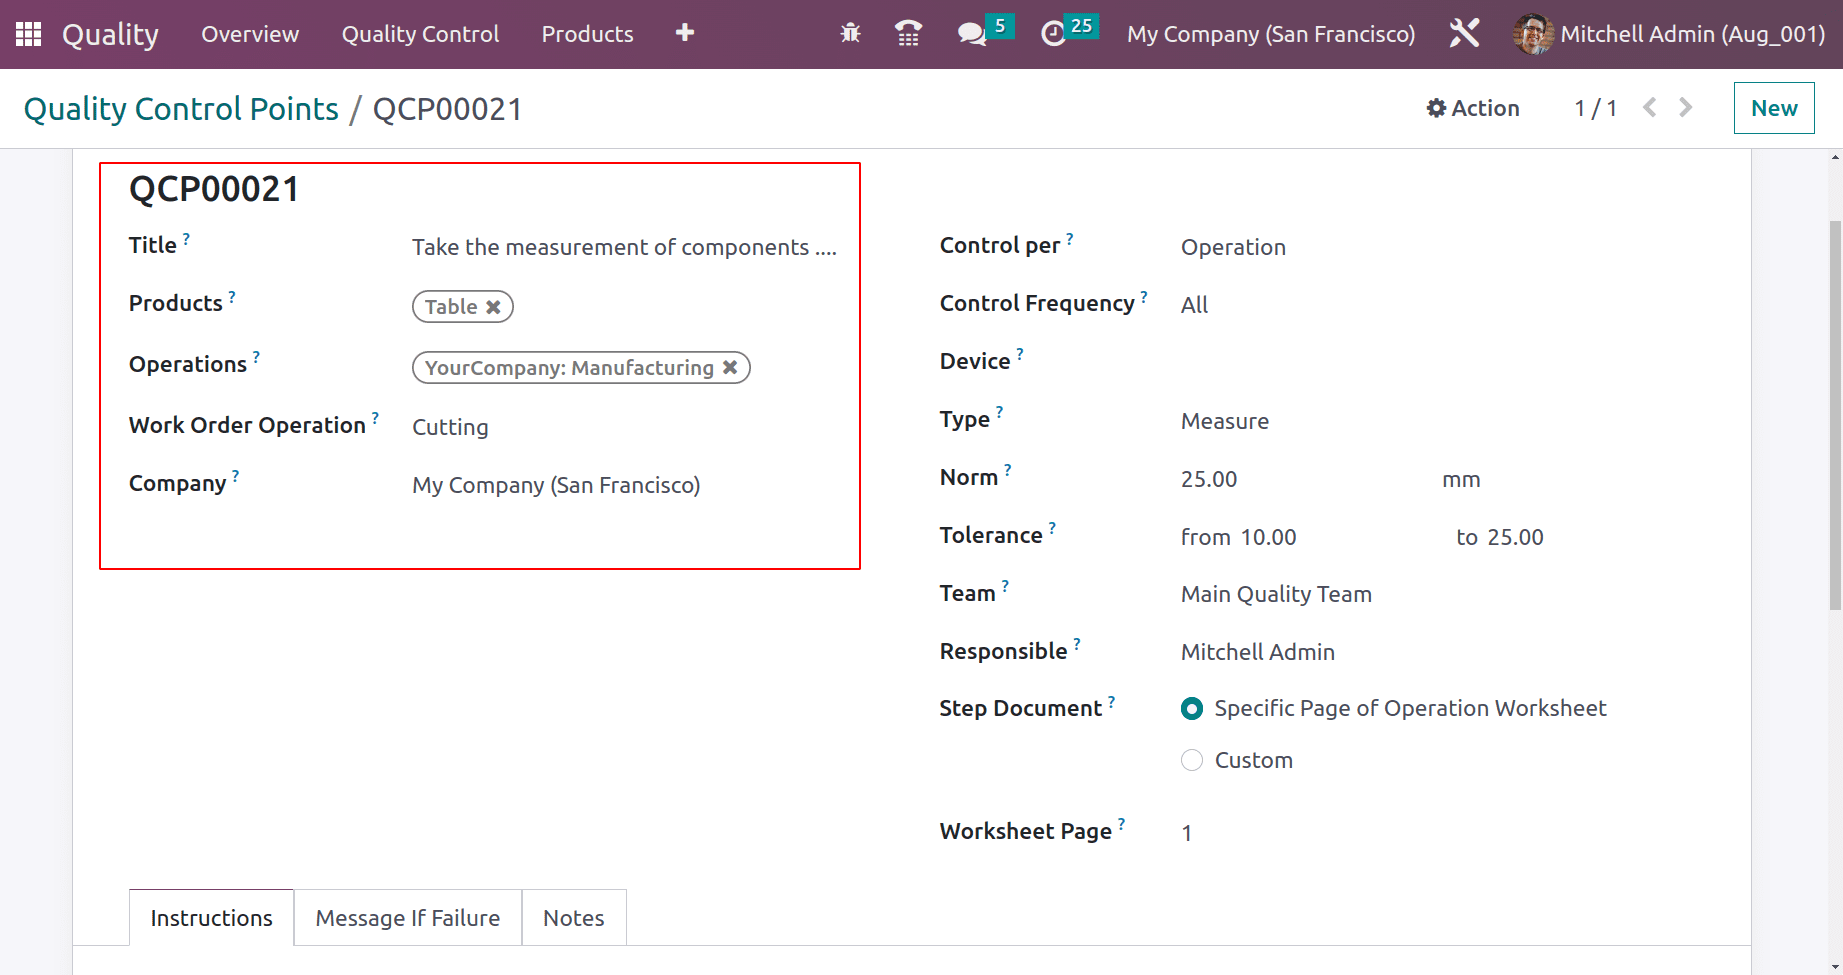
Here the first Control Point was created. The title added is ‘Take the measurement of components.’ The Operation chosen is Manufacturing, and the product is Table. So another field named Work Order Operations is visible there. The work order that we set inside the Bill of Material can be chosen there. So the first operation, Cutting, is chosen.
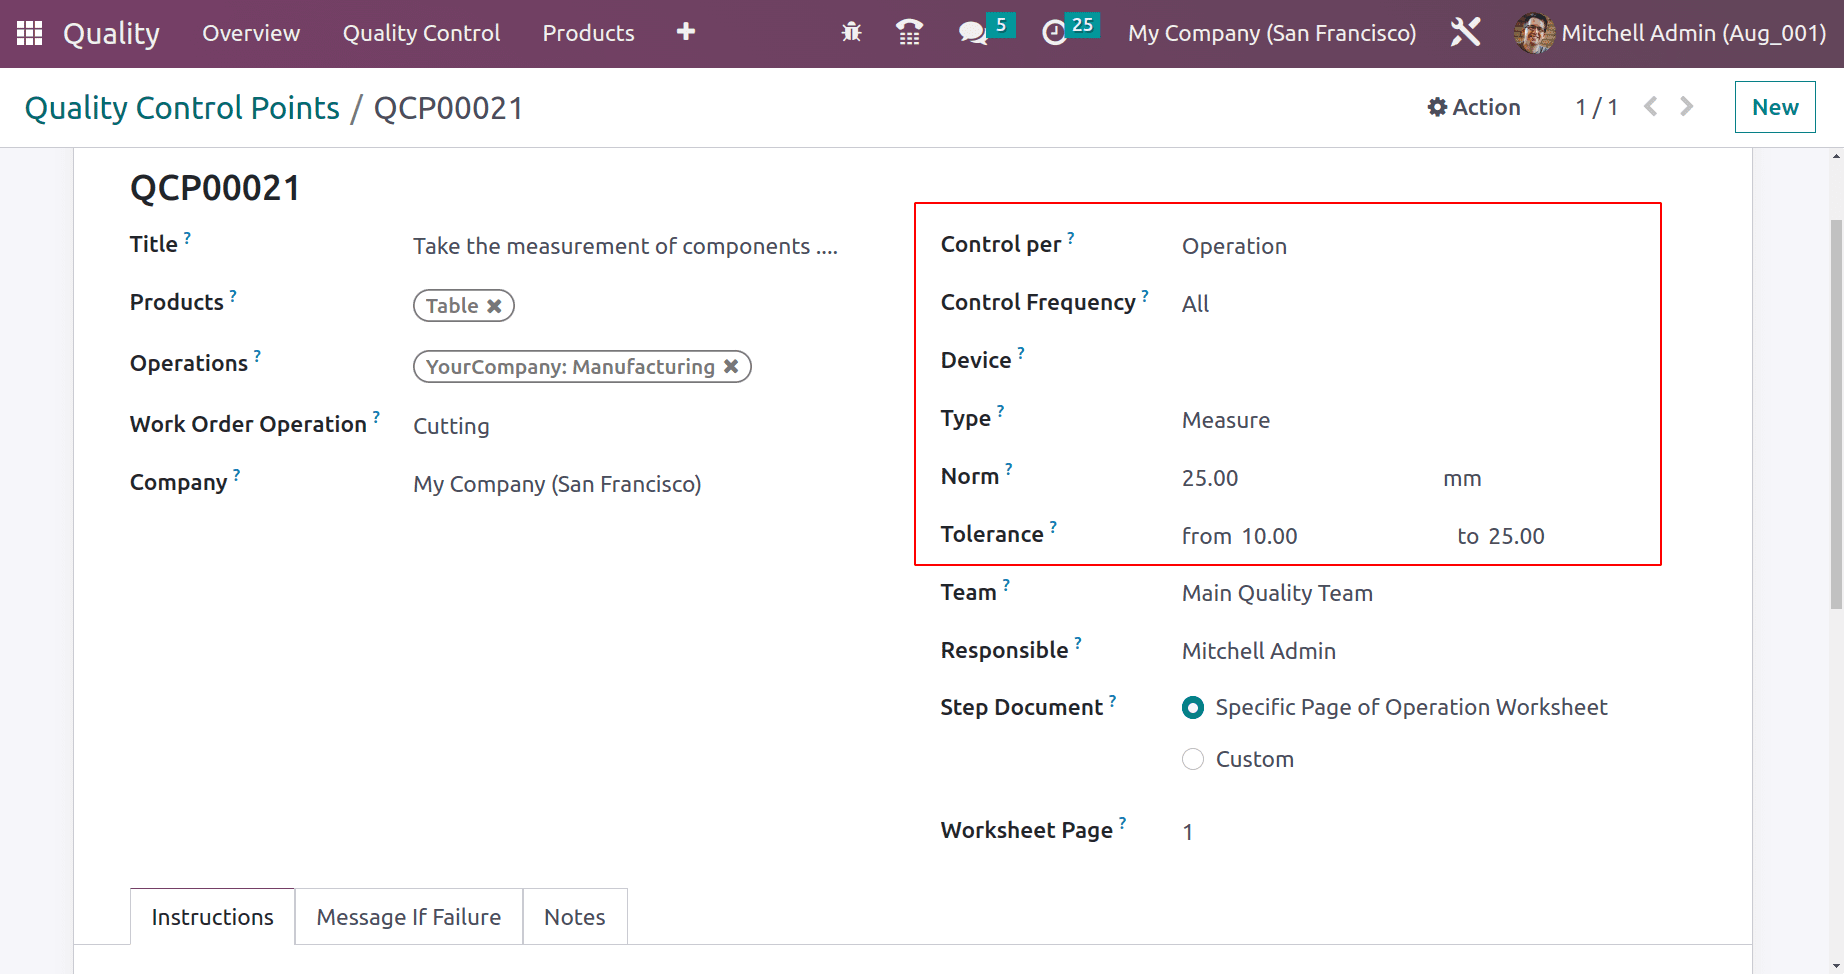
Control per is Operation, and Control Frequency is All. The quality checking type is Measure. The norm value added is 25mm. So the tolerance must be between 10-25. During the quality checking, the operation can be passed only if the measurement is in between 10-25.
Complete the other details and save it.
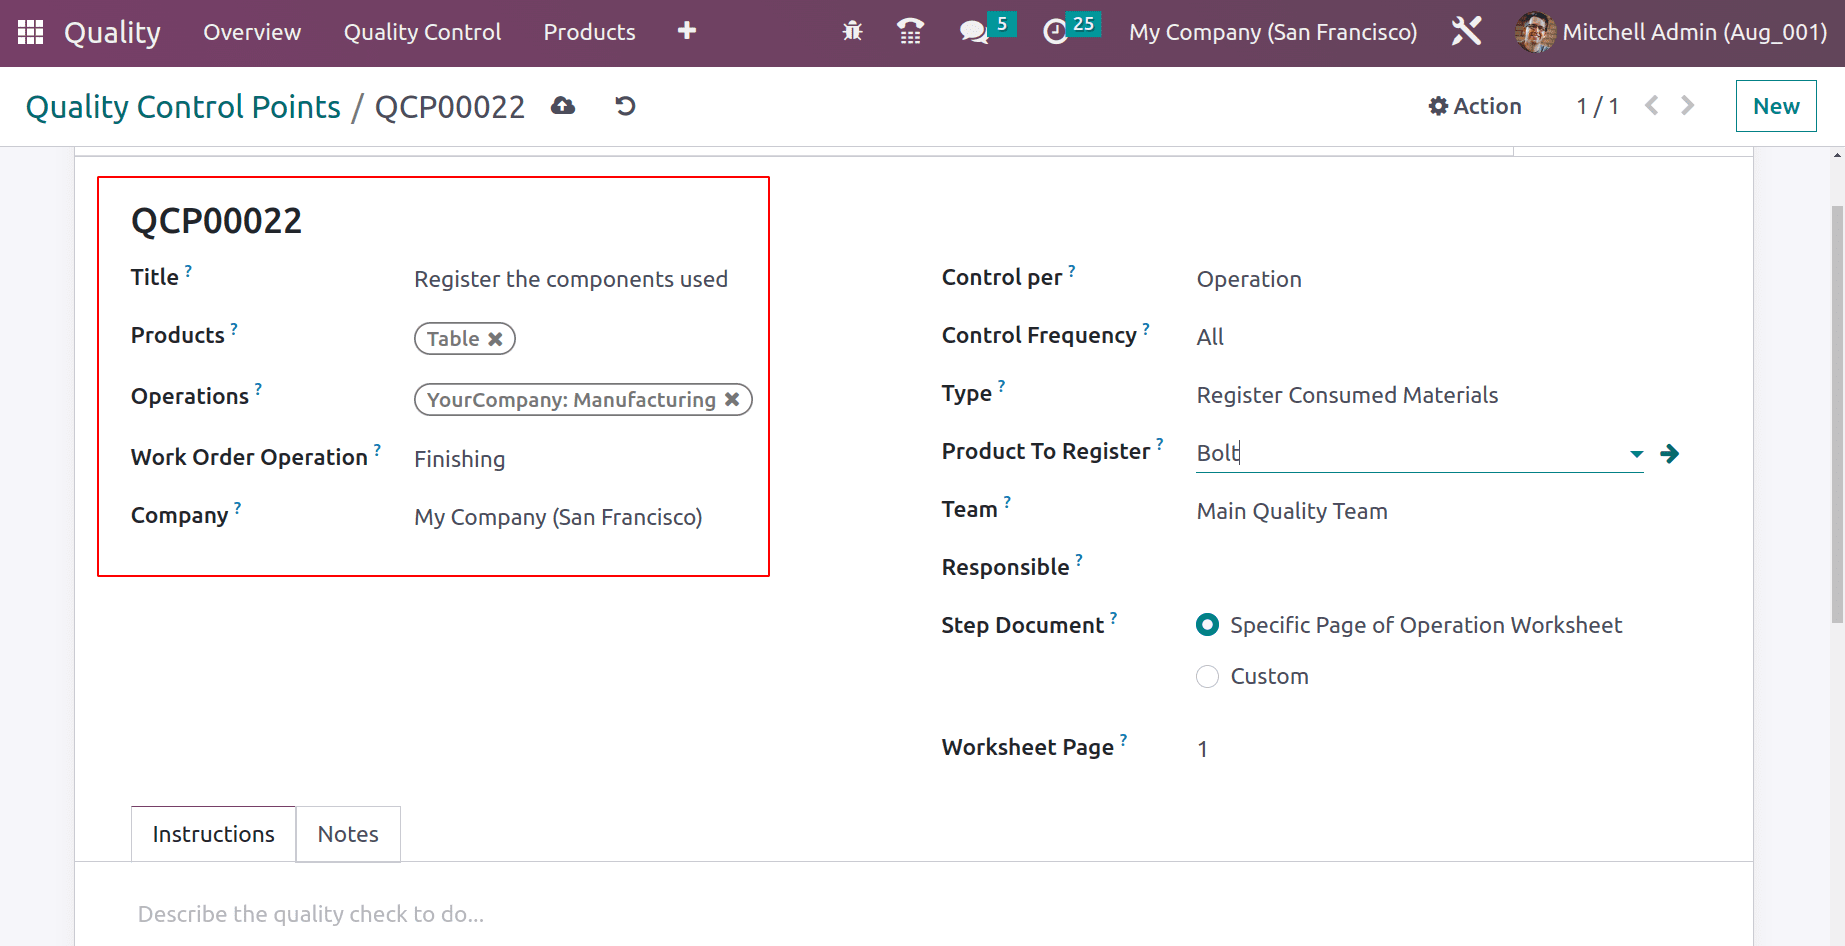
The second Control Point can be set for the second work order. As said before, the title given is “Register the components used”. The quality control per Operation is chosen, and the Operation selected is Manufacturing. The work order is Finishing, which we mentioned inside the bill of materials.
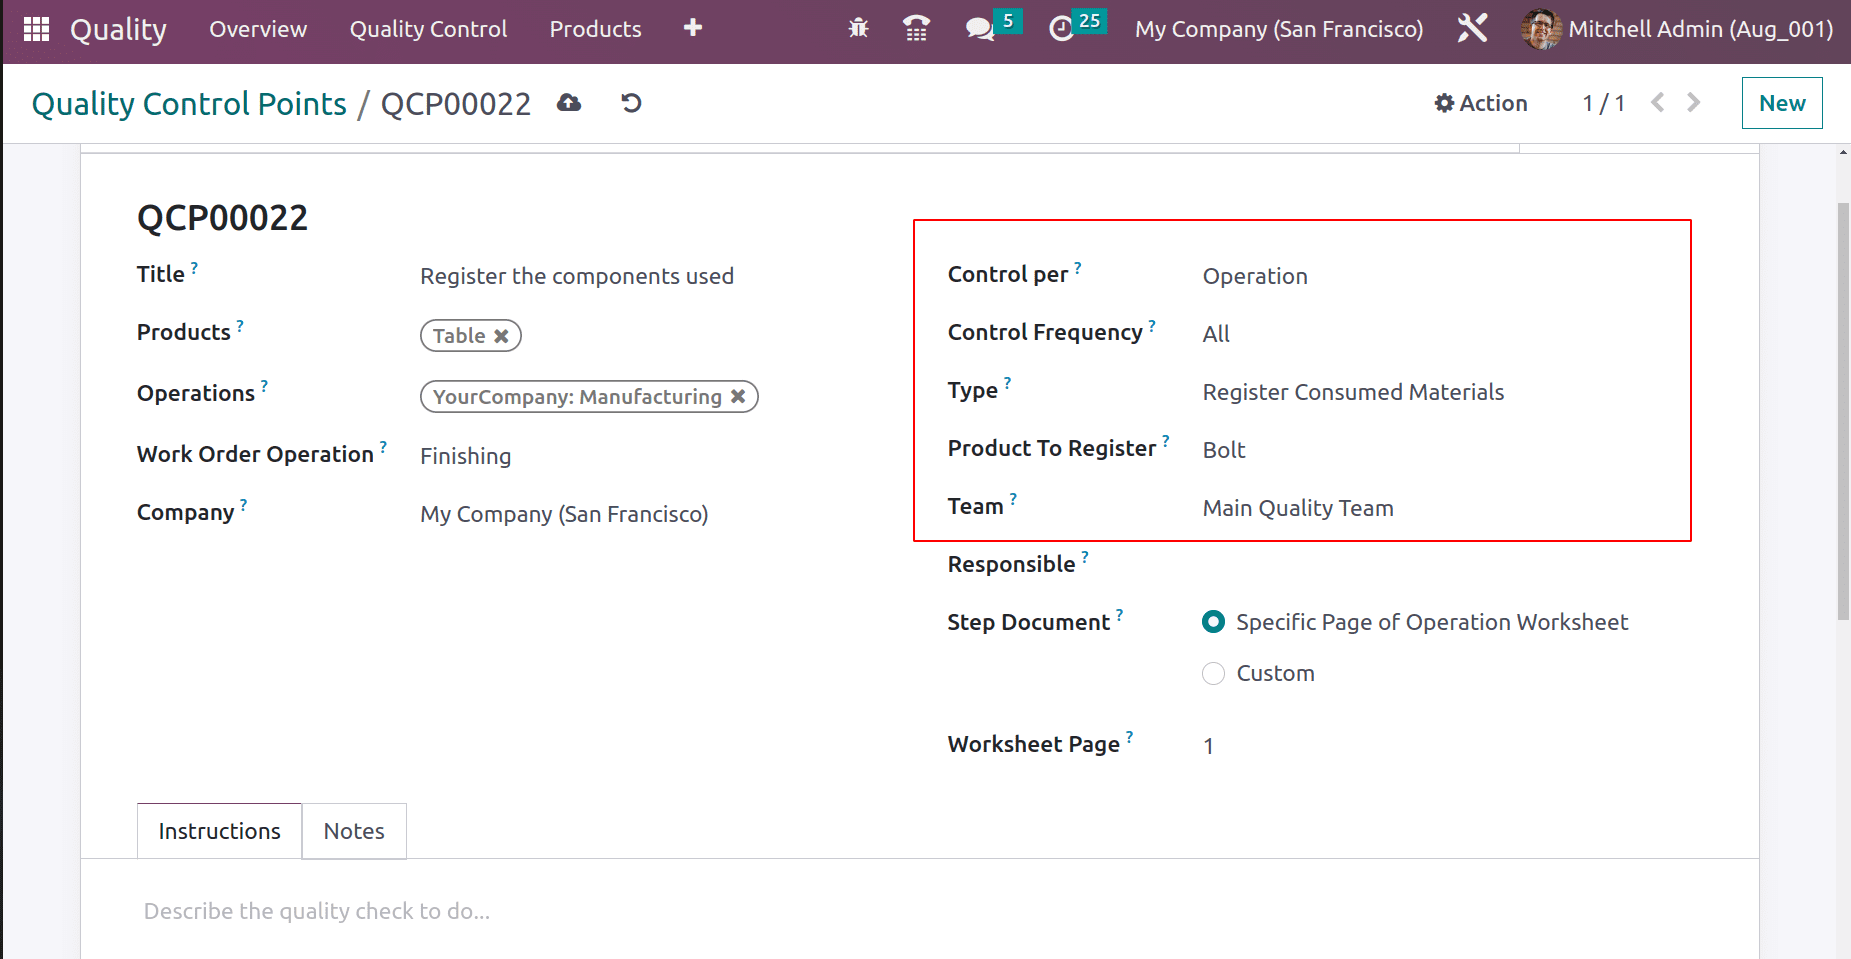
The quality checking type is Register Consumed Material, and the product to register is Bolt.
Save the control point.
Then the third quality check for the third operation during the production of Table. The title added is “Check the quality during Packing.” The control per is Operation, and the operation is Manufacturing. The work order Packing was chosen.
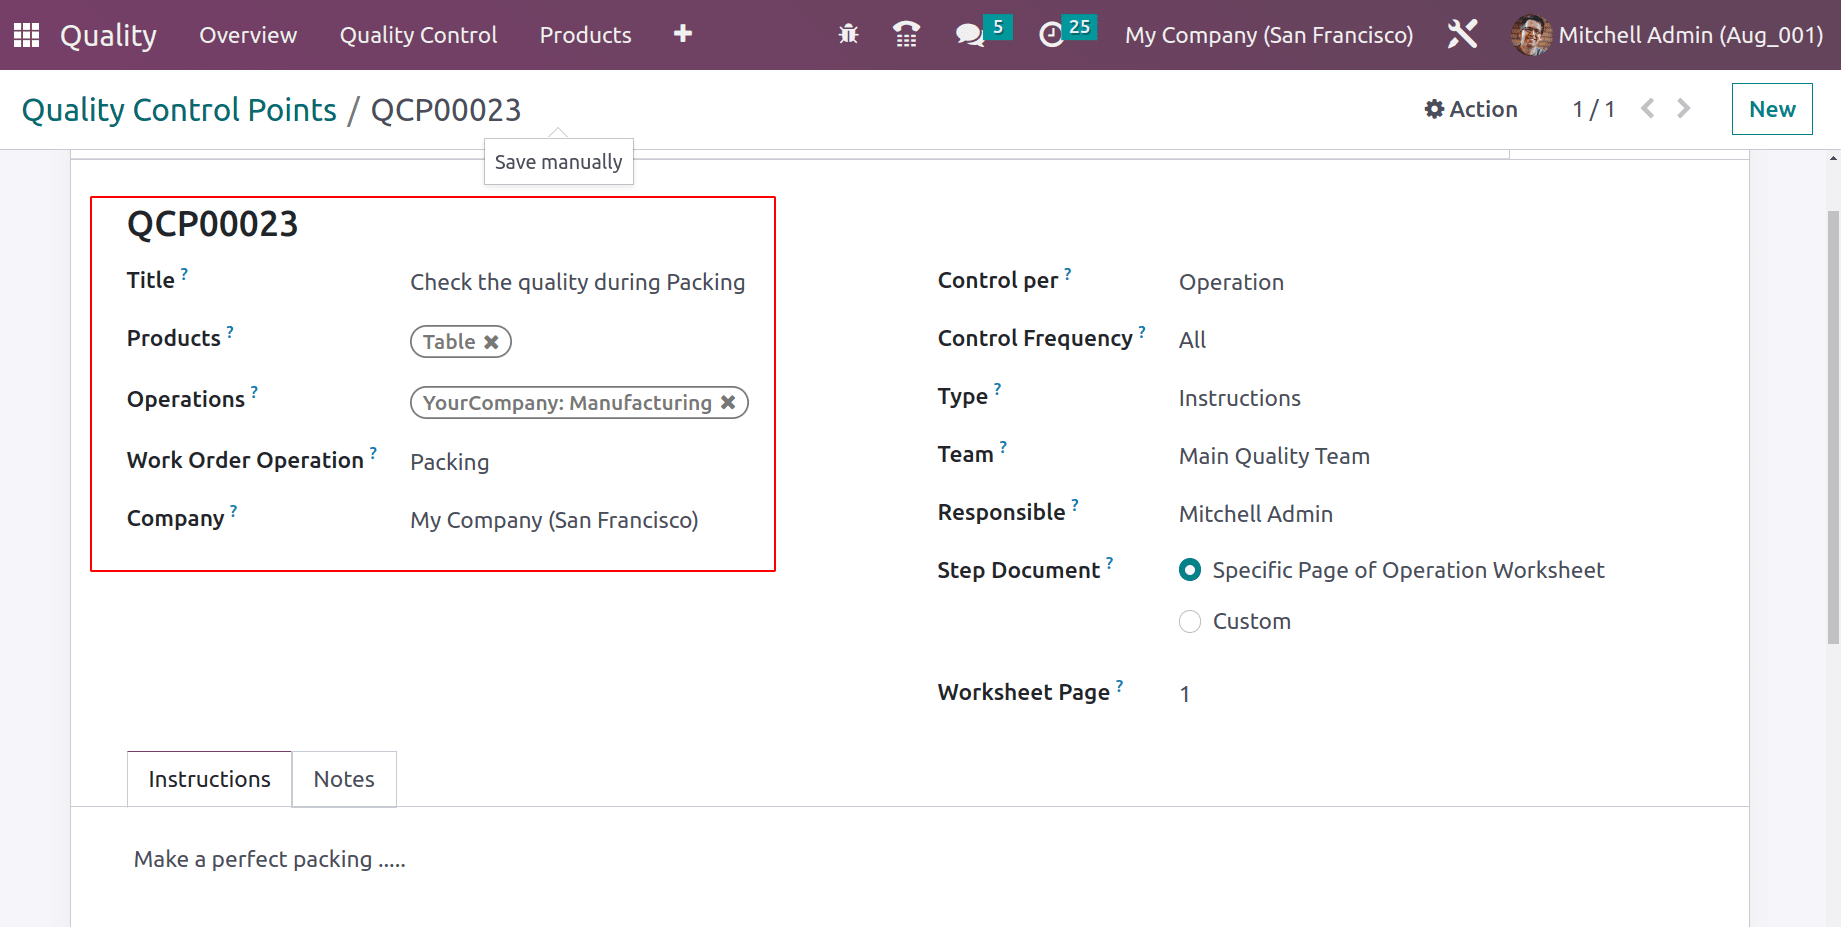
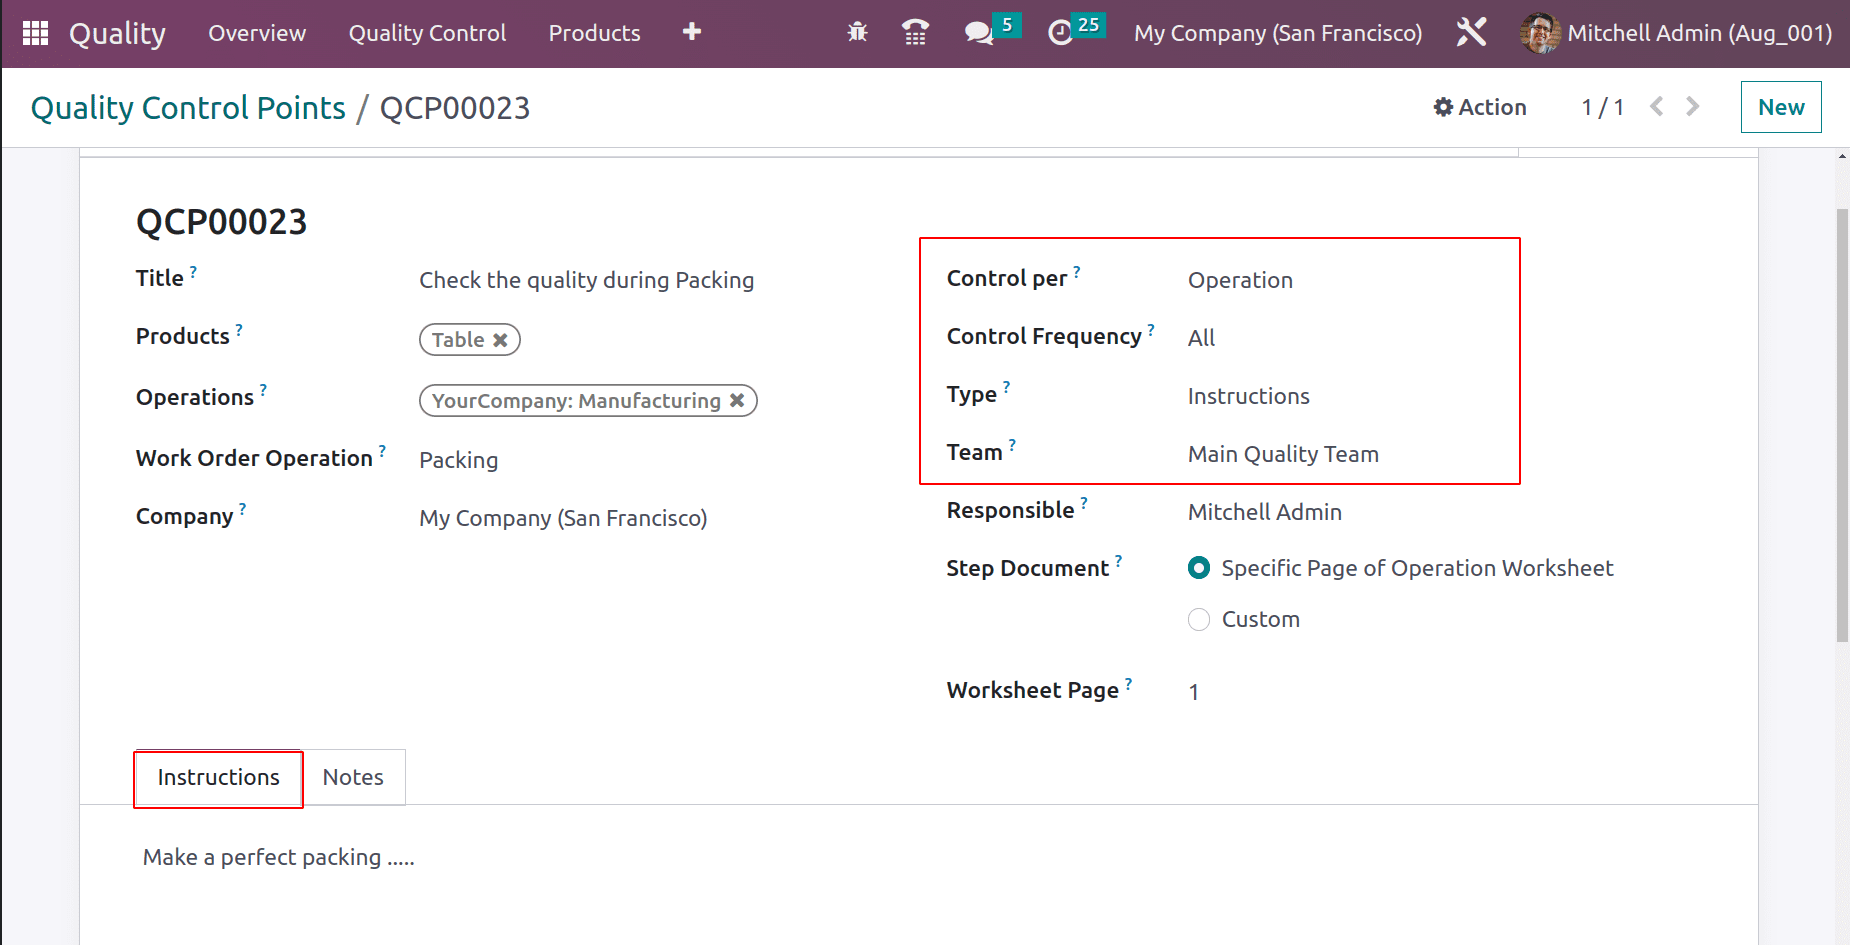
The quality checking type is Instructions. The instructions can be entered in the Instructions tab.
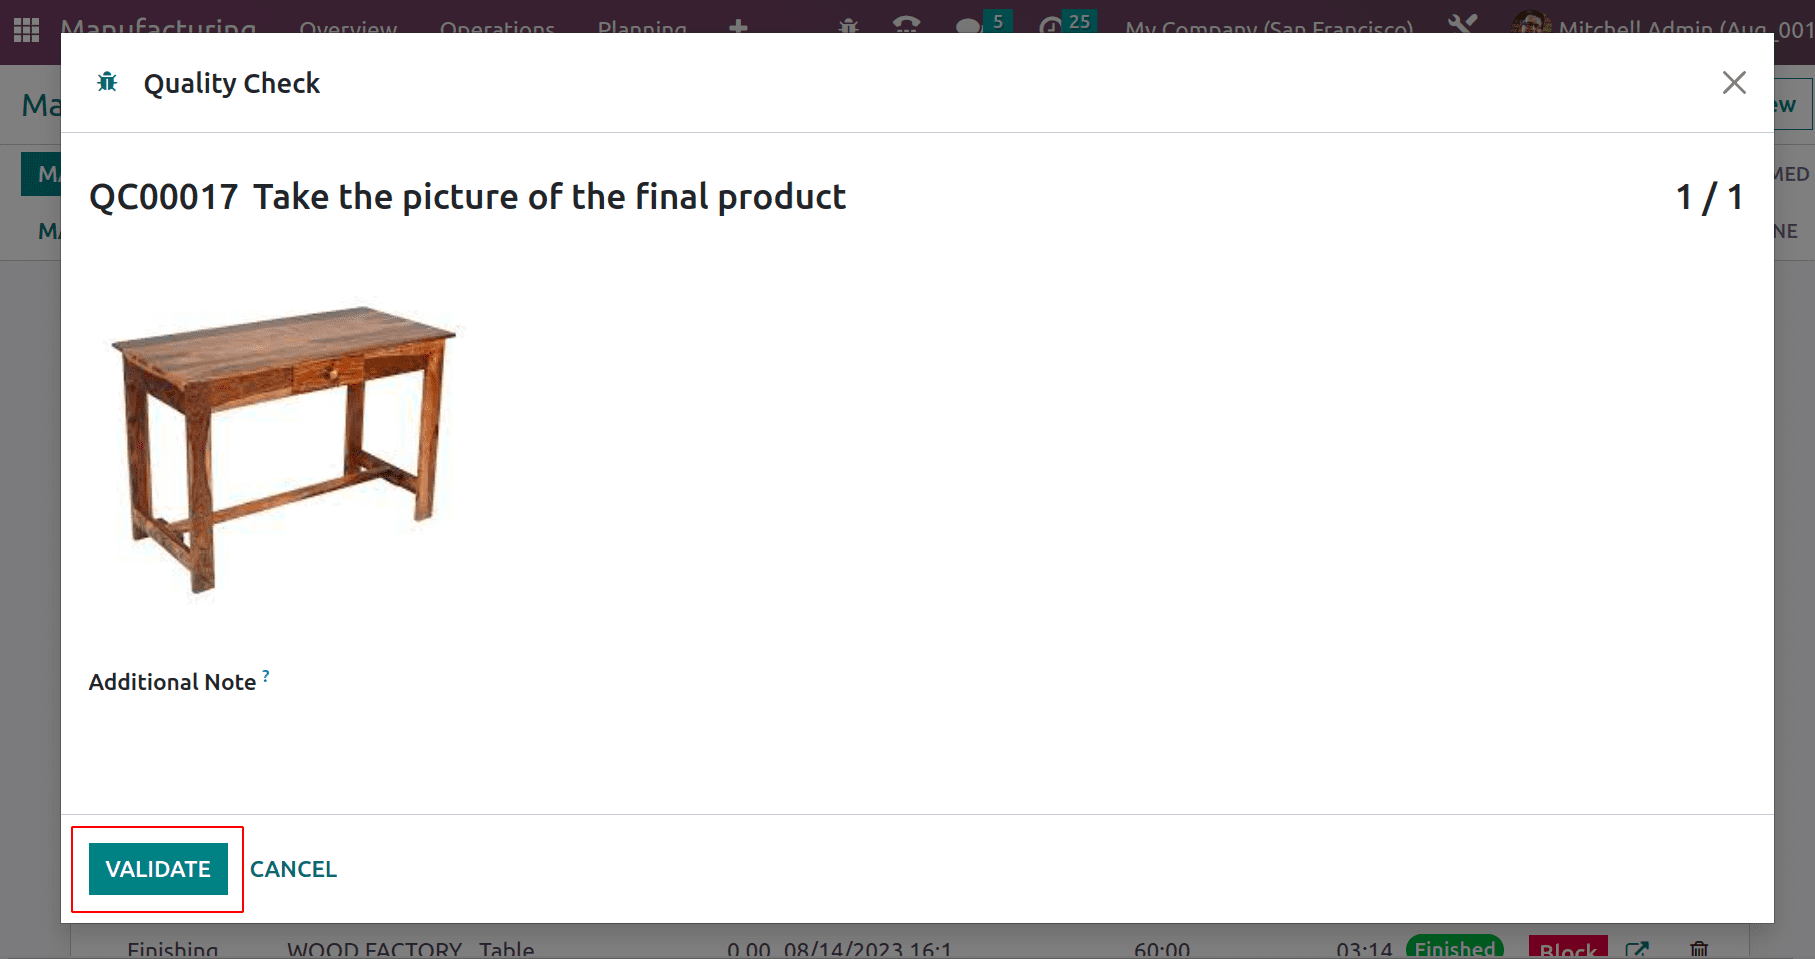
Then the last Quality check is needed before completing the manufacturing process. So create another quality control point for the operation of Manufacturing. The control per is Operation similar to the previous one. The quality checking type is Take a Picture.
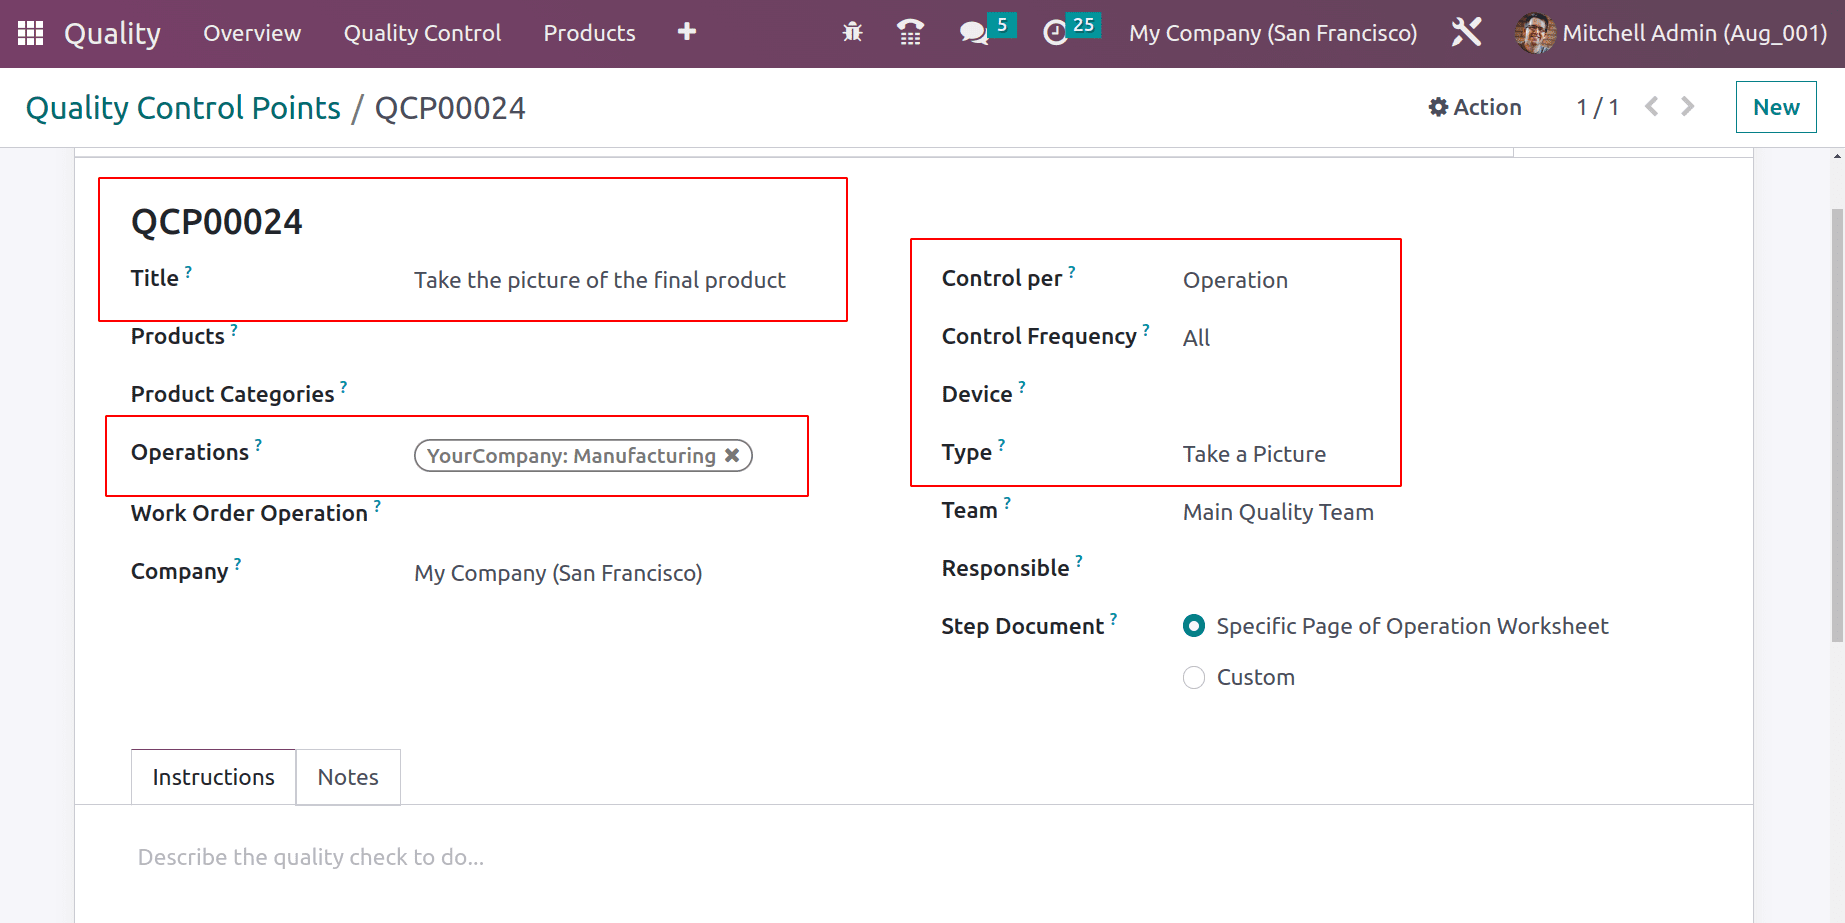
So the user can only complete the manufacturing process after adding a clear picture of the final goods.
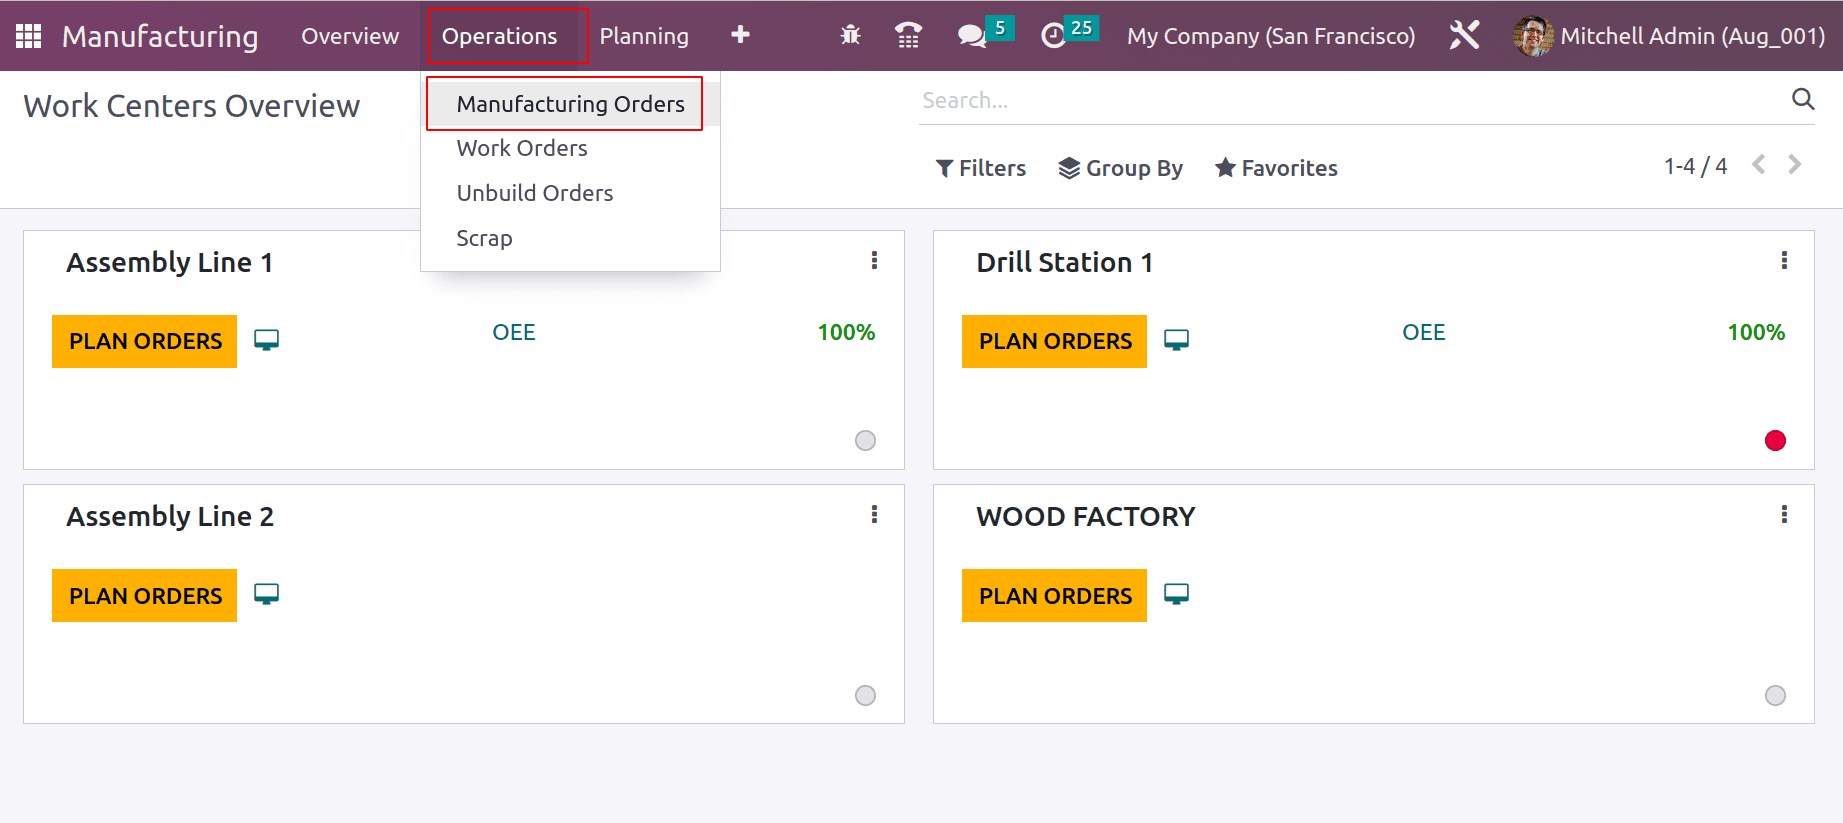
Let's move to the production process. For that, move to the Manufacturing module again. There in the Operation tab, click on the Manufacturing Orders button. Then start a new one for the manufacturing Table.
: Operation > Manufacturing Orders > NEW
Inside the product section, add the product Table. Then the bill of material can be chosen there. Take the proper bill of material from the list if more than one BoM is created for the same product.
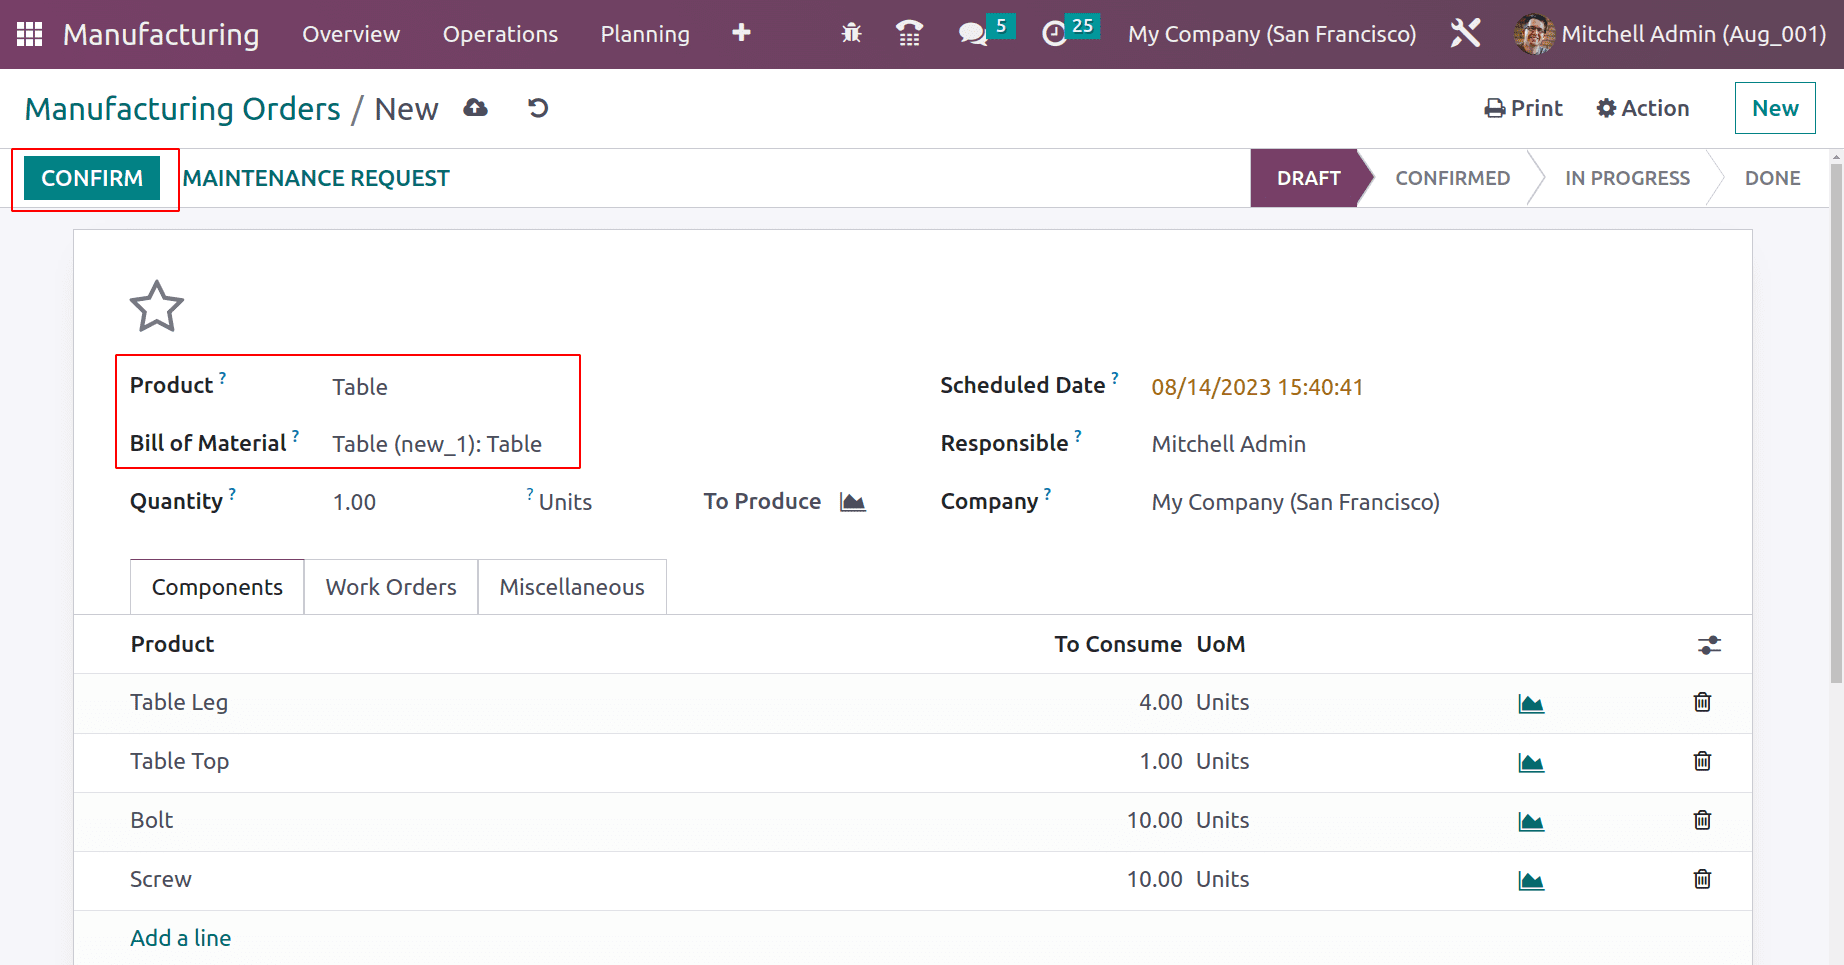
Now all the components and operations will be updated here automatically, according to the chosen BoM. Confirm the order to start the process.
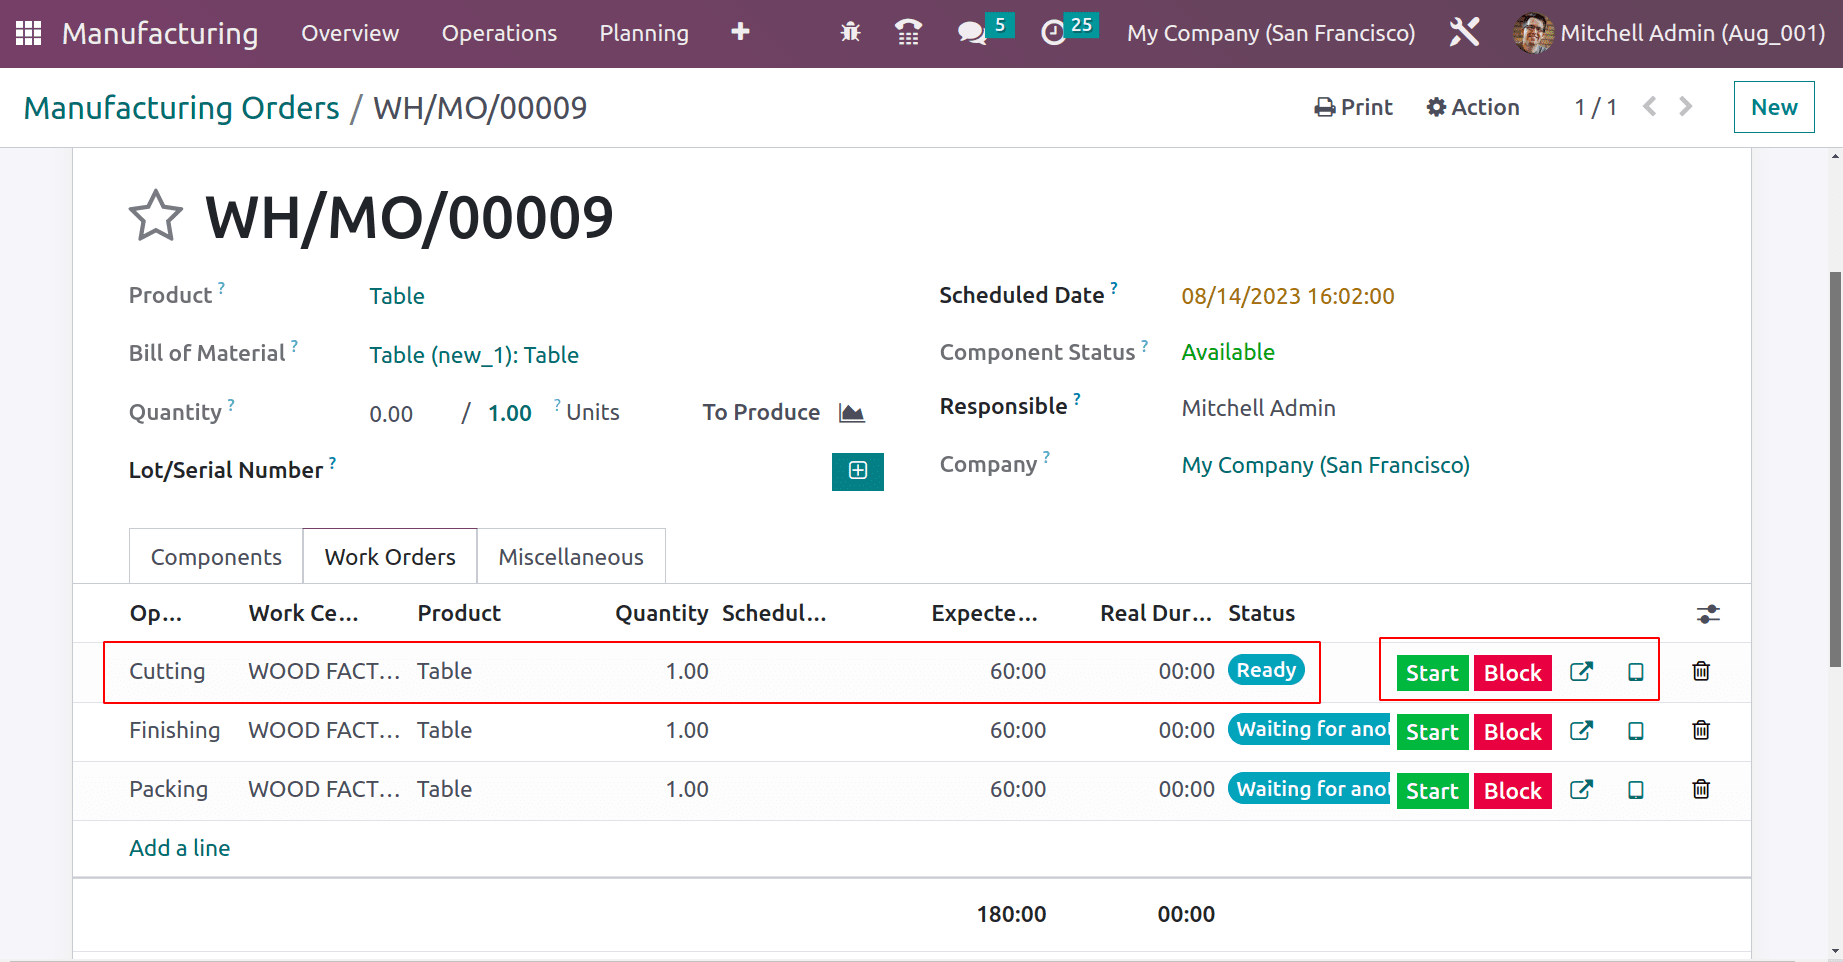
The first operation is Cutting, which is in the ready stage. The operation can begin by clicking on the start button. Then move to the tablet view.

Now all the components and operations will be updated here automatically, according to the chosen BoM. Confirm the order to start the process.
The first operation is Cutting, which is in the ready stage. The operation can begin by clicking on the start button. Then move to the tablet view.
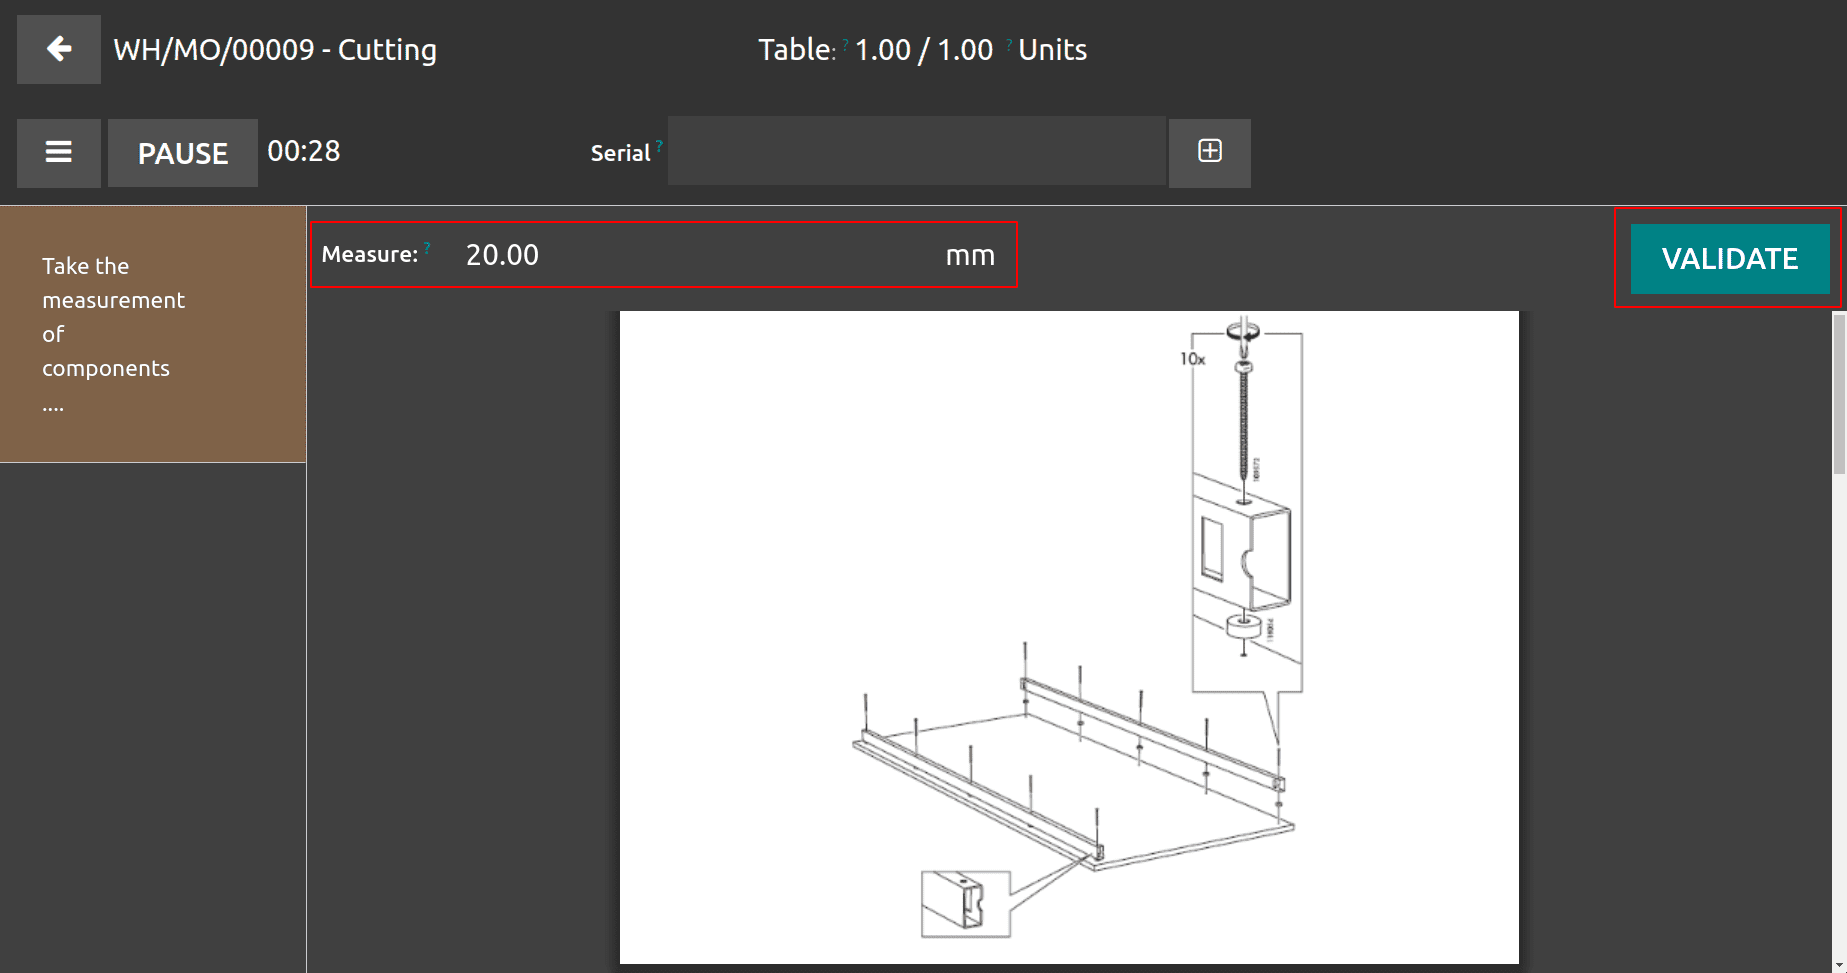
Before ending the process, the user needs to check the quality, and for that add the measurement of the material in the given field. The measurement should be between 10 and 25 mm for a good component.
Then click the VALIDATE button.
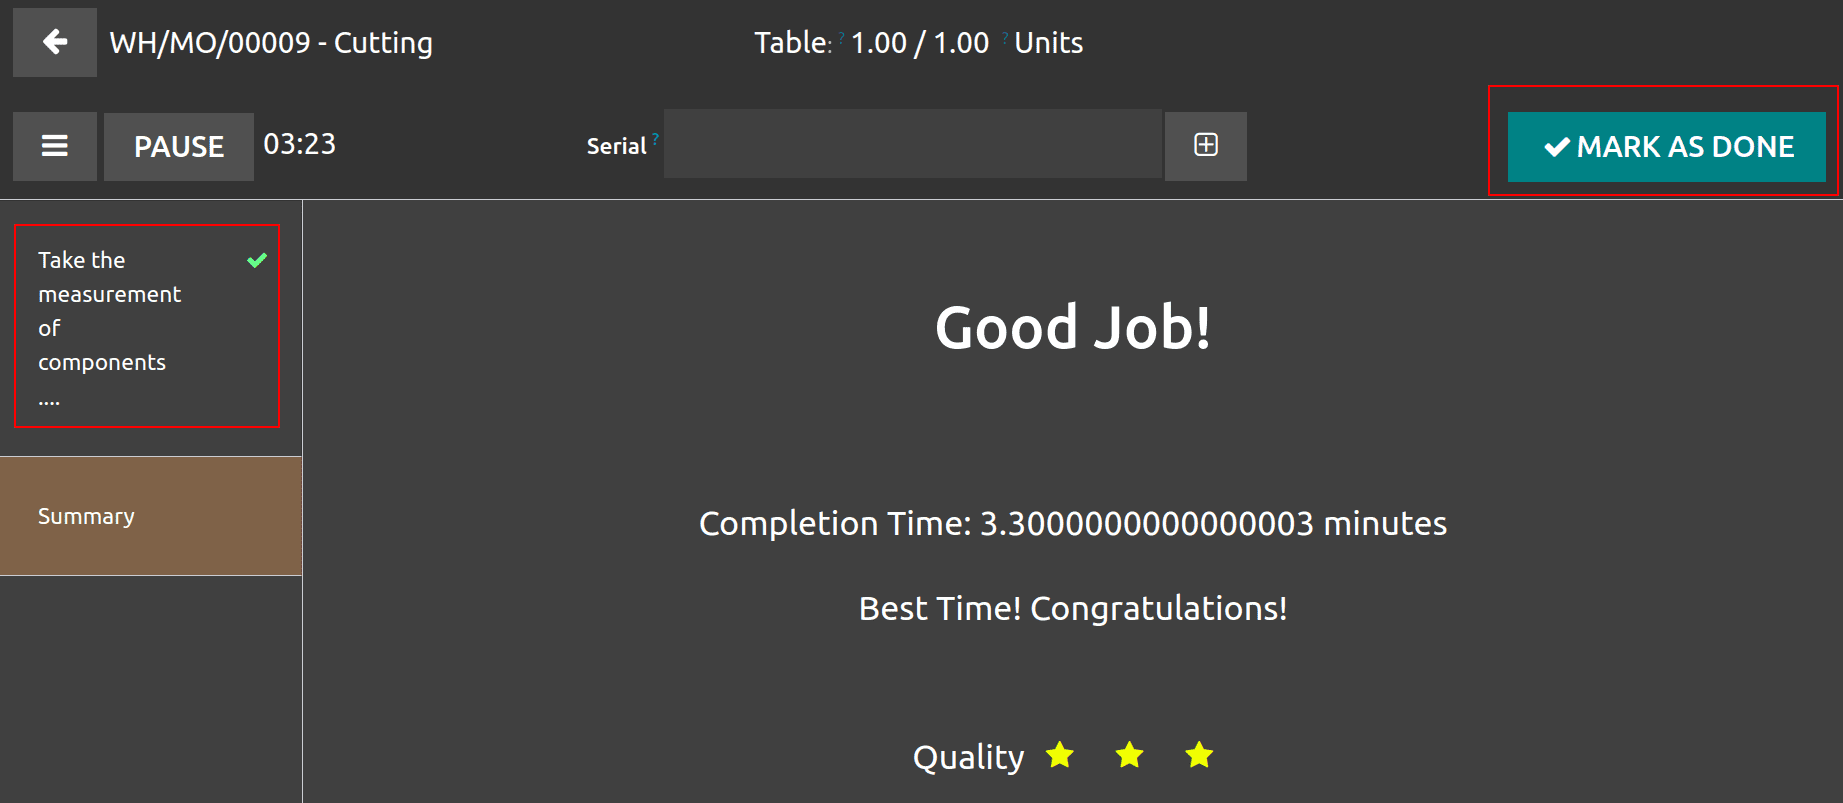
After completing the quality check, the left side window shows the status. Then click on the MARK AS DONE button to complete the cutting process.
Here the first operation is finished, and the second one is Ready. Again start the second work order.
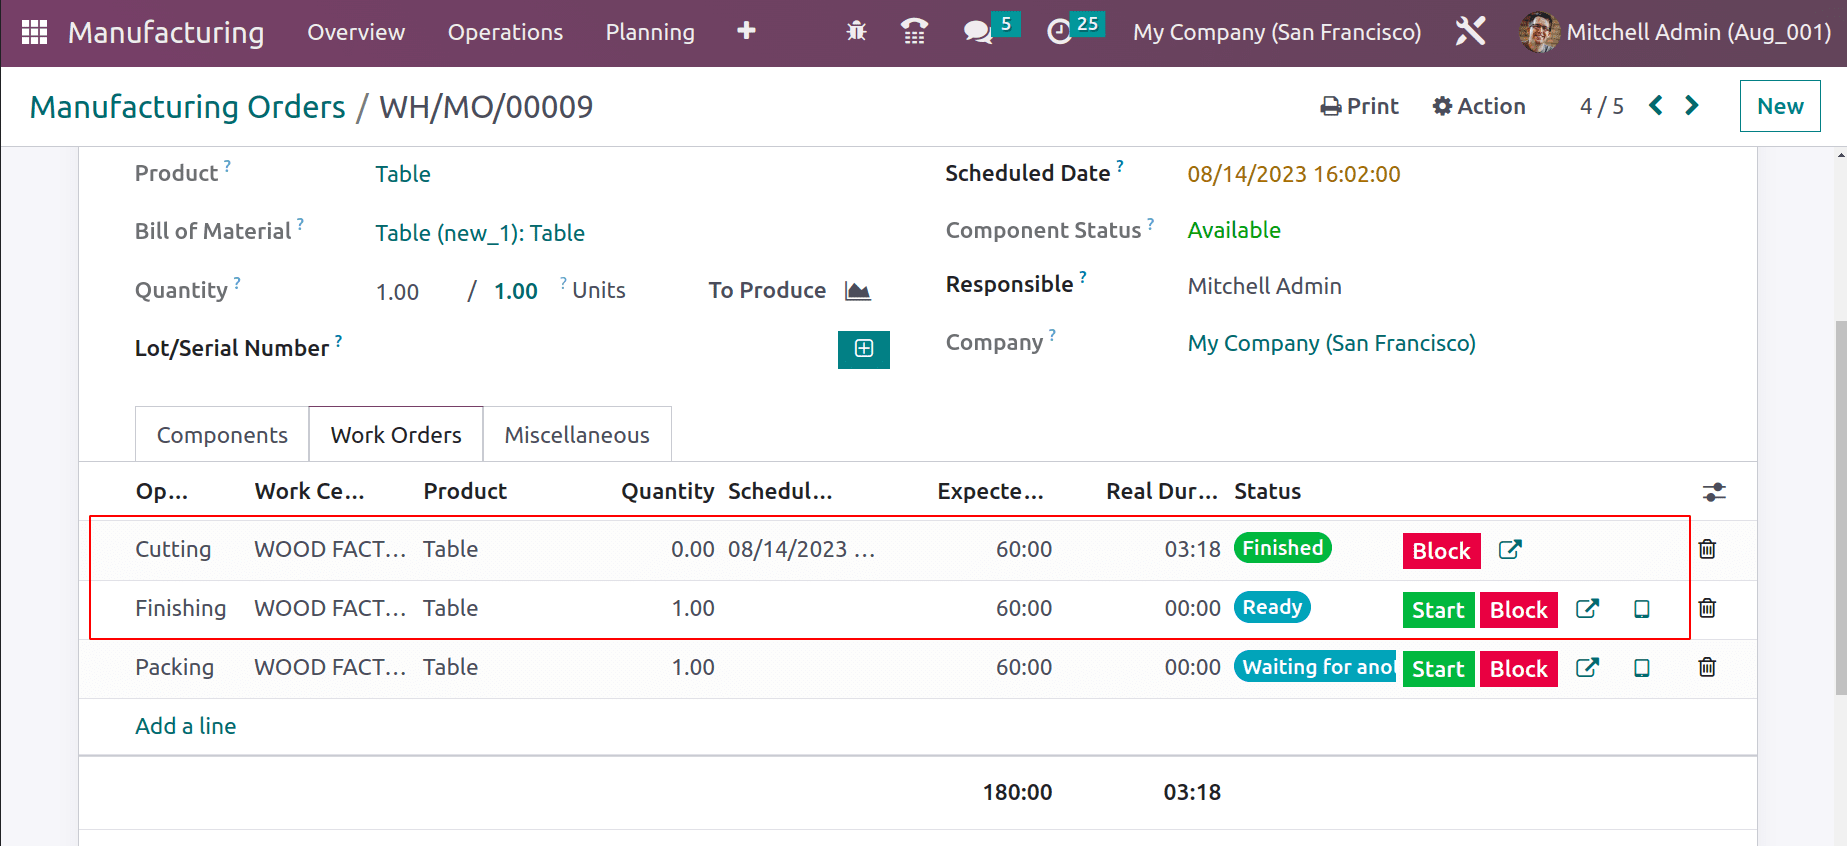
The tablet view shows the second quality checking. Register the consumed material with a quantity. In this operation, two materials are used, which are Bolts and Screws. Click the VALIDATE button.
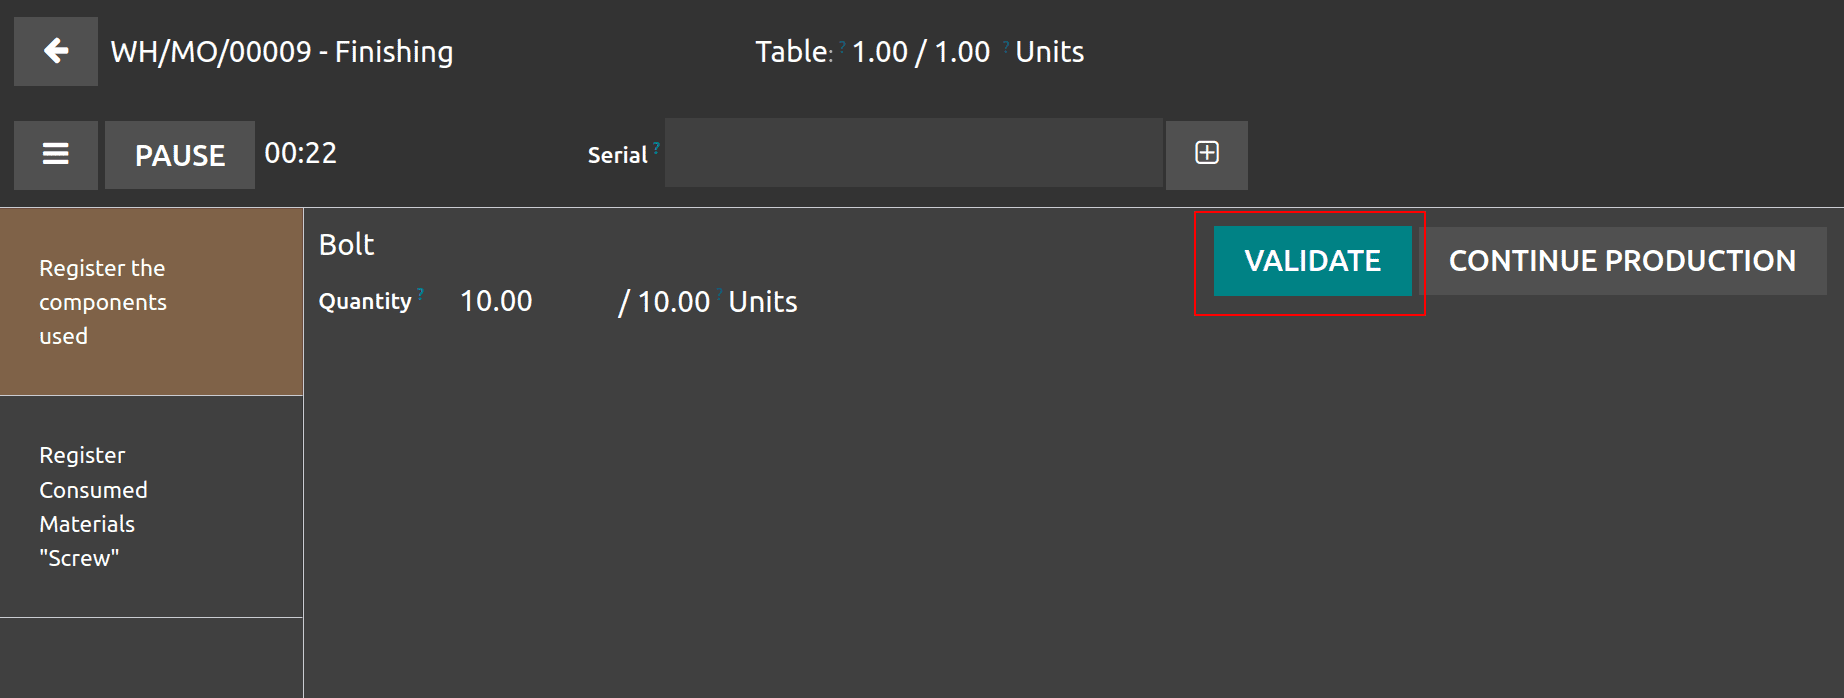
Both operations are completed. So the last process is Packing, which is progressing now. Before completing the Packing, check the quality checking.

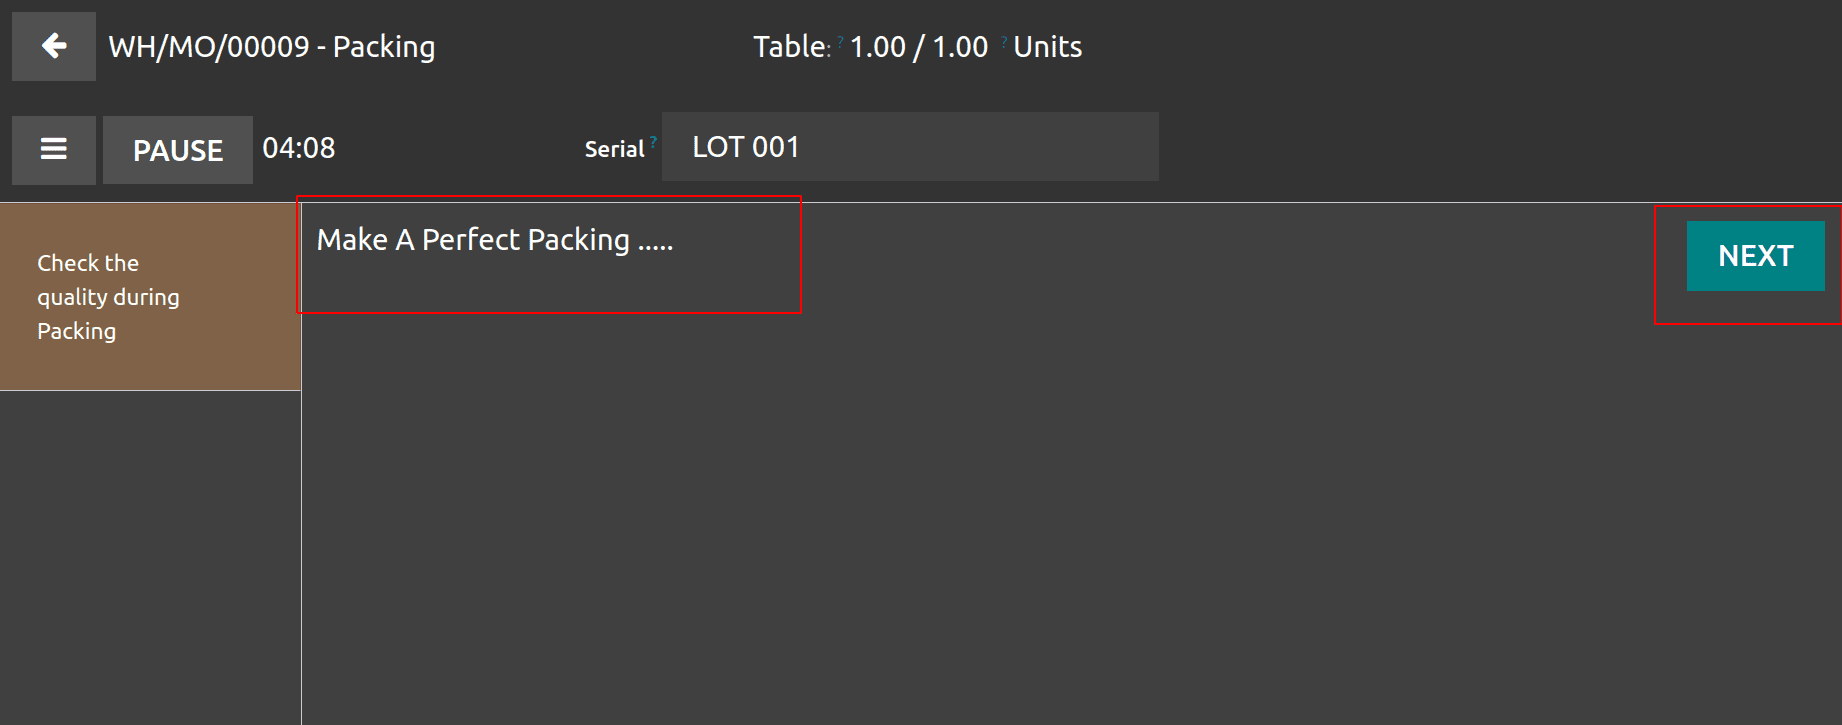
The tablet view shows the created quality checking. The quality checking type is Instruction. The added instruction is visible there. Click on the VALIDATE BUTTON.
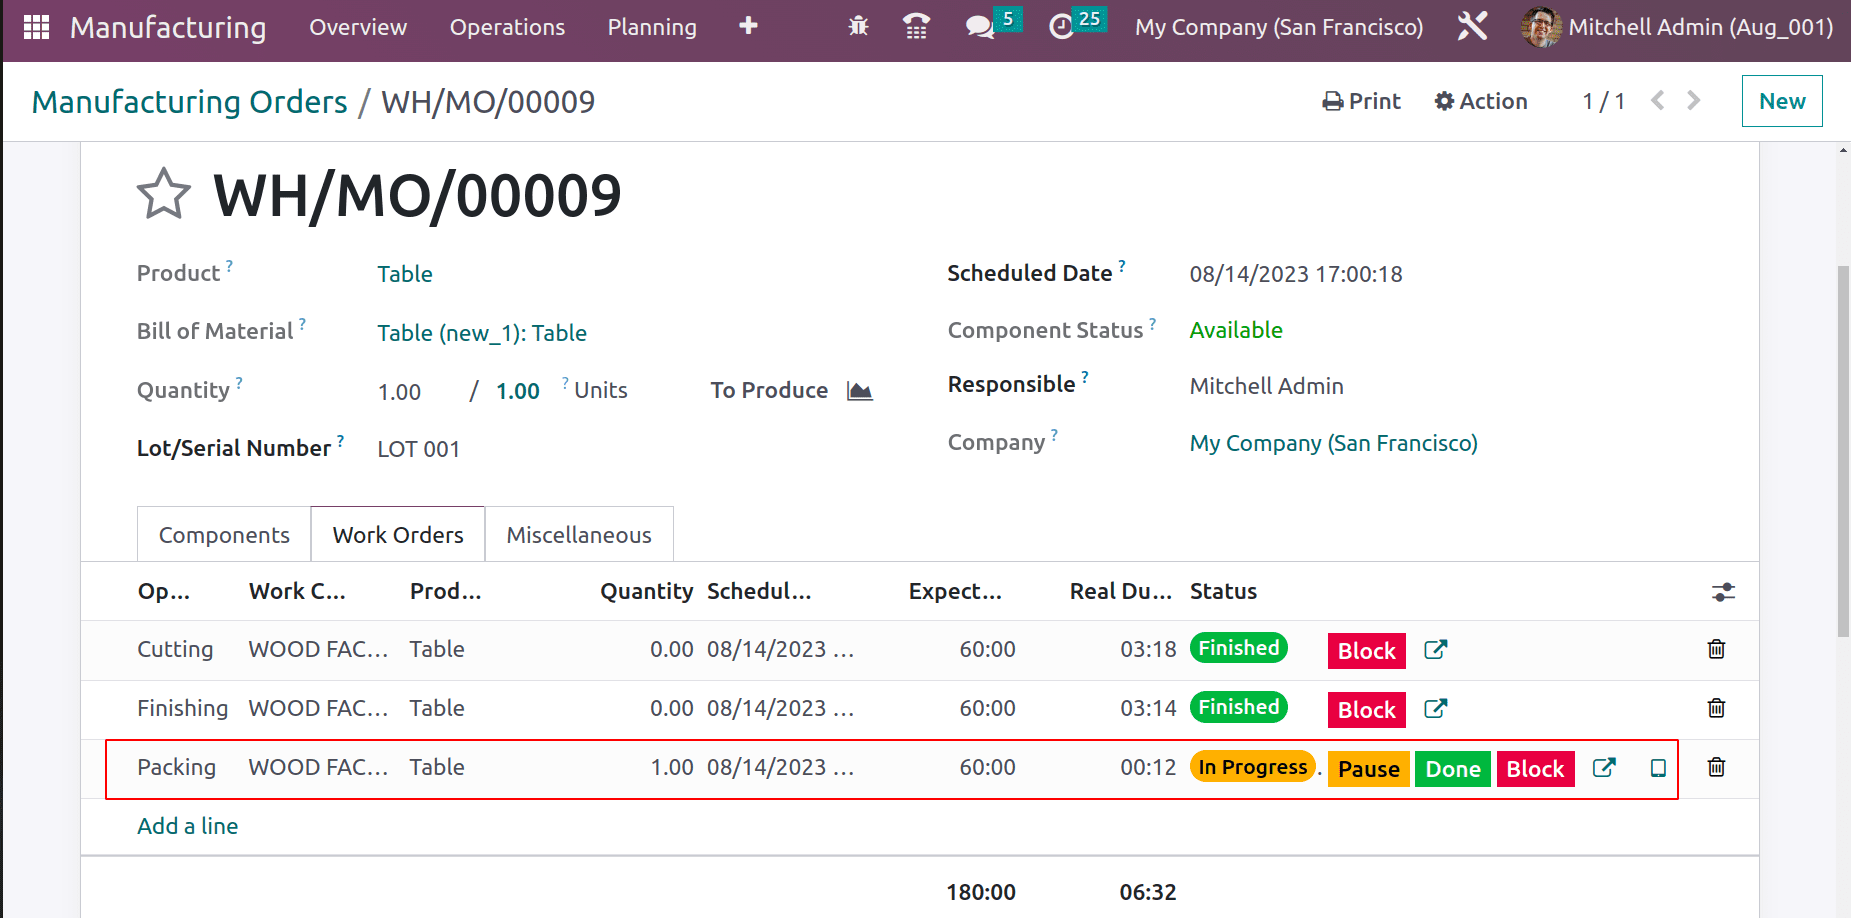
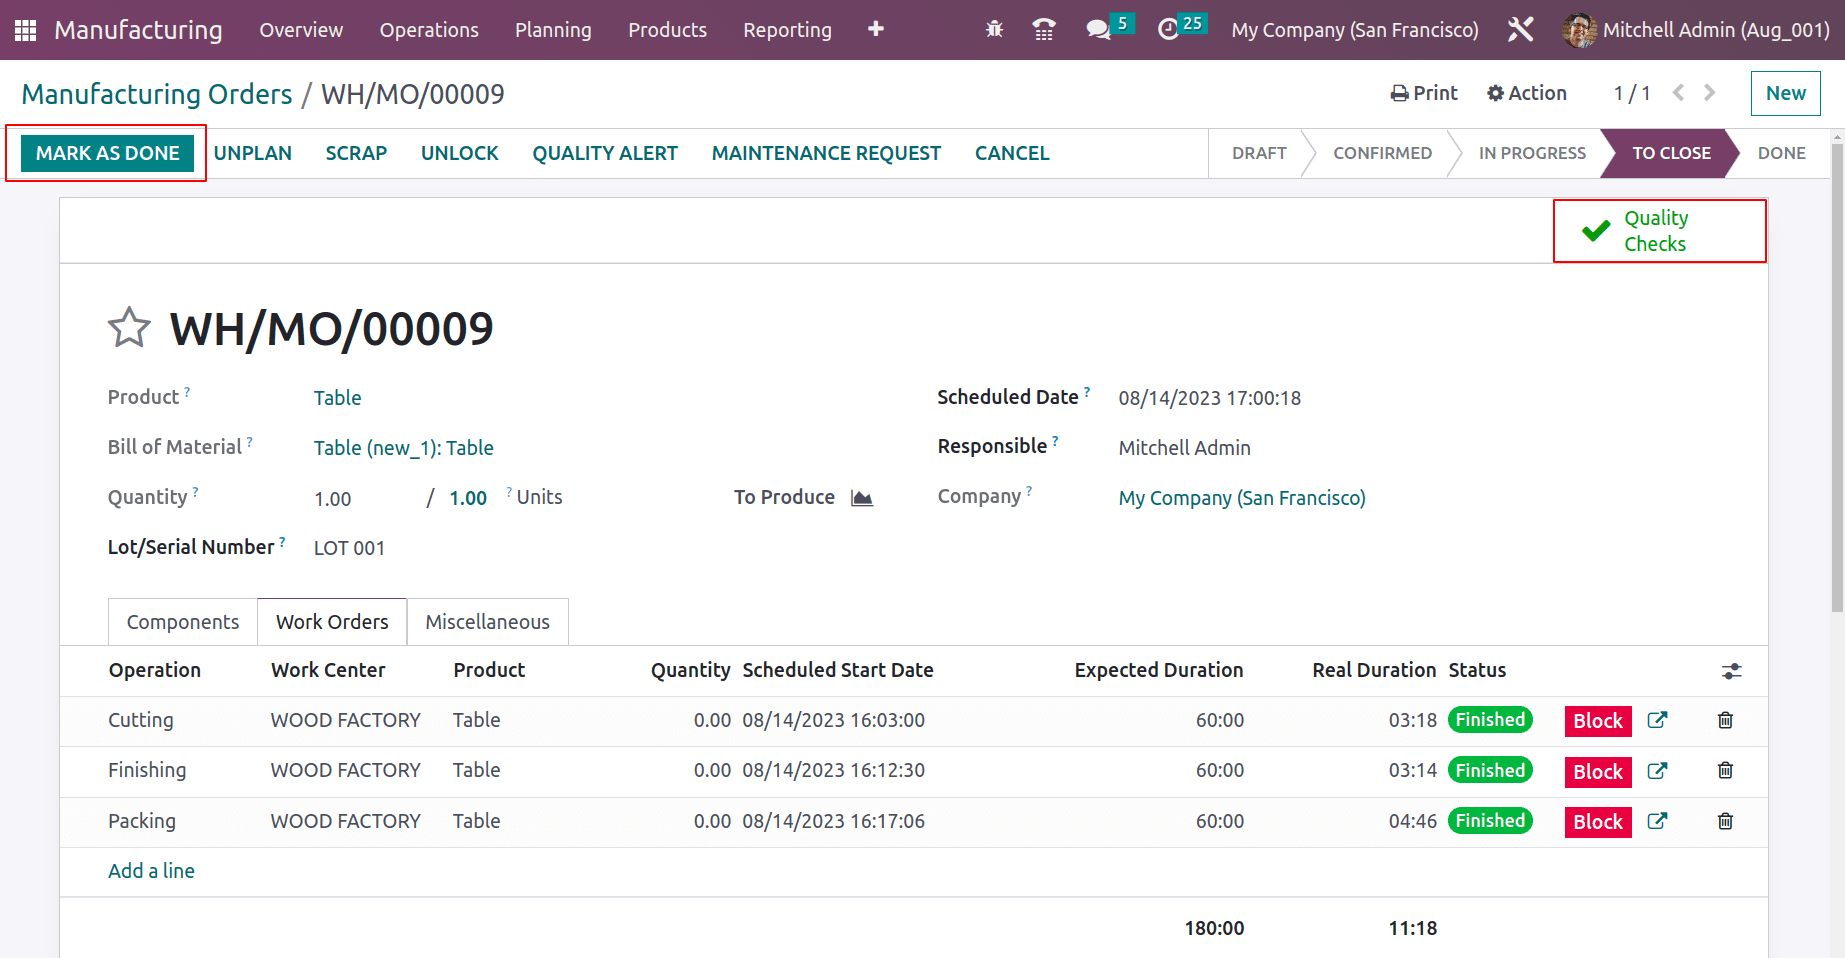
The three operations, Cutting, Finishing, and packing were completed. Then the manufacturing is completed. Before concluding the production process, the user needs to check the quality of the finished goods. So click on the QUALITY CHECKS button.
Add a clear picture of the finished Table. Then validate the quality check.
The smart tab Quality Check is now green-colored, which shows that the quality check was successfully completed and the final product is in perfect condition. Then click on the MARK AS DONE button to complete the manufacturing order.
So by using the Odoo 16 Manufacturing and Quality modules, the quality checking of manufactured goods during each operation is quite simple.