Budget management is essential for efficient business management. Budget planning will allow businesses to manage and organize expenses properly and prioritize the activities accordingly.
Budget management is one of the best ways to analyze the actual performance. Budgets often allow you to take measures for the future wellbeing of the business, giving you enough space to plan the financial stability for the company. With Odoo’s highly advanced budget management features, it is effortless to manage the budgets in the business.
This blog will give you a detailed overview of how to Configure and manage Budgets from the Odoo 15 Accounting module.
You can easily manage complex budget processes with the Odoo 15 Accounting module.
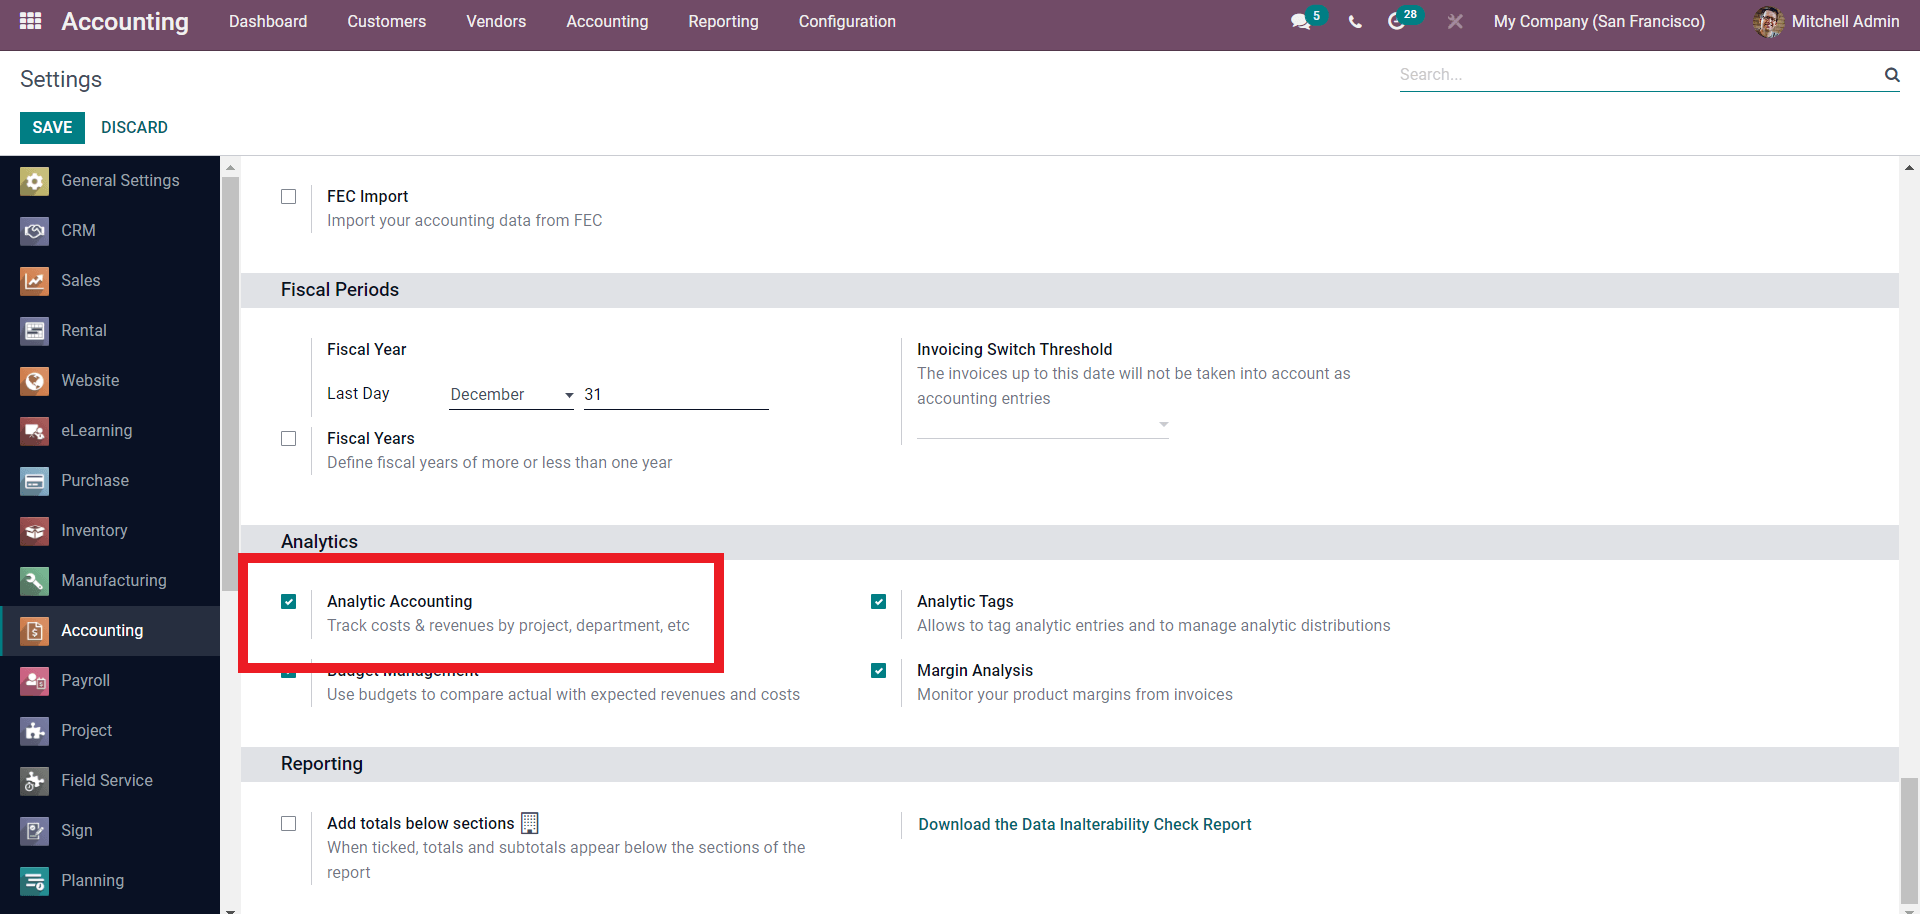
The first step to setting up Budget management with Odoo is to activate it from the configuration setting of the Accounting module, as shown below.

Type in Budget management in the Search bar from the Settings page. Click on the check box next to Budget management to activate it. Odoo uses Analytic Accounting alongside budget management. You can activate the Analytic configurations settings of the Accounting module as shown below.
After the Activations, go to the Accounting tab from the Dashboard of the Accounting module and click on Budgets from the drop-down menu. A page on Budgets will open up, as shown below.
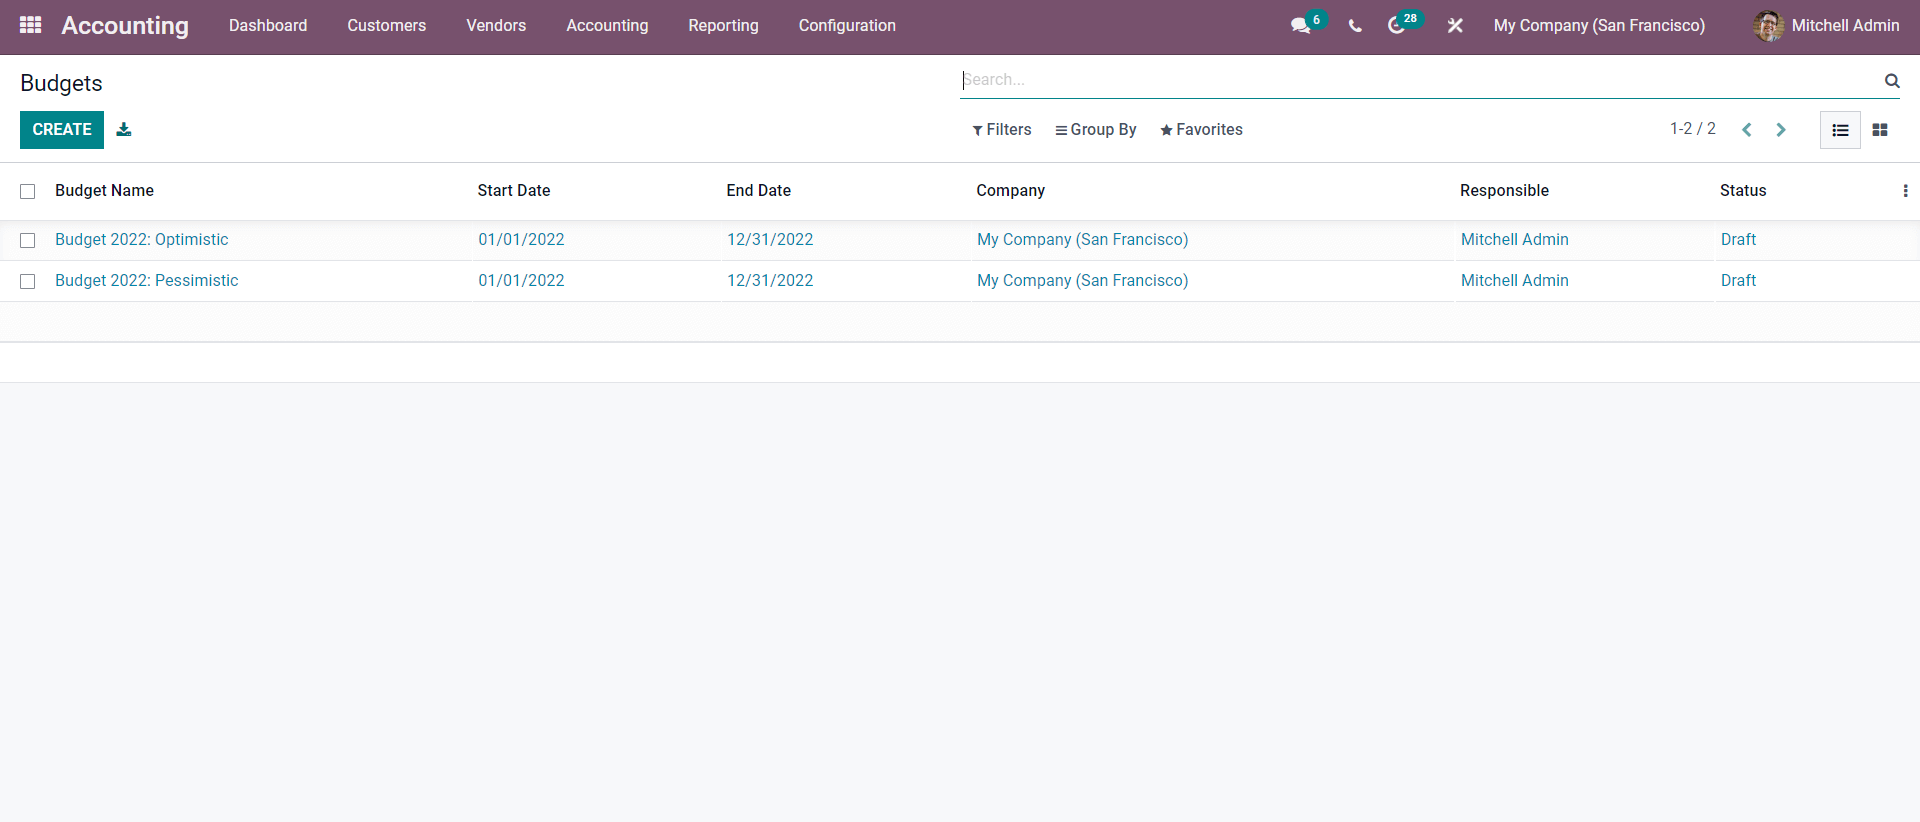
Use the CREATE button to create new Budgets. A confirmation page will open up, as shown below, to configure the new Budget.

Under the Budget Lines section, you can add the Budget lines. Click on the Add a line button and type in the name of the Budgetary Position under the Budgetary positions section. If it is new, then a Create and Edit Window will open up, as shown below.
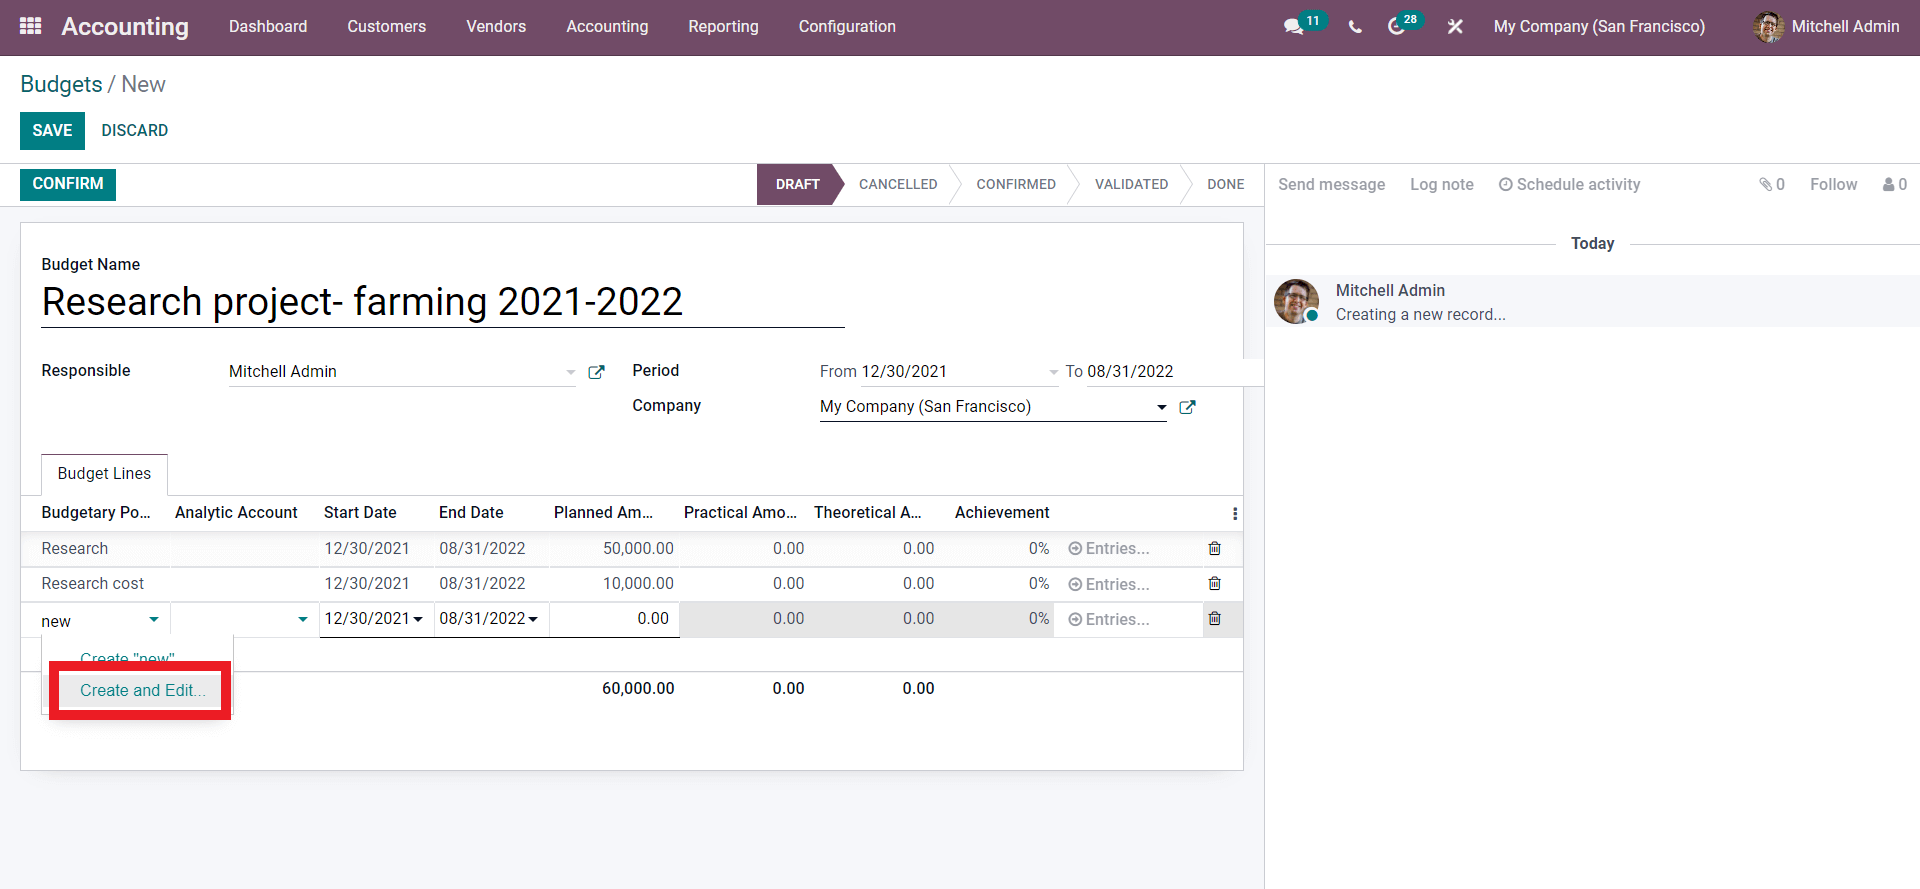
Click on the Create and Edit button, and a configuration page will open up as shown below to configure the Budgetary position shown below.
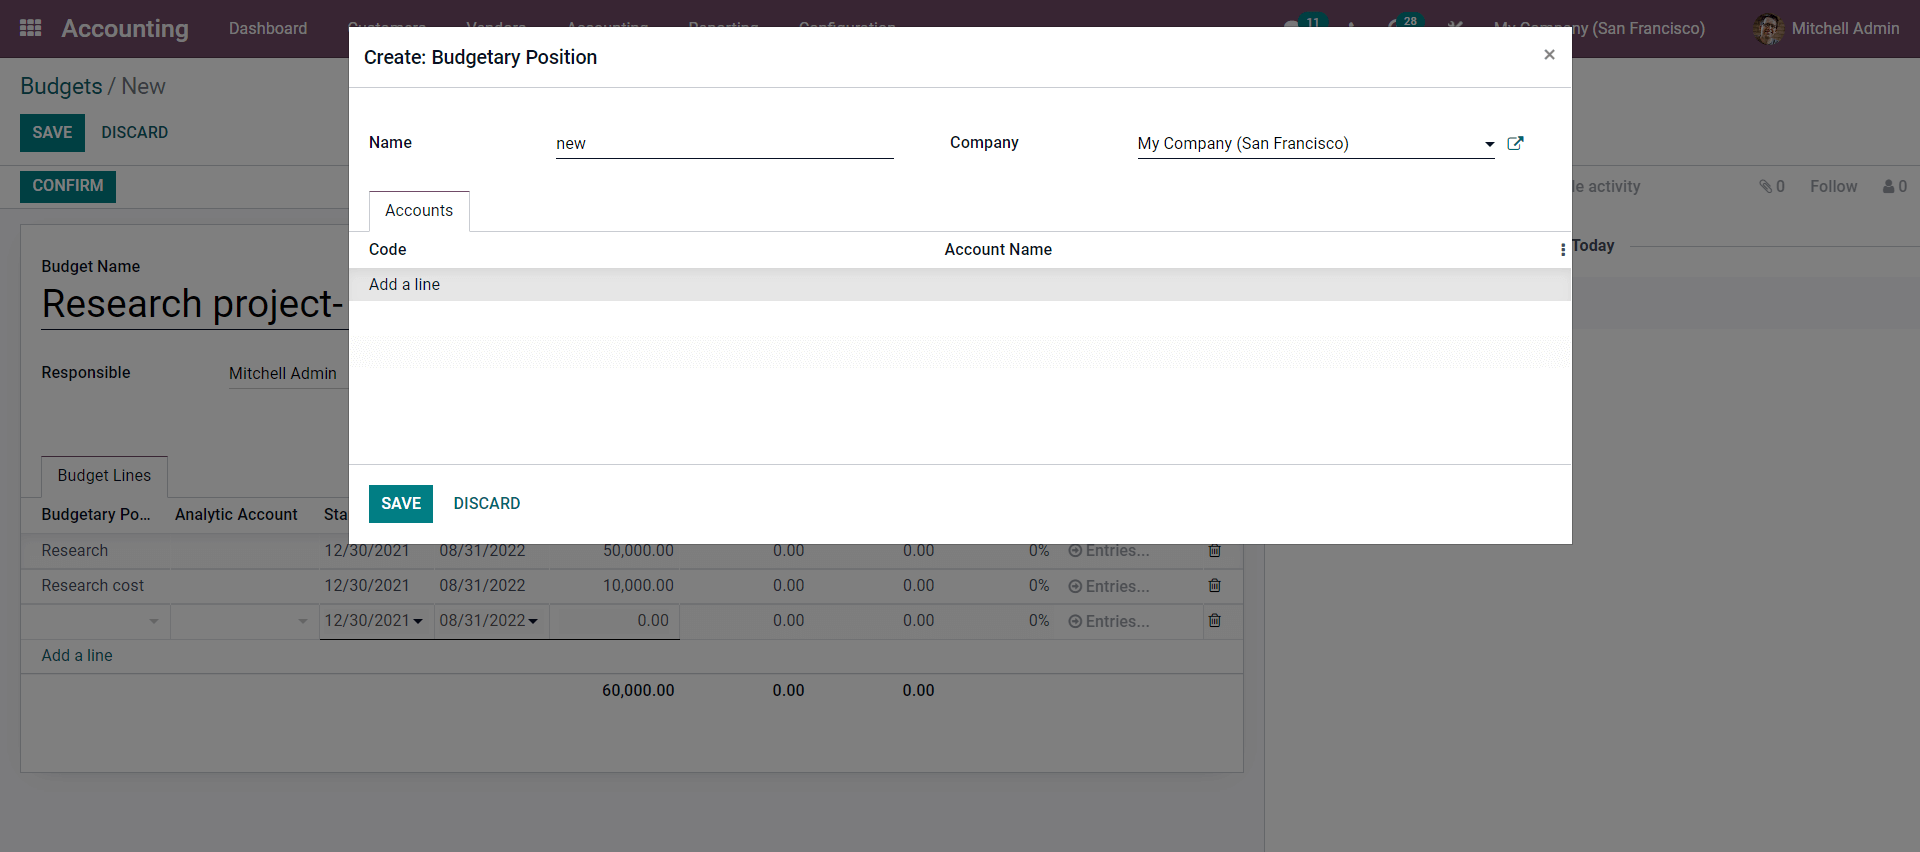
Enter the name of the Budgetary position and add the Accounts under the Accounts section by clicking on the Add a line button; a tab with a list of accounts will open up, as shown below.
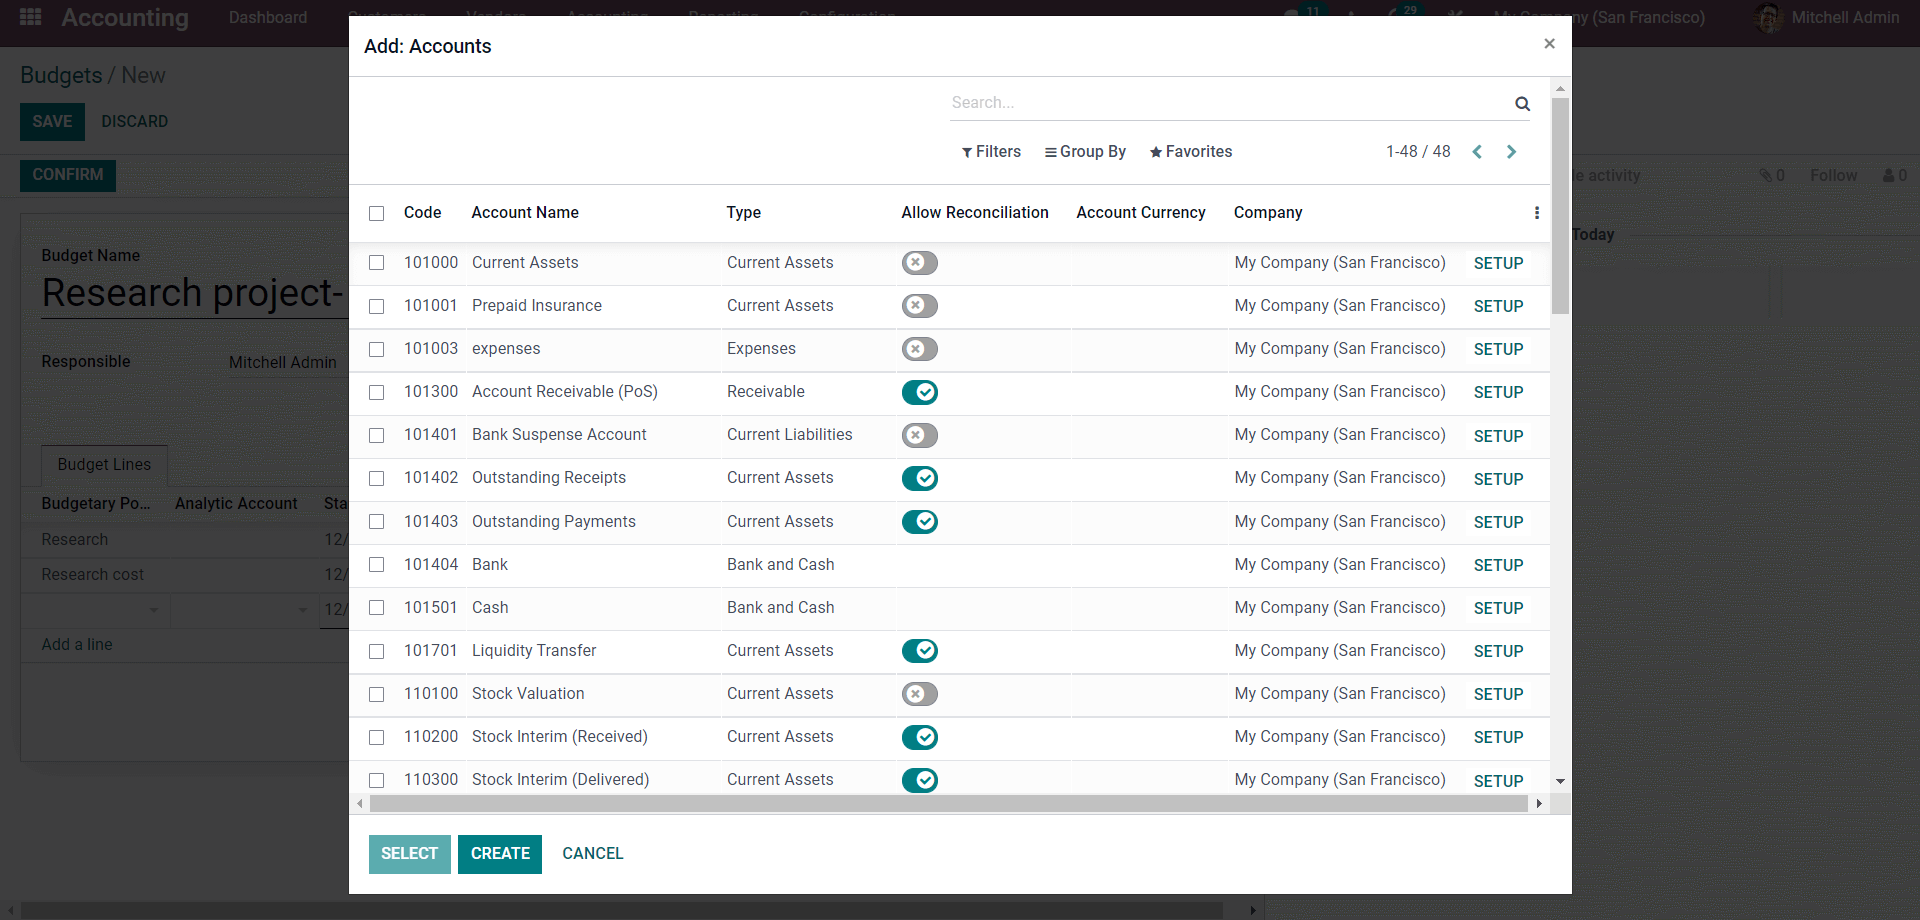
Choss he Accounts concerning the nature of the Budgetary position you are creating. If your budgetary position is concentrated on income, choose the income account, and if it is on the expense, choose an Expense Account. Similarly, you can select an account you want, depending on the nature of your business. If you want to create a new account, then click on the CREATE button and form the preceding configuration page to create the new Account.
After the configuration on the Account, select it by clicking on the empty checkboxes near it and clicking on the SELECT button to apply the selected accounts.
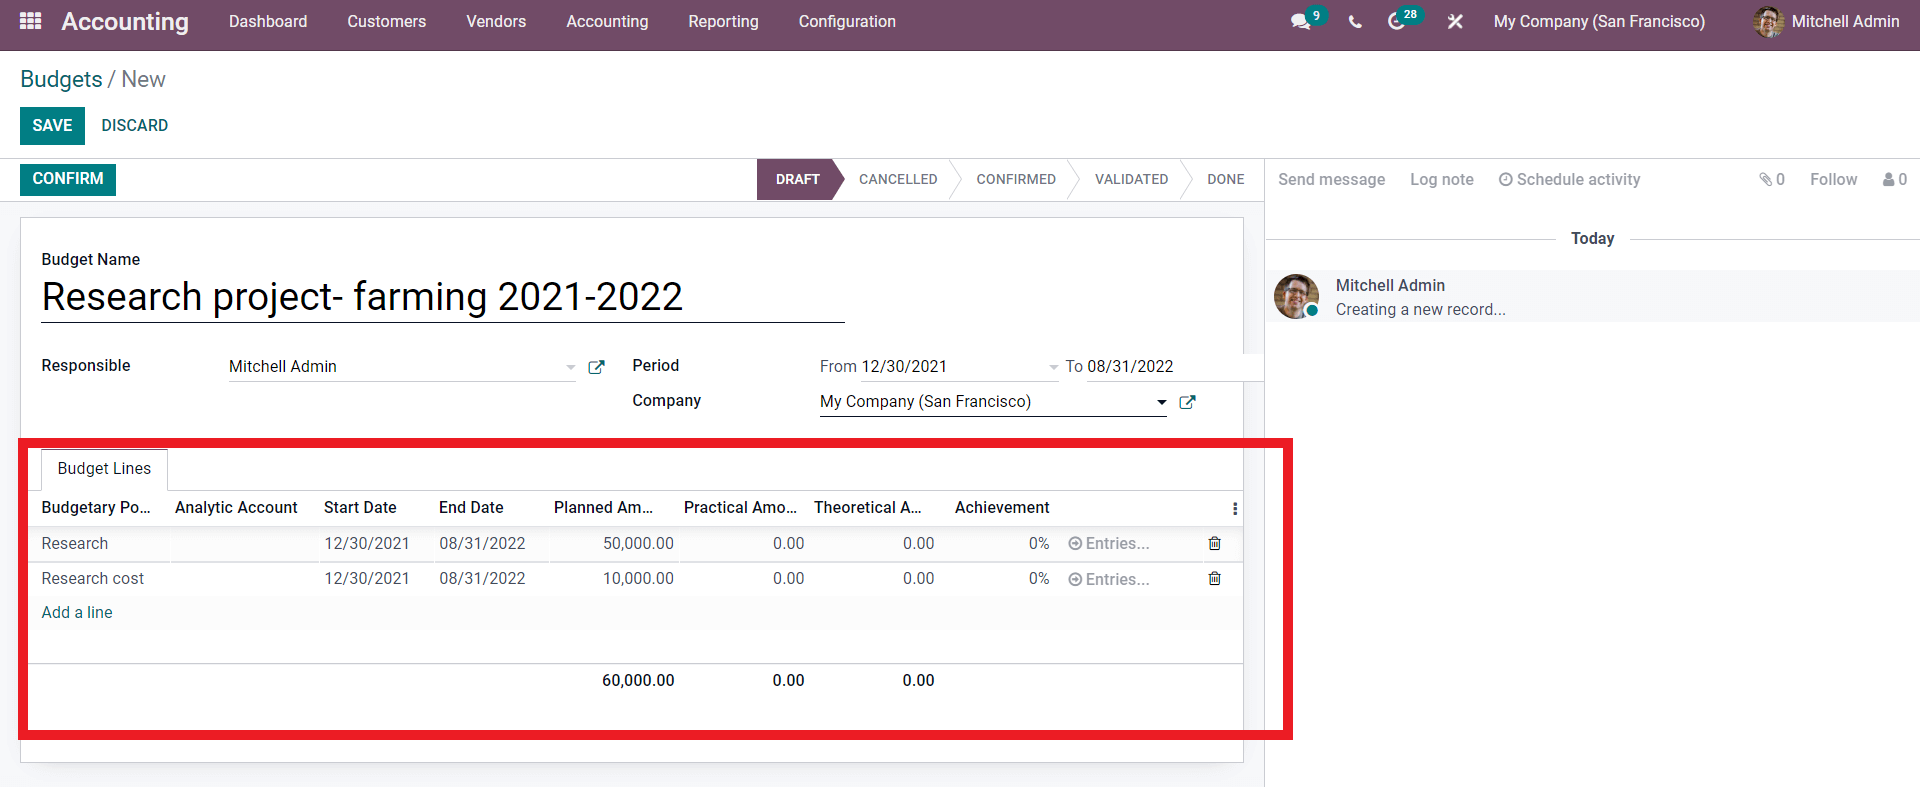
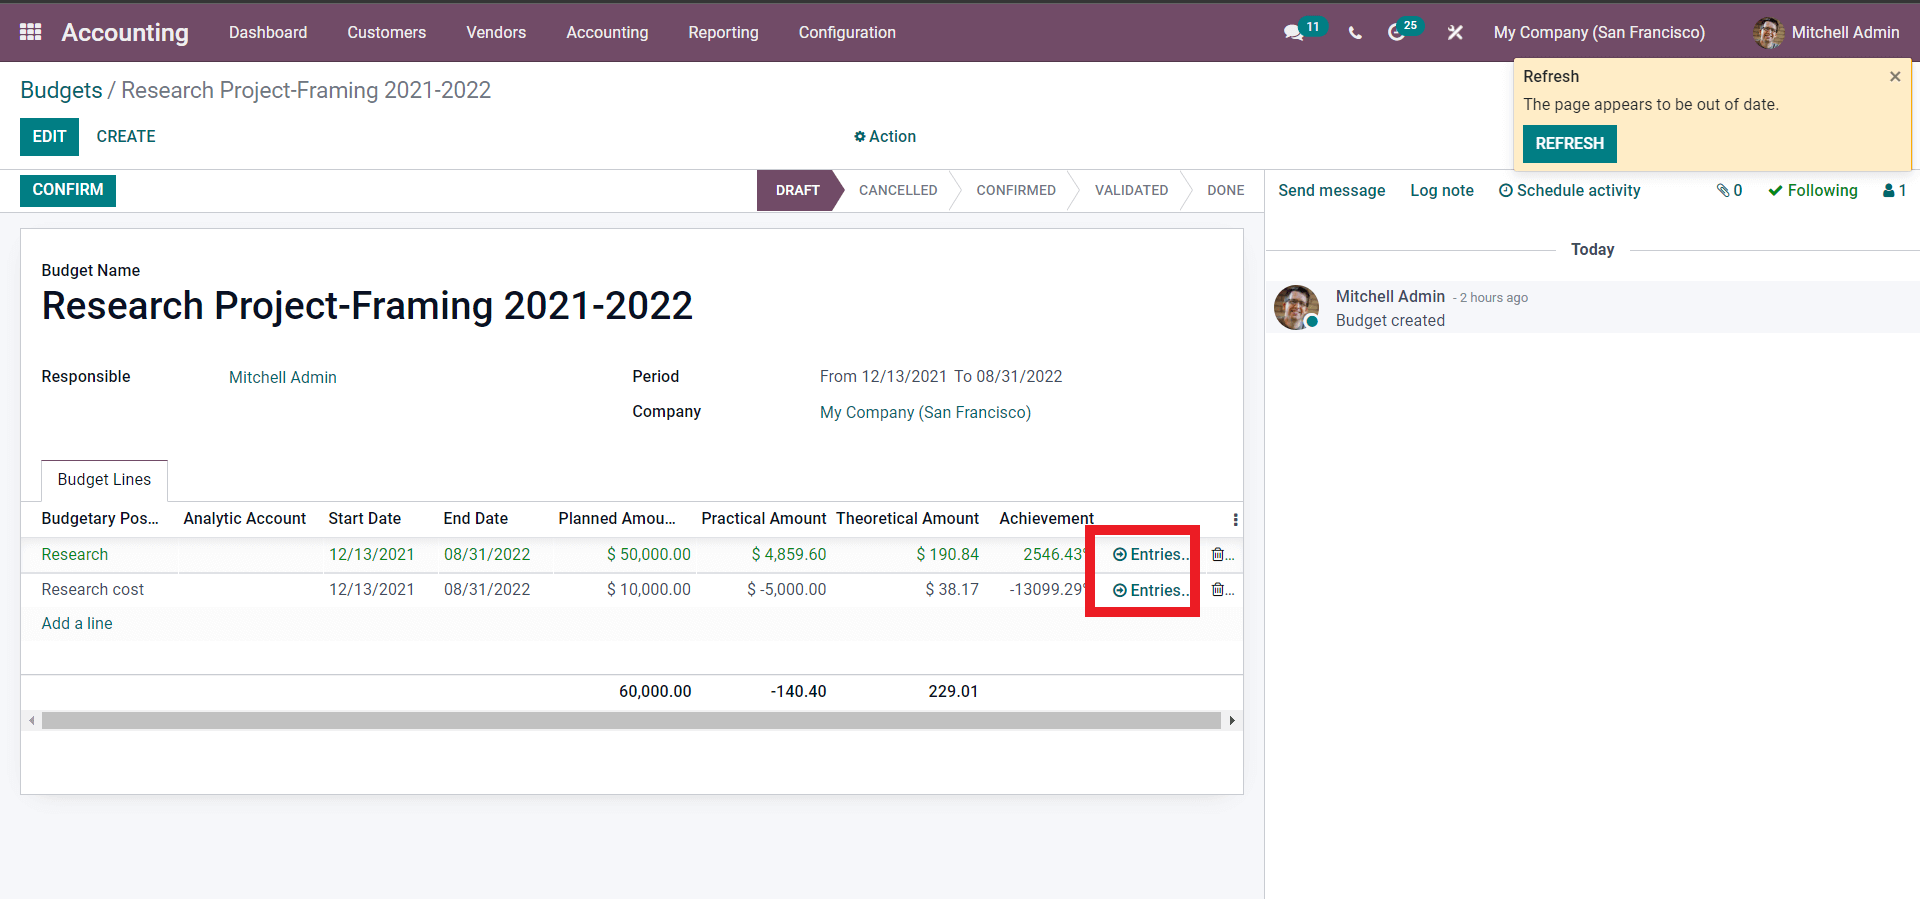
Here the Budgetary Positions are Research and Research cost. You can change the date and the Planned amount of the budget lines. If you want to add an analytic account, click on the Analytic account field and add the account. You can configure the period, The person responsible, and the Company from here. After the configurations, click on the SAVE button to save the newly created Budget.
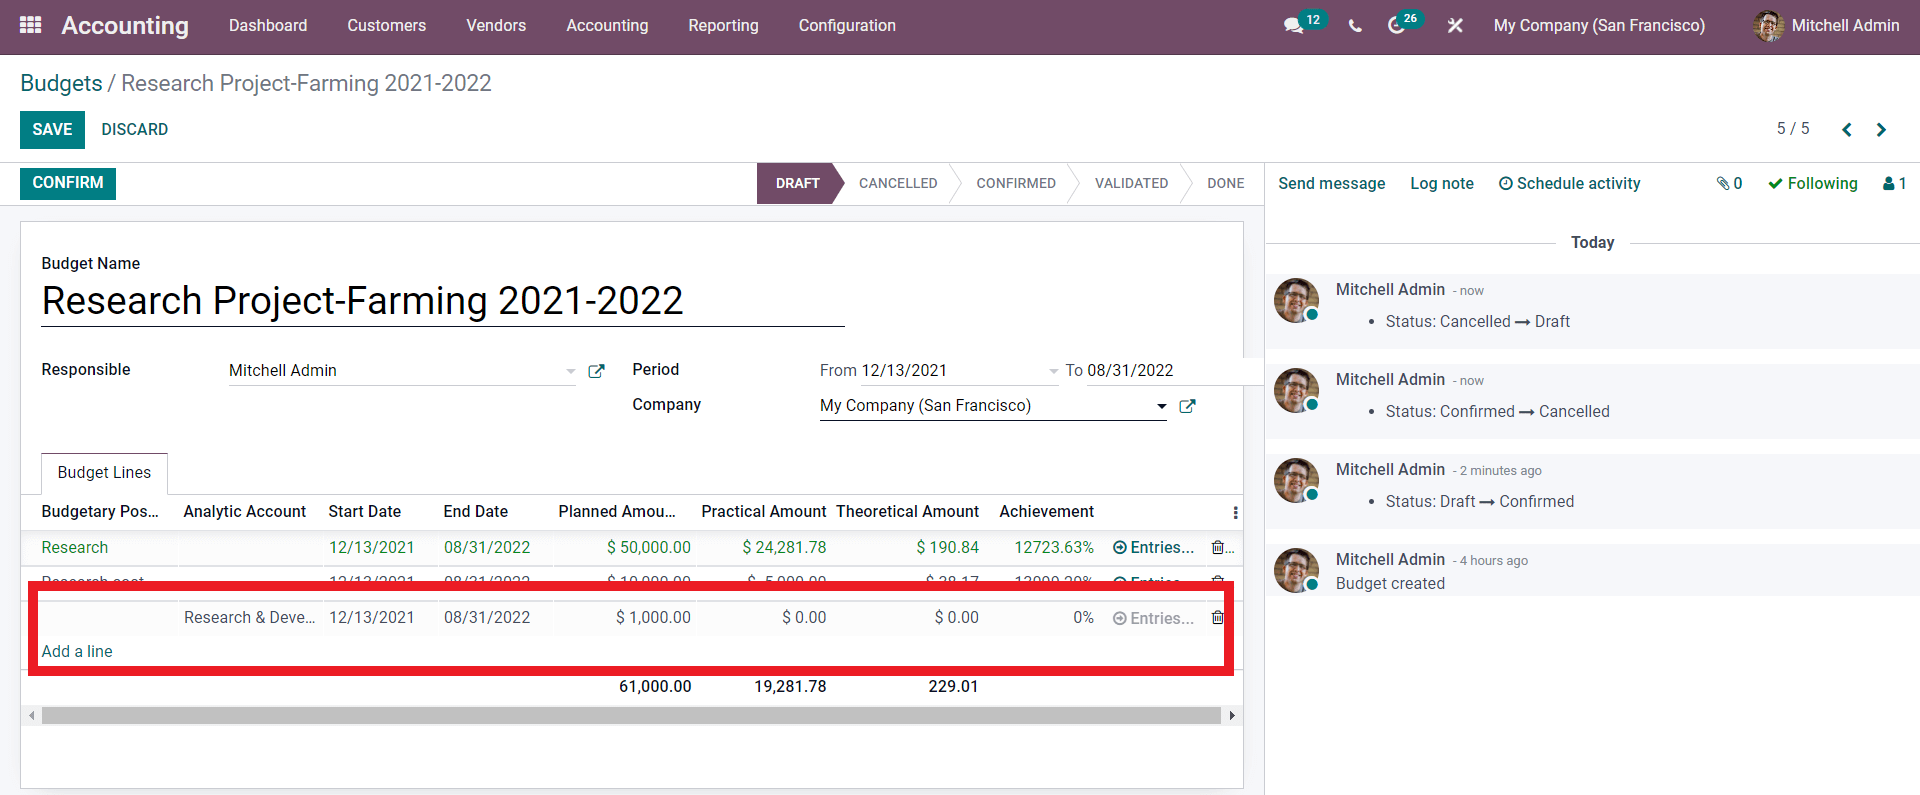
For the sake of explanation, we can reconfigure the above-given configurations on the Budget to see how it will affect the procedures. Let’s reconfigure the Start date to the current date or the date the budget is being created in the project or the process as given below.
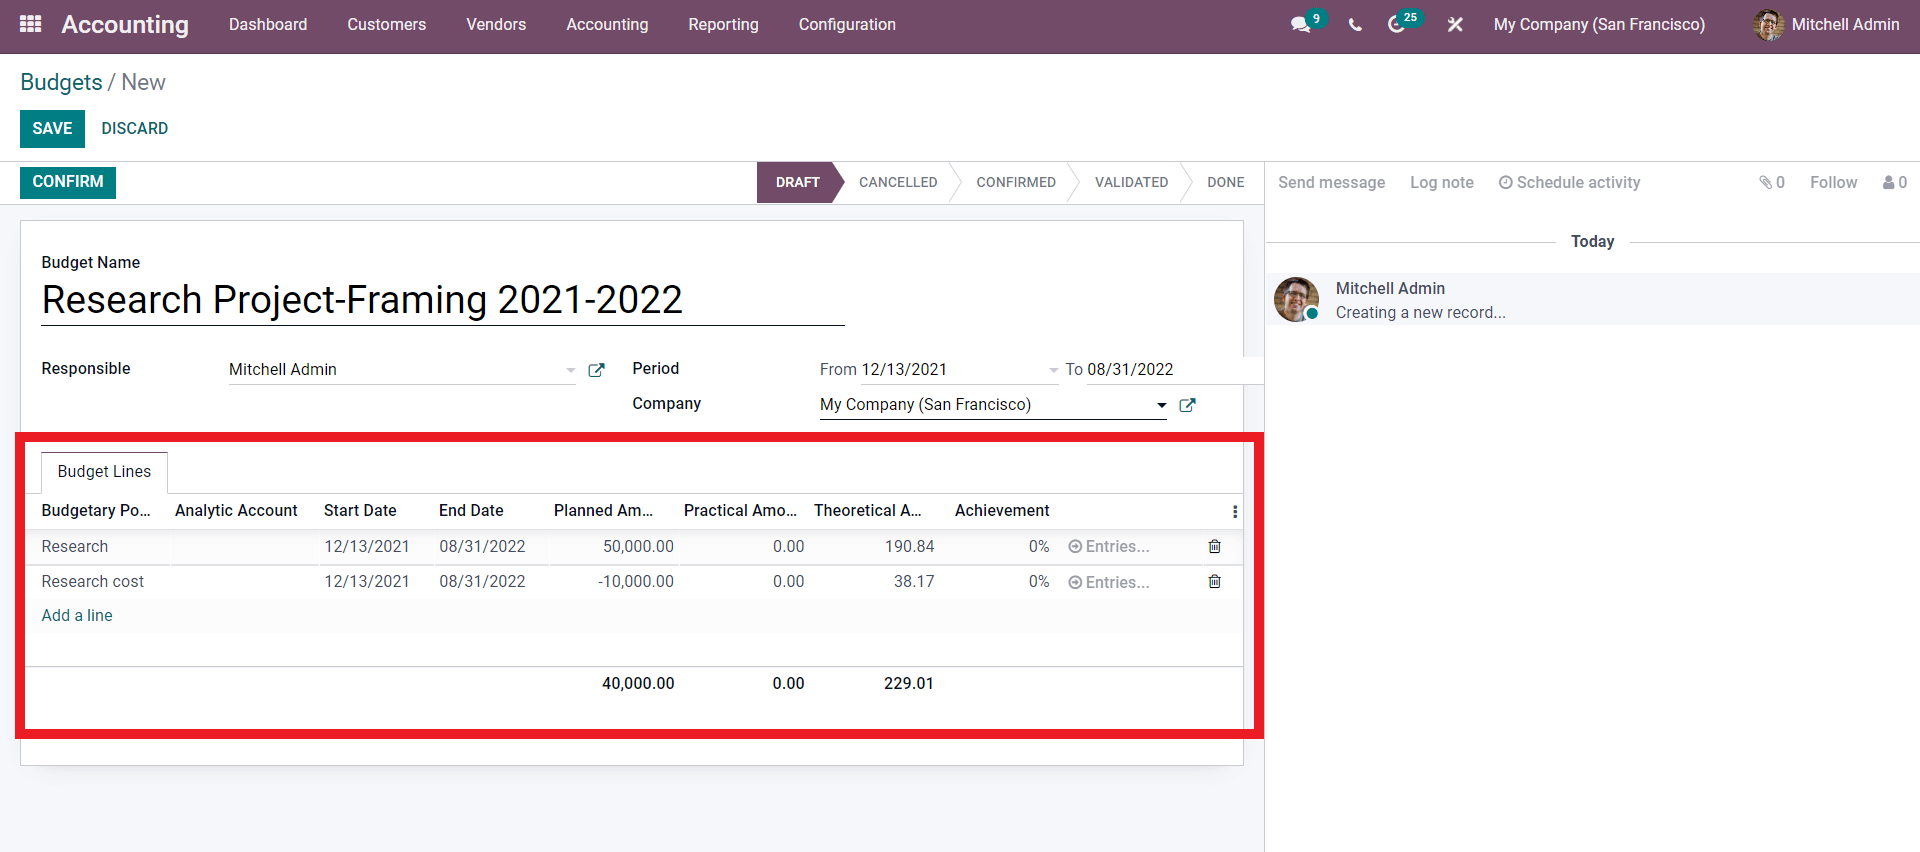
Here, note that the Theoretical amount is automatically calculated and displayed concerning the Planned amount. The mount will be saved with a negative sign if it is negative, and if it’s not, it will be displayed as it is after the configurations on the SAVE button to save it.
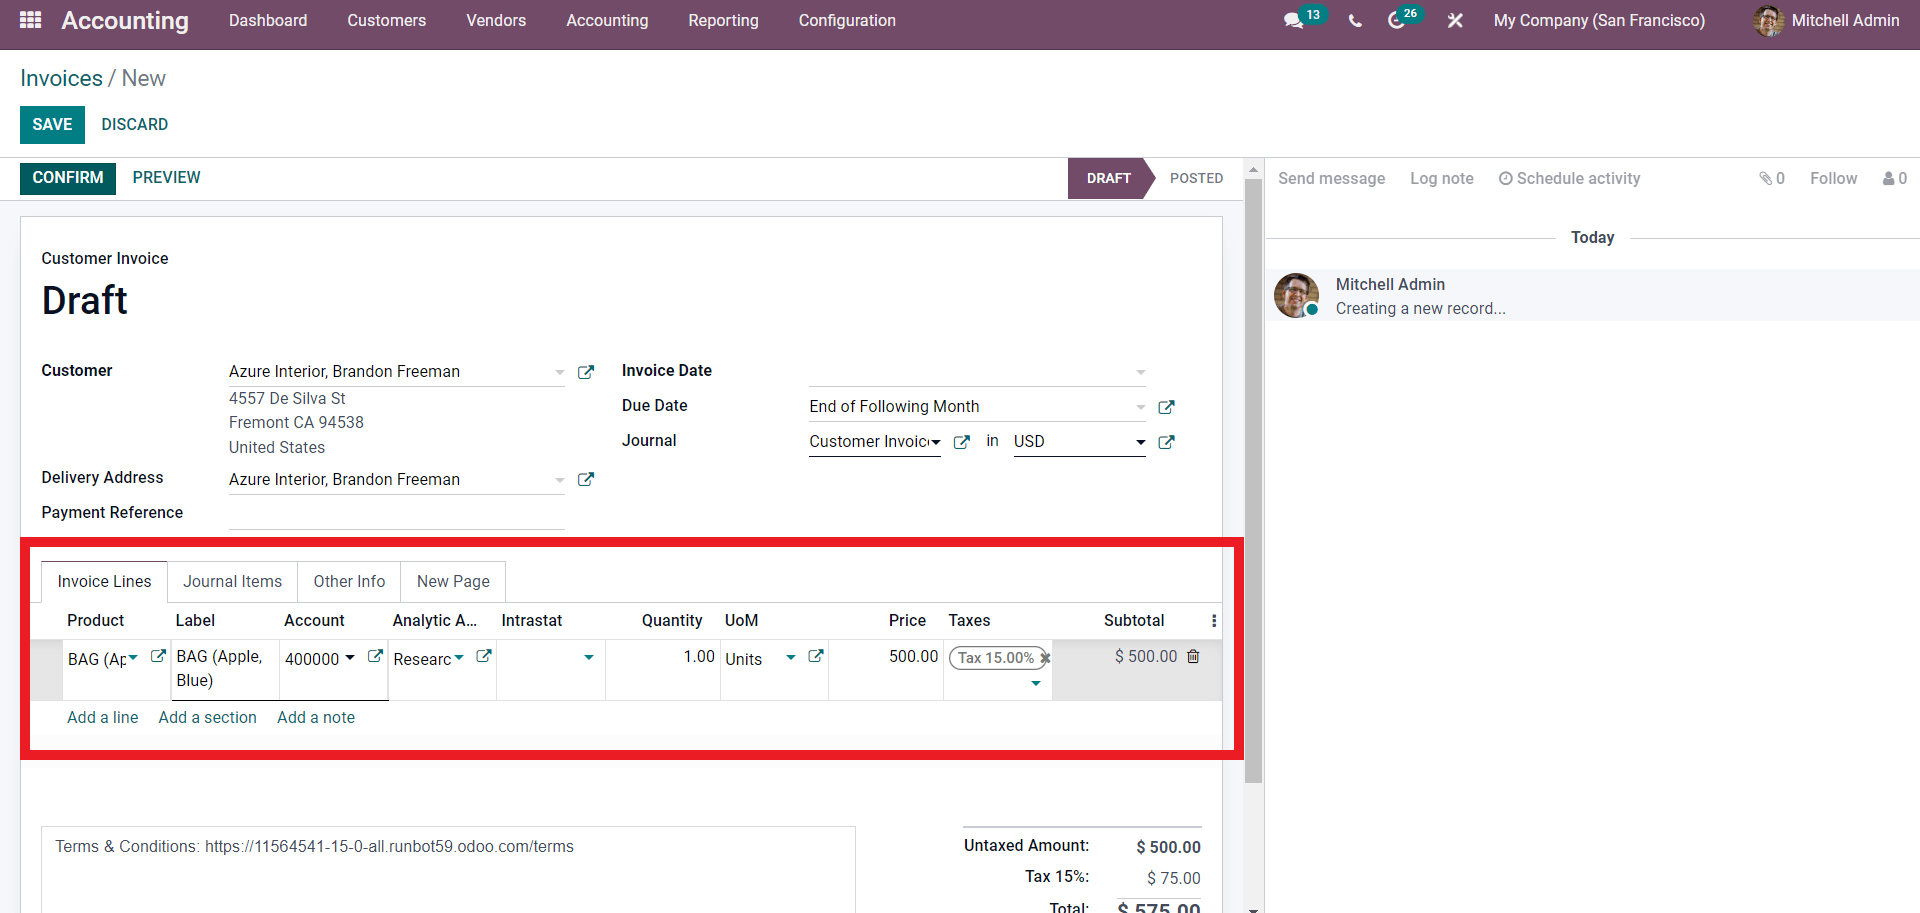
Now let’s create a customer invoice to know how the configuration on the budget works with it. To create an invoice from the Accounting module, go to the Customer tab from the dashboard of the Accounting module and click on Invoices from the Dropdown menu. A configuration page shown below will open up to configure the invoice.
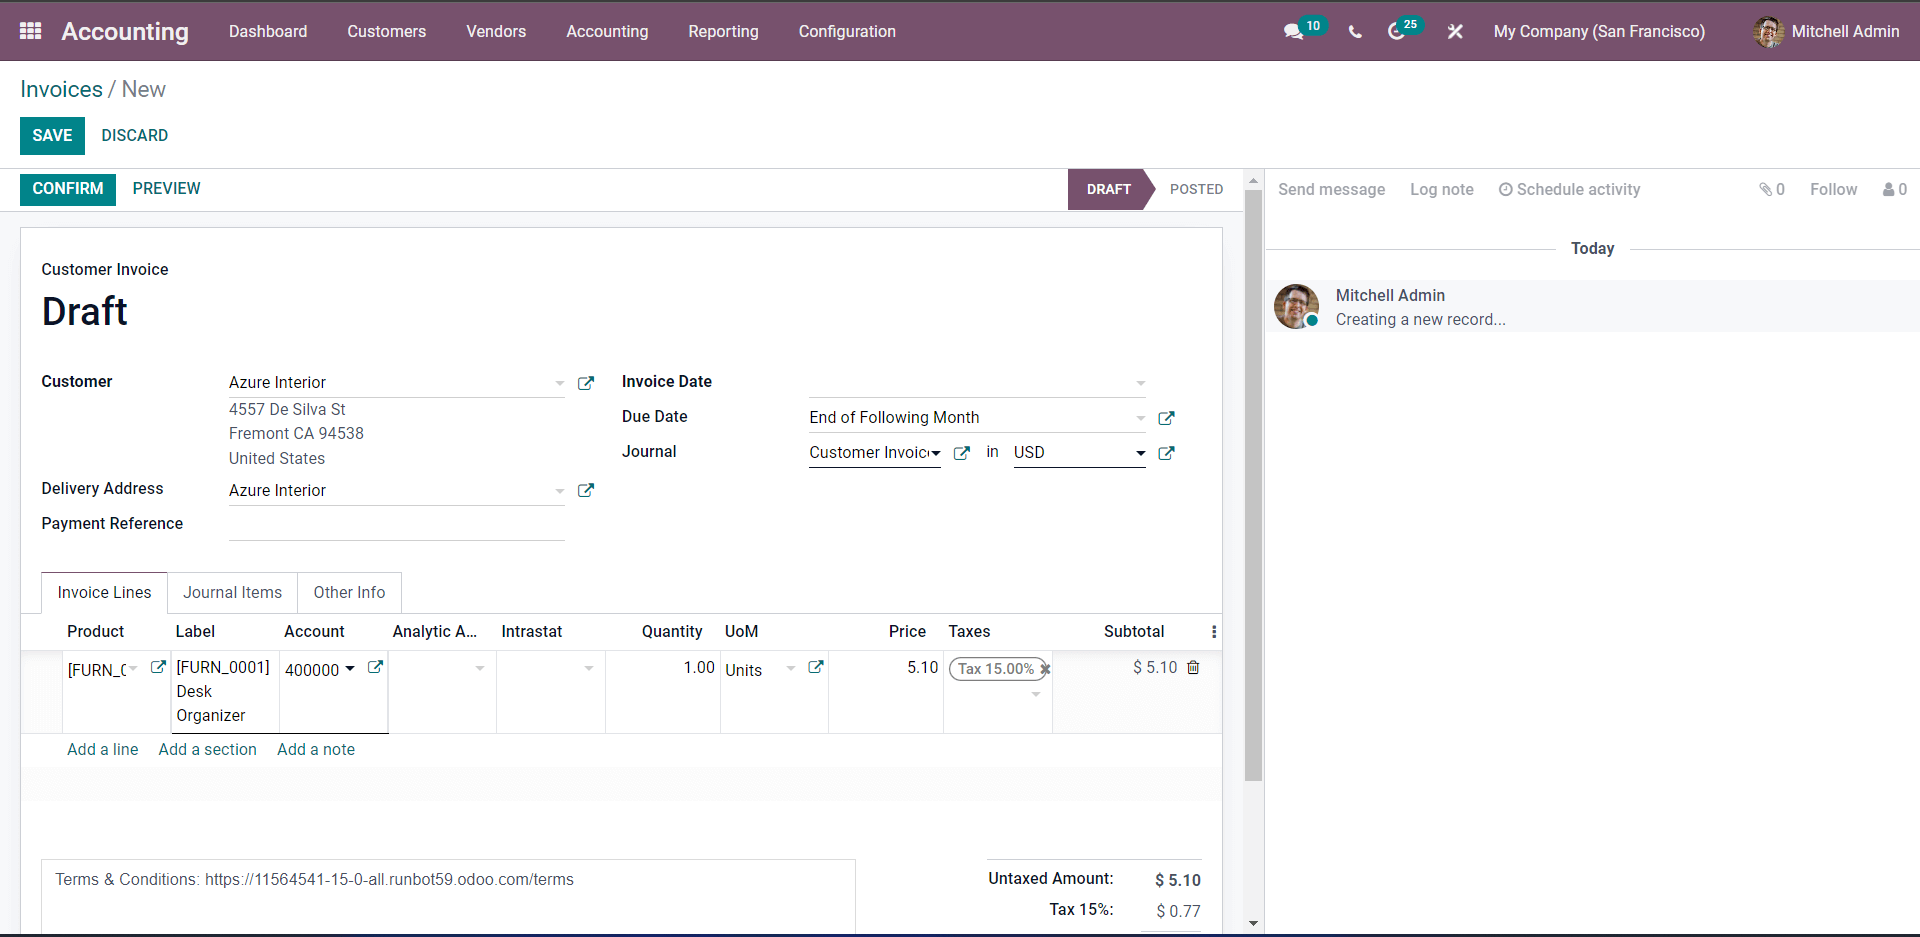
Add the customer and product along with the process and click on the CONFIRM button. After the confirmation, go to the Budget from the Account tab and choose the newly created budget from the list, and you can see that the budget is reconfigured concerning the invoice. From the budget, section click on the Entries button next to the shown below to view the journals entries.
A page with all of the Journal entry items listed down will open up, as shown below.
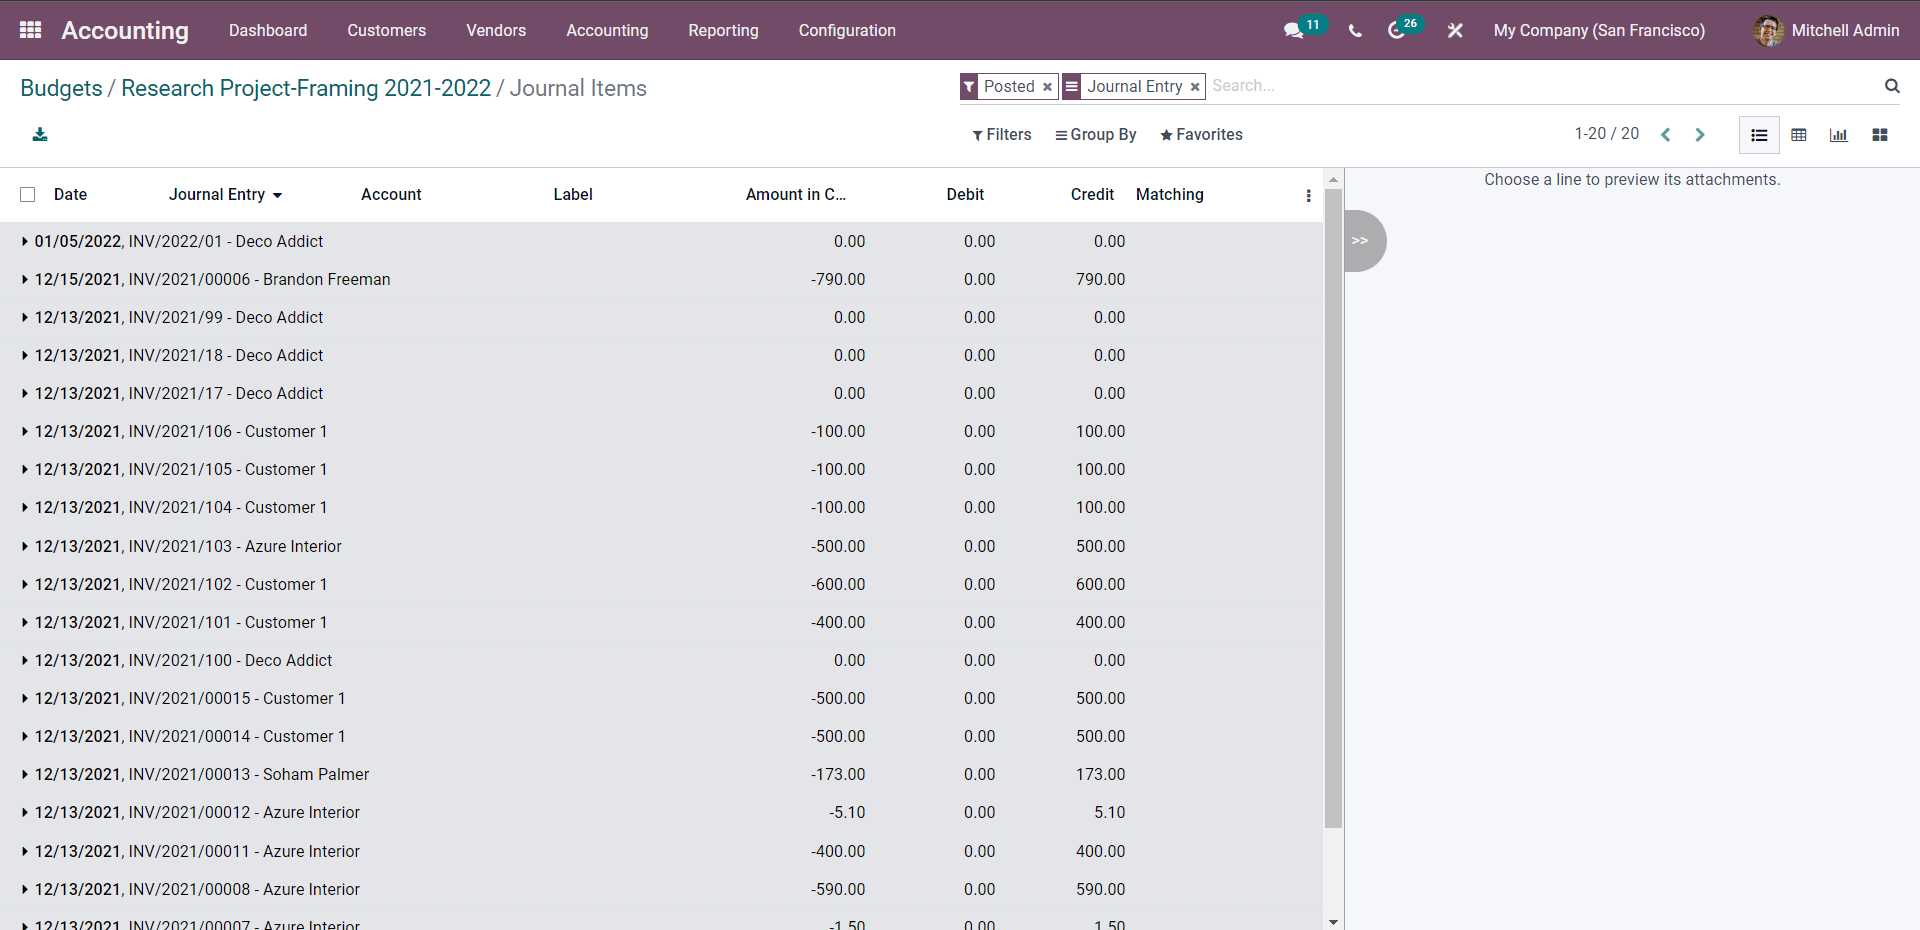
You can manage the entries from here. Click on any entries to have a detailed view of the entry. This can help you to control the budgets more efficiently.
So if you have purchased a product, go to the Vendors tab and click on Bills from the drop-down menu. A page will open up with a list of Bills. Click on the CREATE button, and a configuration tab will open up as shown below to create a new vendor Bill.
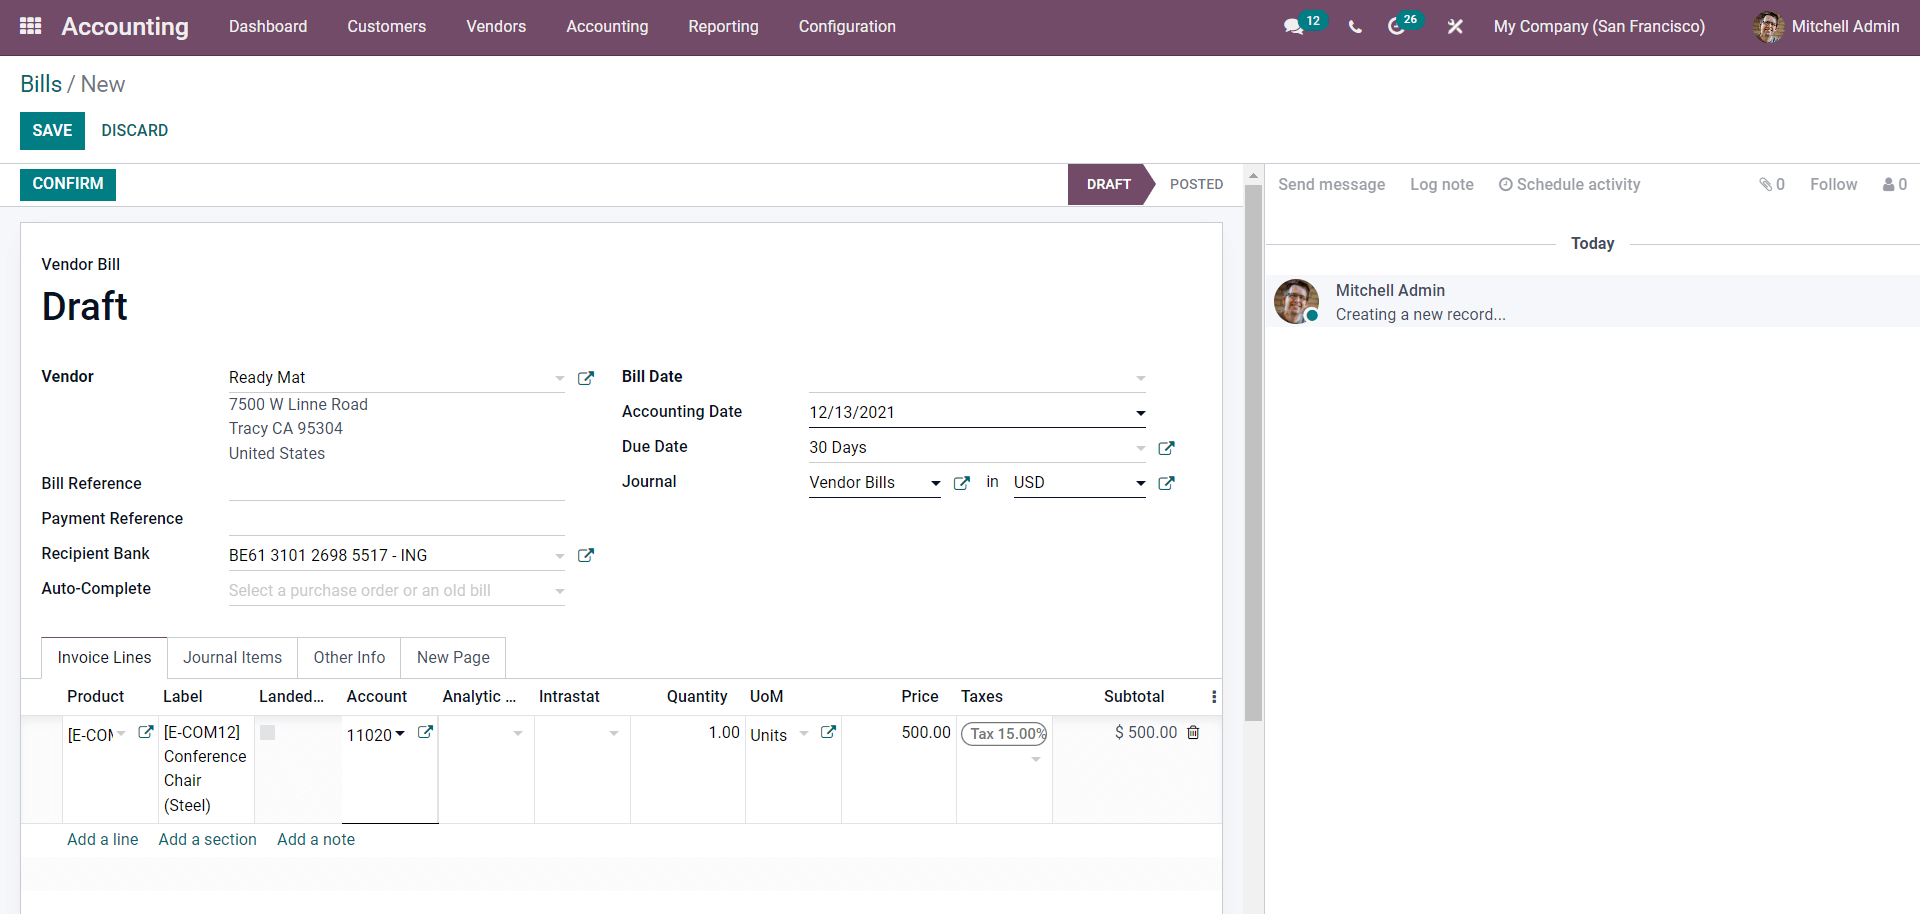
Add the Vendor and the product from the Invoice line section and enter the Bill date, the Accounting date, and other configurations related to billing dates. After the designs, click on the CONFIRM button. This will take you to the Register payment section. After this, go to the Budget section, and you can find that we have crossed the limit and will be displayed accordingly. This also indicates that you should manage the expenses immediately.
As mentioned earlier, you can Link an analytical account to the Budget, as shown below.
To link, click on the Add a line button. Under the Analytic Account section, add the account, specify the Planned amount after the configurations, click on the SAVE button, and create a customer invoice.
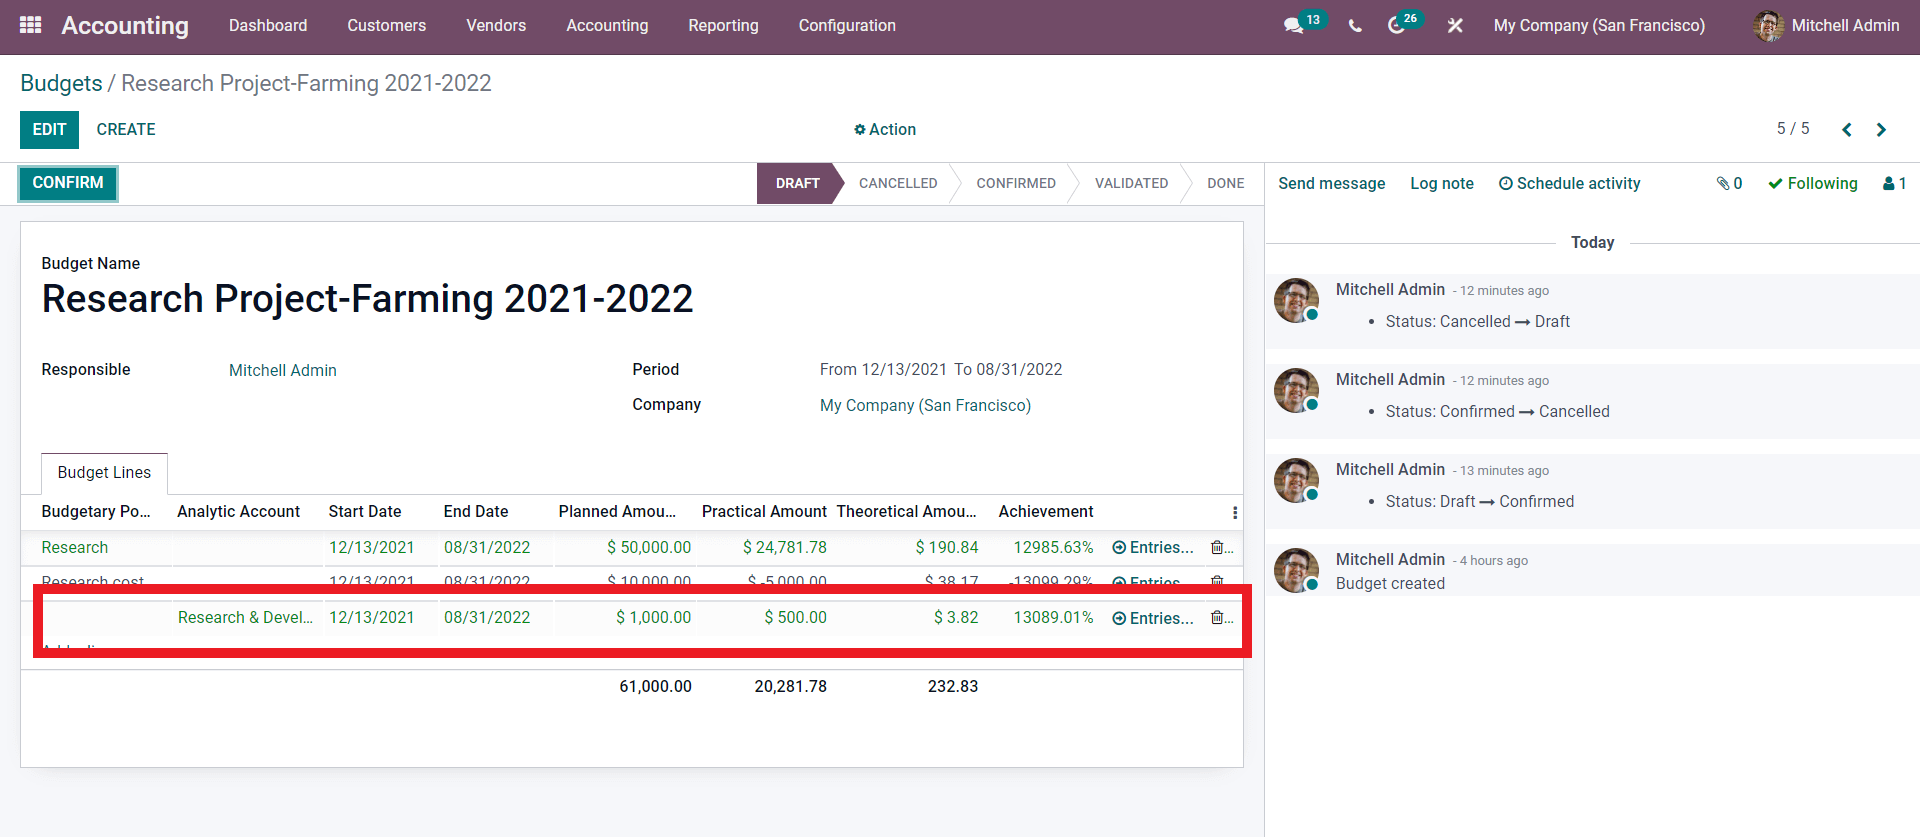
Enter the customer and add the product and under the Analytic account field, be sure to choose the same account as you have given in the Budget section. After the configurations, click on the CONFIRM button and head back to the Budget section, and you can find the entry there as shown below.
Click on the Entries button to view the entry. The entry will be present in the Analytic items section and not in the common journal’s section, as shown below.
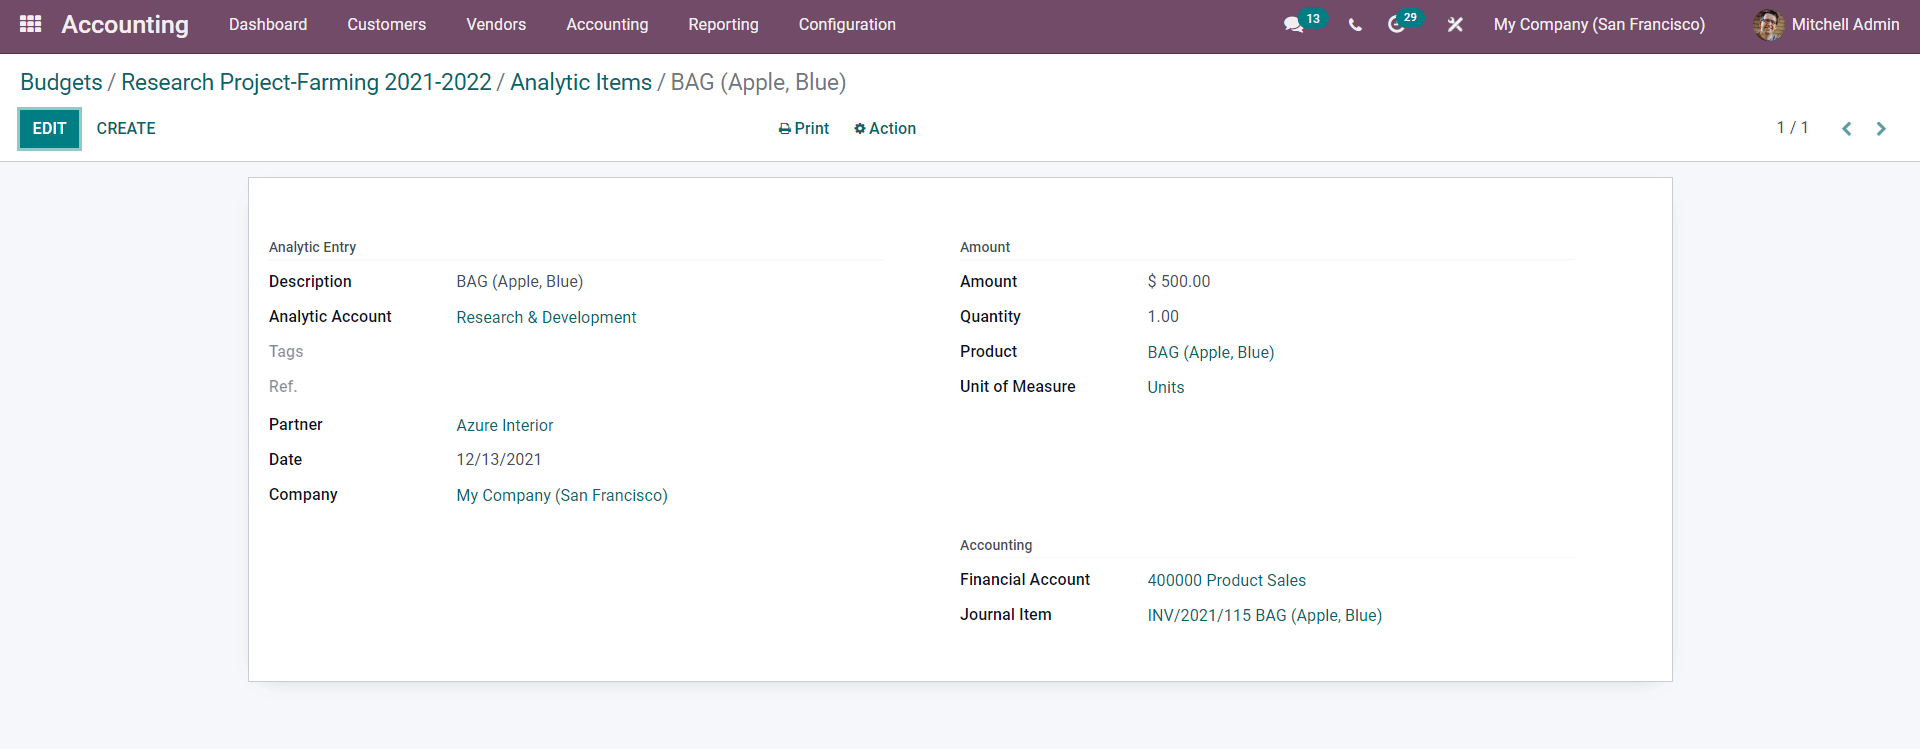
You can have the details on the entry form here.
You can quickly analyze the Budget with the Budget analyst report. To access the budget analysis report, from the dashboard of the Accounting module, click on Reporting tab, and from the Dropdown menu, select Budget analysis, and a page on the report will open up as shown below.
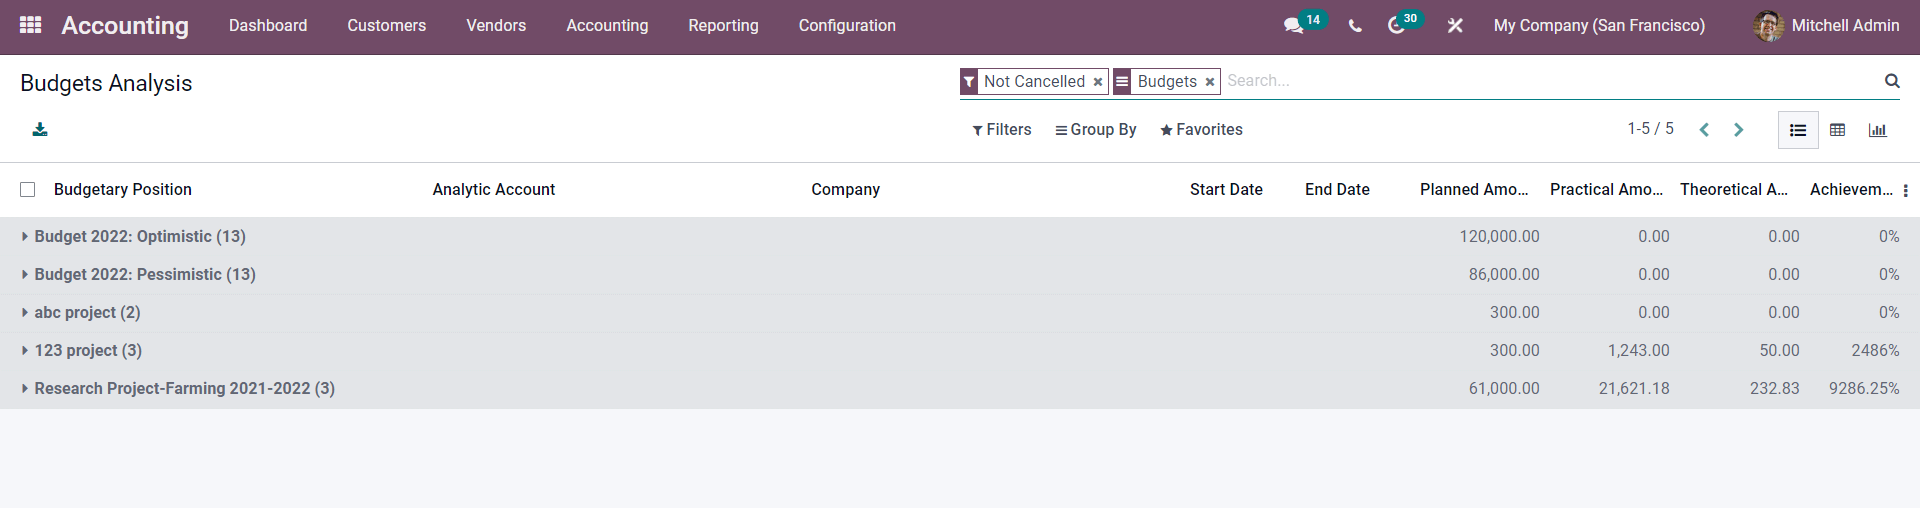
Click on the Budget that you want to have a detailed report on. There are multiple filtering and grouping options on the page that you can effectively use to reach the desired data quickly and help you to avoid Budget data clutter or any other clutter that can create a huddle in business management.
This is how you manage and overview Budgets with the Odoo 15 Accounting module. If you want to know more about Budget management and its vivid process, watch the video given below.