Calculating taxes has always been a difficult part of accounting. Any inconsistency or error in tax calculation can land a firm in trouble. Odoo 14 Accounting module offers a comprehensive support system to compute taxes and prepare tax structure. Odoo 14 also helps to create tax groups for different purposes.
If we are taking the example of India then the tax system will be GST. GST itself has three different forms.
* CGST (Central Goods and Service Tax)
* SGST (State Goods and Service Tax)
* IGST (Integrated Goods and Service Tax)
In many countries, we use group taxes also. VAT (Value Added Tax) can be included in the group tax category.
Odoo Accounting helps the users to set default taxes. Default tax can be set for,
* Product
* Account
* Company
Once we set a default tax for the product, for the account, and for the company, the tax of the product will be considered first. The second priority will be for 'Account' and Company will be considered only at the end. In short, the tax on a product will be taken as the default tax.
To make use of the Odoo Tax setting feature, a user will first have to install the Accounting Module from the Odoo Apps.
How to Create a Tax
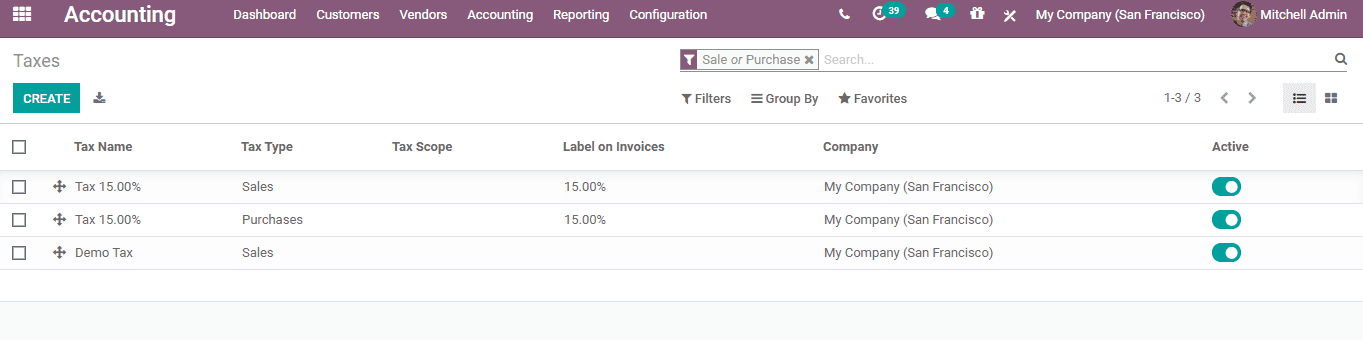
A user can create a tax in simple steps. Go to, Accounting -> Configuration -> Taxes
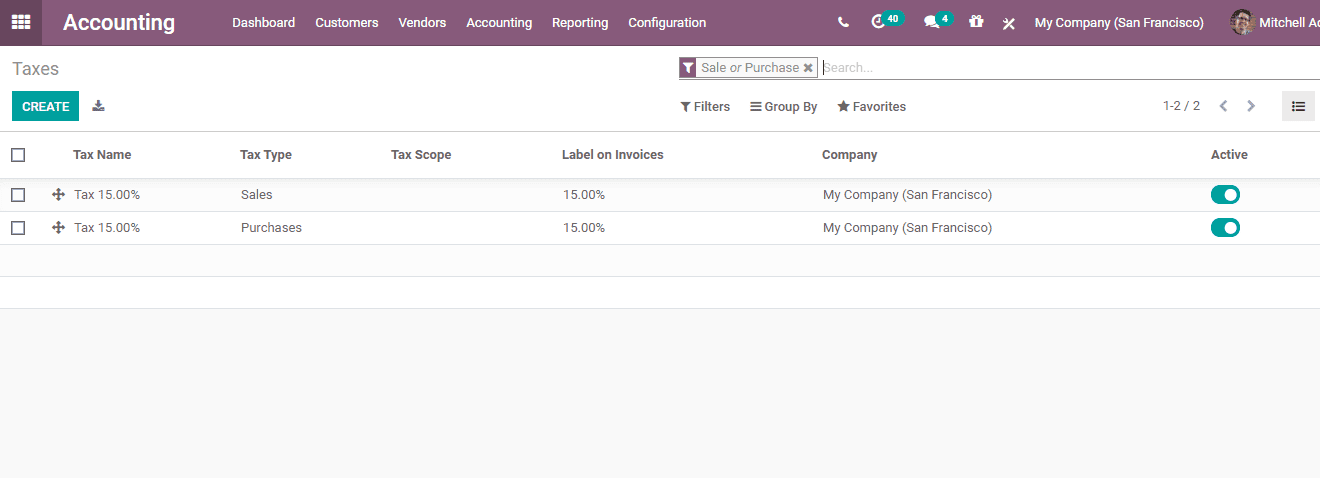
Here, the user will get a window with a list of already created taxes. The user can create new taxes by clicking the Create button
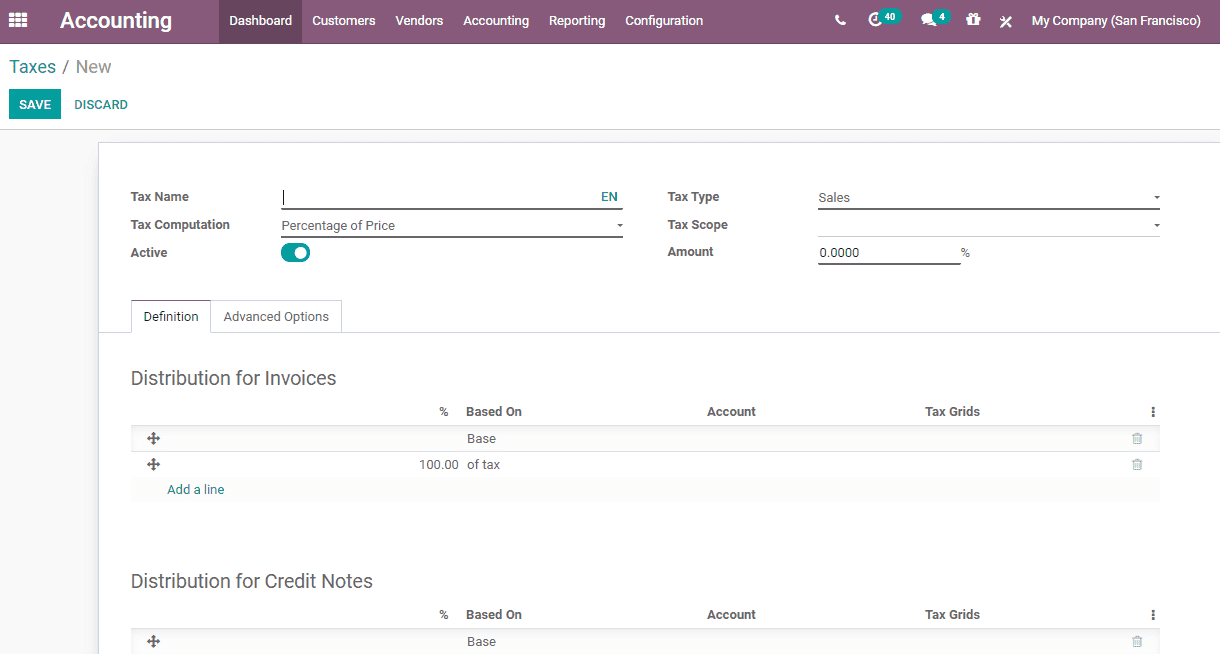
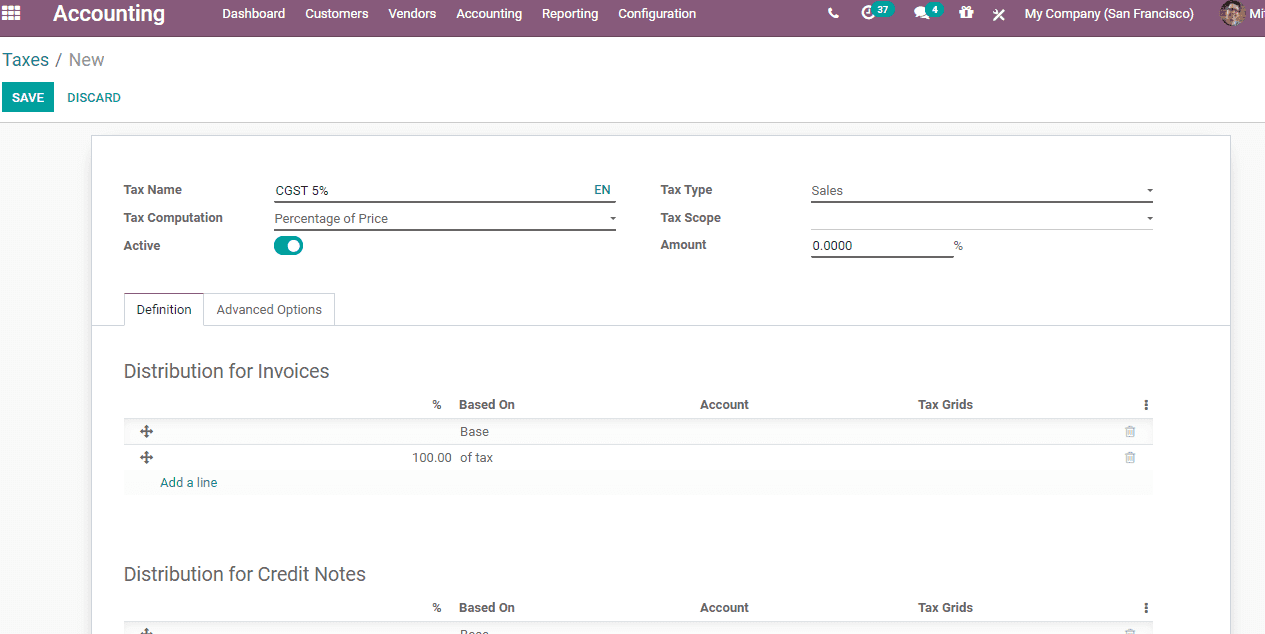
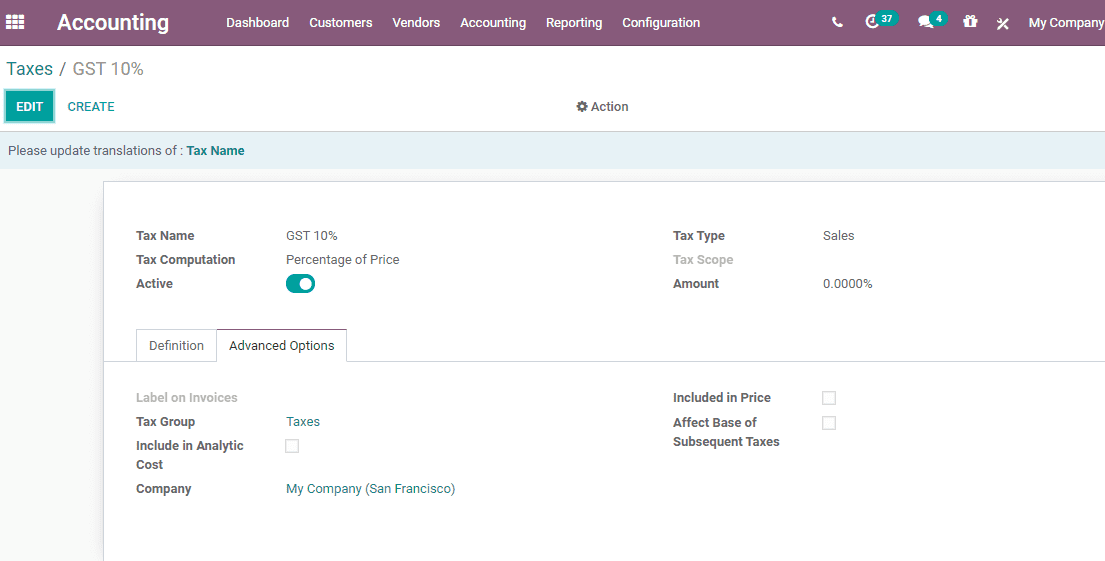
The above given is the form to create a new tax. In this form, a user will have to specify the given details.
Tax name: Name of the particular tax
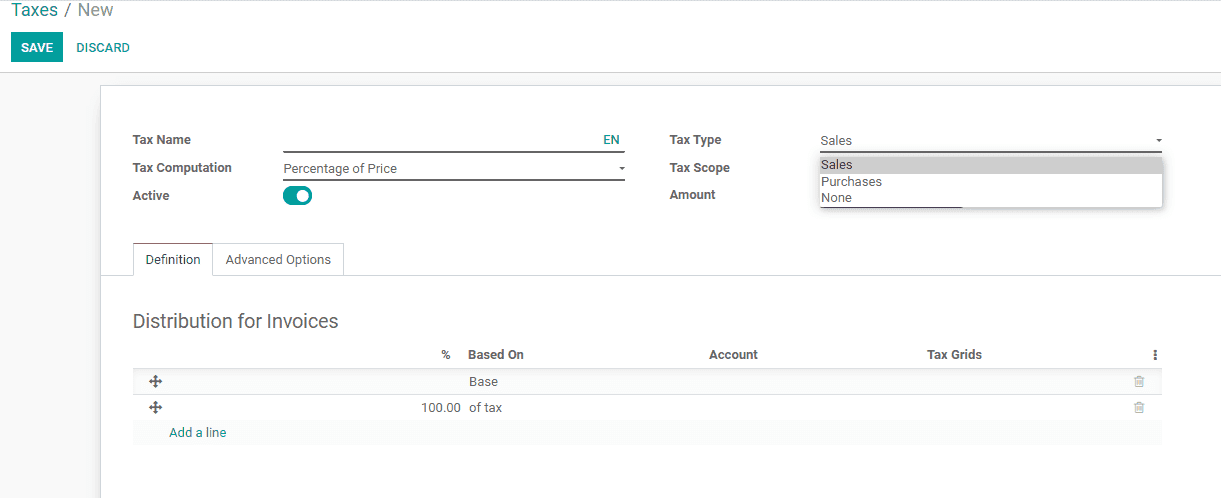
Tax Type: Here, the user can select if the tax is for sale or purchase. Another option is None. This option can be used if we are setting tax groups.
Tax Computation: It decides how to compute the tax. There are different ways to compute.
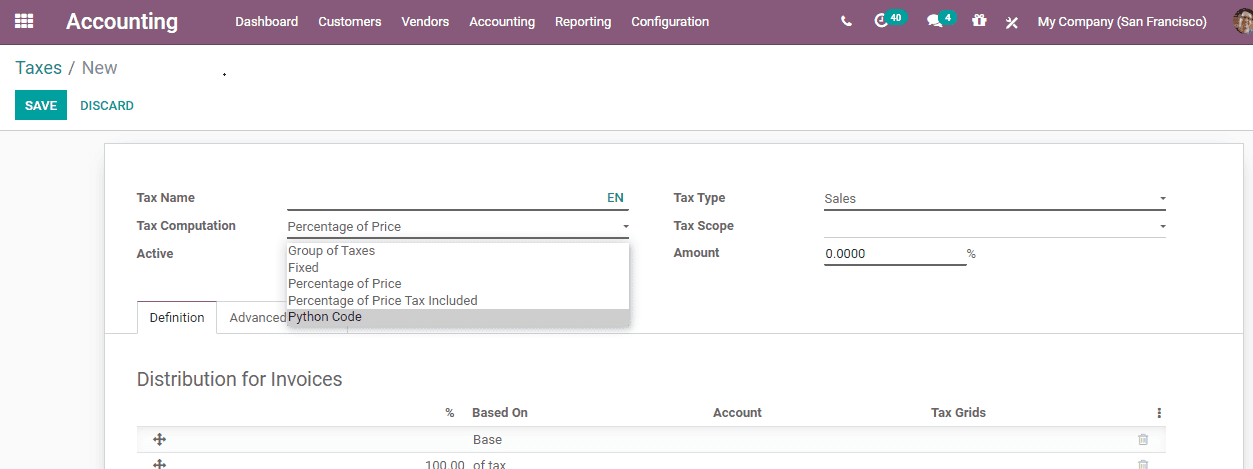
* Fixed
* Percentage of price
* Percentage of price tax included
* Group of taxes
Amount: Amount can be included based on tax computation
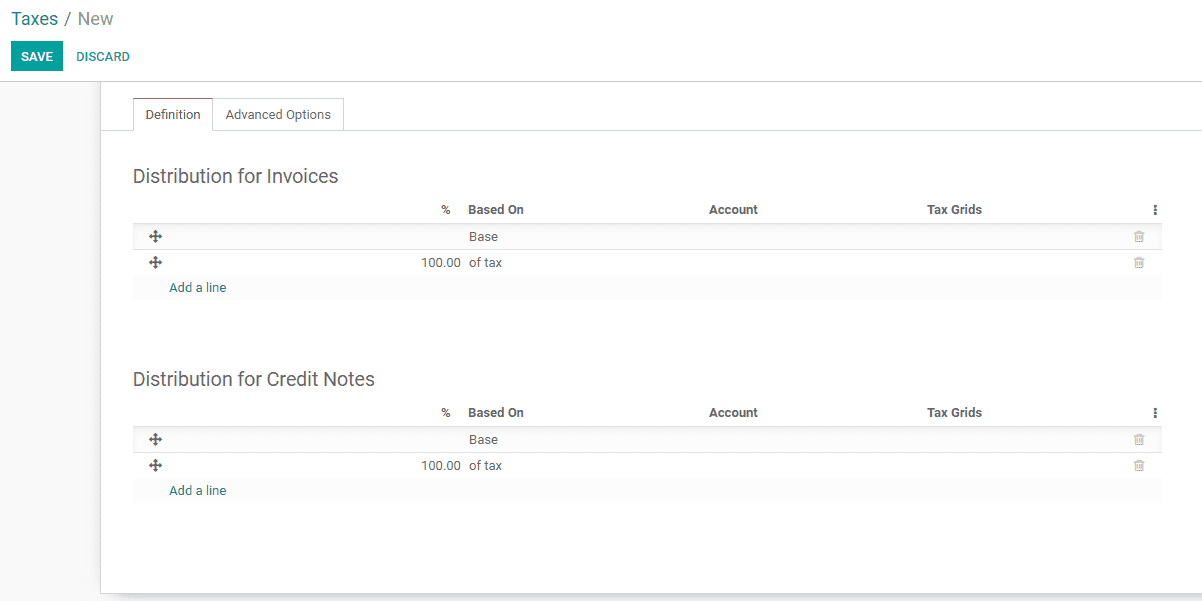
Under the 'Definition' tab there are two options.
* Distribution of Invoices
* Distribution of Credit Notes
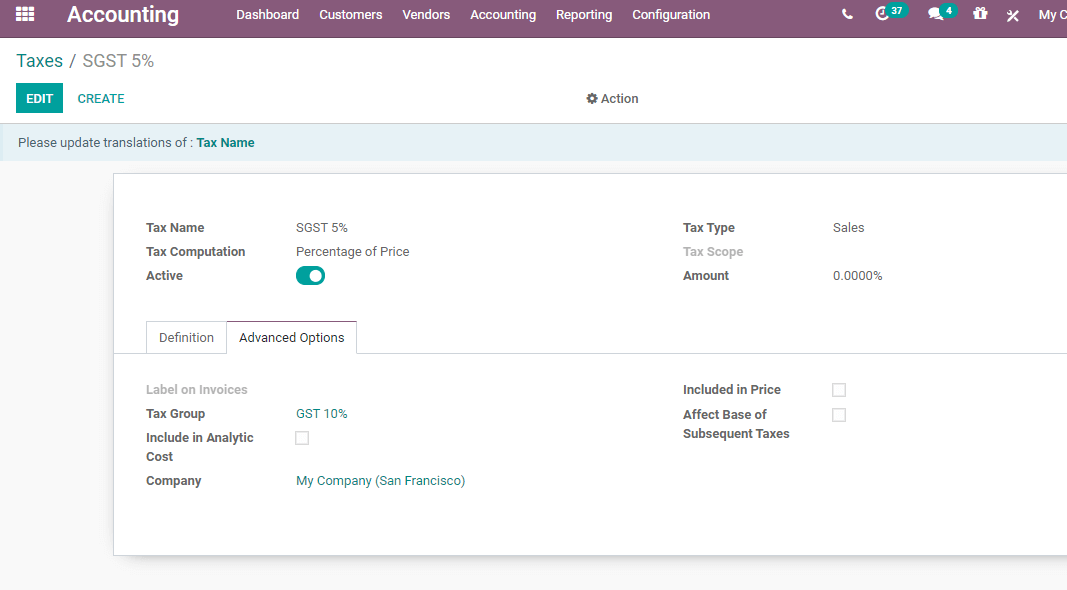
The second tab we have here is the 'Advanced options' tab. Under this tab we have to fill in the following details:
Label on Invoices
Tax group: This is a collection of child taxes
Include in analytic cost: Ticking the checkbox the tax will be added to the analytical account
Include in Price: On checking this box the tax can be included in the product price
Tax due: Based on invoice and payment
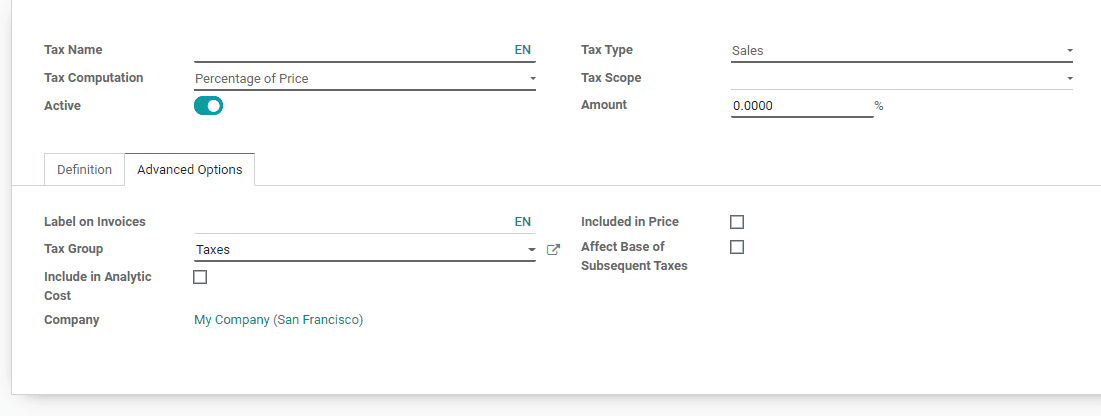
Now we have created a demo tax.
Tax on Product
The user can apply taxation to a product. Once this is enabled, that tax will be automatically shown when we make a sale order or a purchase order. As mentioned earlier, the product tax will get first priority while preparing for sales and purchase of products.
There can be two types of taxes on a product:
Customer tax: The customer has to pay this tax during a sale process
Vendor Tax: This is the tax to be paid during the purchase of a product from a company
Customer Tax
Once we go to products in accounts we will get a window as given below
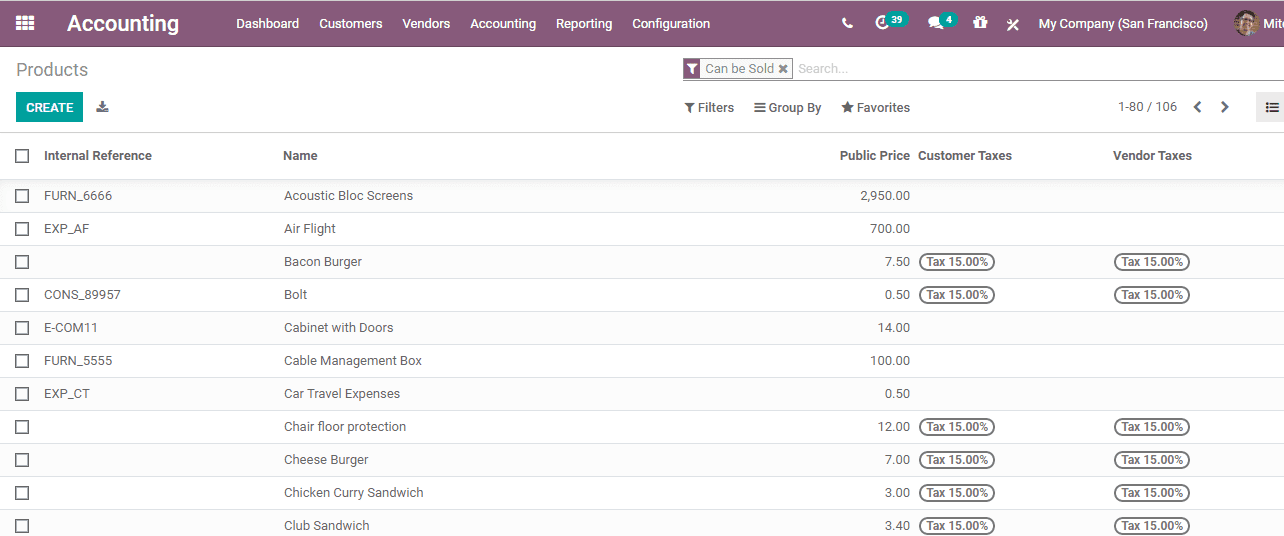
In the above-given form, we can find customer tax and vendor taxes. Here, the user adds the taxes on the list or we can create and add taxes. On clicking create, you will get a new window as given below.
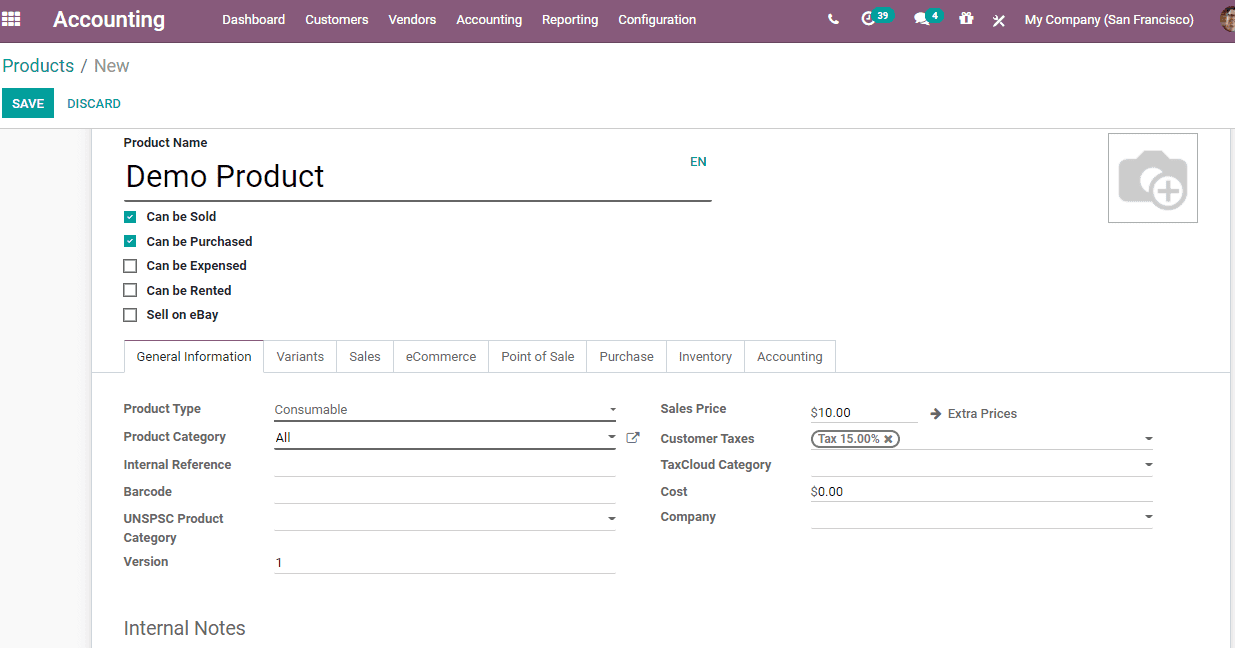
Here, the user can find Customer Tax as 15 percent. The tax we give here will come as default while selling this product to a customer.
VENDOR TAX
Vendor tax can be added during the creation of a product.
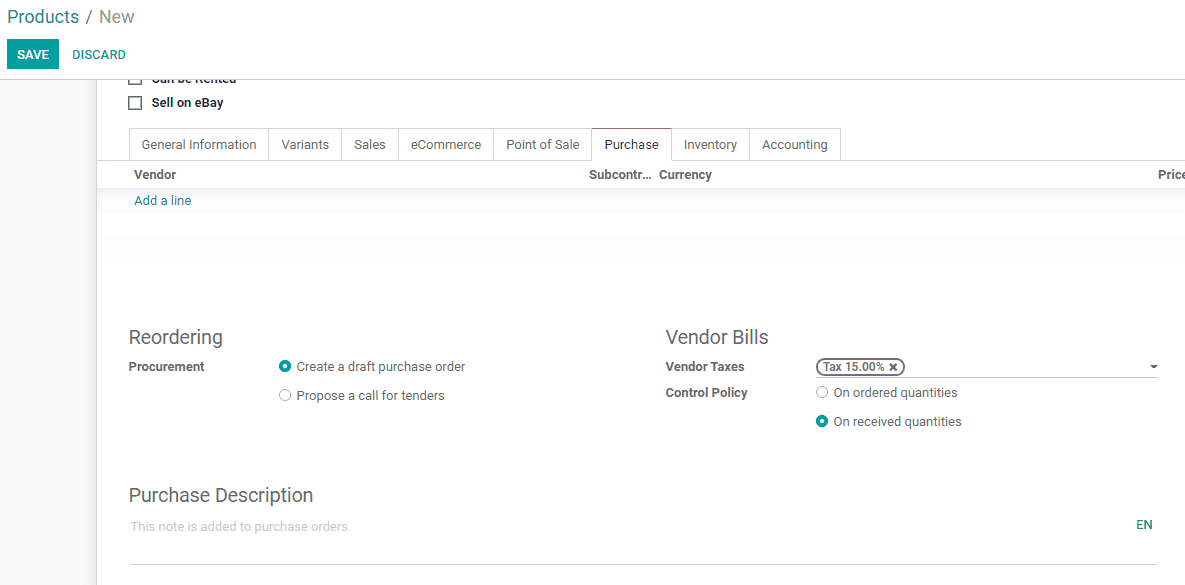
The tax can either be added by editing product details available in the list or while creating a new product. The tax we add here will be set as default tax while we purchase this product from the vendor.
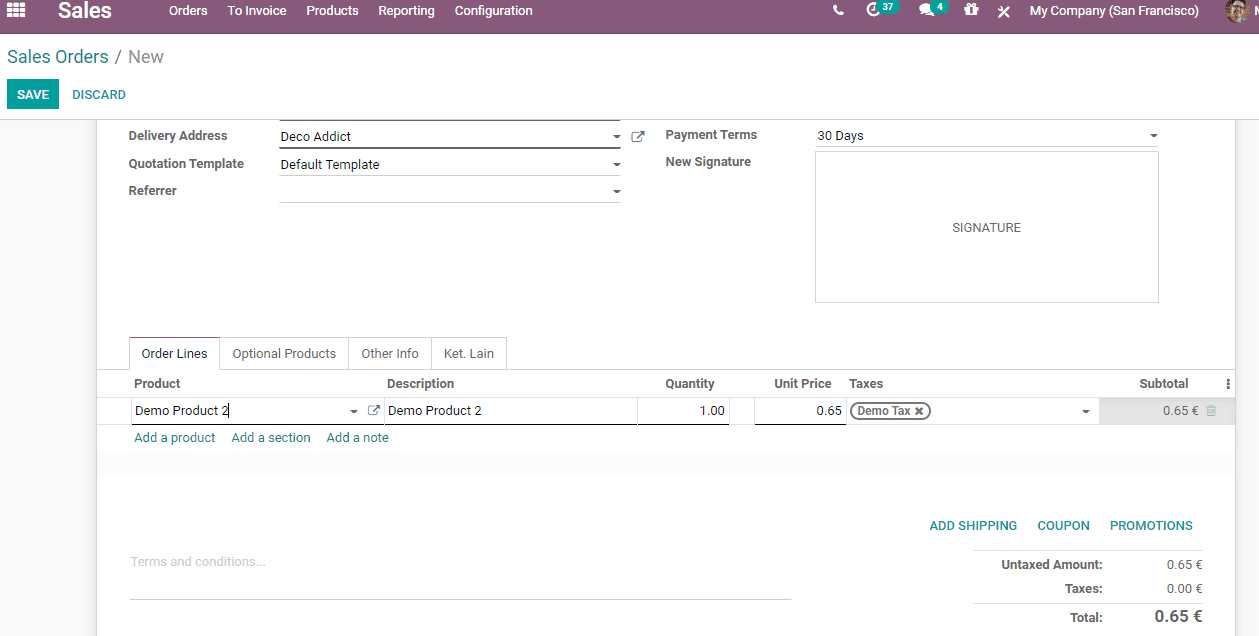
Now, we can generate a sales order and check these features.
For this go to Sale Module and Create Sale Order.
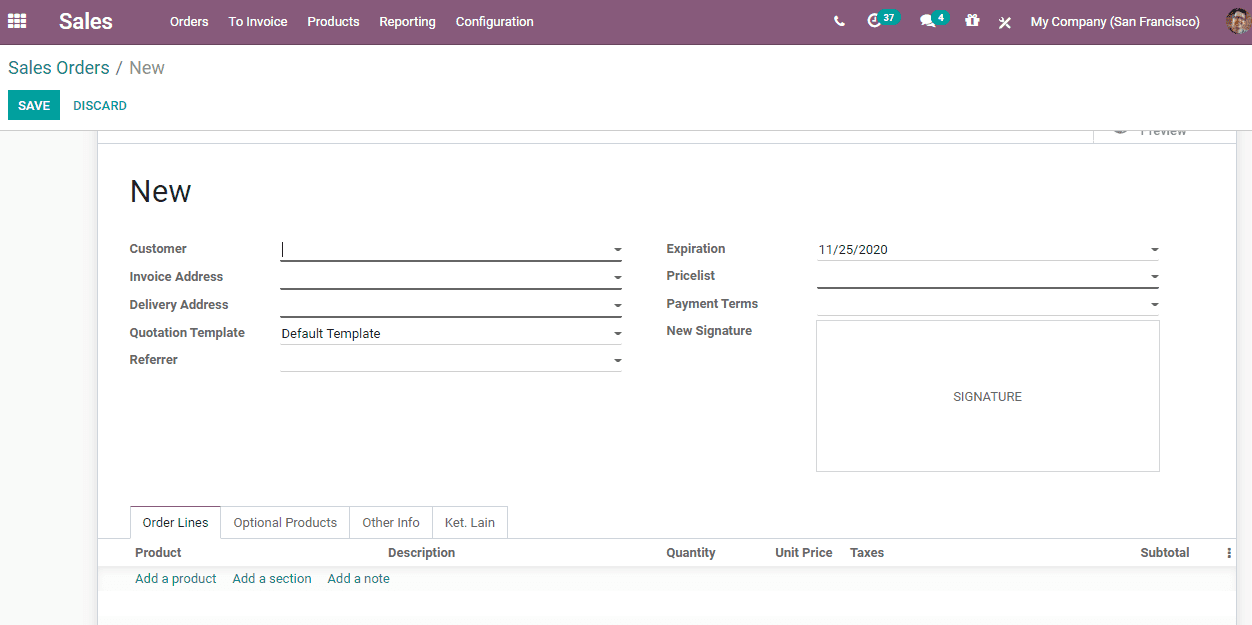
Here the tax is “Demo tax” which we have created. The Demo Tax has come as default tax as we added the tax in the product. Take a look at the below-given image.
Tax on Account
We can assign taxes for accounts. An existing tax can be added to an account or a new tax can be created for an account.
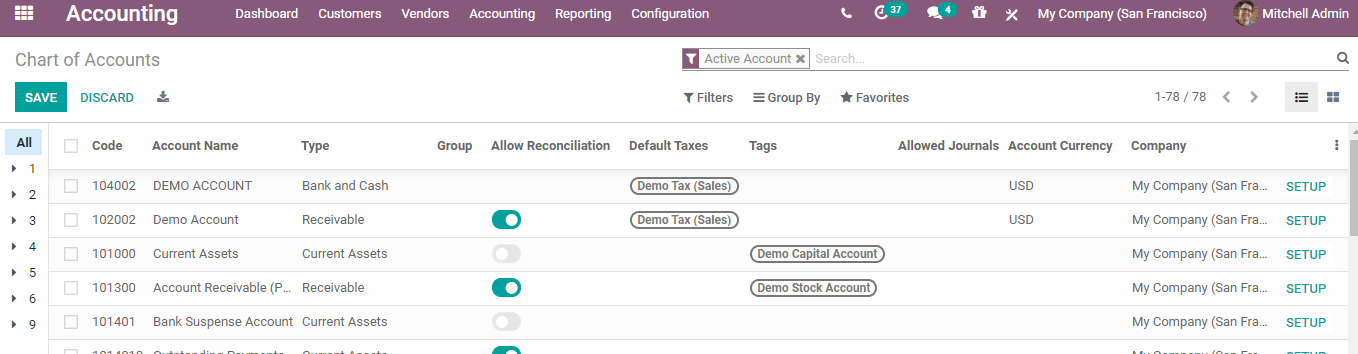
Go to Accounting -> Configuration -> Chart of accounts.
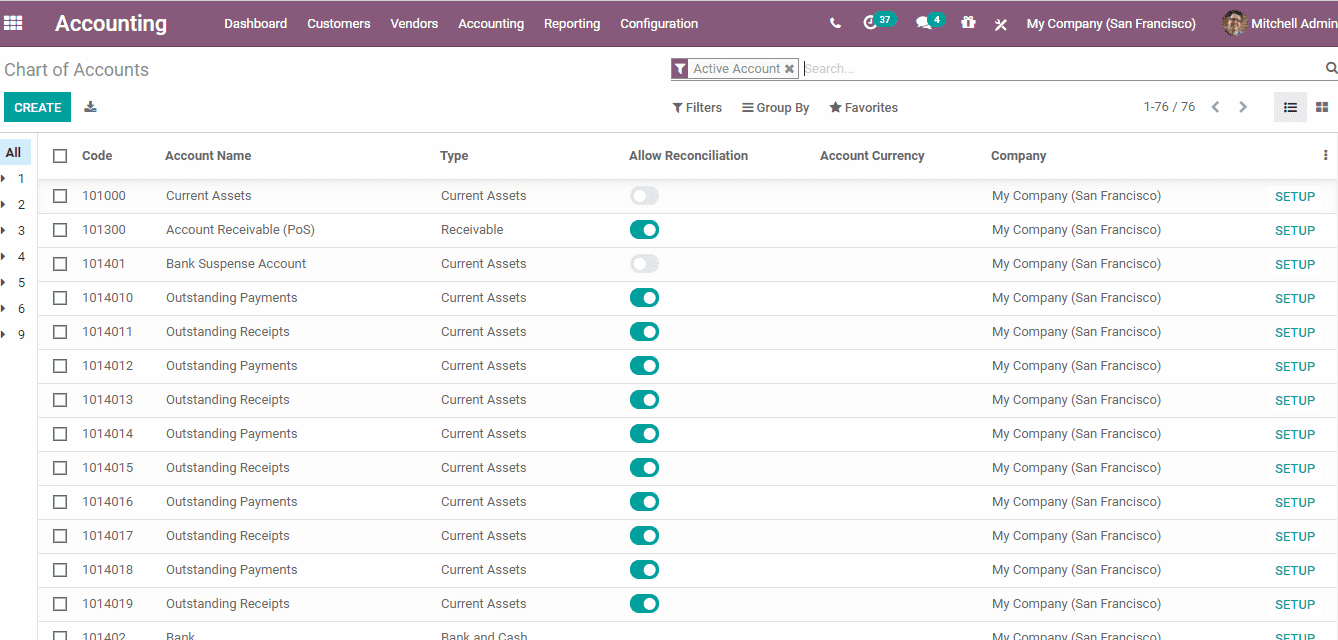
In the above-given window, we can see a number of existing accounts. We can add the tax to any of these accounts. Tax can be added by creating a new account.
To create a new account, click on Create Button.
The user will get a new form as given below
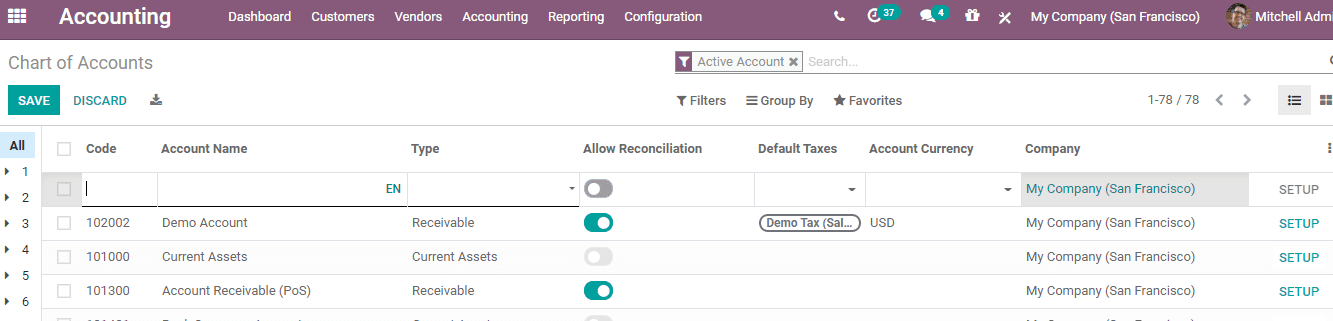
To create a new chart of account, we have to provide a code, account name, account type and other details. To add a tax on this account the user will have to select default taxes.
Here
Code: Code for the account
Name: Name of the account
Type: Type of account
Default taxes: Default tax for the account
Group: The account group is mentioned here
Company: The Company name
Account currency: Currency used for the account.
A user can also sell a product with no product tax
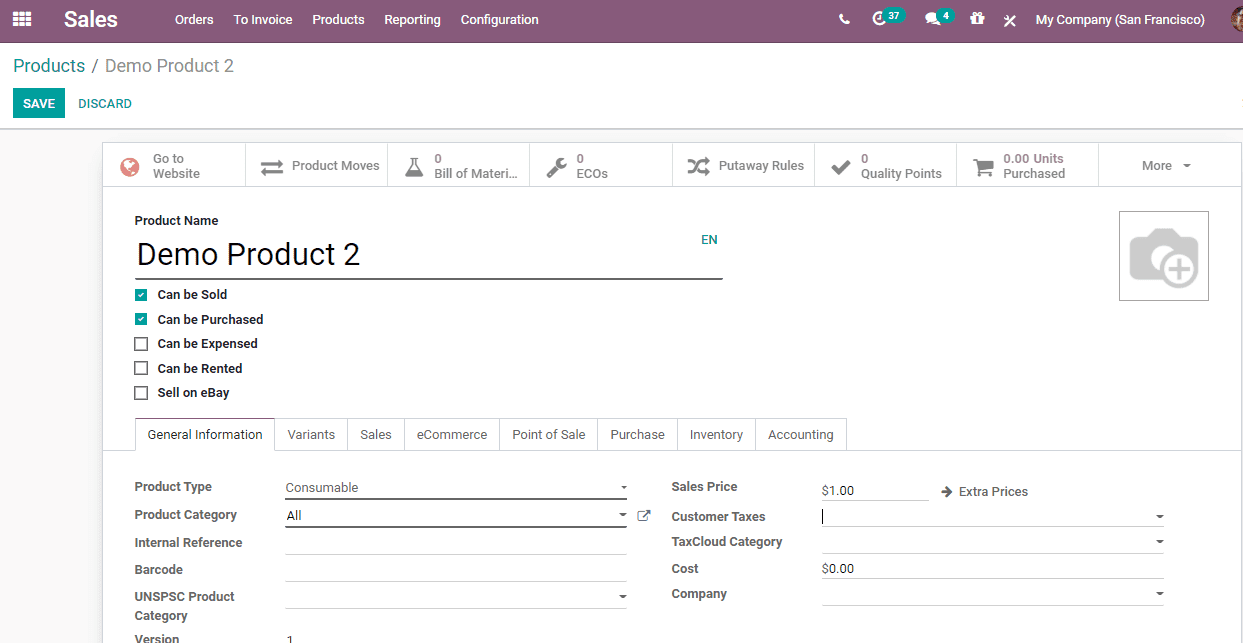
In this form, the customer tax is not mentioned. Now we can take an account which has a tax.
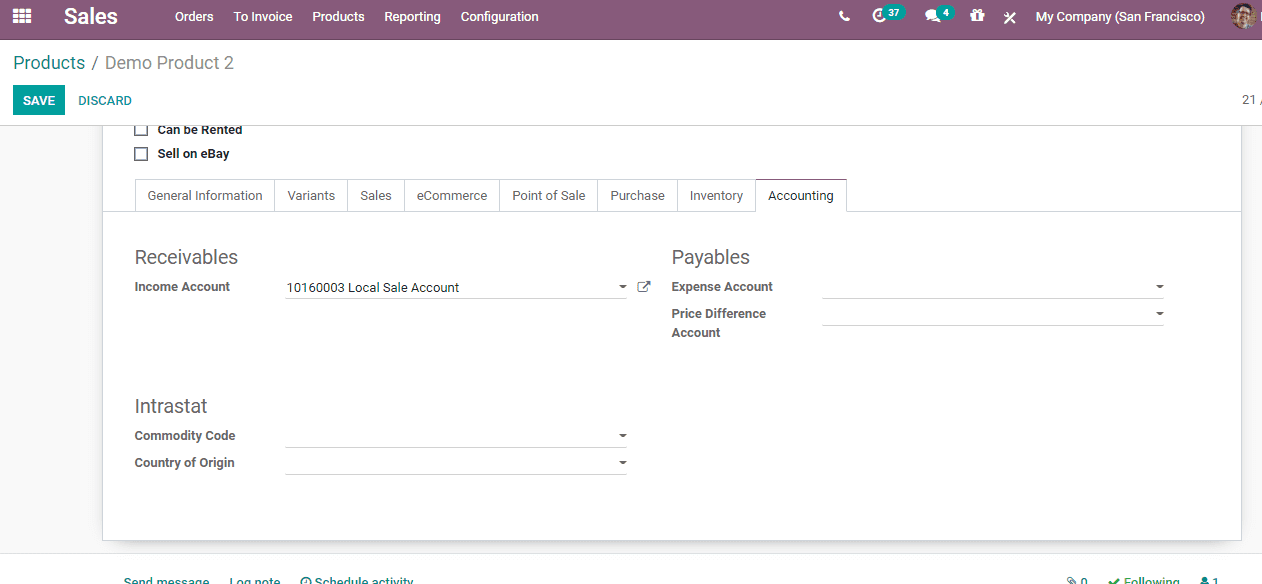
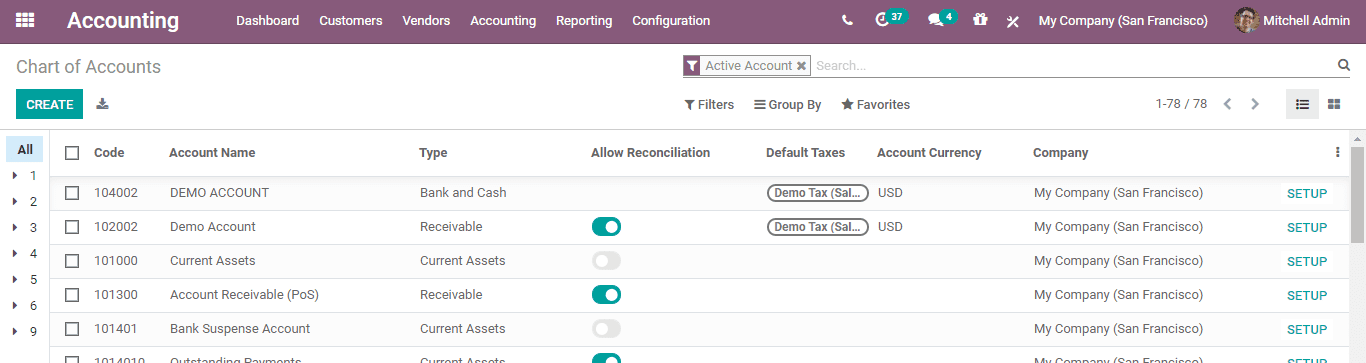
Now, we have selected a local sale account that is subjected to taxation.
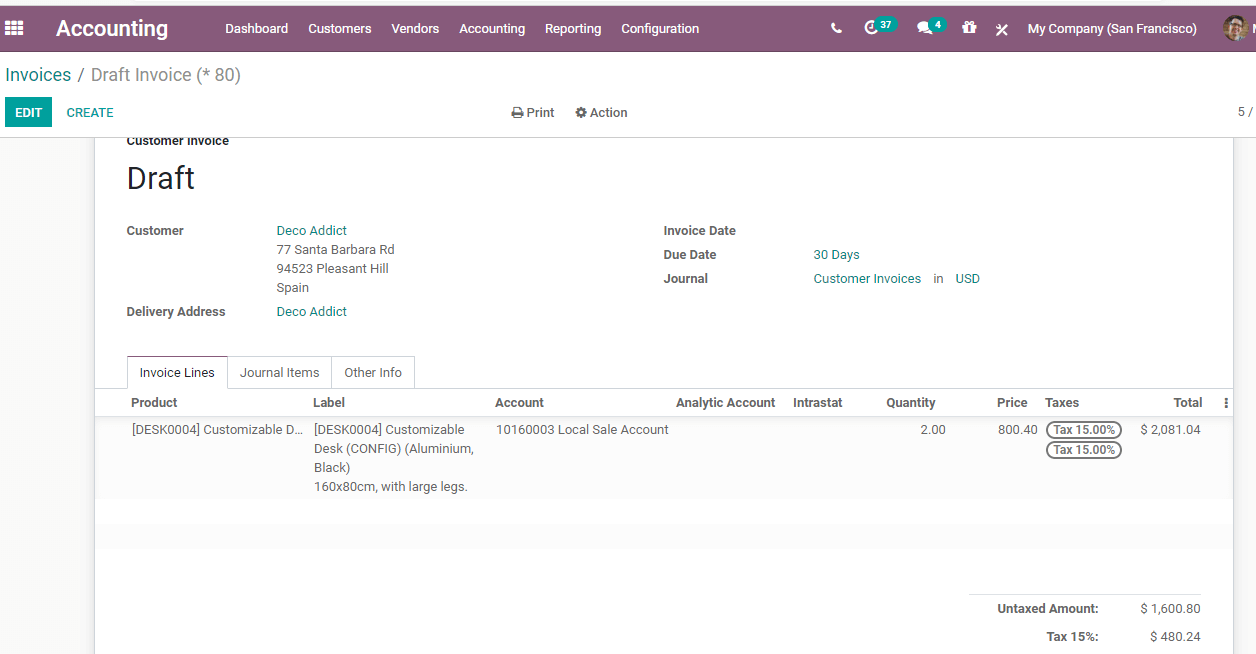
A user can now create a sale order for the product. First, create an invoice. For this go to Accounting> Customers> Invoices

Here, we can find that the account has been auto-filled as “local sale. In this case, we have not set product tax. So the second priority is account tax.
Tax on a Company
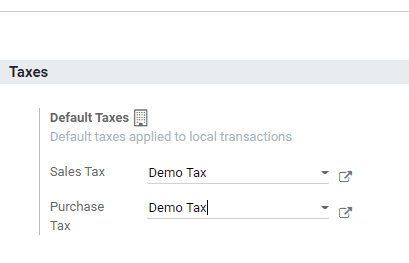
This feature helps us to assign tax for the company. To enable this go to Accounting -> configuration -> settings.
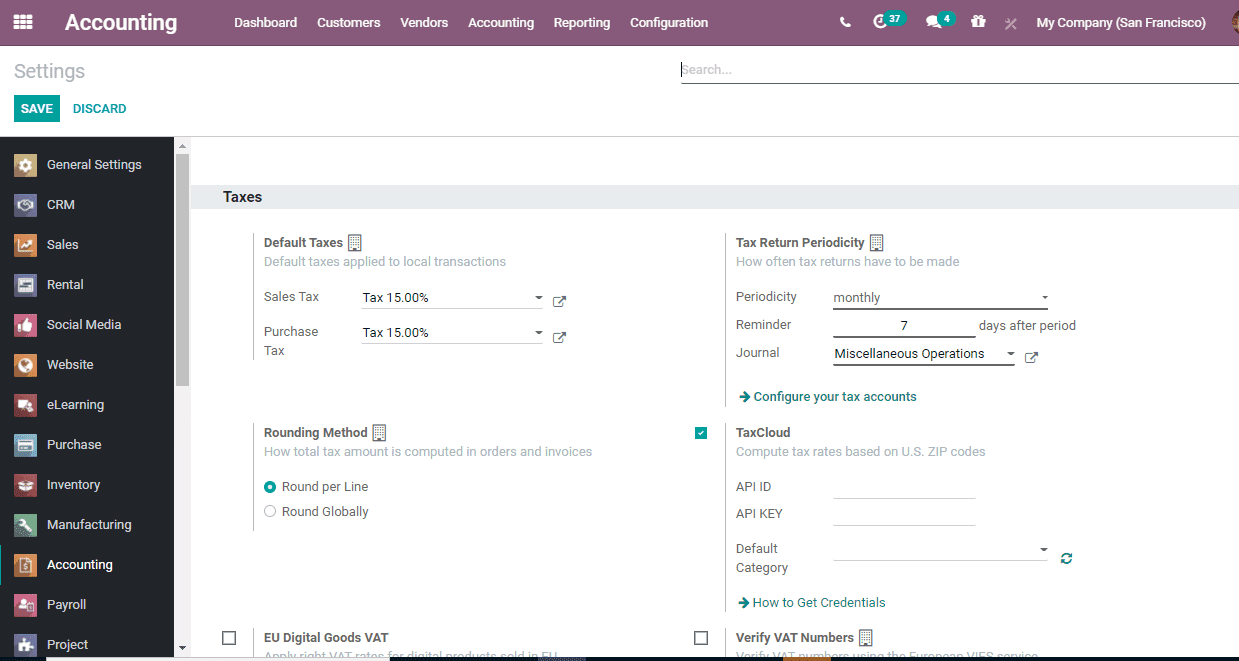
In the above image, we can see the sales and purchase taxes of the company. The default tax can be set from here. We have set a Demo tax for the company removing other taxes.
Then go back to invoices to view the changes.
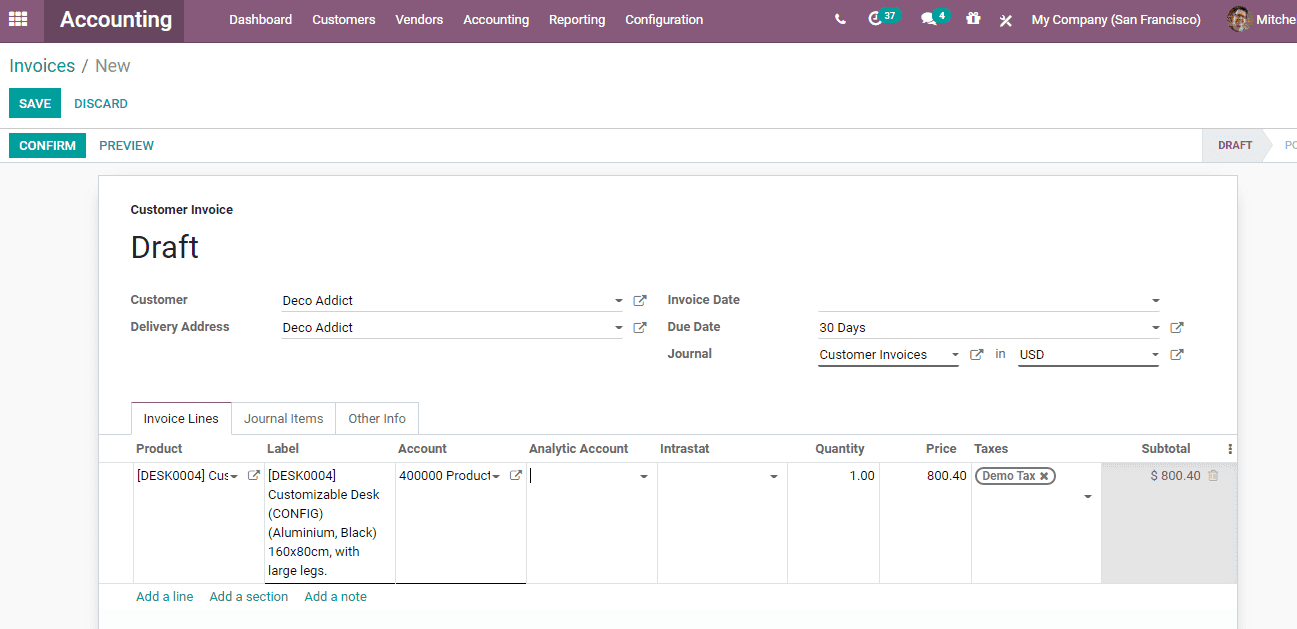
As we had set Demo tax as default tax, the tax here has also changed to Demo tax.
That means, in the absence of Product Tax and Account Tax, the next priority will be given to Company Tax.
How to set a group TAX
Some products may require the setting up of group taxes. Here, we can take into account the tax regime of India. In India we have GST. Usually, this GST amount is divided into central and state government taxes. For example, if the GST is 10 percent, it will be divided into Central GST (CGST) 5% and State GST (SGST) 5%. . In this case, a user will have to set group taxes in such cases.
To do this a user will have to create a child tax of CGST 5% and SGST 5%. Then the user will have to create another tax of GST as 10%. The tax can be computed as 'group tax' by adding the child taxes of CGST and SGST.
Child Tax CGST is 5%
Child Tax SGST is 5%
Group tax GST 10%
Here we can add children tax to the group tax.
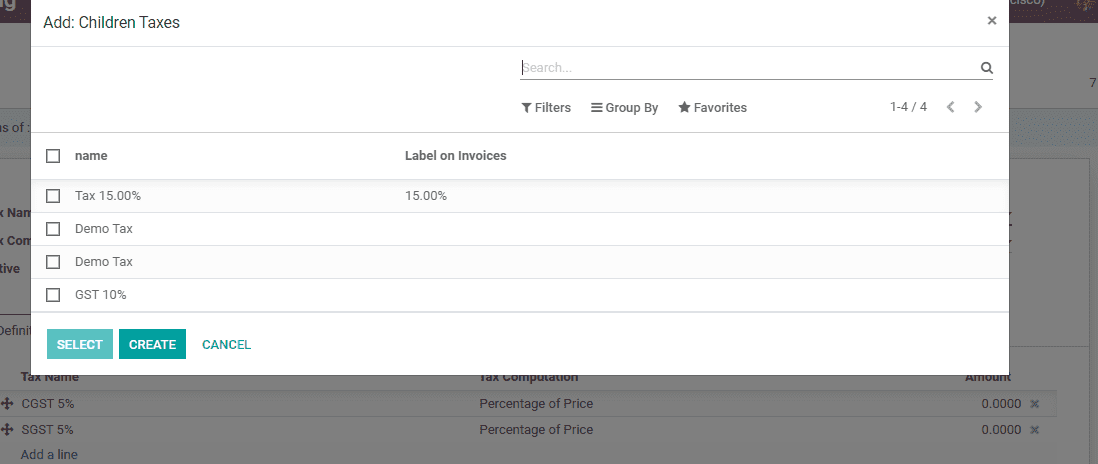
These are the steps to “group tax” and child tax ”.

After adding Children's Taxes to the Group Tax, it will be shown in the definition line as give above.
Tax included and Tax excluded
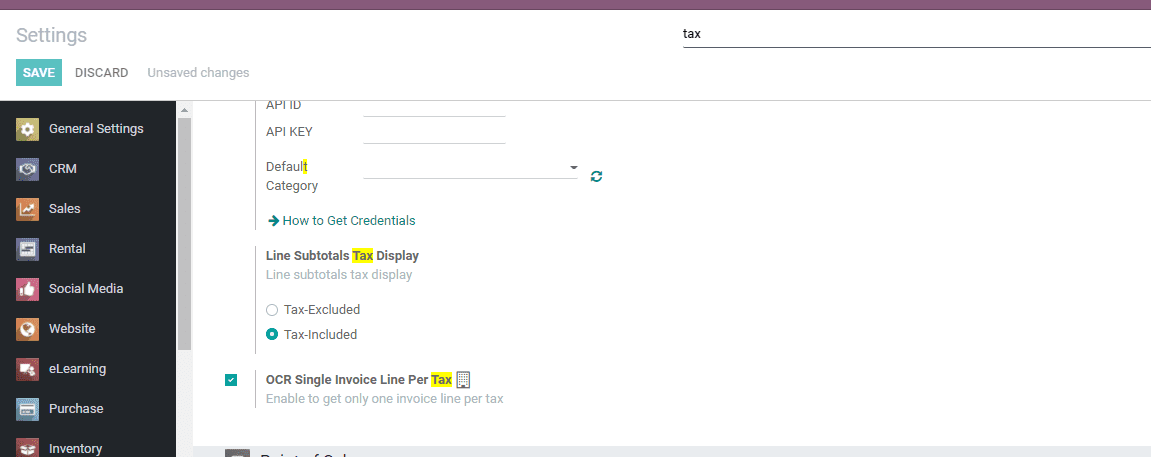
Odoo 14 enables a person to set tax included in the price and excluded from the price. For this, goto Accounting -> Configuration -> Settings search 'Tax' in the search box.
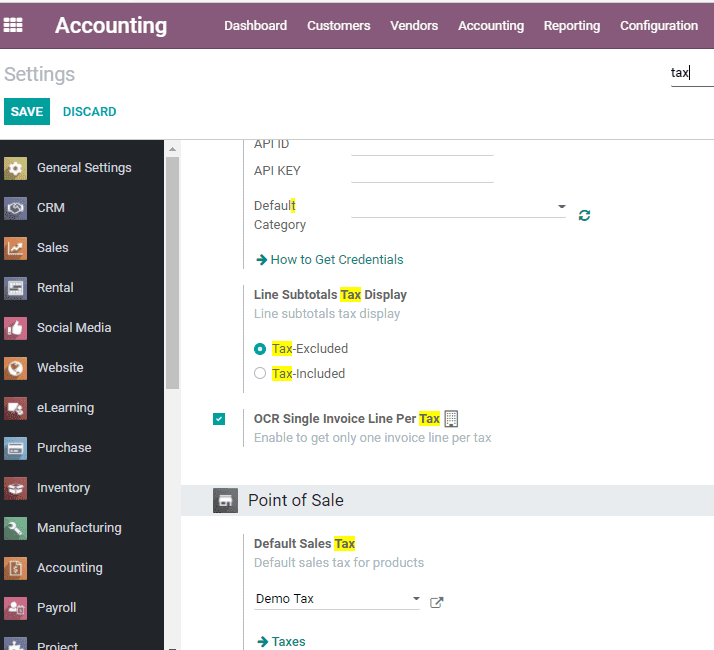
In the above-given image, there are two options under Line Subtotals Tax Display. They are Tax Included and Tax Excluded
Here, we have selected the line subtotal as Tax Excluded Price. That means the tax amount will not be shown in the subtotal price of the product.
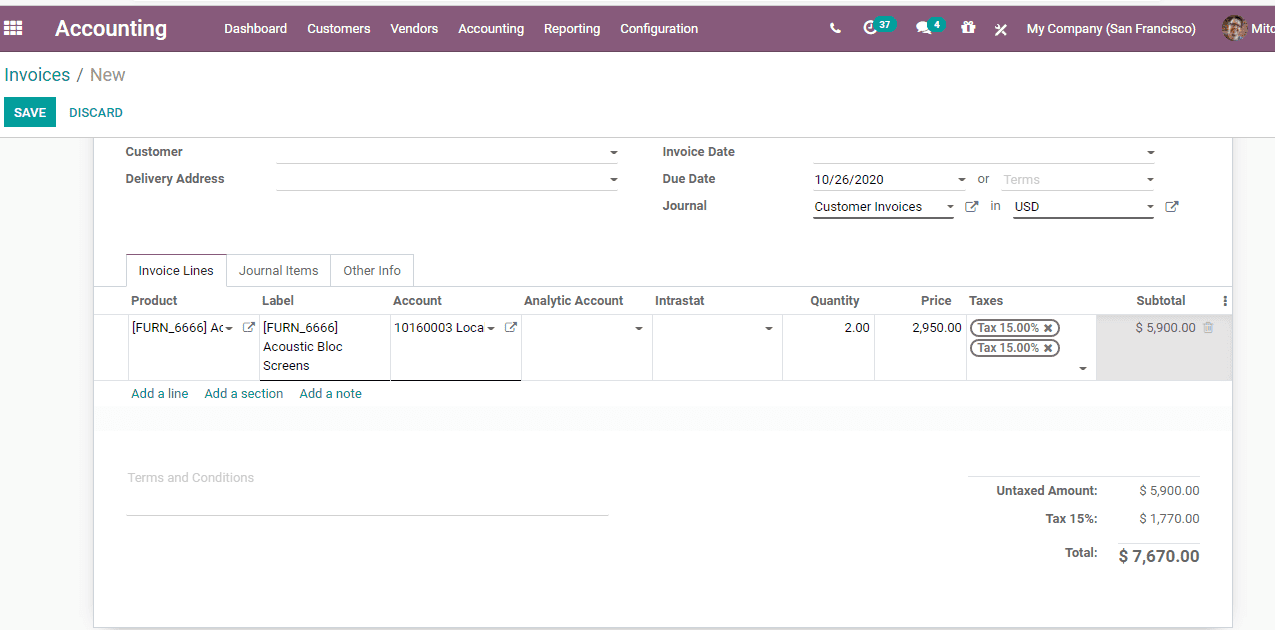
In the above-given image, the price for the product is 2950. Units of measure are 2. The Tax is 30 percent. On checking the subtotal we can find that the tax is excluded from the price.
Now, we can change the settings
Here we have enabled the Tax Included option. This will help you to add a tax amount to the price of the product.
Tax report
Accounting -> Reporting -> Tax reporting. The user can view all tax reports here.
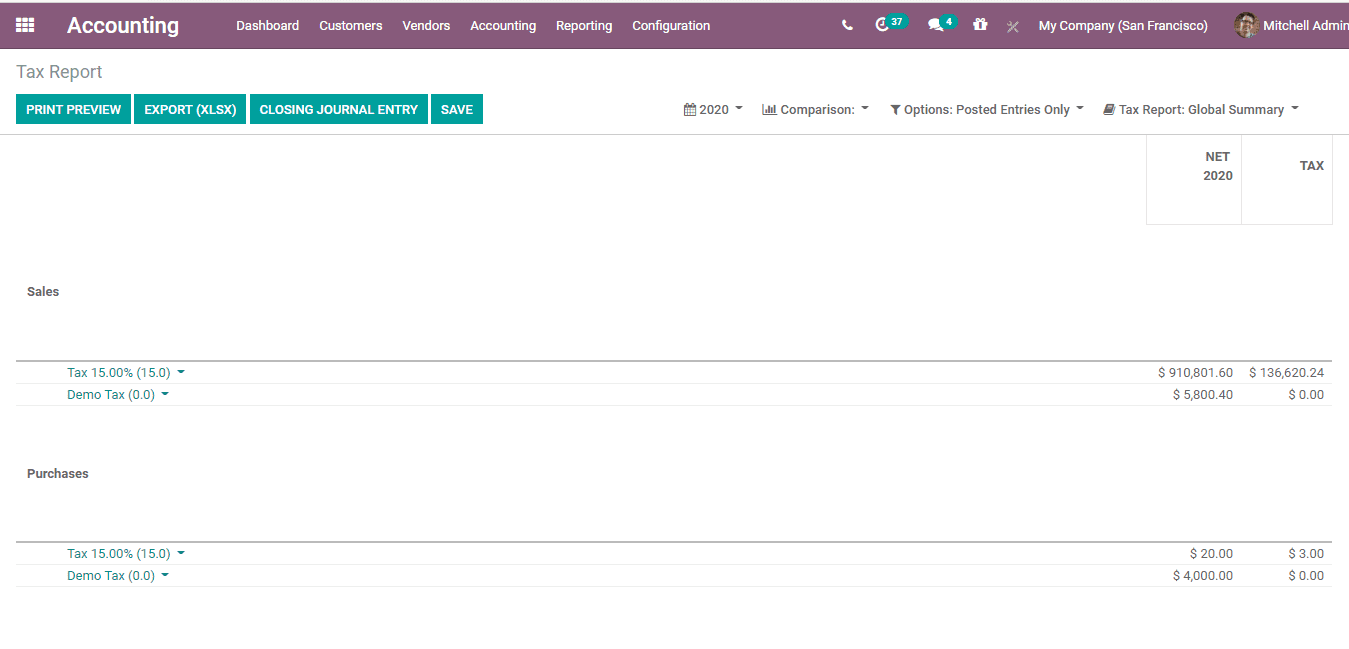
The user will be able to view all the taxes entered during the sales and purchase period.
There are numerous types of taxes, and their application varies greatly, depending mostly on your company’s localization. Tax can be set for a company, product, and account
Refer to our blog on Odoo 14 Accounting to know more about the Accounting Module in Odoo 14