In Odoo, a view represents how data is organized and displayed to users within the interface. It controls interaction and layout, and is defined through XML within the Odoo framework.
In the world of project management, visualizing tasks and their timelines is crucial for successful planning and execution. A Gantt chart is a powerful tool that allows you to do just that, showing the start and end dates of tasks in a clear, visual format. While Odoo offers a variety of views, including Kanban, List, and Calendar views, it doesn't provide a native Gantt view out of the box. However, with some customization and the use of the Vis Timeline library, you can create a robust Gantt view in Odoo.
What is Vis Timeline?
Vis Timeline is a popular JavaScript library that provides a visual timeline to display events in time. It’s highly customizable, allowing you to create dynamic, interactive timelines with ease. Vis Timeline is a great choice for creating a Gantt chart because it’s lightweight, flexible, and integrates well with web applications like Odoo.
Creating a gantt view in odoo.
Step 1: Install the module Gantt View Odoo 18
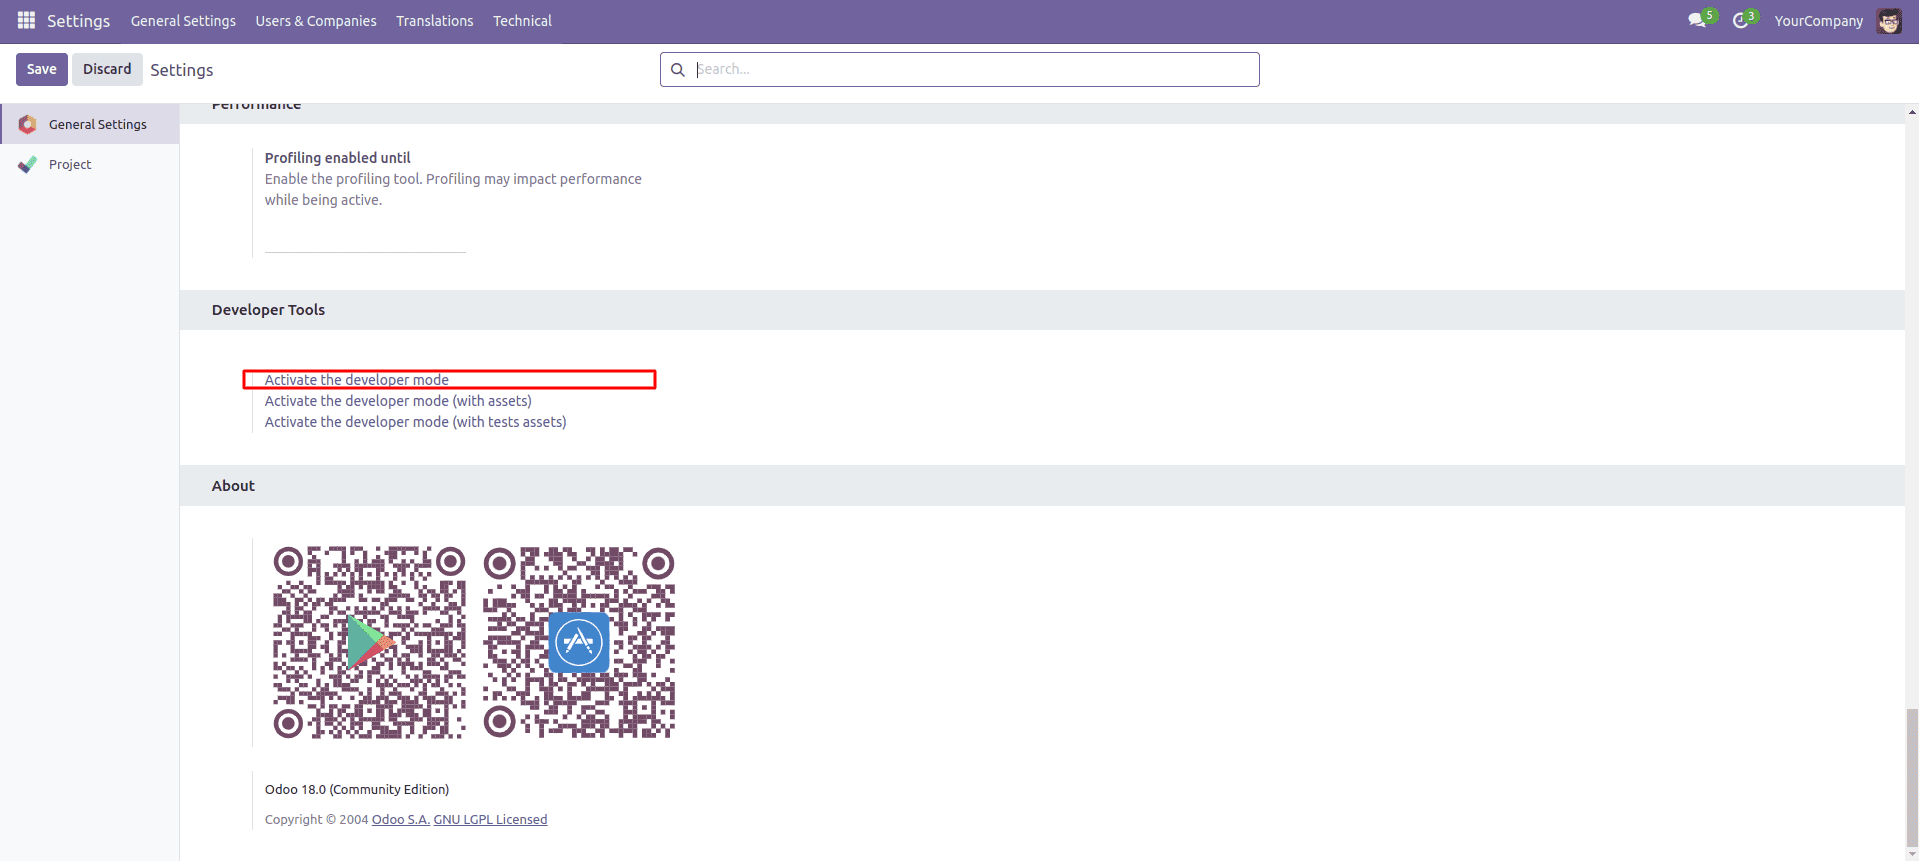
Step 2: Navigate to the Settings module and activate the developer mode
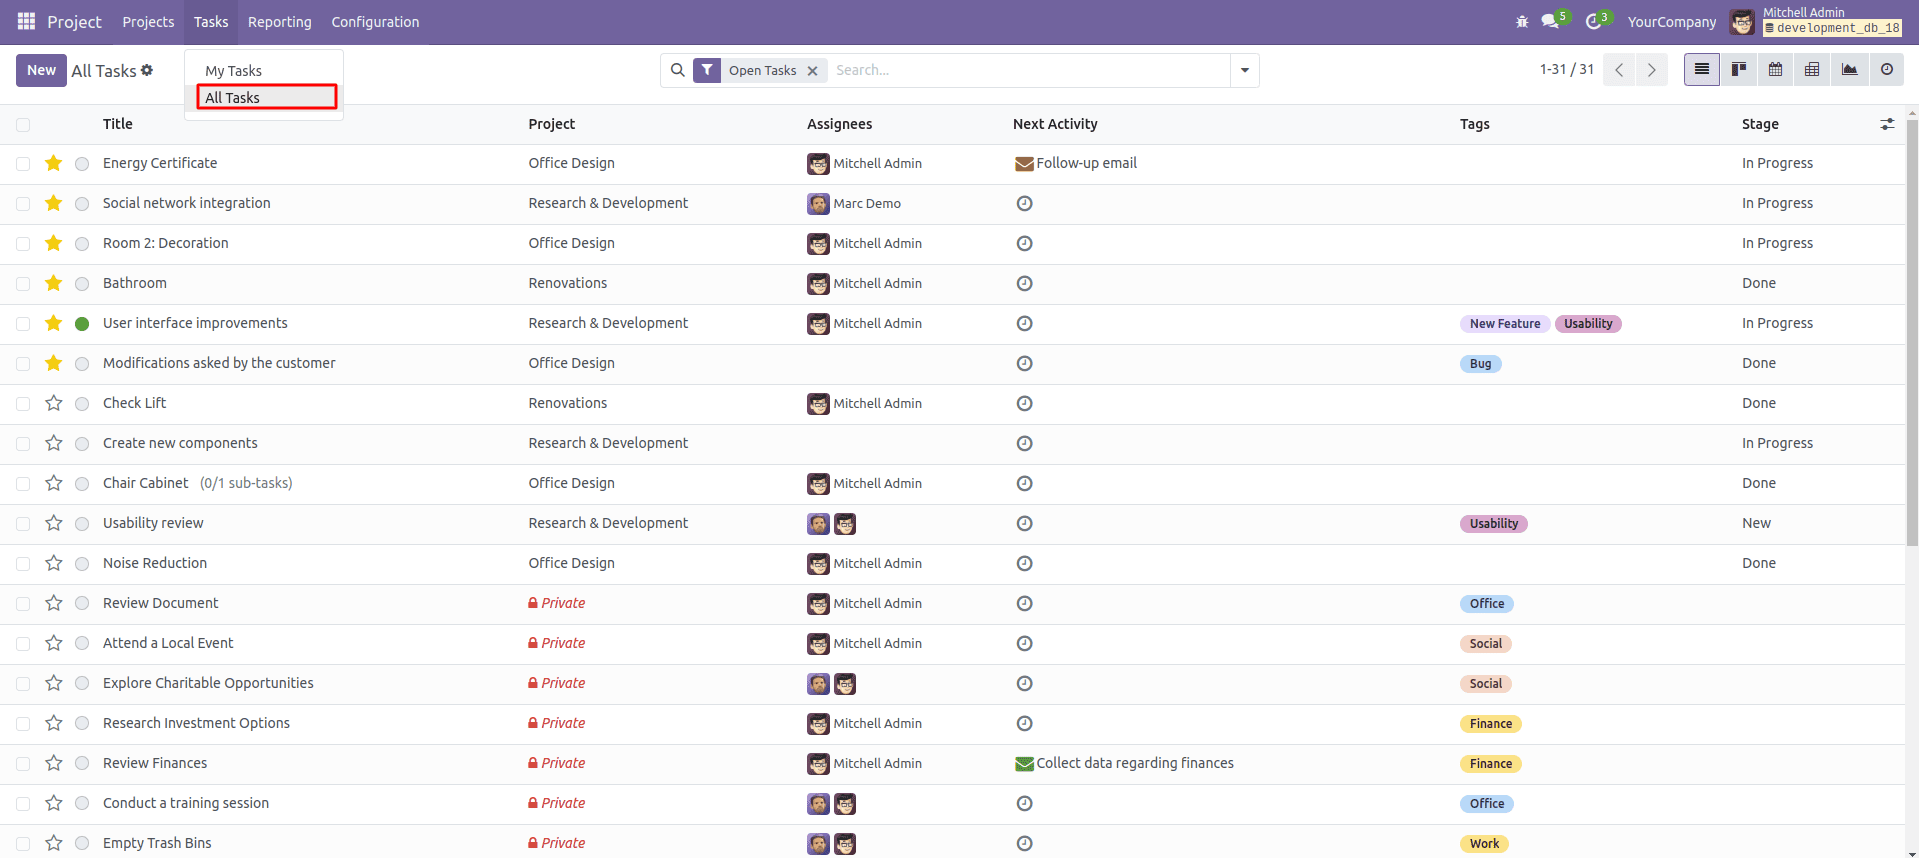
Step 3: Navigate to the Project module and open 'All Task' view.
Step 4: Click on the marked button as shown in the below image and then click 'Action' menu.

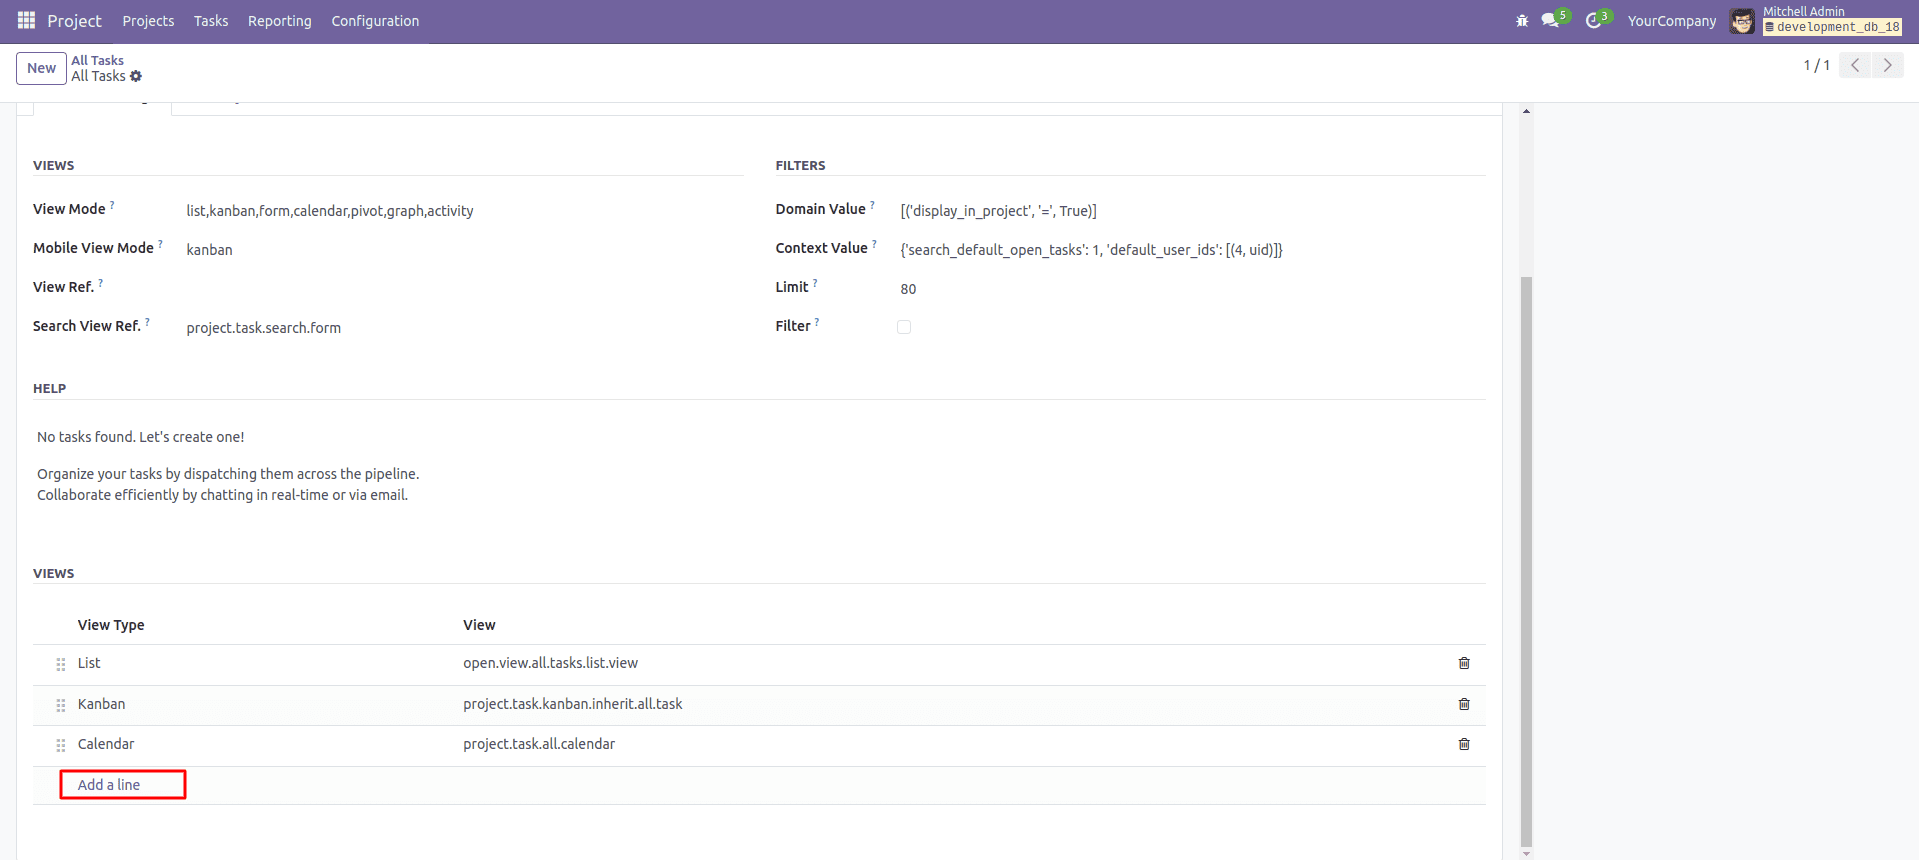
Step 5: Then scroll down and click on the Add a line button
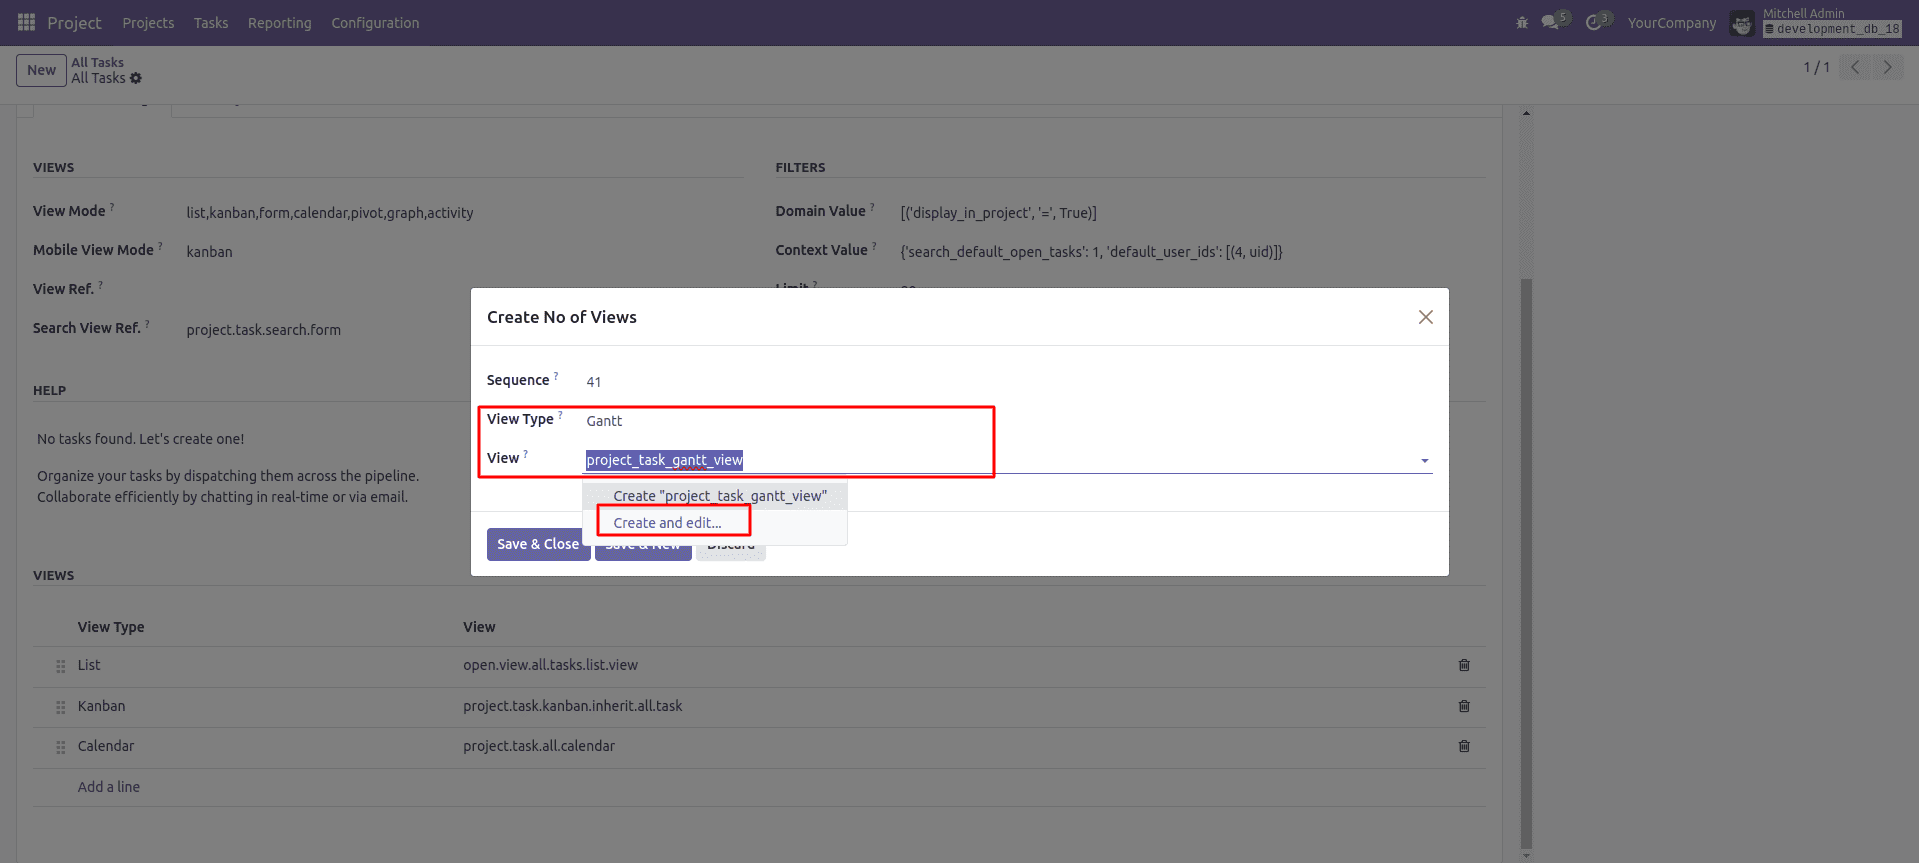
Step 6: A wizard will be opened and add 'Gantt' inside the field 'View type' then in the field 'View' define a name for your view. Here I have named the view as 'project_task_gantt_view', then click on the create and edit button as shown in the below image.
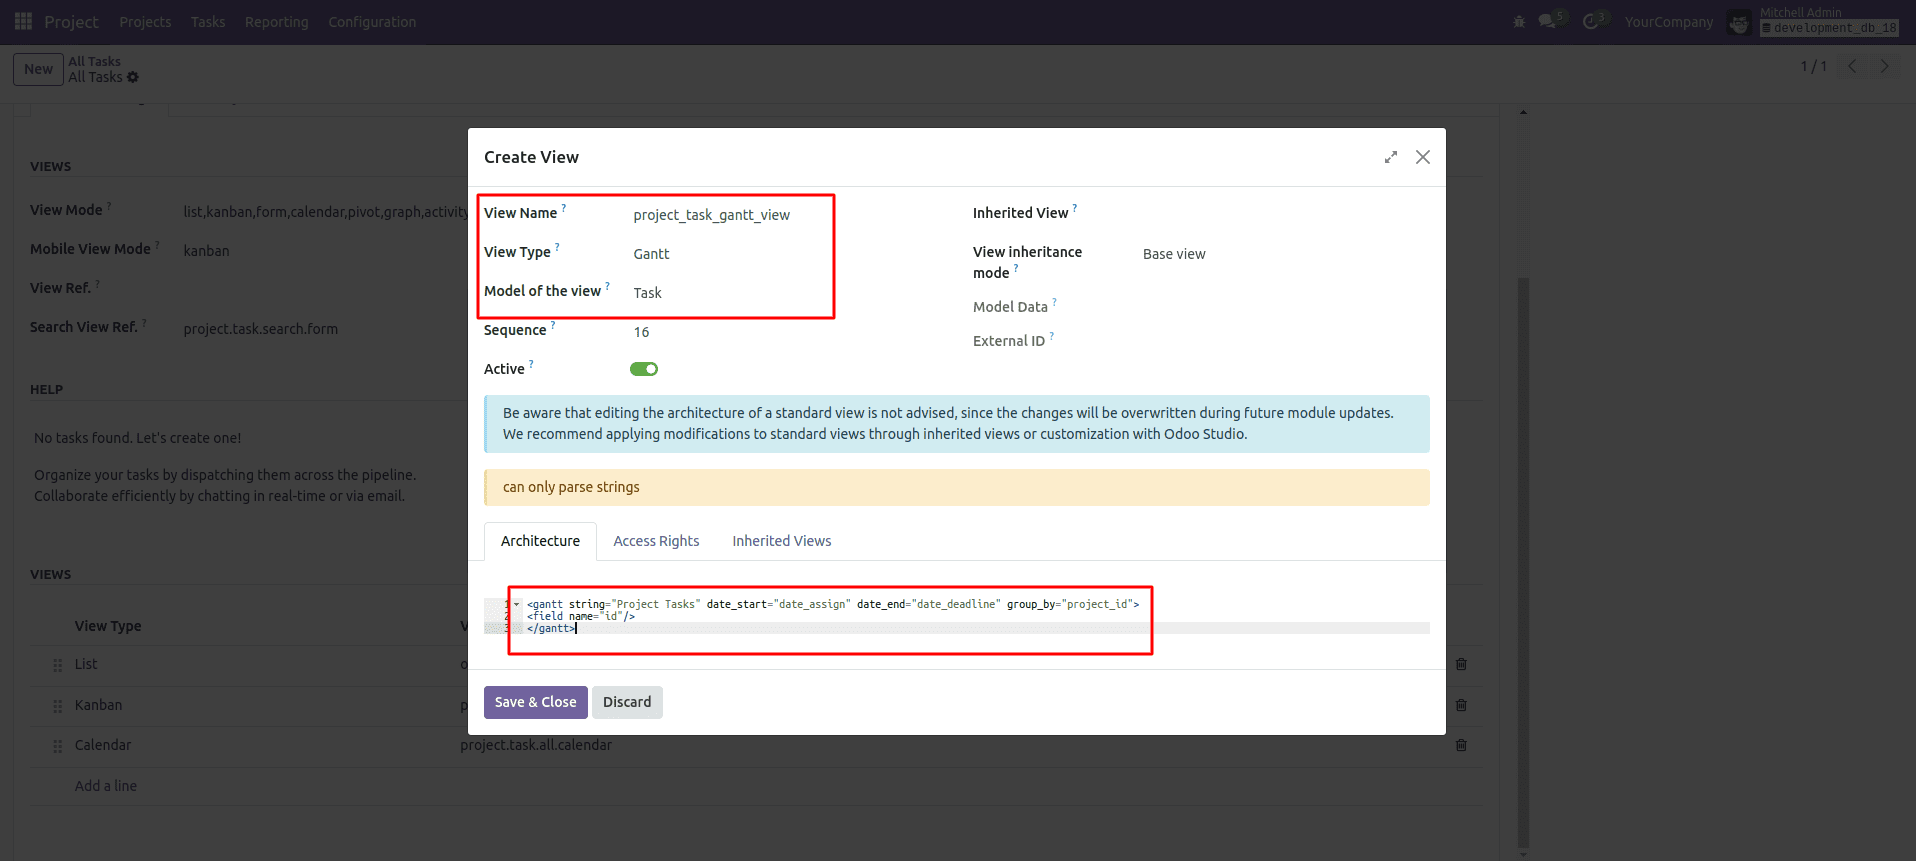
Step 7: A wizard will be opened and add 'Gantt' inside the field 'View type' then 'Task' in the field 'Model of the view'. Then in the Architecture section add the below code as show in below image. Then save and close, again save and close.
<gantt string="Project Tasks" date_start="date_assign" date_end="date_deadline" group_by="project_id">
<field name="id"/>
</gantt>
Note that 'date_assign' and 'date_deadline' are the fields used for the gantt view's start and end date. These fields are mandatory filed. If you have start date and end fields in another name you need to change the code like date_start="Start date field" date_end="End date field".
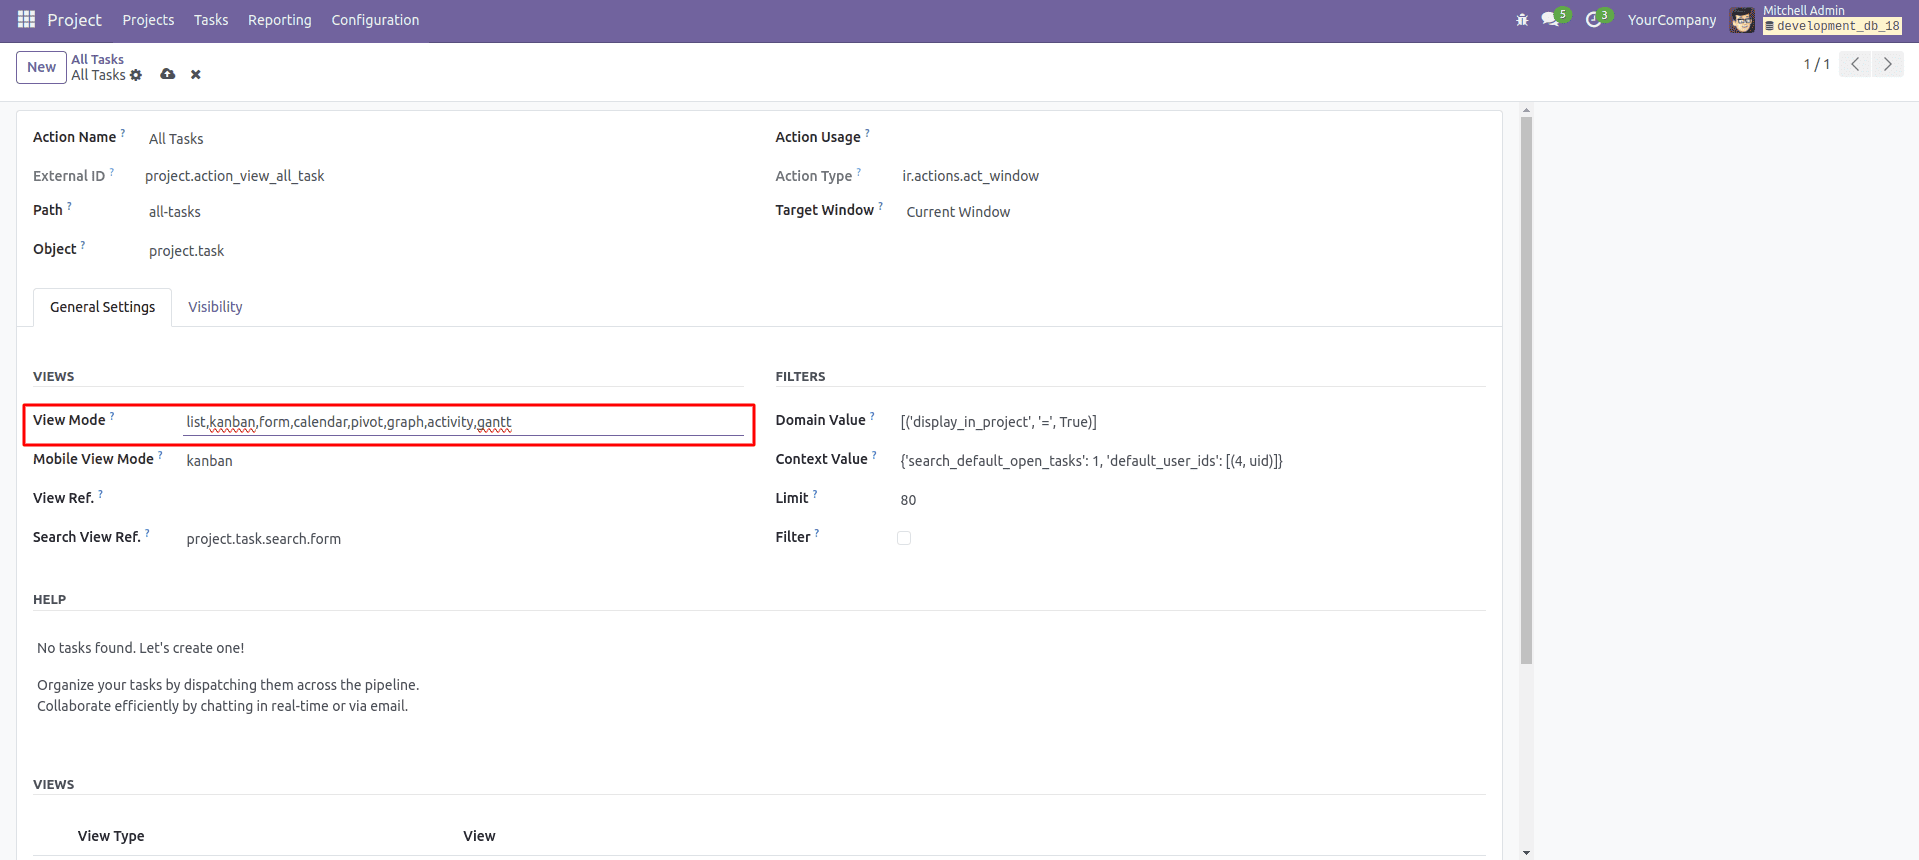
Step 8: Add gantt in the field 'View mode' as shown in the below image.
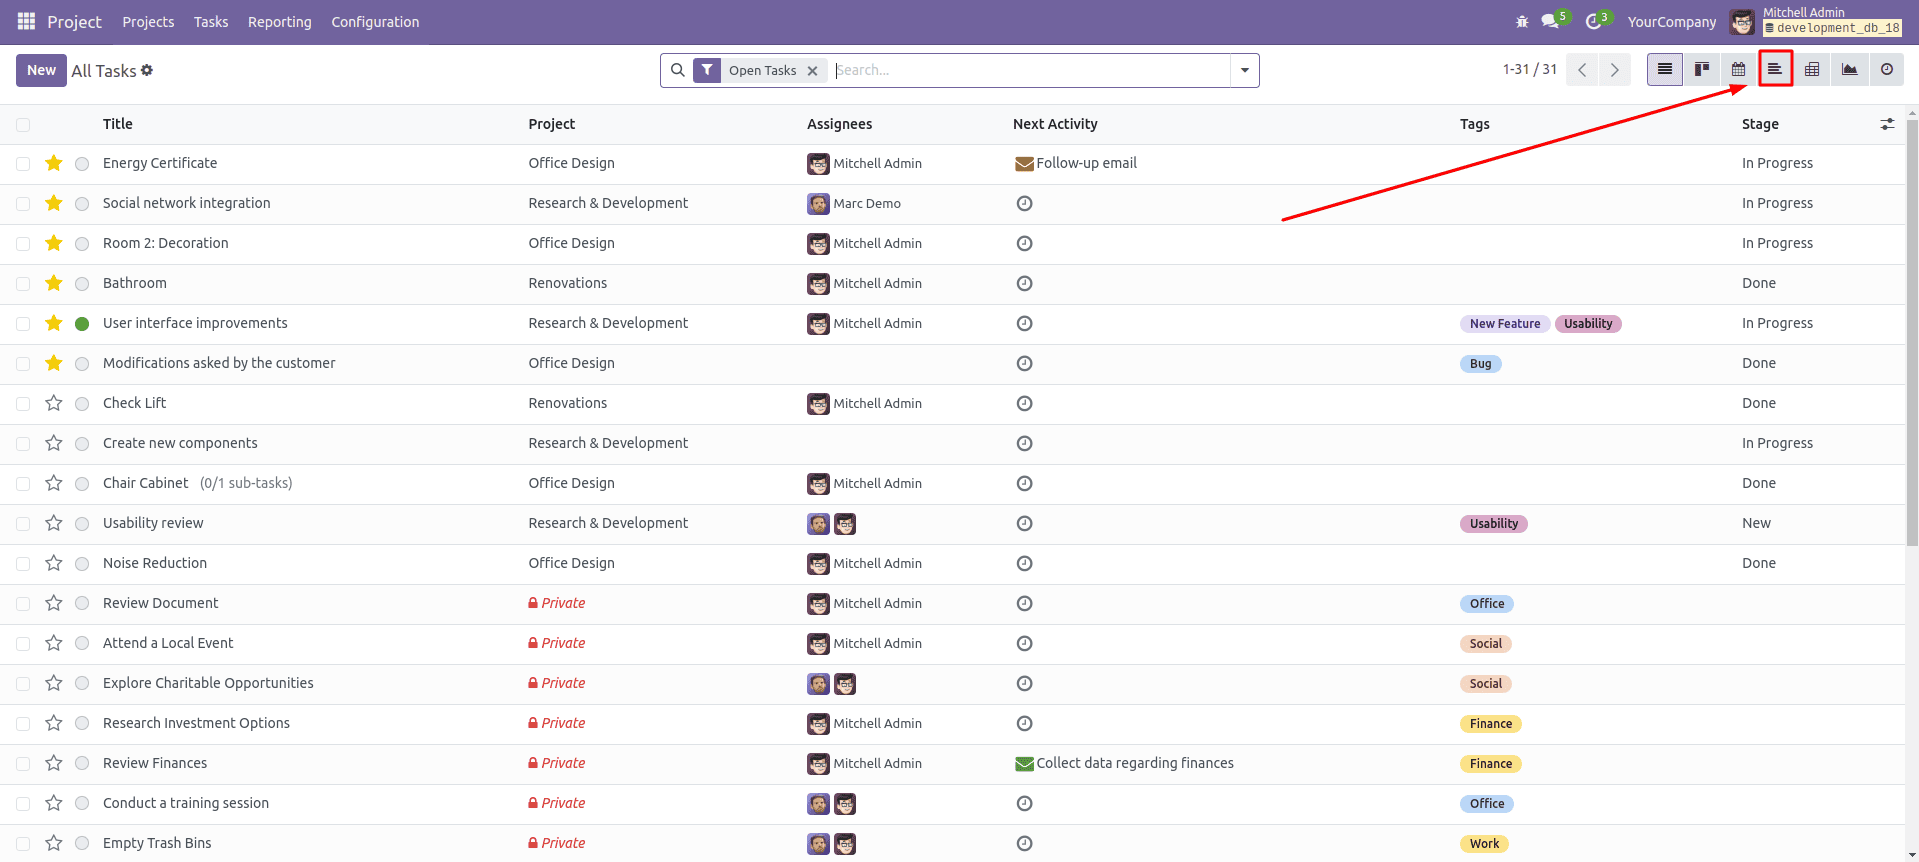
Step 9: Save the form and click on 'All Tasks' menu, and click on the Gantt icon as shown in the below image.
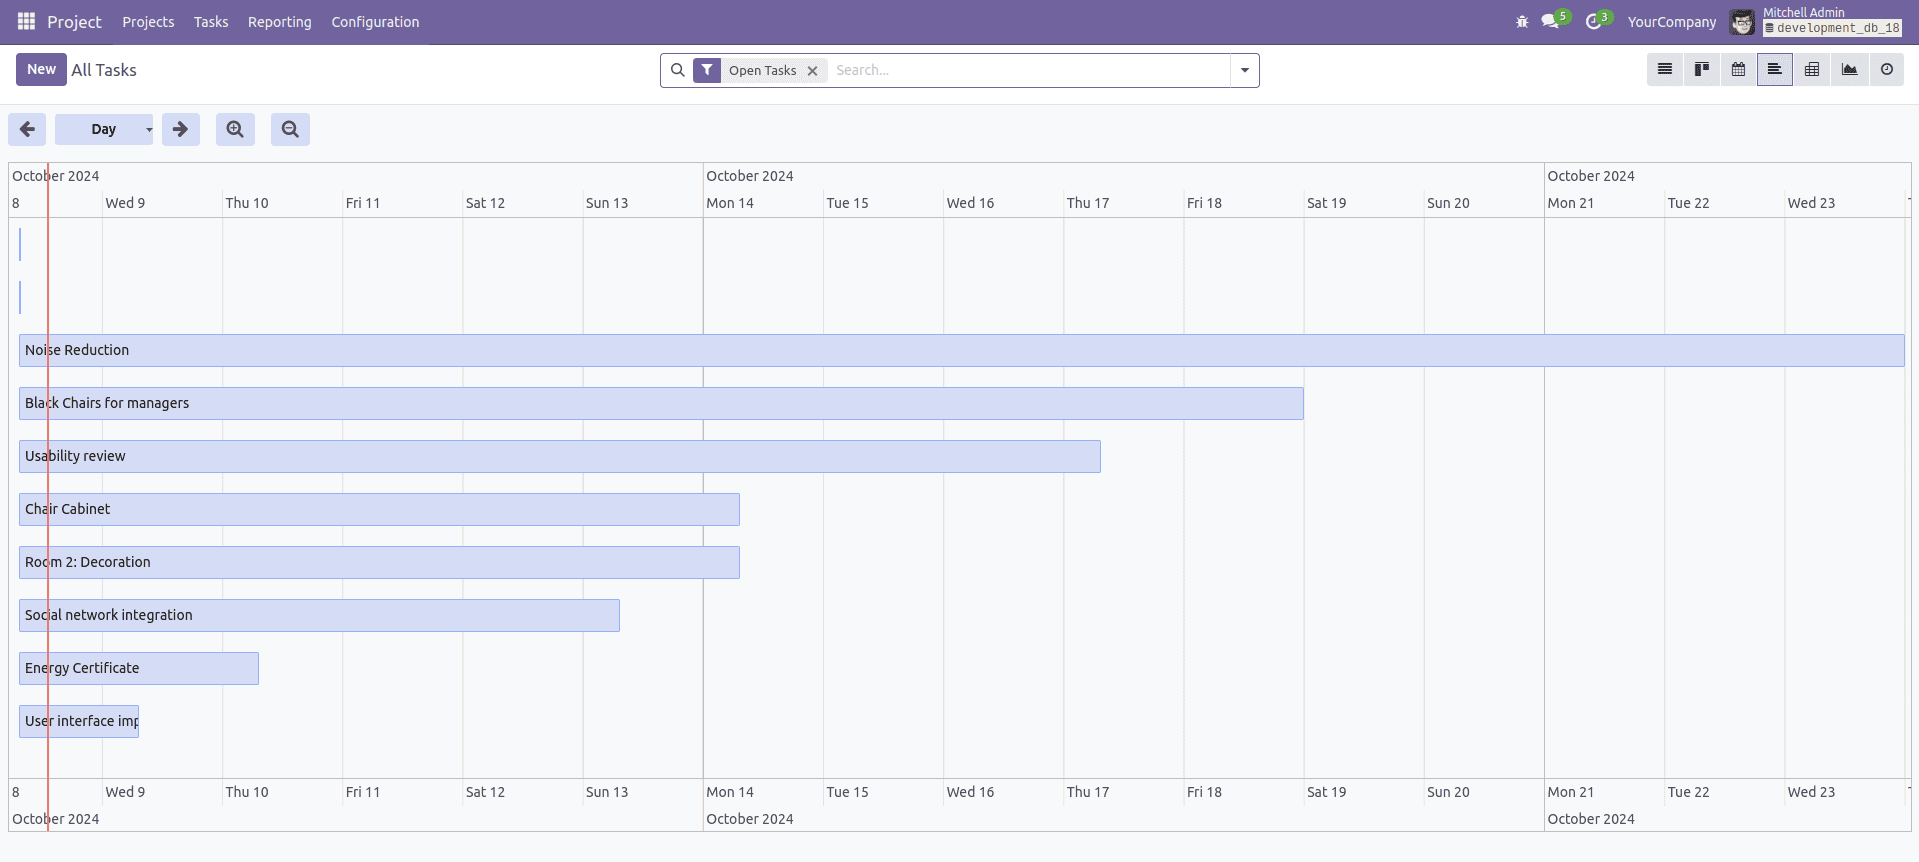
Step 10: Test the view.
Conclusion
By integrating the Vis Timeline library with Odoo 18, you can significantly enhance project visibility and task tracking through a custom Gantt view. This approach not only improves planning and scheduling but also makes your project management workflow more efficient and intuitive.
To read more about How to Create Gantt View in Odoo 18, refer to our blog How to Create Gantt View in Odoo 18.