Odoo as a framework is known for its vast set of Customizable fields and models. However, in certain situations, developers are forced to implement a new data type, it may be because of a sophisticated business model or because of pure technical reasons. In both situations, the developers have to define a new type which may be an inherited type of an existing field or can be a completely new one. We can define fields for any datatype the Postgresql allows. However, we will need to define how the field should behave in different scenarios. For example, if you define a new field to store time values, you have to define how it has to be read by the odoo views, caches, and export options.
In this blog, we will discuss creating Point Data Type which denotes a point on a plane. We will use the builtin Postgres point data type, it should look like this (x,y). Follow the below steps in order to make it happen.
Step 1:
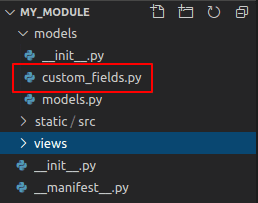
First of all, we have to create a new python file to define the field.I strongly suggest creating a separate file instead of the current working file so that it can be imported anywhere. Here, I’m following the below structure.
Now I have to define the field properties of our pointer field. You can refer to the below code as an example on custom_fields.py.
from odoo.fields import Field
class Point(Field):
""" Encapsulates an :class:`point`. It inherits the odoo.fields."""
"""Field class in order to get all the basic features of an odoo field"""
type = 'point'
""" The postgresql data type we're using for this field"""
column_type = ('point', 'point')
def convert_to_column(self, value, record, values=None, validate=True):
# Converting to column inorder to save the data
# Since we're using builtin postgres type
# no need for extra efforts
return value
def convert_to_record(self, value, record):
# Converting to colurecord inorder to handle the data
return value or {}
def convert_to_read(self, value, record, use_name_get=True):
# Converts the data to a readable format
# Just on case if we have any size incompatibility
# here, it's fine
return value
def convert_to_export(self, value, record):
# Converting the data to be Excel or csv compatible
if value or value == "":
return value
return ''
Step 2:
Since we have defined the new Field Type, we need to import it on where we need to use it, it will not be available in the builtin odoo.fields, we will have to import it individually. Please refer to the below code on models.py on how to use it in your models.
from odoo import models, fields
from .custom_fields import Point
class ResPartner(models.Model):
_inherit = 'product.template'
point = Point(string="Point on Plane")
Step 3:
We’re done with the models, now what..? We need to bring it into the view. We can display this data in a Char widget if we return the data from the convert_to_record method and convert_to_read method as strings. But, there is no point in doing that since we’re doing a new field type.So we have to develop a custom widget for this specific field.In this example, I will just display the X and Y values. However, according to the requirement, you can mark it on an SVG or canvas. Refer below codes to define a new widget.
Create a new file for the widget’s qweb code, I have created the file named as field_point.xml under static/src/xml
<?xml version="1.0" encoding="UTF-8" ?>
<templates id="template" xml:space="preserve">
<!-- Assuming that the data send from JavaScript
will be in a key called value -->
<t t-name="fieldPoint">
<t t-esc="value"/>
</t>
</templates>
Now we need to define the JavaScript for the Widget here, I created a file called point_widget.js under static/src/js refer to the below code on how to render the above-defined qweb template
odoo.define('my_module.point_widget', function (require) {
"use strict";
var AbstractField = require('web.AbstractField');
var core = require('web.core');
var fieldRegistry = require('web.field_registry');
var QWeb = core.qweb;
var FieldPoint = AbstractField.extend({
_render: function () {
this.$el.html(QWeb.render('fieldPoint', {
// passing data as an object
value: this.value,
}));
},
});
// Adding widget to Field Registry so that
// It will be accessible across the system
fieldRegistry.add('point_widget', FieldPoint);
// Returning the widget in case we need to
//extend the widget later on
return FieldPoint;
});
Step 4:
Now we need to import the JavaScript to the odoo JS and also register our template in the qweb.
I created a file called assets.xml under views in order to import the JavaScript as below.
<?xml version="1.0" encoding="utf-8"?>
<odoo>
<data>
<template id="assets_backend" inherit_id="web.assets_backend">
<xpath expr="." position="inside">
<script type="text/javascript" src="/my_module/static/src/js/point_widget.js"></script>
</xpath>
</template>
</data>
</odoo>
Now let’s add the qweb in the manifest as well as add the assets.xml file on the system.
{
'name': "Point Widget",
'version': '13.0.1.0',
'category': 'Extra Tools',
'author': 'Cybrosys Techno Solutions',
'website': "https://www.cybrosys.com",
'company': 'Cybrosys Techno Solutions',
'maintainer': 'Cybrosys Techno Solutions',
'summary': '',
"description": """""",
'depends': ['base','web'],
'data': [
'views/assets.xml',
],
'qweb': ['static/src/xml/field_point.xml']
}
We’re done, the only thing remaining is, calling this widget in your field. Refer to the below code for it.
<?xml version="1.0" encoding="utf-8"?>
<odoo>
<record id="product_form_inherit_add_point" model="ir.ui.view">
<field name="name">product.template.form.point</name>
<field name="model">product.template</field>
<!--The record id i'm using here is arbitrary, not real -->
<field name="inherit_id" ref="sale.product_template_form">
<field name="categ_id" position="after">
<field name="point" widget="point_widget"/>
</field>
</field>
</record>
</odoo>
I hope this blog will help users to understand the basics of creating a new field type in odoo and developing its views.
If you are looking for an Odoo Customization Service or a single module for your specific need we will make it for you. If you have any requirements contact us.