In this blog, we are going to see how to create a new pos screen using owl in Odoo 14. For creating a new screen in pos in this example we will be using qweb and js. Let us create a screen for viewing the product categories in this example. For this, first, let us add a button named 'View Categories' in static/src/xml/category_button.xml.
<?xml version="1.0" encoding="UTF-8"?>
<templates id="template" xml:space="preserve">
<t t-name="ProductCategoryWidget" owl="1">
<div class="control-button category_view">
View Categories
</div>
</t>
</templates>
Here we added a template named 'ProductCategoryWidget' and specified owl="1". Now we need to specify the file in the qweb section of the manifest.
'qweb': ['static/src/xml/category_button.xml'],
Then, let us add the js file in static/src/js/category_button.js and also add the path to js file by inheriting the 'point_of_sale.assets' in views/assets.xml. We should specify the 'views/assets.xml' in the data part of the manifest.
<?xml version="1.0" encoding="utf-8"?>
<odoo>
<template id="assets" inherit_id="point_of_sale.assets">
<xpath expr="." position="inside">
<script type="text/javascript" src="/pos_category/static/src/js/category_button.js">
</script>
</xpath>
</template>
</odoo>
odoo.define ('pos_category.CategoryButton', function (require) {
   'use strict';
   const PosComponent = require ('point_of_sale.PosComponent');
   const ProductScreen = require ('point_of_sale.ProductScreen');
   const {useListener} = require ('web.custom_hooks');
   const Registries = require ('point_of_sale.Registries');
   class CategoryButton extends PosComponent {
   }
   CategoryButton.template = 'ProductCategoryWidget';
   ProductScreen.addControlButton ({
       component: CategoryButton,
       condition: function () {
           return true;
       },
       position: ['before', 'SetPricelistButton'],
   });
   Registries.Component.add (CategoryButton);
   return CategoryButton;
});
Here we have extended the 'PosComponent' and added the class 'CategoryButton' for our button 'View Categories'. Then we specified the xml template to be linked to this class as 'ProductCategoryWidget' which is where we added the button. Now that we added the template to our class 'CategoryButton', we need to add the button to the screen. For this we specify the class as a component, before or after the position where we want the button and the conditions as below
 ProductScreen.addControlButton ({
       component: CategoryButton,
       condition: function () {
           return true;
       },
       position: ['before', 'SetPricelistButton'],
   });
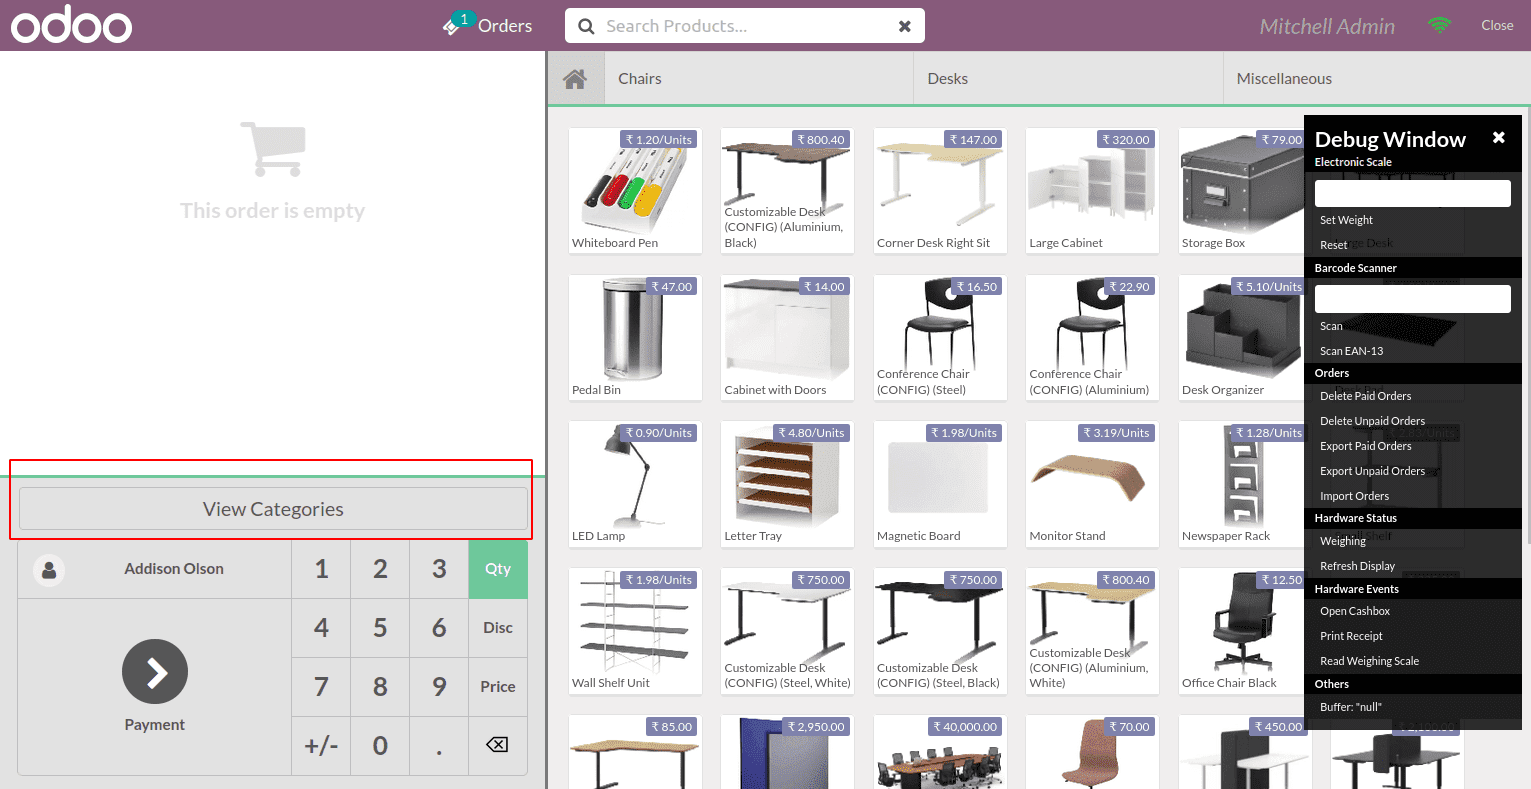
Then we add the component to the registry and upgrade the module. We can see that button gets added as below.
Now that we have added the button to the screen, we need to define the action to be taken when we click on the button. For this, let us add an onclick function and specify it in the constructor of our CategoryButton class.
class CategoryButton extends PosComponent {
   constructor () {
       super (... arguments);
       useListener ('click', this.onClick);
   }
   async onClick () {
       await this.showTempScreen (
           'CategoryScreen',
       );
   }
}
Here we have specified that when we click on the 'View Categories' button, it should display a template with name 'CategoryScreen'. So now let's define the CategoryScreen template in static / src / xml / category_screen.xml and specify it in qweb part of manifest.
<?xml version="1.0" encoding="UTF-8"?>
<templates id="template" xml: space="preserve">
<t t-name="CategoryScreen" owl="1">
<div class="clientlist-screen screen">
<div class="screen-content">
<div class="top-content">
<div class="button back "t-on-click =" back">
Back
</div>
< / div>
<section class="full-content">
<div class="client-window">
<section class="subwindow list">
<div class="subwindow-container">
<div class="subwindow-container-fix scrollable-y"><table class="client-list"><thead><tr><th> Name </th><th> Costing Method </th><th> Inventory Valuation </th>
</tr>
</thead>
</table>
</div>
</div>
</section>
</div>
</section>
</div>
</div>
</t>
</templates>
We have added a back button and specified onclick event for it and also added a table to display name, Costing Method and Inventory Valuation. Now let's add the js part of the template in /static/src/js/category_screen.js and specify its path in the views / assets.xml.
odoo.define('pos_category.CategoryScreen', function(require) {
   'use strict';
   const PosComponent = require('point_of_sale.PosComponent');
   const ProductScreen = require('point_of_sale.ProductScreen');
   const {useListener} = require('web.custom_hooks');
   const Registries = require('point_of_sale.Registries');
   class CategoryScreen extends PosComponent {
       back() {
               this.trigger('close-temp-screen');
       }
   }
   CategoryScreen.template = 'CategoryScreen ';
   Registries.Component.add(CategoryScreen);
   return CategoryScreen;
});
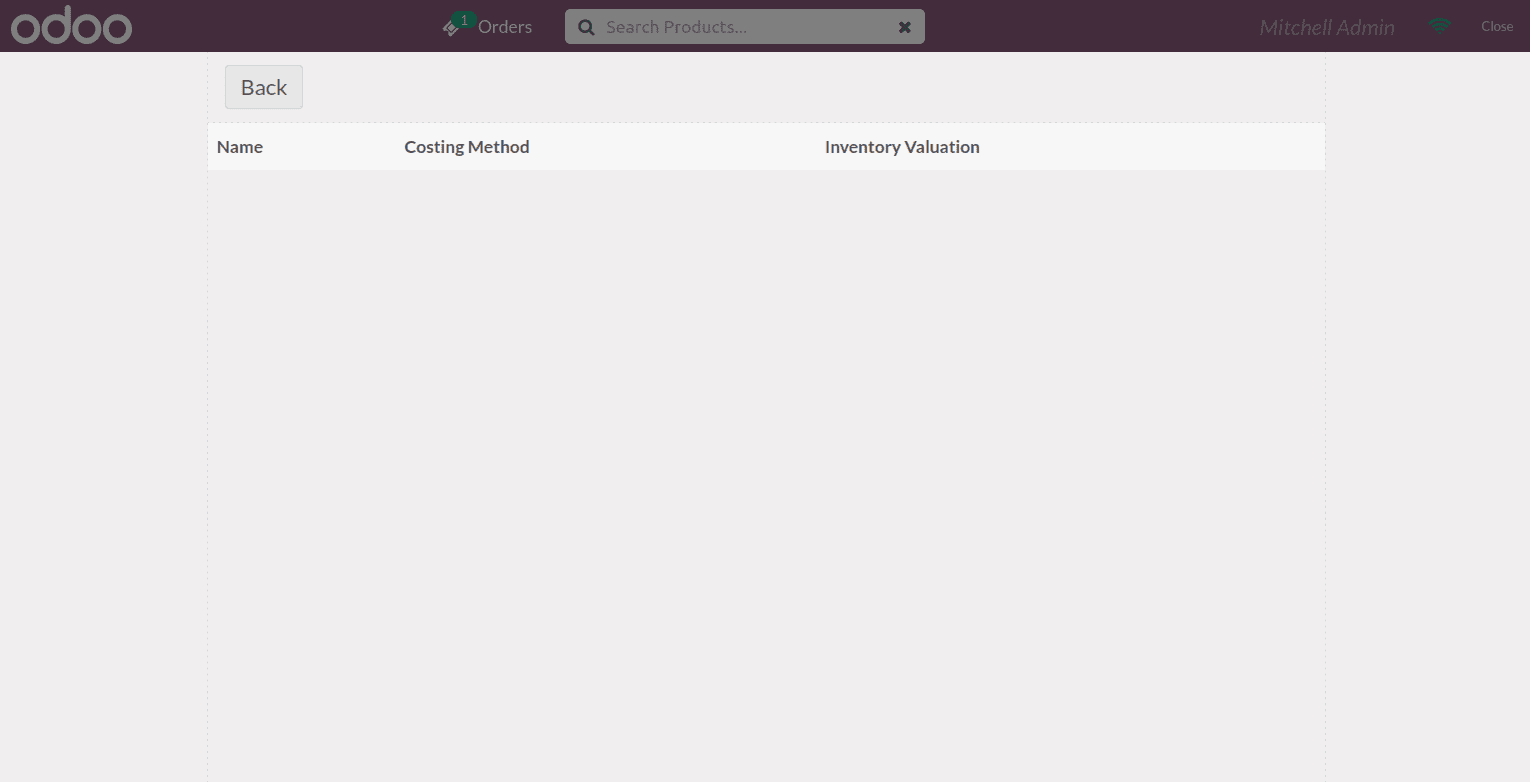
Here we have added the template to our class CategoryScreen and defined the back button function. When we restart it will look like this
Now we need to add the product category data to it. Since the product. category model is already loaded to pos, let us load the extra fields that we need 'costing method' and 'inventory valuation' by using load_fields.
const models = require('point_of_sale.models');
models.load_fields('product.category', ['property_cost_method', 'property_valuation']);
Now that we have loaded the required data, we will get these data in this.env.pos.product_categories.
So let's add it to the constructor part of our class 'CategoryScreen' as below
class CategoryScreen extends PosComponent {
   constructor() {
           super (... arguments);
           this.categories = this.env.pos.product_categories;
       }
   back() {
           this.trigger('close-temp-screen');
   }
}
Now we have the data as a dictionary in categories. so let's add the xml part to it in the template 'CategoryScreen' as below
<?xml version="1.0" encoding="UTF-8"?>
<templates id="template" xml: space="preserve">
  <t t-name="CategoryScreen" owl="1">
      <div class="clientlist-screen screen">
          <div class="screen-content">
              <div class="top-content">
                  <div class="button back "t-on-click="back">
                          Back
                  </div>
              </div>
              <section class="full-content">
                <div class="client-window">
                  <section class="subwindow list">
                    <div class="subwindow-container">
                    <div class="subwindow-container-fix scrollable-y">
                     <table class="client-list">
                      <thead>
                       <tr>
                        <th> Name </th>
                        <th> Costing Method </th>
                        <th > Inventory Valuation </th>
                       </tr>
                      </thead>
                     <tbody>
                      <t t-foreach="categories" t-as="categ" t-key="categ.id">
                        <tr>
                         <td> <t t-esc="categ.name"/> </td>
                         <td> <t t-esc="categ.property_cost_method"/> </td>
                         <td> <t t-esc="categ.property_valuation" /> </td>
                        </tr>
                      </t>
                     </tbody>
                     </table>
                    </div>
                   </div>
                  </section>
              </ div>
            </section>
          </div>
      </div>
  </t>
</templates>
In the t-foreach part of the table body, we are looping the categories data that we have now added and displaying its name, costing method and valuation. Now when we refresh the view and click on 'View Categories', it will look like this
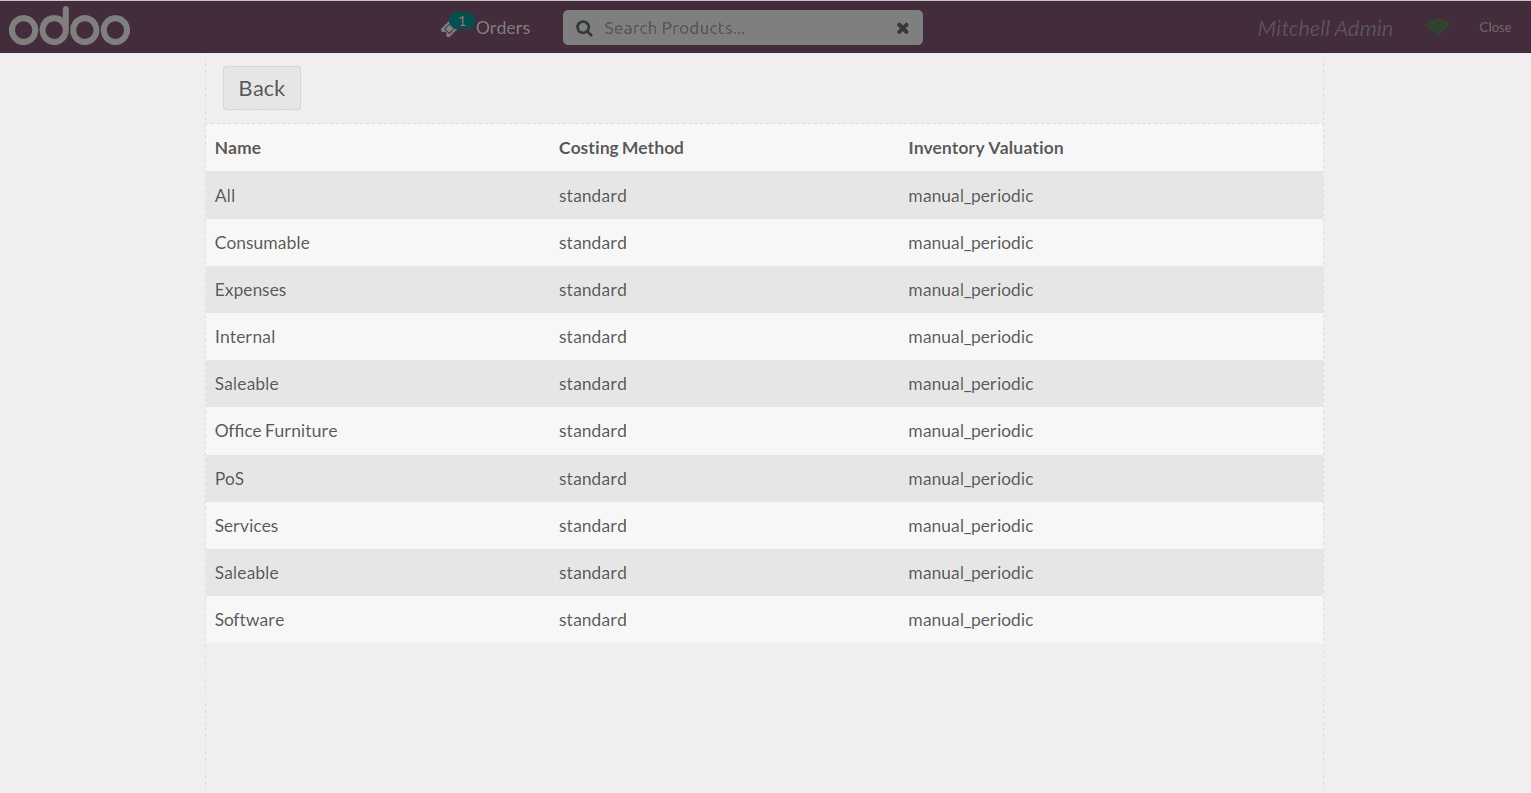
Thus we have successfully added the product category view screen to pos in odoo 14.
Read about OWL from our Previously Published blog