Expense management holds its title as one of the most crucial parts of any business institution. Expenses on employees on behalf of the company are ordinary. Sometimes employees have to take their own money for Local conveyance, mobile bills, or any other costs related to the institution within which the employee is working. Employees should be paid back fairly for their commitment to the institution. With the Odoo 15, Expense module, employees can effortlessly create and send expense reports to their companies.
The Expenses module is integrated with the other HR modules of odoo for generating maximum efficiency and making the initial setup and configuration much more accessible.
This blog will give you a detailed note on Employee Expense management with the Odoo 15 Expenses module
Reporting Expenses
Expenses can be created and reported directly from the expenses modules dashboard. The image given below represents the dashboard of the Expense module.
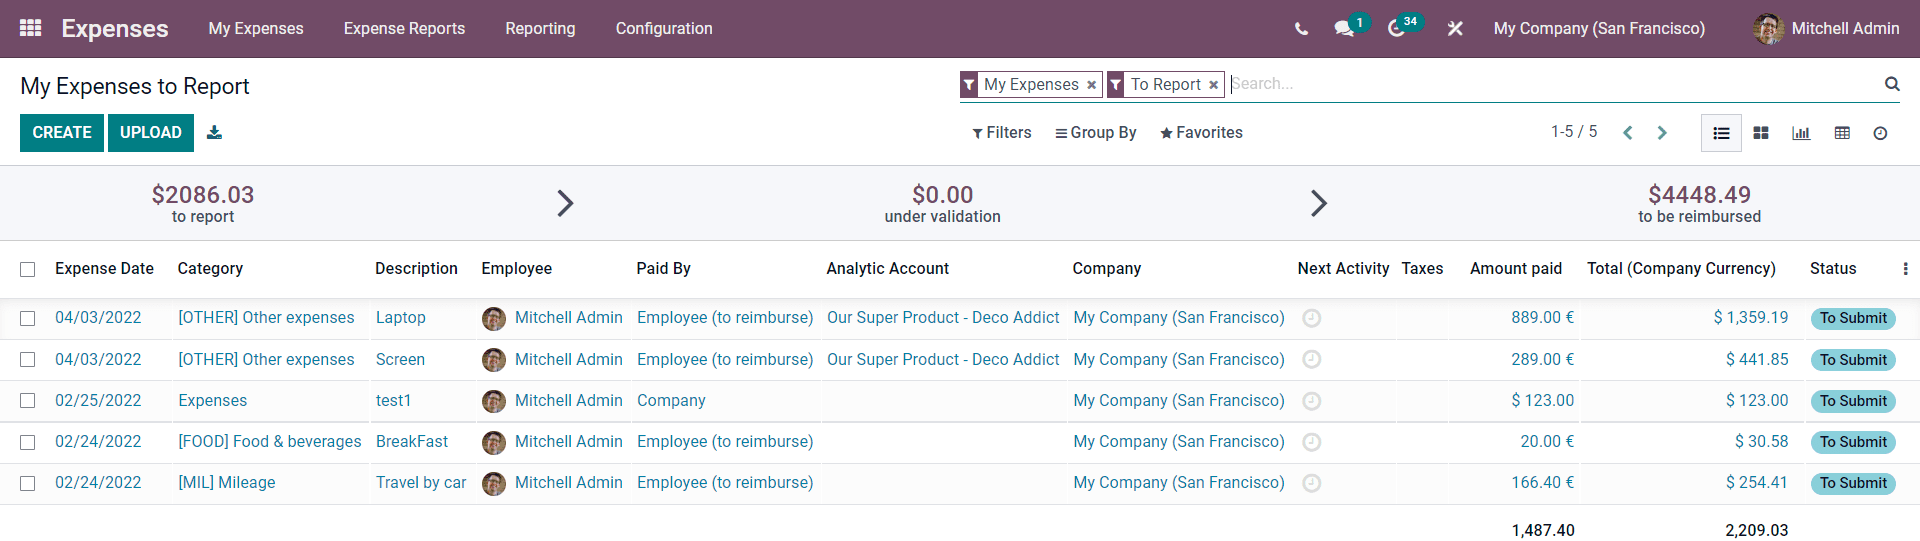
The module's dashboard will be filled with information on the Reported Expenses. The dashboard is personalised to the user for easier access to the expenses. Before explaining the expense module dashboard, we must know how to report an expense. For reporting a new Expense, click on the CREATE button, and a configuration page will open up to create the new expense report.
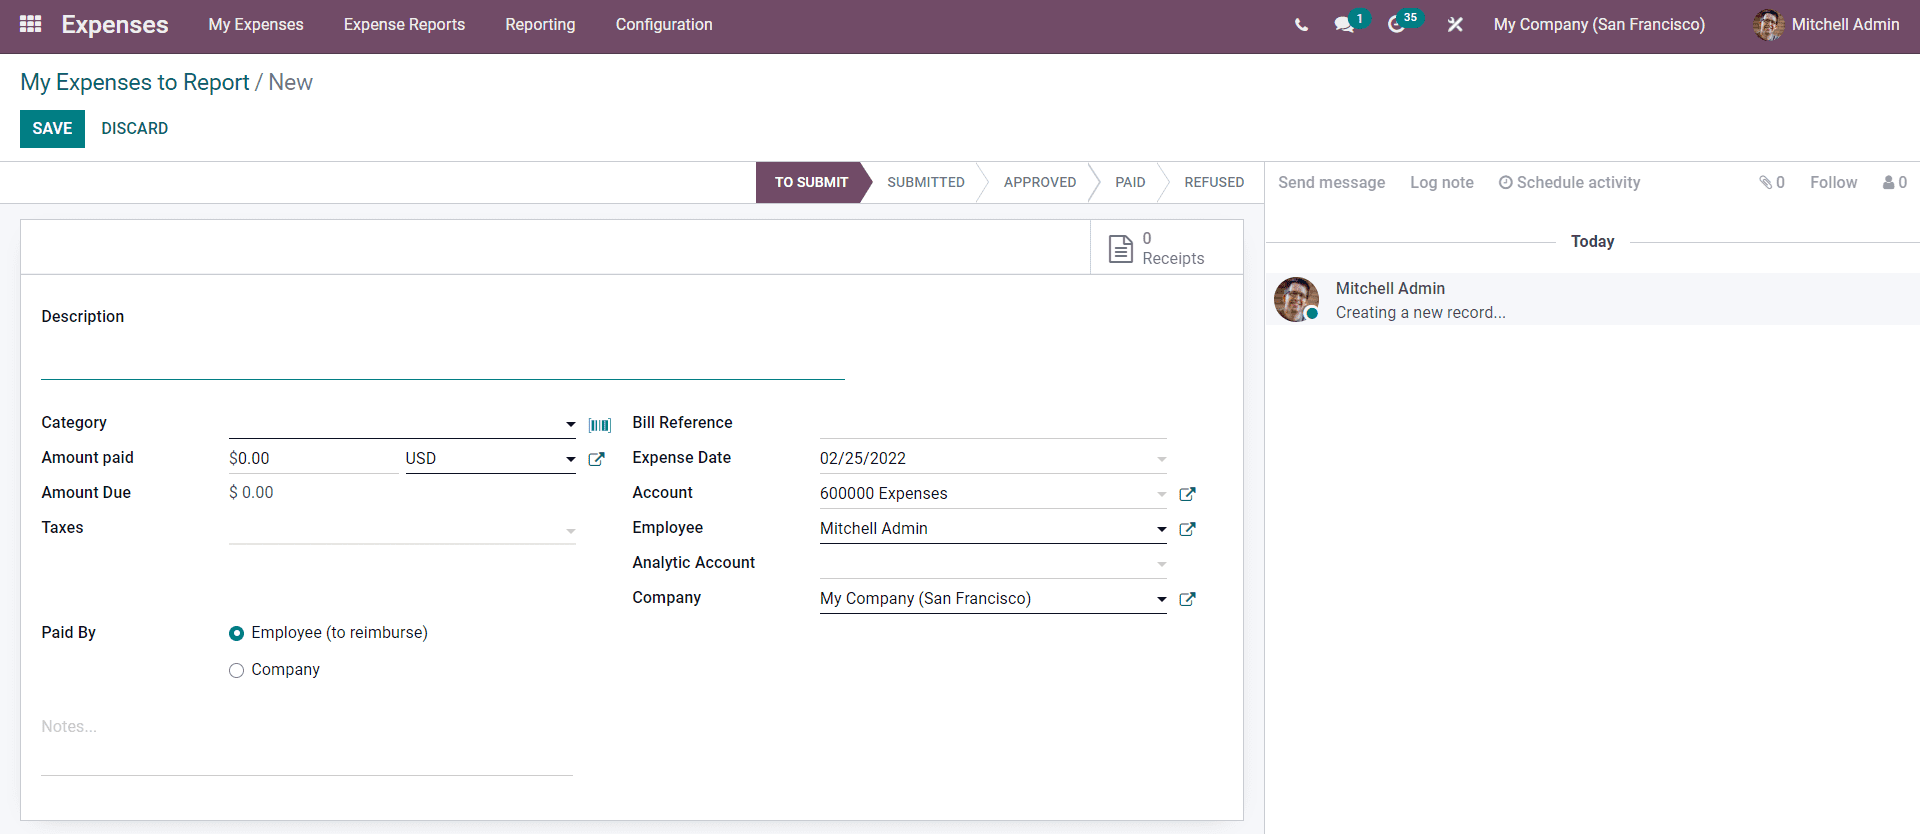
To understand the Expense report configuration, let's go through an example. Let's create an expense report on Mitchel, who had a client meeting accompanied by lunch.
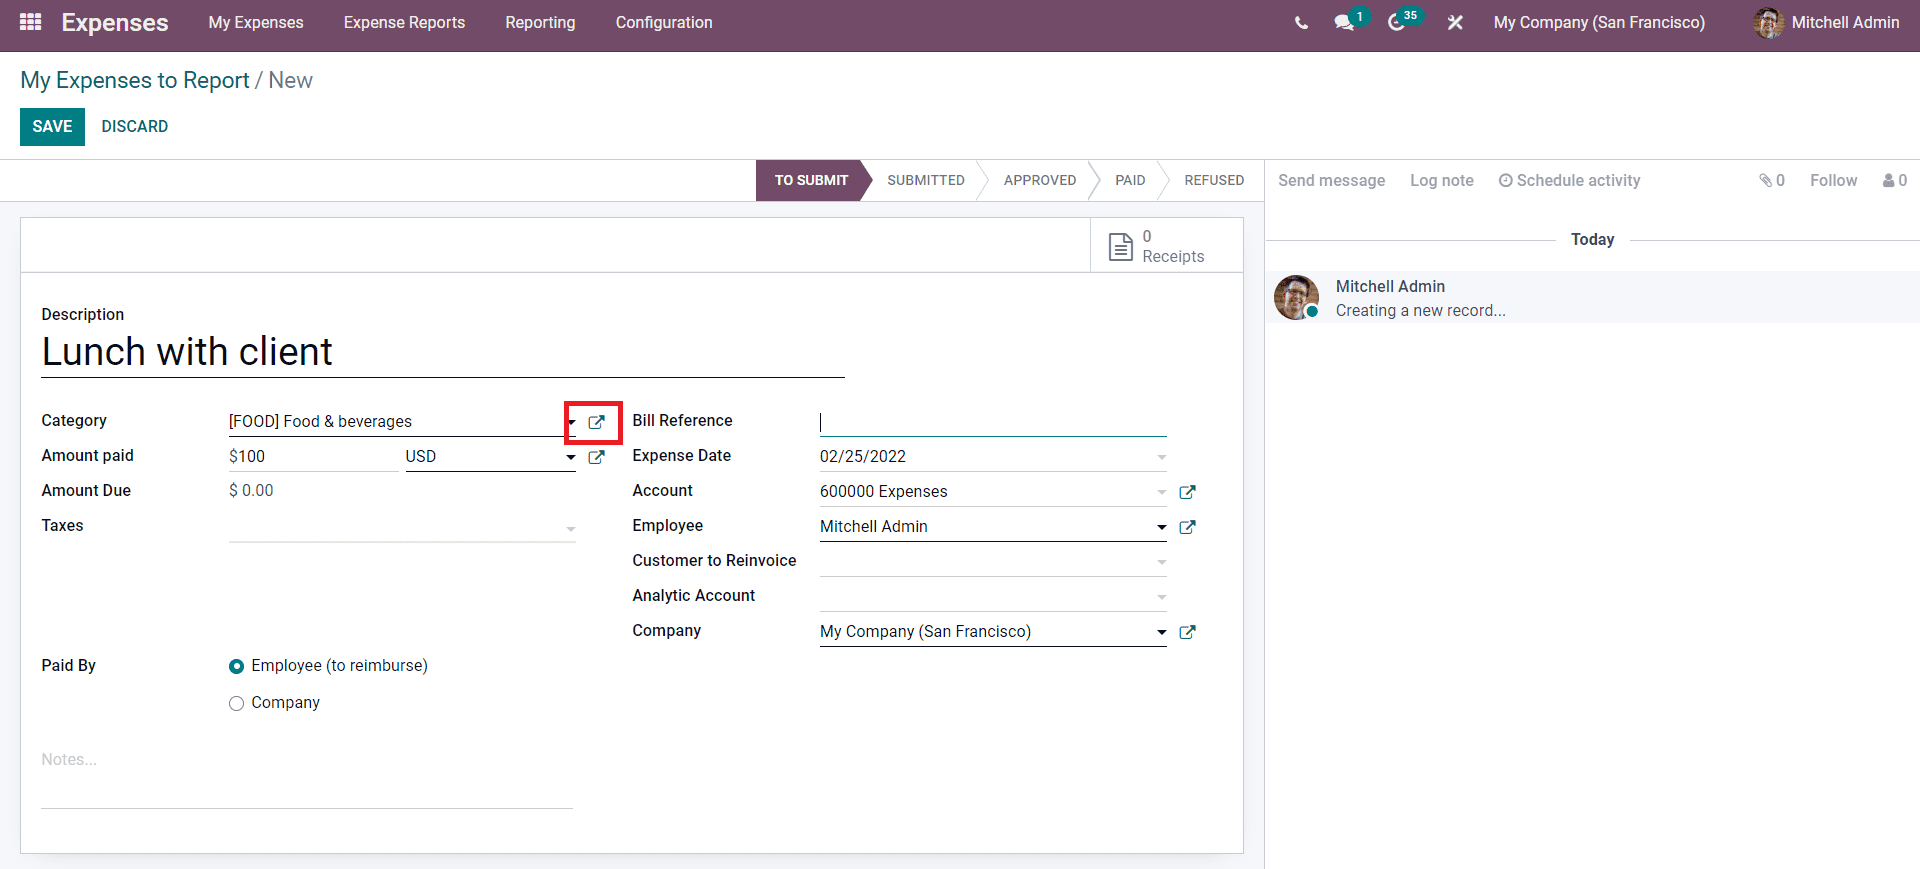
To begin with, in the Description section of the configuration page, Mitchell has to enter the cause for the expense as shown below.
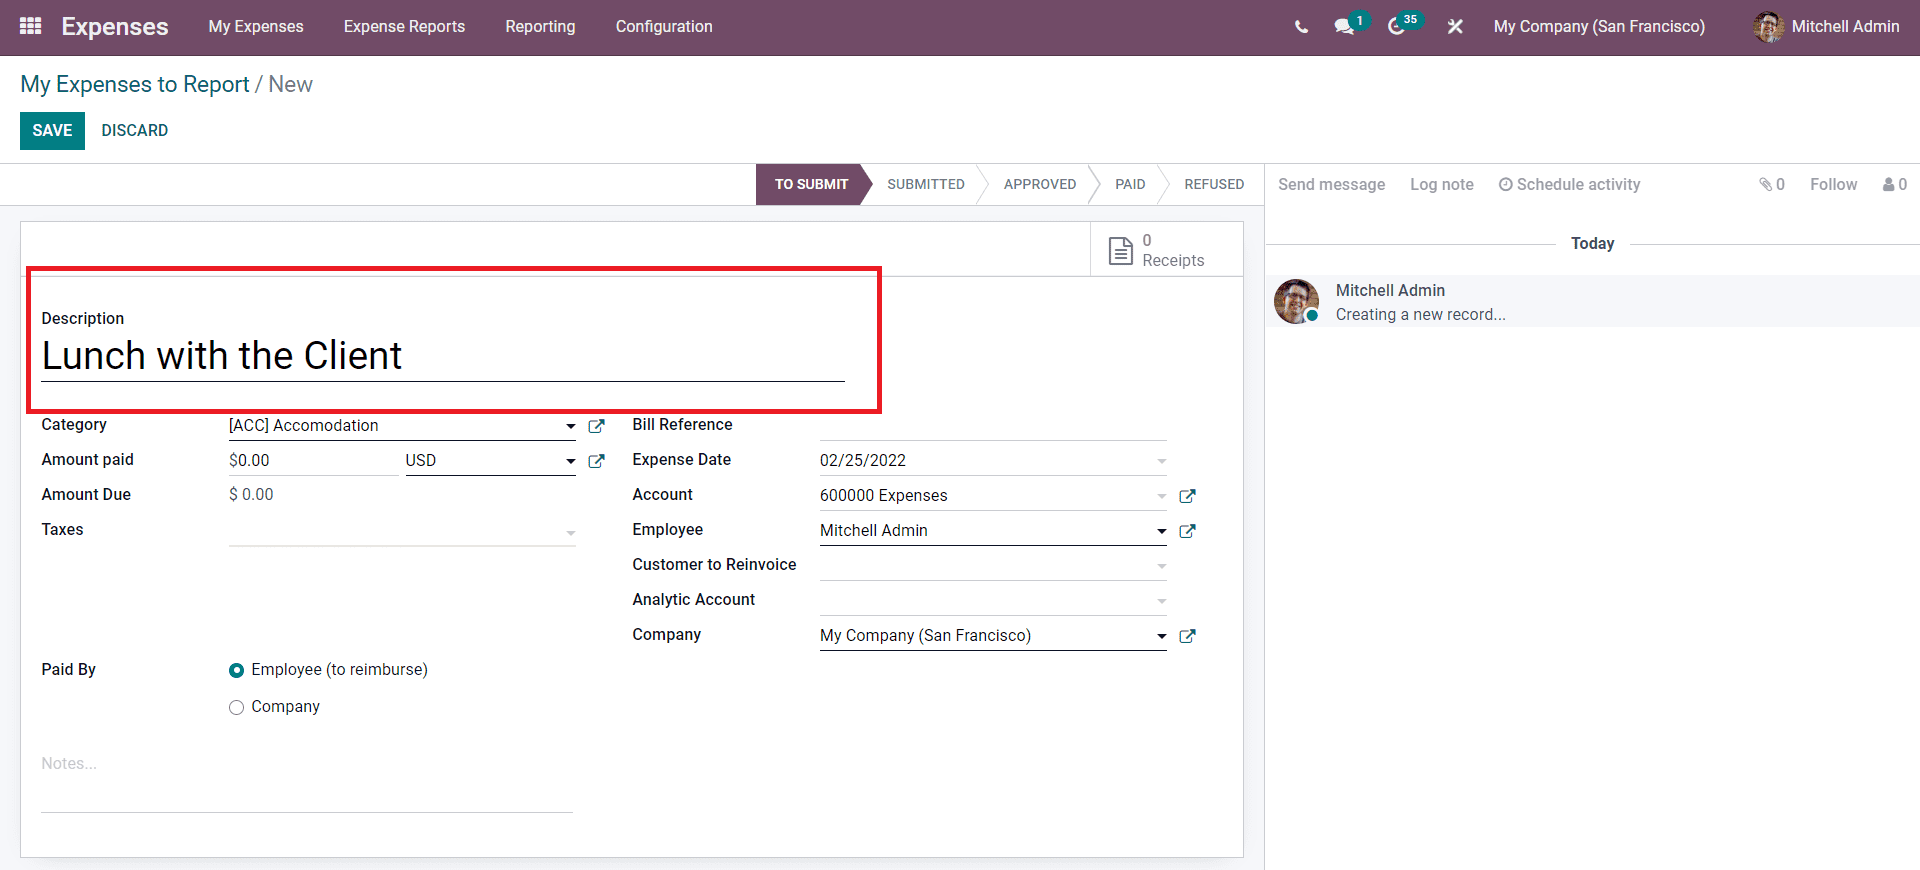
After describing the reason, Mitchell has to select the Category in which the expense has occurred. For this, he has to go to the Category or the Product field and choose from the dropdown menu.
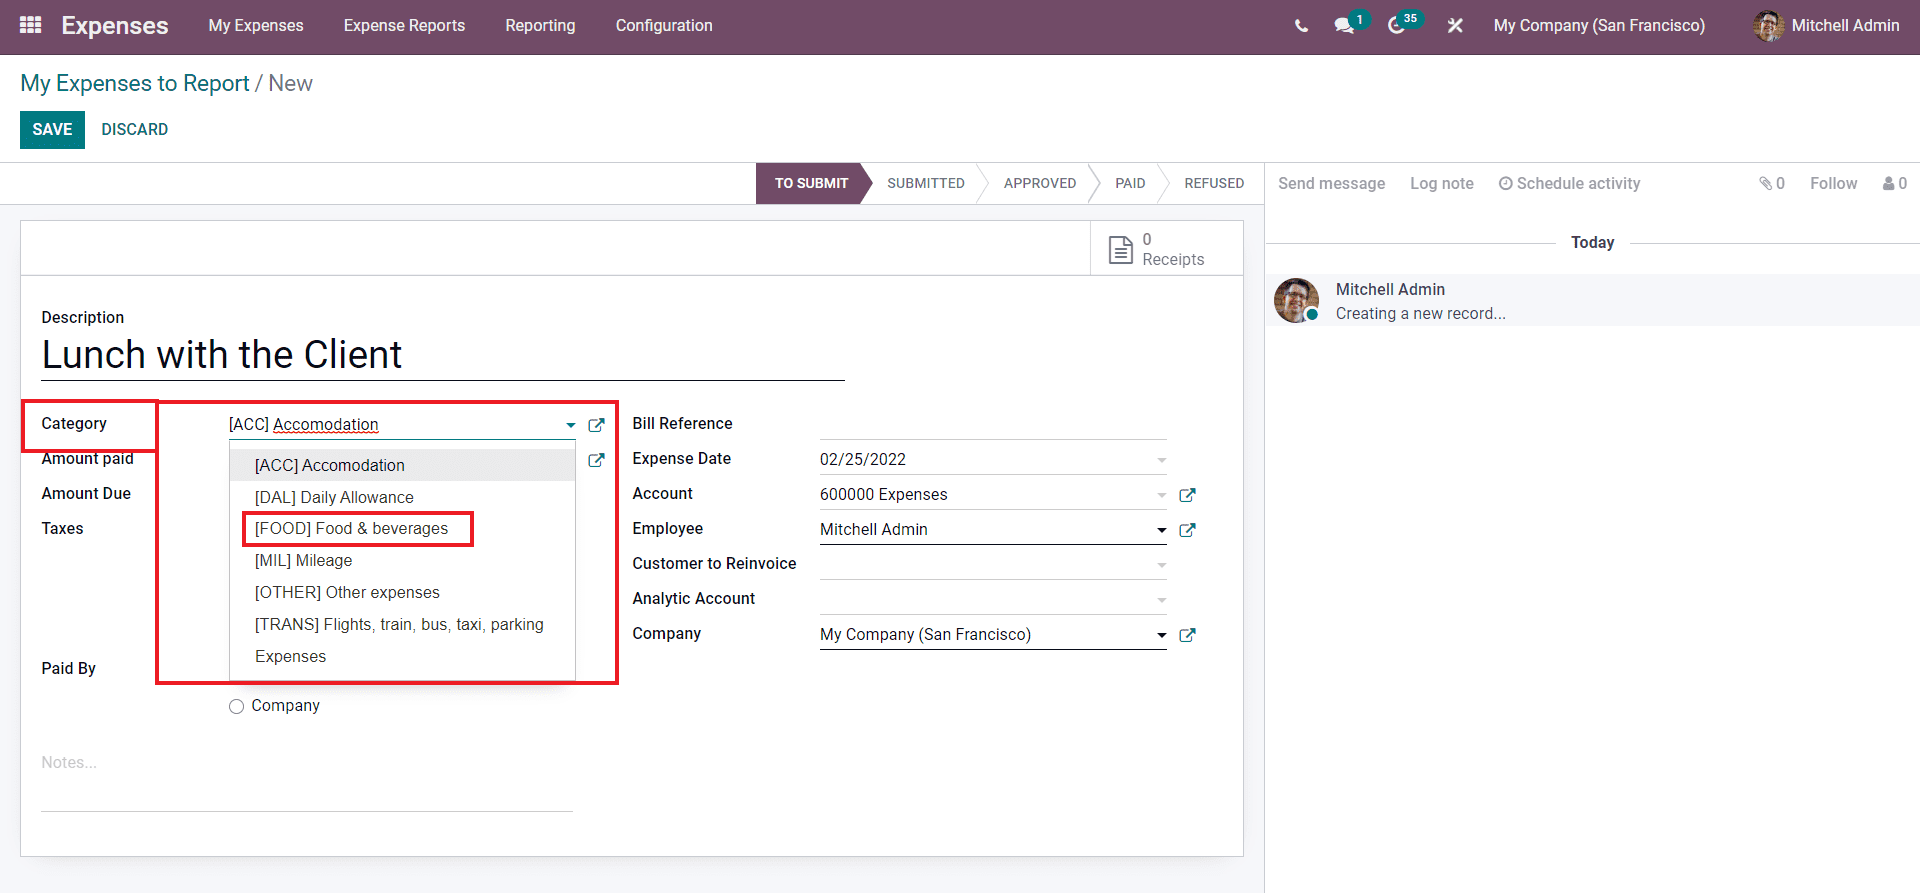
As marked in the image given above, Mitchell has to choose a category that satisfies that reason for the Expense. So, in this case, Mitchell had a Luch with the client, so the Category that he has to choose is Food and beverages.
Expense category
Dividing the expenses into various categories makes it easy for management and analysis. The external link next to the selected category can be used to configure the expense category.
A page on the selected expense category will open up as shown below
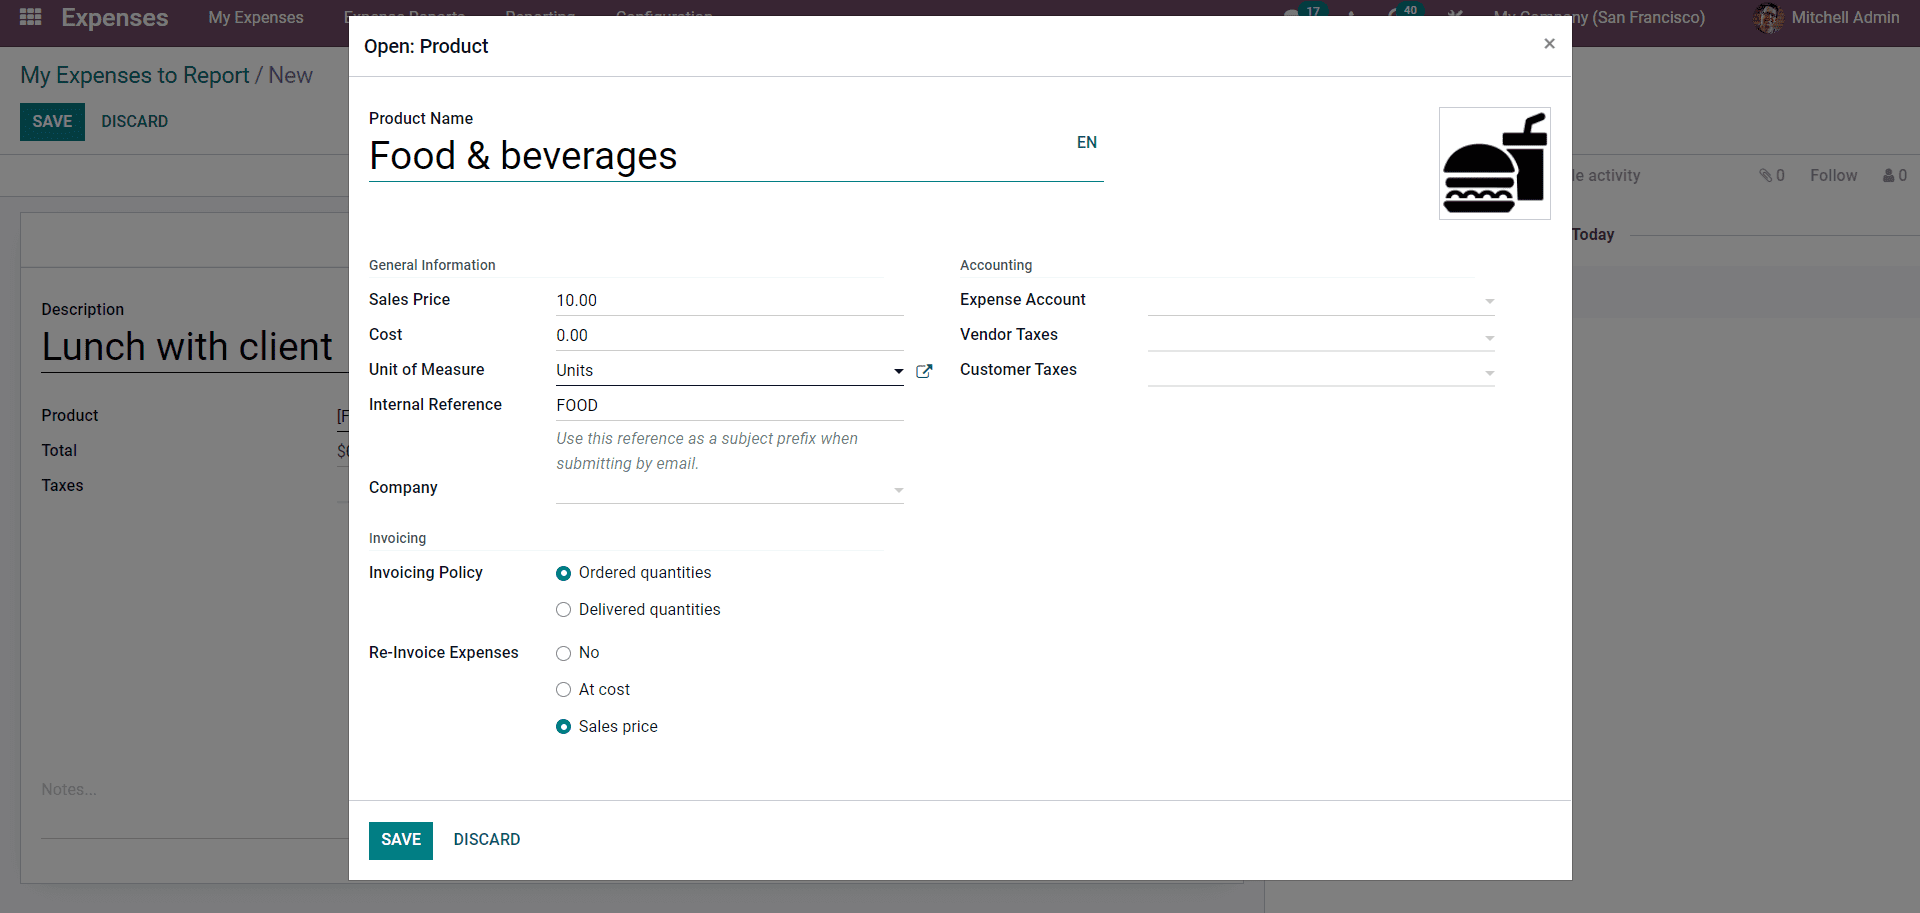
Mitchell can reconfigure the selected expense category from this page. The category is treated as a product in Odoo to refer directly to an expense or purchase. Note that the Editing status of the products strictly depends on the employee's role in the company and will be restricted to the employees who are on a lower level.
The next step is to enter the total consumption price in the Total field, as shown in the image given below.
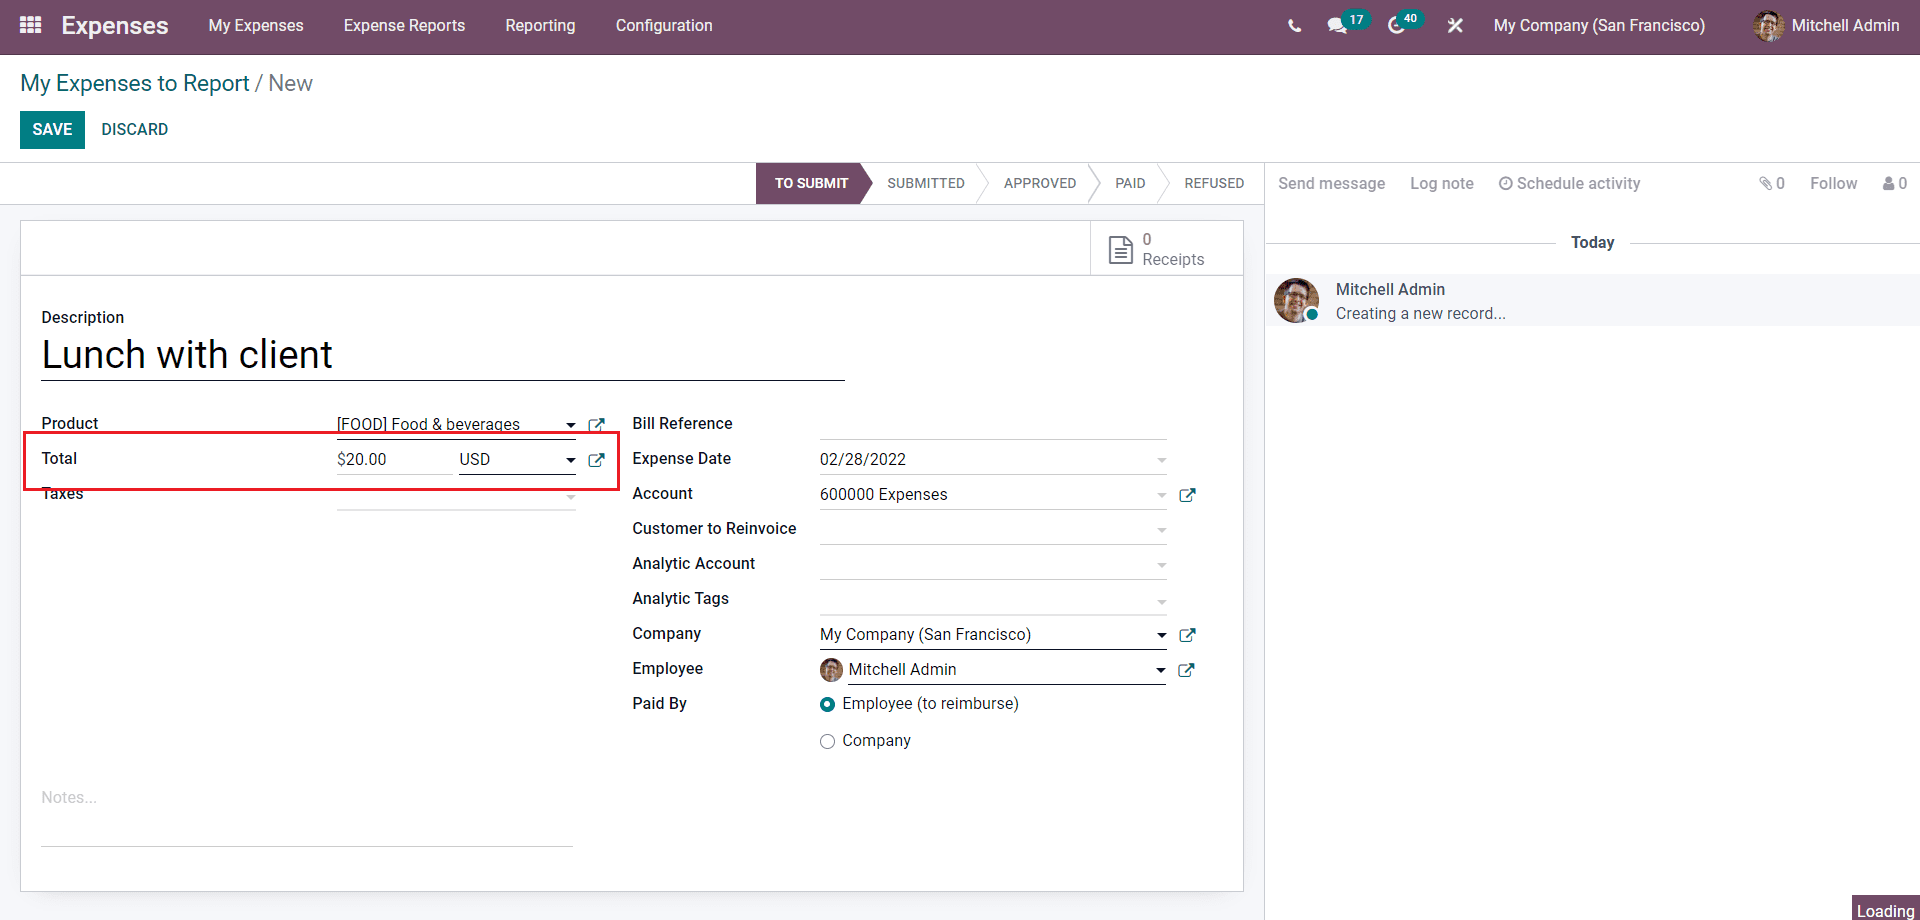
Mitchell can enter the Total amount and choose the currency in which the payment is made. The default option for the currency is USD, and Mitchell can select any currency on the drop-down menu of options. He can use the External link next to the Selected Currency for configurations. Mitchell can add the taxes for the expenditure in the Taxes field.
The next step that Mitchell has to do is add the Expense date in the Expense date field, as shown below.
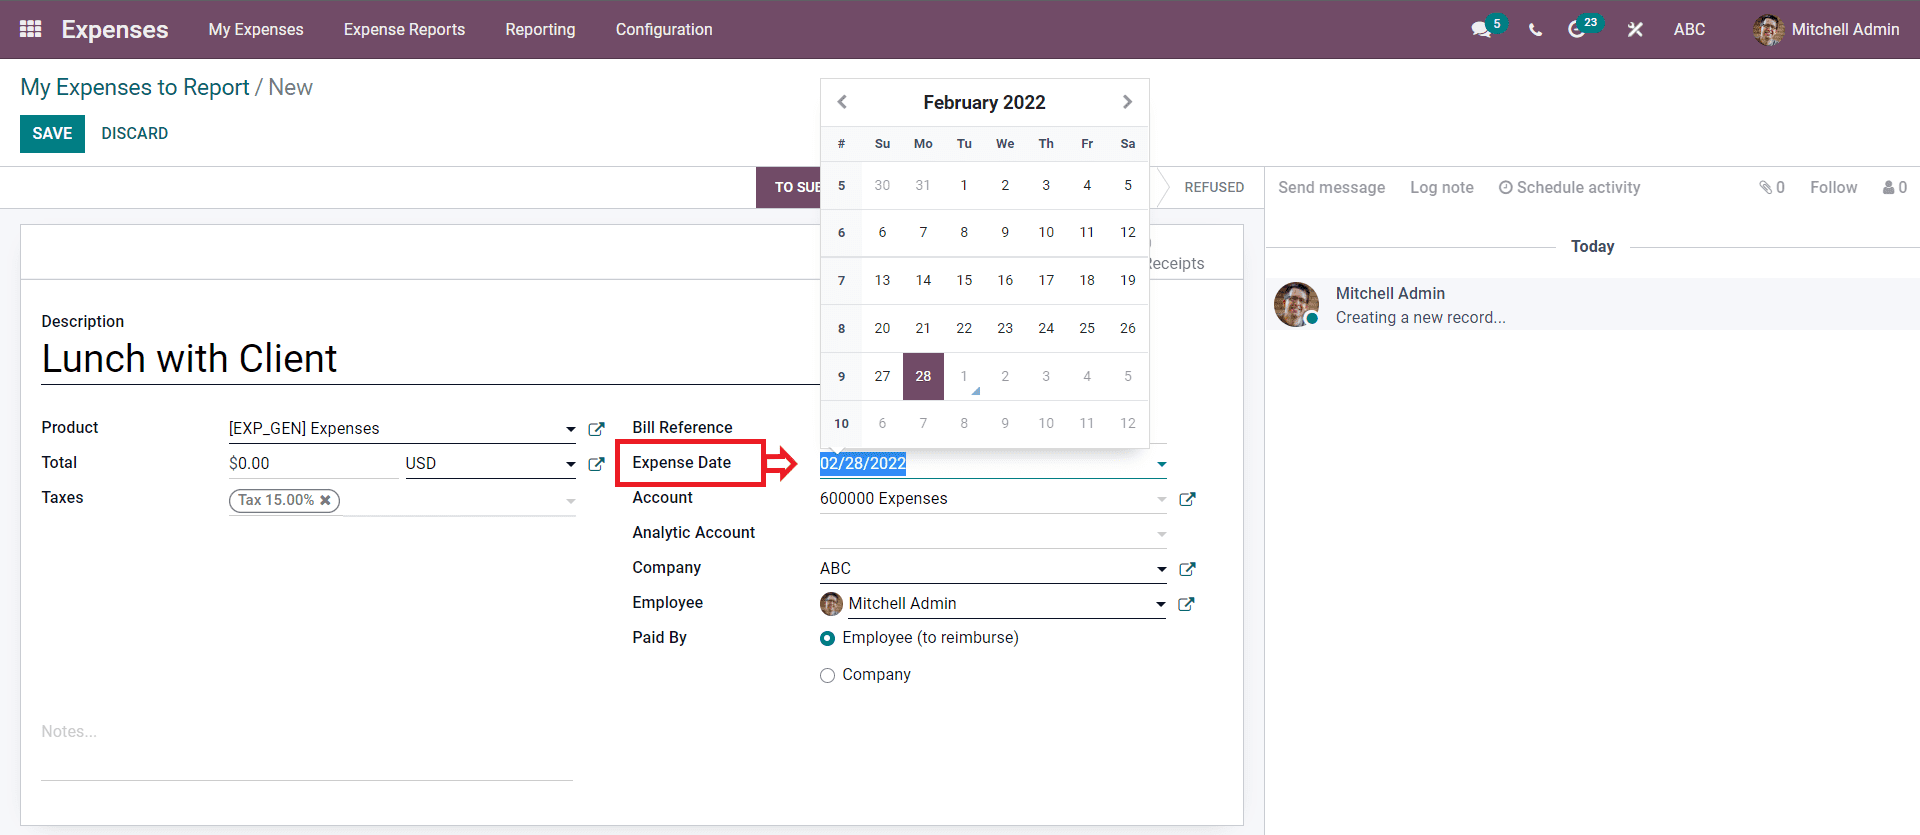
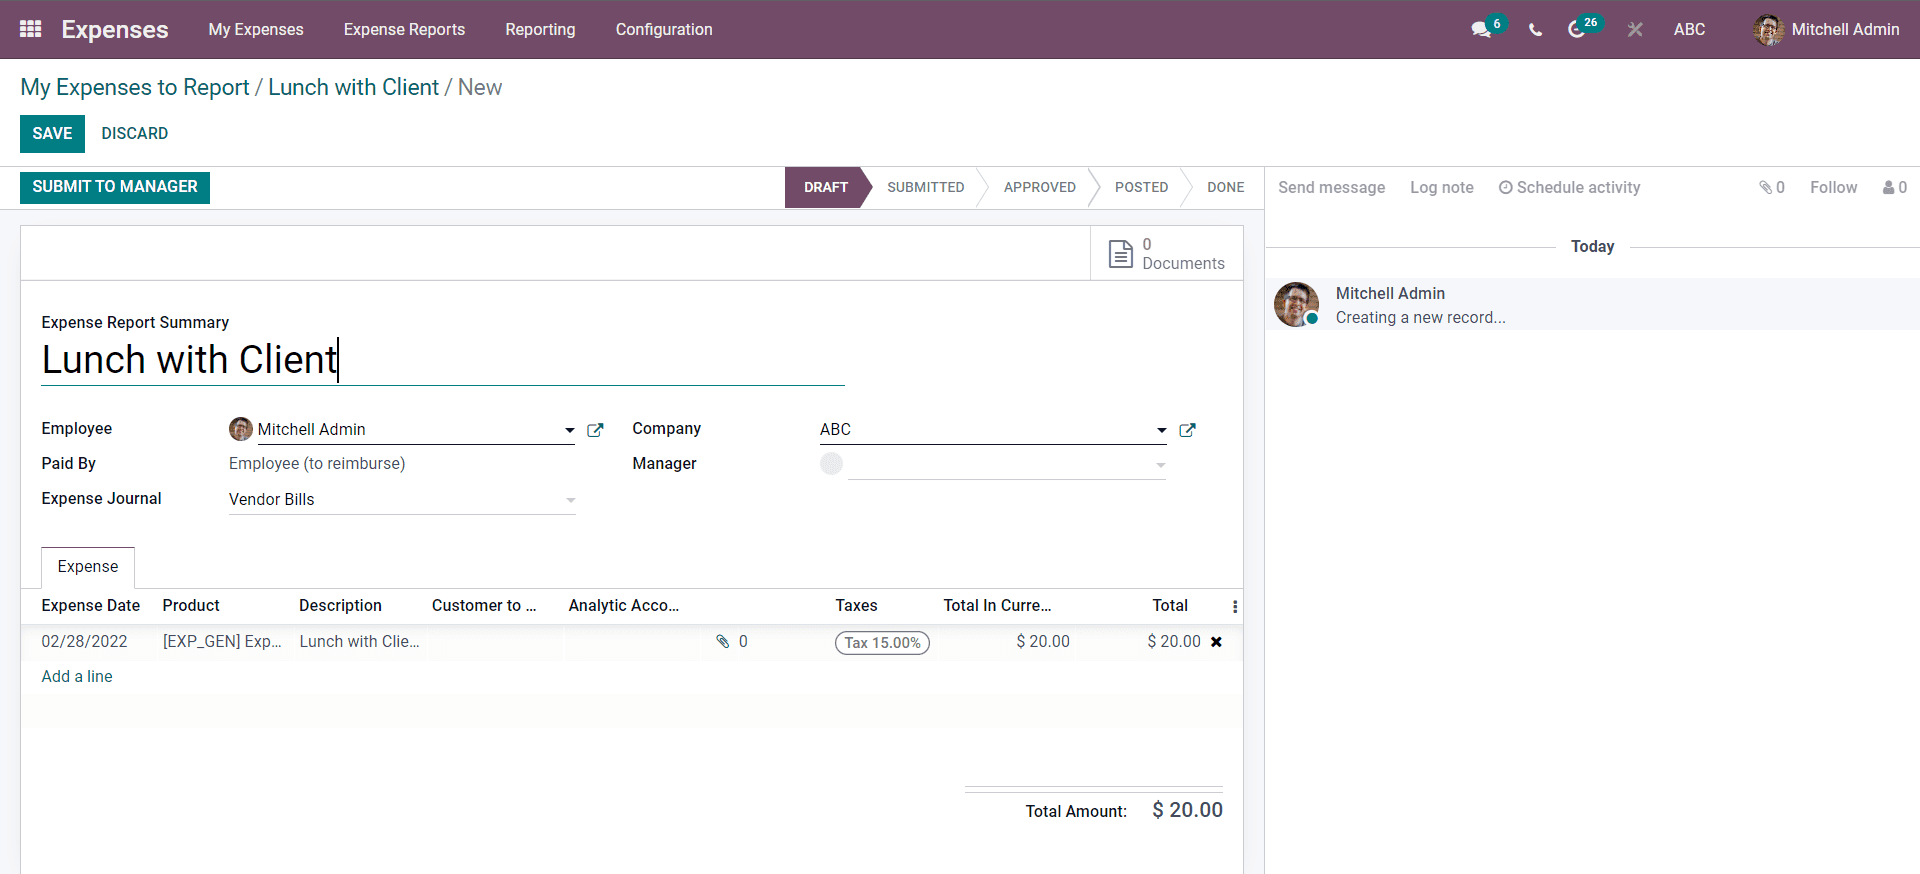
Here Mitchell has selected 02/28/2022 as the expense date and he can choose the Account from the Account field to enter the Expenses. Mitchell can add an Analytic account to the Expenses to record the expense on the Analytic account if necessary. Then he can choose the company, the employee and choose from the Paid by section for defining the payer; Employee (to reimburse) or Company. Mitchell can save the configurations on the new Expense report by clicking the SAVE button. The SAVE button will take Mitchell to the next stage of the Expense report configurations, as shown in the image below.
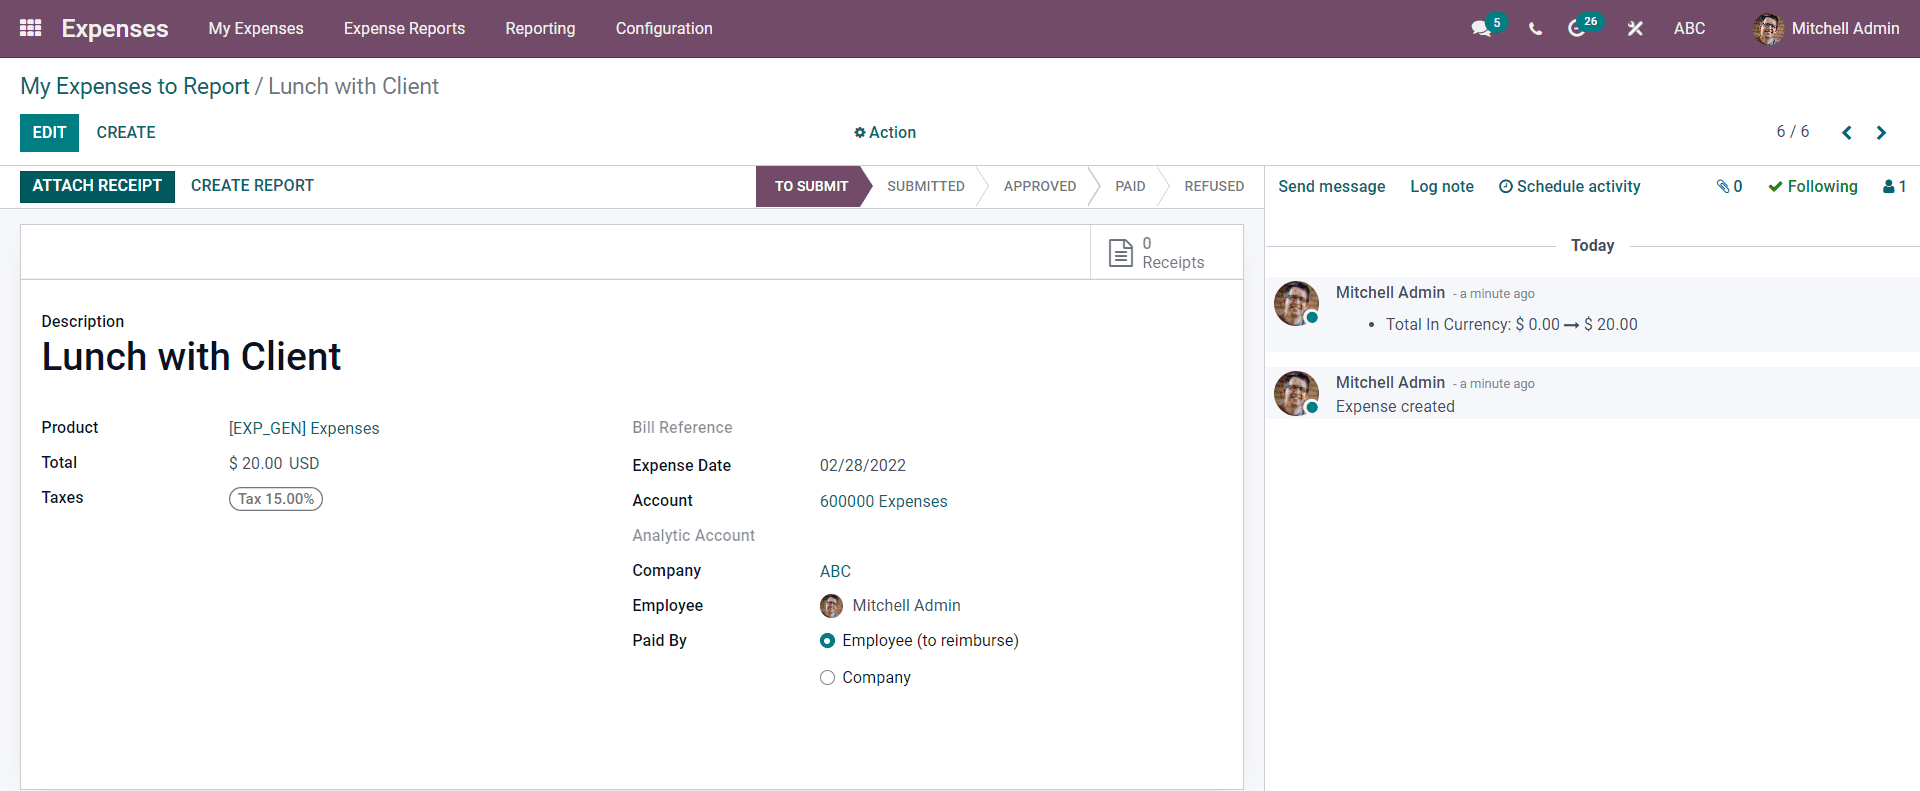
Mitchell has the option to add a Receipt to the Expense by clicking on the ATTACH RECEIPT button. The page allows him to go through the details again before creating the report. He can click on the EDIT button if there are any faults in the report. He can click on the CREATE REPORT button to create the report on the expense. Mitchell will be taken to the next step or page in the process for final configurations as shown below.
Mitchell can complete the final configurations on the Report before submitting it to the Manager for confirmation. All of the configurations on the report will be displayed on this page. Mitchell can instantly submit the report to the manager by clicking on the SUBMIT TO MANAGER. After the confirmation from the manager, the page will open up as shown below for Mitchell to overview.
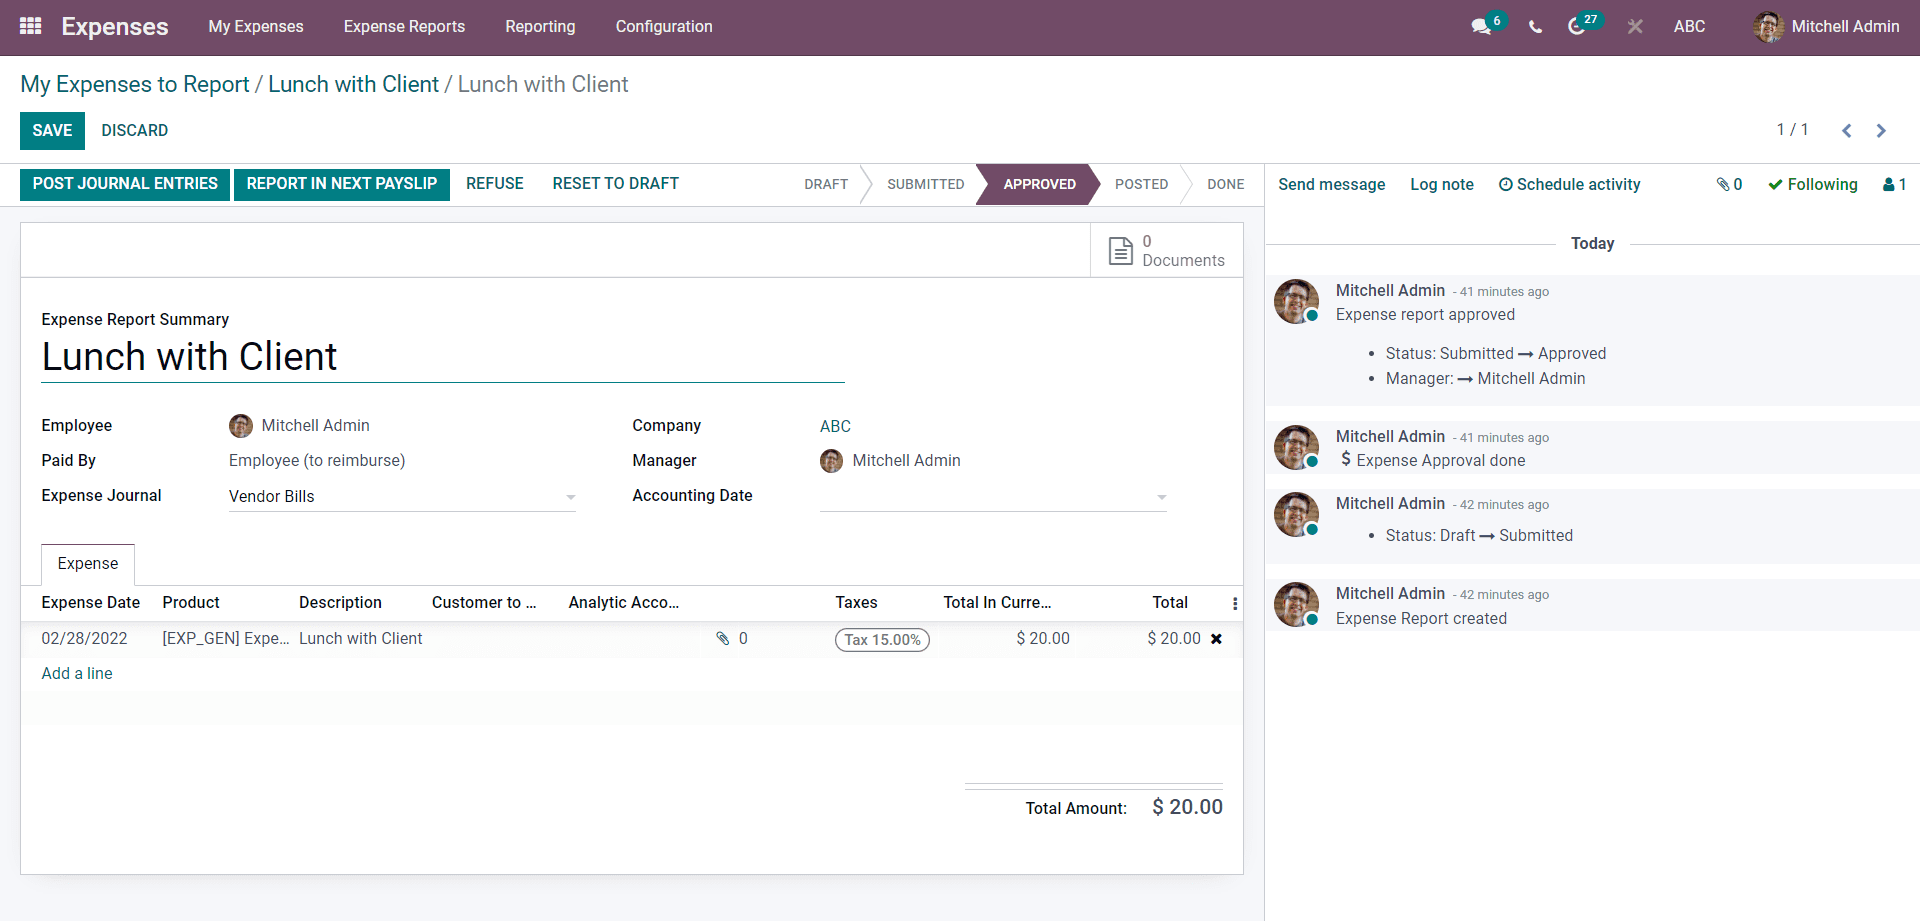
Mitchell can click on the POST JOURNAL ENTRIES BUTTON to post the expense on the journal entries. He can report the cost on the next payslip by clicking on the REPORT IN PAYSLIP button; the employee receives the amount of the expense with the salary. Mitchell, as the manager, has the power to deny the Expense by clicking on the REFUSE button.
Note that in the example situation given above, Mitchell is also the company's Manager, which allows him to have more access to the expenses configurations that the employees won't have. So Mitchell can either enter the Journal or Report it in the next payslip or Refuse the Expense. If the manager has clicked on the Journal entry button, the Payment registration page will open up, as shown in the image below.
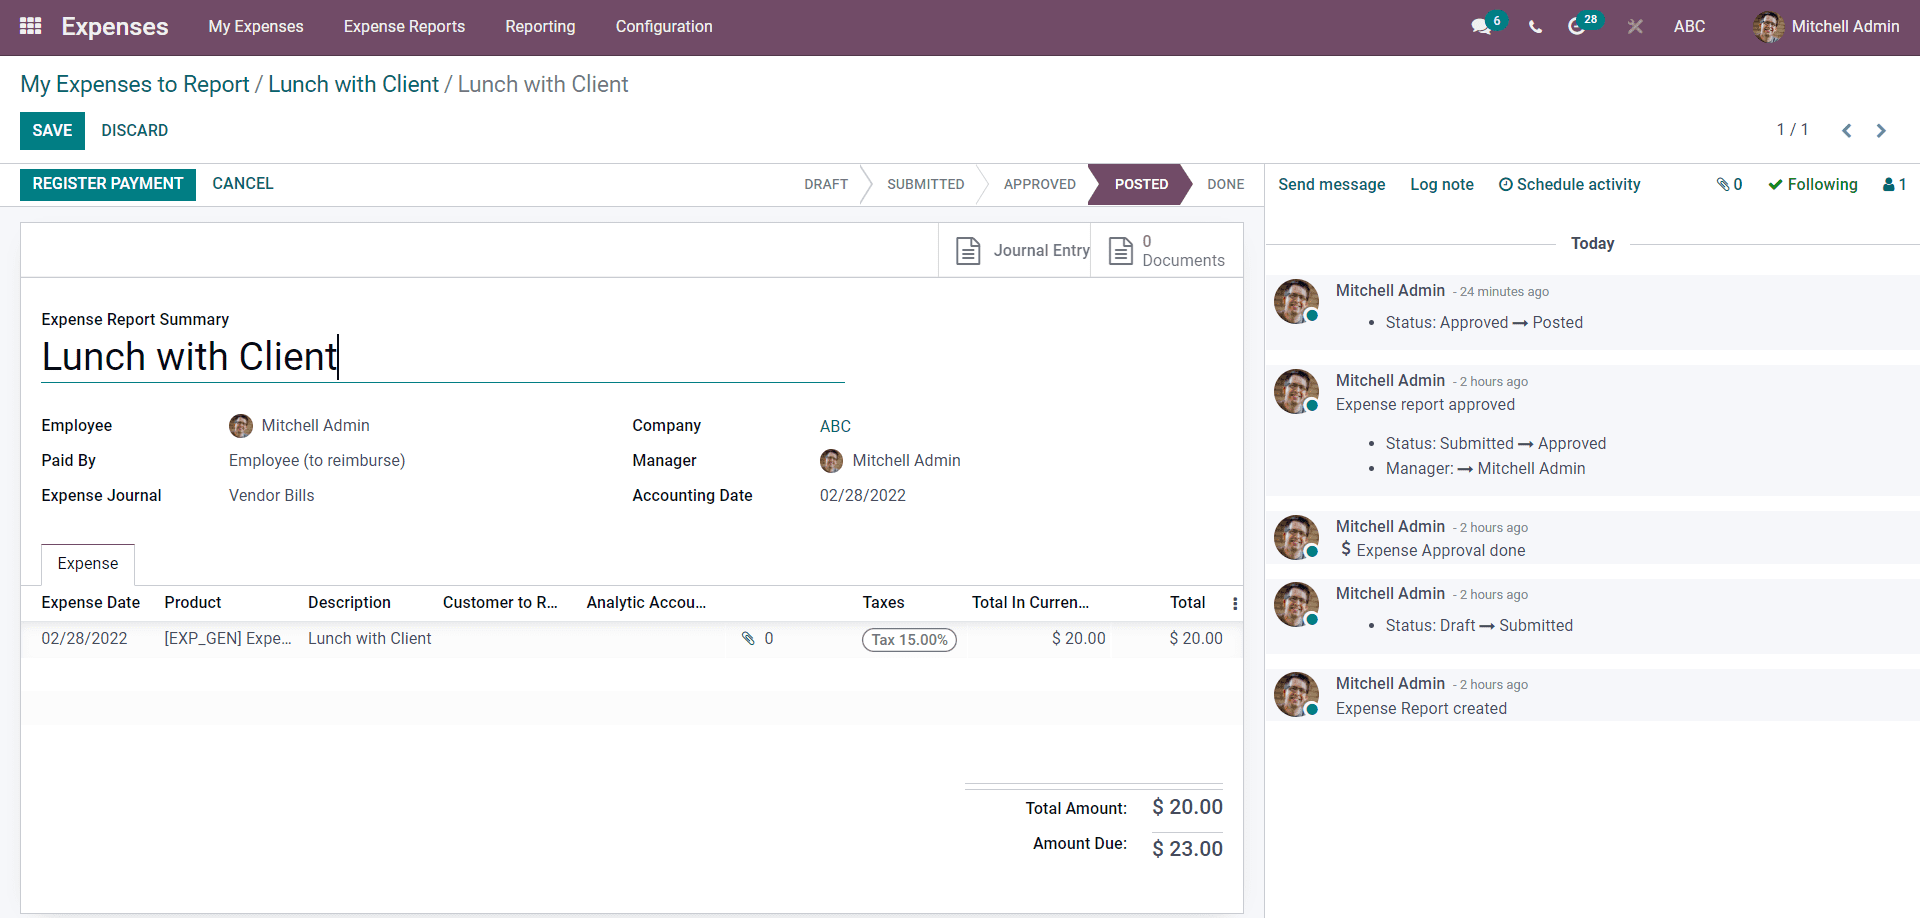
The register payment page will allow Manager Mitchell to overview the summary on the Expense report. All of the details on the Report will be given on this page for him to go through. By clicking on the REGISTER PAYMENT button, Mitchell can approve the payment, which will provide a Mitchell tab for configuring and registering the cost, as shown below.
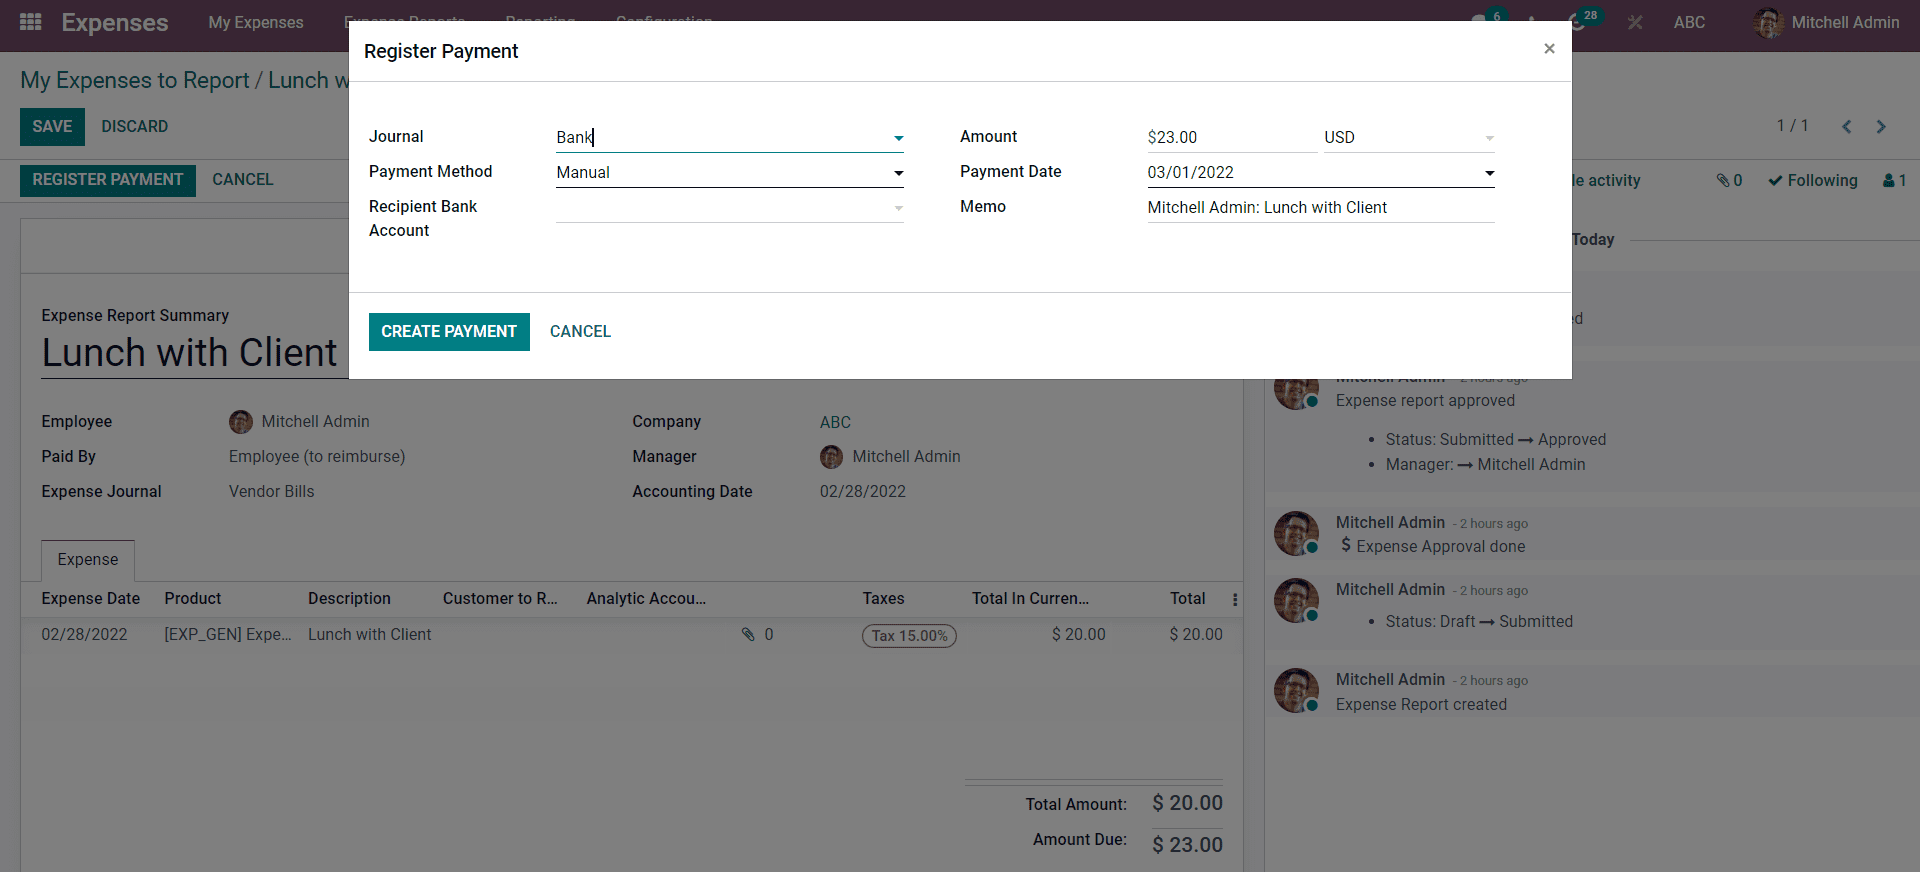
Here you can note that Mitchell entered the Amount and the Payment date from their respective fields. Mitchell has chosen the bank and the payment method manual in the Journal field. The Recipient Bank account from the particular field so that Mitchel, as the manager, can send the money to the bank account. After the configuration, he can click on the CREATE PAYMENT button to generate the payment, which will give him an In Payment tag, as shown in the image provided below.
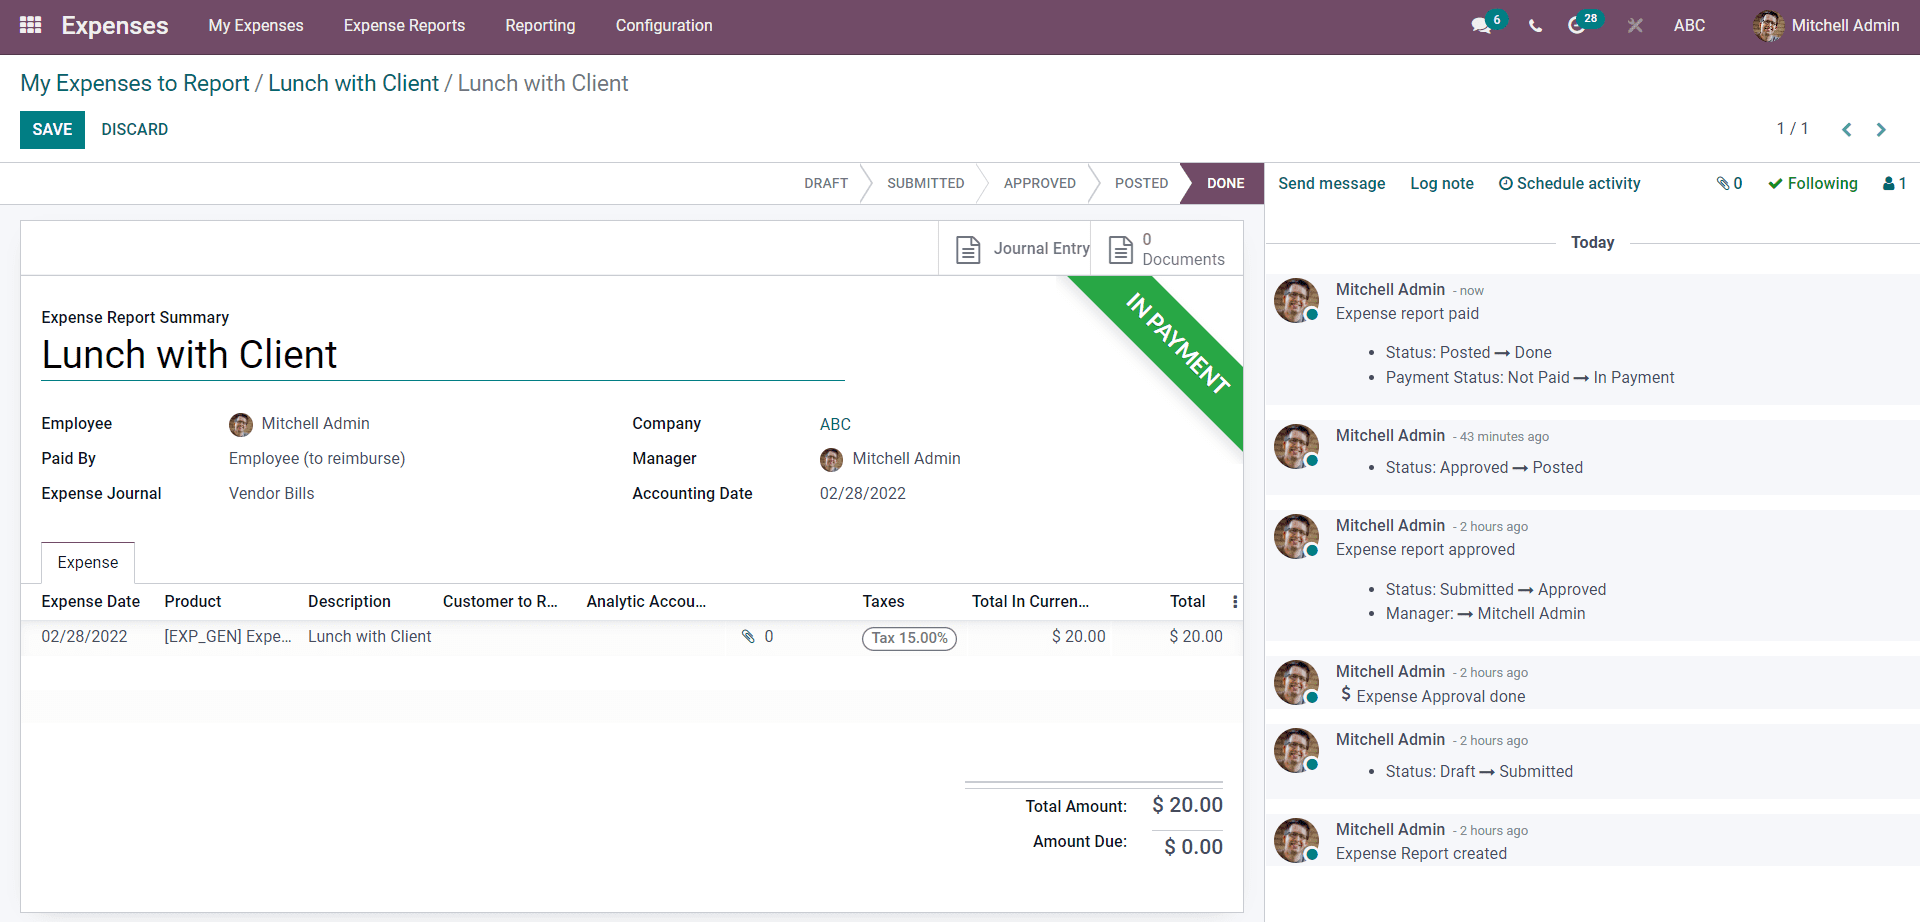
If Mitchell has opted for the REPORT IN PAYSLIP, then the payment will be automatically included in the employee's payslip.
Managing the Expenses
It is often hard for the employee and managers to keep track of the expenses. The All my expenses feature of the module will let the employees have a complete overview of their expenses reports and their current status. In this case, Mitchell can overview all of his Expenses from the Expense module itself. He can go to the All my Expenses
under the My expenses tab from the Expenses module. His expenses will be listed on the All my expenses page, as shown below.
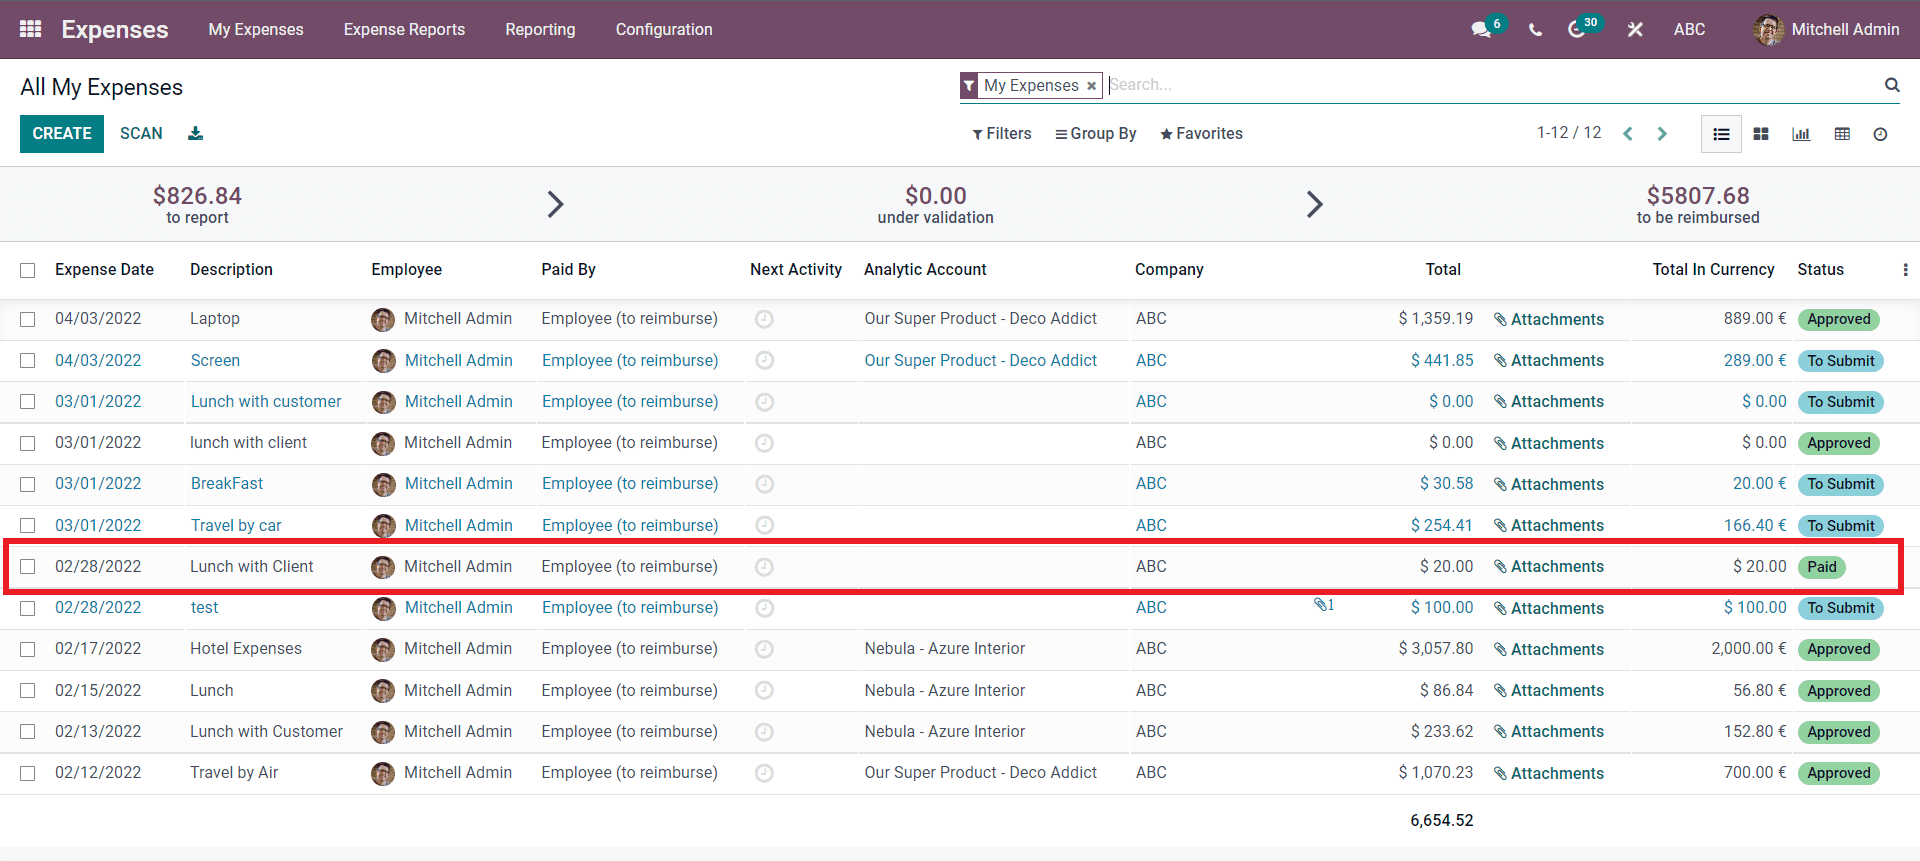
The Expense will be entered on the list of expenses as highlighted in the image given above. Mitchell can overview the Expense by clicking on the Expense from the list. The advanced filtering options will allow him quick access to the Expenses for easy management and convenience. Mitchell can manage and have a complete overview of all his expenses from this page.
Expense Report management
Mitchell can now manage his expenses reports from the Expenses Reports under My Expenses in the module's dashboard. Mitchels personalised Expense report page will open up as shown in the image given below.
All of the Expenses reports that Mitchell created will be listed on this page for easy management. Mitchell can instantly create a new Expense Report by clicking on the CREATE button from this page. Mitchell can access the Expses from the Expenses Report tab shown in the image below as the admin or the manager.
It is extremely important for Mitchell to manage the Expense Reports for accurately overviewing them.
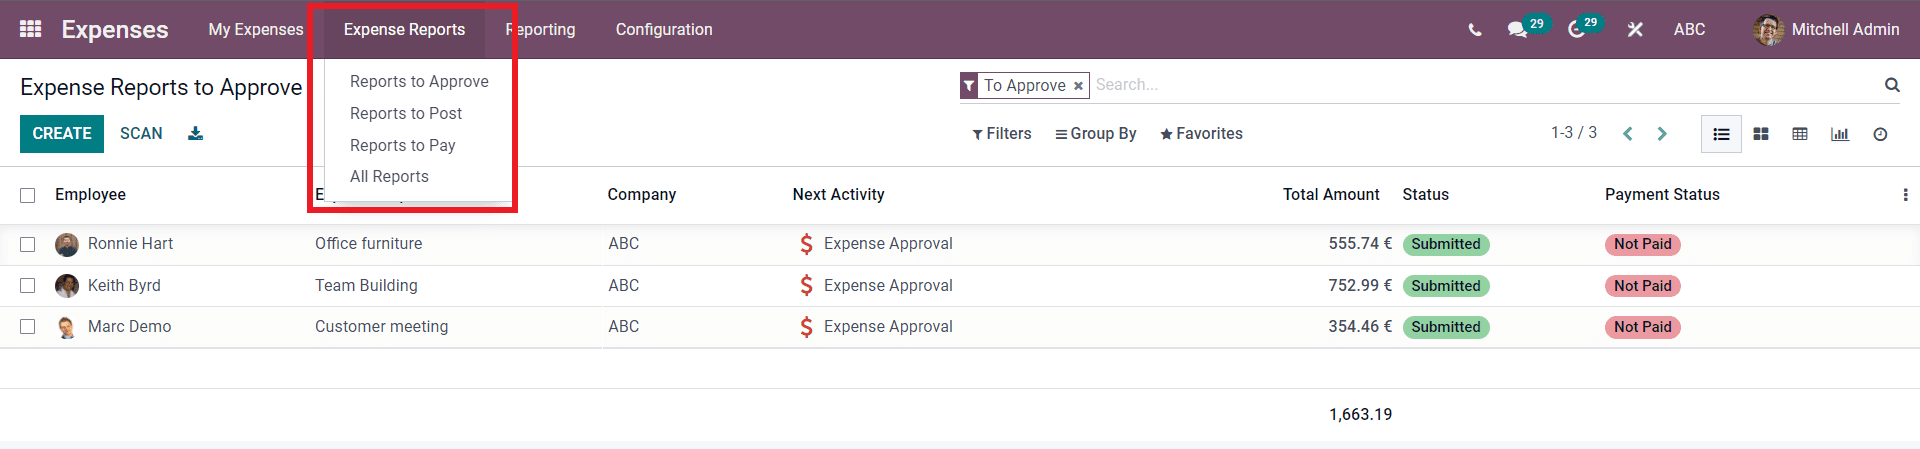
Reports to Approve
If he goes to the Reports to Approve he can get the list of all of the expense reports waiting for Approvals as shown in the image given below.
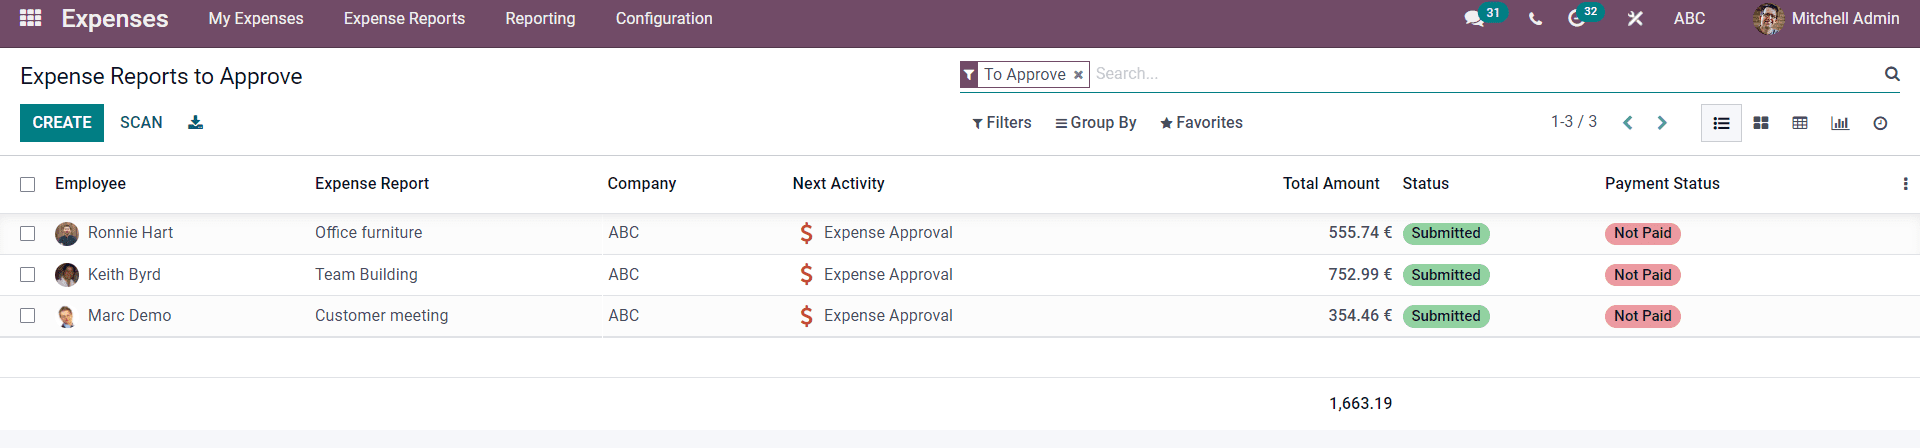
Mitchell can manage all of his employees from this page. All of the Employees under Mitchell along with their expenses reports will be listed down with their payment status marked as highlighted in the image given below.
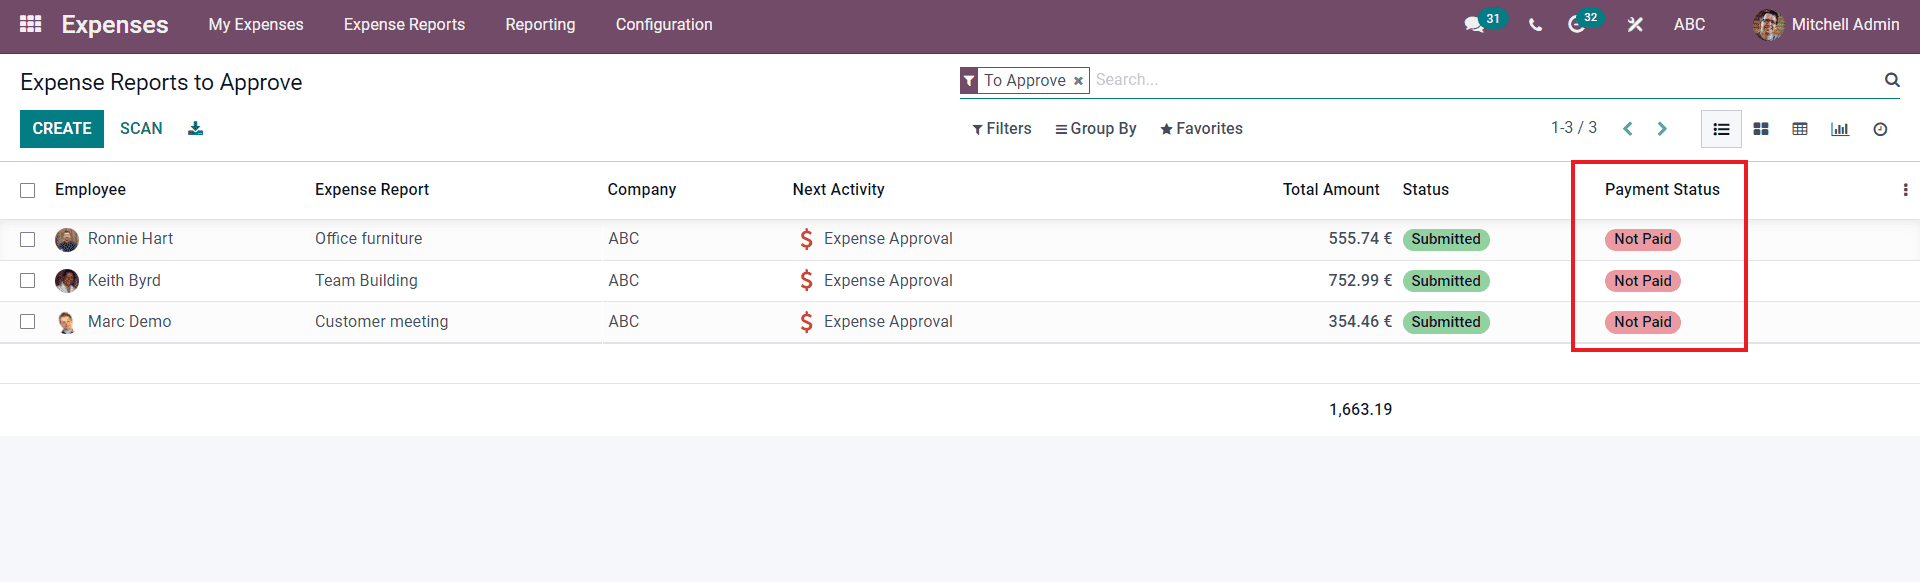
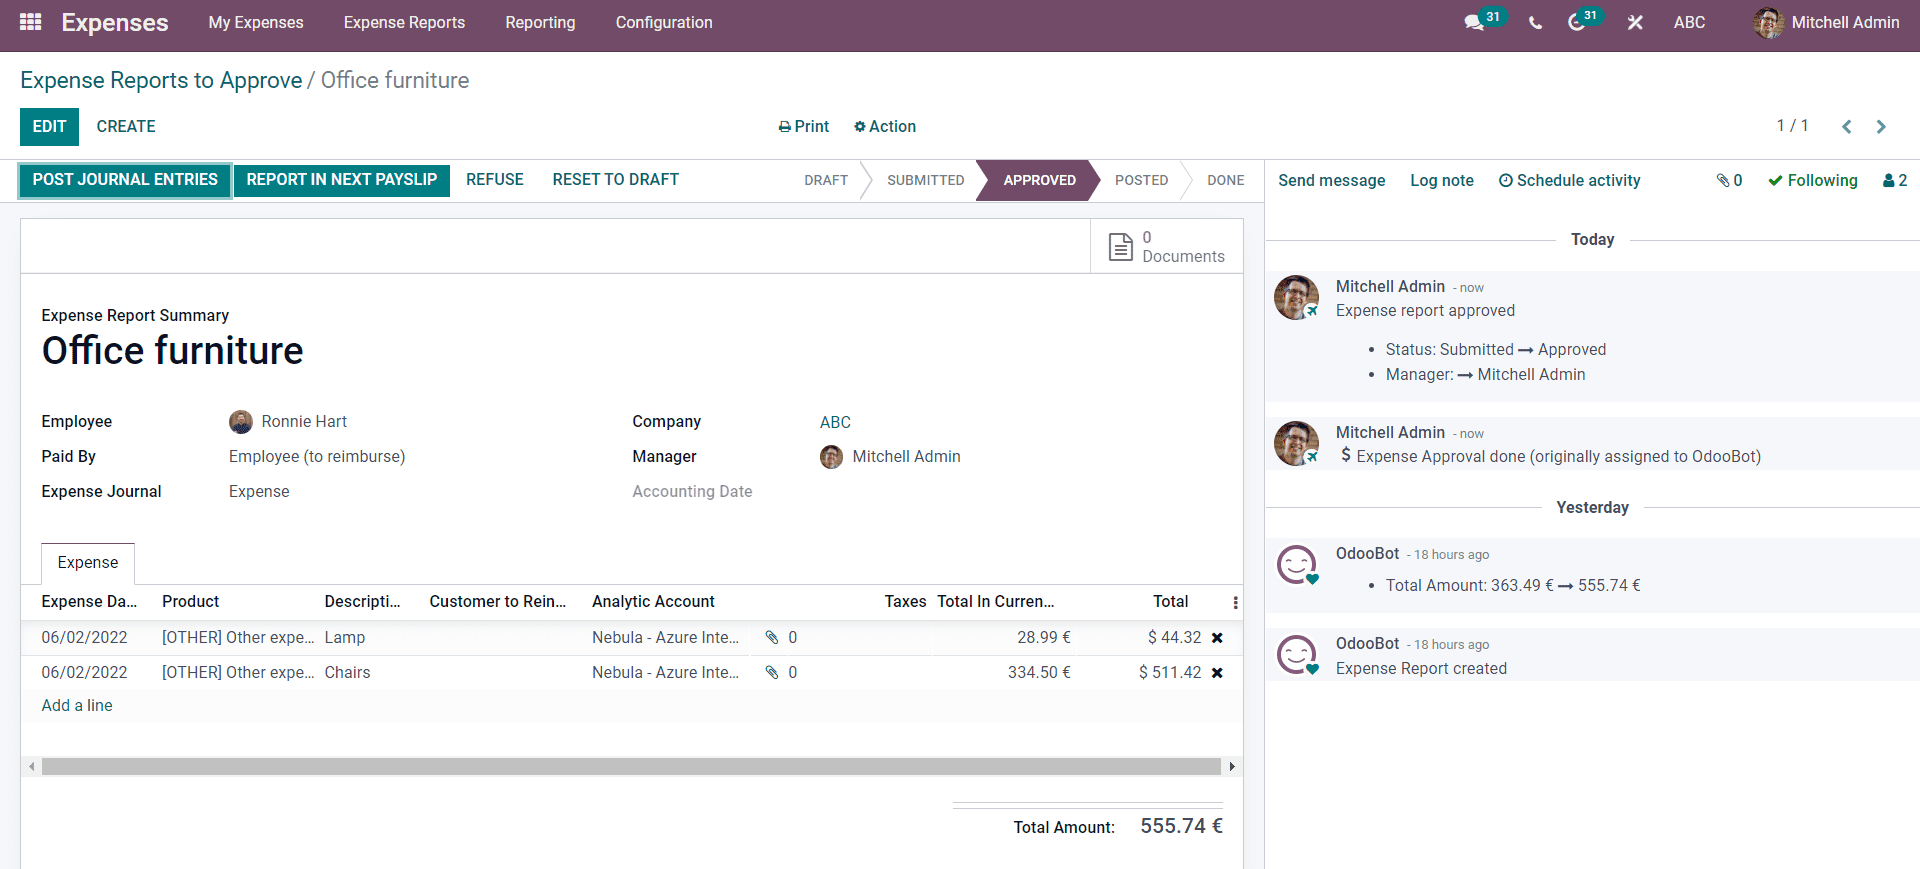
Mitchell can choose from the list of employees for approval management on the Expenses report. So if Mitchell wants to approve the expense of his employee, Ronnie Hart he can simply click on the employee from the list and the page describing the employees expense will open up ads shown in the image given below.
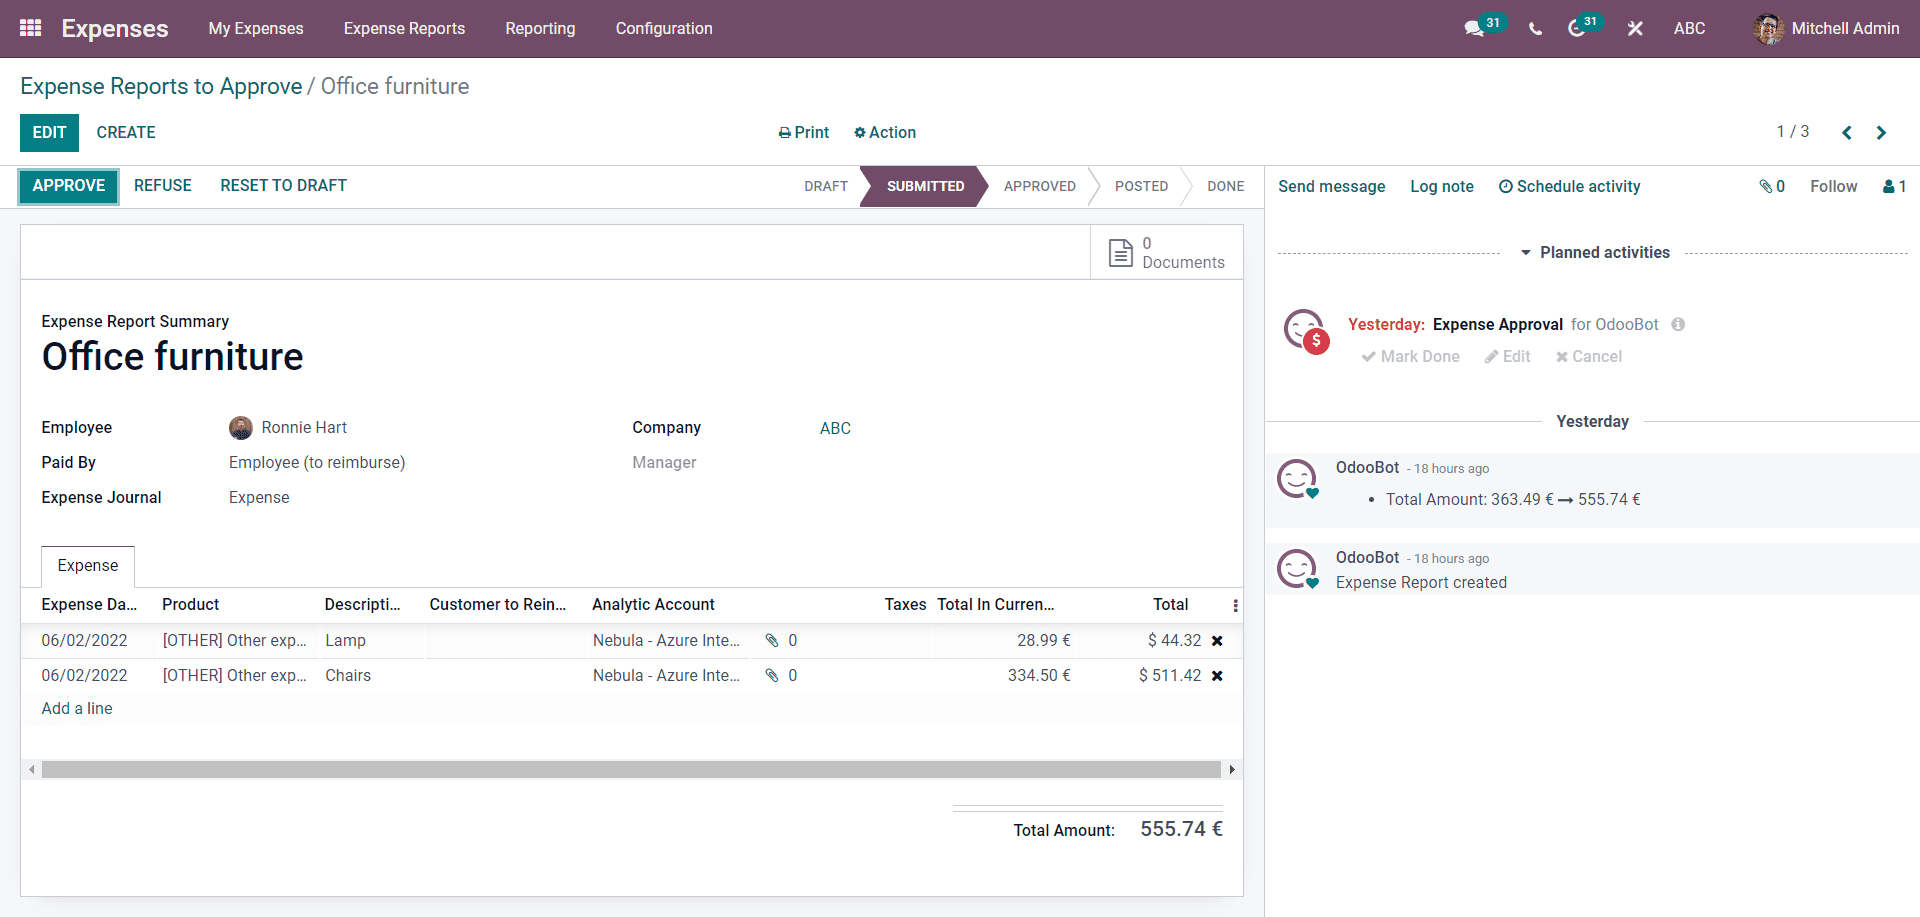
Mitchell can go through the details and decide whether to allow Approve or Refuse by clicking on their respective buttons. Mitchell can edit the configuration done by Ronnie hart to ensure the rigidity of the Expense summary. In this situation, Mitchell is convinced about the Expense and he wants to approve it. Mitchell can click on the APPROVE button to approve the expense and the page will move on to the next stage in the process as shown in the image given below.
Mitchell can choose whether to Enter the expense into the Journal entries by clicking on the POST JOURNAL ENTRIES or directly enter it to the payslip by clicking on the REPORT IN NEXT PAYSLIP button. The respective tab or page on it will open up based on the options that Mitchell choose from the two as mentioned in the Expenses management section of this blog.
Reports to post
The next step in the process is that Mitchell can overview the Expenses reports that are yet to be posted as shown in the image given below.
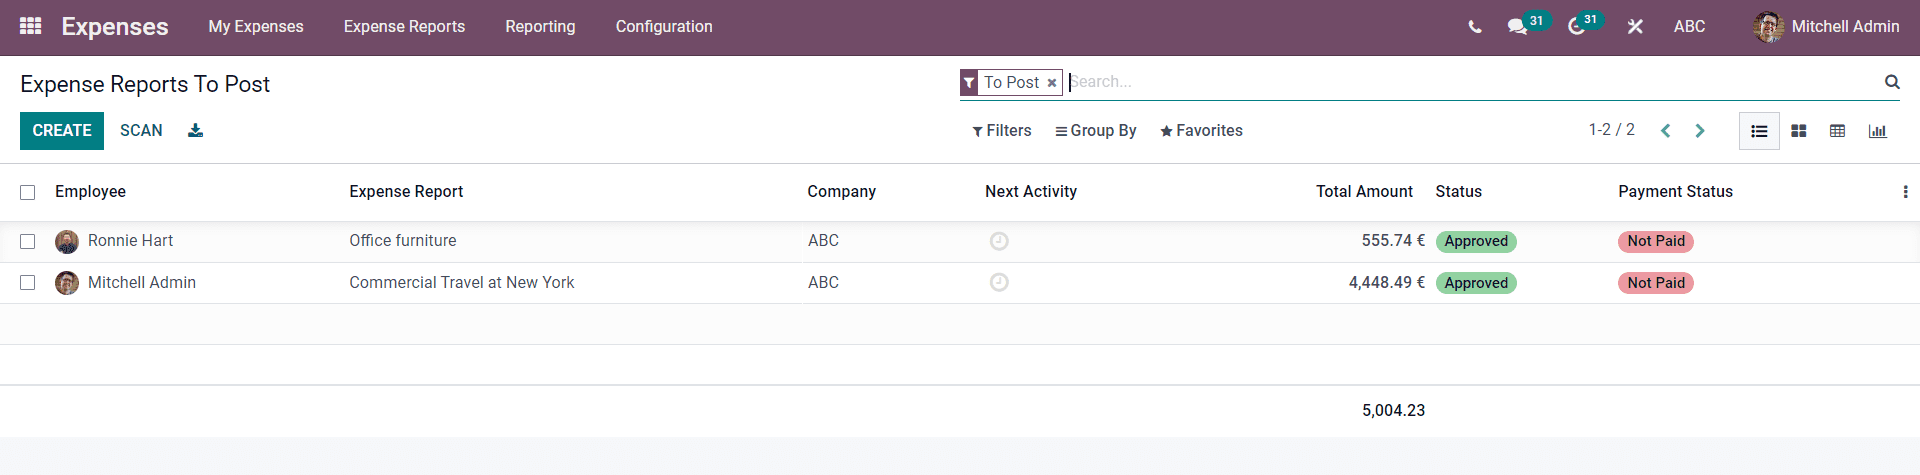
All of the Expenses reports to post will be listed down on this page. Mitchell can click any from the list to upgrade the status on them. Here Mitchell can post the Expense report of Ronnie hart by clicking on it and the configuration page will open up as shown below.
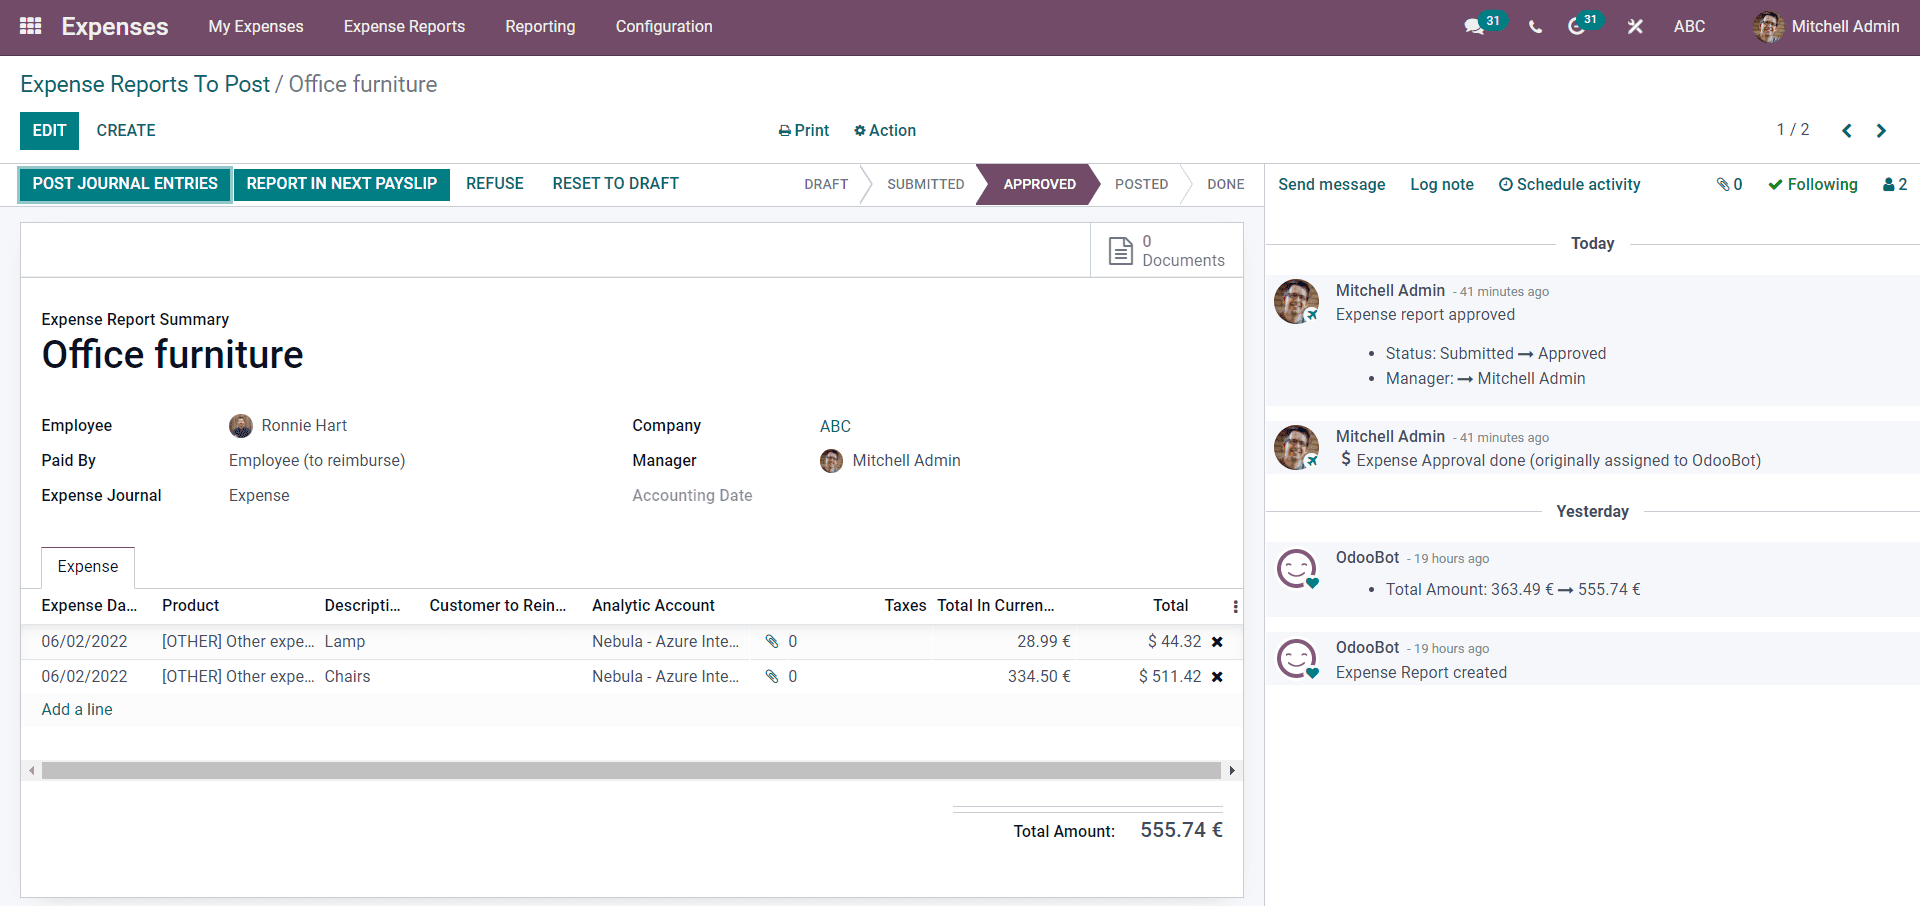
Mitchelll can go through the details from the page before confirming the report. Posting the report will allow Mitchell to effortlessly manage the expenses report.
Reports to pay
The Reports Pay option will allow Mitchell to view the list of expenses that need to be paid. But with the steps that Mitchell has taken on Ronnie, he already got paid. But Mitchell can create a new report to pay from the page by clicking on the CREATE button which will give him a configuration page as shown in the image given below.
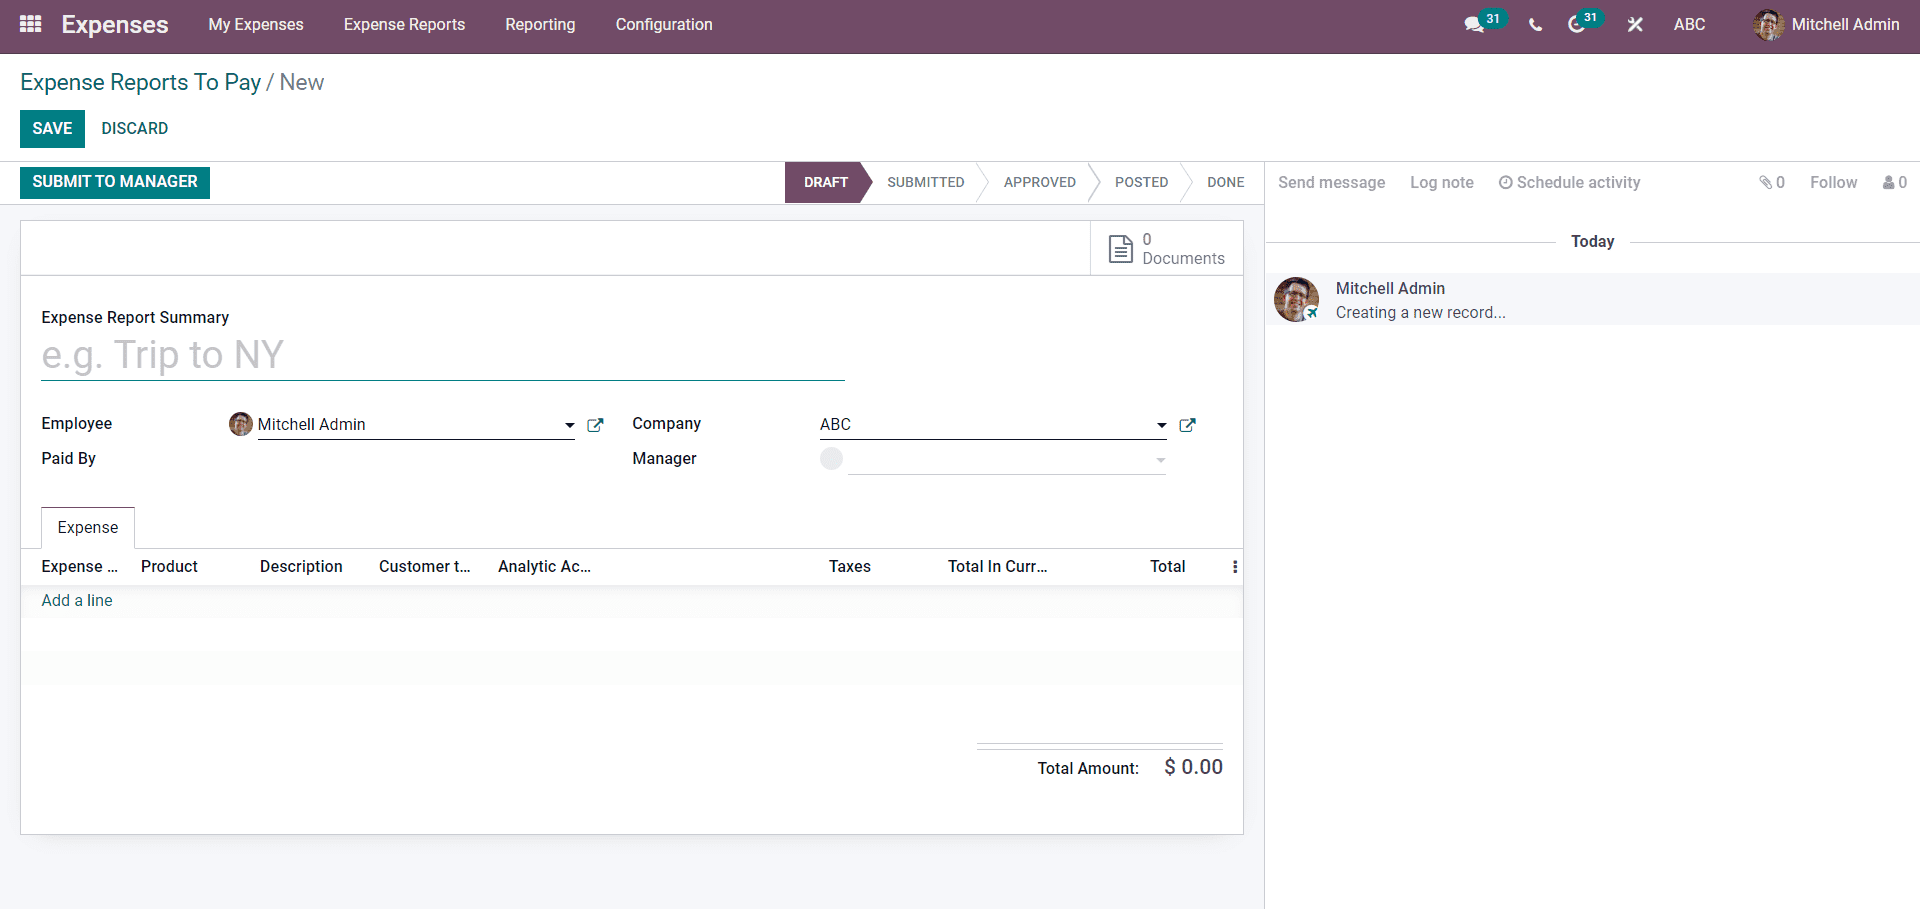
Mitchell can create a new Expenses report to pay from this page. After the configurations, Mitchell can submit the payment request to the manager by clicking on the SUBMIT TO MANAGER button. Mager can approve the payment instantly after this.
All Reports
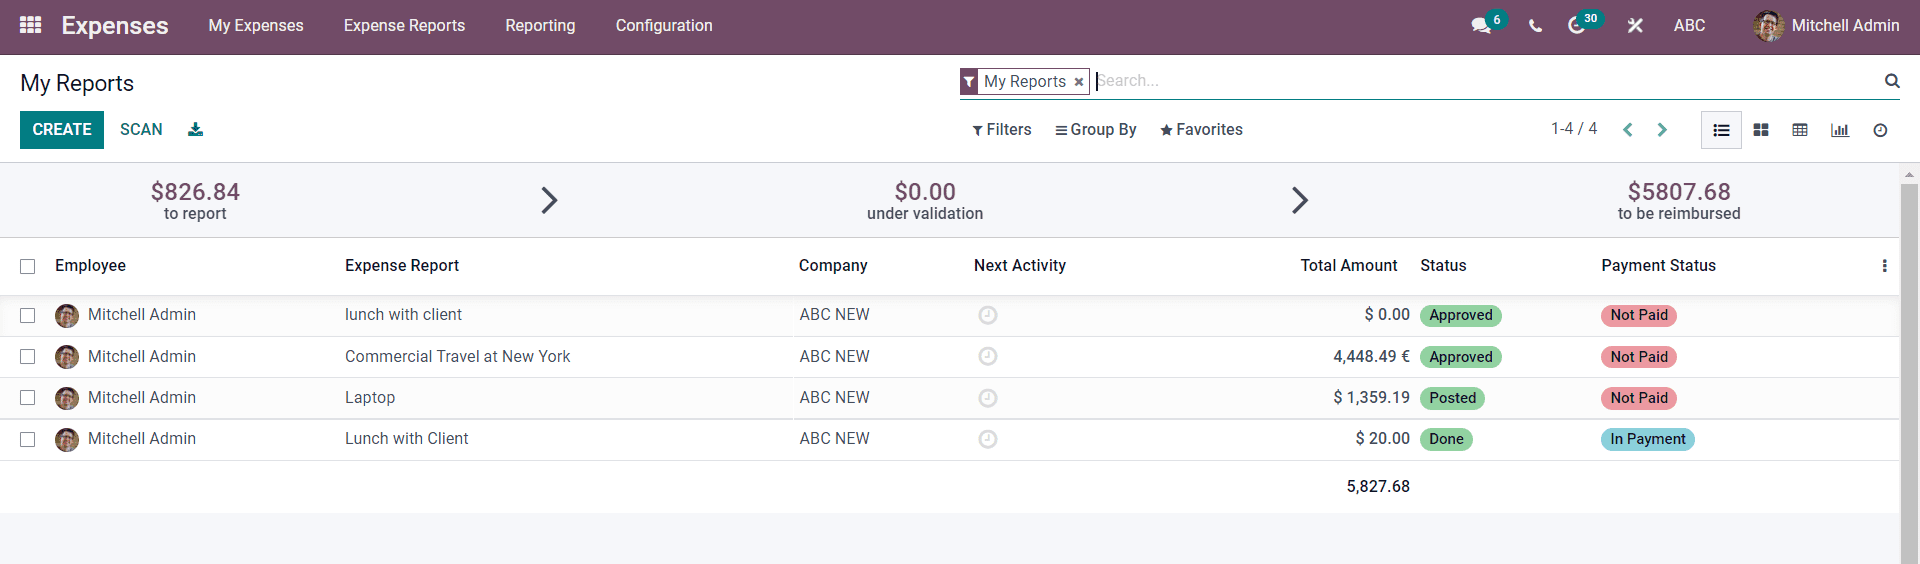
Finally, Mitchell can view all of the expenses reports in All reports as shown below.
The live status on the reports with their payment status will be listed on this page for Mitchell to have an overview of the expense management procedures. Here the payment of Ronnie Hart is still at bay so Mitchell can click on Ronnie from the list and the page on it will open up as shown below.
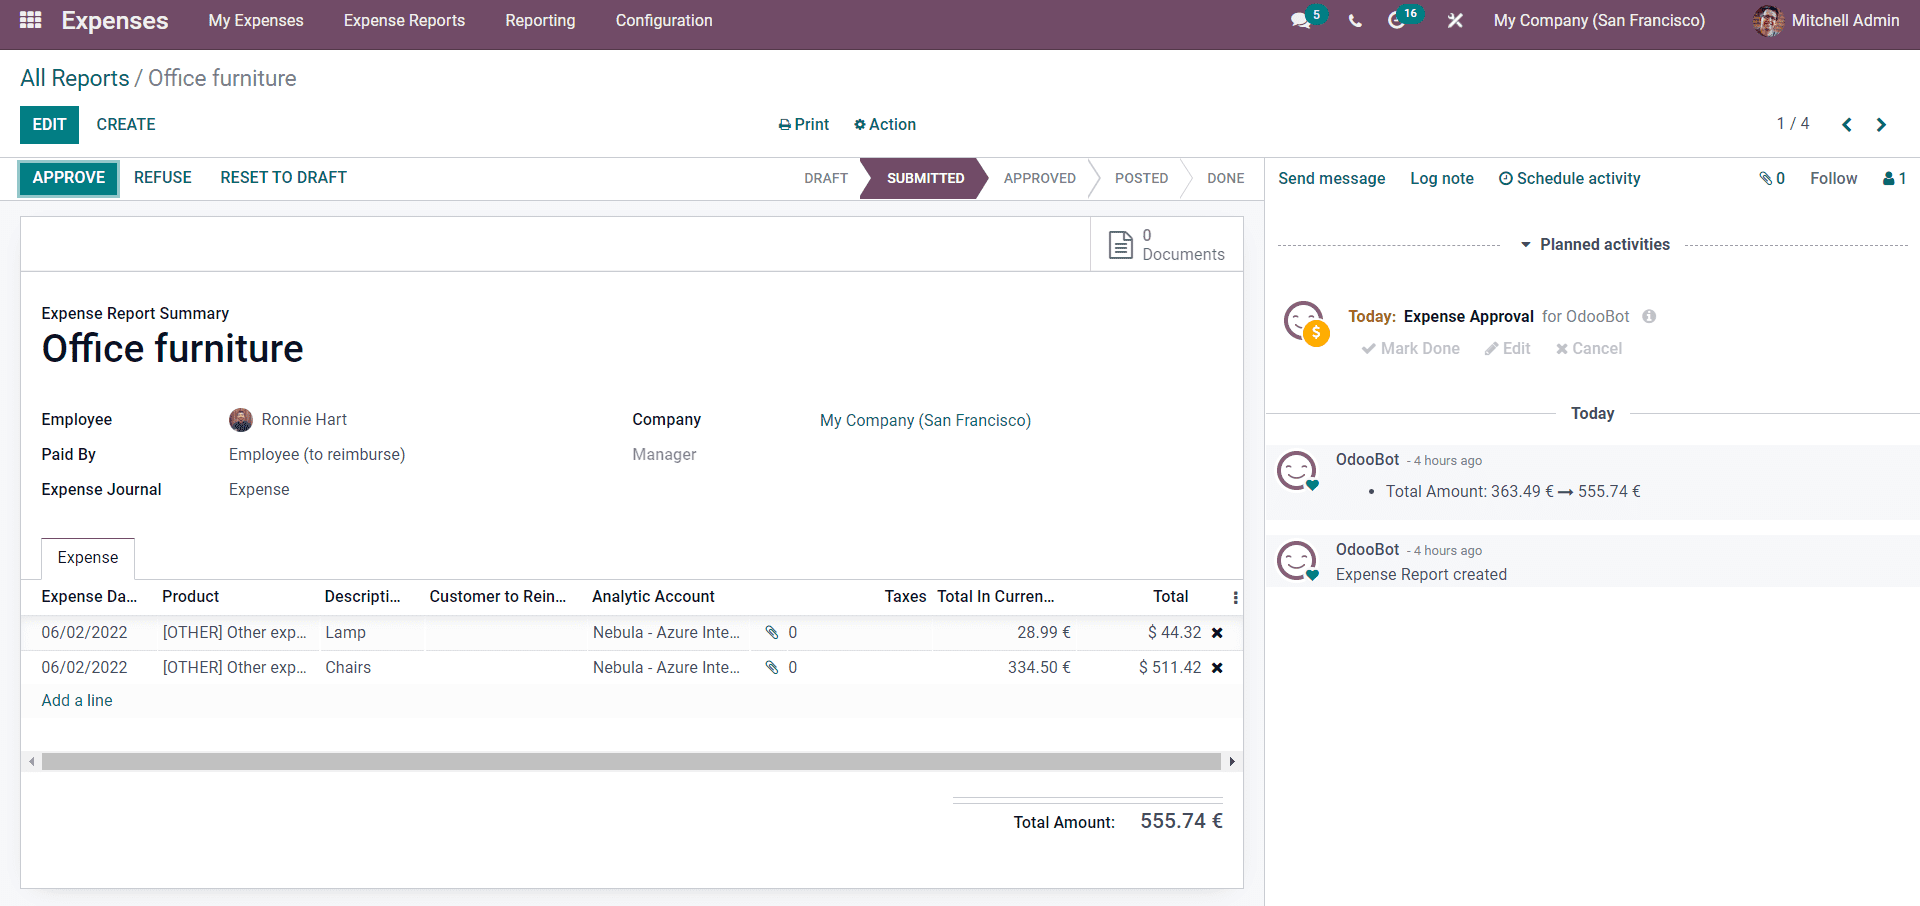
Mitchell can go through the details on the report and approve by clicking on the APPROVE button. After the Approval, Ronnie will be provided with the amount of the expense. Similarly, Mitchell can overview and manage all of his employee expenses request from the All reports page.
This is how you can create and manage the Expenses report from the Odoo 15 Expense module.
The advanced Expenses management features of the module make it extremely easy to work and manage multiple expense reports simultaneously efficiently without any clutter or data loss. The module will let you have maximum fluidity and workflow in management for generating maximum efficiency out of its users.