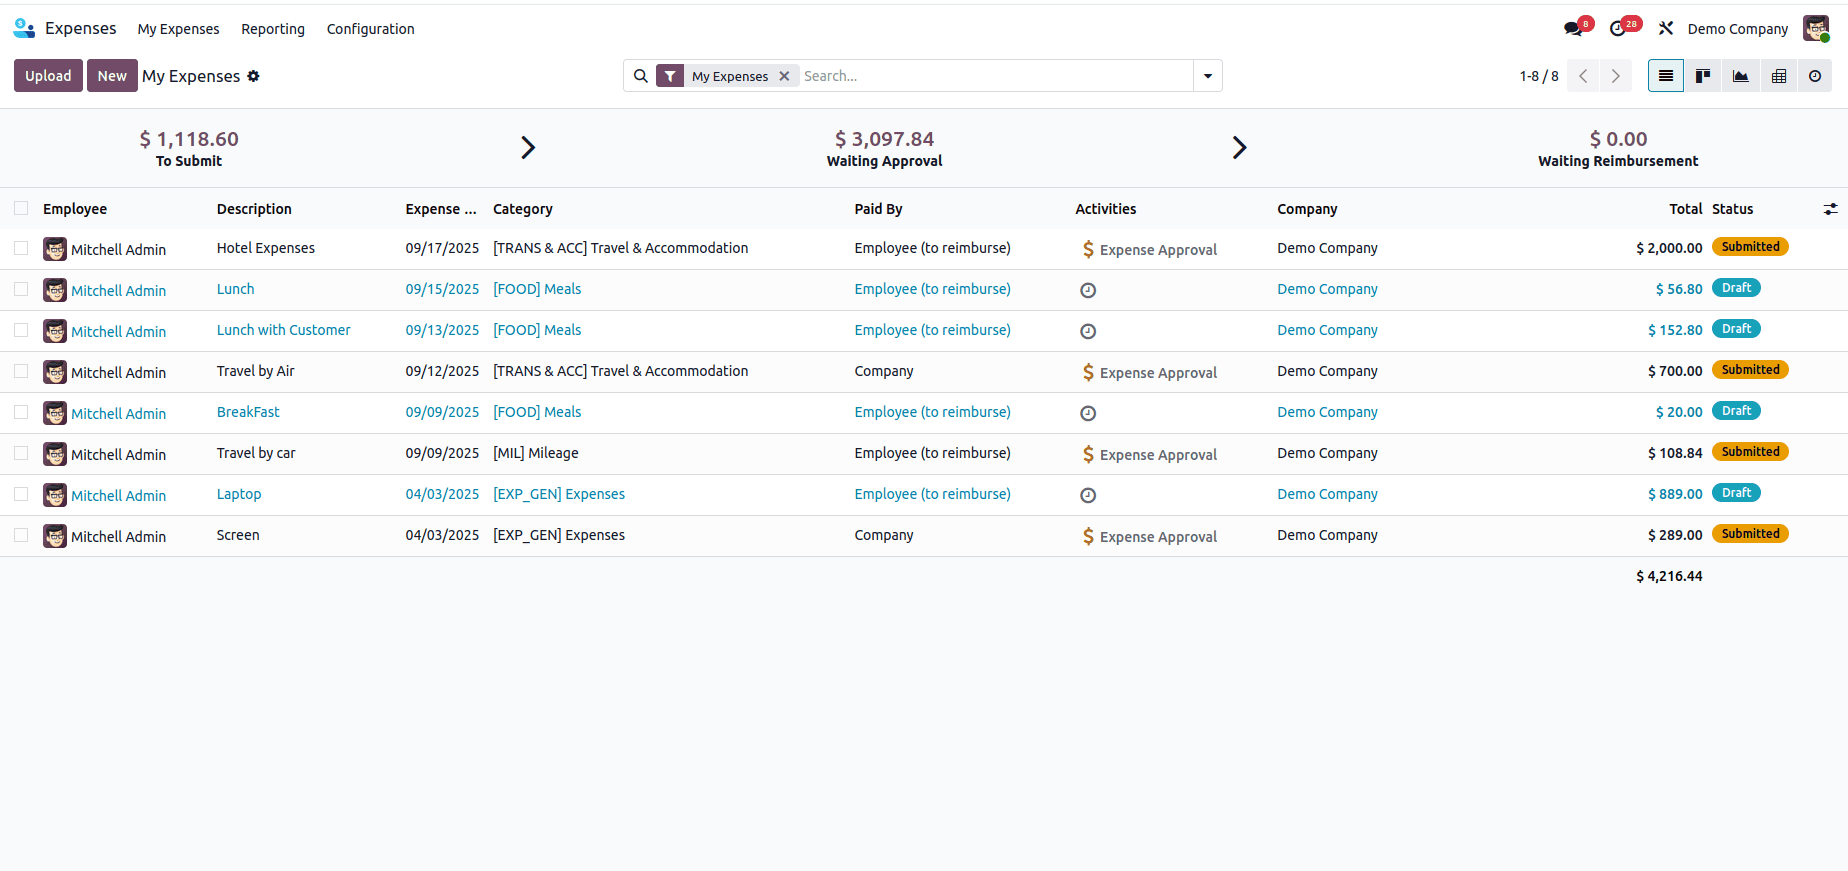
Managing expenses in an organization can be tricky without a clear process. Odoo 18 makes expense reporting quick, transparent, and paperless. Employees can submit expense claims, attach receipts, and track approval status, all from a single dashboard.
In this blog, we’ll walk through the exact steps an employee needs to follow to report expenses in Odoo 18.
From the Odoo main menu, go to the Expenses application. This will take you to the main expense dashboard, where you can see your draft expenses, reports, and submission history.From the Odoo main menu, go to the Expenses application. This will take you to the main expense dashboard, where you can see your draft expenses, reports, and submission history.
Creating an Expense in Odoo 18
In Odoo 18, an employee can create an expense in two ways:
1. Uploading a Receipt or Bill
Click the Upload button to attach a bill or receipt.
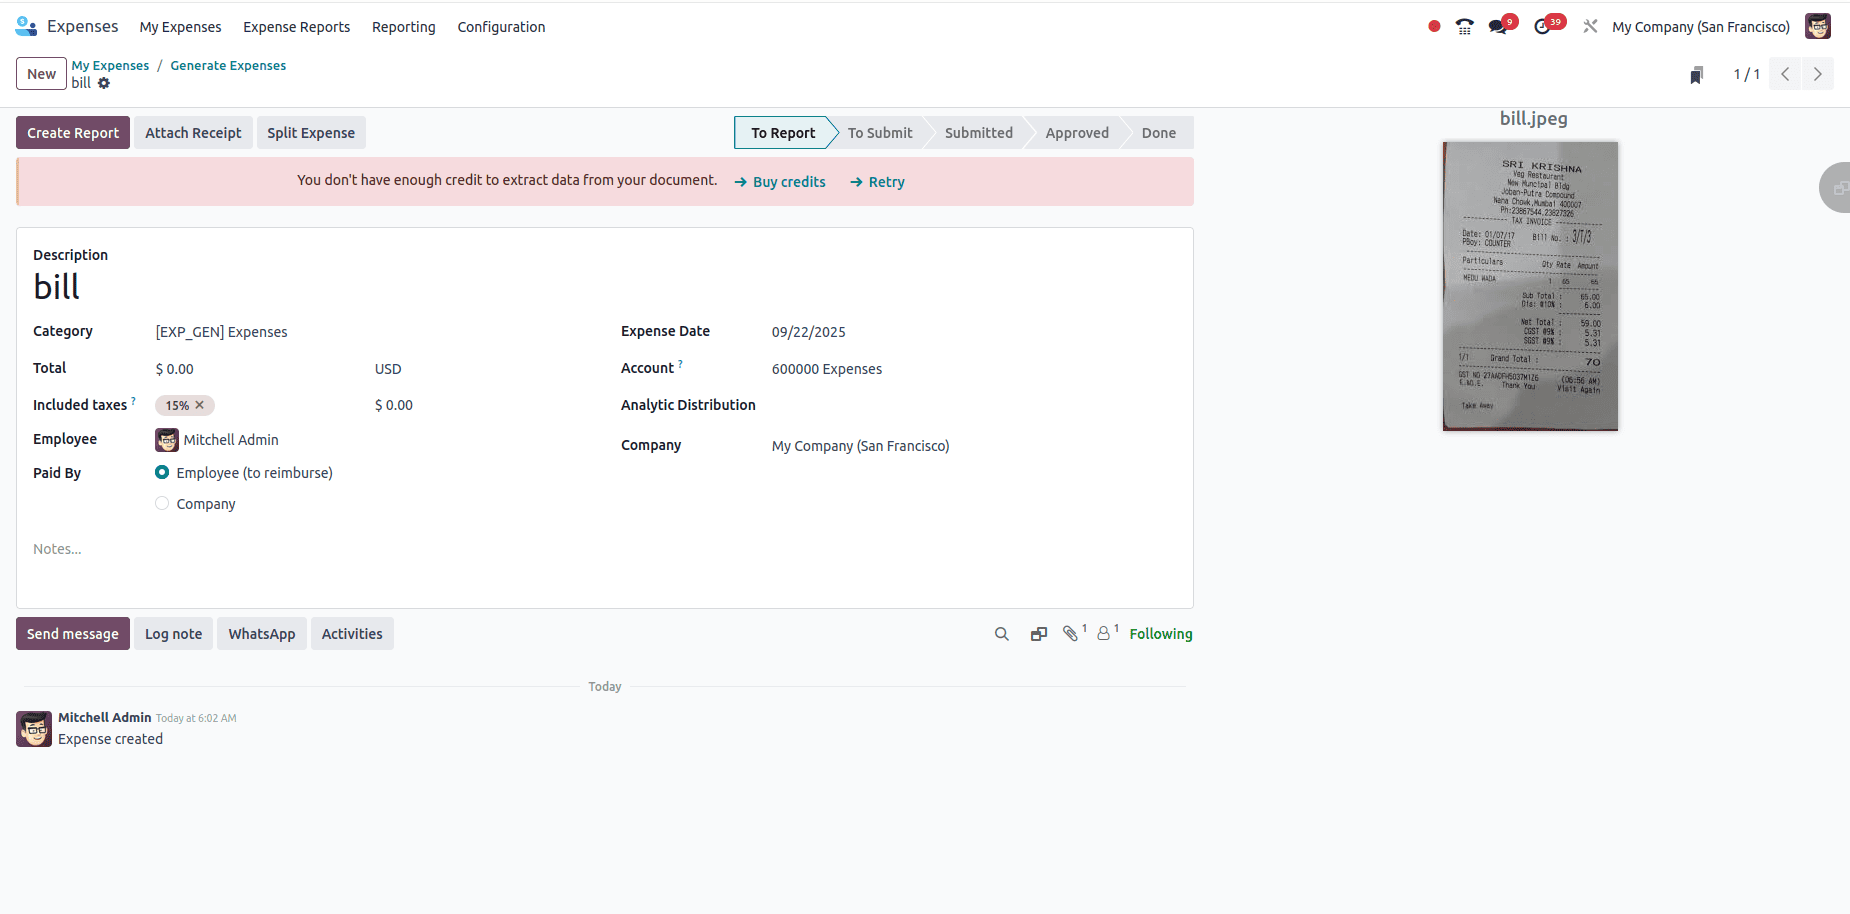
Once you upload the document, Odoo automatically generates a draft expense entry using OCR to extract the key details. On the right side, you can see the attached receipt for easy reference.
3. Creating an Expense Manually
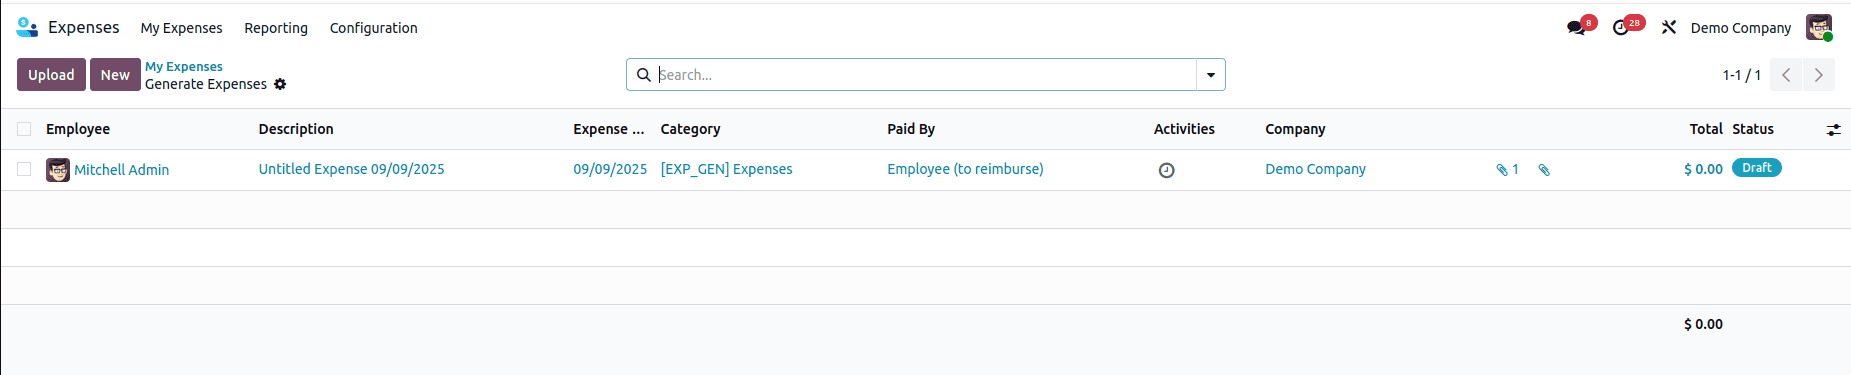
If no document is available or you want to enter the details yourself, click the New button to create an expense from scratch.
Regardless of the method you choose, only the initial action differs — both options lead to the same draft expense form where you can review and update the details.
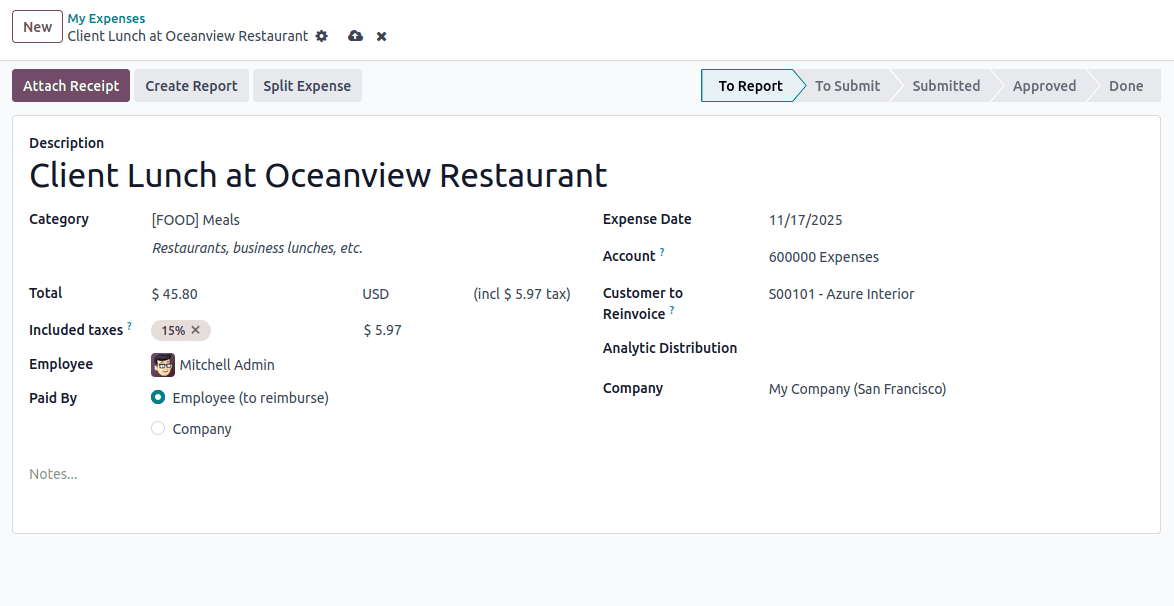
Below is an example of a draft expense created from a restaurant bill.
Reviewing and Editing the Expense Details
After the draft is created, you can review and update the fields as needed. Here is a breakdown of each field, explained using the restaurant bill example:
Description
Enter a clear summary of the expense.
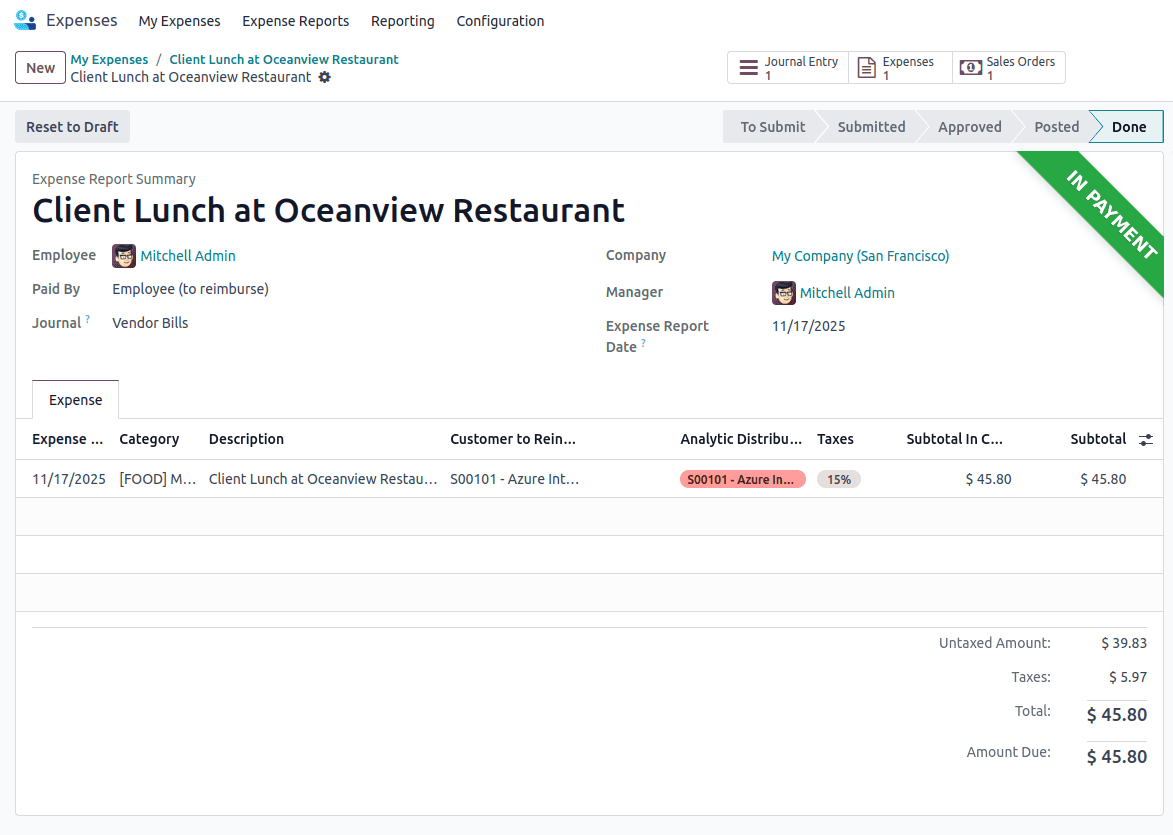
Example: “Client Lunch at Oceanview Restaurant.”
Category
Select the appropriate expense category.
Example: For a restaurant bill, choose Meals or Travel & Meals depending on your company’s structure.
Total & Taxes
Odoo uses OCR to detect the total amount and applicable taxes. If OCR credits are not available, you can enter these values manually.
Example:
- Total: $45.80
- Taxes: 15% tax applied, which is calculated to $ 5.97
Employee
This field automatically shows the employee creating the expense.
Example: Mitchell Admin (auto-filled).
Paid By
Select who paid for the expense:
- Employee (To Reimburse): If employee (Mitchell Admin) paid the restaurant bill using his own money.
- Company: If the company card was used.
Expense Date
Confirm the date shown on the receipt.
Example: November 12, 2025.
Account
Odoo assigns the default expense account based on the category.
Example: For expenses, the system may use 600000 Expenses.
Customer to Reinvoice
Use this if the expense should be billed to a customer—often useful in consulting, service, and project-based businesses.
If the restaurant bill was for a lunch meeting with Azure Interior, select S00101 - Azure Interior
So the $45.80 expense can be added to their invoice.
Analytic Distribution
Distribute the expense across different analytic accounts or projects.
This is helpful when the cost relates to specific projects or departments.
Creating an Expense
Sometimes a single bill covers multiple expense types—for example, a restaurant bill split between Meals and Entertainment or a shared taxi fare between two employees—and Odoo 18 makes this easy with the Split Expense feature.
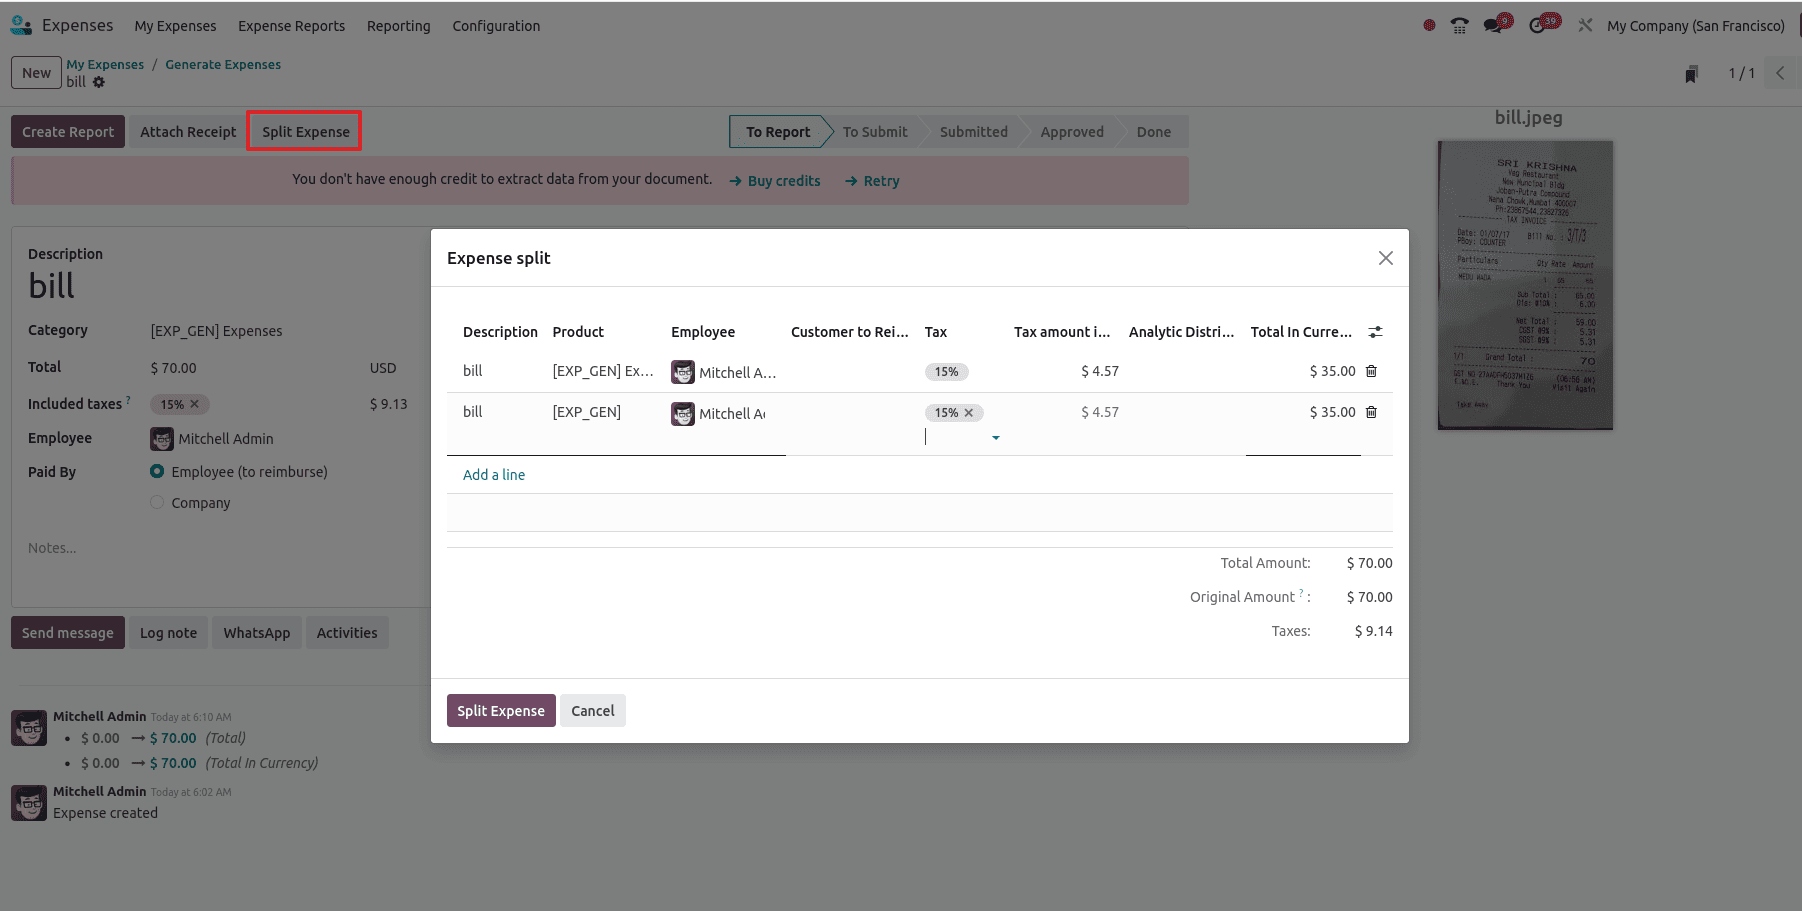
You can click on the Split Expense button. Clicking Split Expense opens a pop-up where the total can be divided into multiple lines, each with its own description, category, employee, tax, and amount. In the example shown, the original $70 bill has been split into two equal parts of $35 each for the same employee, with Odoo automatically recalculating the taxes to ensure the total remains consistent with the original receipt.
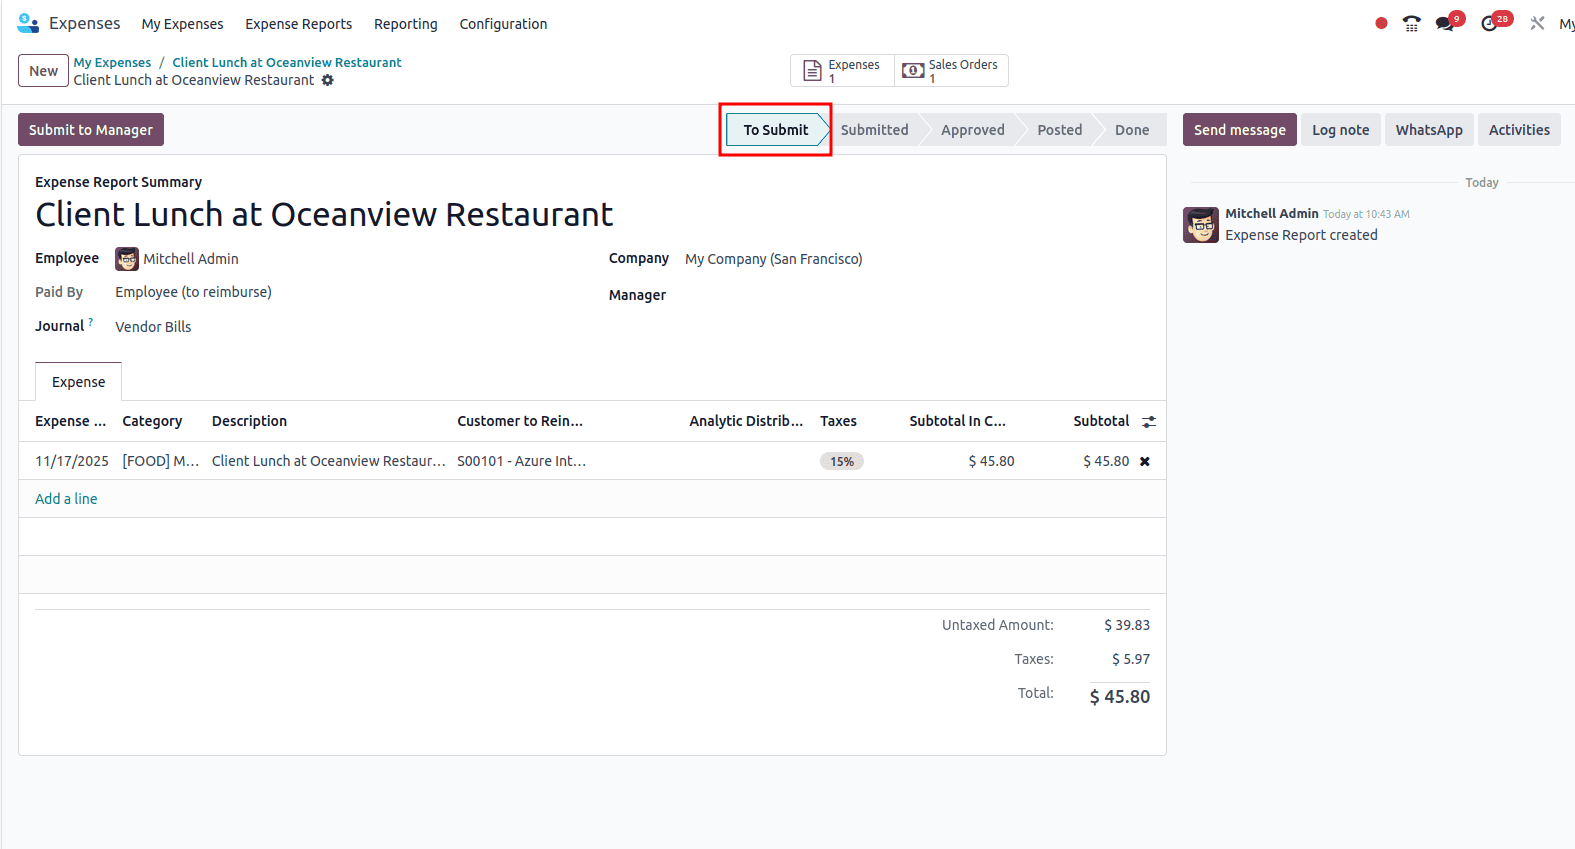
After reviewing the details, click Create Report to group this expense into a report. Expense reports help bundle multiple claims together, making the approval and reimbursement process smoother.
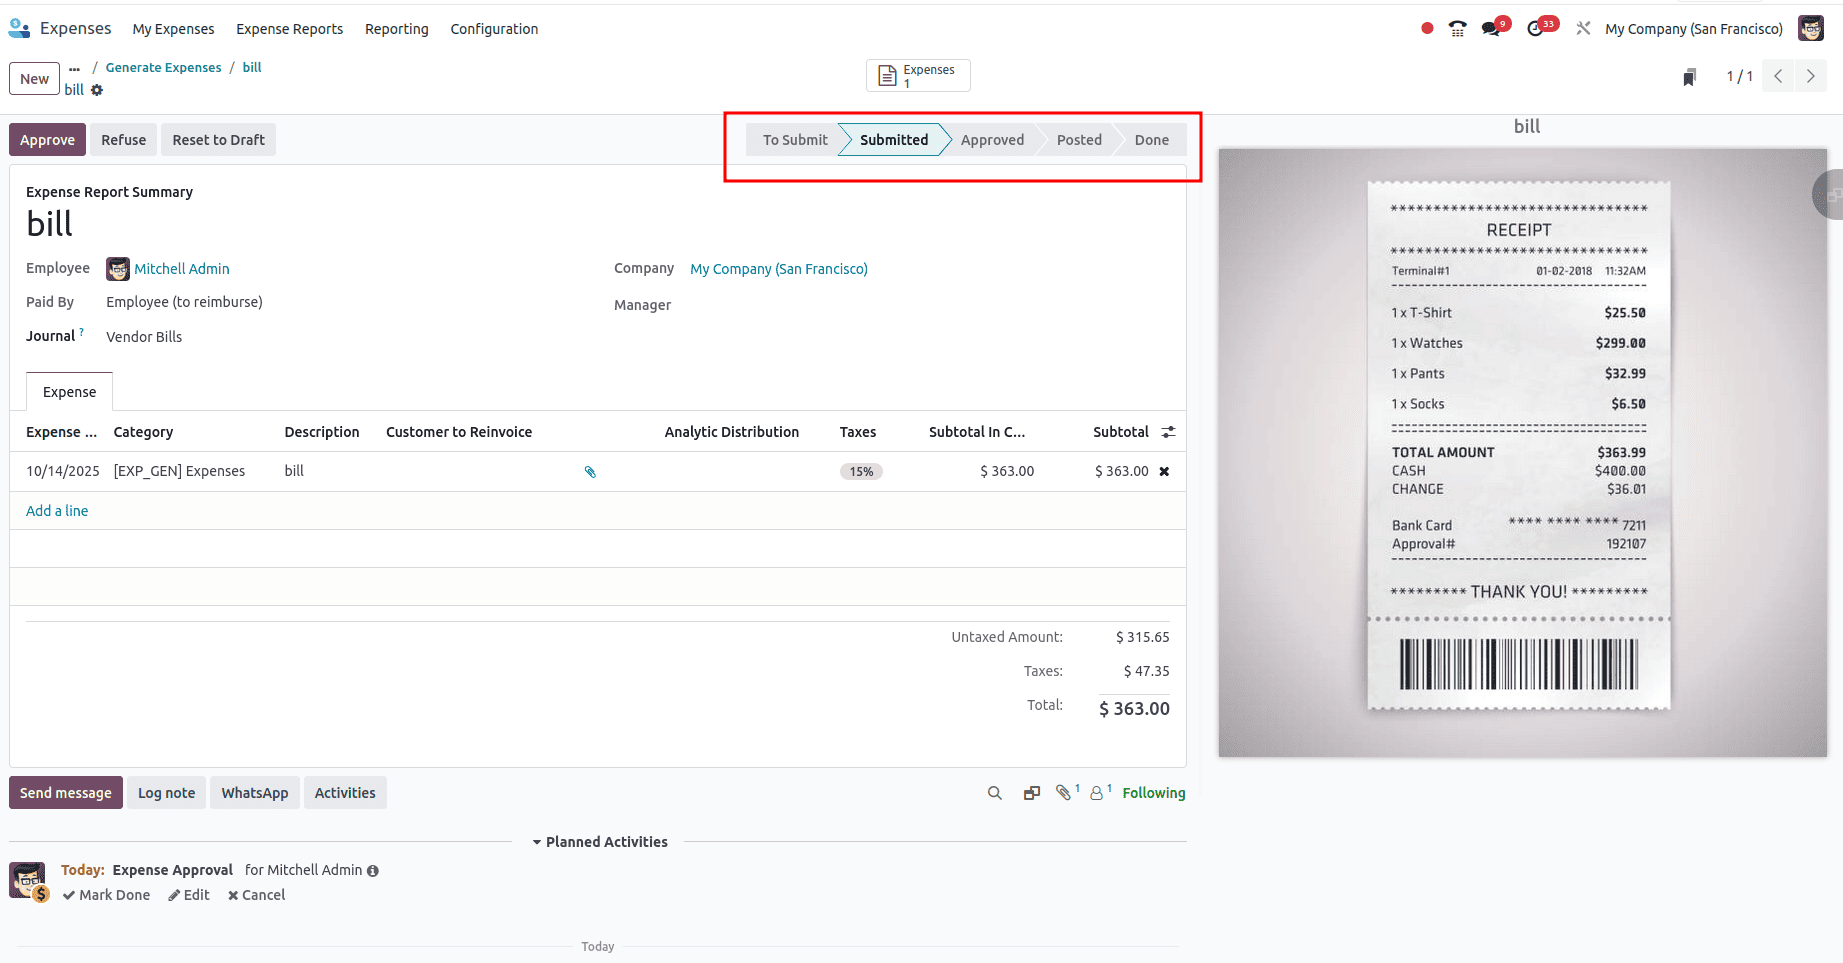
Each report follows a workflow:
- To Submit > Waiting for an employee to submit.
After clicking Create Report, the report moves to the To Submit stage. Here, you will see the Submit to Manager button.
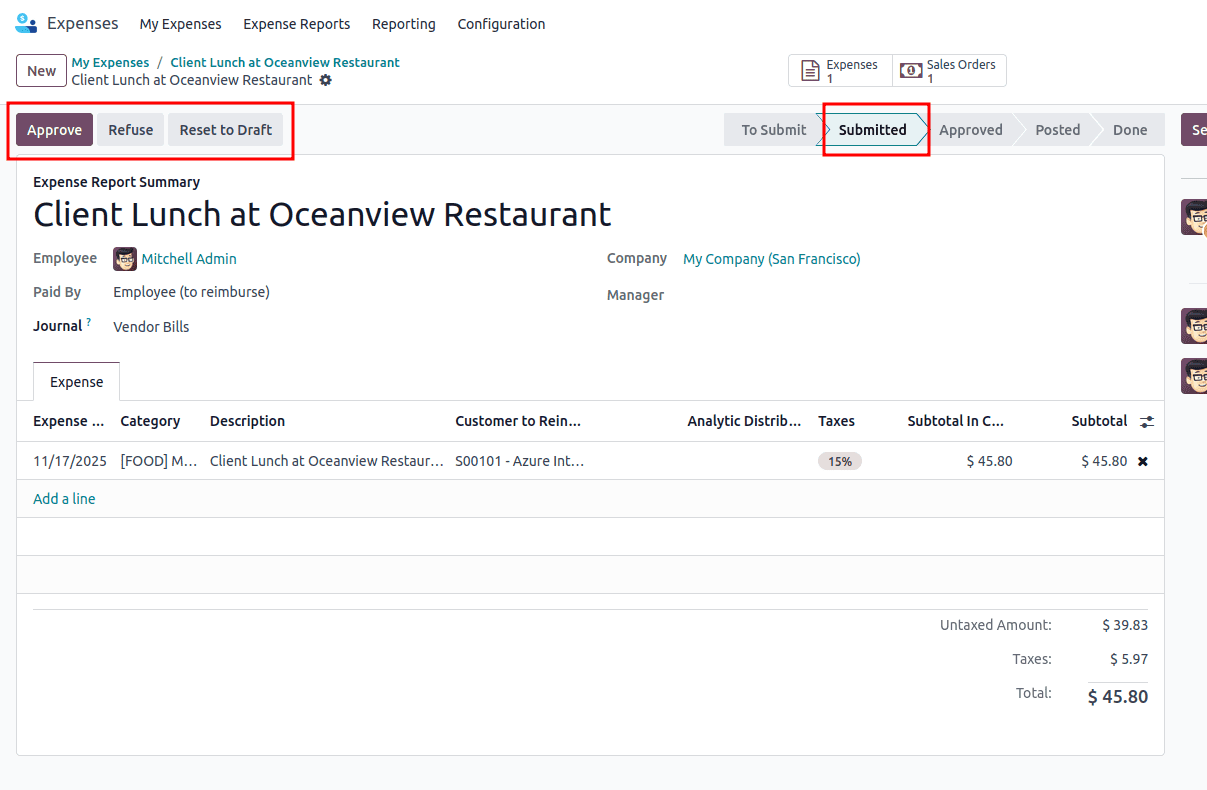
- Submitted > Pending manager approval.
When you click Submit to Manager, the report moves to the Submitted stage.
At this point, the manager can either:
- Refuse the report if corrections are needed
There is also a Reset to Draft button, which moves the report back to the To Submit stage if changes are required.
- Approved > Approved and ready for accounting.
Once the manager approves the expense report, it moves to the Approved stage.
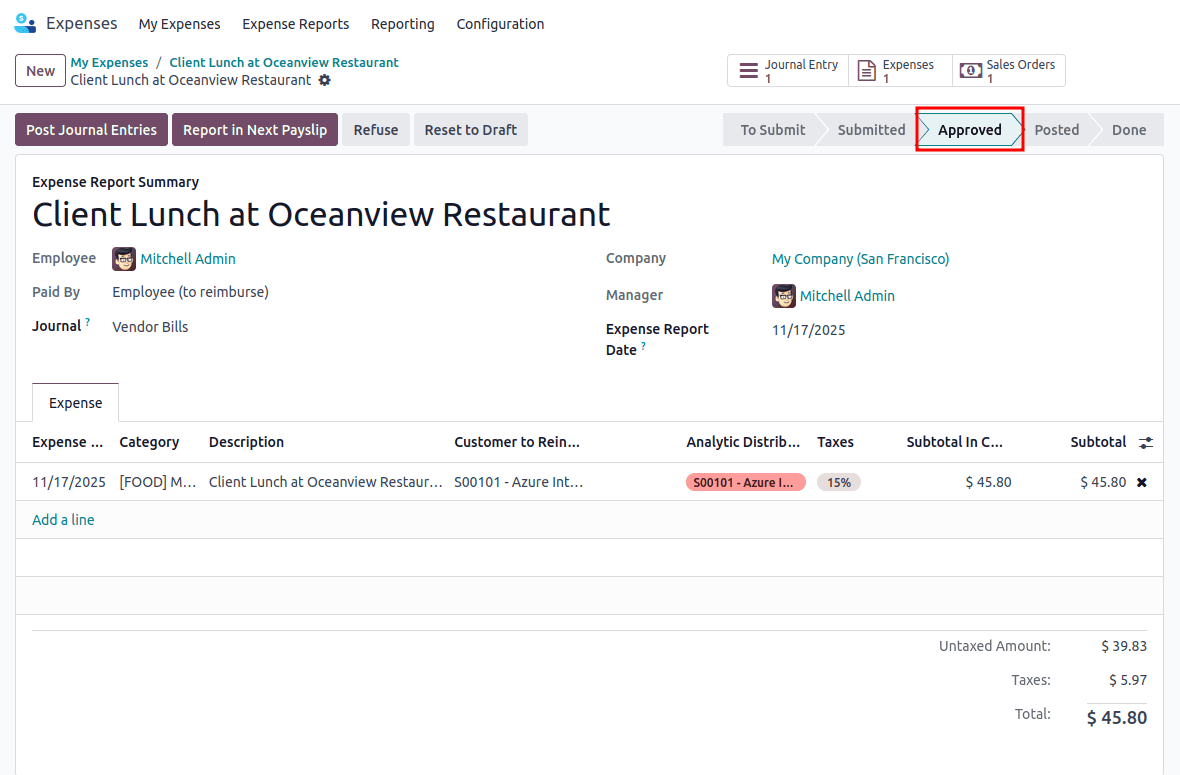
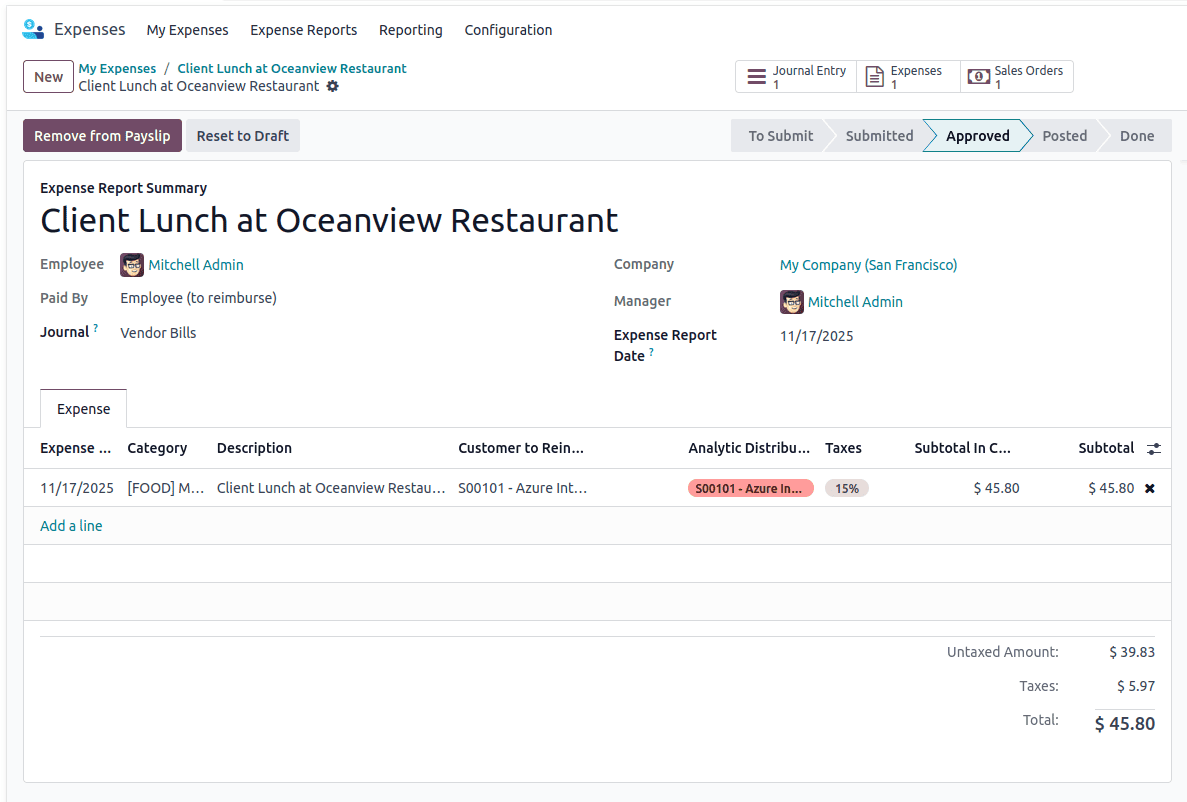
If the employee is to be reimbursed through payroll, click Report in Next Payslip.
This will include the expense amount—in this example, $45.80—in the employee’s next salary. If needed, you can click Remove from Payslip to undo this action and exclude the expense from payroll reimbursement.
To continue the accounting process, click Post Journal Entries to move the report to the Posted stage and generate the necessary accounting entries.

- Done > Finalized and reimbursed.
After posting the journal entries, click the Pay button to record the reimbursement to the employee. Once the payment is completed, the report moves to the Done stage, marking the expense as fully processed.
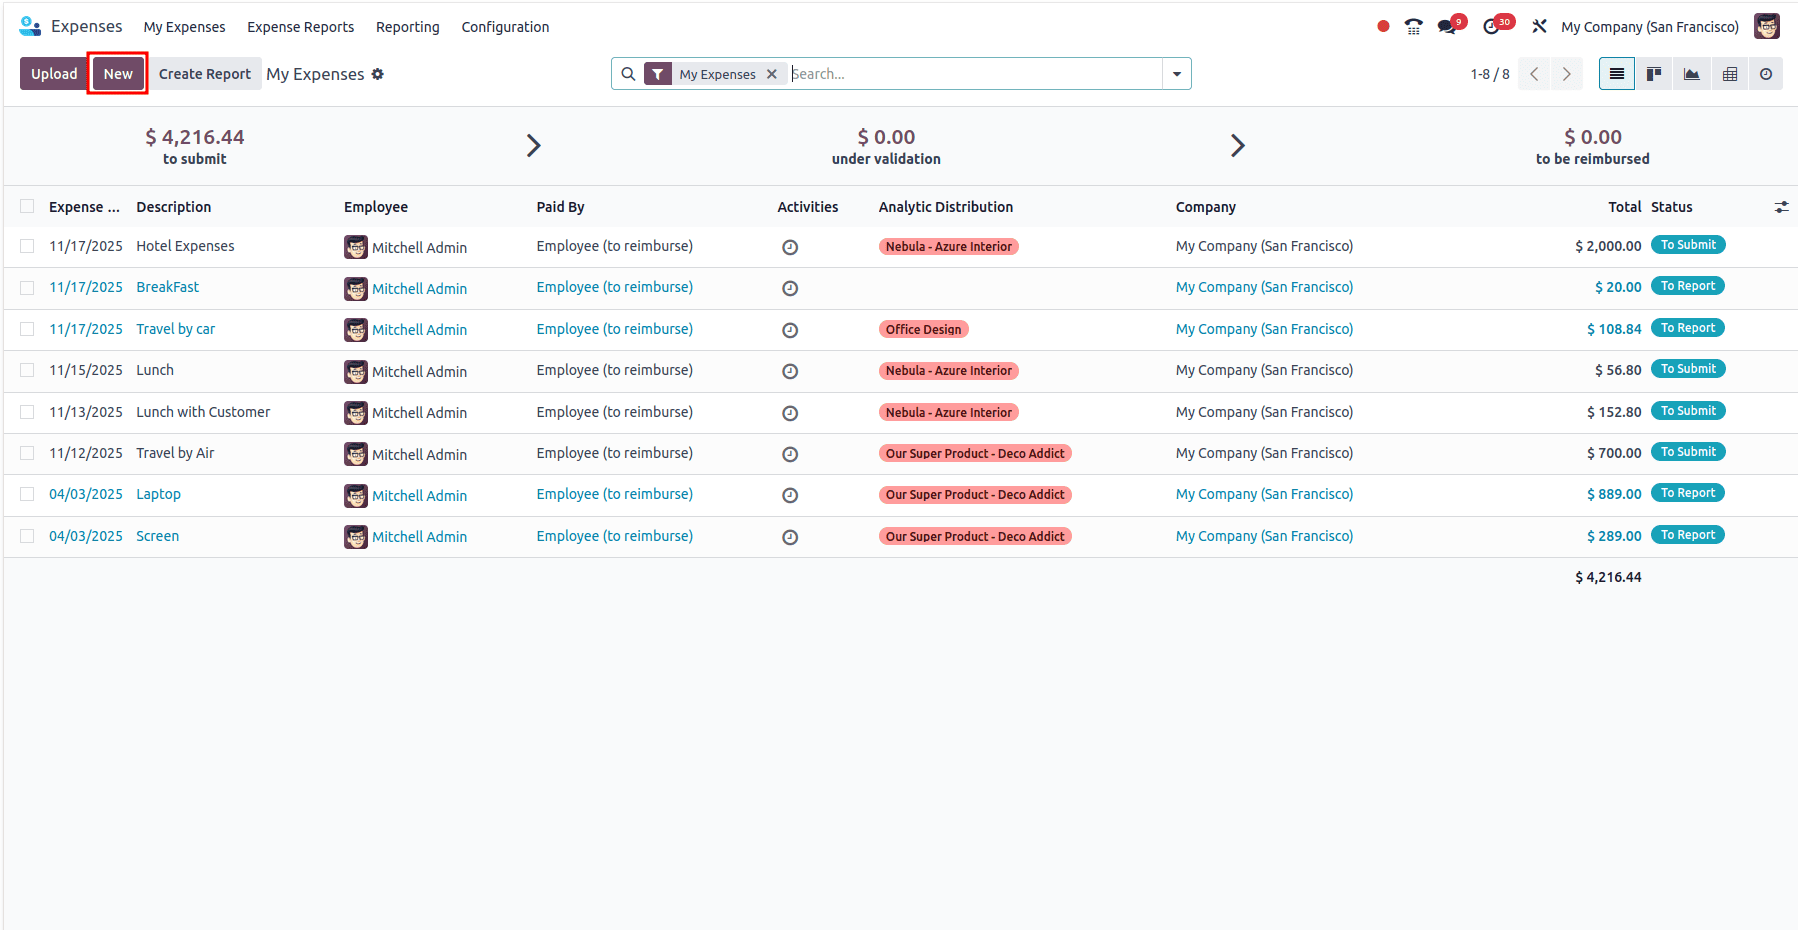
Employees can track the progress of their expense reports directly from the dashboard.
Once approved, expenses marked as Paid by Employee will be reimbursed through payroll or a direct payment. If the company paid directly, the expense simply gets logged in the accounting system for reporting purposes.
Managing expenses doesn’t have to be messy or time-consuming. With Odoo 18, employees can easily upload receipts, split costs, and submit claims—all from a single dashboard. Managers get a clear approval workflow, finance teams have complete visibility, and employees are reimbursed quickly without needing to deal with paper forms or manual tracking.
To read more about Overview of Reporting in Odoo 18 Employee, refer to our blog Overview of Reporting in Odoo 18 Employee.