Effective lunch management for staff members can significantly enhance productivity and job satisfaction. The Odoo 18 Lunch Module offers a streamlined approach to managing vendor lists, handling employee meal orders, scheduling lunches, and maintaining budget control by centralizing the lunch process. As a result, HR and administrative departments may reduce errors, manual tracking, and coordination time. Workers can simply track their orders, explore options, and place orders within designated time windows. Managers may analyze reports, automate daily tasks, and monitor lunch spending. Organizations with contracts for multiple food providers or those that provide subsidized meals will find the Lunch module particularly helpful. It guarantees accountability and transparency with built-in features, including meal categories, vendor pricing listings, and notifications. With its user-friendly and intuitive platform, Odoo 18 streamlines lunch logistics for both small and large teams. This blog outlines the key features of the Odoo 18 Lunch Module.
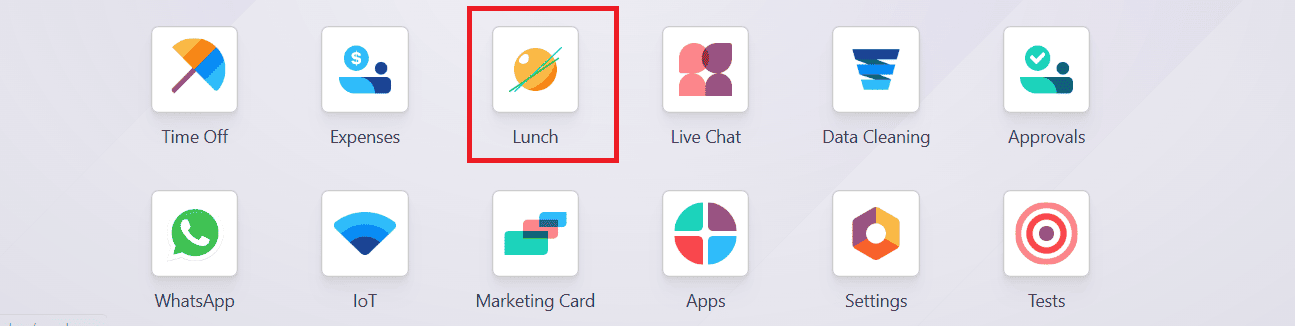
Firstly, select the Lunch module from the Odoo 18 dashboard.
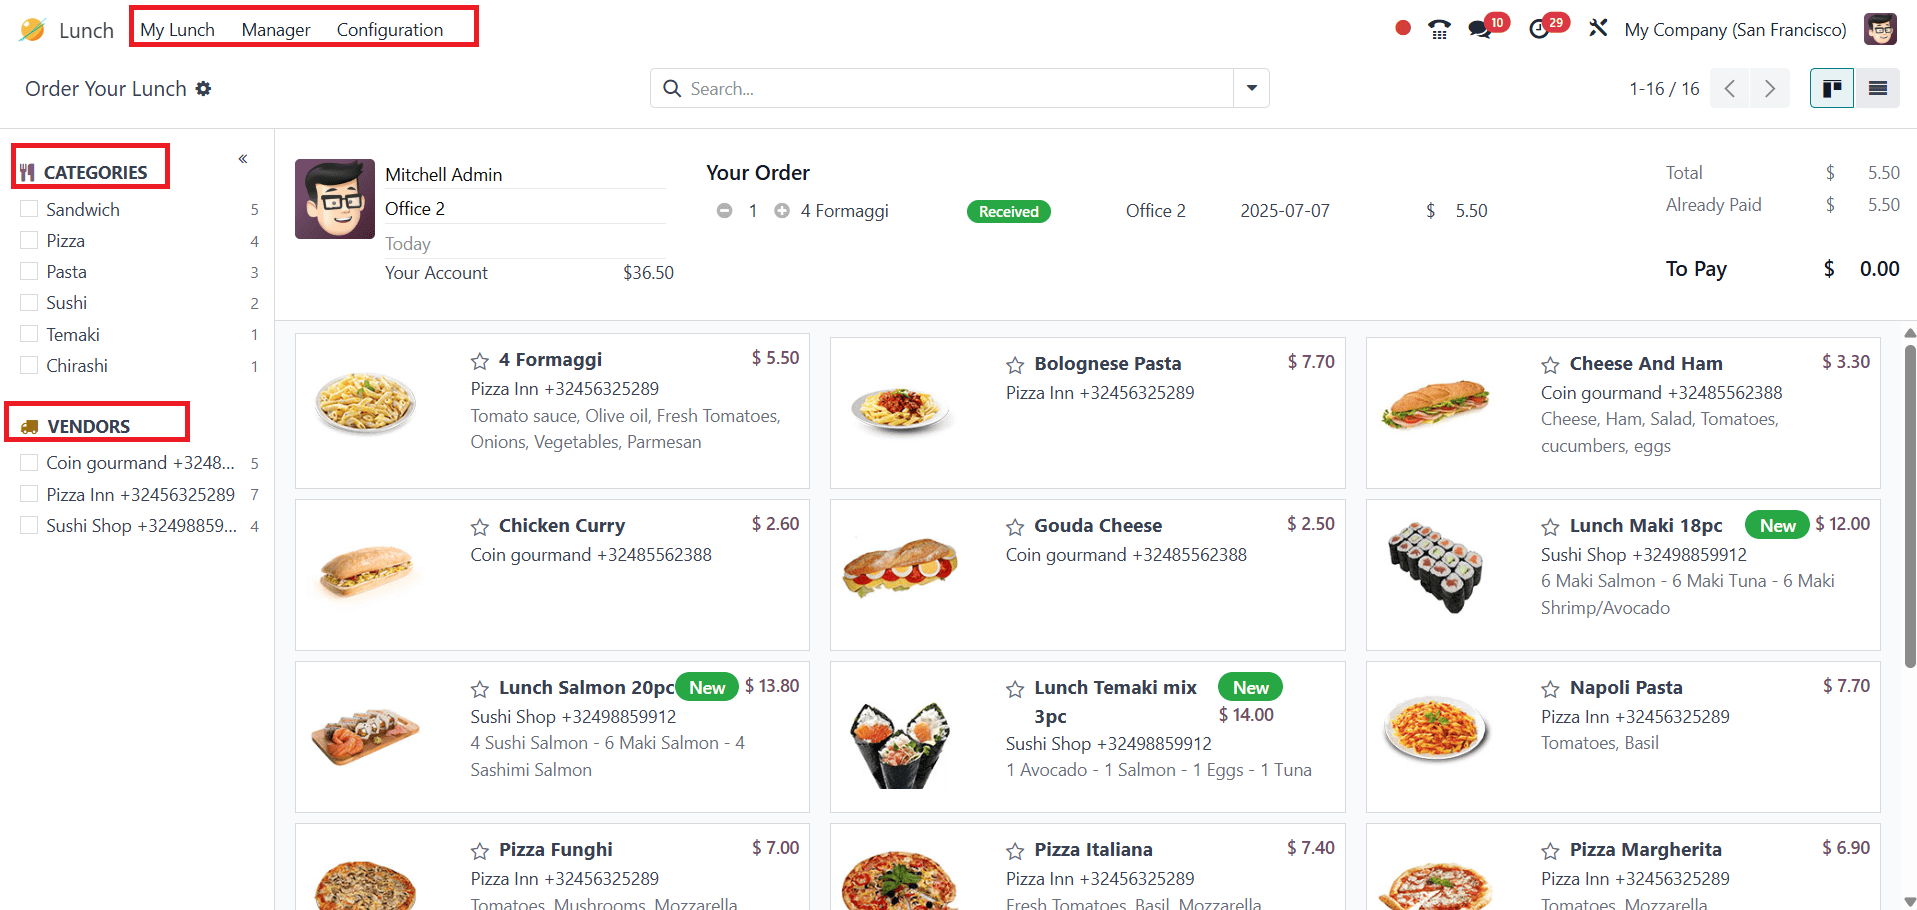
Here, you can view the Lunch module options, including My Lunch, Manager, and Configuration. Food categories and vendor details are visible on the left panel of the dashboard.
Configuration:
Settings:
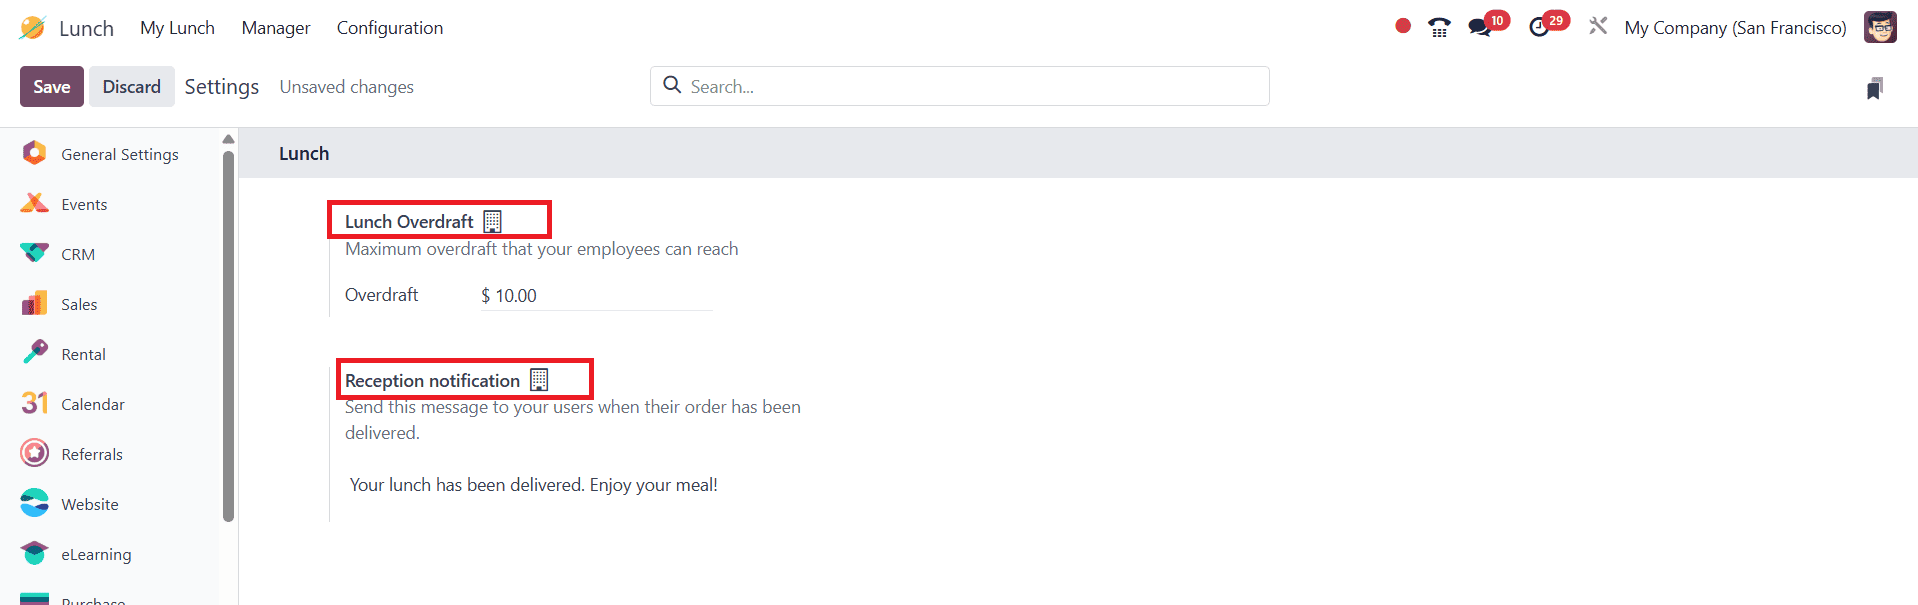
In the Lunch module, navigate to Configuration > Settings. Users can set a maximum amount for employees under Lunch Overdraft and also set an alert notification to be displayed at the time of delivery under the Reception Notification option.
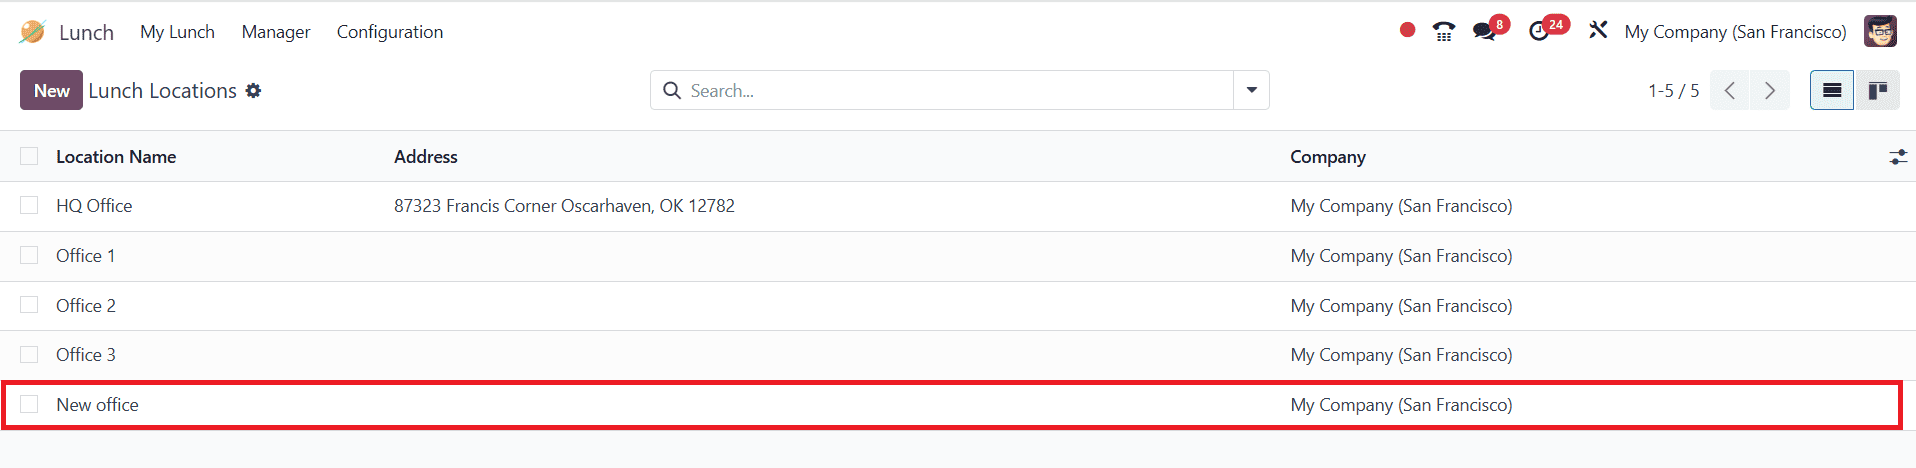
Locations:
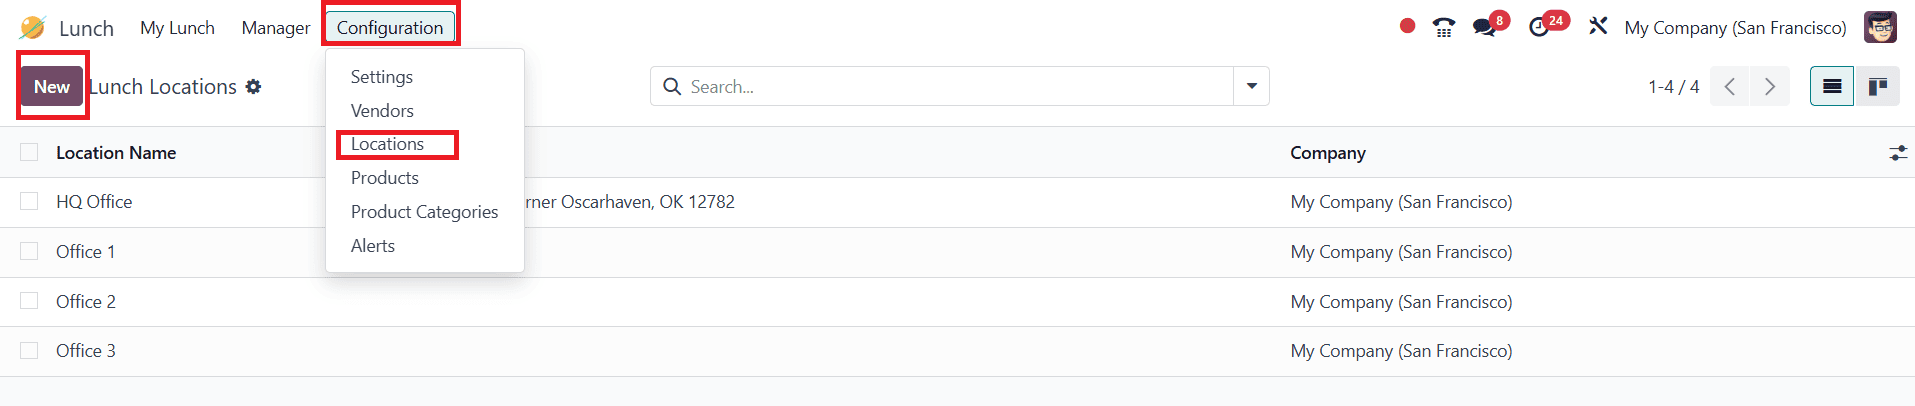
To set a location for receiving meal orders for employees, navigate to Configuration > Locations. The dashboard displays a list of available locations. To create a new location, click on the New button as shown below:
A blank line will appear in the list view, where you can add the new location and save it.
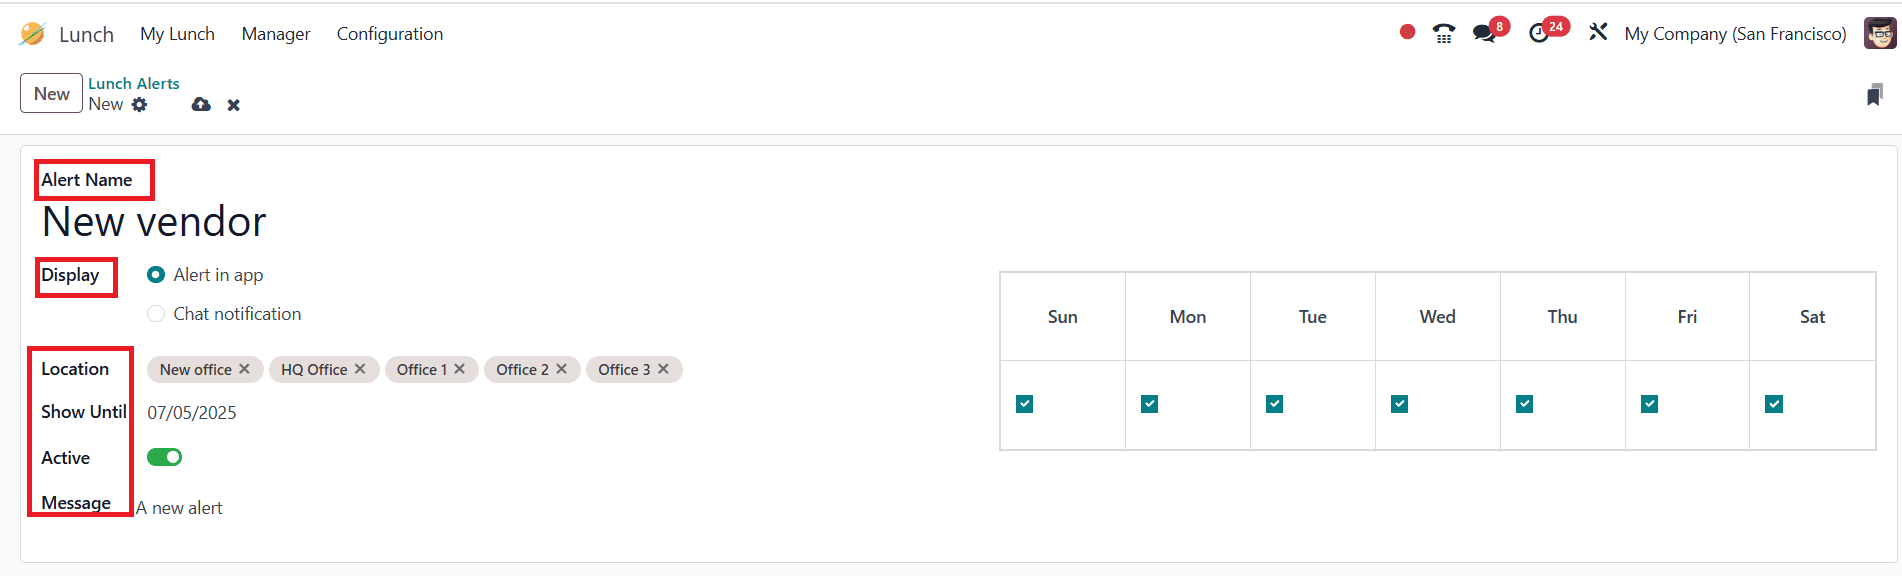
Alerts:
Here, users can set a lunch alert for employees within the app. Go to Configuration > Alerts. There are no alerts created by default, so click on the New button as shown below:

Here, you can add the Alert Name, Display, Location, Show Until, enable the Active option, and enter a Message.
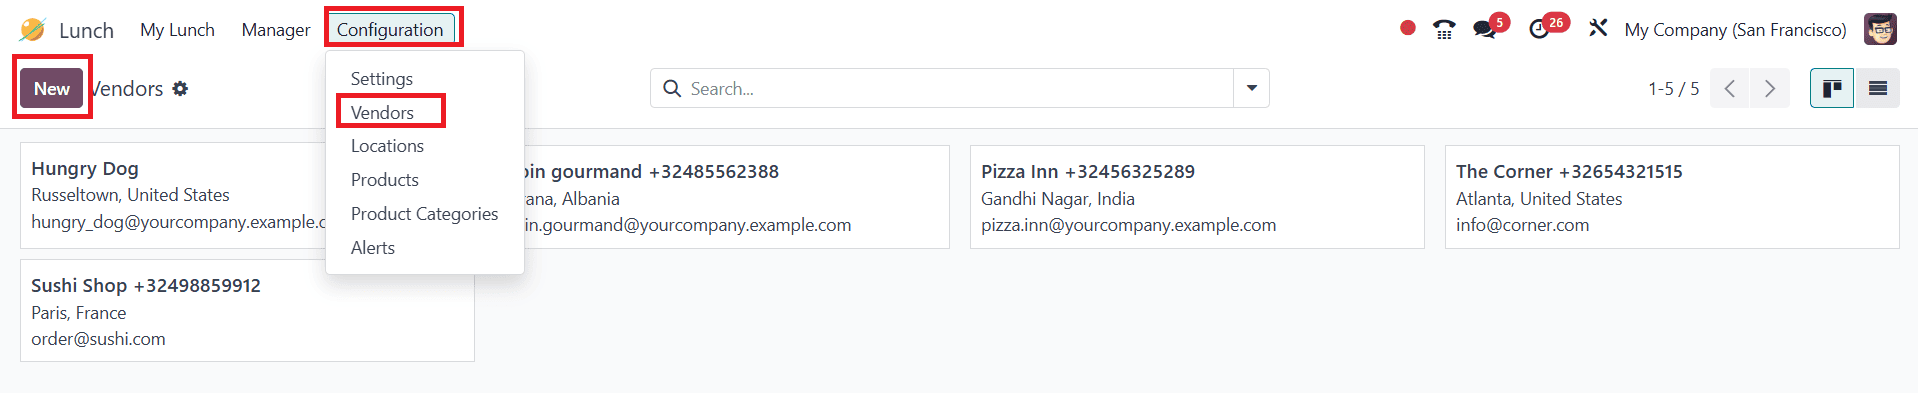
Vendors:
To view the available vendors, navigate to the Configuration > Vendors. To create a vendor, click on the New button as shown below:
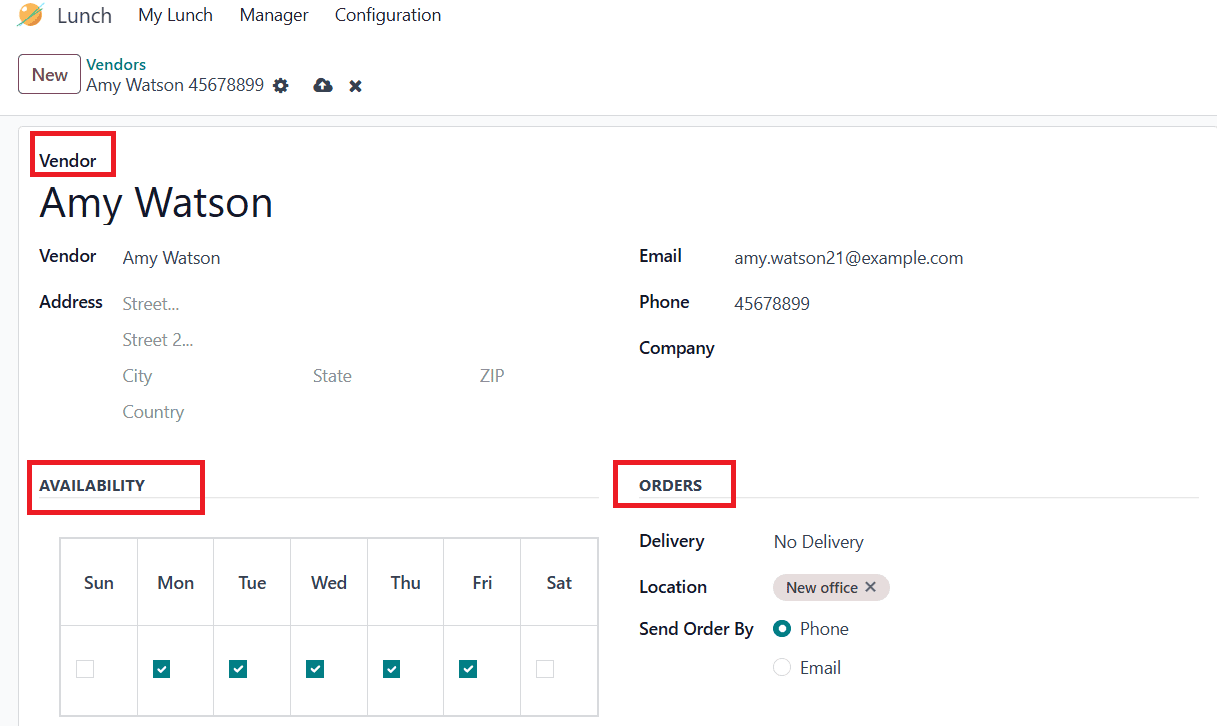
Here, you can add details such as Vendor name, Address, Email, Phone, and Company. You can set the available days under the Availability option. Under the Orders option, you can add Delivery, Location, and Send Order By as shown below:
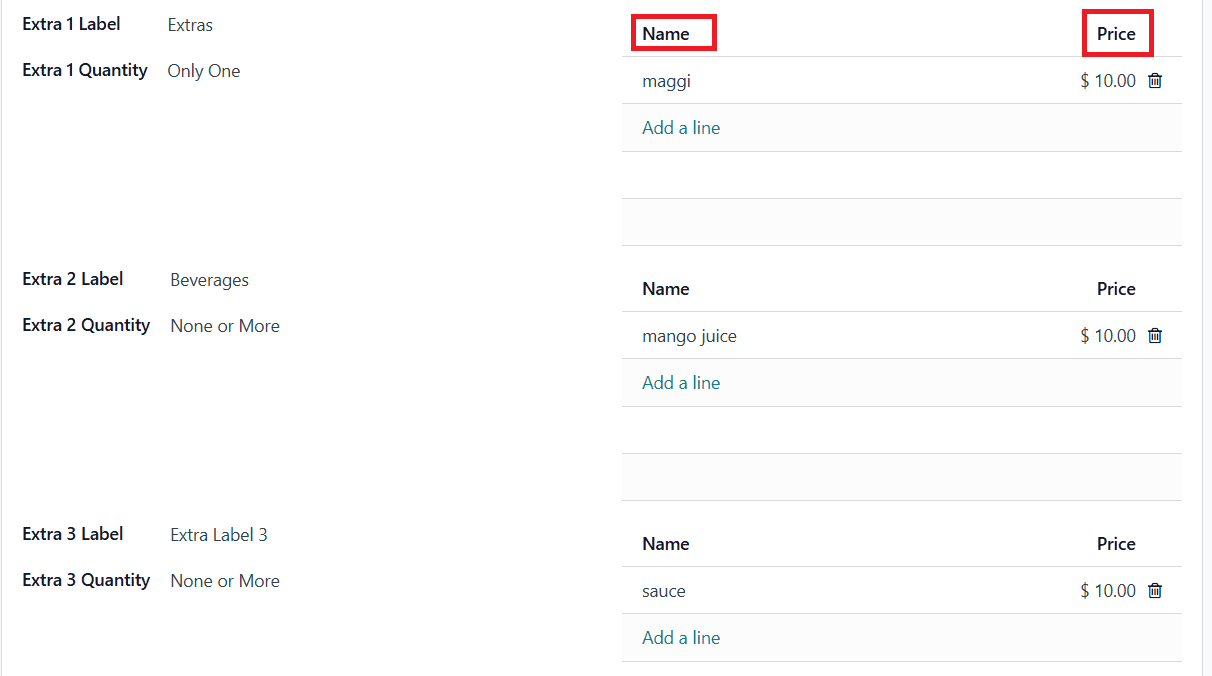
Here, you can add extras to your order. Add the Name and Price of your extras on the right side of the screen. You can add extra items, such as beverages and food.
Products:
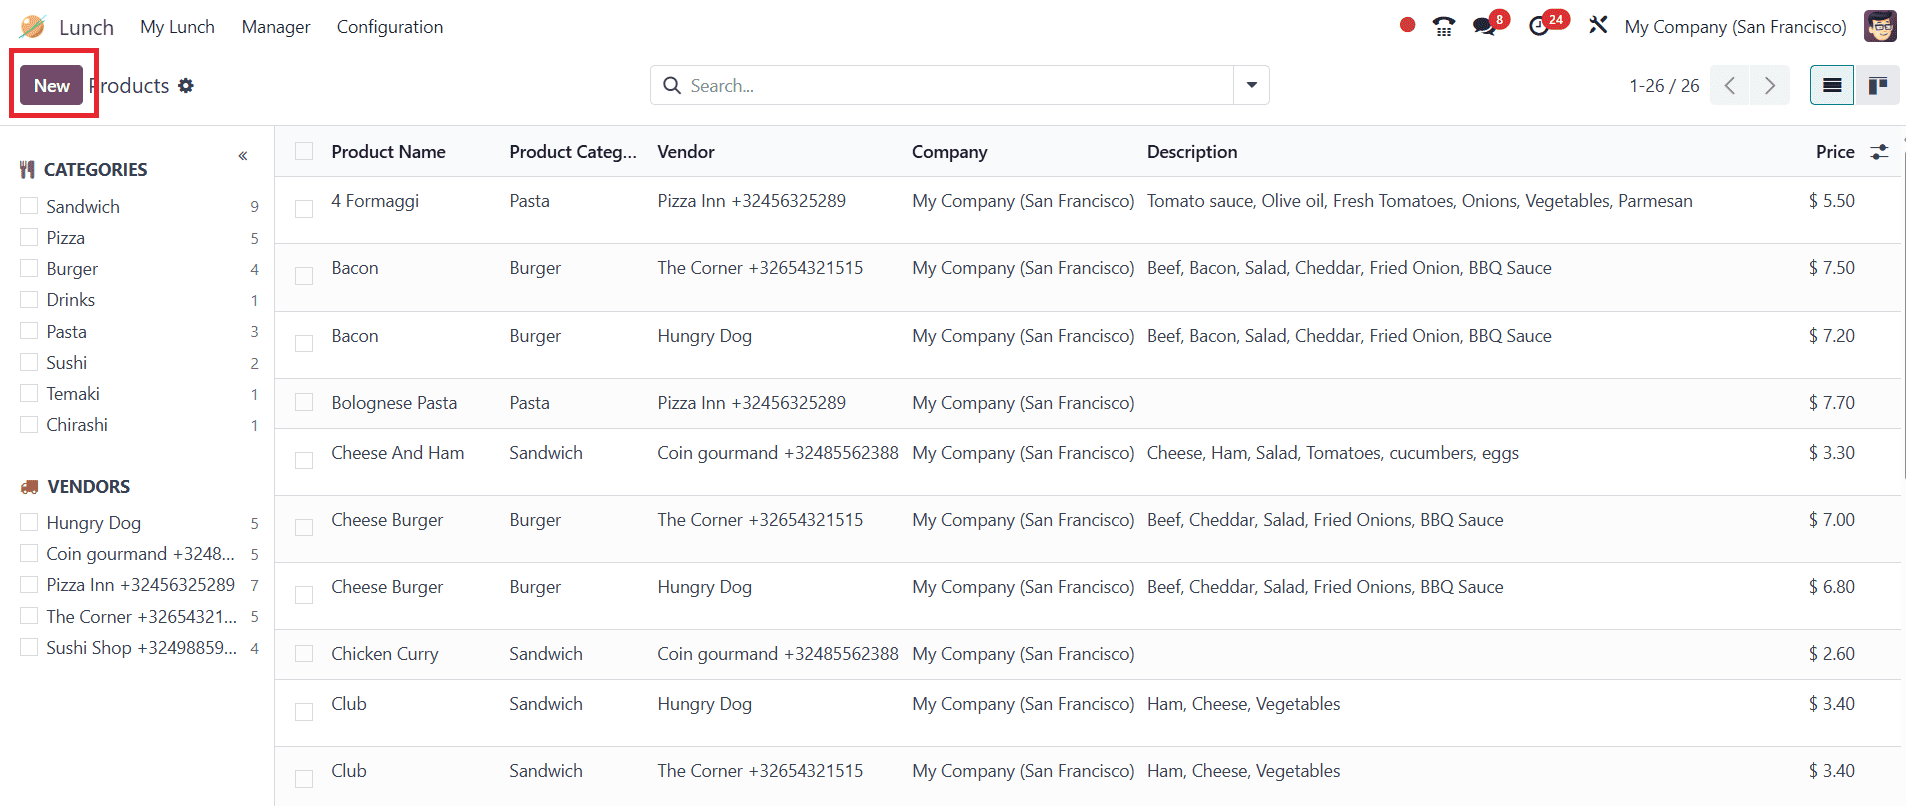
To view the available products, navigate to the Configuration > Products. To create a new product, simply click on the New button.
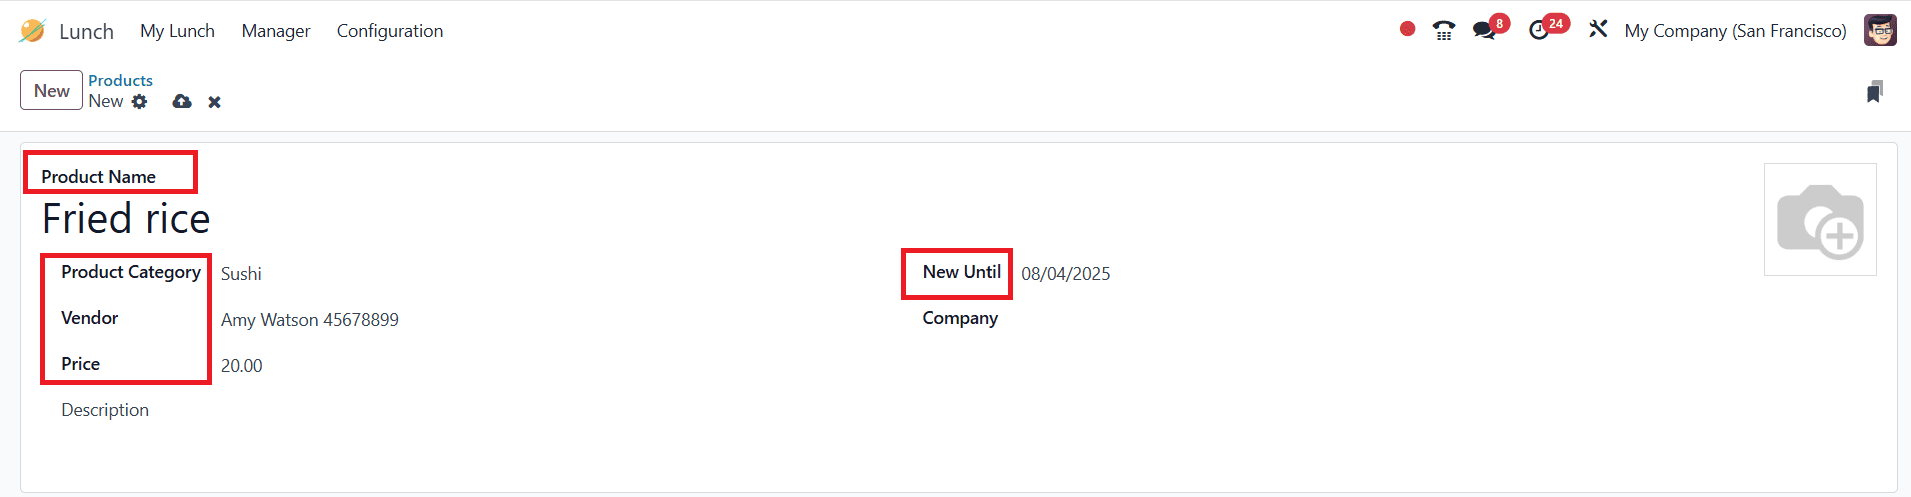
Here, you can add the Product Name, Product Category, Vendor, Price, and Description. You can also add a date under the New Until option.
Product Categories:
Product Categories help you order products easily. To view the product categories in a list, navigate to Configuration> Product Category. Click on the New button below to create a new category.

Add a name for your new Product Category and save it.

New Order:
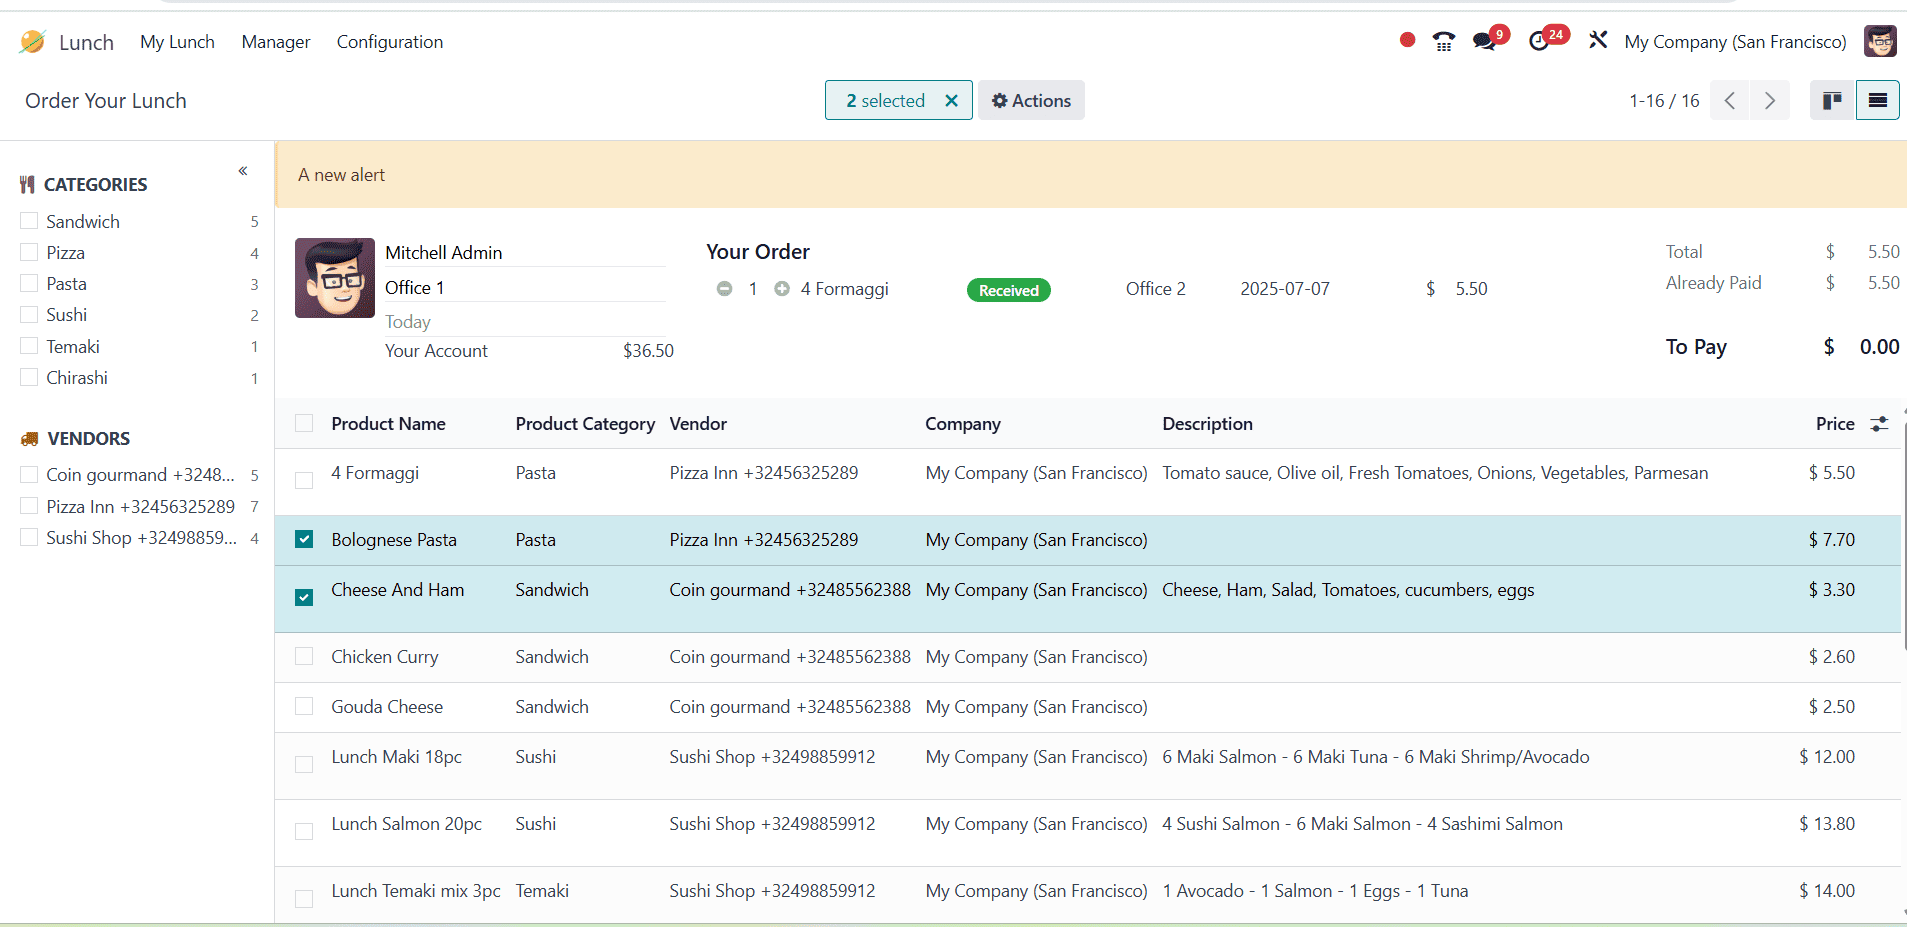
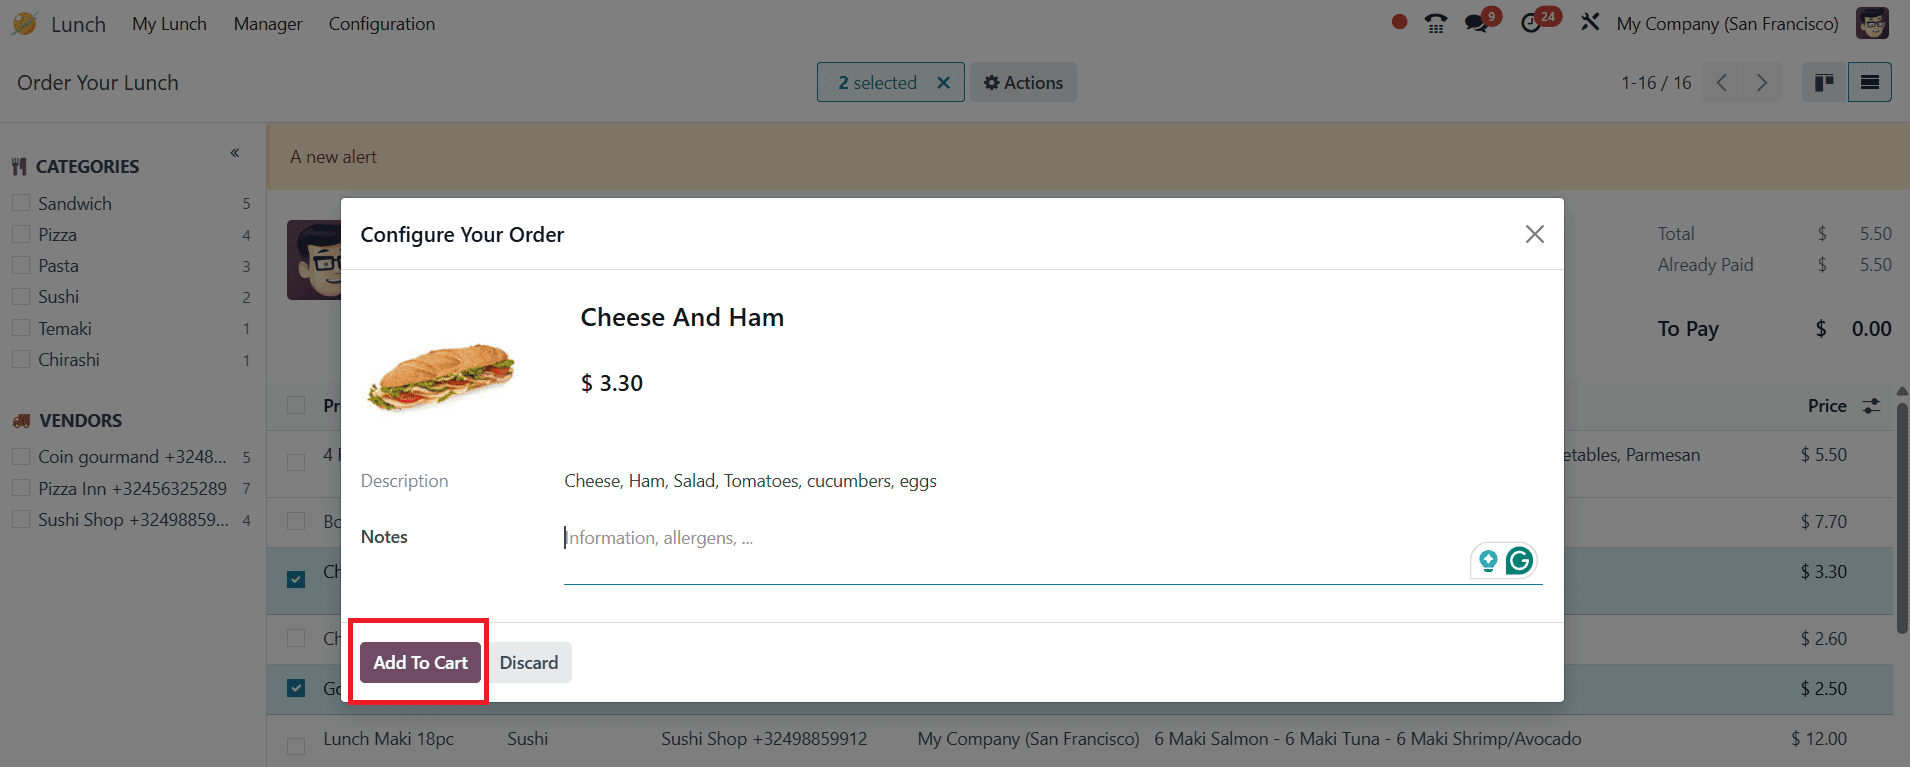
Here, the users can order food items directly from the Lunch module dashboard. To order, select the food items from the list as shown below:
A new pop-up screen will appear to confirm your order. Here, you can view the product details, specify any extras, and provide a description of your food item. Then click on the Add To Cart button as shown below:
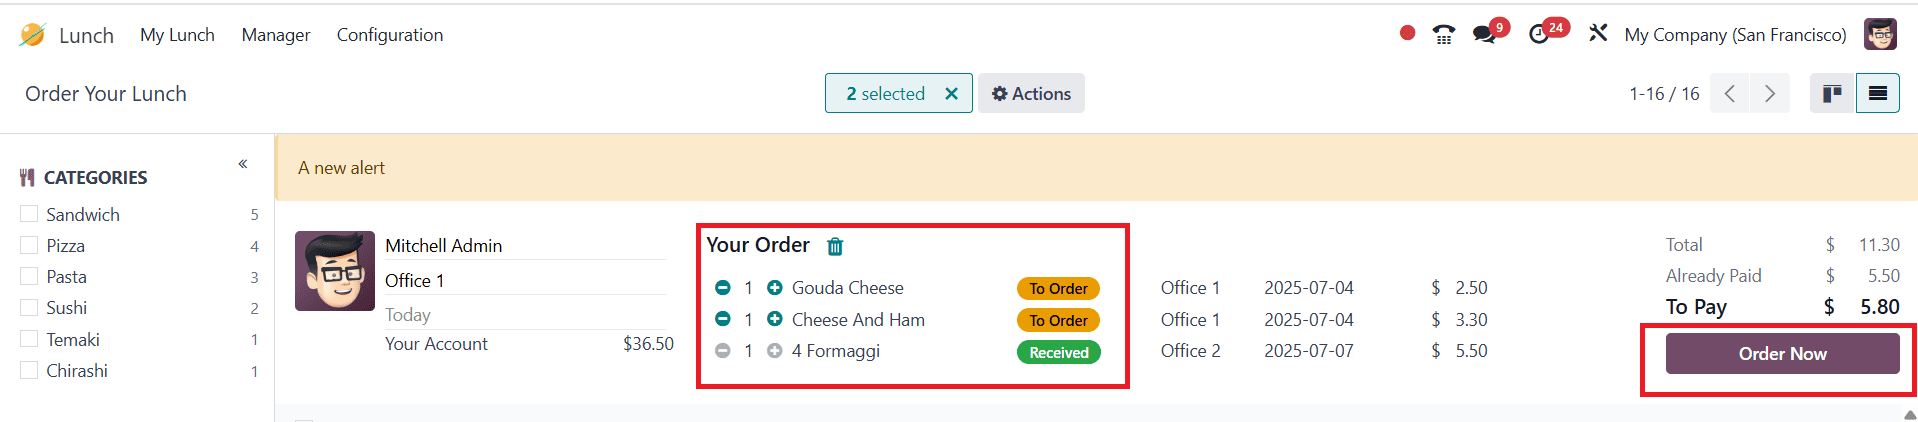
Under the Your Order option, you can view the details of your order. The right side of the screen shows the total amount of the order. To confirm the order, click on the Order Now button as shown below:
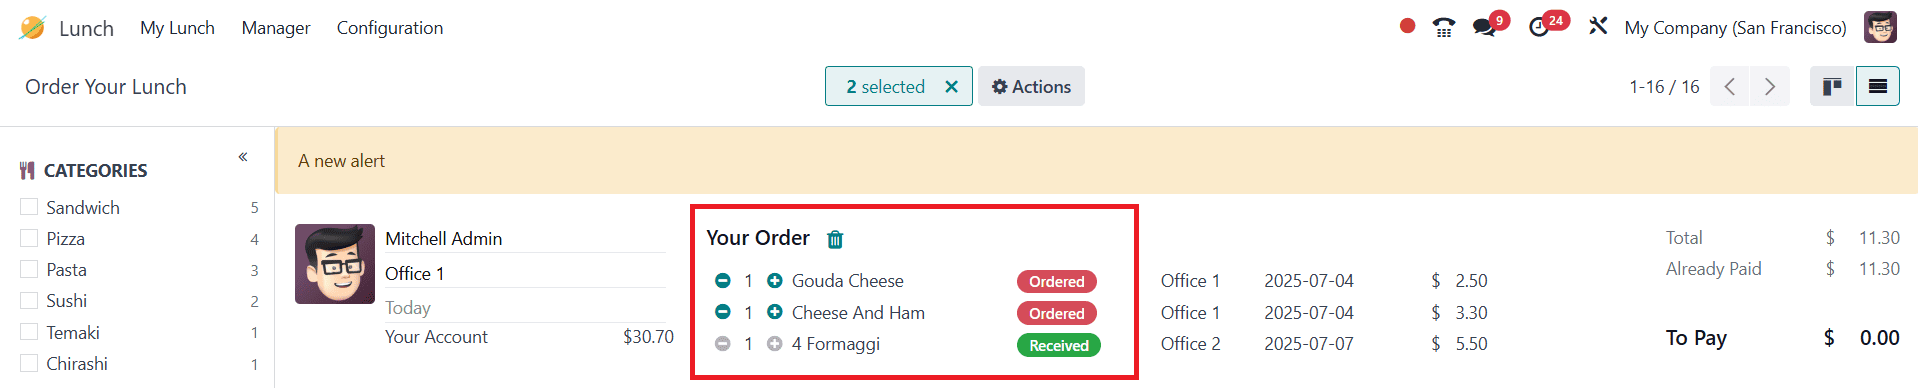
You can view the Ordered label next to the order once it has been placed.
Manager menu:
Managers can create budgets, control menus, manage vendors, and track orders using the Manager menu in the Odoo 18 Lunch module.
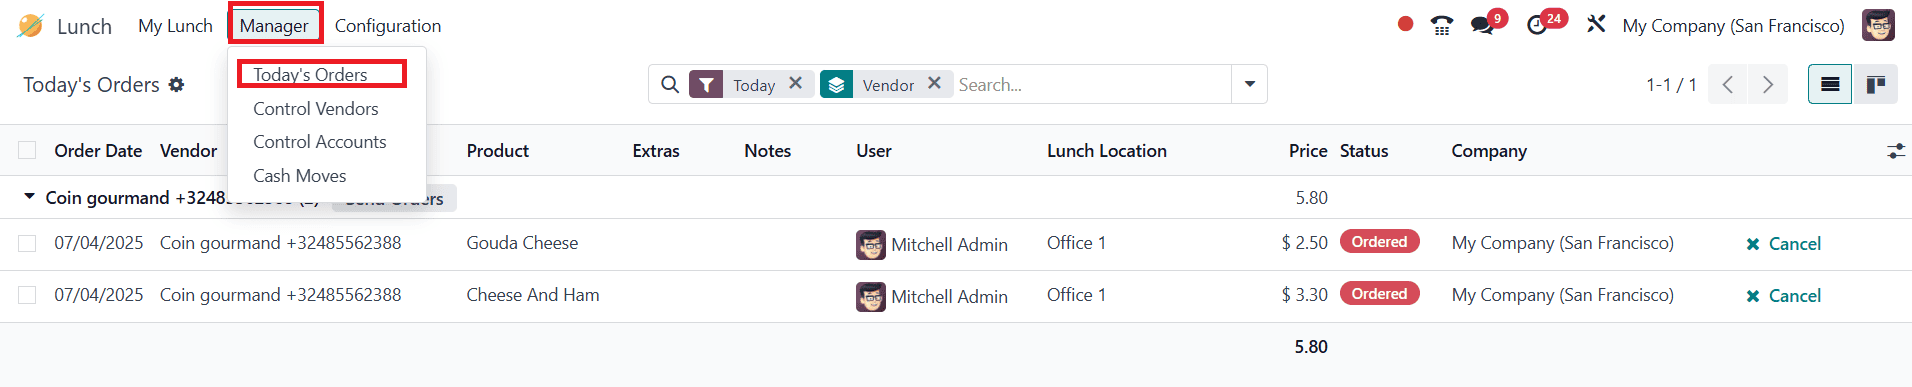
Today’s Orders:
Under the Today’s Orders option, you can view the orders placed on the current day.
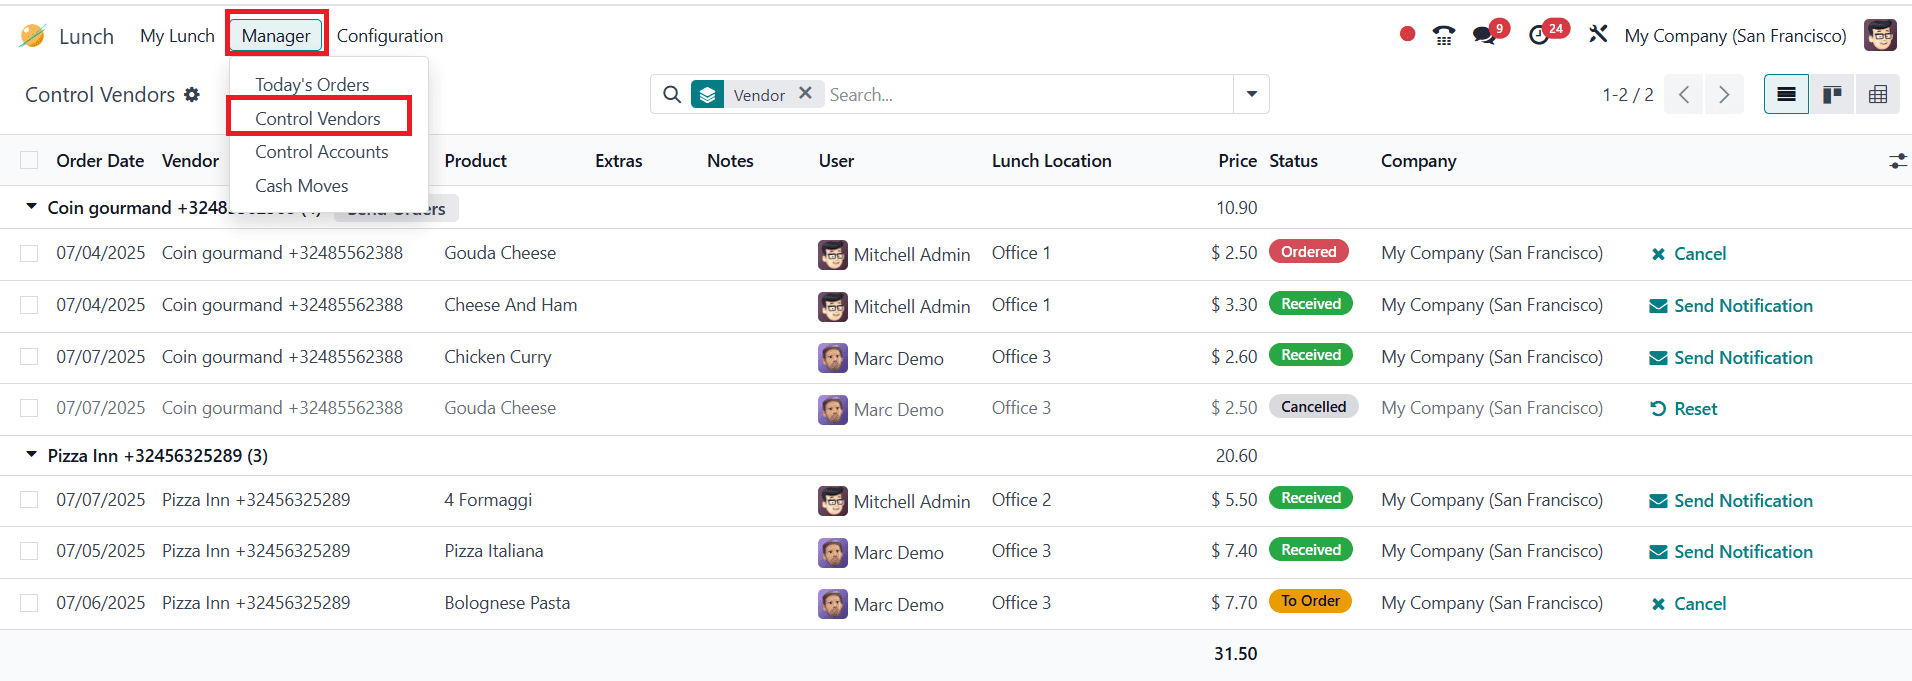
Control Vendors:
Under the Control Vendors option, you can see the vendor’s order separately. A clear overview of orders made with various suppliers is also available.
Control Accounts:
Under the Control Accounts options, you can view the various user accounts where the order has been placed. This feature assists both employees and managers with accounting and reporting tasks. This section allows you to monitor employee balances and their lunch order-related financial transactions. Employee account balances and financial transactions related to lunch orders can be tracked here.

Cash Moves:
Under the Cash Moves option, you can view the cash transactions of the users.

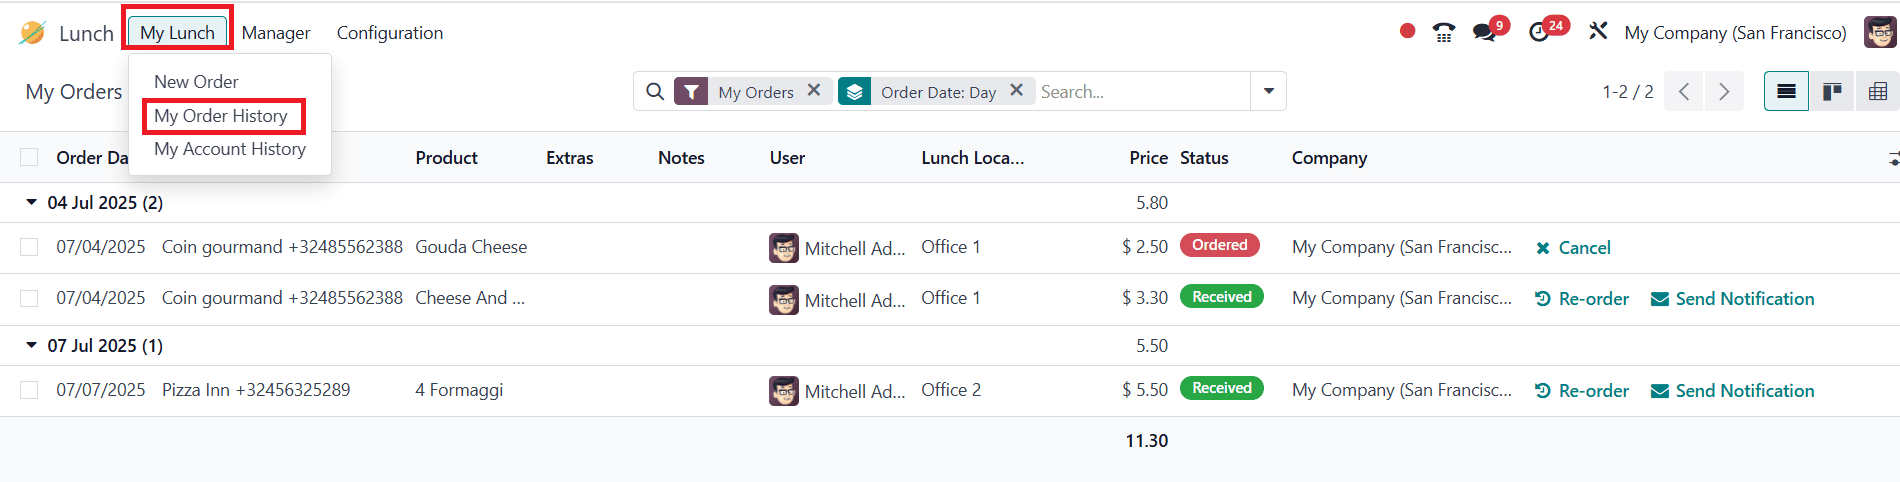
My Order History:
Under the My Order History option, you can view all previous order details. When you click the Reorder button, you can reorder the same product. If needed, click on the Cancel button to cancel the order. Click on the Send Notification button to notify the seller about the order.
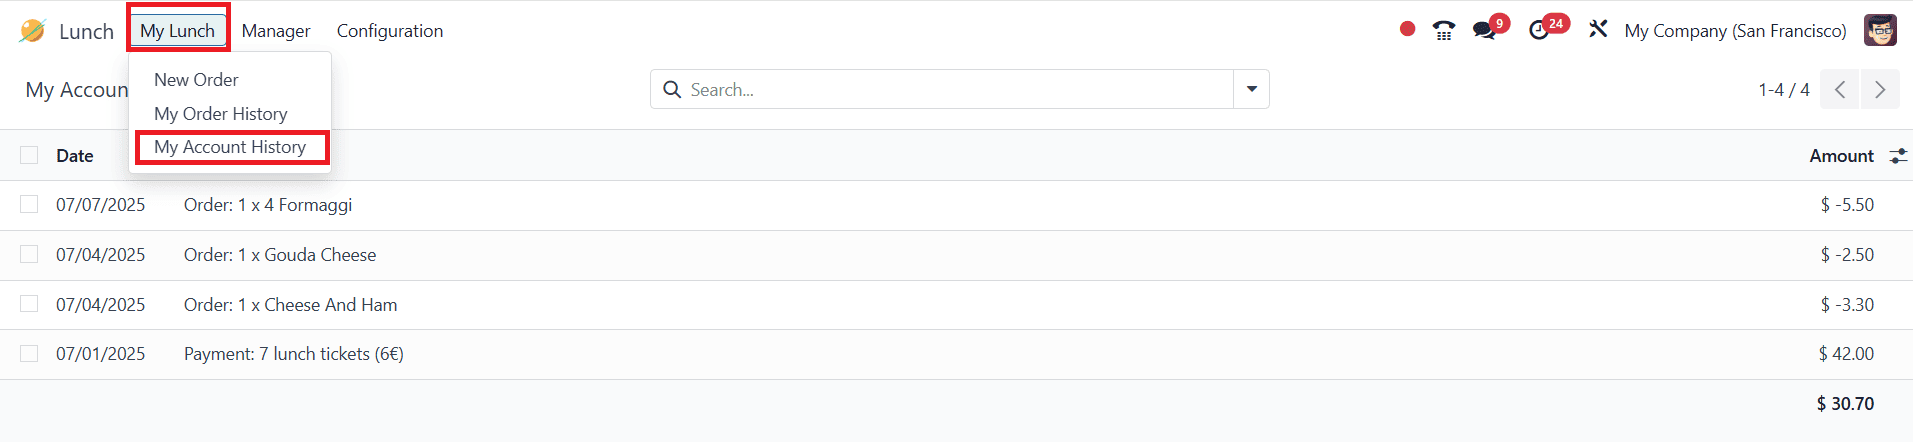
My Account History:
The My Account History section displays the transaction history of the selected account or wallet.
Conclusion:
For increasing employee satisfaction and automating lunch order processes, the Odoo 18 Lunch module is a valuable and effective solution. Real-time visibility, error reduction, and the elimination of manual lunch monitoring allow organizations to concentrate more on their core operations. Odoo 18 lunch management improves staff dining experiences, increases responsibility, and saves time. For businesses seeking to enhance employee satisfaction and streamline lunch order management, the Odoo 18 Lunch module offers an effective solution.
To read more about How to Manage Employee Lunches in Odoo 17 Lunch App, refer to our blog How to Manage Employee Lunches in Odoo 17 Lunch App.