In the case of Odoo POS, it offers enhanced usability and user-friendliness. It facilitates easy operation through browser-based functionality and supports offline usage scenarios. Odoo 17 employs OWL concepts in its POS system, with JavaScript code utilizing OWL principles. This framework significantly contributes to crafting intuitive interfaces for ERP systems. The Odoo 17 version relies on the Odoo Web Library (OWL) for web development. To integrate a button into POS, you must leverage the OWL framework and create a new module within a custom directory.
Let's discuss the integration of buttons across three distinct points within a POS system: the product screen and the payment screen.
Added JS files and XML files to the src folder. The manifest.py
'assets': {
    	'point_of_sale._assets_pos': [
        	'pos_buttons/static/src/js/*',
        	'pos_buttons/static/src/js/PopUp/*',
        	'pos_buttons/static/src/xml/pos_product_screen_button.xml',
        	'pos_buttons/static/src/xml/pos_pop_up.xml',
    	]
	},
Here's how you can integrate XML and JS files into the manifest files. These files are situated within the 'point_of_sale' assets directory. Specifically for Odoo 15, you can include web-based content (XML files) within the 'web.assets_qweb' assets.
Let’s see how this works.
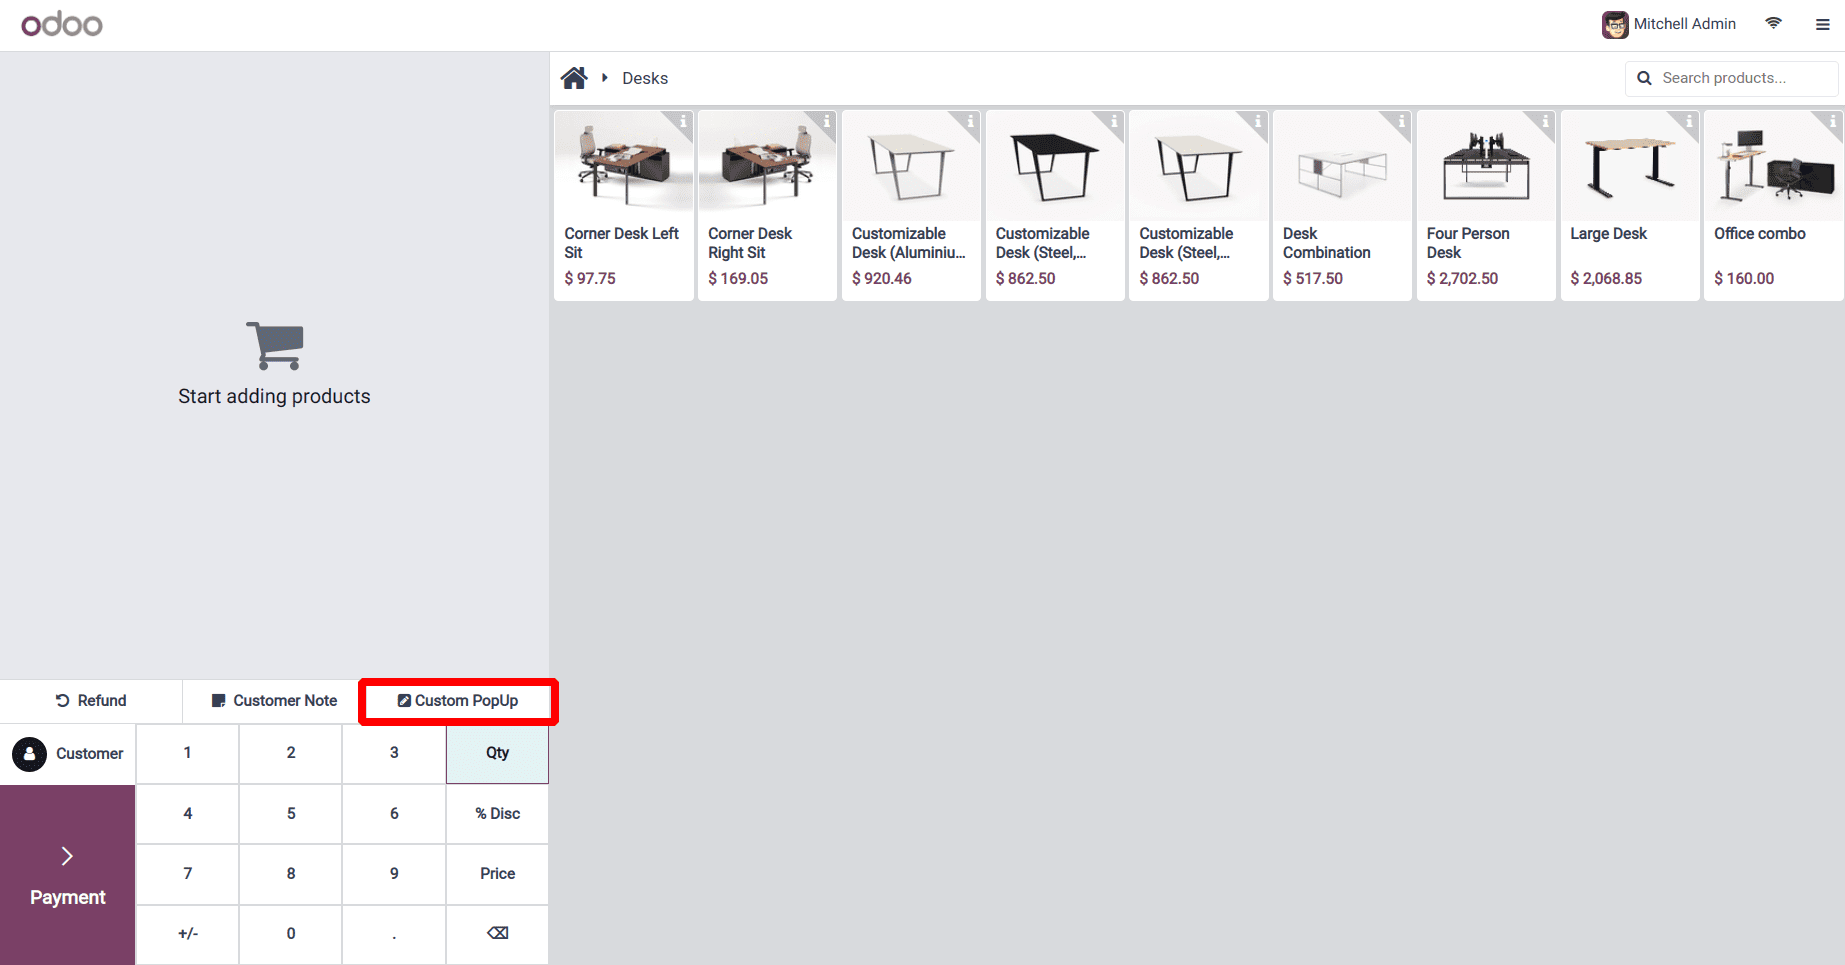
To implement a custom PopUp button on the screen, we'll utilize the OWL concept by creating a JavaScript (JS) file and an XML file. Follow the steps below:
Create an XML File: Navigate to the static/src/xml directory and create a new XML file. Add the following code to define the structure of your custom PopUp button:
<?xml version="1.0" encoding="UTF-8"?>
<templates id="template" xml:space="preserve">
<t t-name="point_of_sale.CreateButton">
   	 <button class="control-button btn btn-light rounded-0 fw-bolder"
            	t-on-click="() => this.onClick()">
   		 <i class="fa fa-pencil-square" role="img"
           	aria-label="Custom Alert" title="Custom Alert"/>
        	<span> </span>
        	<span>Custom PopUp</span>
   	 </button>
    </t>
</templates>
The JS file must be added after the button. Additionally, it's important to specify the module and necessary screens in the JS file by utilizing /**@odoo-module **/ to define the module. This ensures that the JavaScript functionalities are properly associated with the Odoo module and its relevant screens.
/**@odoo-module **/
import { _t } from "@web/core/l10n/translation";
import { ProductScreen } from "@point_of_sale/app/screens/product_screen/product_screen";
import { useService } from "@web/core/utils/hooks";
import { Component } from "@odoo/owl";
import { usePos } from "@point_of_sale/app/store/pos_hook";
import { CustomAlertPopup } from "@pos_buttons/js/PopUp/pos_pop_up";
Above mentioned code is the required screen to add a button to the Product Screen.
The full code is shown below:
/**@odoo-module **/
import { _t } from "@web/core/l10n/translation";
import { ProductScreen } from "@point_of_sale/app/screens/product_screen/product_screen";
import { useService } from "@web/core/utils/hooks";
import { Component } from "@odoo/owl";
import { usePos } from "@point_of_sale/app/store/pos_hook";
import { CustomAlertPopup } from "@pos_buttons/js/PopUp/pos_pop_up";
export class CreateButton extends Component {
	static template = "point_of_sale.CreateButton";
	/**
 	* Setup function to initialize the component.
 	*/
	setup() {
    	this.pos = usePos();
    	this.popup = useService("popup");
	}
	/**
 	* Click event handler for the create button.
 	*/
	async onClick() {
    	this.popup.add(CustomAlertPopup, {
        	title: _t('Custom Alert'),
                	body: _t('Choose the alert type')
    	})
	}
}
/**
 * Add the OrderlineProductCreateButton component to the control buttons in
   the ProductScreen.
 */
ProductScreen.addControlButton({
component: CreateButton,
});
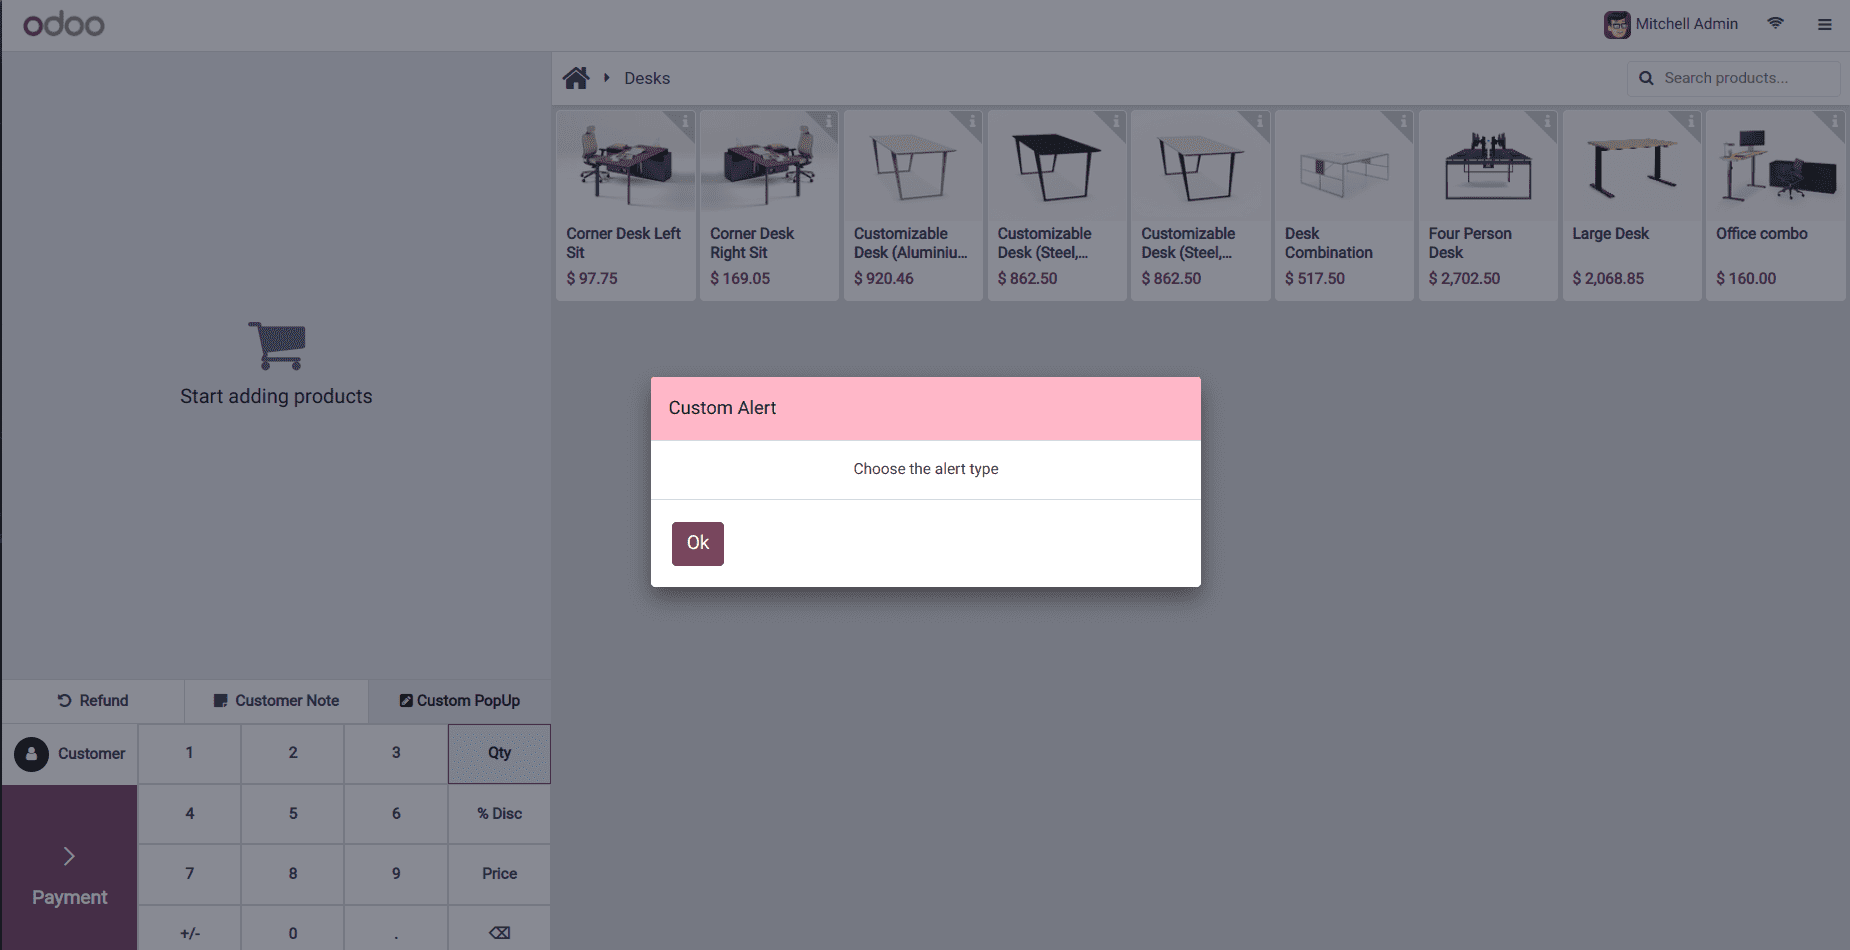
In order to extend the product screen, we added a class called CustomAlertPopup and a function called onClick to the code above (). The button prompts a pop-up error notice when we click it.
The onClick() function can be modified to fit your reasoning.
PopUp file:
/** @odoo-module */
import { AbstractAwaitablePopup } from "@point_of_sale/app/popup/abstract_awaitable_popup";
import { _lt } from '@web/core/l10n/translation';
import  { onMounted, useRef, useState } from "@odoo/owl";
/**
 * CustomAlertPopup component for displaying custom messages as an alert popup.
 * Inherits from AbstractAwaitablePopup.
 */
export class CustomAlertPopup extends AbstractAwaitablePopup {
 	static template = "pos_buttons.CustomAlertPopup";
 	static defaultProps = {
     	confirmText: _lt('Ok'),
     	title: '',
     	body: '',
     	};
}
PopUp XML file:
<?xml version="1.0" encoding="UTF-8"?>
<templates id="template" xml:space="preserve">
	<t t-name="point_of_sale.CreateButton">
   	 <button class="control-button btn btn-light rounded-0 fw-bolder"
            	t-on-click="() => this.onClick()">
   		 <i class="fa fa-pencil-square" role="img"
           	aria-label="Custom Alert" title="Custom Alert"/>
        	<span> </span>
        	<span>Custom PopUp</span>
   	 </button>
    </t>
</templates>
The button has been integrated into the product screen through the code snippet provided below. By following these instructions and correctly including the files in the manifest file, the button should operate as intended. The functionality of the distinctive button we've introduced to the POS, including the display of a pop-up message, is illustrated in the screenshot above.
Payment Screen
XML
In the XML Template, we have to inherit the point_of_sale.PaymentScreenButtons, after inheriting the template, we can add the buttons
<?xml version="1.0" encoding="UTF-8"?>
<templates id="template" xml:space="preserve">
    <t t-name="pos_button.PaymentScreenButtons"
   	t-inherit="point_of_sale.PaymentScreenButtons"
   	t-inherit-mode="extension">
	<xpath expr="//div[hasclass('payment-buttons')]" position="inside">
   	<button class="button button-partial-payment btn btn-light py-3 text-start rounded-0 border-bottom"
           	t-on-click="onClick">
           	<i class="fa fa-money me-2"/>Custom Button
       	</button>
   	</xpath>
   </t>
</templates>
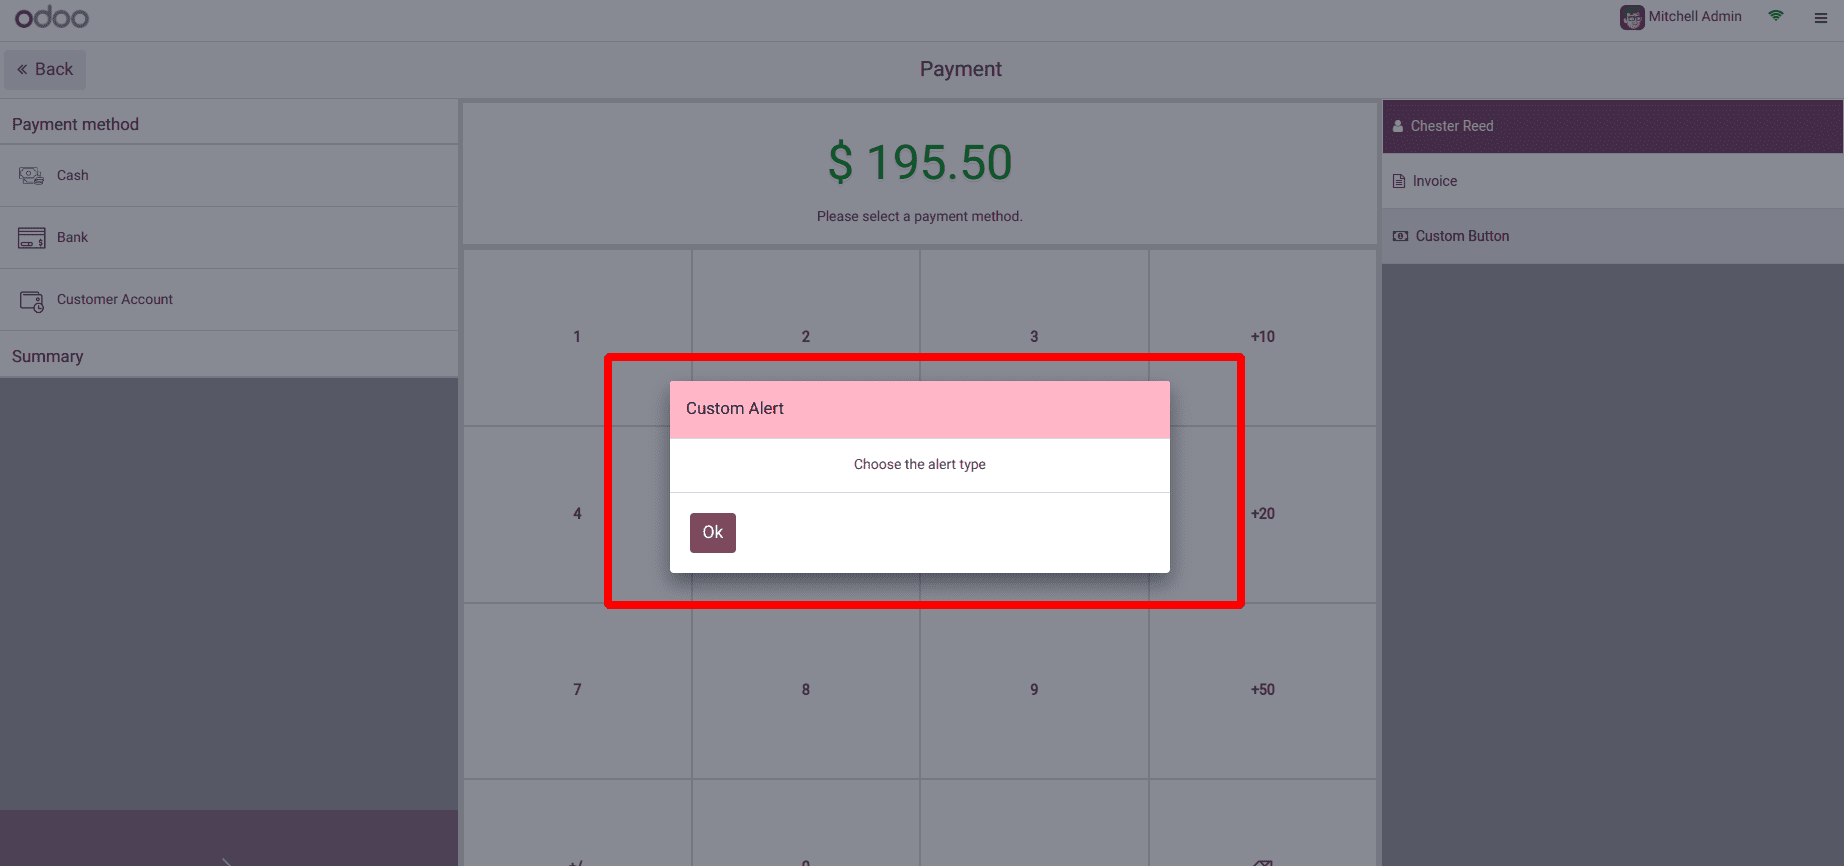
Once the template has been generated, the button will become visible on the payment screen.

JS
/**@odoo-module **/
import { _t } from "@web/core/l10n/translation";
import { PaymentScreen } from "@point_of_sale/app/screens/payment_screen/payment_screen";
import { usePos } from "@point_of_sale/app/store/pos_hook";
import { CustomAlertPopup } from "@pos_buttons/js/PopUp/pos_pop_up";
import { patch } from "@web/core/utils/patch";
patch(PaymentScreen.prototype, {
	async onClick() {
    	this.popup.add(CustomAlertPopup, {
        	title: _t('Custom Alert'),
                	body: _t('Choose the alert type')
    	})
	}
})
Clicking the button triggers the generation of a popup action, as depicted in the image below.
Here's the process for incorporating a custom button into the Product, Payment screens within the point of sale interface. Additionally, you have the flexibility to position the button wherever desired by specifying the location and supplying the XPath. The assets files are integrated into the manifest files, and the button can be added via both JS and XML files. If you want to know more about how to add a custom Button in the odoo PoS Screen , please refer to our previous blog.