Businesses often need to collect information from different people, whether customers, employees, vendors, or event attendees. This could include feedback, opinions, questionnaire responses, or details needed for a particular purpose. The Odoo 20 Surveys module makes this process easier by allowing users to create, share, and analyse surveys, forms, and questionnaires. It also provides options for creating certifications and collecting feedback.
In this blog, we will discuss how to add conditional questions and branching logic to Odoo 20 Surveys, which allows questions to appear based on the answers given to previous questions.
Creating a Survey
The Odoo 20 Survey module allows users to create surveys and questionnaires to collect information and feedback. To begin, open the Survey module in Odoo 20. You can see the default Kanban view of existing surveys, as shown below.
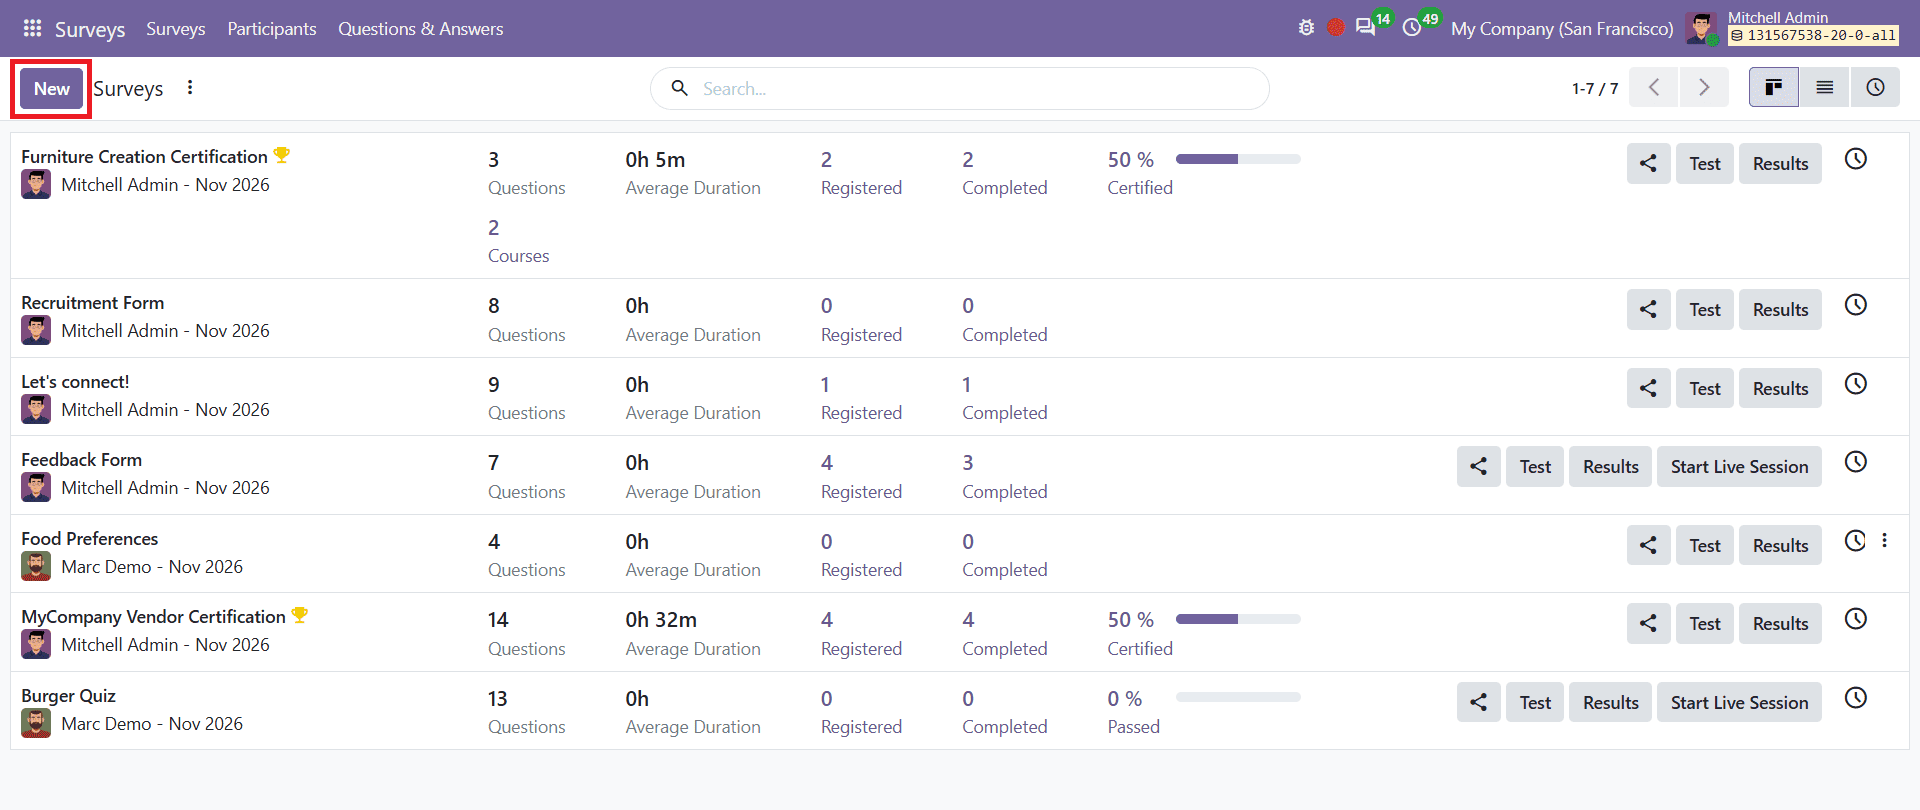
Click the New button to create a new survey. A survey form will appear as shown below.
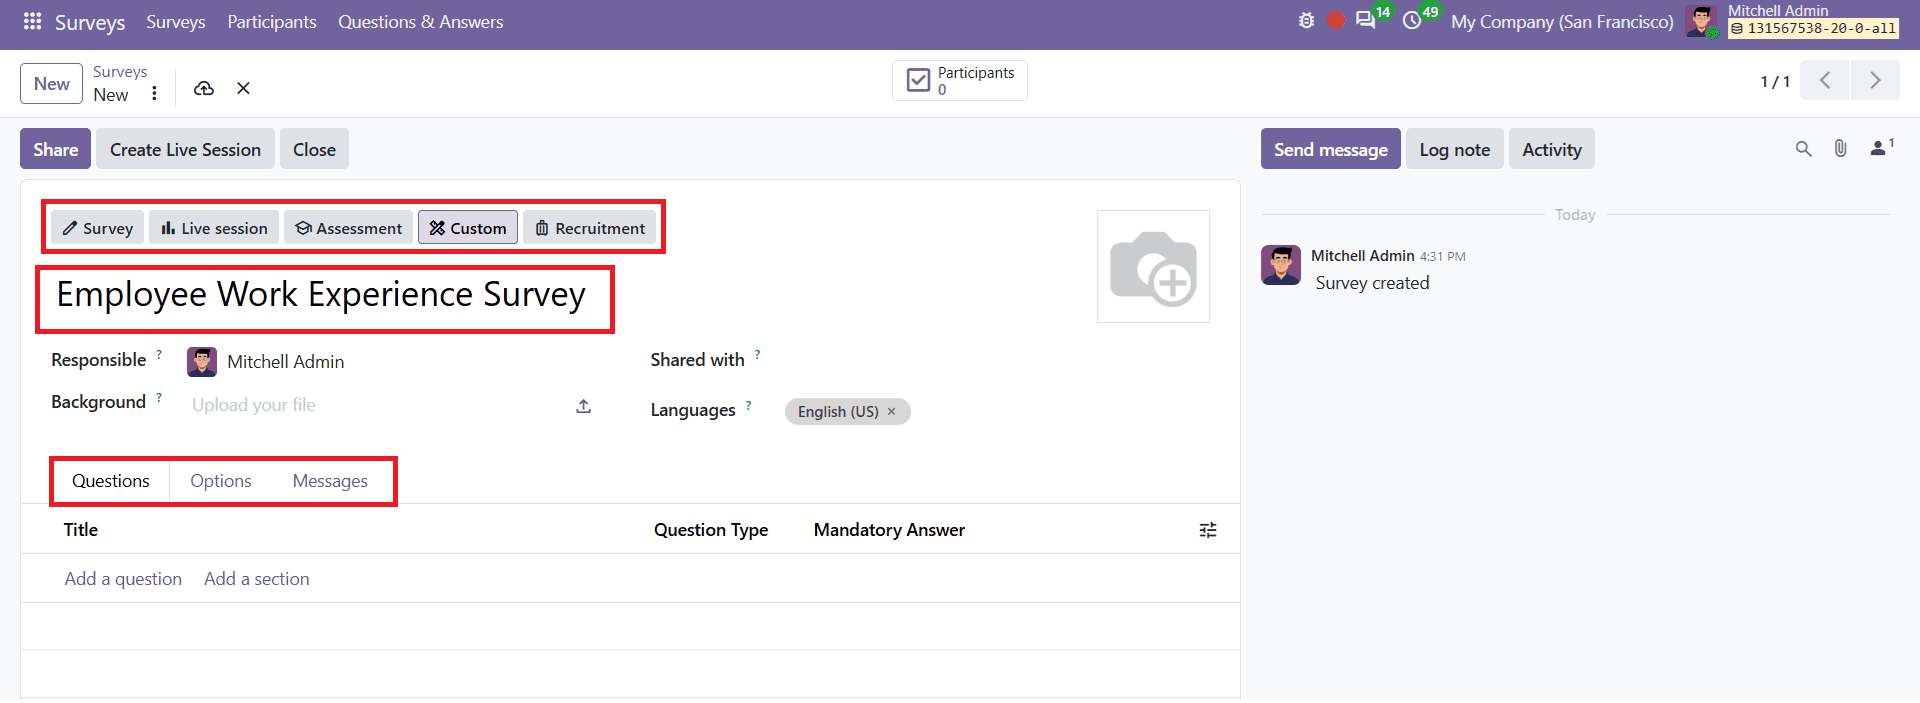
In that form, you can select the survey style according to your preference, such as Survey, Live session, Assessment, Custom, and Recruitment. Custom will be the default option. Also, the form has three tabs: Questions, Options, and Messages.
The Questions tab allows you to add questions and sections to the survey. You can select Add a question to create new questions or Add a section to organize questions into different parts. A section divides the survey into organized parts, allowing users to group related questions together. You can arrange the relevant questions under sections using drag and drop. Sections help organize survey questions into different groups based on their topics.
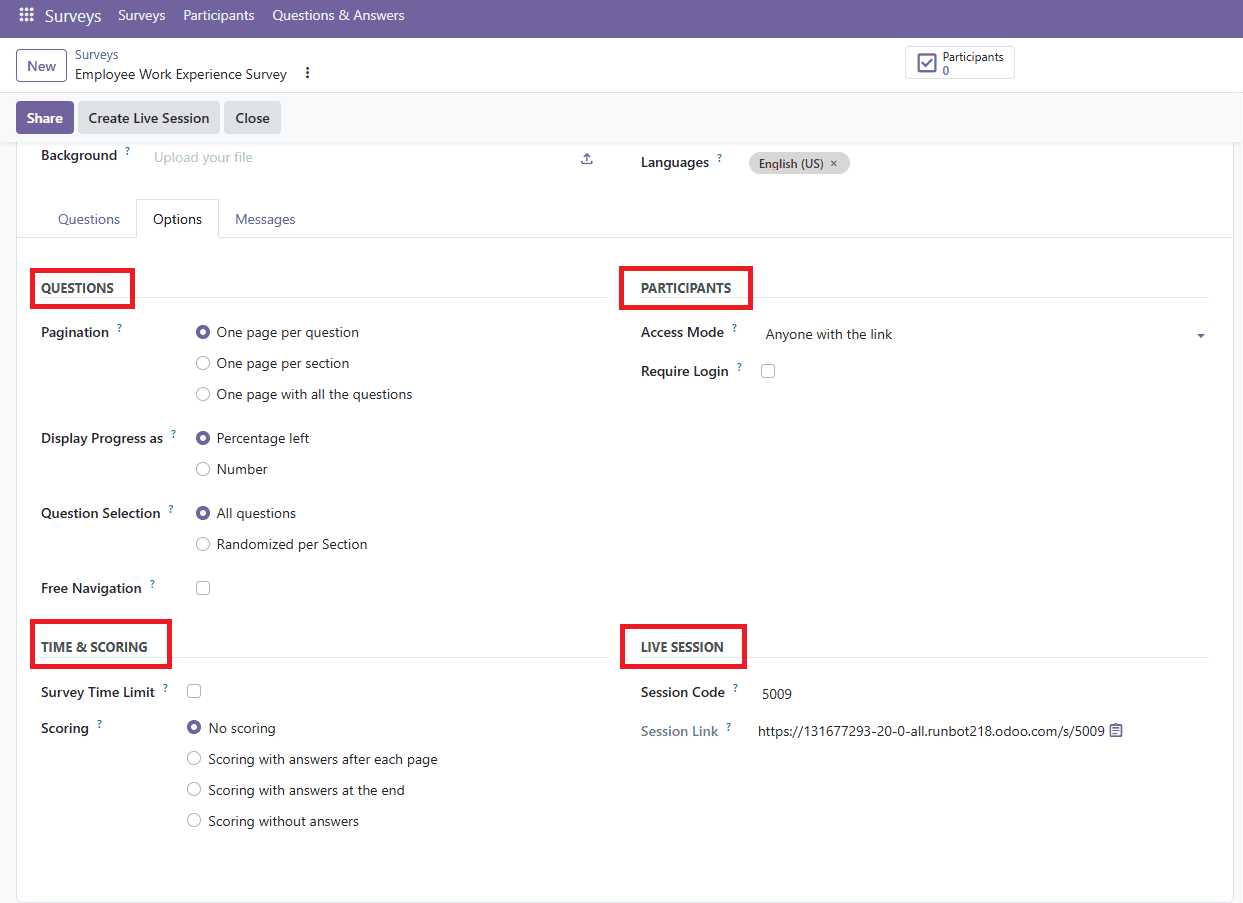
The Options tab includes survey-related sections, such as Questions, Participants, Time & scoring, and Live session. These options help you configure how participants access and complete the survey. The Options tab is shown below.
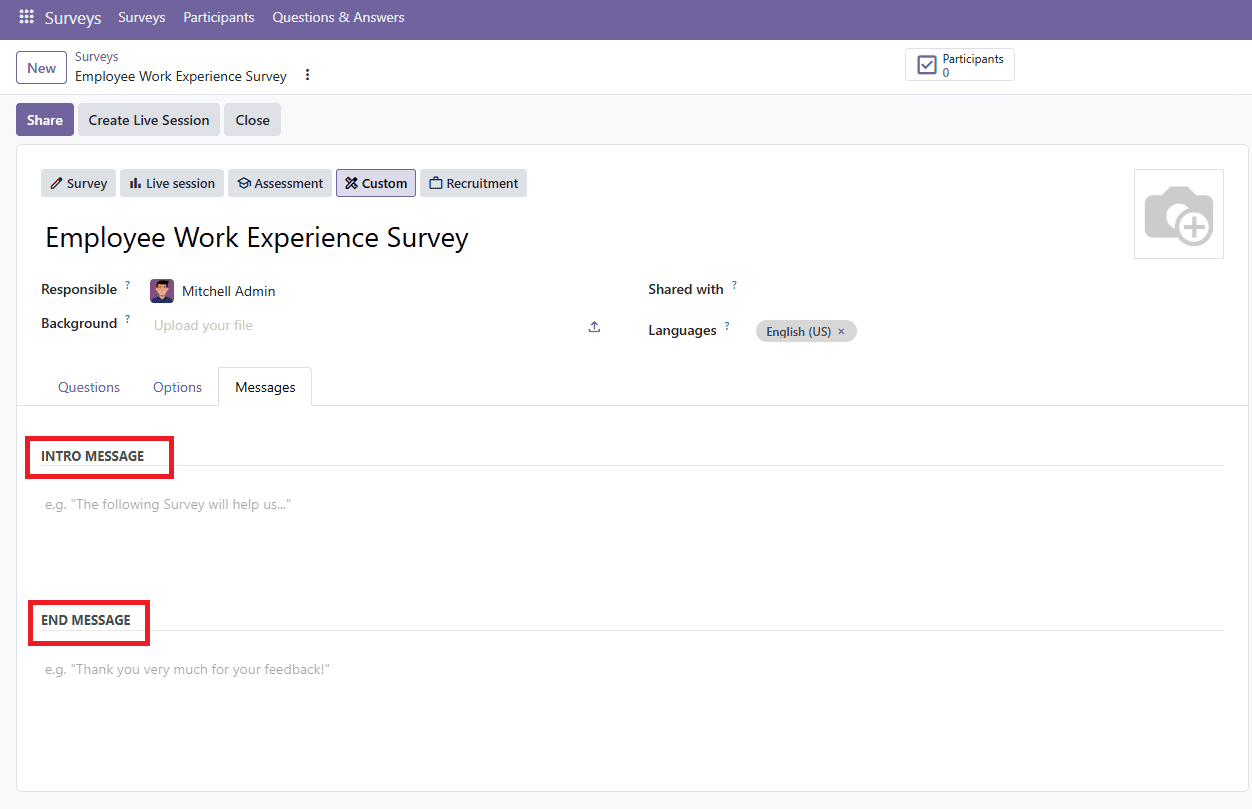
The Message tab allows you to customize the intro message and end message as shown below.
Adding Questions to the Survey
After configuring the survey settings, the next step is to add questions to the survey. Click on Add a question under the Questions tab, which opens a pop-up window as shown below.
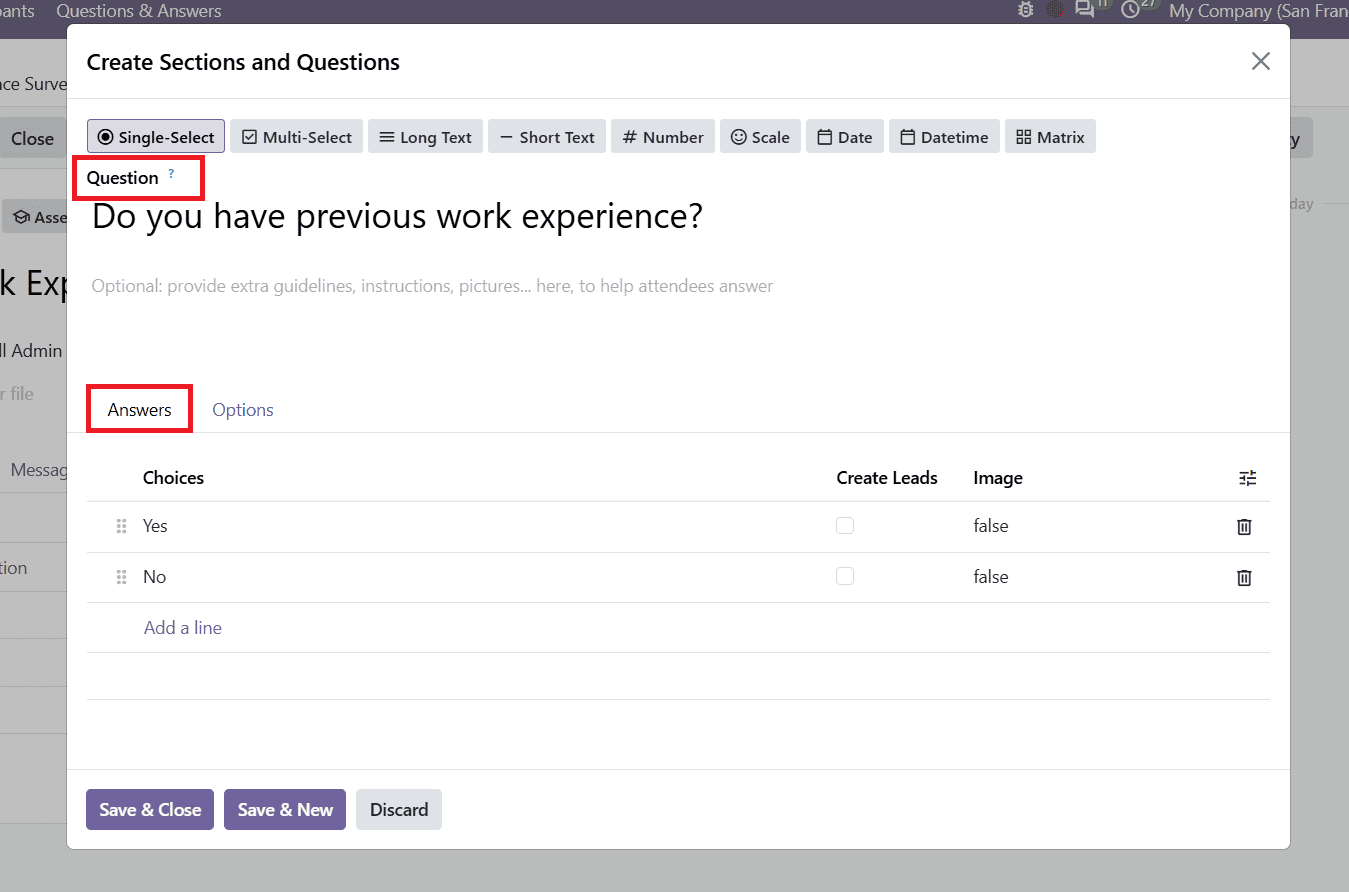
In this form, you can enter questions and select their types. Odoo 20 provides different question types, including Single-Select, Multi-Select, Long Text, Short Text, Number, Scale, Date, Datetime, and Matrix. These question types allow you to collect different kinds of responses based on the purpose of the survey. You can use predefined answer choices to gather specific information or provide text and numerical fields for open-ended questions. Selecting appropriate types of questions help organize the survey and make is easier for participants to provide their answers. According to the question type, different features will appear in the Answers section and Options tab.
After selecting the suitable question type, enter the question in the question field and add answers by clicking Add a line. You can also configure additional settings for each question through the Options tab.
The Options tab of the Single-Select question type is shown below.
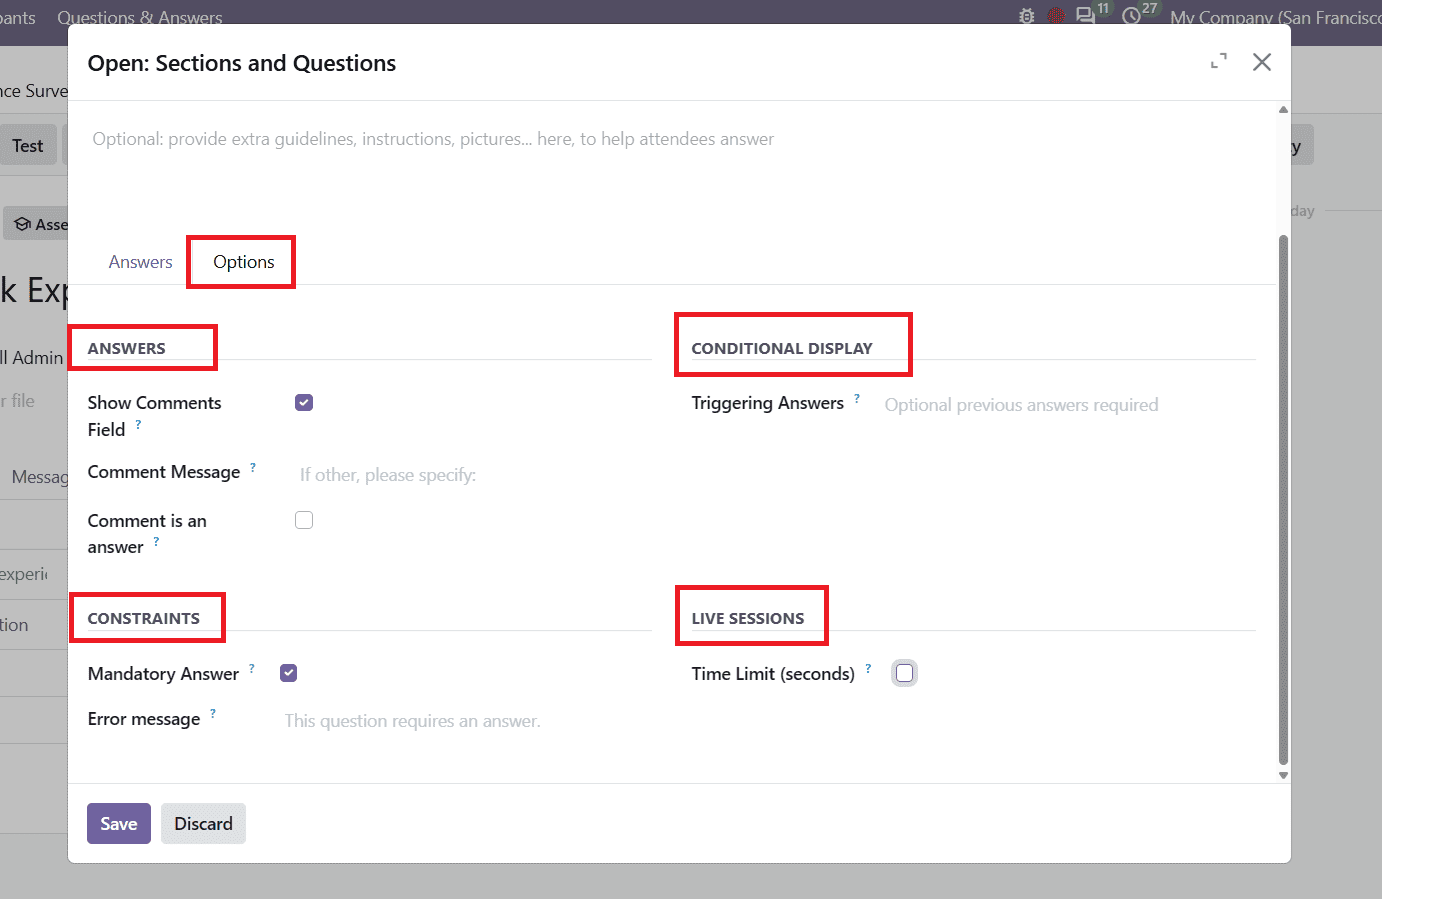
This tab contains four sections: Answers, Conditional Display, Constraints, and Live Session. Each section provides settings to control how participants respond to the questions.
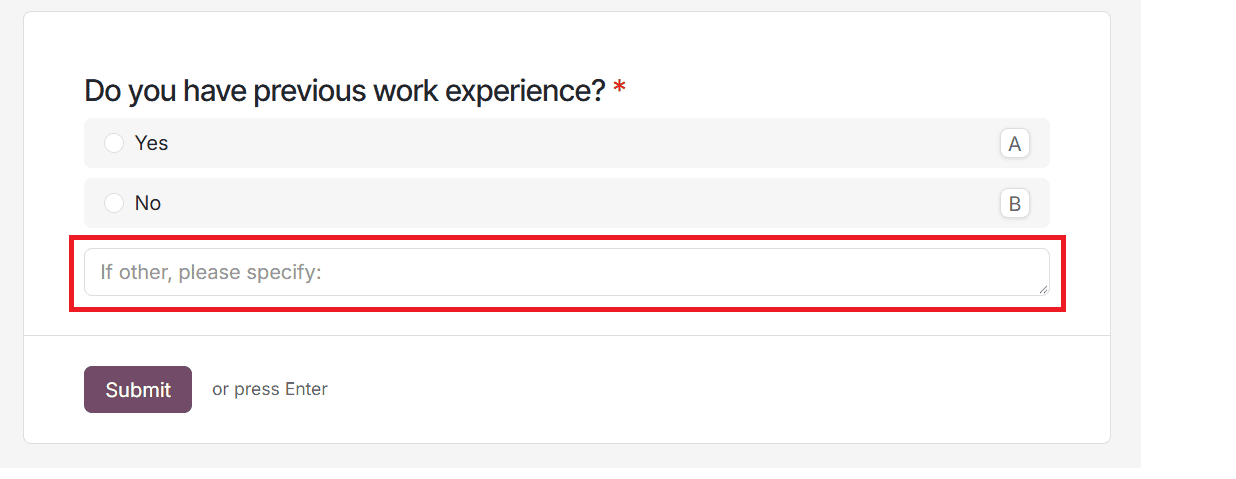
Answers: The Show Comment Field option allows participants to enter an additional comment along with their selected answer. When it's enabled, you can configure a Comment Message as a guide for participants. The Comment is an answer option allows the entered comment to be treated as an answer rather than additional feedback.
The Show Comment field appears in the survey as shown below.
Constraints: The Mandatory Answer option requires participants to answer the question before moving on to the next. When it's enabled, you can also provide a custom Error message.
Conditional Display: The Triggering Answers field allows you to select answers from previous questions that determine when the current question should appear. This helps create a survey flow based on participants' responses. This option is unavailable when random question selection is enabled. This is where you configure branching logic.
Live Sessions: This section is used for live surveys. The Question Time Limit option allows you to set a time limit, in seconds, for participants to submit their answers during an interactive live session.
The available options may vary depending on the selected question type. Some settings are specific to particular question types, while others may be available across multiple types. Therefore, the Options tab may display different configurations when you select a different question type.
Adding Conditional Questions
Sometimes, all questions in the survey may not be relevant to every participant. For example, a business may want to ask additional questions only to those who have used a particular service. Odoo 20 survey provides a Conditional Display feature, which allows you to display specific questions based on the answers selected by participants in the previous questions.
To add conditional questions, first create the questions required for your survey. Then create another question and navigate to the Options tab as shown below.
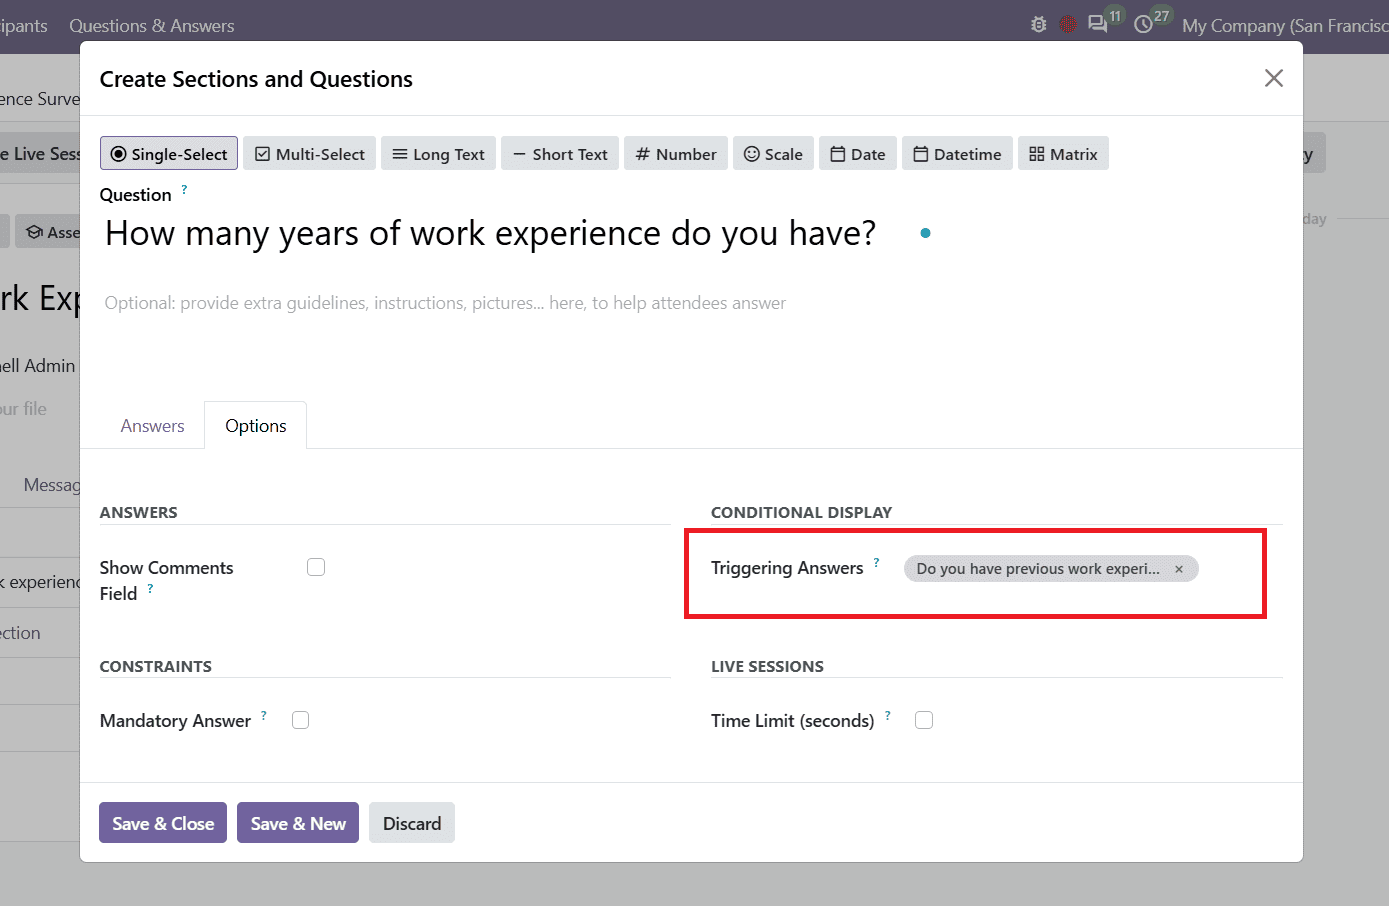
Under the Conditional Display, locate the Triggering Answers field. Select the answer from the previous questions that should trigger the display of the current question. This ensures that the question appears only when a participant selects the specified answer. This type of conditional display is commonly known as skip logic in surveys. It allows participants to skip questions that are not relevant to their previous answers. For example, if a participant answers No to a question about using a particular service, related follow-up questions can remain hidden. This helps keep the survey focused on questions relevant to each participant.
After configuring the triggering answer, click the Test button to preview the survey. You can see the created questions in the image shown below.
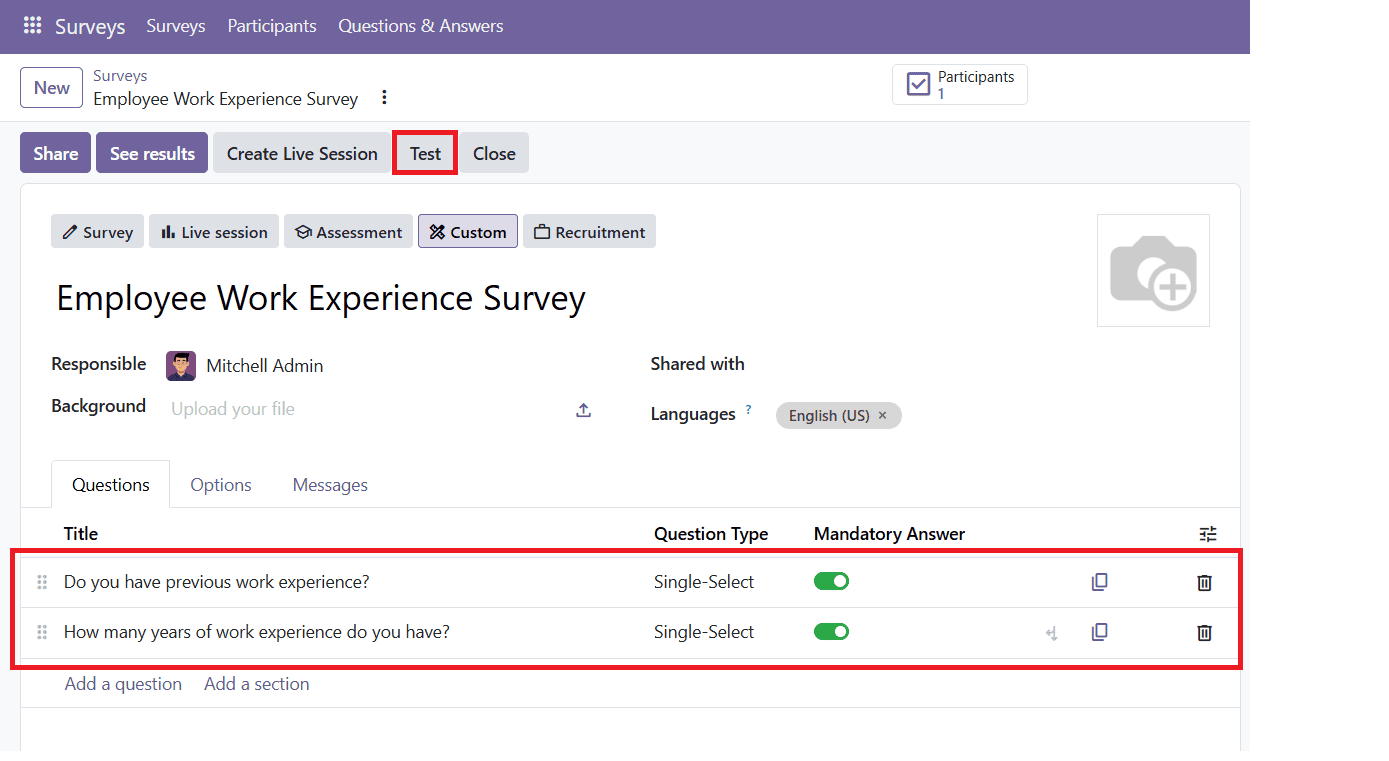
When you open the survey, the first question appears as shown below.
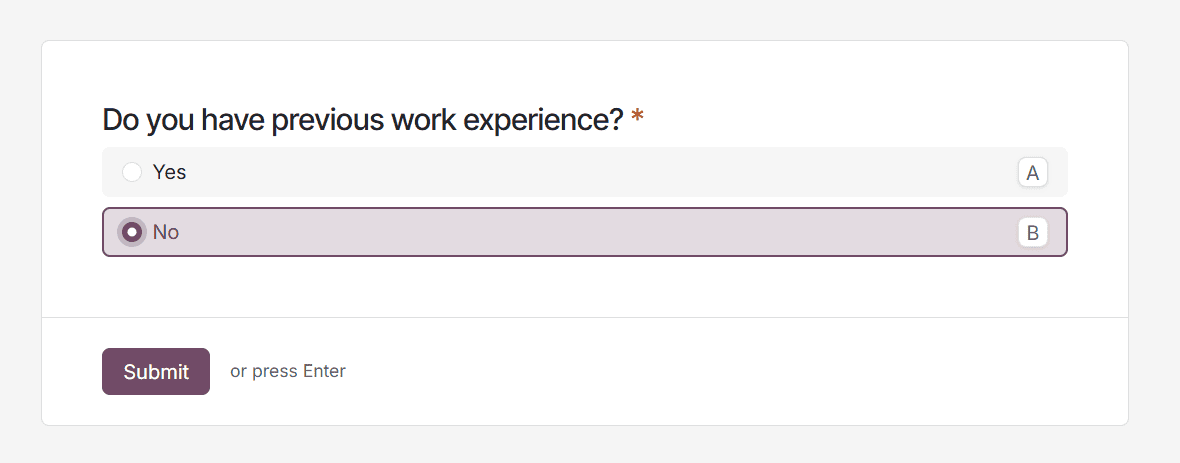
If you have configured Yes as the triggering answer, selecting No allows the participant to submit the response without displaying the next question.
However, if the participant selects Yes, the Continue button appears instead.
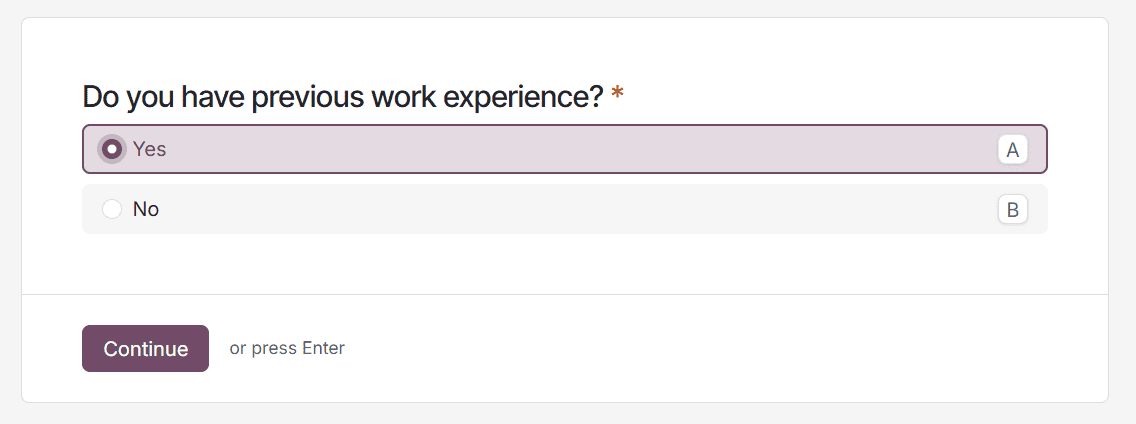
Clicking Continue displays the next question configured with that triggering answer, as shown below.
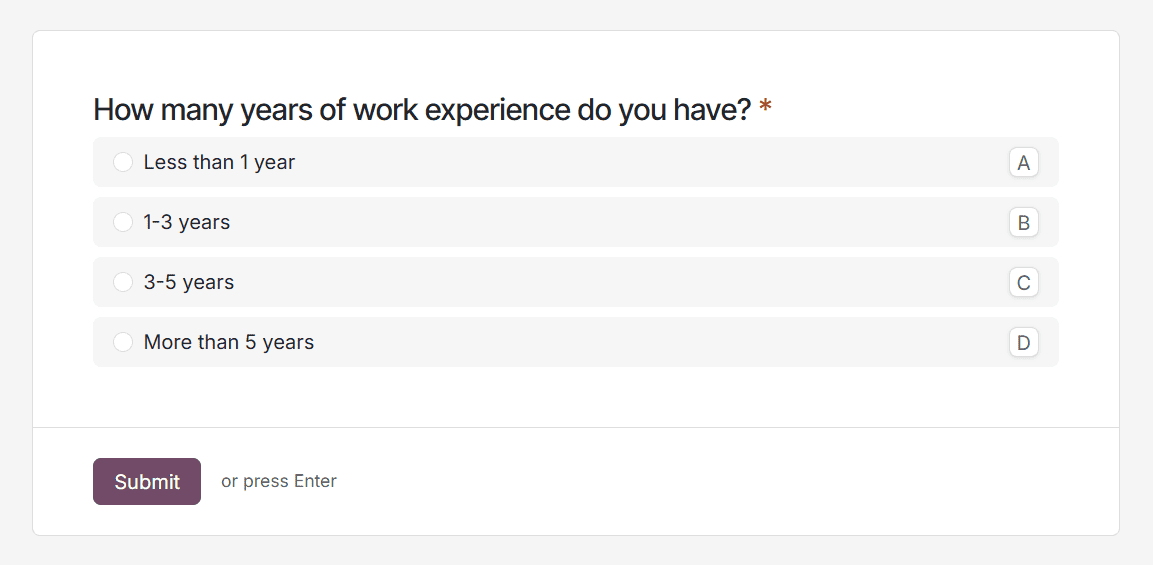
Participants can answer the displayed question and proceed through the survey. After you click the Submit button, the submitted response is saved as a test entry. This allows users to check the survey flow and verify that the conditional questions work as expected before sharing the survey with participants.
Conditional questions and branching logic help make surveys more relevant to participants by displaying questions according to the previous responses. With the Conditional Display option in Odoo 20 Surveys, users can control which questions appear and create a more organized survey experience.
To read more about A Complete Guide to Odoo 19 Surveys, refer to our blog, A Complete Guide to Odoo 19 Surveys.