Turning emails into tasks can be tedious and time-consuming. Sometimes we even miss some tasks. With Odoo 19, we can make this process automatic. We can easily turn emails into tasks. This helps our teams deal with customer inquiries and our own tasks better.
This way, we can manage our company's workflow easily. All emails will be turned into tasks, so we will not miss anything. We will not have to create tasks one by one, which will save us a lot of time and effort. Our employees will be able to work on their tasks. This blog will show us how to set up Odoo 19 to create tasks automatically from emails.
To create tasks from emails in Odoo, we need to create an email alias for our project. This means that any email sent to this alias will create a task in our project. To get started we need to open the Project module and pick the project we want to work on. If the project does not exist yet we have to click the button to make a new one. Then we have to give the project a name.
Next we have to find the part that says Create tasks by sending an email to. This is where we can set up an email address for the Project. We can use this email address for the Project to create tasks.
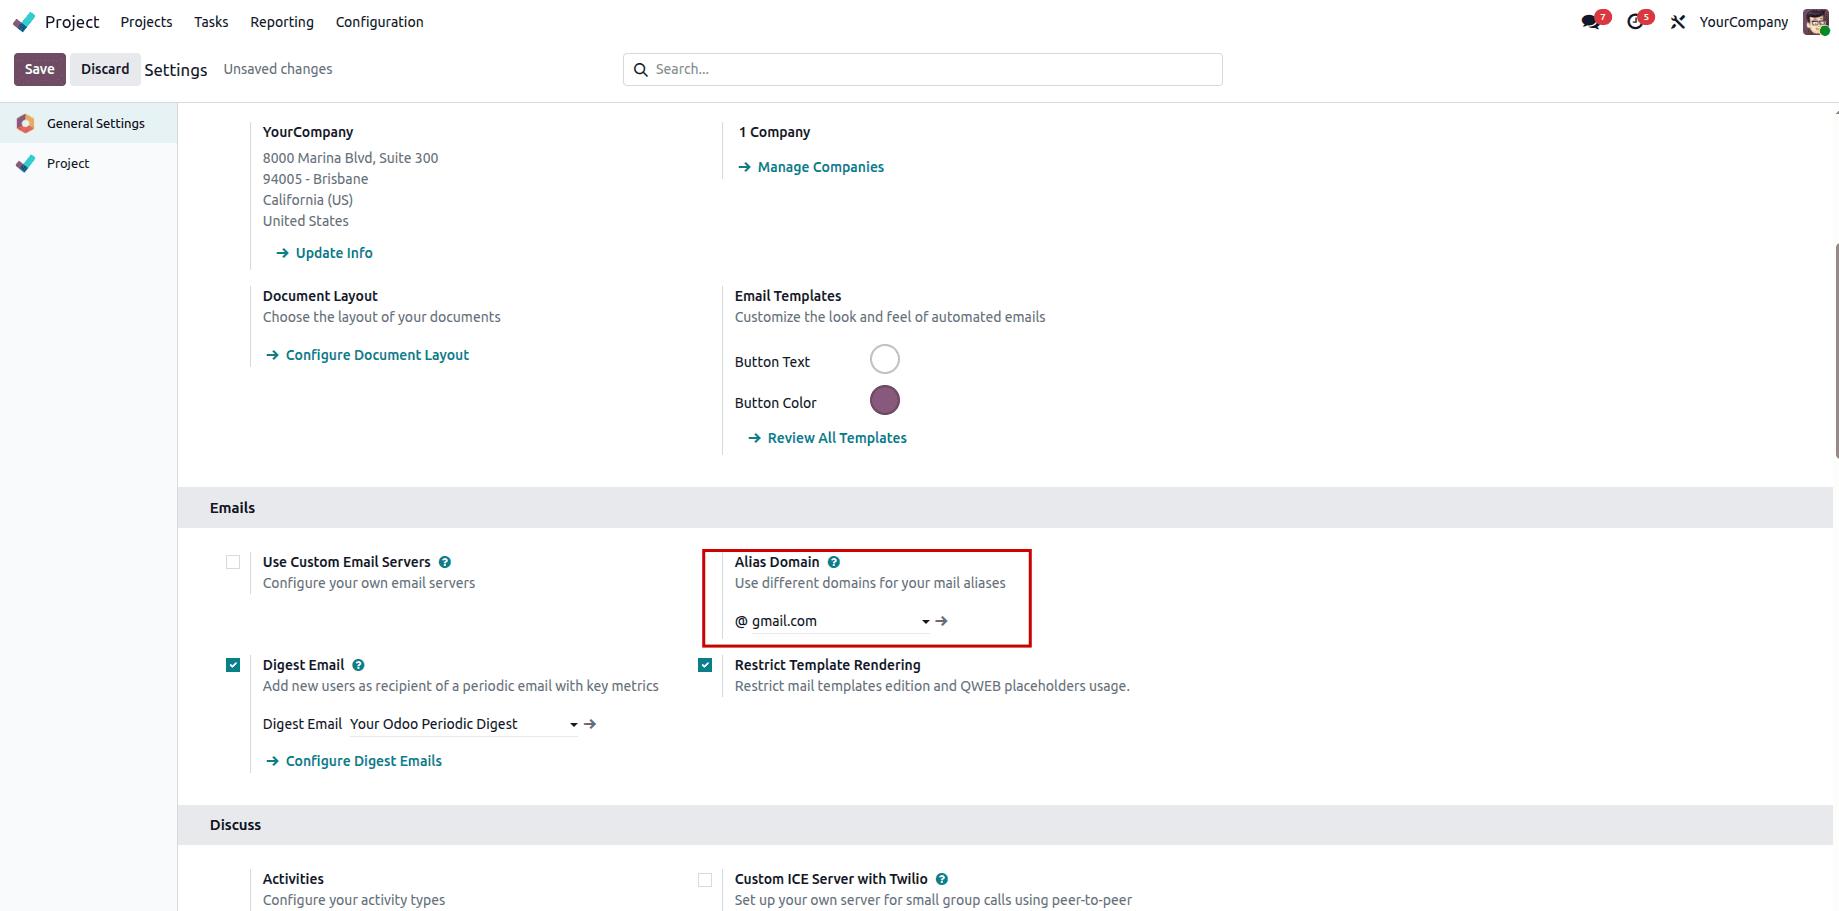
If our project already exists, we can select it. Go to its settings. You will find a field that says "Create tasks by sending an email to". This is where you can set up a special email address for your project. This special email address is like an alias for the project. You can use this email alias to create tasks for the project by sending emails to it. If our domain is not created yet, we need to go to the settings and choose the emails section. There, we can create a domain. Choose one that already exists.

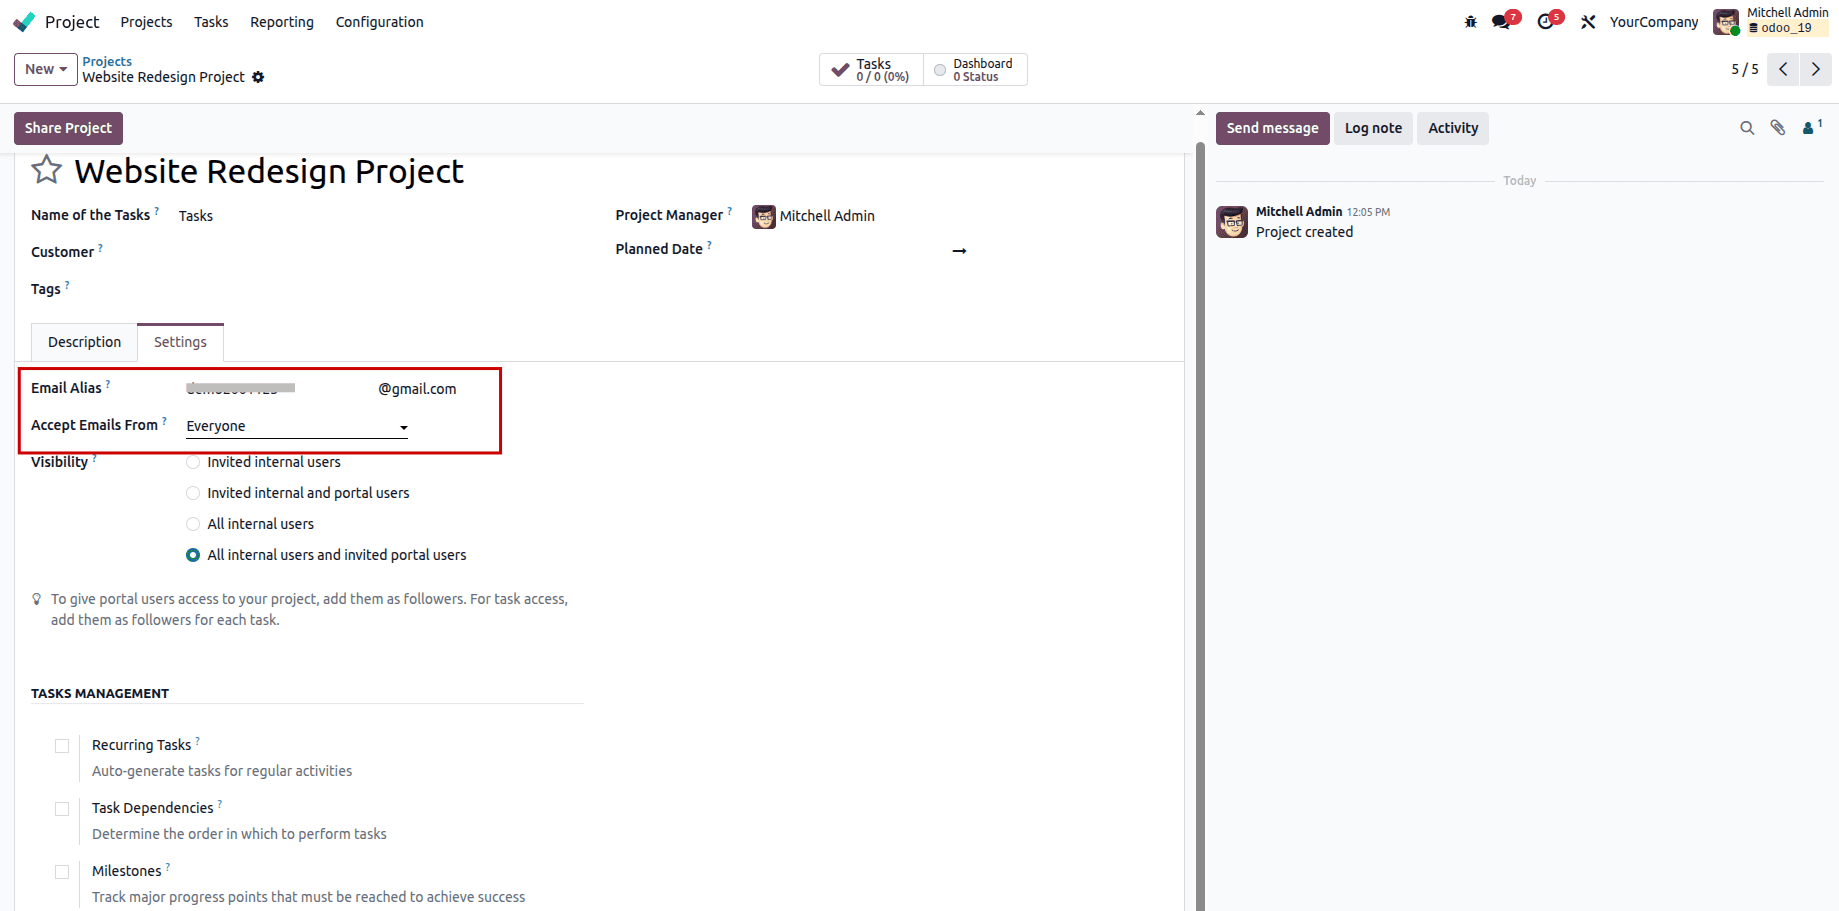
They lead them to the Settings tab within the view of the project, where a field is found named Create tasks by sending an email to, within which they can create an alias email address for that particular project. In case the domain is not yet created, you should visit the general settings and choose the emails section, where you will find the option of Alias Domain, where you can either pick a domain or create one.
We need to configure the privacy settings by selecting who is permitted to send emails for task creation. The available options are Everyone, Authenticated Partners, Followers, and Authenticated Employees. Choose the option that best fits your requirements.
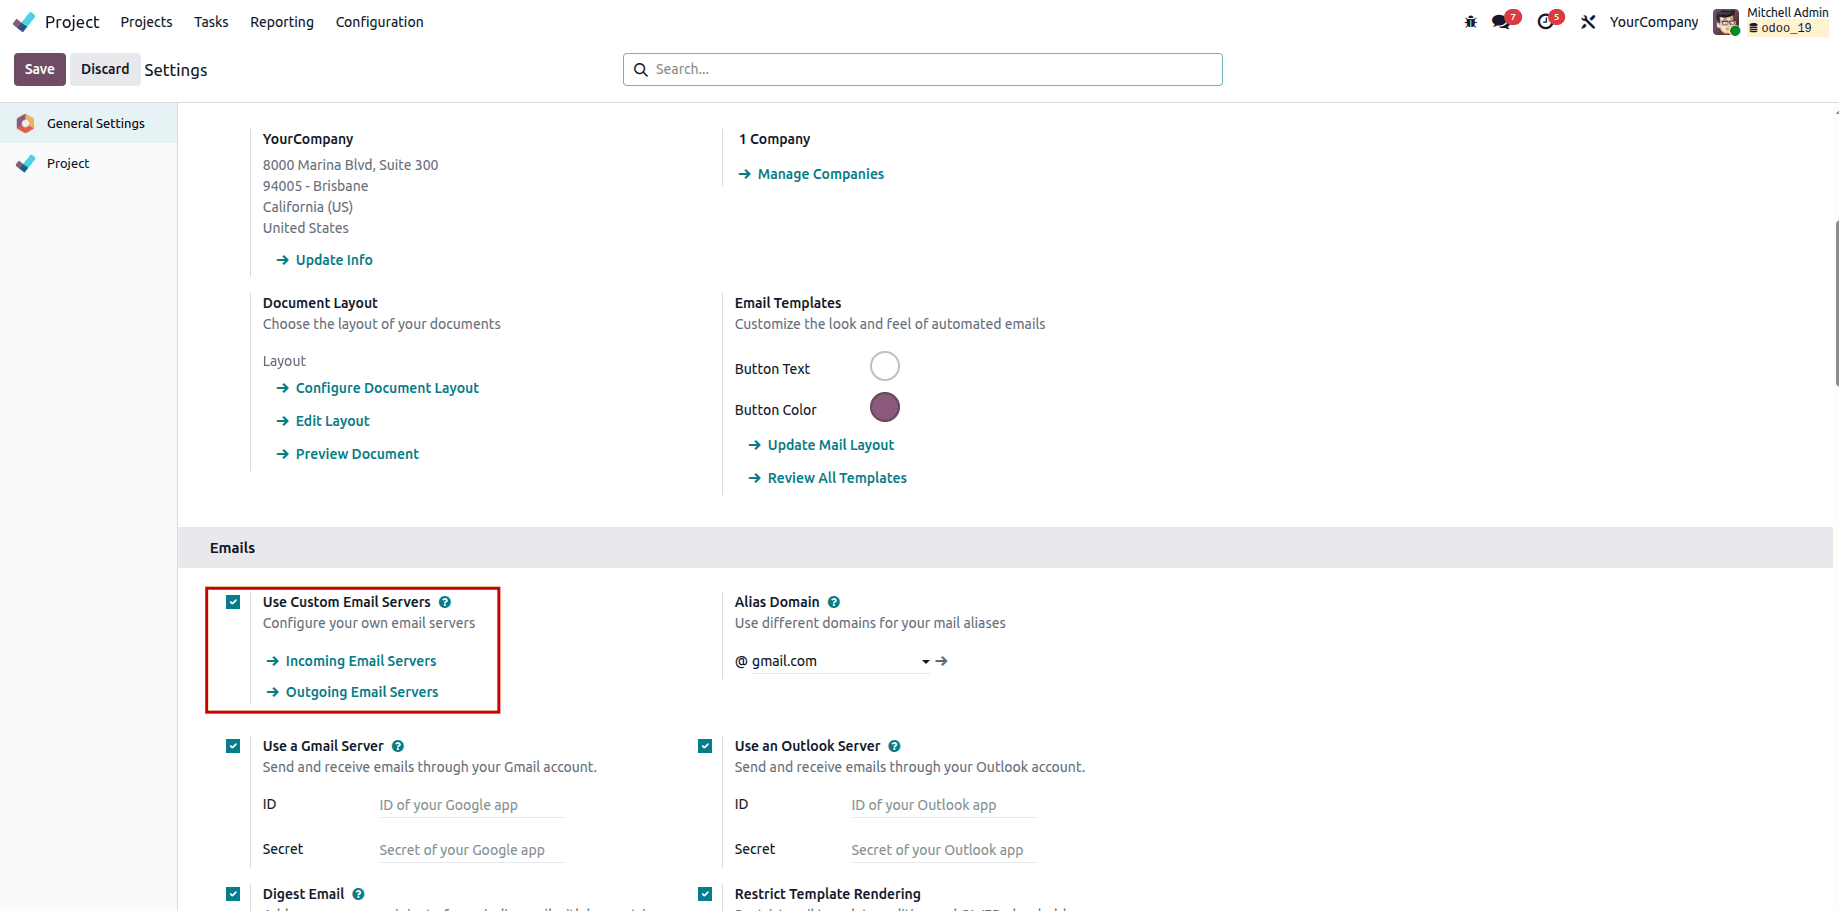
After we set up our email alias, we need to make sure we have a mail server. We can do this by going to the Settings menu and then to the General Settings inside the Email tab. Then we need to activate the Use Custom Email Servers option and click on Incoming Mail Servers.
This opens the window that will display all of the preconfigured incoming mail servers, and to add an incoming mail server, you just need to click the New button.

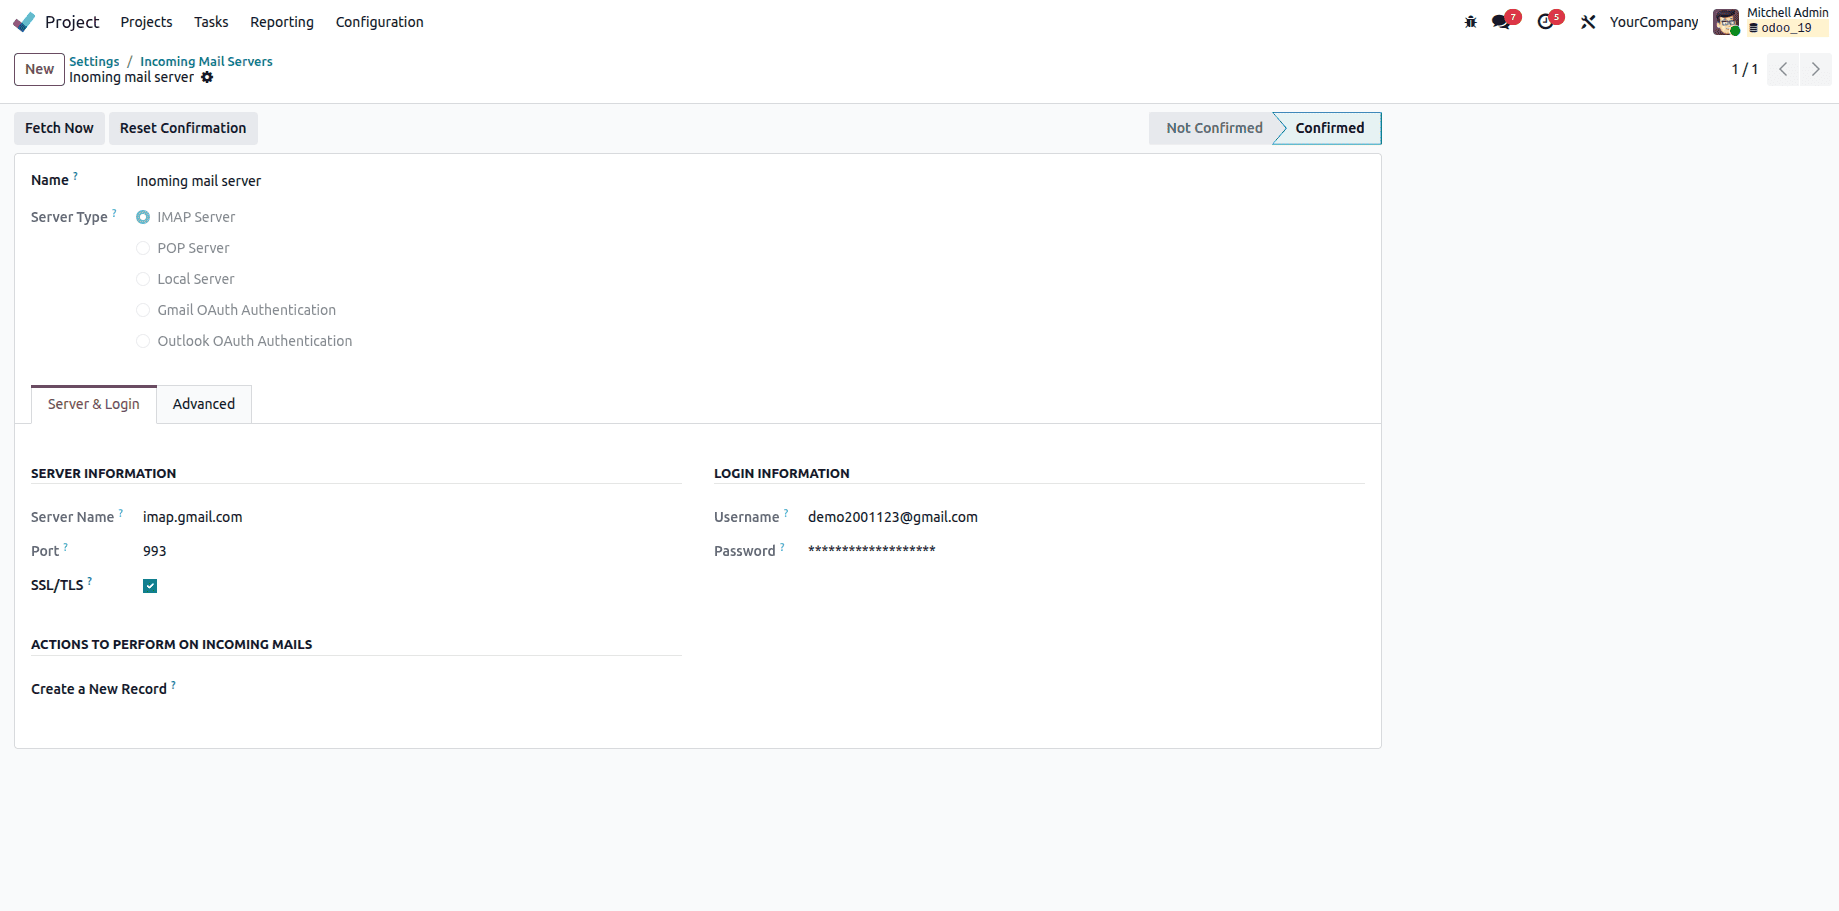
This will open a window that shows all mail servers that're available.To add another mail server you need to click the New button. We need to enter the configurations for our mail server, like its name, type, port, and login information. Once we are done, we can click 'Test & Confirm'.
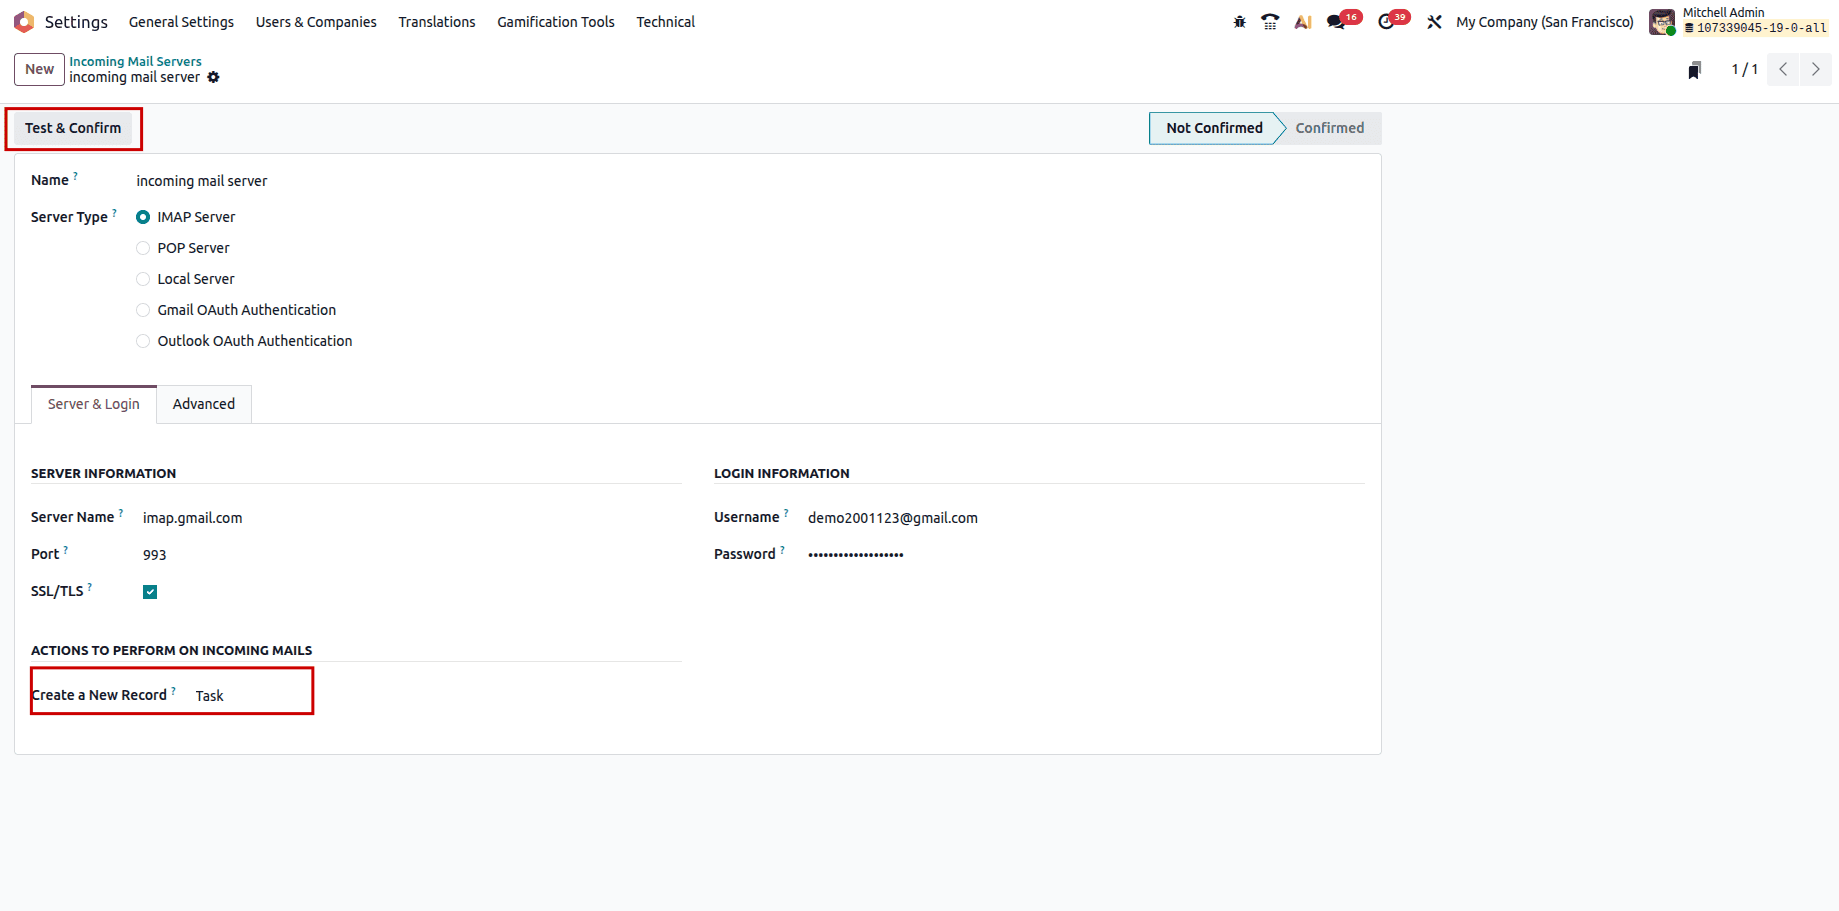
The status has been updated from “Not Confirmed” to “Confirmed.”
After setting up everything, each email that comes to the assigned alias would become a task.The email subject serves as the task title. The email body is included as the task description.The attachments would get associated with the task. In addition to this, the entire content would also be visible on the project’s chatter page. The sender of the email would become the customer of the task.
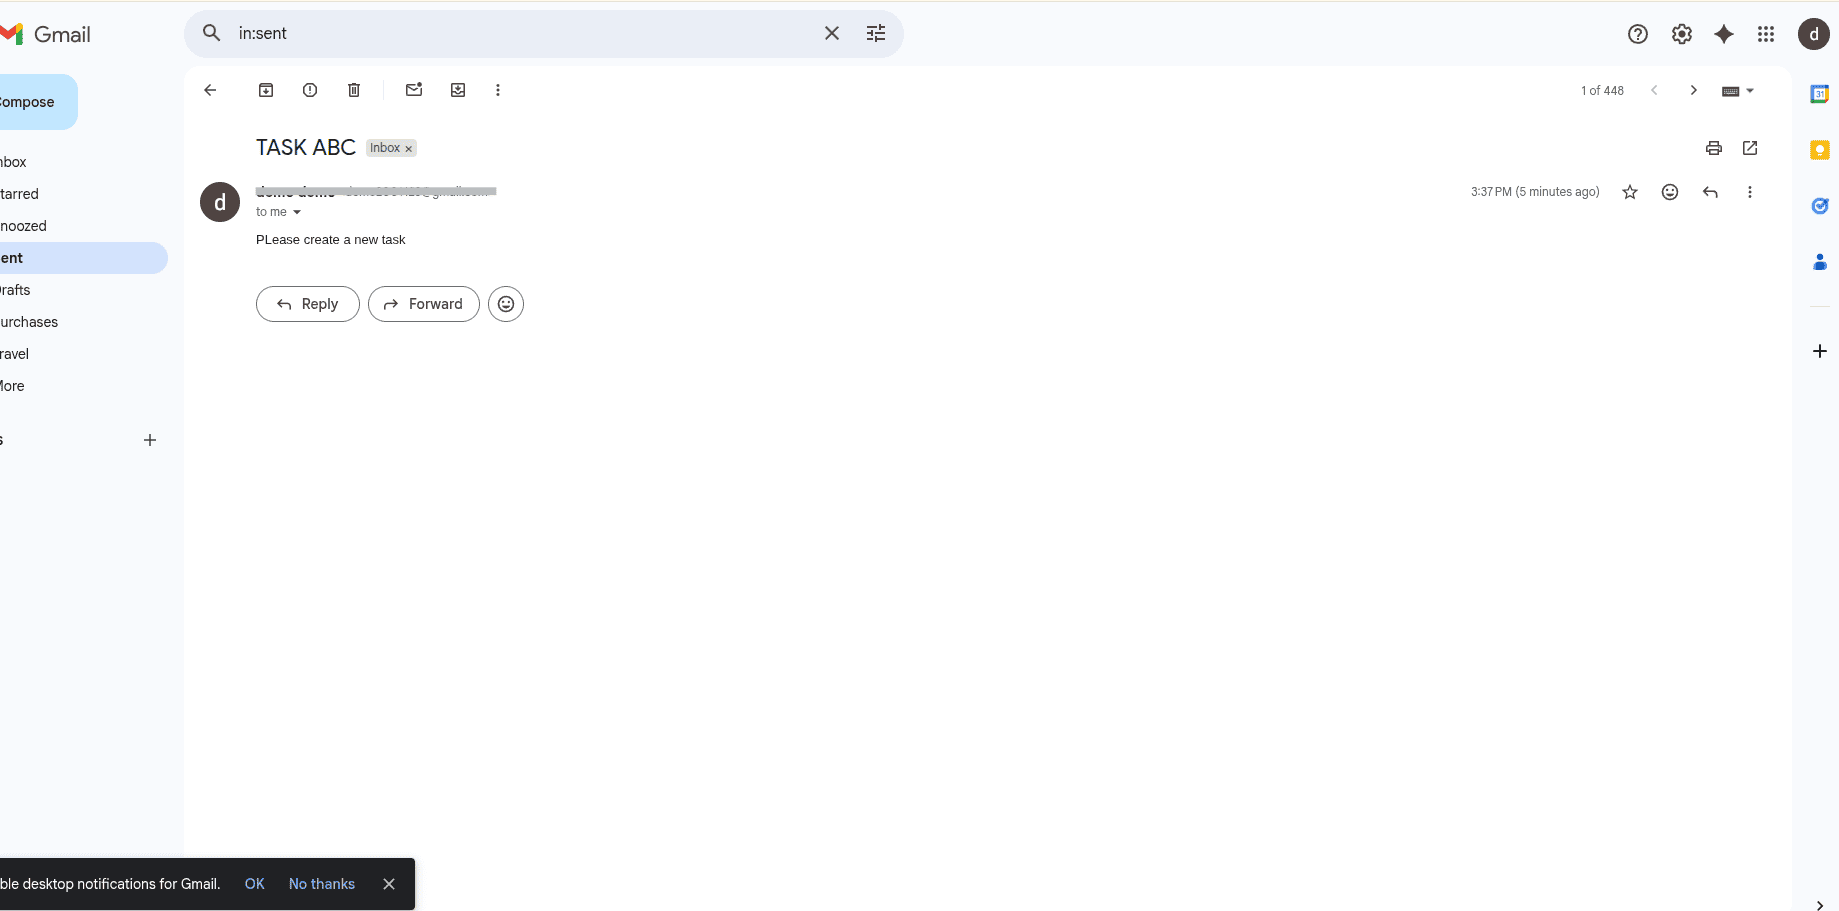
After sending the email, navigate to the incoming mail server and click “Fetch Now” to retrieve the record.

Next, open the Project module and choose the project where the task was created.
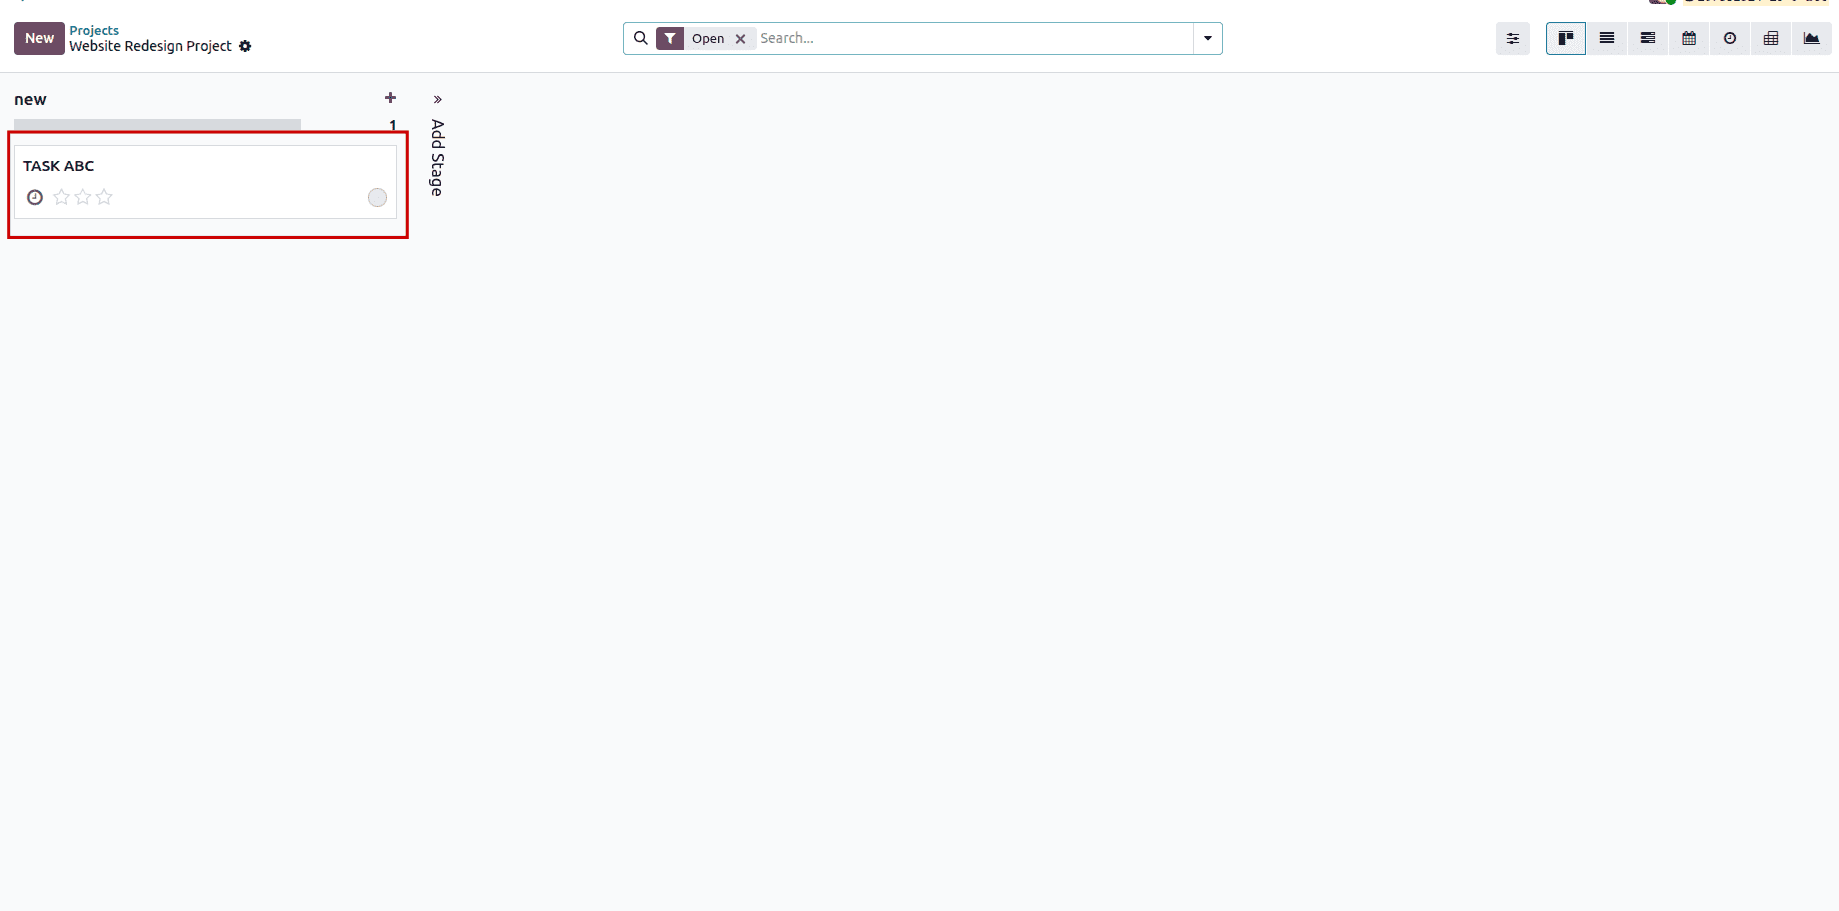
That is all about how a task is generated for a project based on an incoming email in Odoo 19. The process of creating tasks automatically through emails in Odoo 19 is highly effective because it will improve the management of projects by reducing efforts, increasing collaboration, and avoiding missing any tasks.
Through this method, companies will save time on administration and increase their efficiency by focusing on implementing plans rather than wasting time on such administrative procedures. You should start automating your task generation using emails in Odoo 19.
To read more about How to Create Tasks in a Project Upon an Incoming Email in Odoo 18, refer to our blog How to Create Tasks in a Project Upon an Incoming Email in Odoo 18.