In Odoo, the standard export functionality is powerful but sometimes fails to meet specific reporting requirements, such as custom formatting, specific column naming, or complex data aggregation. In this blog, we will explore how to implement a custom Excel (XLSX) export feature in Odoo 18 by adding a dedicated download button to the List View using OWL (Odoo Web Library) and a Python backend controller.
Step 1: Extending the List View Controller
First, we need to extend the standard ListController to define our custom export logic. We will use the download service from the Odoo web core to trigger the file download from our custom route.
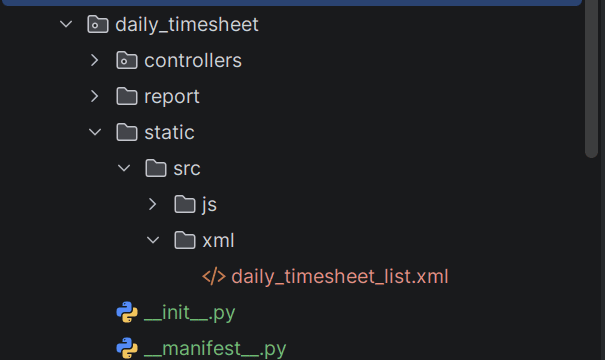
Create a file at static/src/js/daily_timesheet_list.js:

/** @odoo-module **/
import { ListController } from "@web/views/list/list_controller";
import { listView } from "@web/views/list/list_view";
import { registry } from "@web/core/registry";
import { download } from "@web/core/network/download";
export class DailyTimesheetListController extends ListController {
   async onDirectExportData() {
       const payload = {
           domain: this.model.root.domain,
       };
       if (!this.model.root.isDomainSelected && this.model.root.selection.length > 0) {
           const selectedIds = this.model.root.selection.map((r) => r.resId);
           payload.ids = selectedIds;
       }
       await download({
           data: {
               data: JSON.stringify(payload),
           },
           url: `/daily_timesheet/export_xlsx`,
       });
   }
}
DailyTimesheetListController.template = "daily_timesheet.ListView";
export const dailyTimesheetListView = {
   ...listView,
   Controller: DailyTimesheetListController,
};
registry.category("views").add("daily_timesheet_list", dailyTimesheetListView);
Step 2: Adding the Download Button to the UI
Next, we define the XML template to place our button in the Control Panel's additional actions area.
Create a file at static/src/xml/daily_timesheet_list.xml:
<?xml version="1.0" encoding="UTF-8"?>
<templates xml:space="preserve">
   <t t-name="daily_timesheet.ListView" t-inherit="web.ListView" t-inherit-mode="primary">
       <xpath expr="//t[@t-set-slot='control-panel-additional-actions']" position="inside">
           <t t-if="props.context.from_daily_timesheet">
               <button type="button" class="btn btn-light o_button_export ms-1" style="font-size: 16px; padding: 4px 8px;"
                       t-on-click="onDirectExportData" title="Download">
                   <i class="fa fa-download"/>
               </button>
           </t>
       </xpath>
   </t>
</templates>
Step 3: Creating the Python Export Controller
The backend controller will receive the domain or selected IDs, fetch the data, and use the xlsxwriter library to generate the formatted Excel file.
Create a file at controllers/daily_timesheet.py:
class DailyTimesheetExportController(http.Controller):
   @http.route('/daily_timesheet/export_xlsx', type='http', auth='user', methods=['POST'])
   def export_xlsx(self, data, **kwargs):
       params = json.loads(data)
       domain = params.get('domain', [])
       ids = params.get('ids', None)
       model = request.env['timesheets.analysis.report']
       if ids:
           domain = [('id', 'in', ids)]
       records = model.search(domain, order='date asc, employee_id asc')
       output = io.BytesIO()
       workbook = xlsxwriter.Workbook(output, {'in_memory': True})
       sheet = workbook.add_worksheet('Daily Timesheet')
       normal_header_fmt = workbook.add_format({
           'bold': True,
           'border': 1,
           'align': 'center',
           'valign': 'vcenter',
       })
       cell_fmt = workbook.add_format({
           'border': 1,
           'align': 'left',
           'valign': 'vcenter',
       })
       number_fmt = workbook.add_format({
           'border': 1,
           'align': 'right',
           'valign': 'vcenter',
           'num_format': '0.00',
       })
       COLUMNS = [
           ('Employee',       lambda r: r.employee_id.name or '',20, cell_fmt,   False),
           ('Description',    lambda r: r.name or '',30, cell_fmt,   False),
           ('Activity Group', lambda r: r.project_id.name or '',25, cell_fmt,   True),
           ('Task',           lambda r: r.task_id.name or '',25, cell_fmt,   False),
           ('Business Unit',  lambda r: r.company_id.name or '',20, cell_fmt,   True),
           ('Department',     lambda r: r.department_id.name or '',20, cell_fmt,   False),
           ('Time Spent',     lambda r: r.unit_amount, 12, number_fmt, False),
       ]
       sheet.set_row(0, 20)
       for col_idx, (label, _, width, _, is_yellow) in enumerate(COLUMNS):
           fmt = normal_header_fmt
           sheet.write(0, col_idx, label, fmt)
           sheet.set_column(col_idx, col_idx, width)
       for row_idx, record in enumerate(records, start=1):
           sheet.set_row(row_idx, 15)
           for col_idx, (_, accessor, _, fmt, _) in enumerate(COLUMNS):
               try:
                   value = accessor(record)
               except Exception:
                   value = ''
               if isinstance(value, float):
                   sheet.write_number(row_idx, col_idx, value, fmt)
               else:
                   sheet.write(row_idx, col_idx, value or '', fmt)
       workbook.close()
       output.seek(0)
       xlsx_data = output.read()
       return request.make_response(
           xlsx_data,
           headers=[
               ('Content-Type',
                'application/vnd.openxmlformats-officedocument.spreadsheetml.sheet'),
               ('Content-Disposition',
                content_disposition('daily_timesheet.xlsx')),
           ],
       )
Step 4: Registering the Custom View
Finally, we need to link our custom JS class to the Odoo List View using the js_class attribute.
Update your view XML:
<record id="timesheets_analysis_report_list_inherited" model="ir.ui.view">
    <field name="name">timesheets.analysis.report.list.inherited</field>
    <field name="model">timesheets.analysis.report</field>
    <field name="inherit_id" ref="hr_timesheet.timesheets_analysis_report_list"/>
    <field name="arch" type="xml">
        <xpath expr="/list" position="attributes">
            <attribute name="js_class">daily_timesheet_list</attribute>
        </xpath>
    </field>
</record>
By combining OWL for the frontend interaction and a Python controller for data processing, you can create highly customized Excel exports in Odoo 18. This approach provides a seamless user experience while maintaining full control over the exported file's layout and content.
To read more about How to Generate XLSX Report Using Controller in Odoo 18, refer to our blog How to Generate XLSX Report Using Controller in Odoo 18.