Debit notes and Credit notes play a huge role in proper Accounting management. With the Accounting module, you can easily manage Debit notes and Credit notes.
This Blog will give you a detailed note on configuring and using Debit notes and Credit notes with the Odoo 15 Accounting module.
Debit Notes
Debit notes are essential documents issued when goods and services are received more than ordered. You can manage these inconveniences in business with Odoo. Managing debit notes is essential to keep an excellent customer-to-business relationship.
To use Debit Notes in the Accounting module of Odoo15, go to the module’s dashboard, and under the Vendor tab, select Bills. The page with Bill listed will open out as shown below.
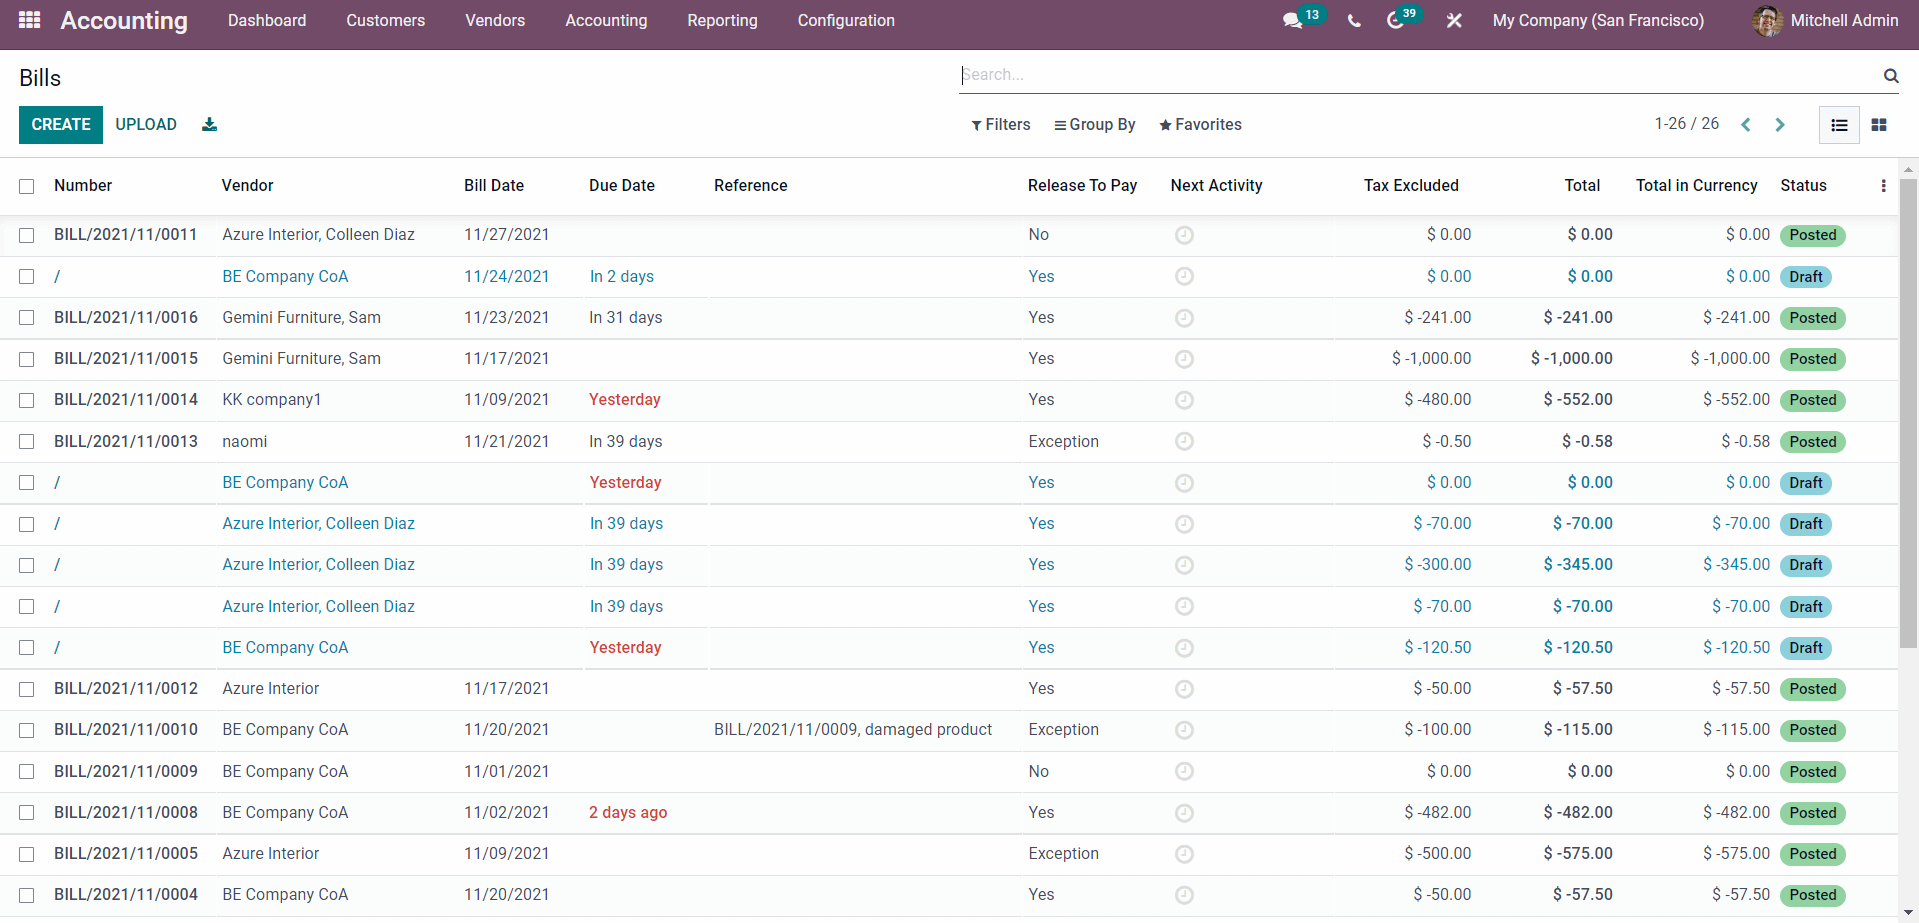
You can create, manage and have a complete overview of the Bills from here. To use the Debit note feature, select from the Bills or create a new bill and a configuration page on the Bill open up as shown below.
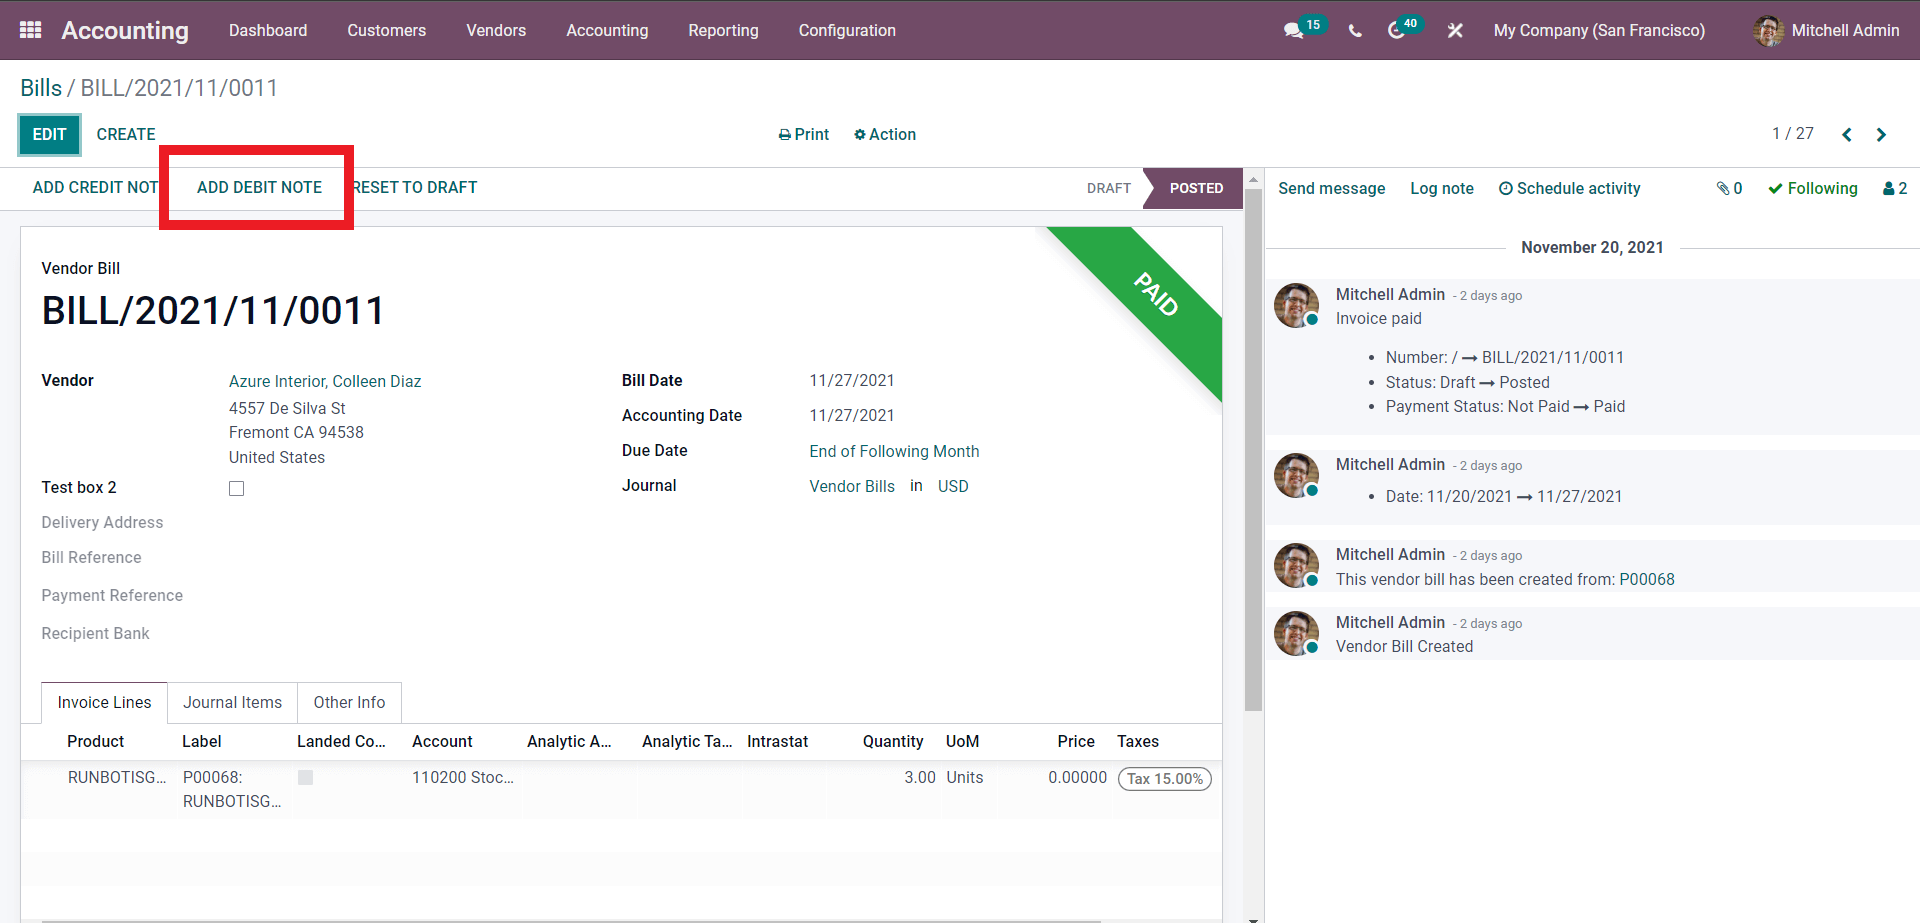
From the preceding Configuration page as shown below you can create a debit note.
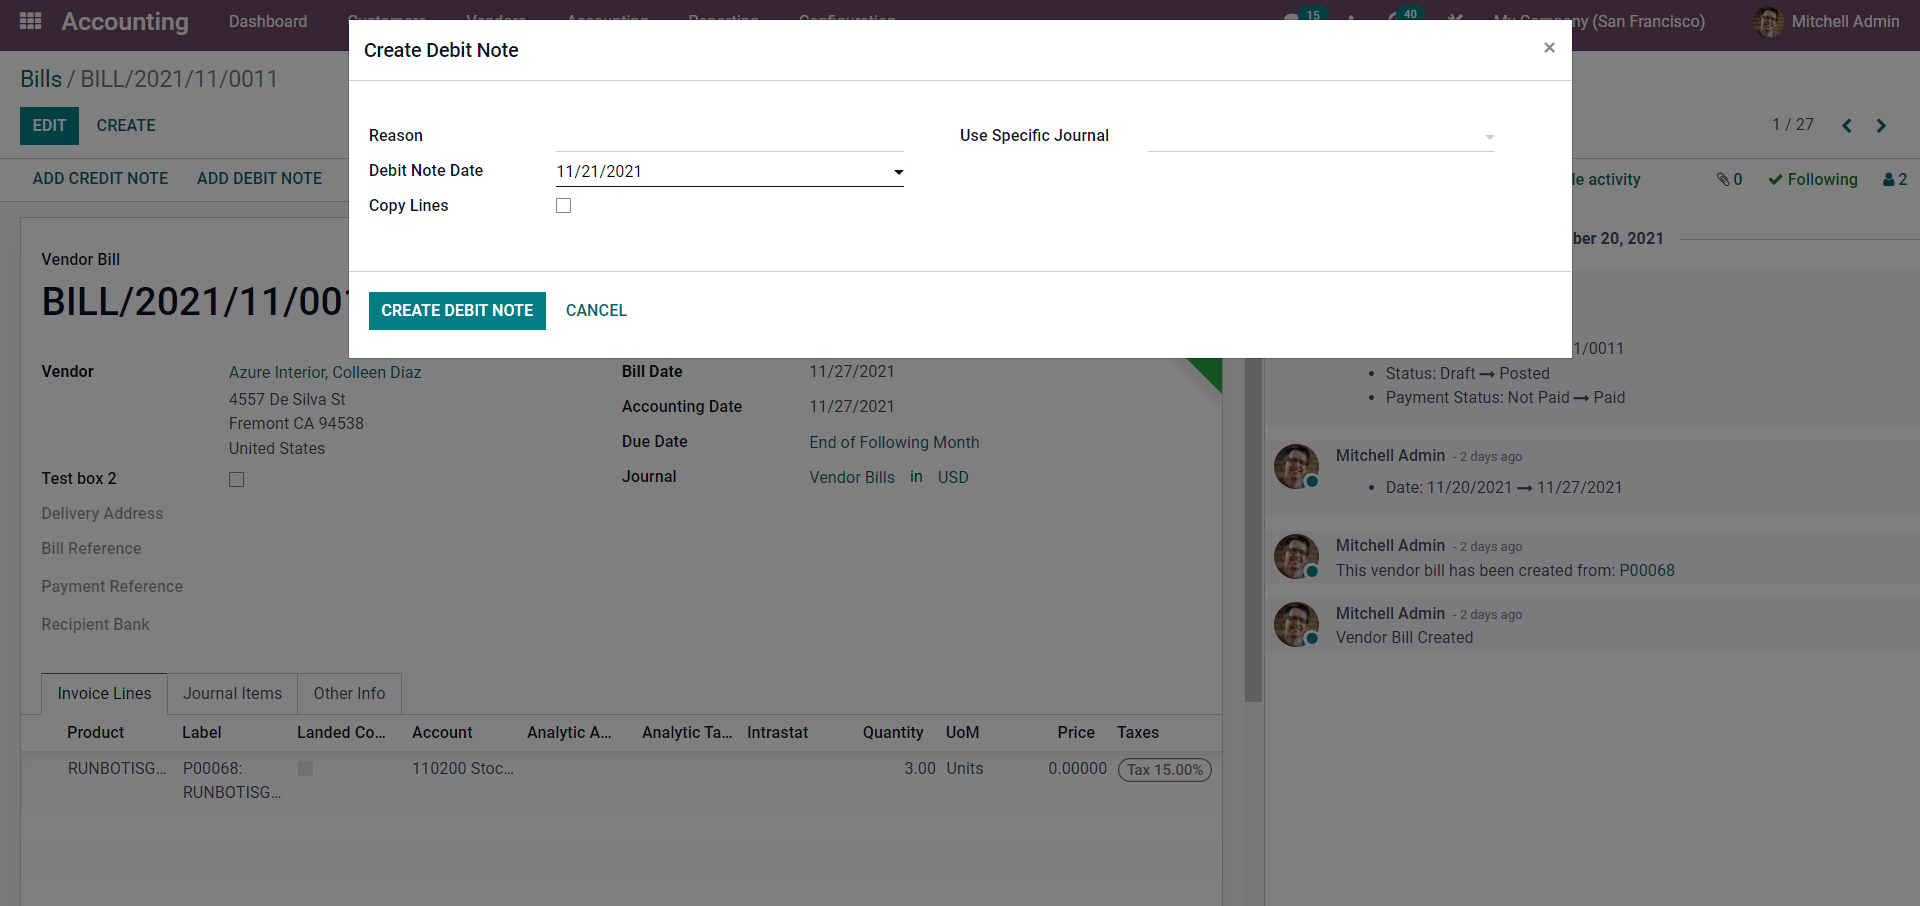
Here you can type in the reason for the debit note in the Reason section. You can use a specific Journal for the Debit note from the Use Specific Journal section. Click on the fields next to it to view the Journals defined and choose from them.
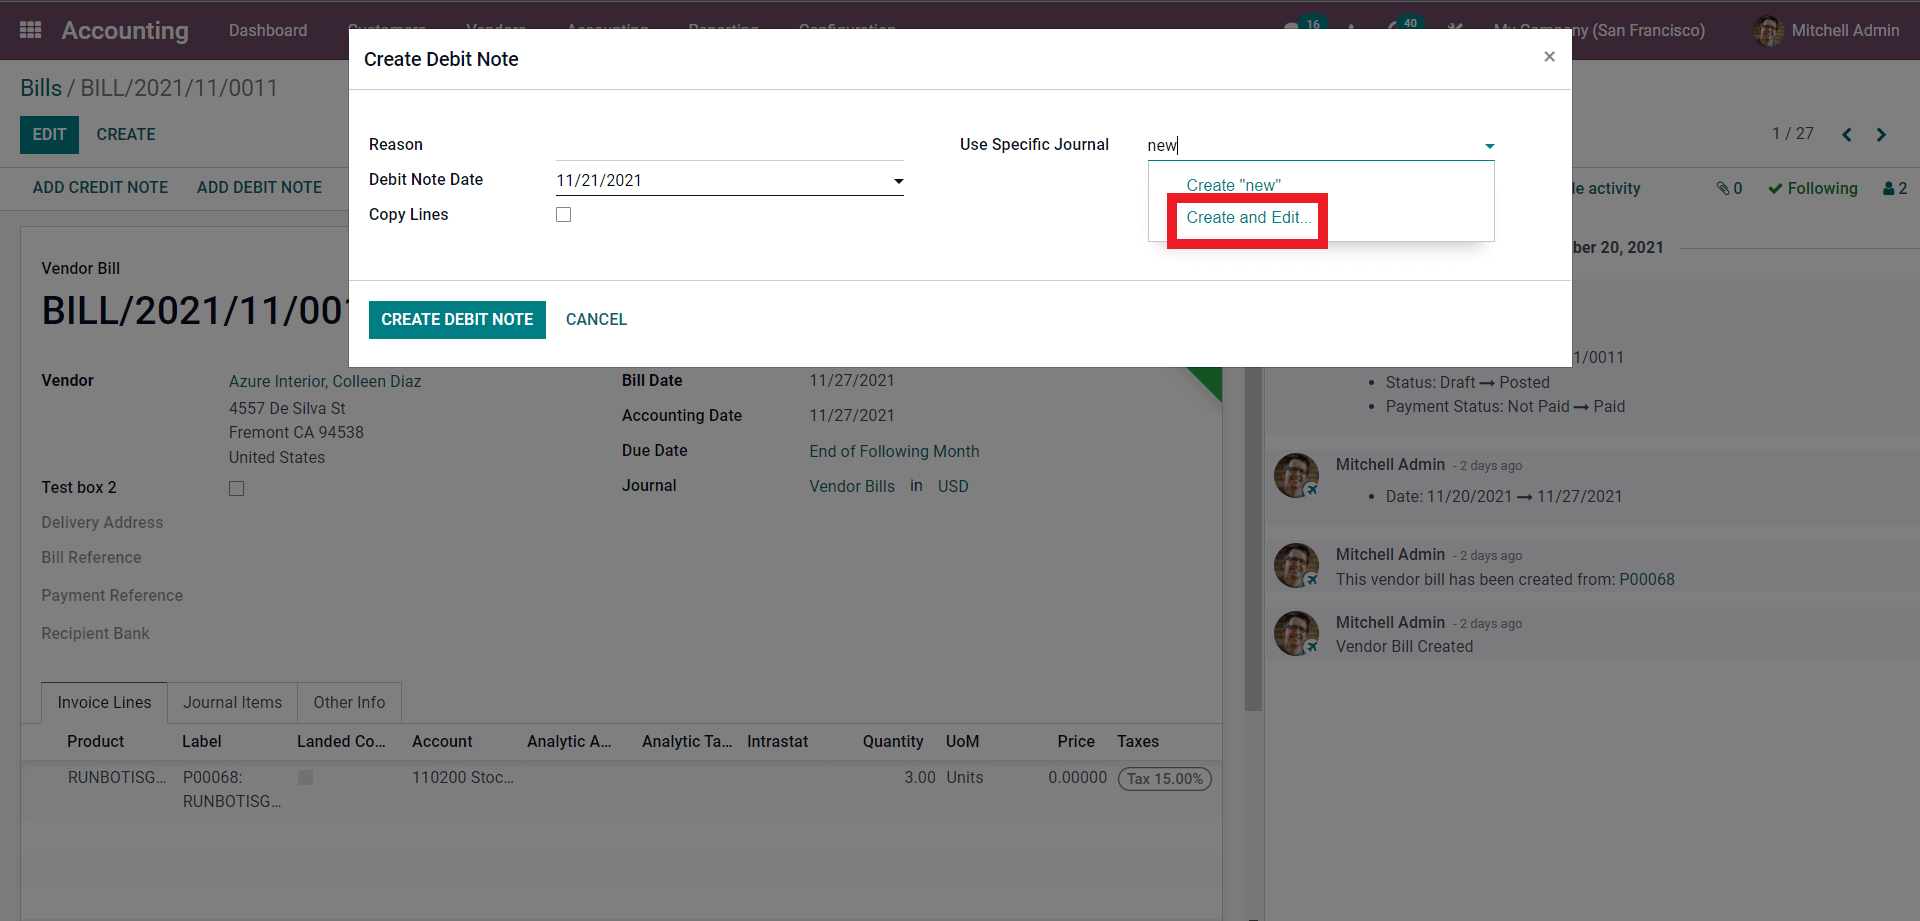
If you want to create a new journal just type in the name of the new Journal, and a Create and Edit button will appear as highlighted below.
A Specific Journal configuration tab will appear.
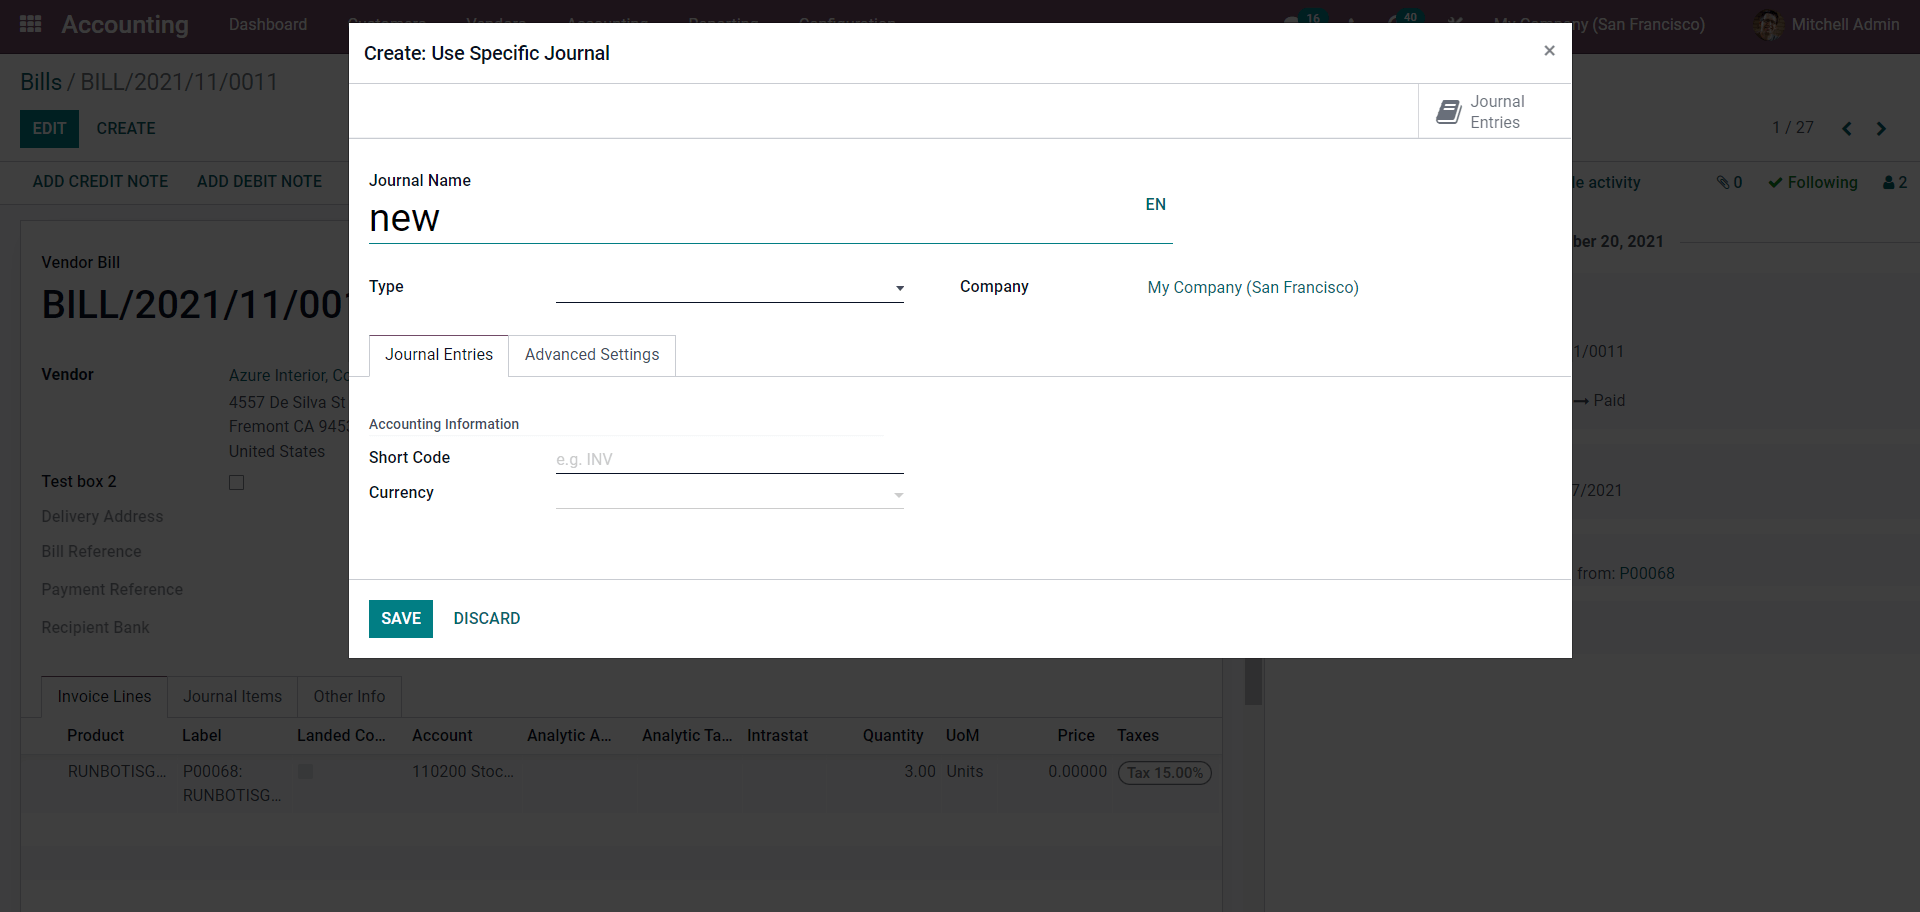
You can create the New Specific Journal from here. After the configuration, save it and add it to the Debit note if necessary.
Choose the Debit Note Date from the Debit note configuration section. After the configurations, click on the ‘CREATE DEBIT NOTE BUTTON’ and create the debit note. The Vendor bill page will open up after the Debit Note configurations. Add the product under the ‘Invoice Lines’ tab below and click on the Confirm button.
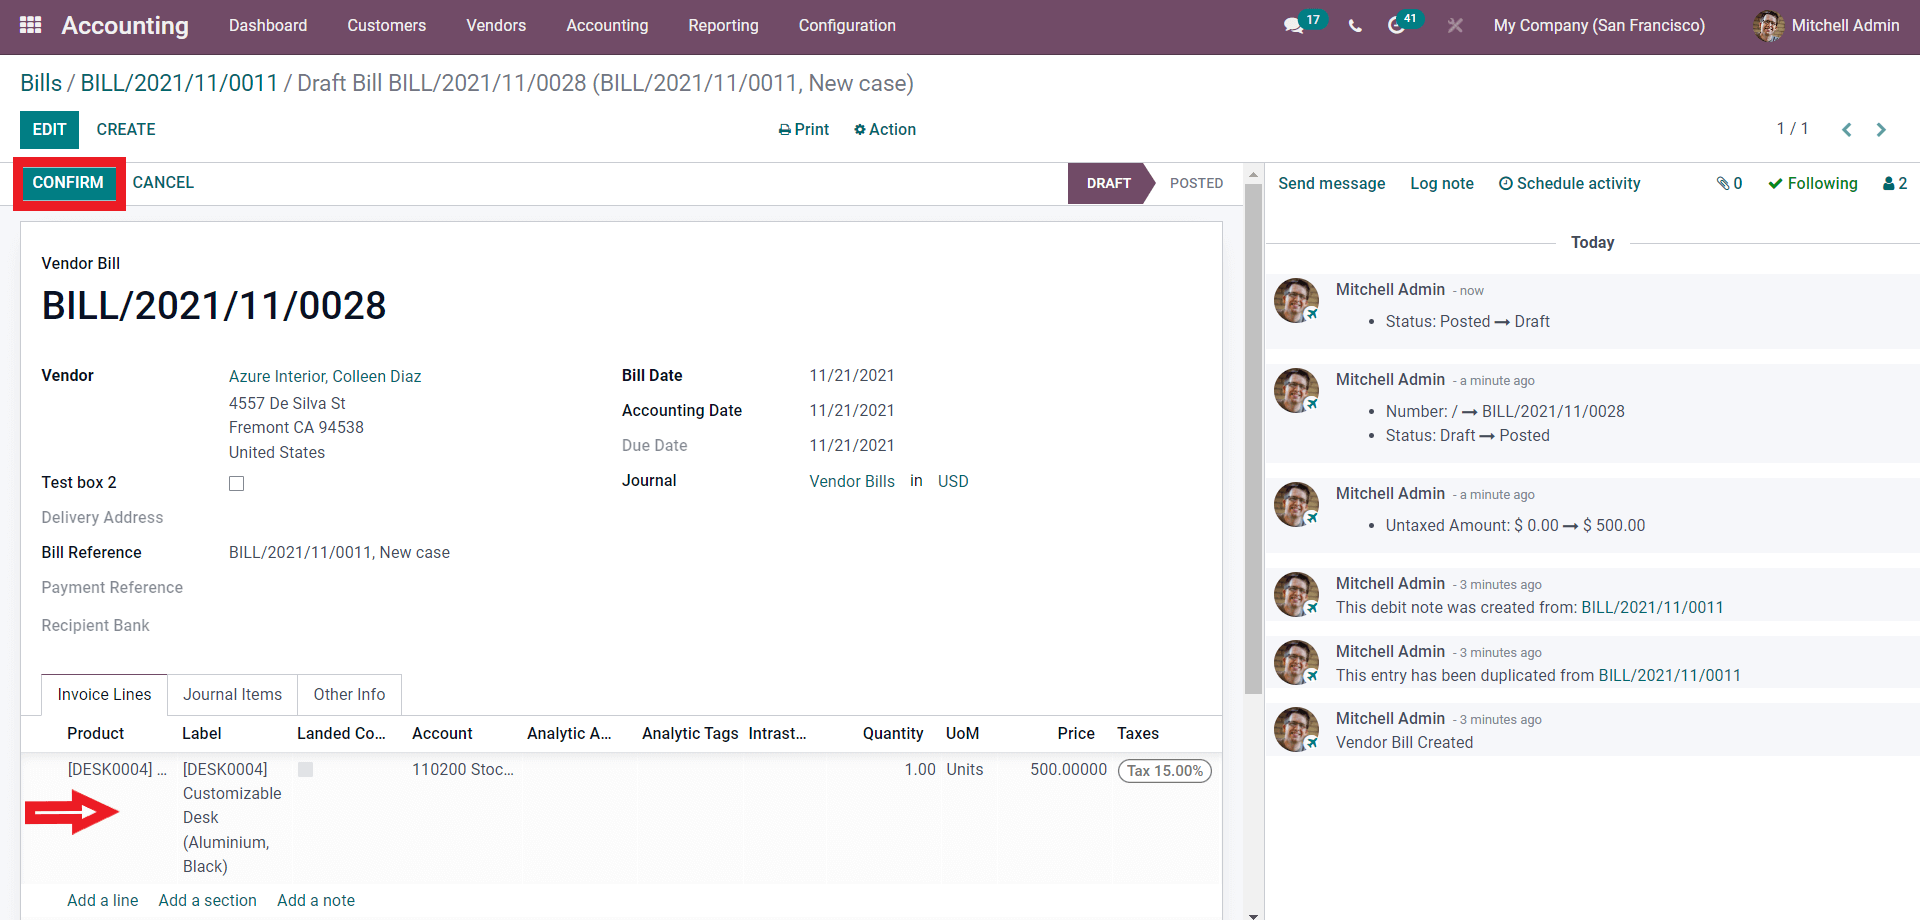
The confirmation button will proceed you to the next stage or section of the process, as shown below.
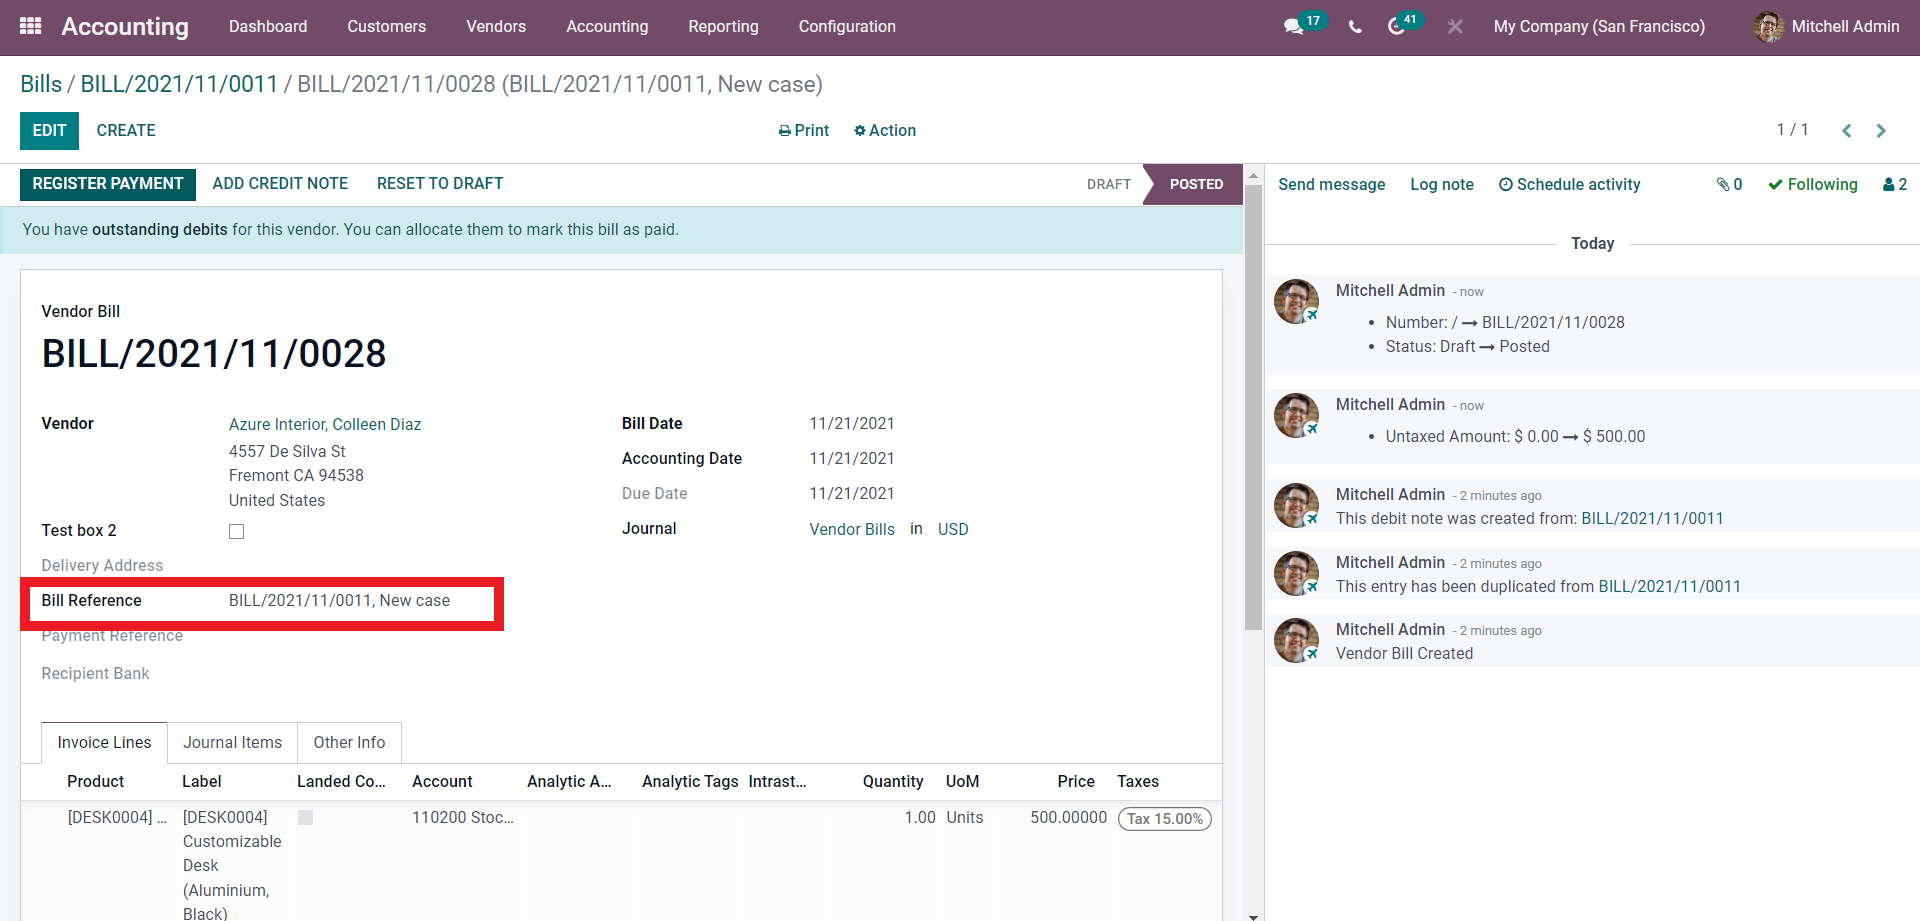
Here in the Bill reference section, you can see the name of the Debit Note. Here the Name is Following the bill number, ‘New Case.’ Click on the REGISTER PAYMENT button to Register the payment.
This is how you create and configure the Discount notes in Odoo.
Credit Notes
Credit Notes are short documents issued to the Customers as a notification that a certain amount has been credited from them. Credit Notes are triggered due to a mistake in the invoice, a rejection of the services, damaged items or goods, and sending wrong items. For this matter, Credit Notes play a massive role inefficient management.
It is effortless to use and manage credit notes with the Odoo 15 Accounting module in any of these cases. To issue a Credit note or Credit Memo, go to your Accounting module. From the Dashboard of Accounting module under the Customer tab, you can find Credit Notes; click on it to go to the Credit notes below.
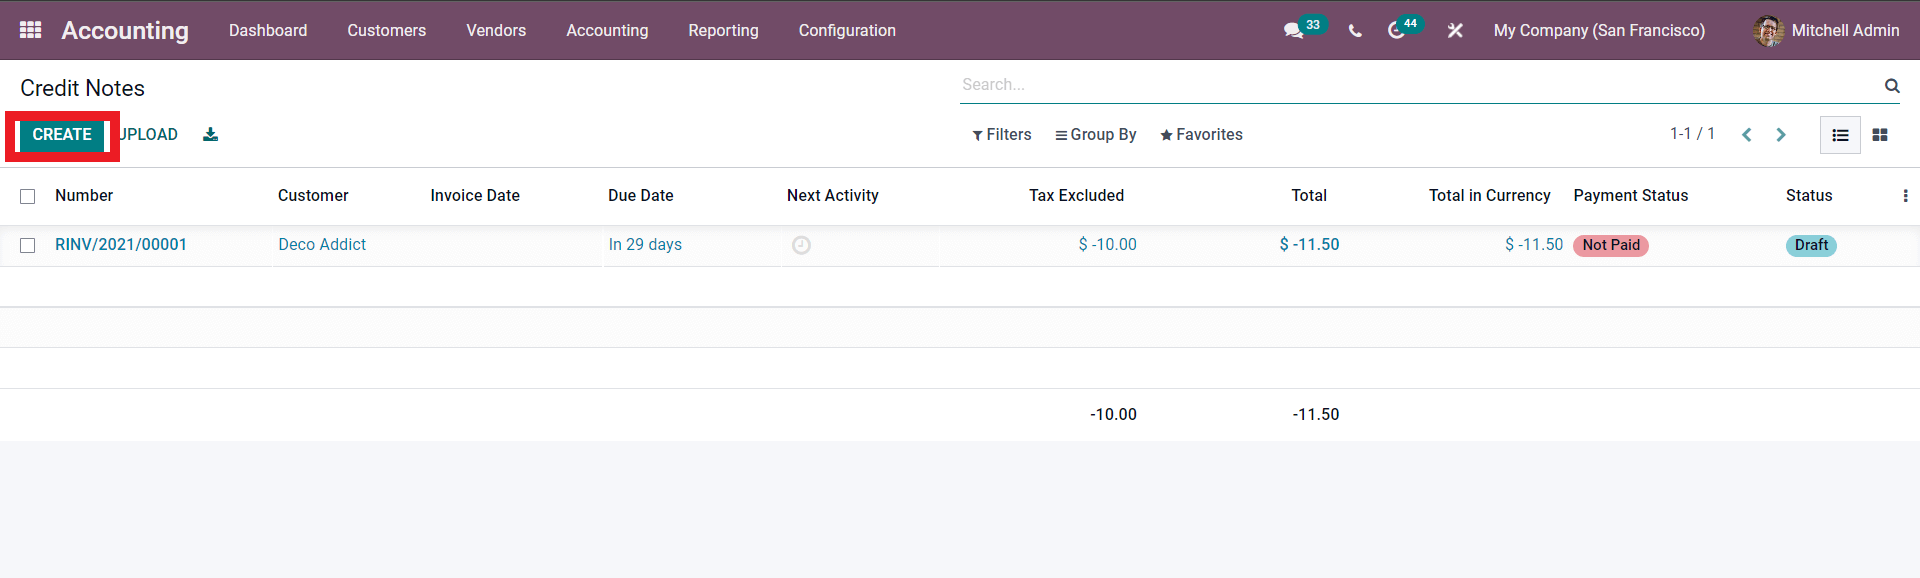
All of the Created Credit Reports will be listed here for you to overview and manage at any time.
Use the CREATE button highlighted in the image above to create a new Credit Note. A configuration page will open up for you to configure the Credit note directly from the customer invoice, as shown below.

The primary step is to choose the Customer and set the delivery address. After the configurations on the upper section of the invoice under the invoice tab, you can add the products by clicking on the Add a line button. Choose the product and add it to the invoice as shown below.
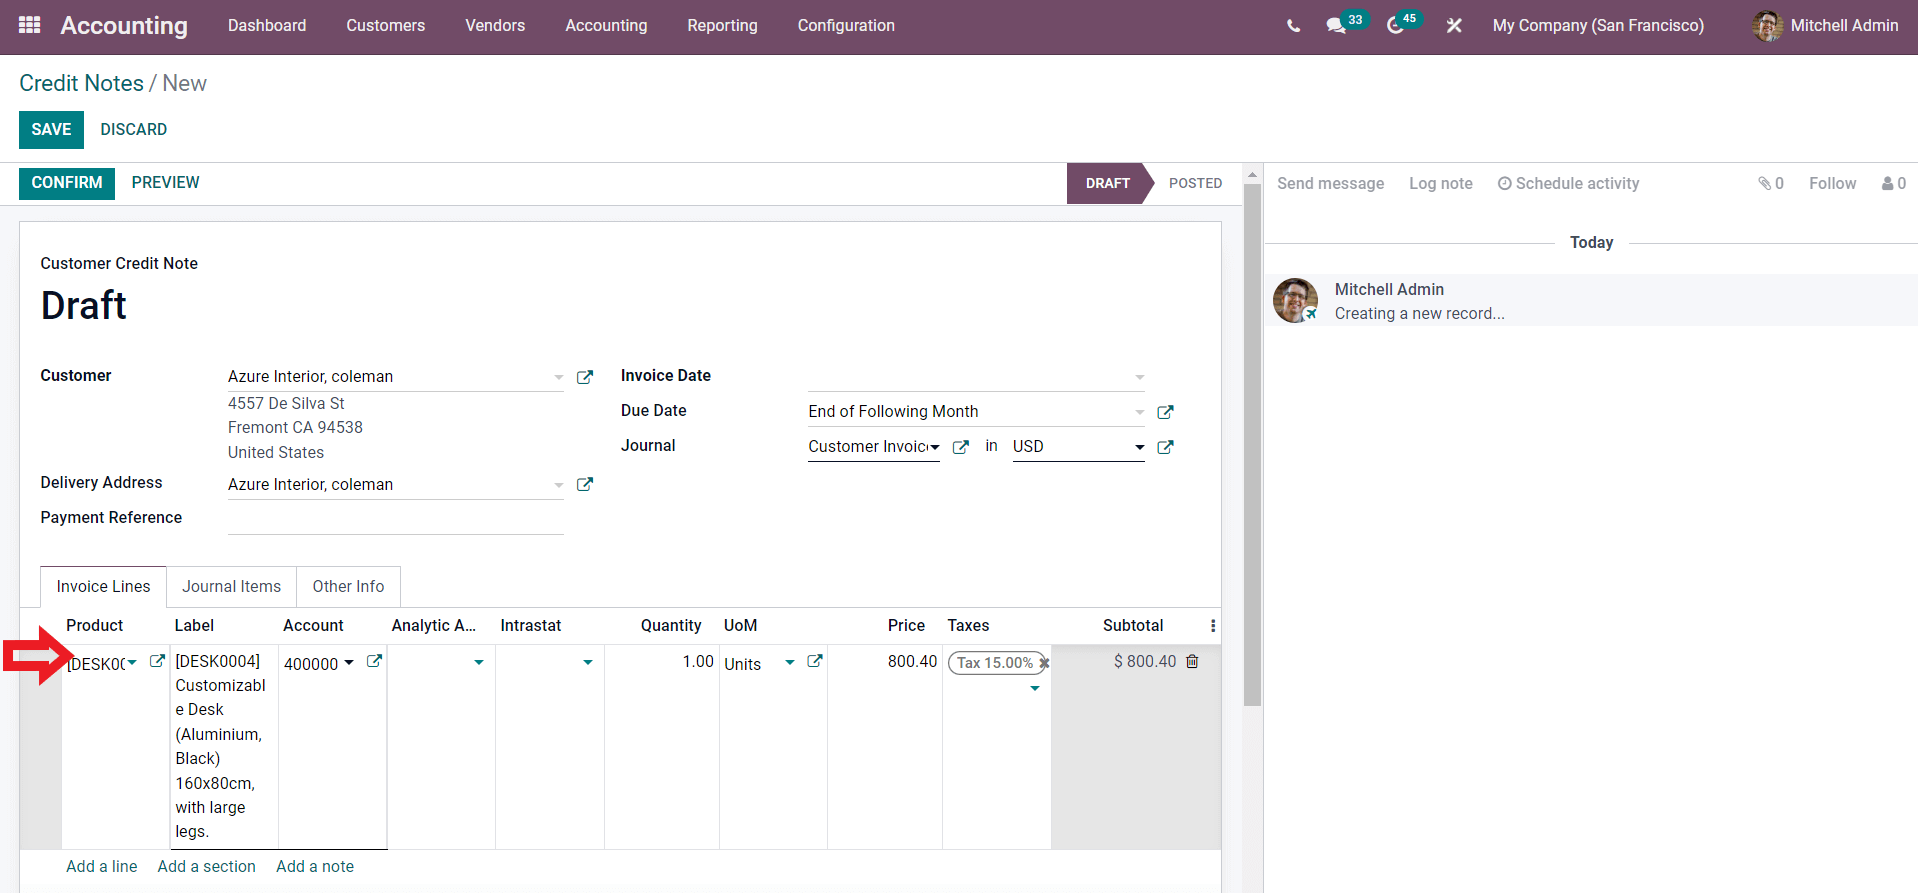
Type in the Invoice Date, Due date, Delivery address, and choose the Journal. Add the Product, and in the Journal items, you can check the Journal items, and you can have and add more info under the Other info tab.
After the configuration, use the CONFIRM button, for confirmation.
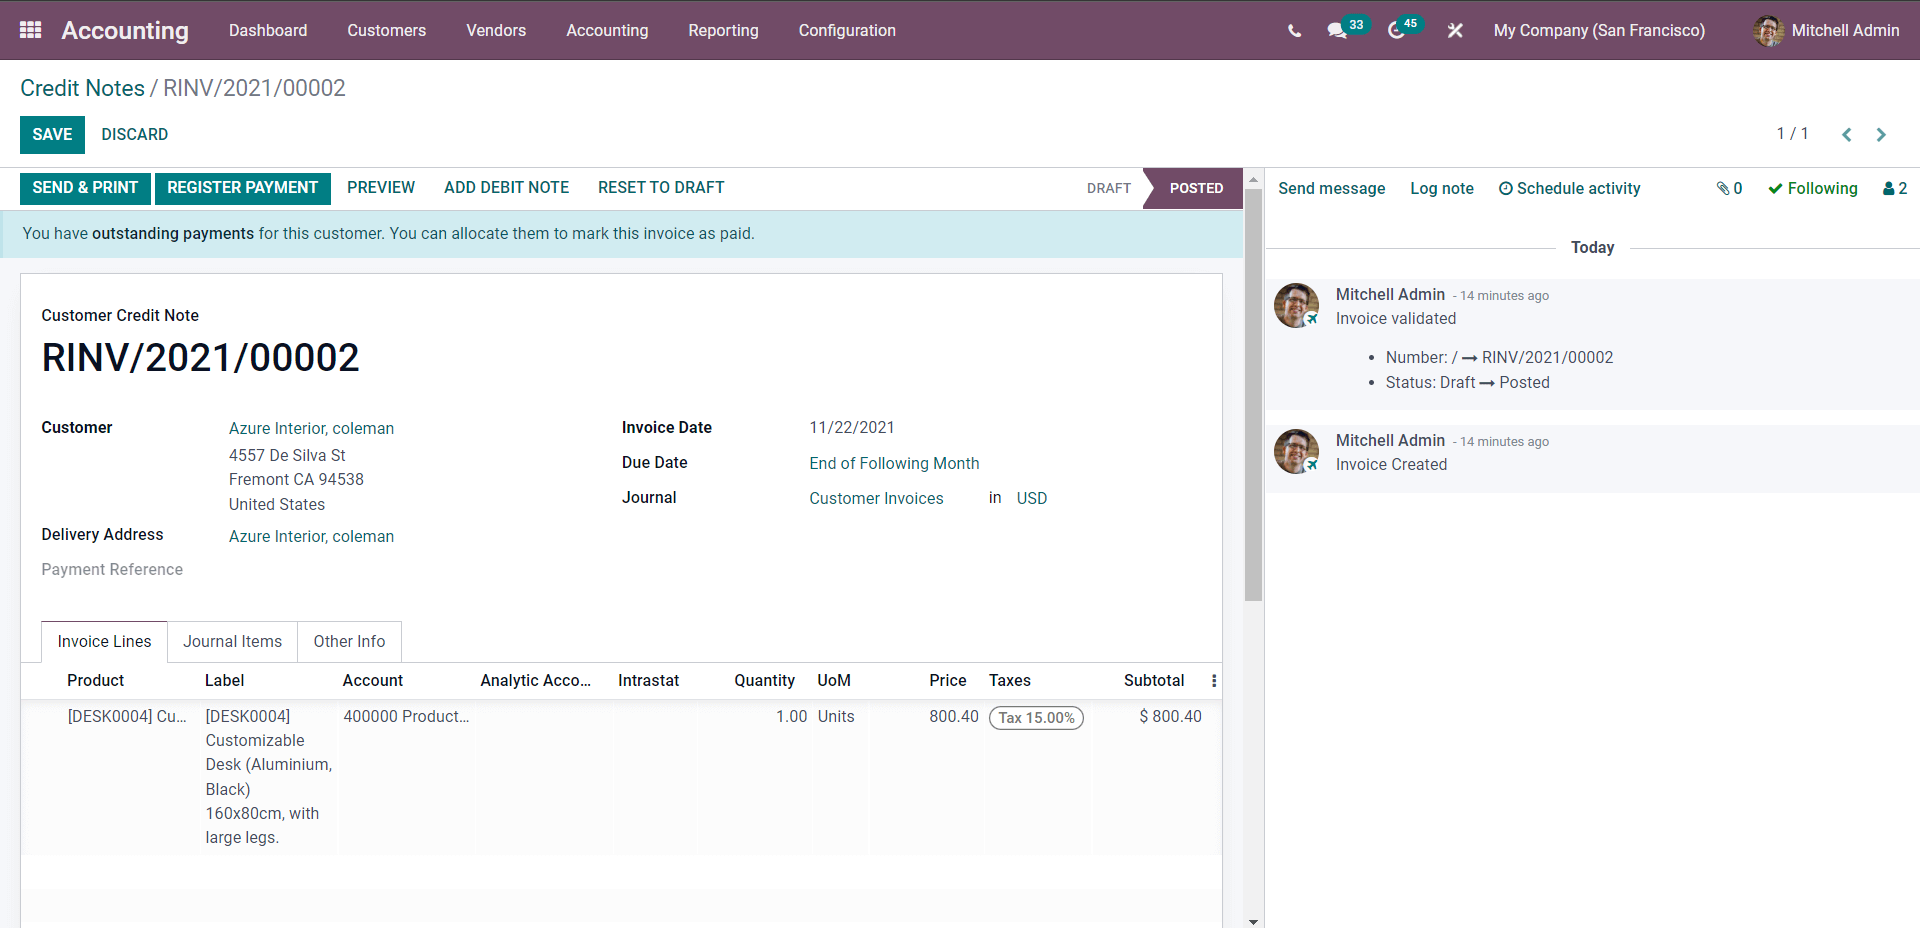
From here, click on the REGISTER PAYMENT button.
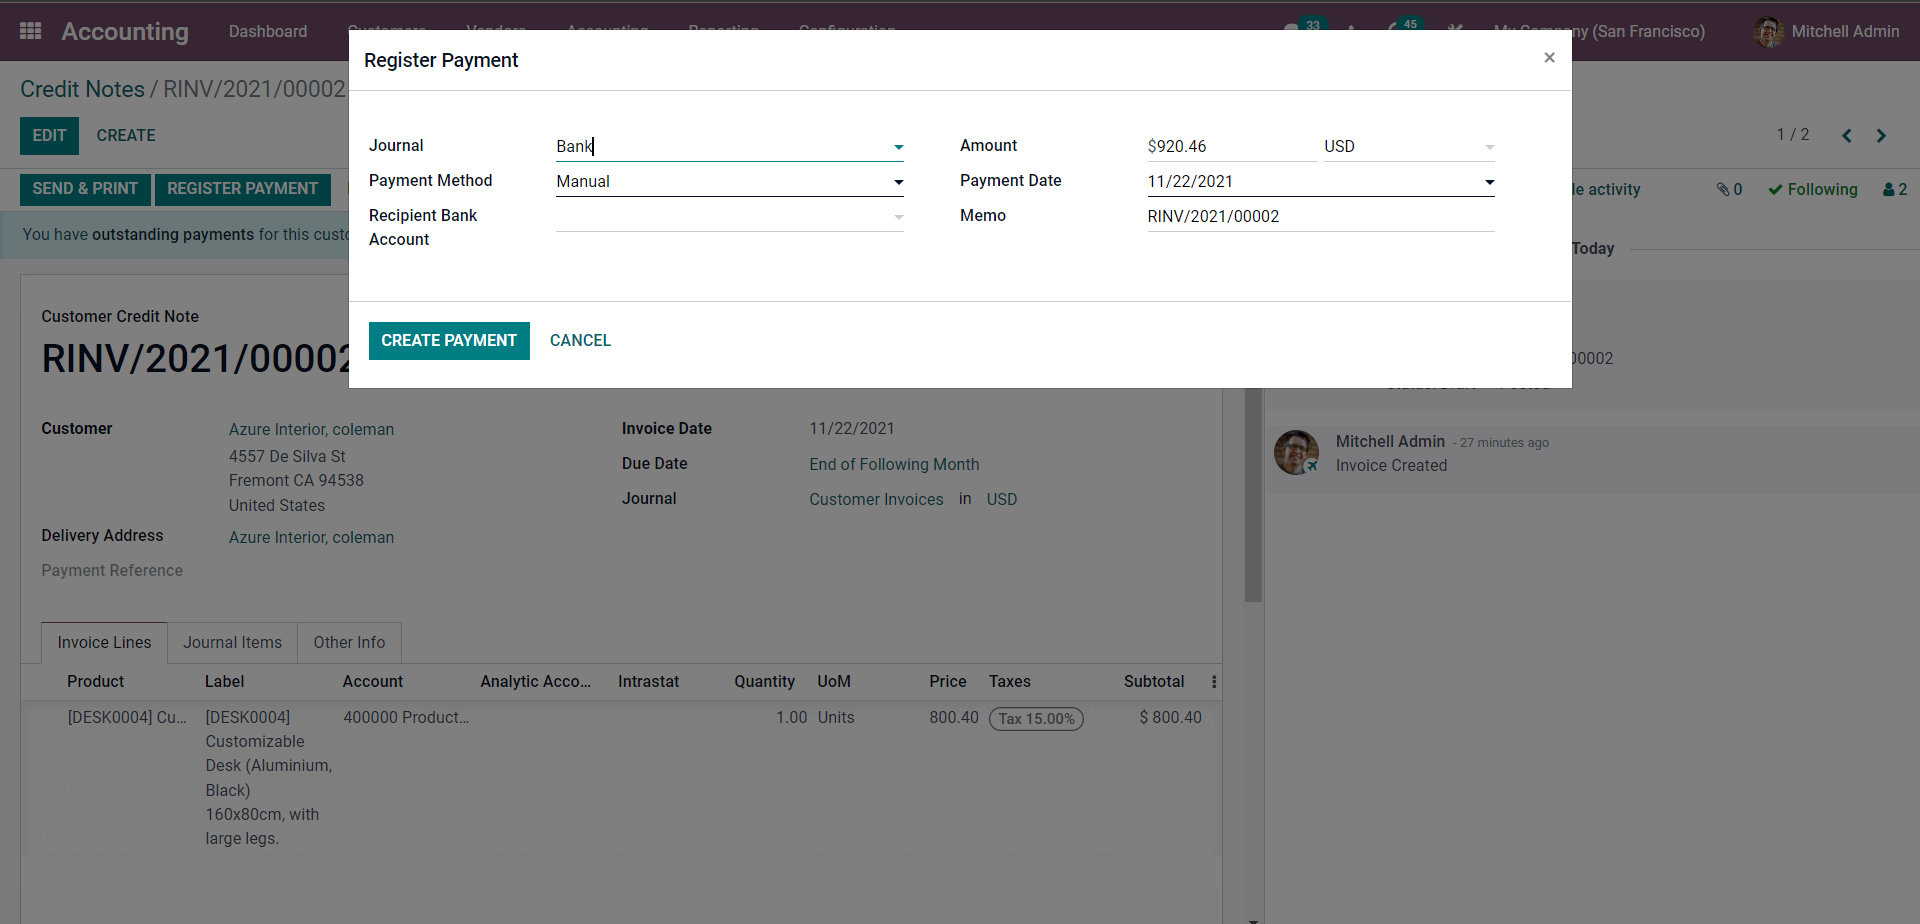
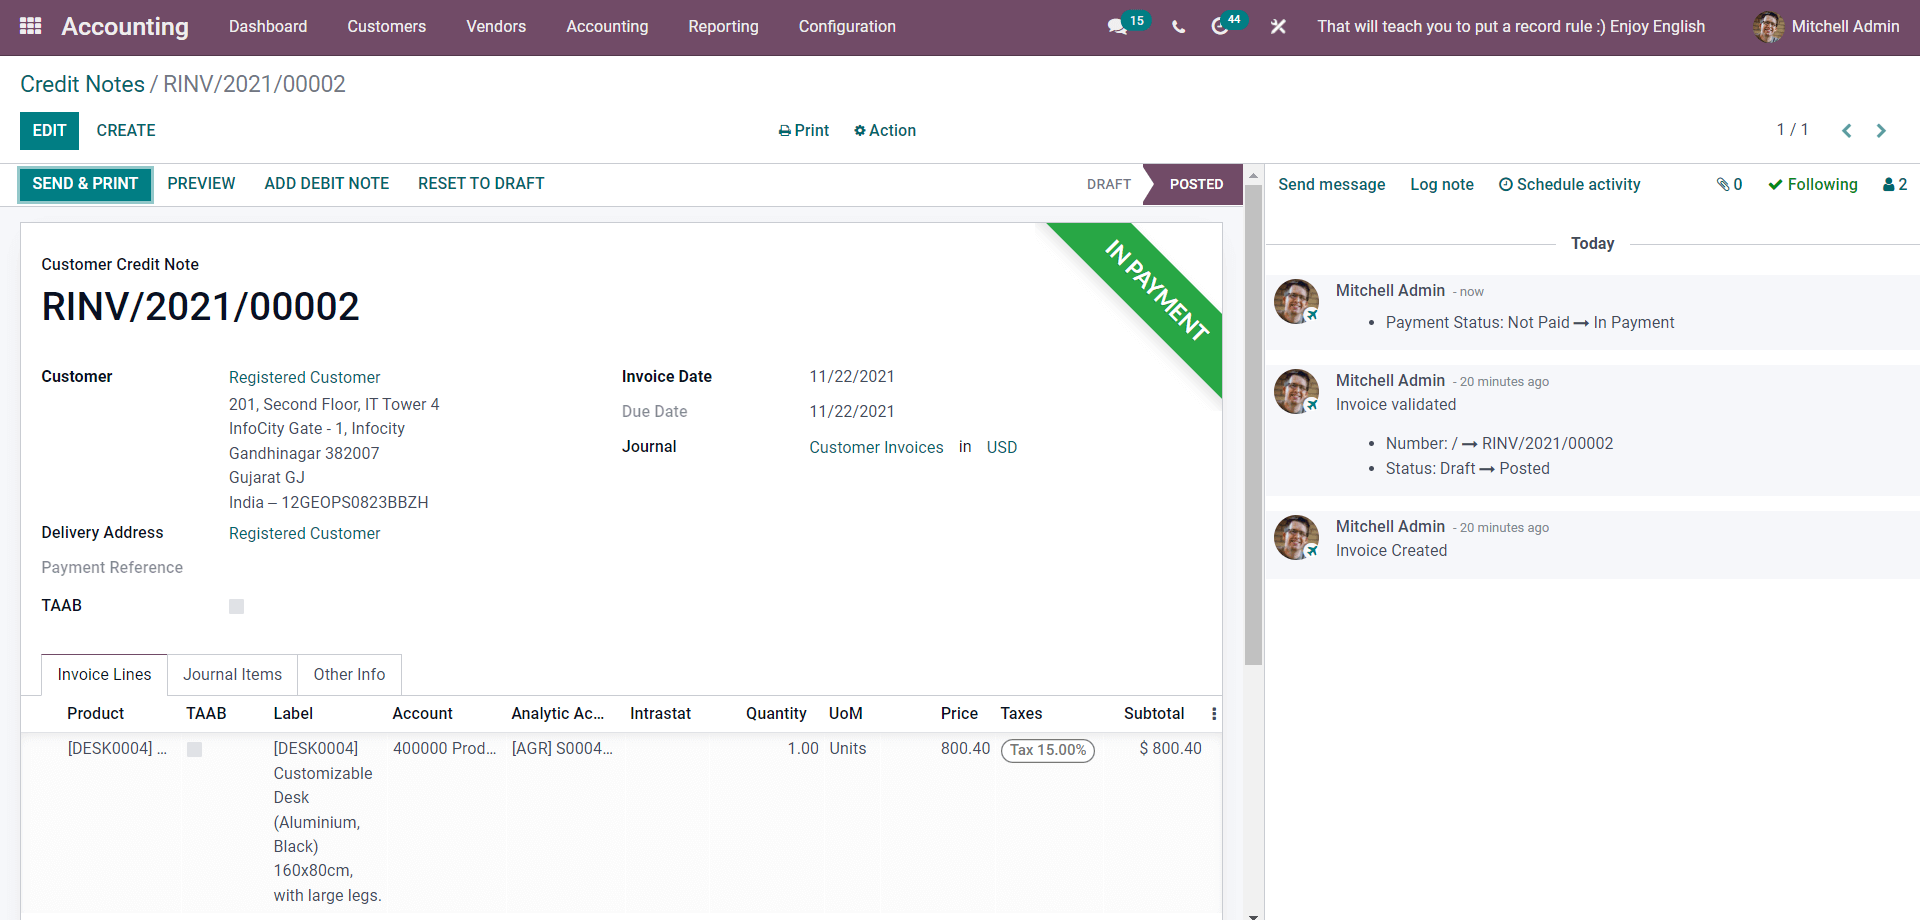
Note that the Files will be automatically filled in concerning the product you have chosen. After the configuration, click on the CREATE PAYMENT button, and the invoice will display with the tag as IN PAYMENT, as shown below.
From customer invoice
You can also create Credit notes Directly from the Customer Invoice. To do this, go to the Customer Tab from the Dashboard of the Accounting module and click on the CREATE button to create a new invoice.
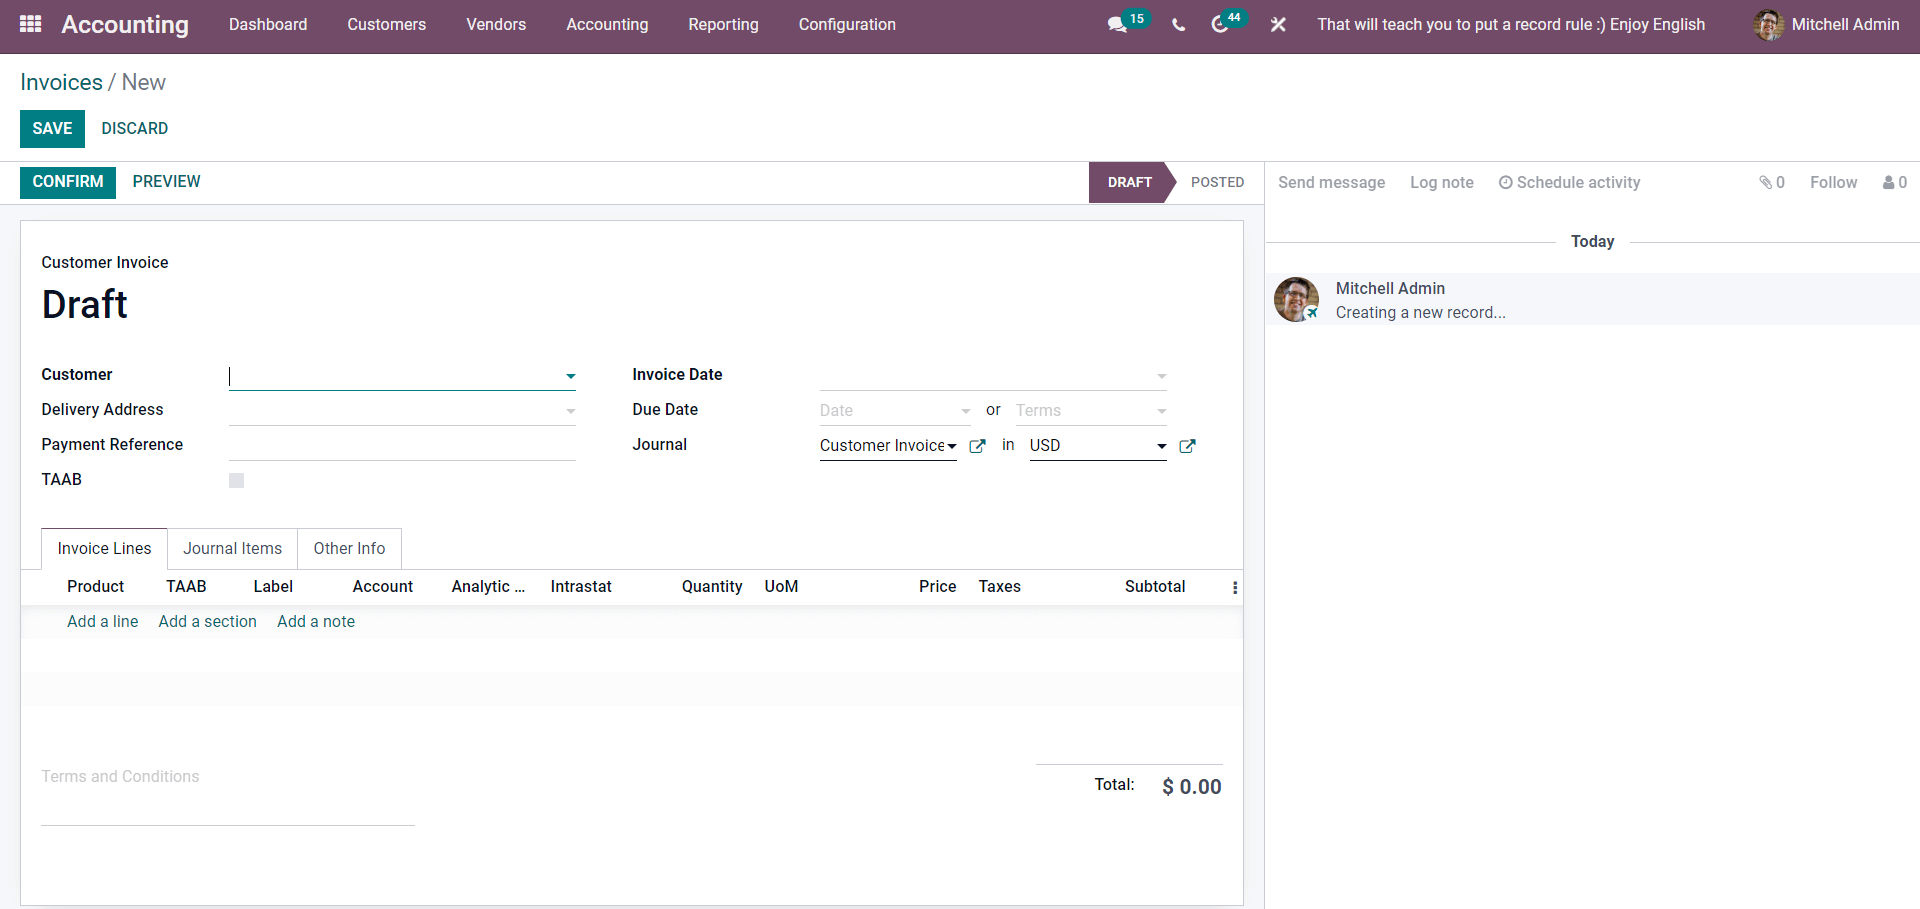
You can configure the Invoice form here. Type in the details and add the Product here and click on CONFIRM.
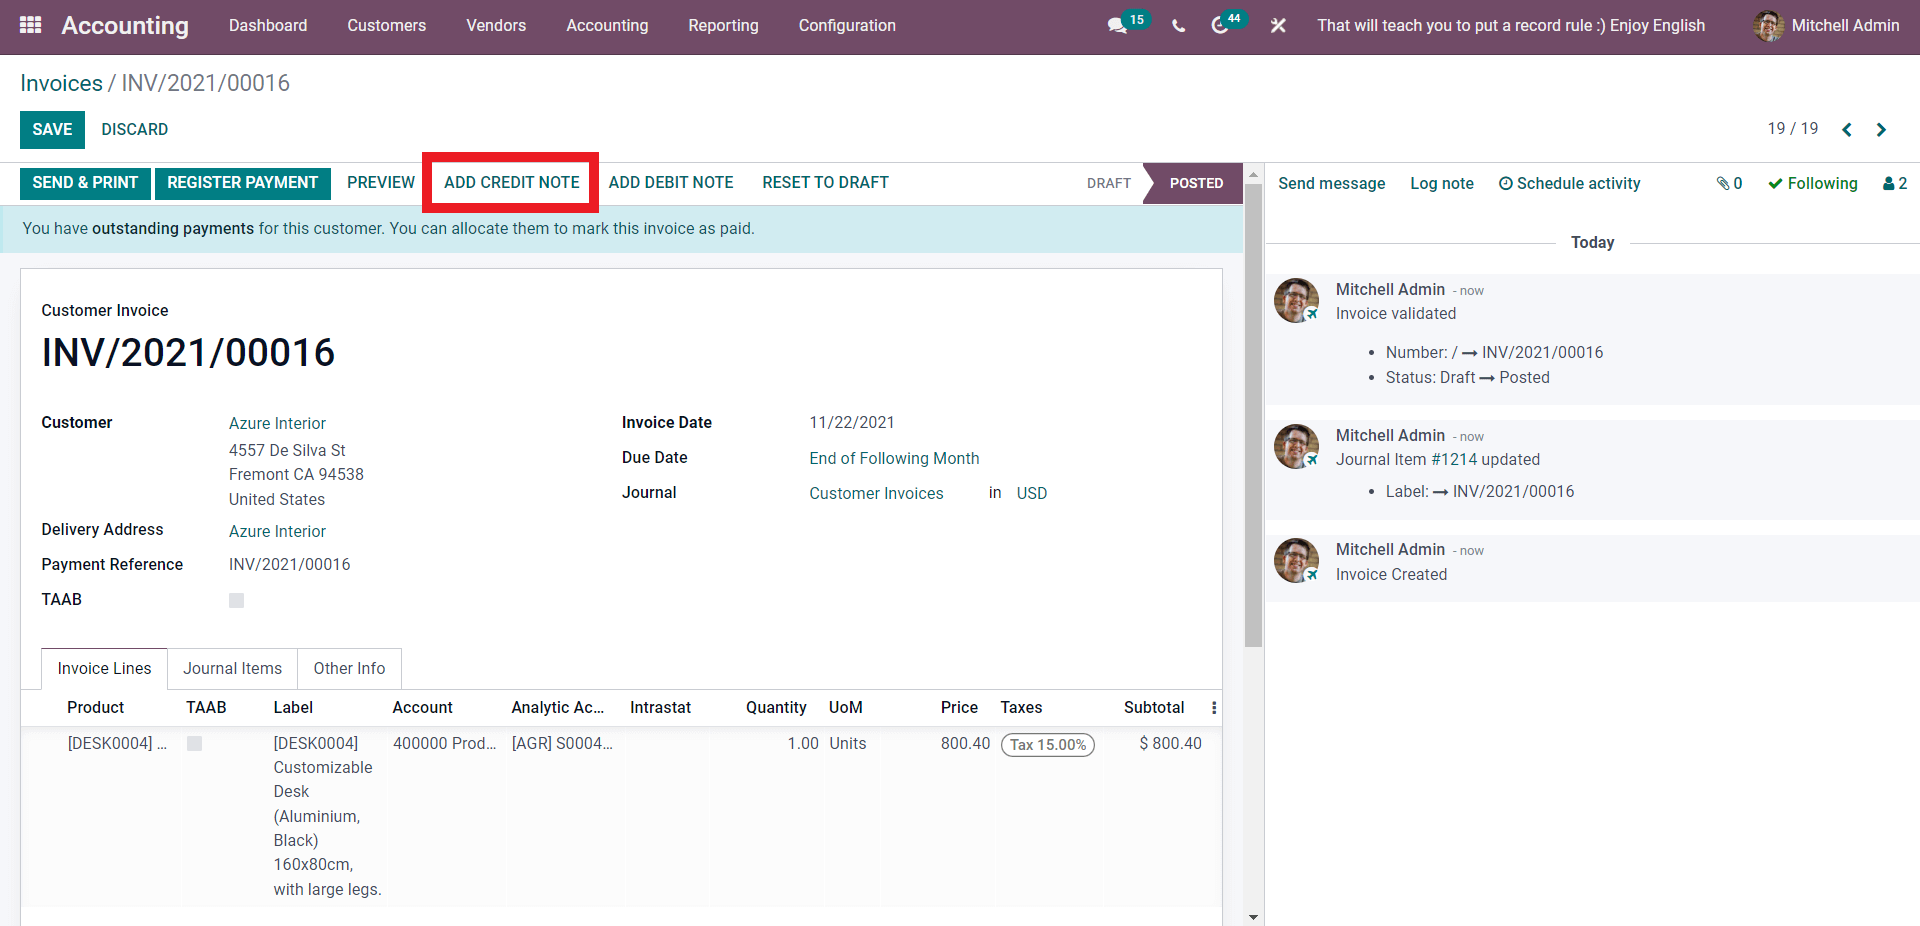
From here, click on the ADD CREDIT NOTE. As shown below, a configuration tab will open up to configure the Credit note.
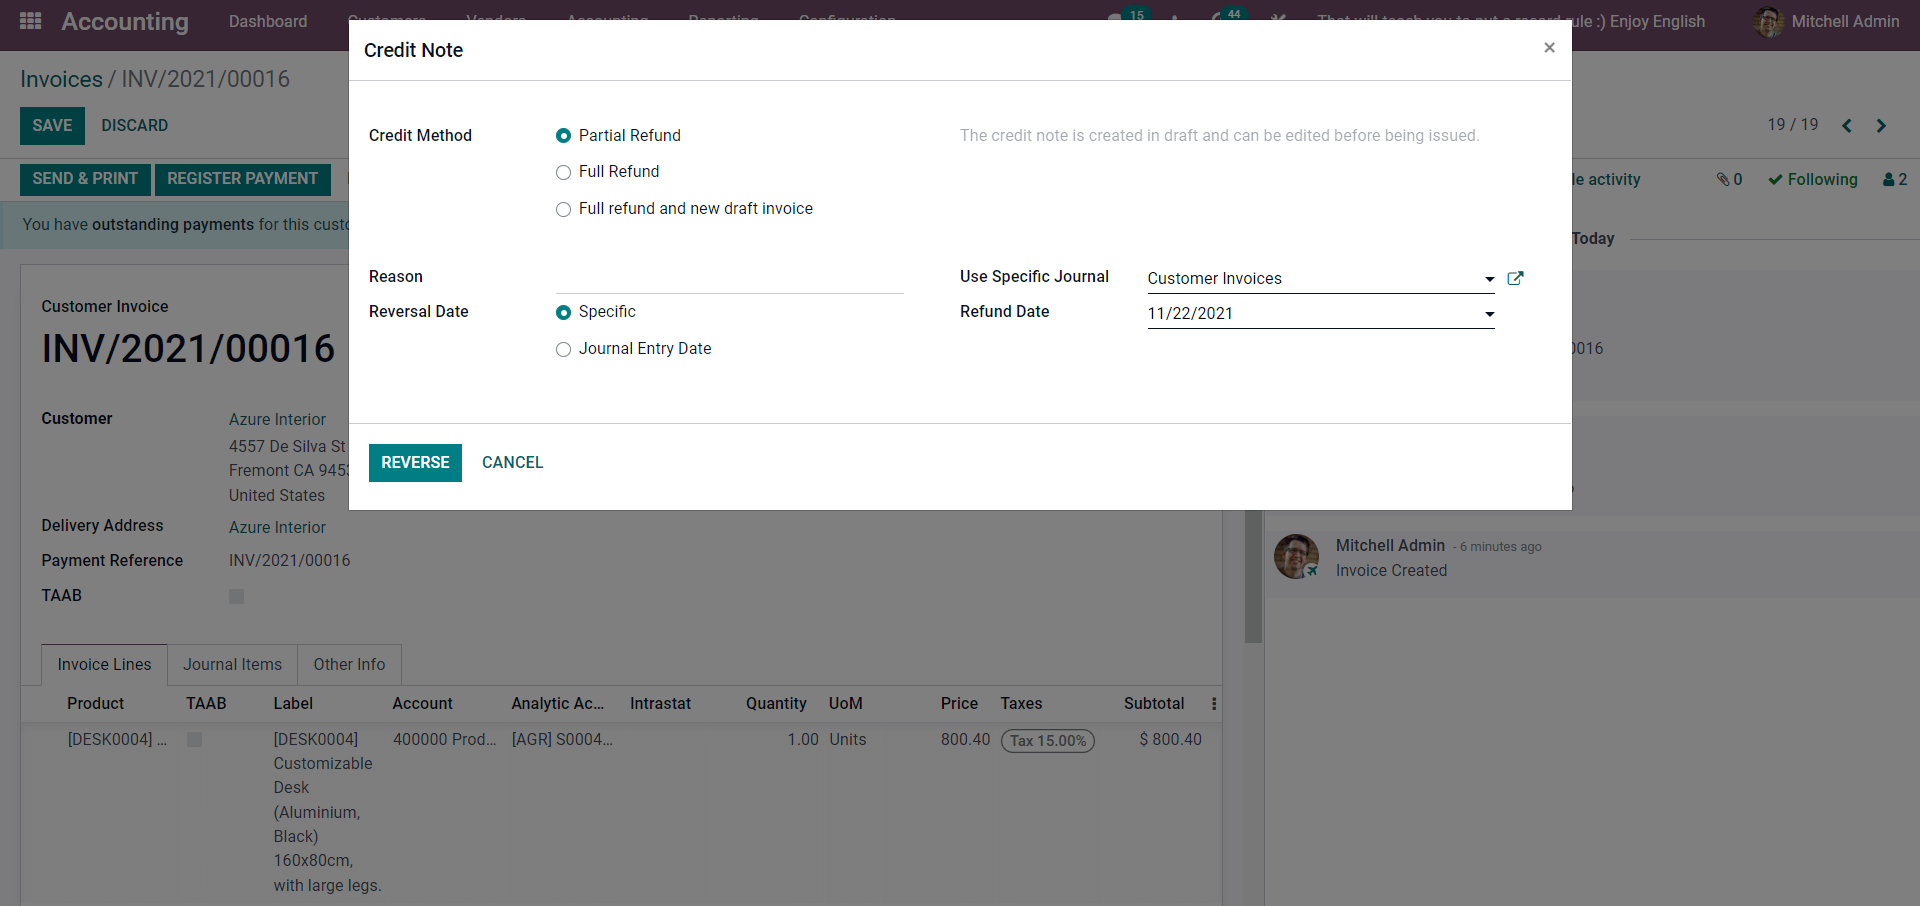
There are three Credit Methods: Partial Refund, Full Refund, Full Refund, and New Draft Invoice.
Selecting the Partial refund creates the Draft credit note prefilled with the original invoice information. If you choose Full Refund, the credit note will be automatically validated and will be reconciled with the invoice. If you select Full Refund and New Draft Invoice, then the credit note will be auto validated and will also be reconciled with the invoice. The original or the real invoice will be saved and duplicated as a new Draft.
And Similar to the Debit Note, you can Use a specific Journal if necessary. Type in the reason for the Credit note in the ‘Reason’ section. You can choose between Reversal Date between Specific or Journal entry date. If you select Specific, you can configure and enter a custom date, and if you select the Journal entry date, it will be automatically updated concerning the journal entry date.
After the Configurations, click on the REVERSE button to finalize the process and Confirm it by clicking on the CONFIRM button from the invoice configuration section below.

The final page for the entire process will open up as shown below.
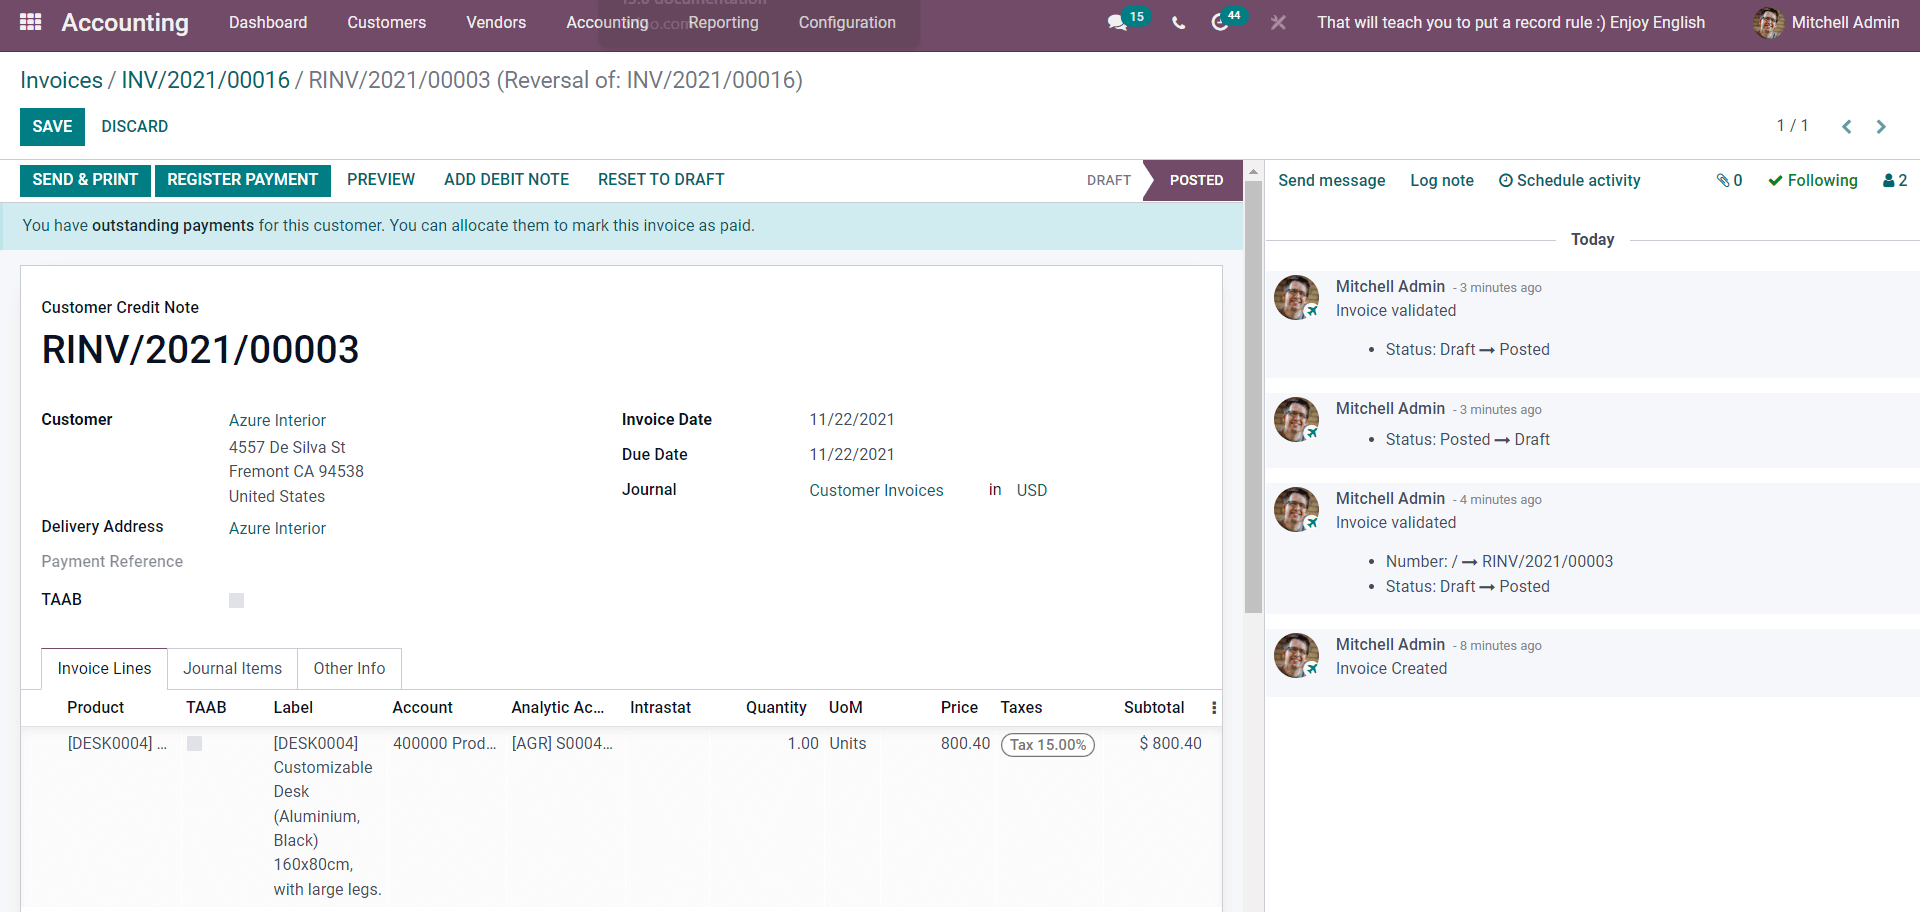
Click on the REGISTER PAYMENT button after a final check, and a configuration tab will open up for Register Payment, as shown below.
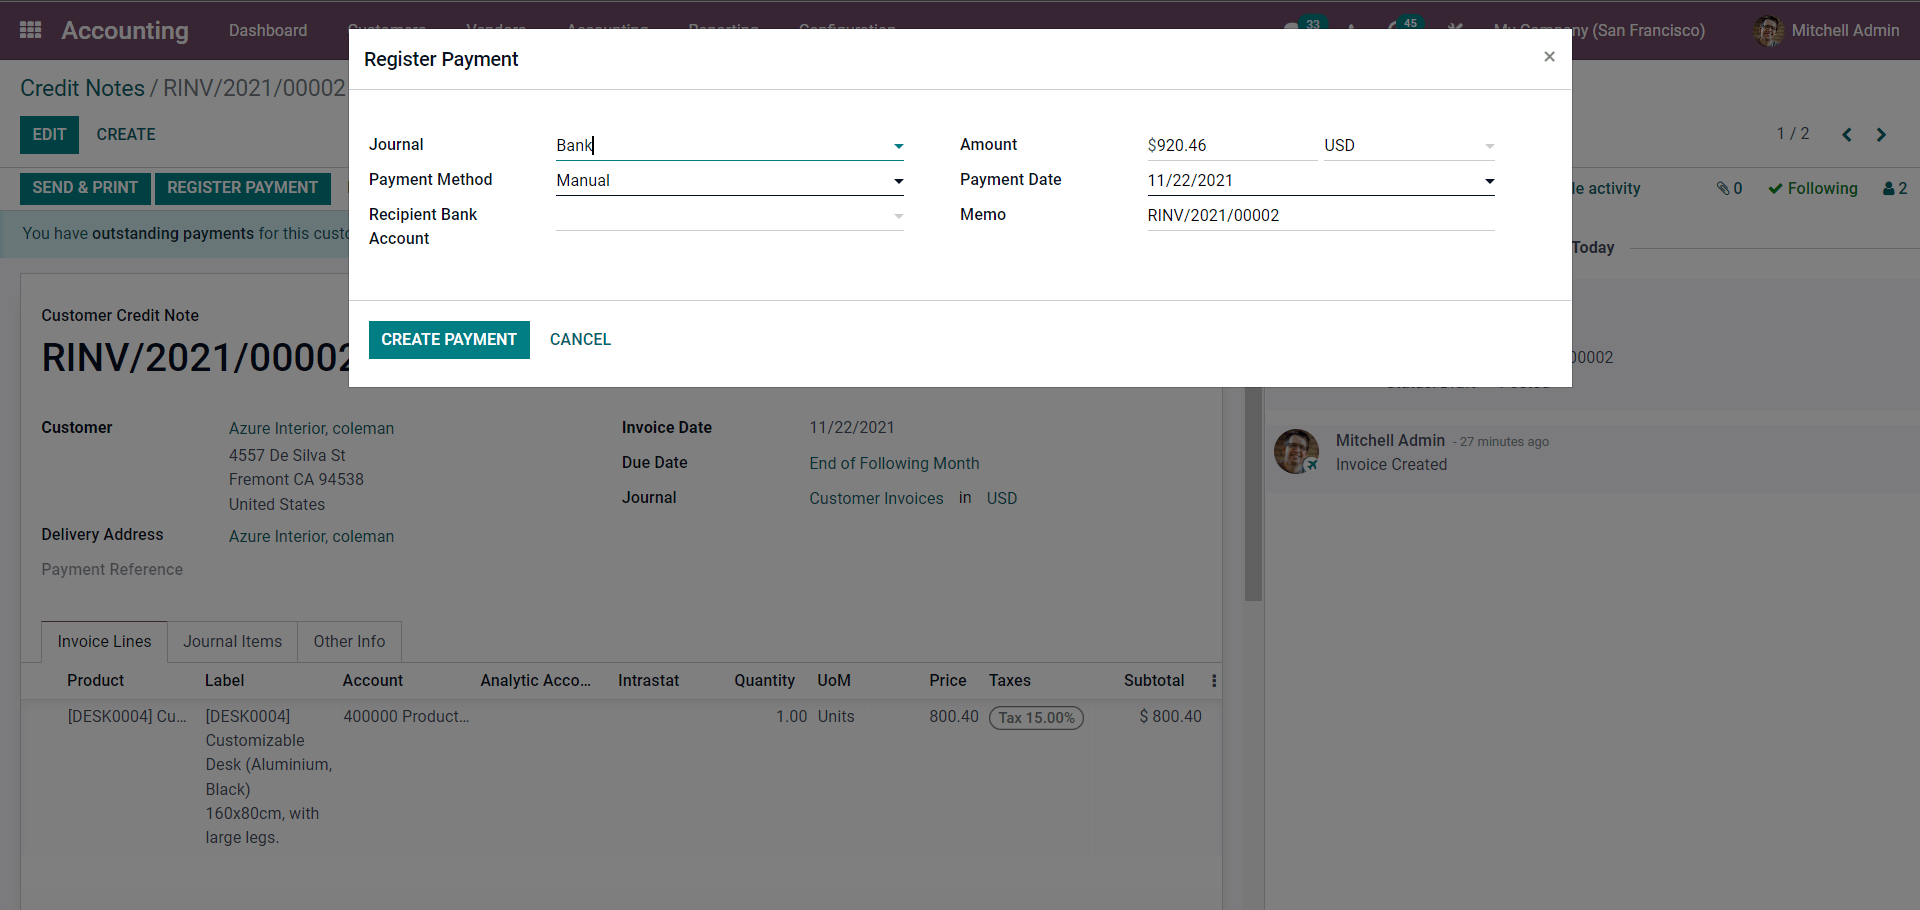
All of the details will be auto-filled, and if you want to change the configuration, you can do it from here. After the setup, click on the CREATE PAYMENT, and the formats will be saved.
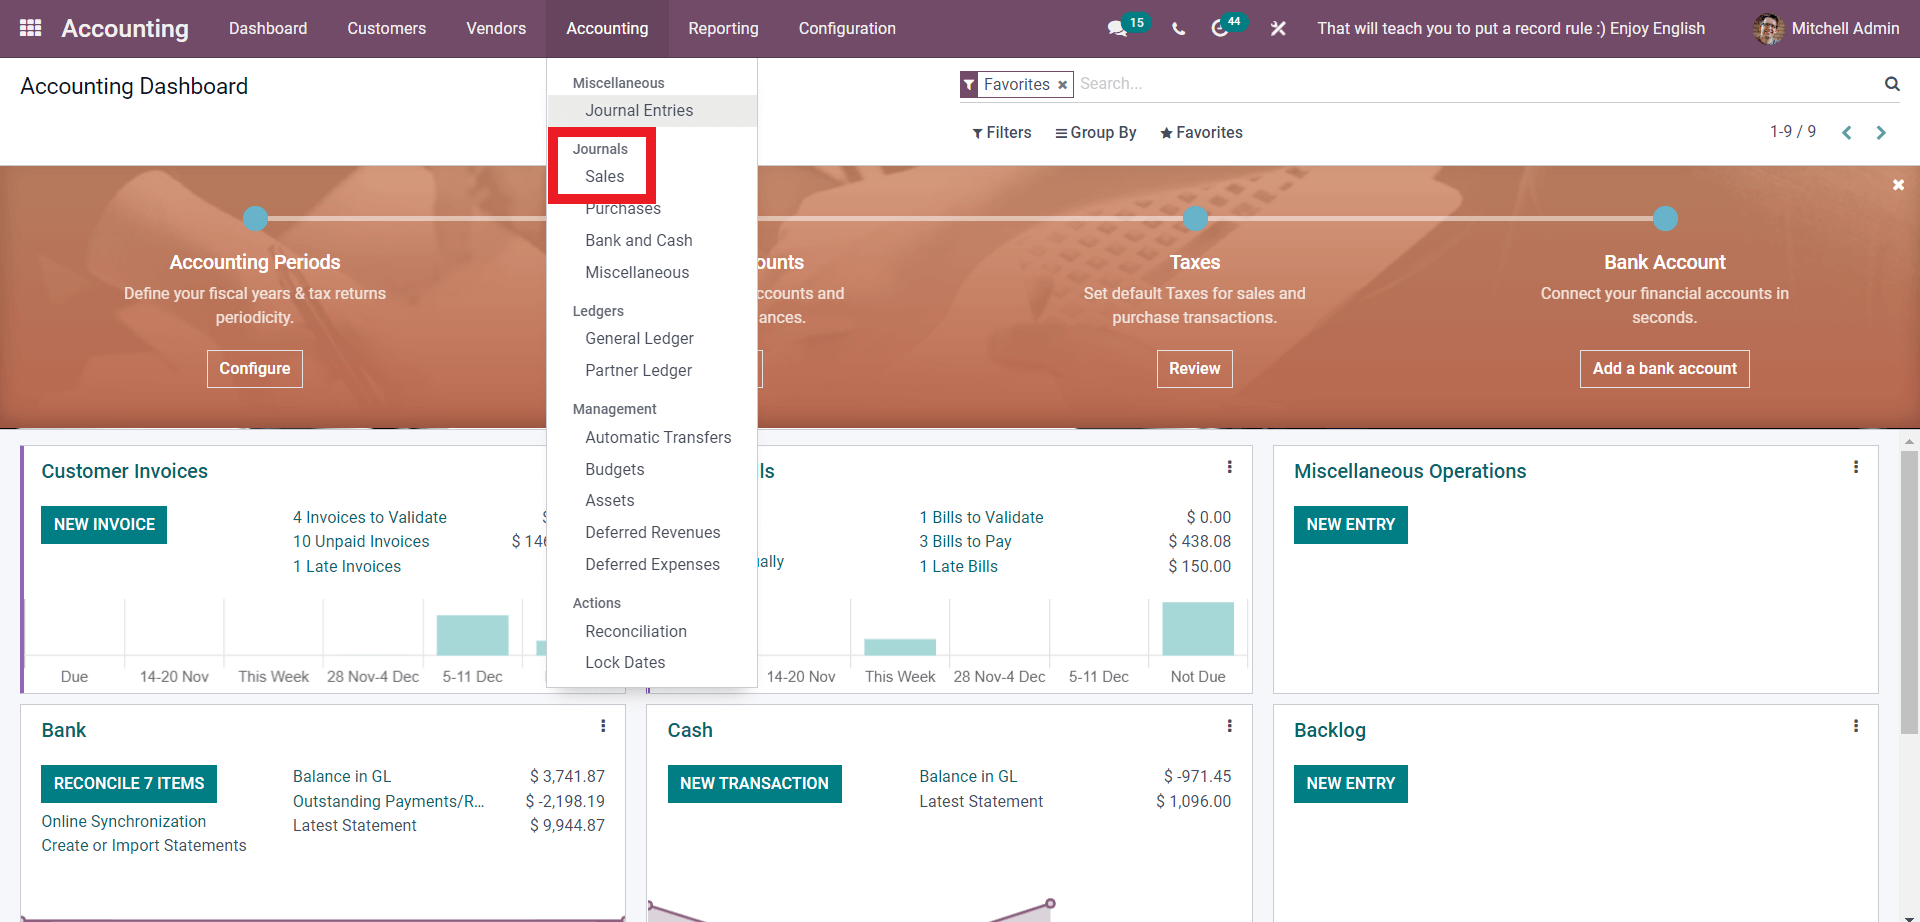
After this, the Credit note will be available to view in the Sales Journal. Go to the Accounting tab from the Dashboard of the Accounting module, under the Journal section, select Sales as shown below.
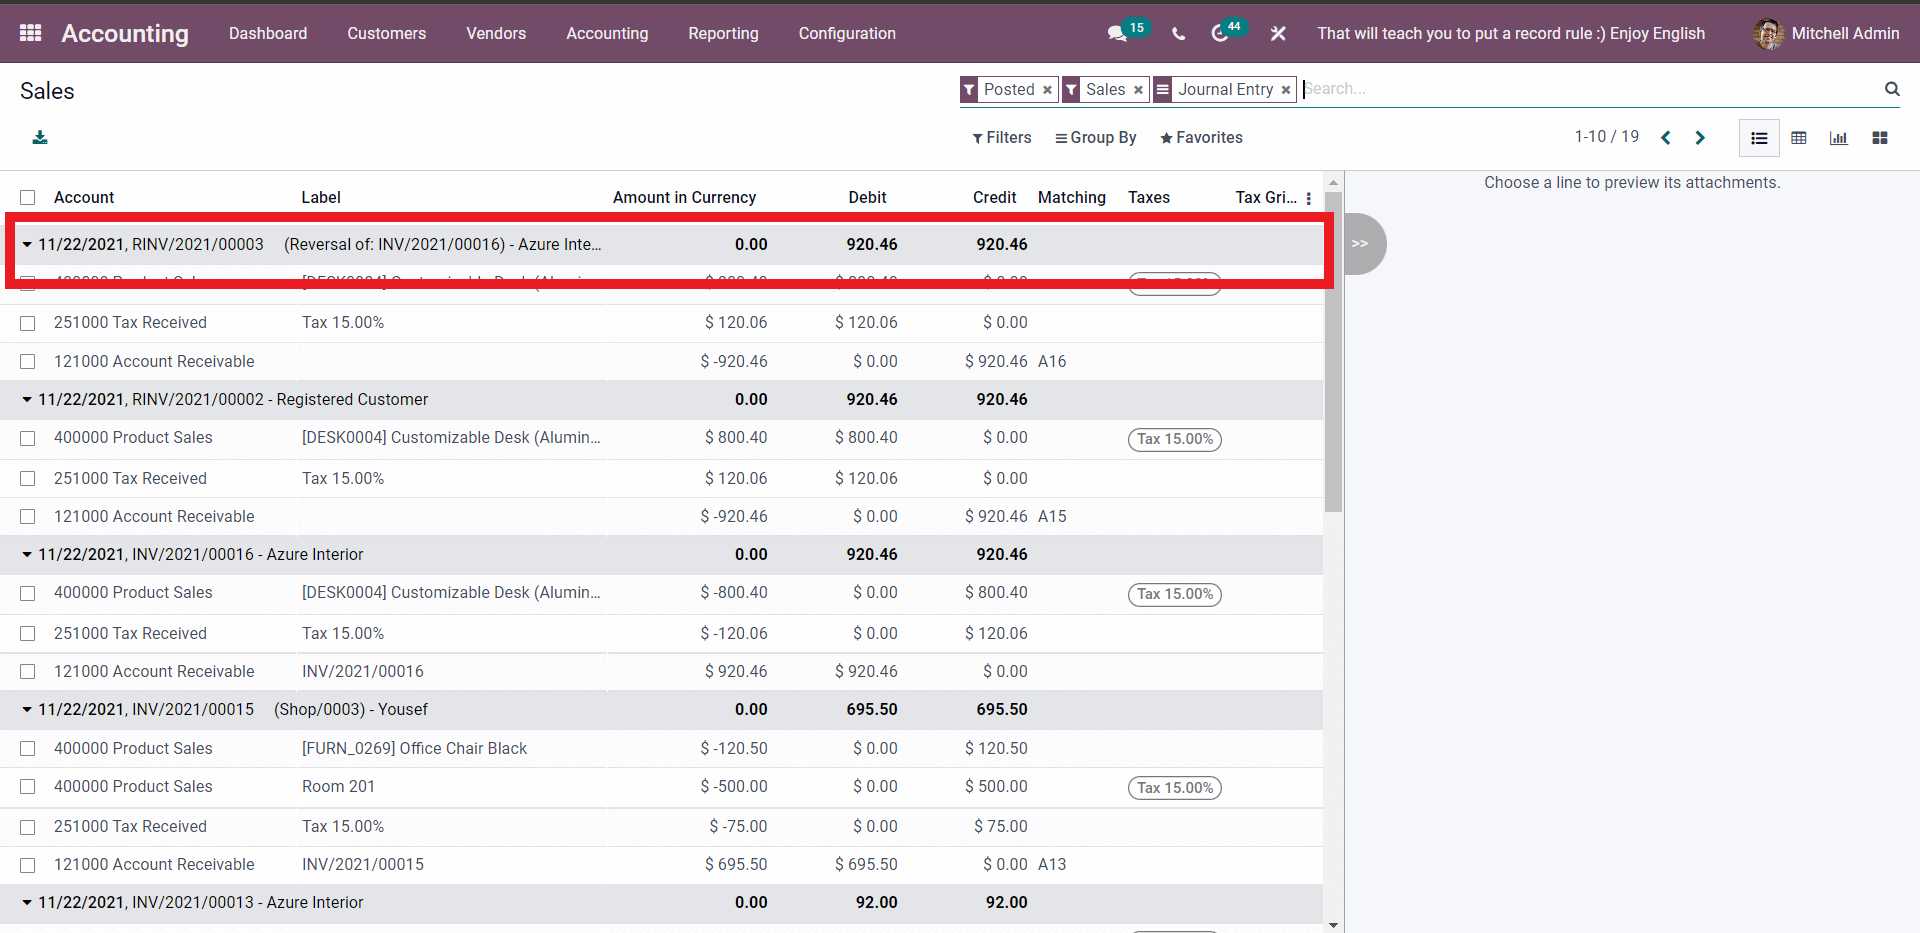
This will take you to the Sales section shown below, where the newly created Credit Note will be displayed in the list.
Having an Efficient Credit and Debit note management system is essential for keeping the integrity of the business and will help you tremendously in achieving good customer relations.