You can edit documents collaboratively in real-time with Collaborative Pad and Ether Pad, two real-time editors. Write articles, press releases, to-do lists, etc., with your friends, classmates, or coworkers while simultaneously working on the same document.
Collaborative pads
The collaborative pads are already in the Odoo. Go to apps and searching for collaborative pads. We can see the module for collaborative pads.
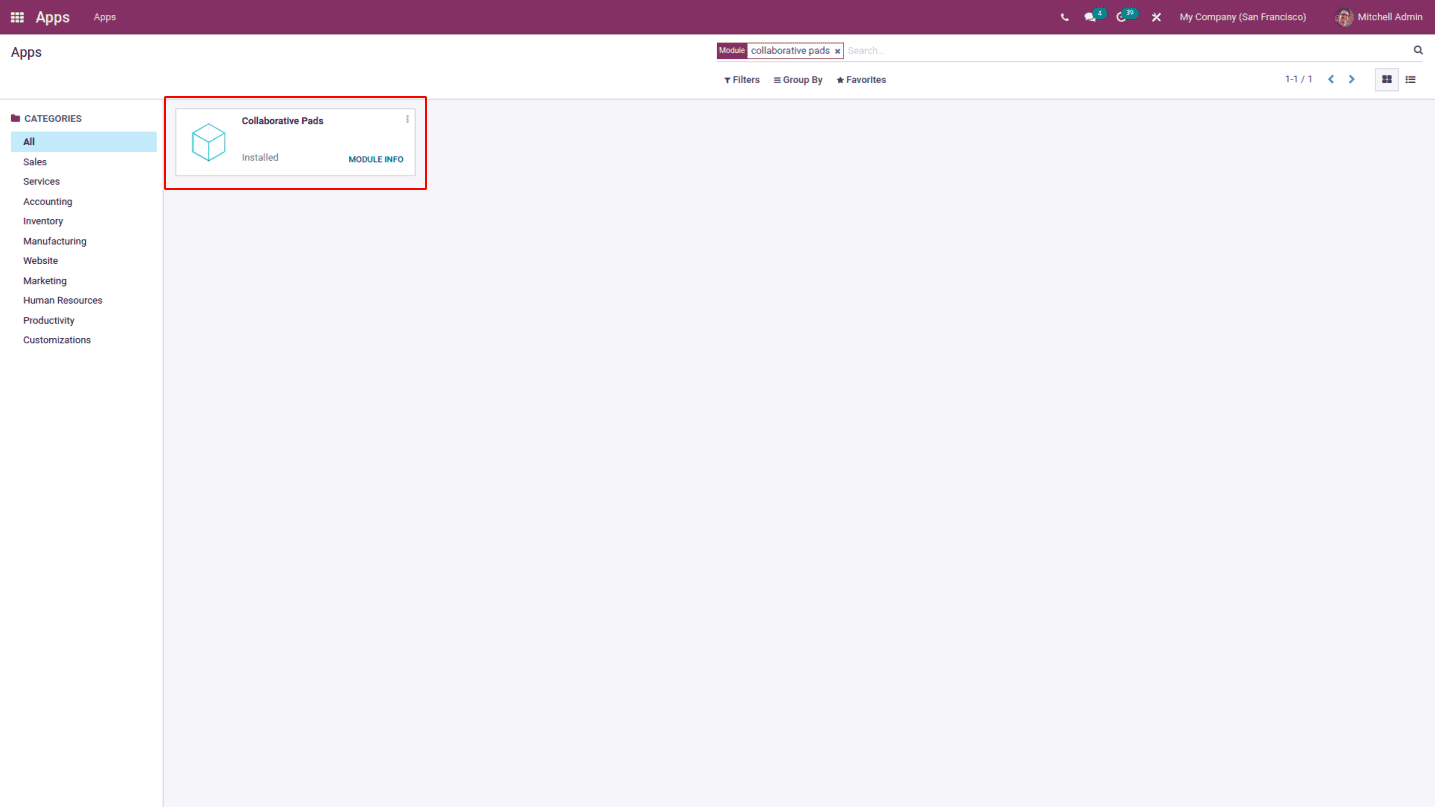
Install it from here. Just click the module, info we can see the technical information.

How to configure collaborative pads?
Collaborative Pad, a great tool offered by Odoo, will enable you to collaborate and exchange ideas in order to successfully complete projects and tasks for your business. The employees who have been given a shared assignment will be able to work together on it. You can communicate with your teammates through this platform whenever you need their help. Your communication history will be saved in the system, allowing you to quickly track the success of your teamwork. Using this collaborative pad, you may evaluate each team member's effort, offer instructions accordingly, clear up any questions, and organize the project's next action. The collaborative pad will be present in the description tab of the Project module.
In order to set up the collaborative pads, navigate to Project > Configuration > Settings> Task Management > Collaborative Pads
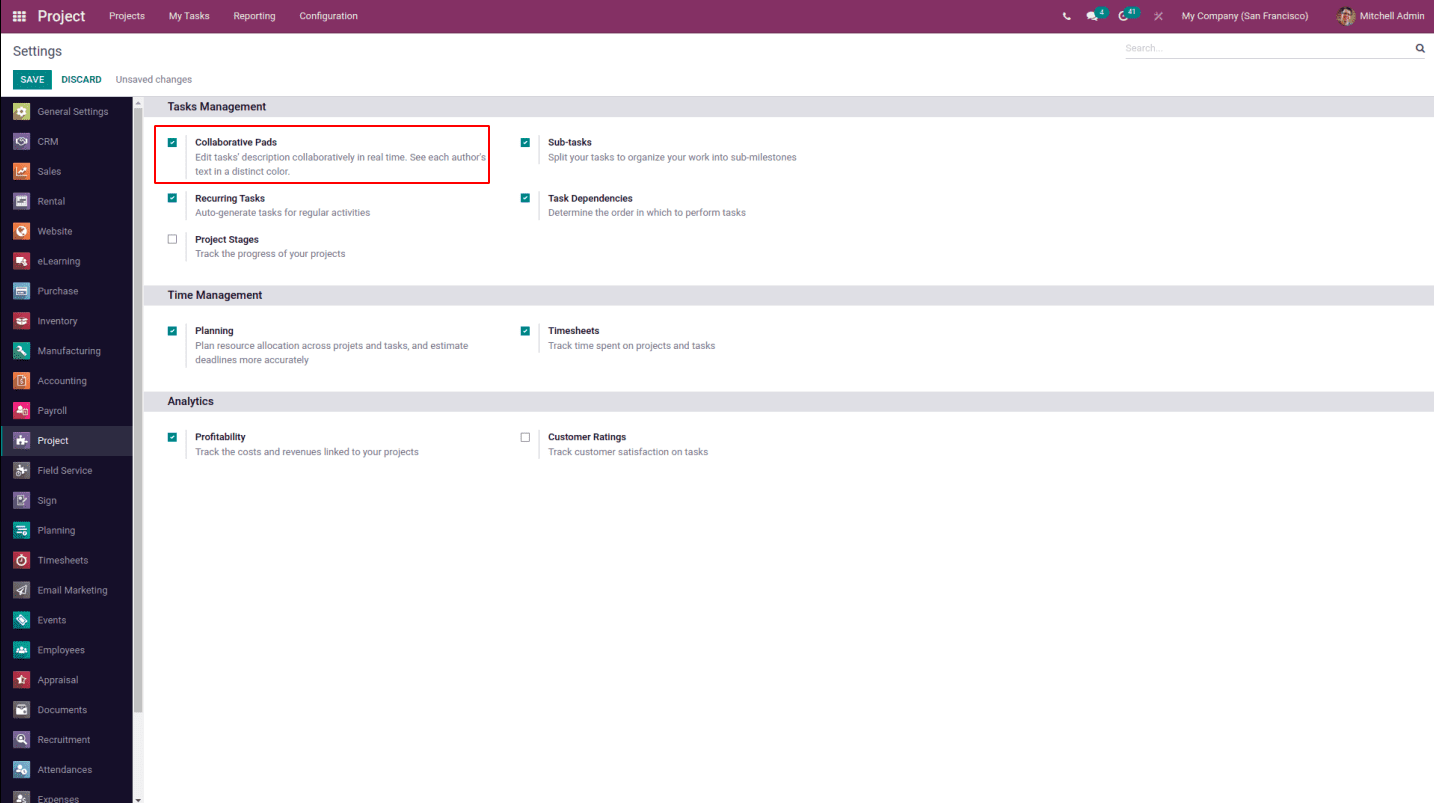
The Collaborative Pads option may be found in the Settings menu's Task Management tab. From this platform, you may turn on the collaborative pad. After you've saved the modifications with the Save button, go back to the Project menu to start a new project.
The collaborative pad can be applied to already-created tasks and projects in Odoo.
If you open any existing project or start a new one, you will notice that the description has been changed to collaborative pads.
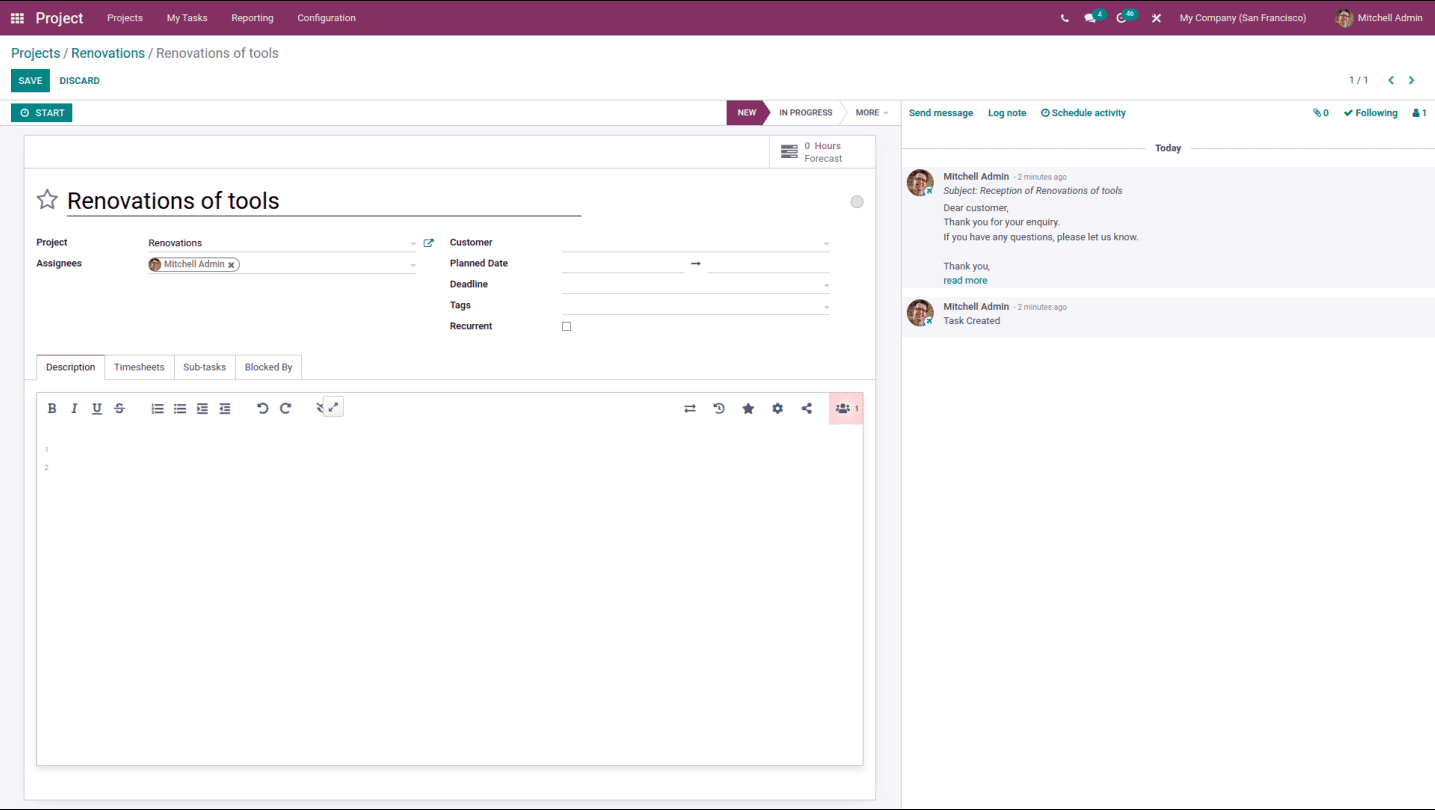
To communicate with our teammates, we can use the tab.
The number of users, embedded options, settings options, time slider options, etc., are all shown on the pad's right top.
The switch pad choice, the closed eye icon, etc., are located at the top.
Ether pad
The open-source web editor Etherpad provides real-time collaborative editing and is very customizable. Like a live multiplayer editor that runs in your browser, Etherpad enables real-time collaborative document editing.
Before installing the collaborative pad module in Odoo, you must first configure the Etherpad server.
So, here is a step-by-step tutorial for installing an Etherpad server in Ubuntu.
To install Node.js 16 first, we must first set up the PPA. The cURL command should be used from your home directory.
Install curl using
Install NodeJS and npm
sudo apt install curl
cd ~
curl -sL https://deb.nodesource.com/setup_16.x | sudo bash -
sudo apt -y install nodejs
After installation, check the Node.js version.
$ node  -v
V16.14.2
Install and run Etherpad Lite
Clone the repository of etherpad from github
git clone git://github.com/ether/etherpad-lite.git
cd etherpad-lite
bin/run.sh
Start the Etherpad-lite service by typing bin/run.sh on the command line. You can visit etherpad by using the URLs http://localhost:9001/ or http://0.0.0.0:9001/ without closing the terminal.
The following screen indicates that your etherpad server is operating properly if you can view it.Note: You can modify the following file to alter the port for the Etherpad server or make other necessary changes.

/opt/etherpad/local/etherpad/etherpad-lite/settings.json
Integrate this etherpad with Odoo now. Install the module collaborative pad.
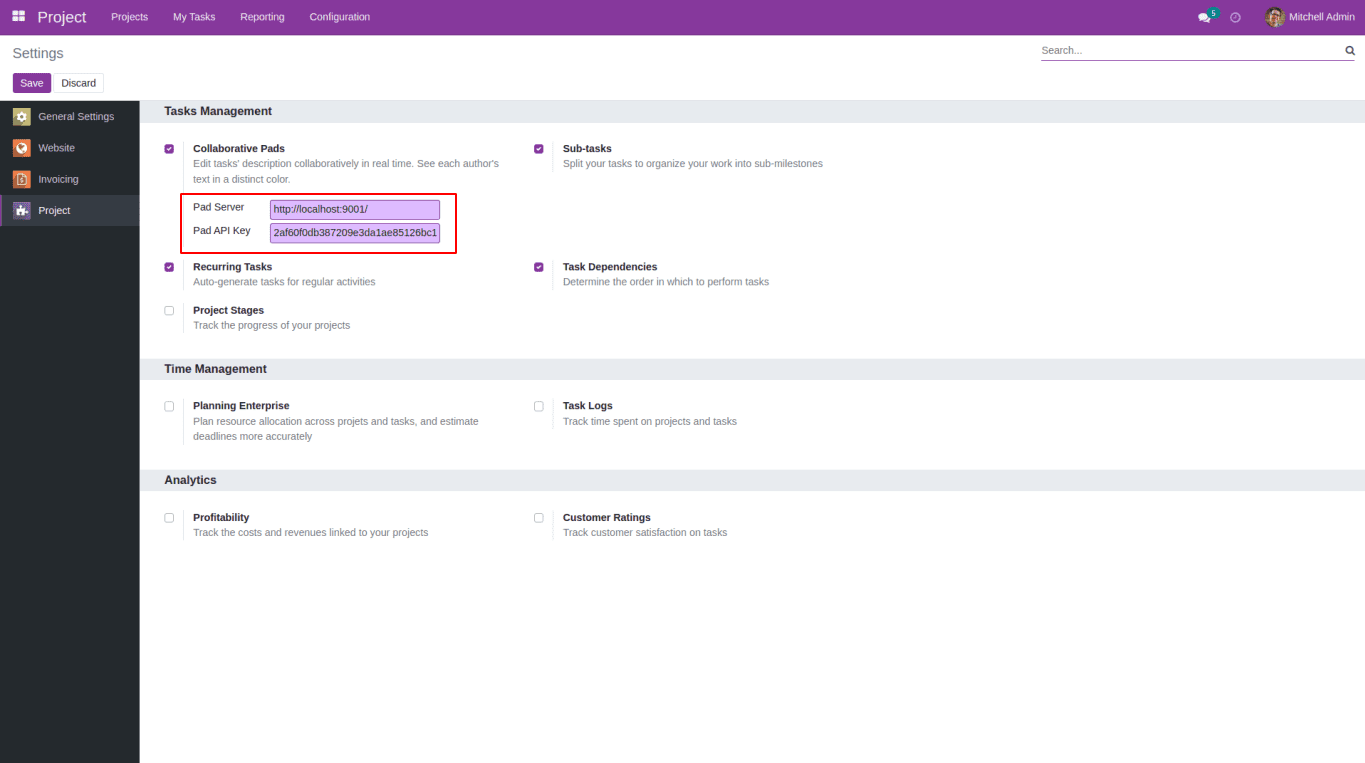
To link Odoo with the Etherpad server after installation, you must configure the PAD server IP address and API key.
Pad Server: http://localhost:9001
Pad Api Key: (You may find it in the file APIKEY.txt in /opt/etherpad/local/etherpad/etherpad-lite. Simply open the file, copy the key, and then paste it in this location.)
/opt/etherpad/local/etherpad/etherpad-lite/settings.json
Integrate this etherpad with Odoo now. Install the module collaborative pad.
To link Odoo with the Etherpad server after installation, you must configure the PAD server IP address and API key.
Pad Server: http://localhost:9001
Pad Api Key: (You may find it in the file APIKEY.txt in /opt/etherpad/local/etherpad/etherpad-lite. Simply open the file, copy the key, and then paste it in this location.)
Note: Etherpad-lite can be installed on servers other than Odoo servers. They don't have to be kept on the same server. Simply enter the remote IP into the 'Pad Server' option in Odoo's configuration.
When everything is configured correctly, you will notice that an etherpad is available on any task screen.
If you want Etherpad to work with Odoo, you must manually start the server every time. Consequently, to start an etherpad service, follow the steps below.
sudo mkdir /var/log/etherpad-lite
sudo touch /var/log/etherpad-lite/etherpad-lite.log
sudo chown etherpad.etherpad /var/log/etherpad-lite
sudo chmod -R 777 /var/log/etherpad-lite
Create the etherpad-lite file in the /etc/init.d folder and paste the text of the following file into it.
If there is any trouble creating a file inside /etc/init.d, please follow the steps below
1. Open the file manager and open ‘ /etc/init.d’ folder,
2. Right-click on the mouse and there should be an option called ‘Open in terminal’
3. In the terminal, paste the below snippet:
a.sudo touch etherpad-lite
b sudo nano etherpad-lite
4.Paste the snippet in opened screen
#!/bin/sh
### BEGIN INIT INFO
# Provides:      	etherpad-lite
# Required-Start:	$local_fs $remote_fs $network $syslog
# Required-Stop: 	$local_fs $remote_fs $network $syslog
# Default-Start: 	2 3 4 5
# Default-Stop:  	0 1 6
# Short-Description: starts etherpad lite
# Description:   	starts etherpad lite using start-stop-daemon
### END INIT INFO
PATH="/usr/local/sbin:/usr/local/bin:/sbin:/bin:/usr/sbin:/usr/bin:/opt/node/bin"
LOGFILE="/var/log/etherpad-lite/etherpad-lite.log"
EPLITE_DIR="/opt/etherpad/local/etherpad/etherpad-lite"
EPLITE_BIN="bin/run.sh"
USER="etherpad"
GROUP="etherpad"
DESC="Etherpad Lite"
NAME="etherpad-lite"
set -e
. /lib/lsb/init-functions
start() {
  echo "Starting $DESC... "
    start-stop-daemon --start --chuid "$USER:$GROUP" --background --make-pidfile --pidfile /var/run/$NAME.pid --exec $EPLITE_DIR/$EPLITE_BIN -- $LOGFILE || true
  echo "done"
}
#We need this function to ensure the whole process tree will be killed
killtree() {
    local _pid=$1
    local _sig=${2-TERM}
    for _child in $(ps -o pid --no-headers --ppid ${_pid}); do
        killtree ${_child} ${_sig}
    done
    kill -${_sig} ${_pid}
}
stop() {
  echo "Stopping $DESC... "
  if test -f /var/run/$NAME.pid; then
    while test -d /proc/$(cat /var/run/$NAME.pid); do
      killtree $(cat /var/run/$NAME.pid) 15
      sleep 0.5
    done
    rm /var/run/$NAME.pid
  fi
  echo "done"
}
status() {
  status_of_proc -p /var/run/$NAME.pid "" "etherpad-lite" && exit 0 || exit $?
}
case "$1" in
  start)
      start
      ;;
  stop)
    stop
      ;;
  restart)
      stop
      start
      ;;
  status)
      status
      ;;
  *)
      echo "Usage: $NAME {start|stop|restart|status}" >&2
      exit 1
      ;;
esac
exit 0
Then click Ctrl + O to save, Ctrl + x to close the screen.
sudo chmod -R 777 /etc/init.d/etherpad-lite
sudo chown -R etherpad.etherpad /etc/init.d/etherpad-lite
Start the Etherpad services.
service etherpad-lite start
Apply the following command if you want Etherpad services to run when the computer starts.
sudo update-rc.d etherpad-lite defaults
That was all about setting up an Etherpad server and integrating it with Odoo.
Now etherpad is available in Odoo. To view that, first open the project module.
Then open one of the projects.
Then open any one of the tasks or create a new task, then you can see that the description has been changed to ether pads.