Odoo 18 remains a powerful and flexible ERP solution, with its website builder standing out as a key feature. In this blog post, we'll delve into how to enhance your Odoo 18 website forms by adding a Many2Many field, a dynamic capability that enables complex record relationships, offering users a more interactive and enriched web experience.
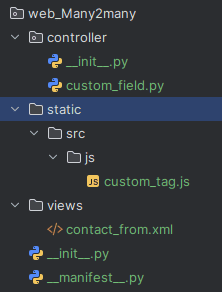
We create a tailored Python file as a controller called custom_field. At the same time, we develop a static asset to implement a JavaScript function, and we set up a view to handle XML file integration.
<odoo>
 <template id="website_contactus_tag" inherit_id="website.contactus">
   <xpath expr="//input[@name='subject']" position="after">
       <!-- Tags Dropdown and Selected Tags Inline -->
       <div class="mb-3 d-flex s_website_form_field s_website_form_custom" data-type="many2many" data-name="Tag"
            style="border: 2px solid #00000000; padding: 8px; border-radius: 8px;">
       <div class="col-6">
           <label class="s_website_form_label" for="contact_tag">
               <span class="s_website_form_label_content">Tags</span>
           </label>
           <!-- Tags Dropdown -->
           <select id="contact_tag"
                   class="js-example-basic-multiple form-control s_website_form_input"
                   name="tag"
                   multiple="multiple">
               <t t-foreach="tags" t-as="tag">
                   <option t-att-value="tag.id">
                       <t t-esc="tag.name"/>
                   </option>
               </t>
           </select>
        </div>
           <!-- Display Selected Tags as Pills Inline -->
           <div id="tag-pills-container" class="tag-pill-container col-6" style="display: flex; flex-wrap: wrap; gap: 6px;
                margin-top: 24px; border: 1px solid #212529; padding: 6px; border-radius: 8px; margin-left: 7px;">
               <!-- Pills for selected tags will appear here -->
           </div>
       </div>
       <!-- Include the external JavaScript file -->
       <script type="text/javascript" src="/web_Many2many/static/src/js/custom_tag.js"></script>
   </xpath>
 </template>
</odoo>
This example showcases the XML file we are designing as a template. We extend the default website portal form view by embedding our custom-field tags. To achieve this, we reference the parent using model_name.template_id with the value "portal.portal_my_details_fields".
/** @odoo-module **/
import publicWidget from "@web/legacy/js/public/public_widget";
const TagPillsWidget = publicWidget.Widget.extend({
   selector: '#tag-pills-container',
   events: { 'click .remove-tag-btn': '_onRemoveTagClick' },
   init(parent, options) {
       this._super(...arguments);
       this.selectedTags = [];
   },
   start() {
       this.tagDropdown = this.el.querySelector('#contact_tag');
       if (!this.tagDropdown) return this._super(...arguments);
       [...this.tagDropdown.options].forEach(opt => {
           if (opt.selected) this.selectedTags.push({ id: opt.value, name: opt.text.trim() });
       });
       this.tagDropdown.addEventListener('click', e => this._onTagClick(e));
       this._updateTags();
       return this._super(...arguments);
   },
   _onTagClick(e) {
       if (e.target.tagName !== 'OPTION') return;
       const { value: id, textContent } = e.target;
       const name = textContent.trim();
       const exists = this.selectedTags.find(t => t.id === id);
       this.selectedTags = exists
           ? this.selectedTags.filter(t => t.id !== id)
           : [...this.selectedTags, { id, name }];
       e.target.selected = !exists;
       this._updateTags();
   },
   _onRemoveTagClick(e) {
       const id = e.currentTarget.dataset.tagId;
       this.selectedTags = this.selectedTags.filter(t => t.id !== id);
       const opt = this.tagDropdown?.querySelector(`option[value="${id}"]`);
       if (opt) opt.selected = false;
       this._updateTags();
   },
   _updateTags() {
       this.el.innerHTML = '';
       this.selectedTags.forEach(({ id, name }) => {
           const pill = Object.assign(document.createElement('div'), {
               className: 'tag-pill',
               style: 'background:#e6f0ff;color:#000;padding:4px 8px;border-radius:16px;font-size:14px;margin:2px;display:inline-flex;align-items:center;',
               textContent: name,
           });
           const btn = Object.assign(document.createElement('div'), {
               className: 'remove-tag-btn',
               dataset: { tagId: id },
               textContent: '×',
               style: 'background:#6c757d;color:#fff;width:18px;height:18px;display:flex;align-items:center; justify-content:center;cursor:pointer;font-size:12px;font-weight:bold;margin-left:6px;border-radius:50%;'
           });
           pill.appendChild(btn);
           this.el.appendChild(pill);
       });
   },
});
publicWidget.registry.TagPills = TagPillsWidget;
export default TagPillsWidget;
Include a JavaScript file and define its corresponding script. In this process, establish an Odoo widget that manages tag selections using a dropdown. Selected tags appear as removable pills. The script synchronizes UI and dropdown states, letting users dynamically add or remove tags through clicks, updating the DOM accordingly.
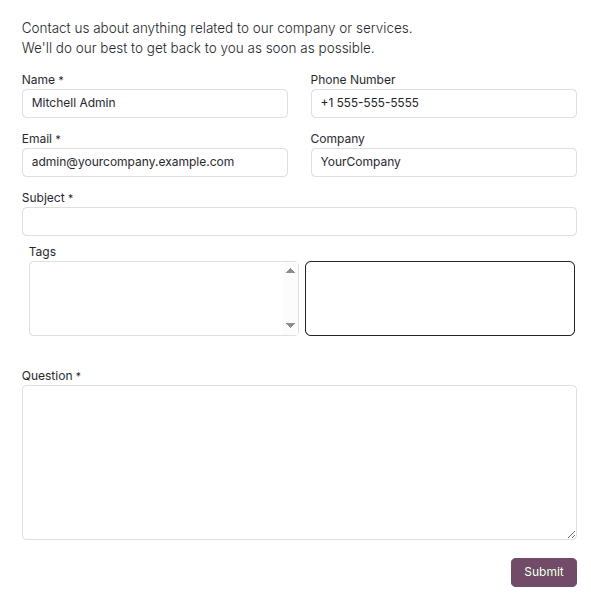
The Tags field is now displayed on the contact us form. To access its values from the backend, we import the Customer Portal module, override the _prepare_home_portal_values method, and inject our custom data.
from odoo.addons.portal.controllers.portal import CustomerPortal
from odoo import http
from odoo.http import request

class WebsiteTag(CustomerPortal):
   @http.route(['/contactus'], type='http', auth="user", website=True)
   def account(self, **kw):
       tags = request.env['crm.tag'].sudo().search([])
       raw_tag_ids = request.params.get('tag_ids_hidden')
       tag_ids = []
       if raw_tag_ids:
           try:
               tag_ids = list(map(int, raw_tag_ids.split(',')))
           except ValueError:
               tag_ids = []
       if tag_ids:
           partner = request.env.user.partner_id
           partner.write({'category_id': [(6, 0, tag_ids)]})
       values = self._prepare_home_portal_values({})
       values.update({
           'tags': tags,
       })
       return request.render("web_Many2many.website_contactus_tag", values)
This code customizes the Odoo /contactus page. It loads all CRM tags and checks if the user submitted any tag selections. If tags are selected, they are saved to the user's profile. Finally, it shows the contact page with all available tags, allowing personalized user categorization.
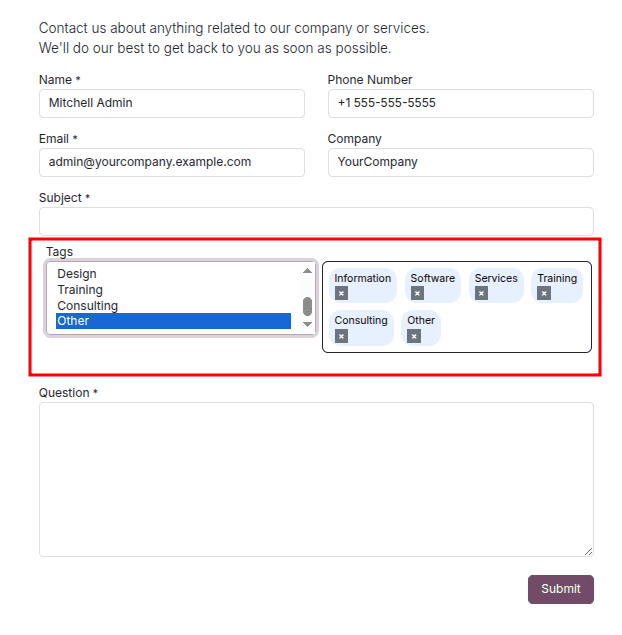
We now have the ability to choose from all available "crm.tags" using the Many2Many field. This method also allows us to integrate Many2Many fields for any model, enabling more dynamic and flexible form configurations across the website
To read more about How to Use Group By for Many2Many Fields in Odoo 18, refer to our blog How to Use Group By for Many2Many Fields in Odoo 18.