In order to guarantee product quality, consistency, and customer satisfaction, proper factory management is essential. It enhances total production efficiency, minimizes waste, and maximizes resource utilization. Businesses may reduce downtime and address problems promptly by keeping defined protocols and tracking performance. Adherence to industry and safety norms is also guaranteed by efficient manufacturing management. In the end, it increases profitability by reducing expenses and consistently satisfying consumer wants.
The setup of Work Centers in Odoo 18 Manufacturing is covered in this article, with an emphasis on how to set them up efficiently in your production setting. It contains important parameters, including costing, time before and after manufacturing, capacity, and efficiency. Through precise work center layout, the guide assists firms in improving production flow and optimizing resource planning.
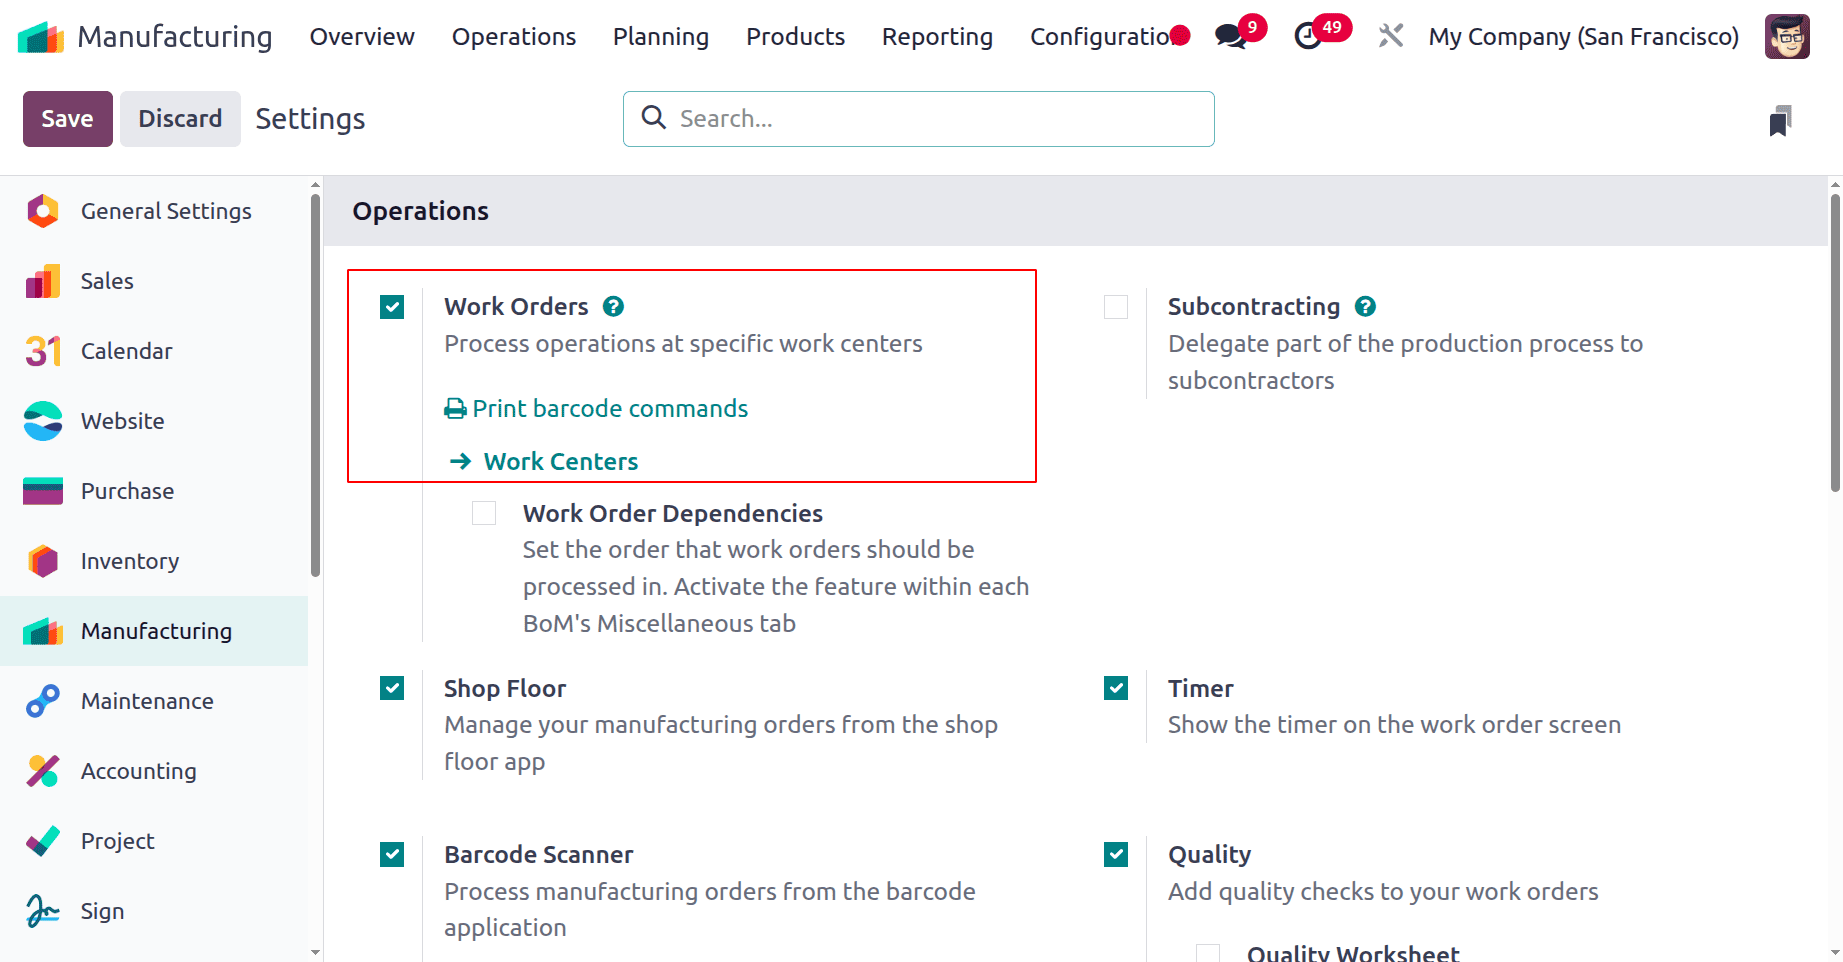
First, users need to enable the Work Orders from the manufacturing settings.
: Configuration > Settings > Work Orders > Save
Work Center Configurations
A work center in Odoo 18 Manufacturing is a logical or physical location where particular production tasks are carried out. It can stand in for manufacturing teams, workstations, or machinery. Every work centre has specific requirements, such as cost per hour, working hours, efficiency, and capacity. Manufacturing operations are scheduled and organized using work centers in routing. They support workload management, cost calculation, and productivity tracking. Better scheduling, planning, and performance analysis in the production process are made possible by properly structured work centers.
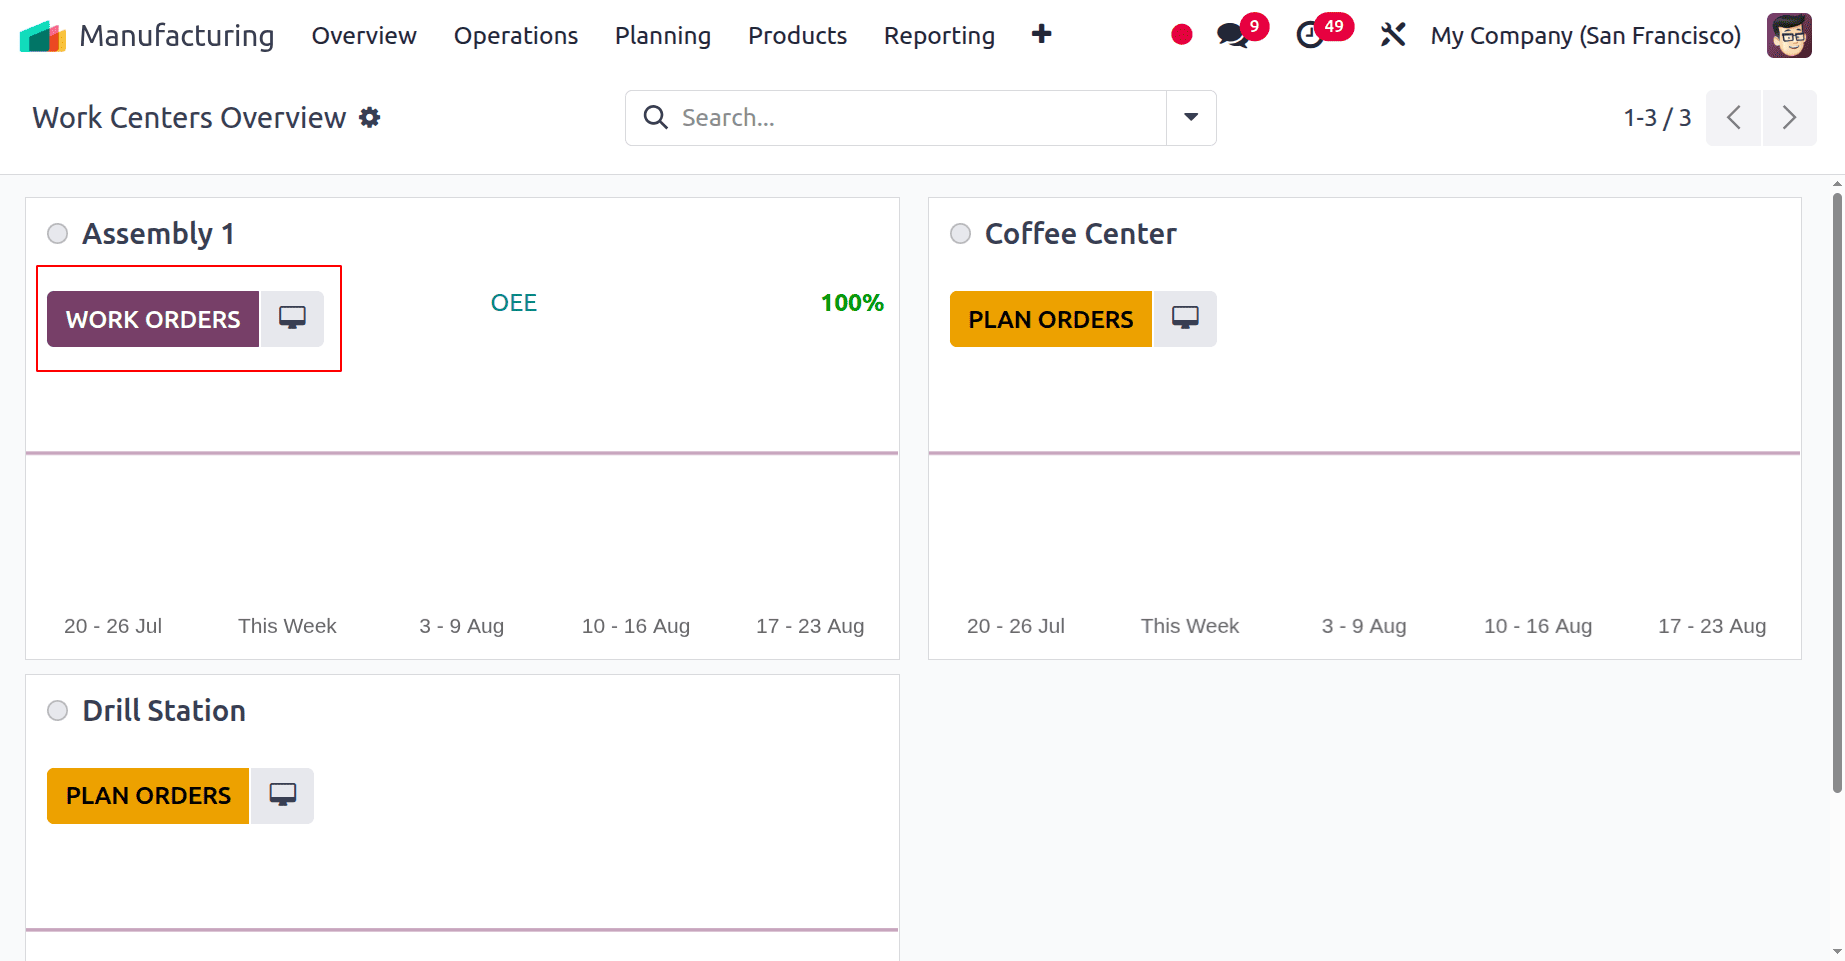
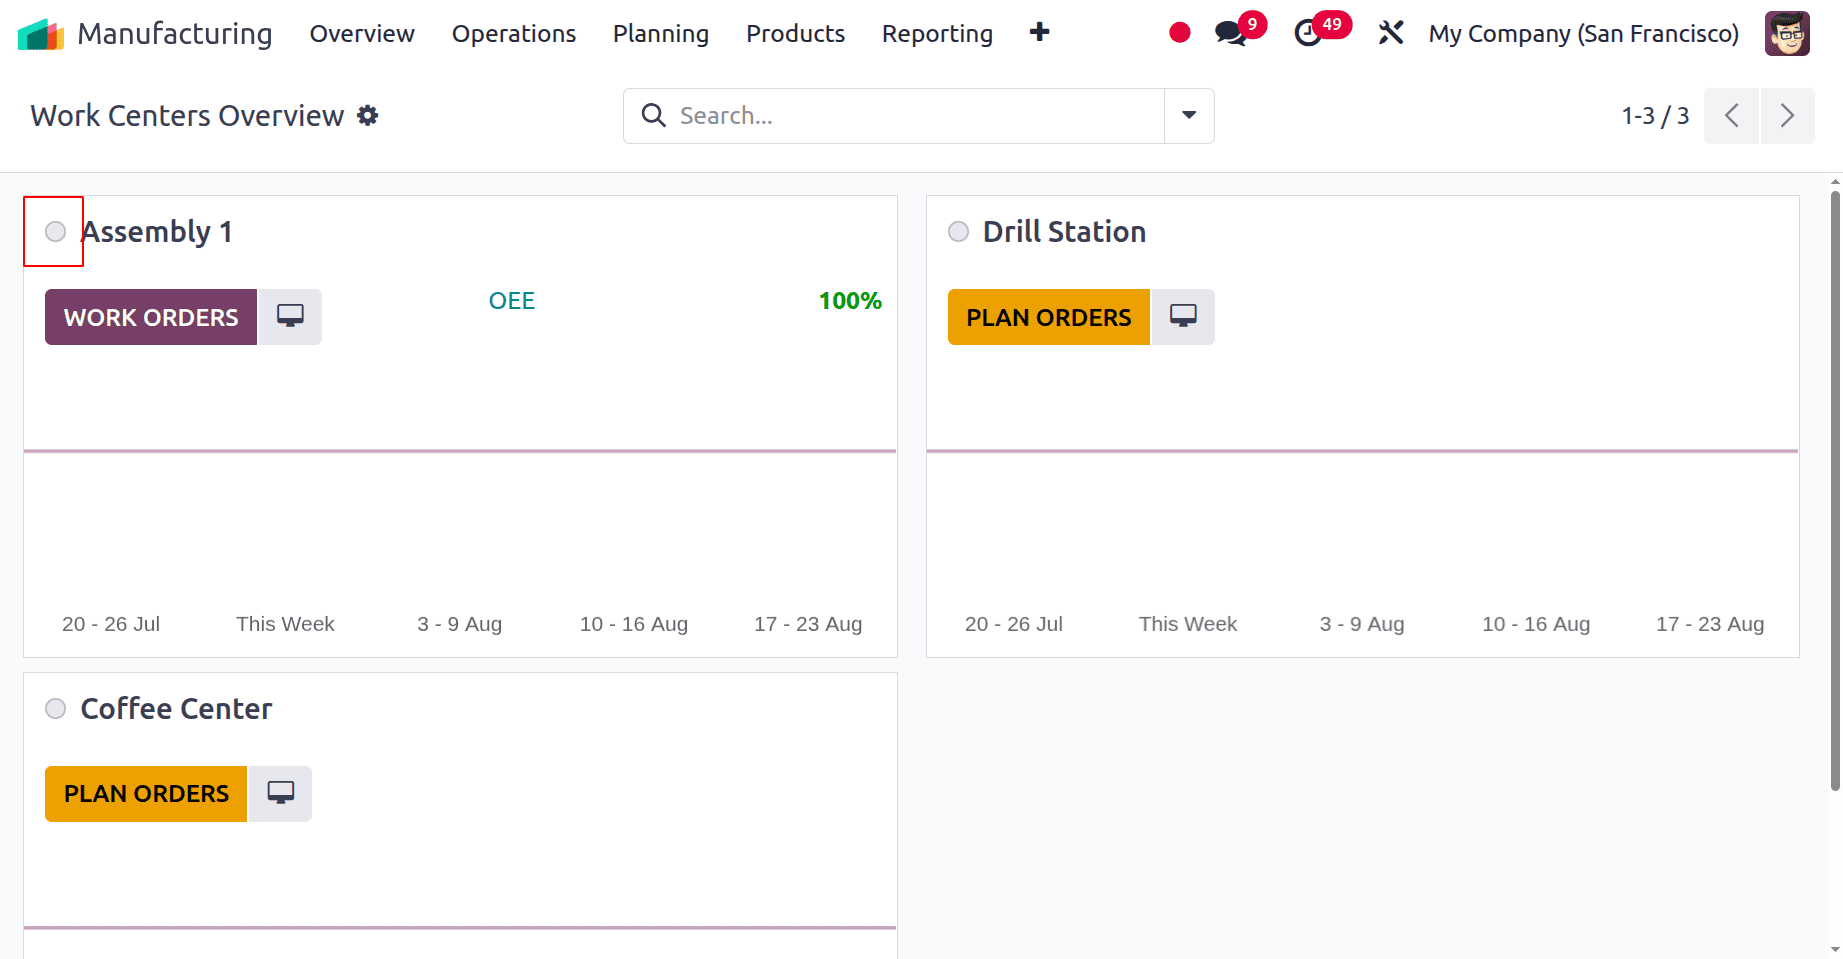
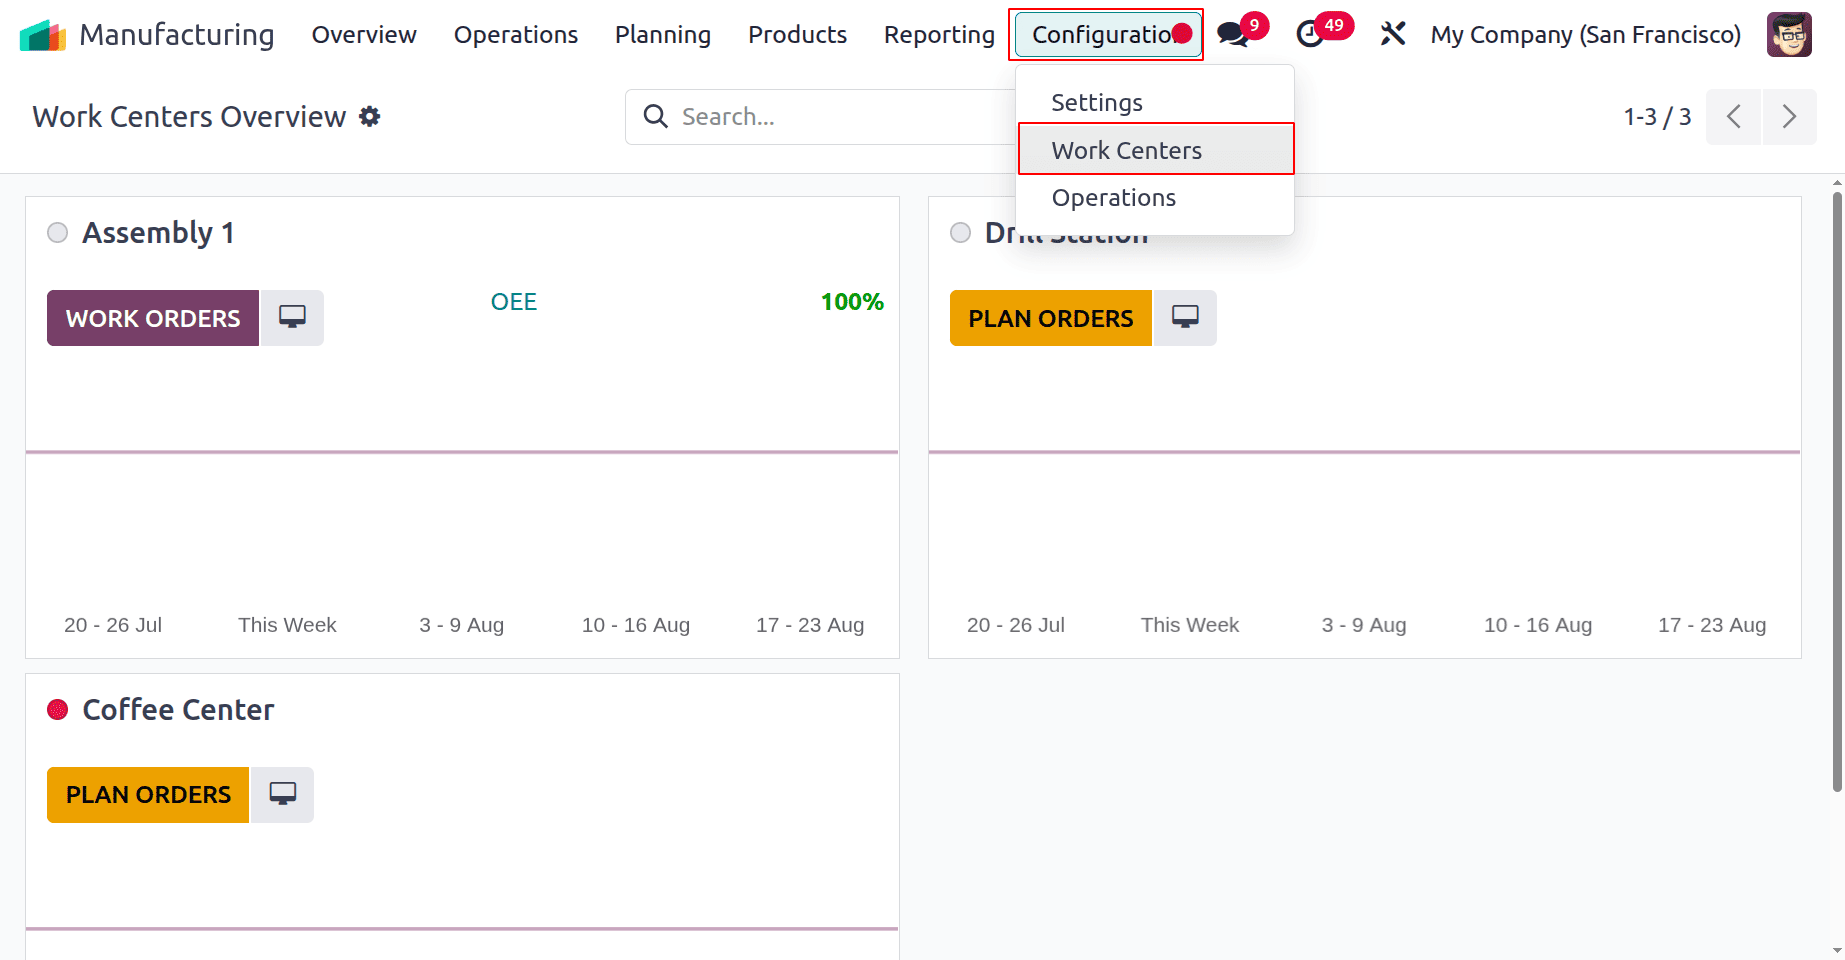
The dashboard of the Odoo 18 Manufacturing module contains a kanban view of all the configured Work centers, as shown below.

While checking the first work center named as Assembly 1, the OEE is shown as 100%. There is a tab named WORK ORDERS. It implies that there are scheduled work orders in this work center.
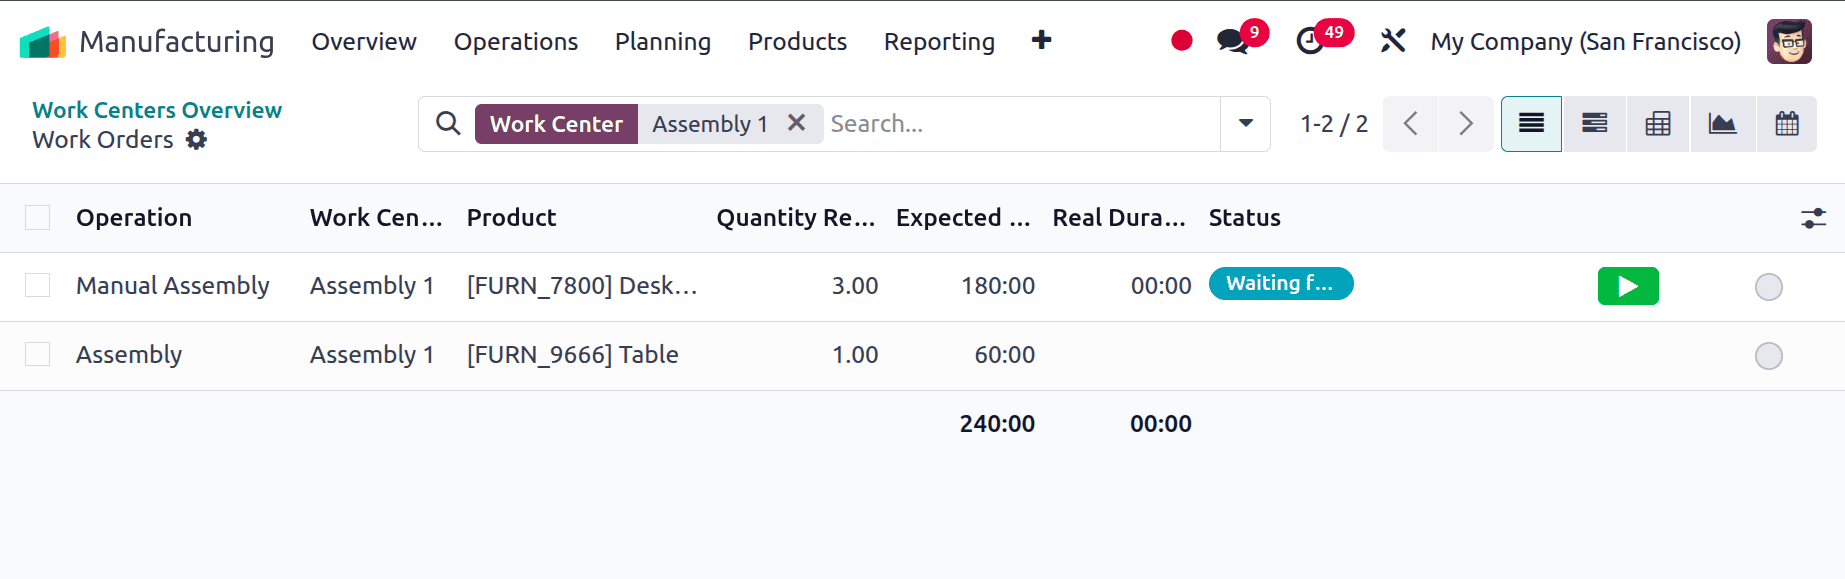
While clicking on it, which directs to the Work Orders window. So, as shown below, there are two work orders planned inside the work center.
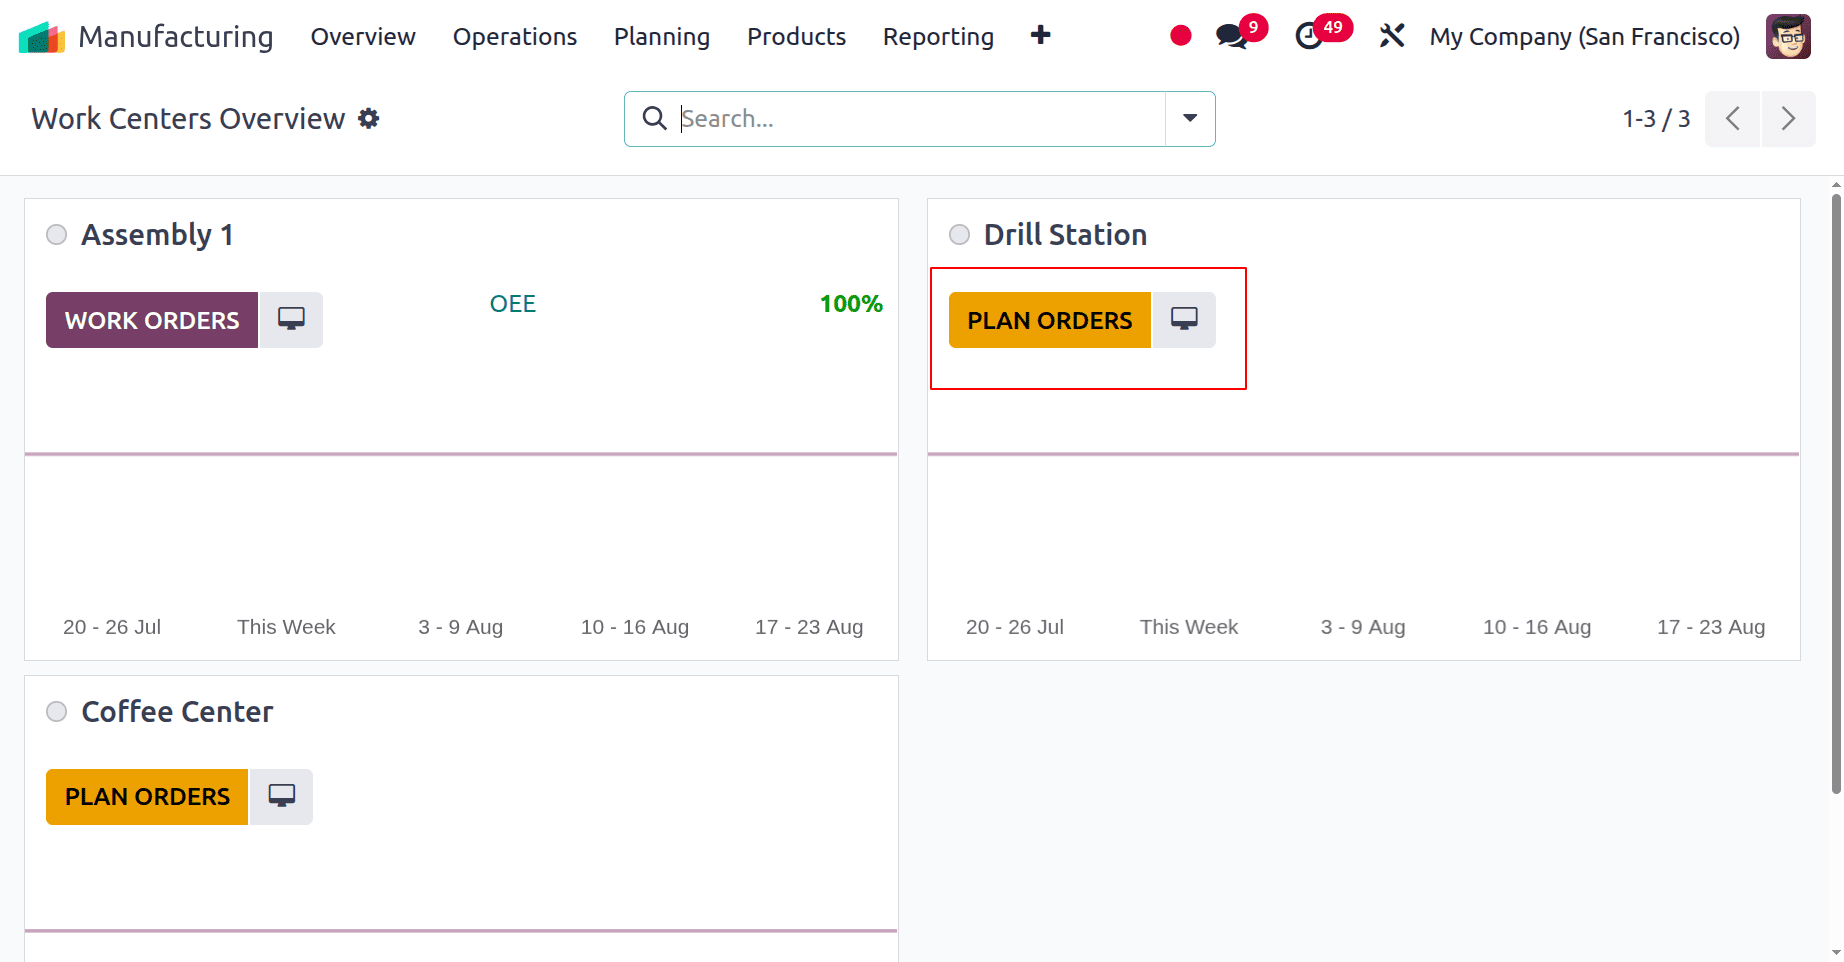
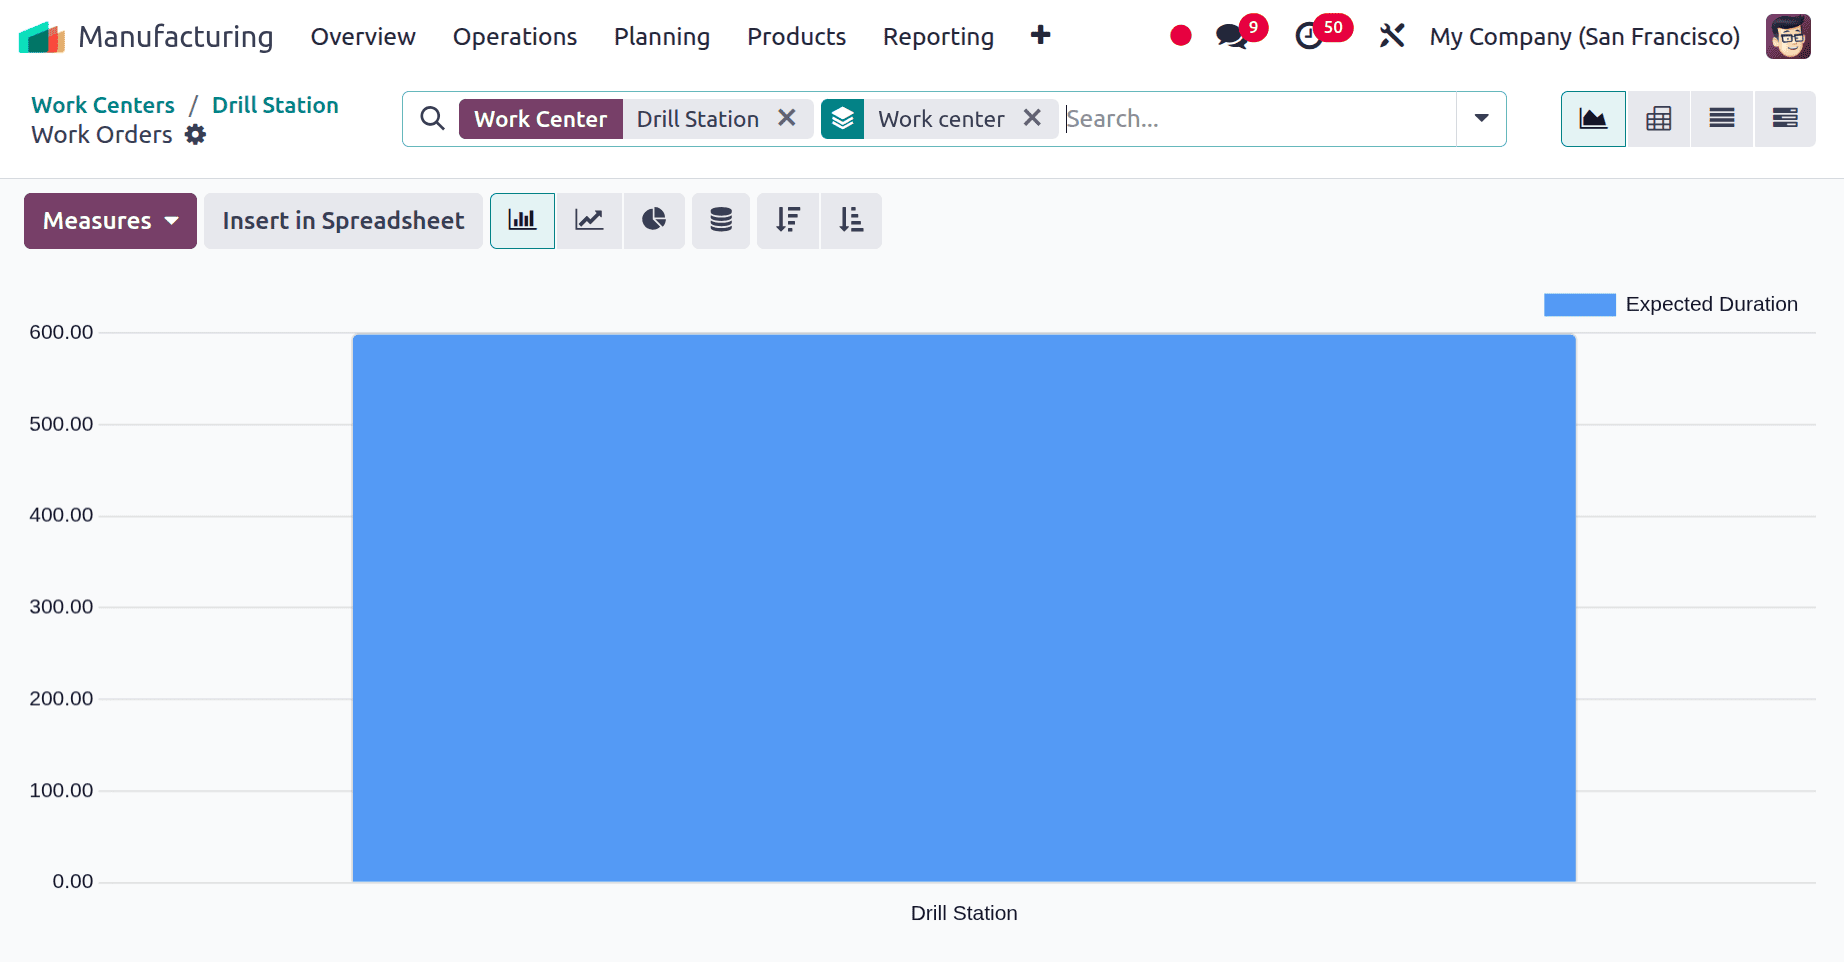
The next work center is Drill Station, and there shows a PLAN ORDERS, which implies that there are no planned work orders for the work centers.
There is an icon on all the work centers, as shown below, which helps to update the status of the work center.
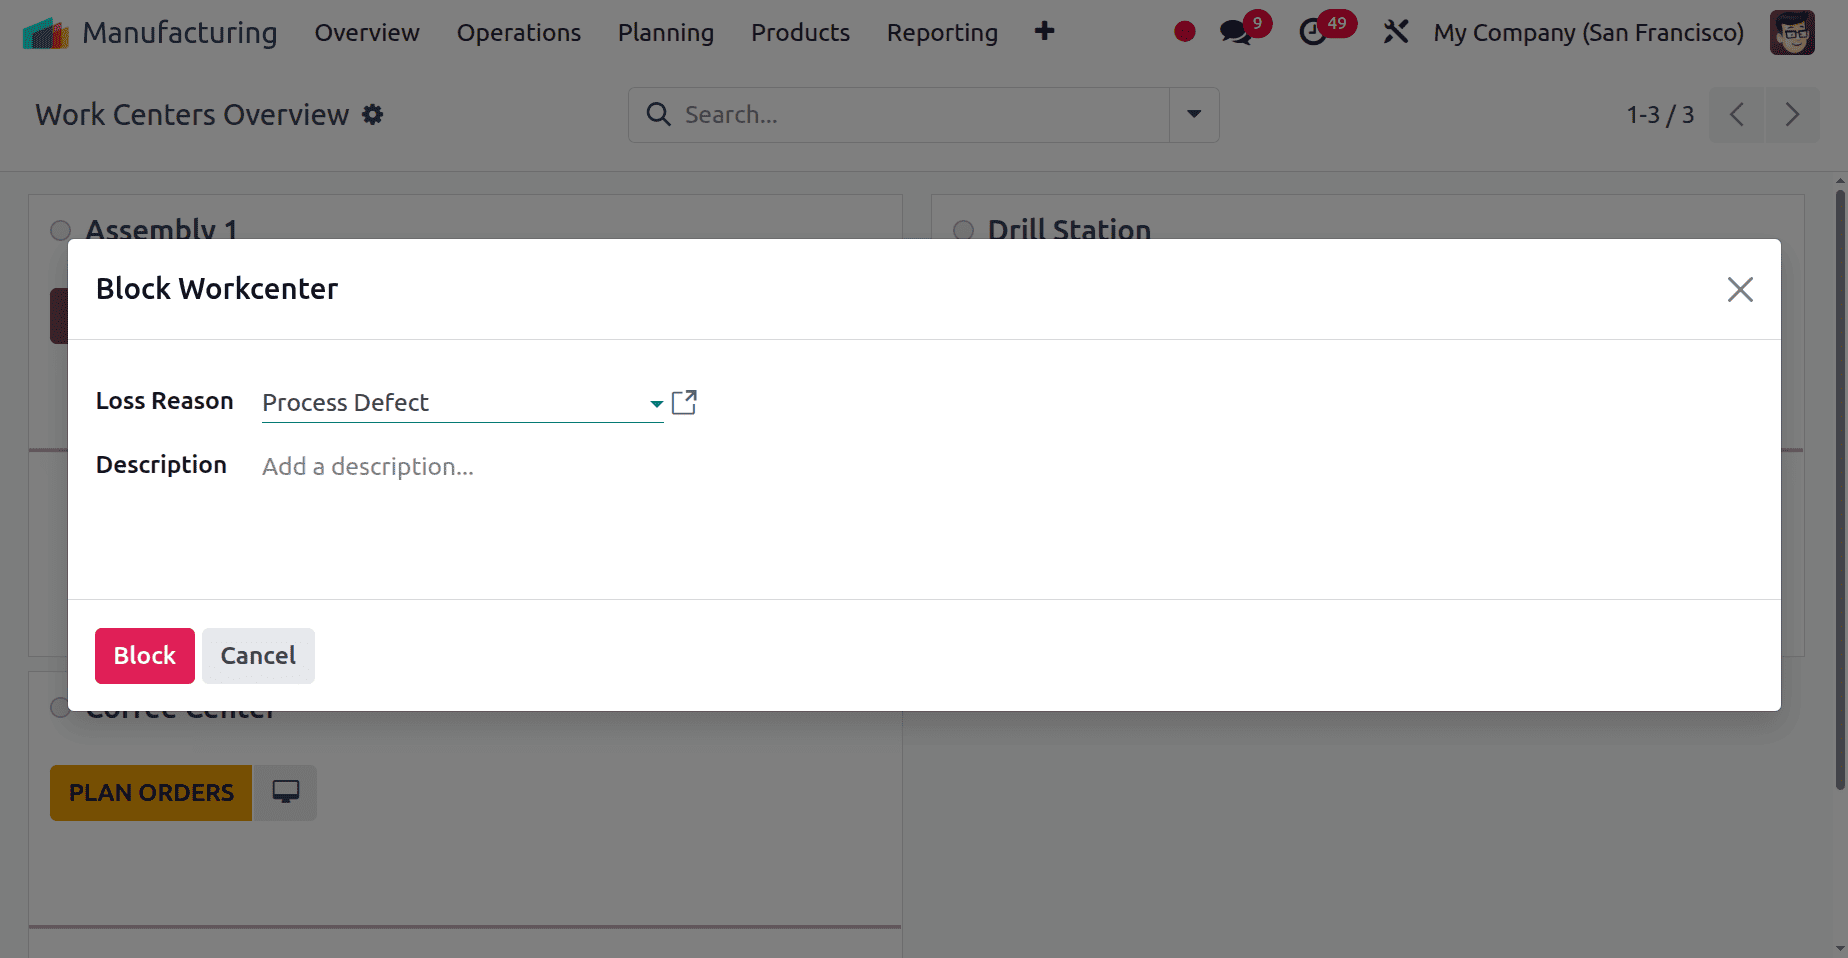
While clicking on it, users can block the work center. Add the Loss Reason and description, then click on the Block button.
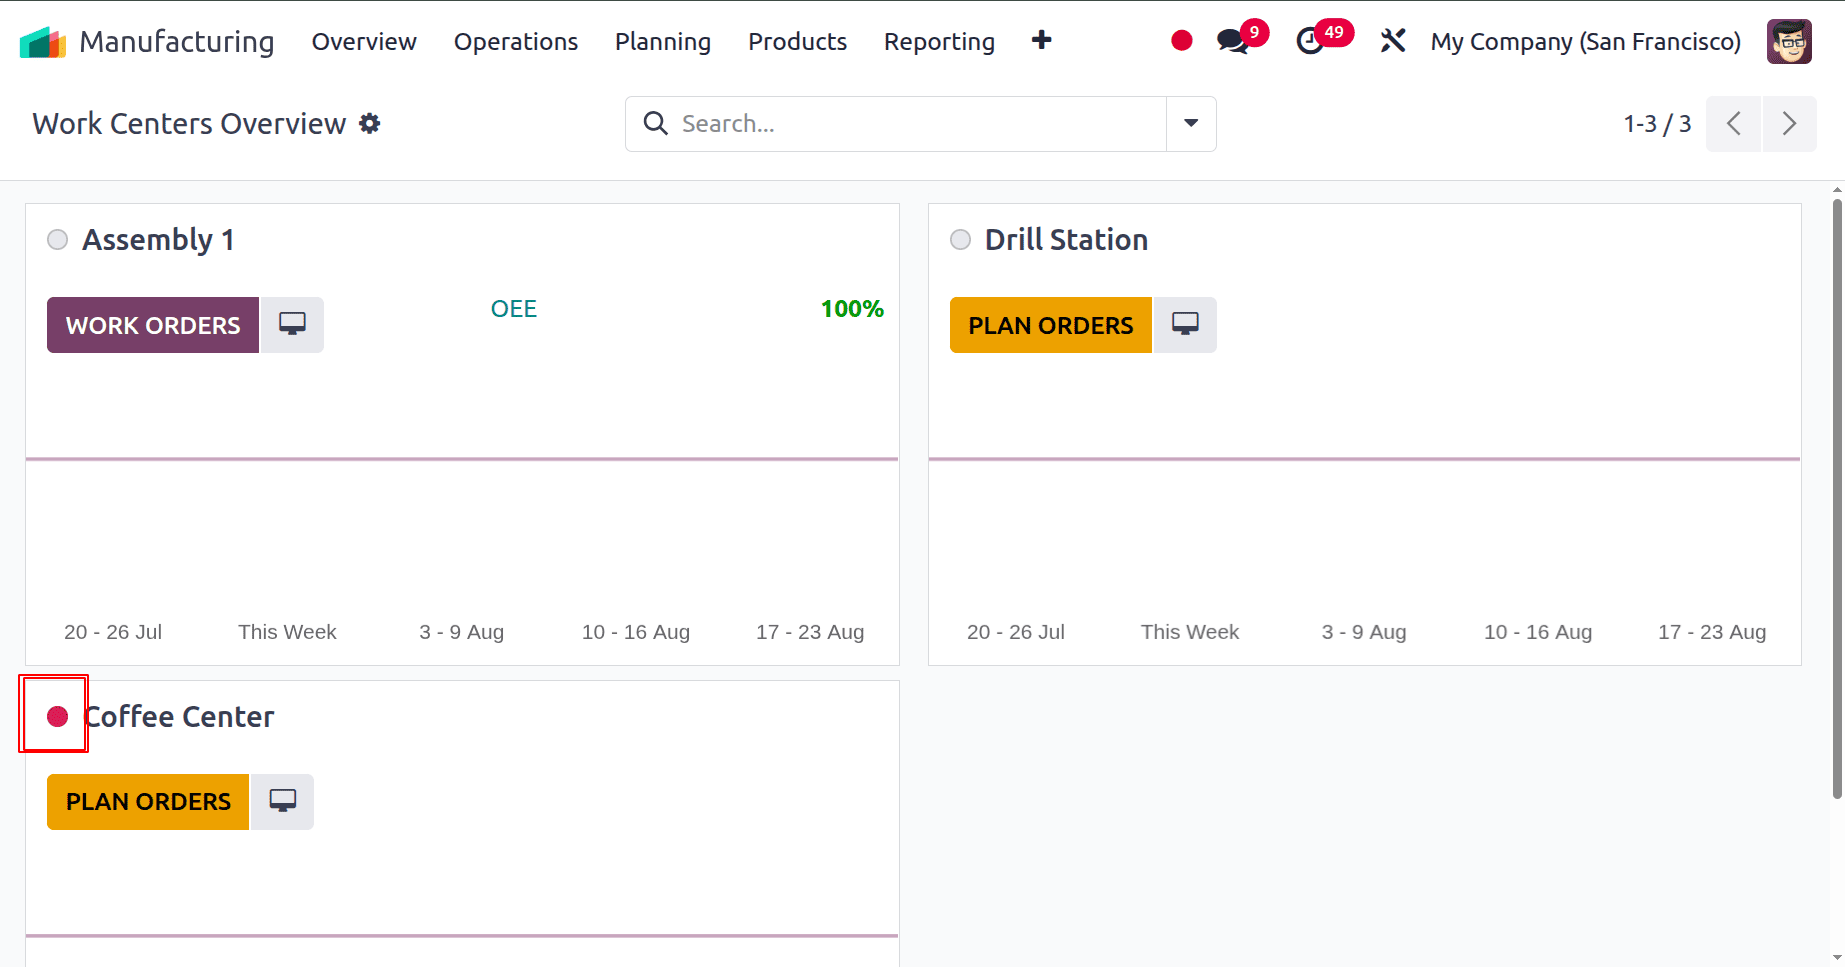
Then there is a red color, which implies that the work center is currently blocked and can’t plan any work orders inside it.
Clicking on the three dots at the upper right corner of the work center will open a pop-up with several options.
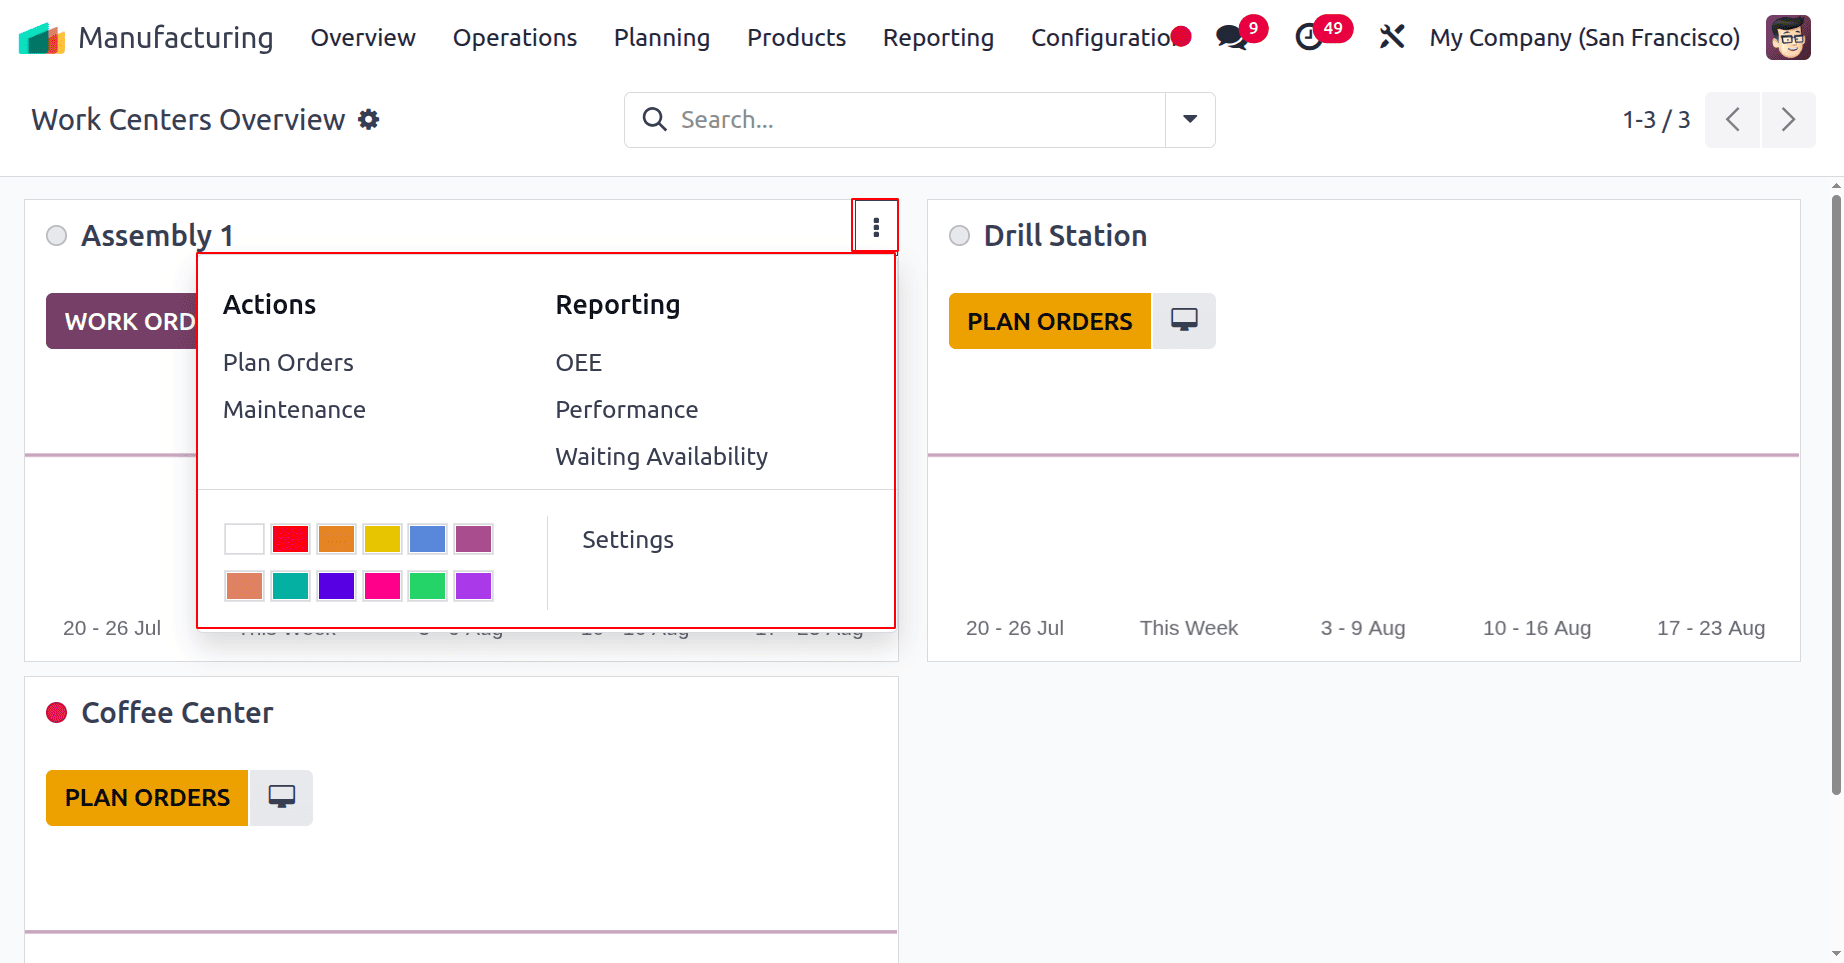
Users can plan orders and maintenance by choosing the Plan Orders and Maintenance under Actions. The second one is the Reporting option. Users can view the OEE and performance reports by clicking on the Work Availability, which will lead to the shopfloor to view the waiting operations for the work center. The Settings menu then aids in modifying the work centers' settings. The color helps to customize the view of the work center in the dashboard.
From the Configurations menu, a list of options like Settings, Work Centers, and Operations is displayed. Choose the Work Centers first.
Work center name, code, tag, alternative work centers, cost per hour, capacity, time efficiency, and OEE objective are among the details included in the list.
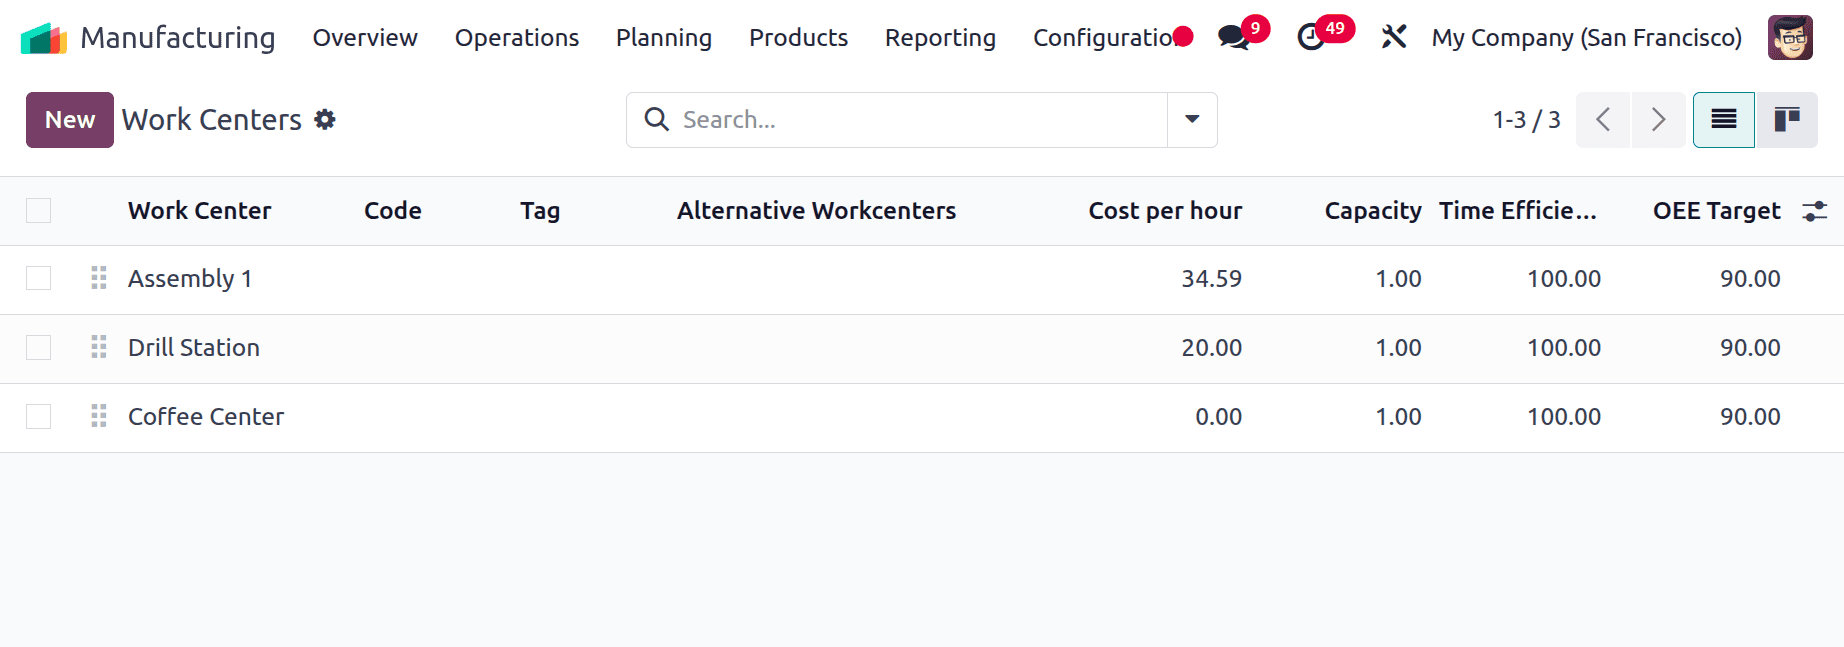
Click the New button to add a new one. Add the work center name first, then add the tag and alternative work center. Code is used to identify the workcenter, then mention the Working Hours and the company.
In Odoo 18 Manufacturing, an alternate work center serves as a fallback or replacement site where tasks can be completed in the event that the main work center is overburdened or unavailable. By enabling operations to continue using available resources, it lessens production delays and increases flexibility. To know more about Alternative work centers, refer to the blog named “How Alternative Work centers are Used in Odoo 18 Manufacturing”.
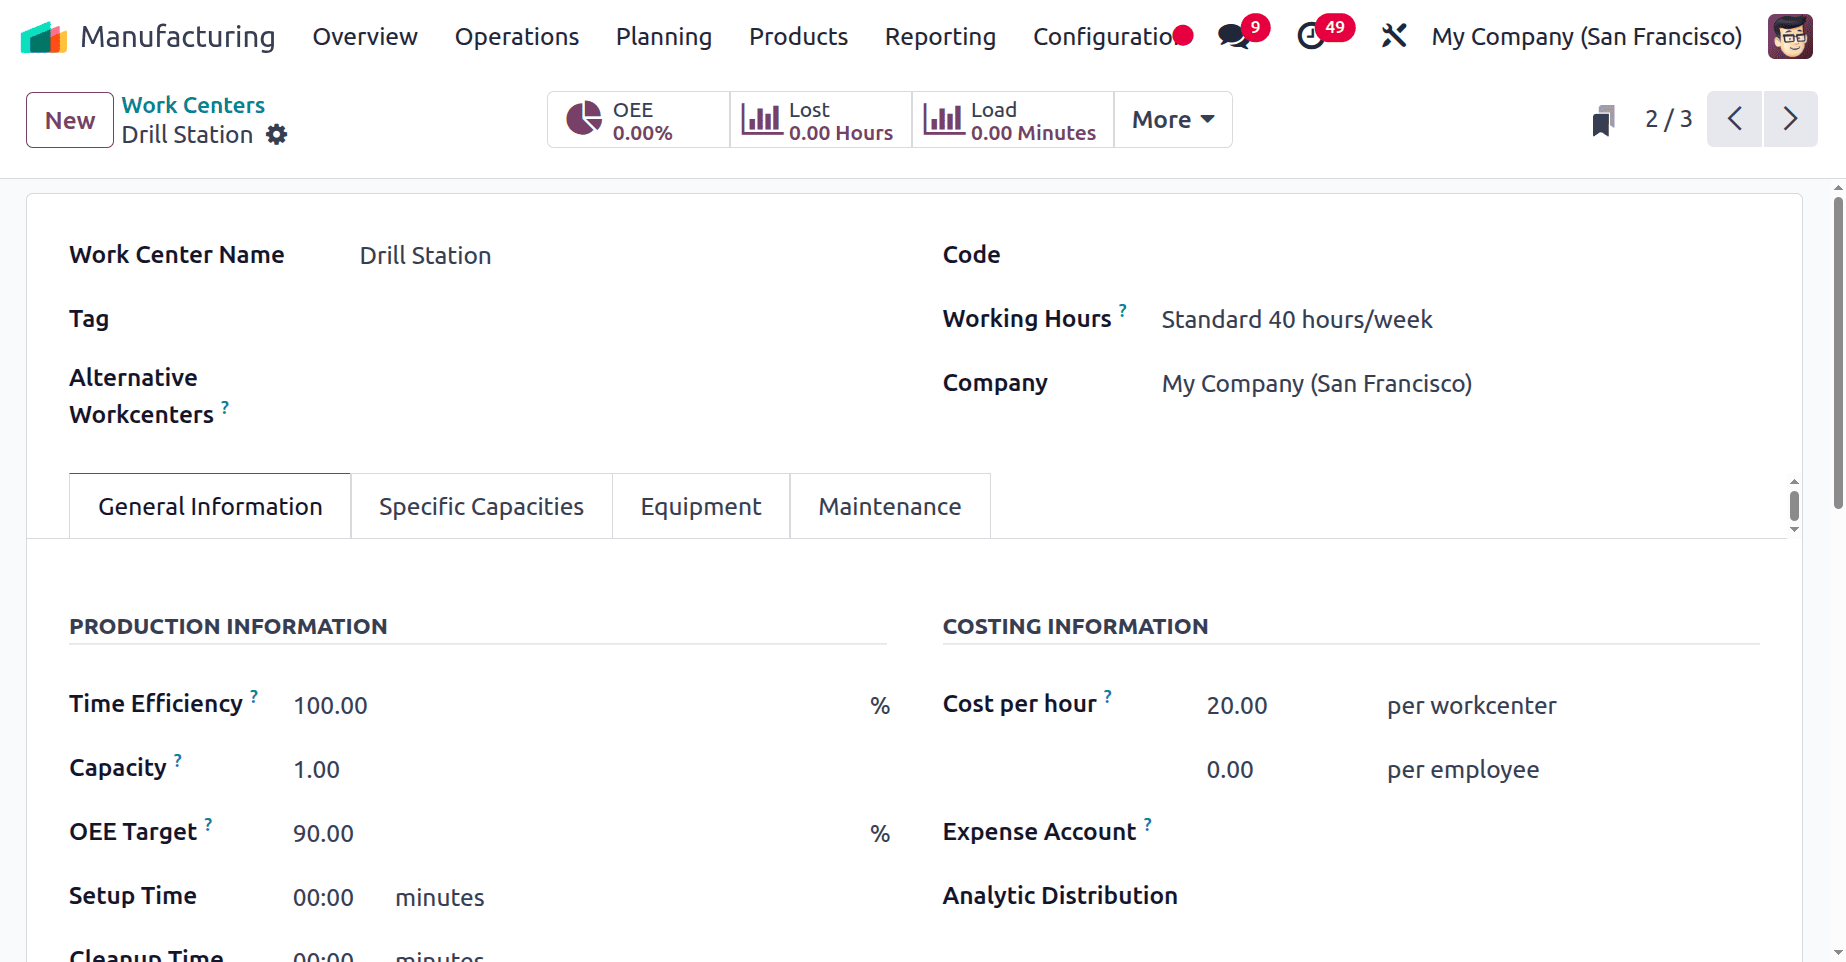
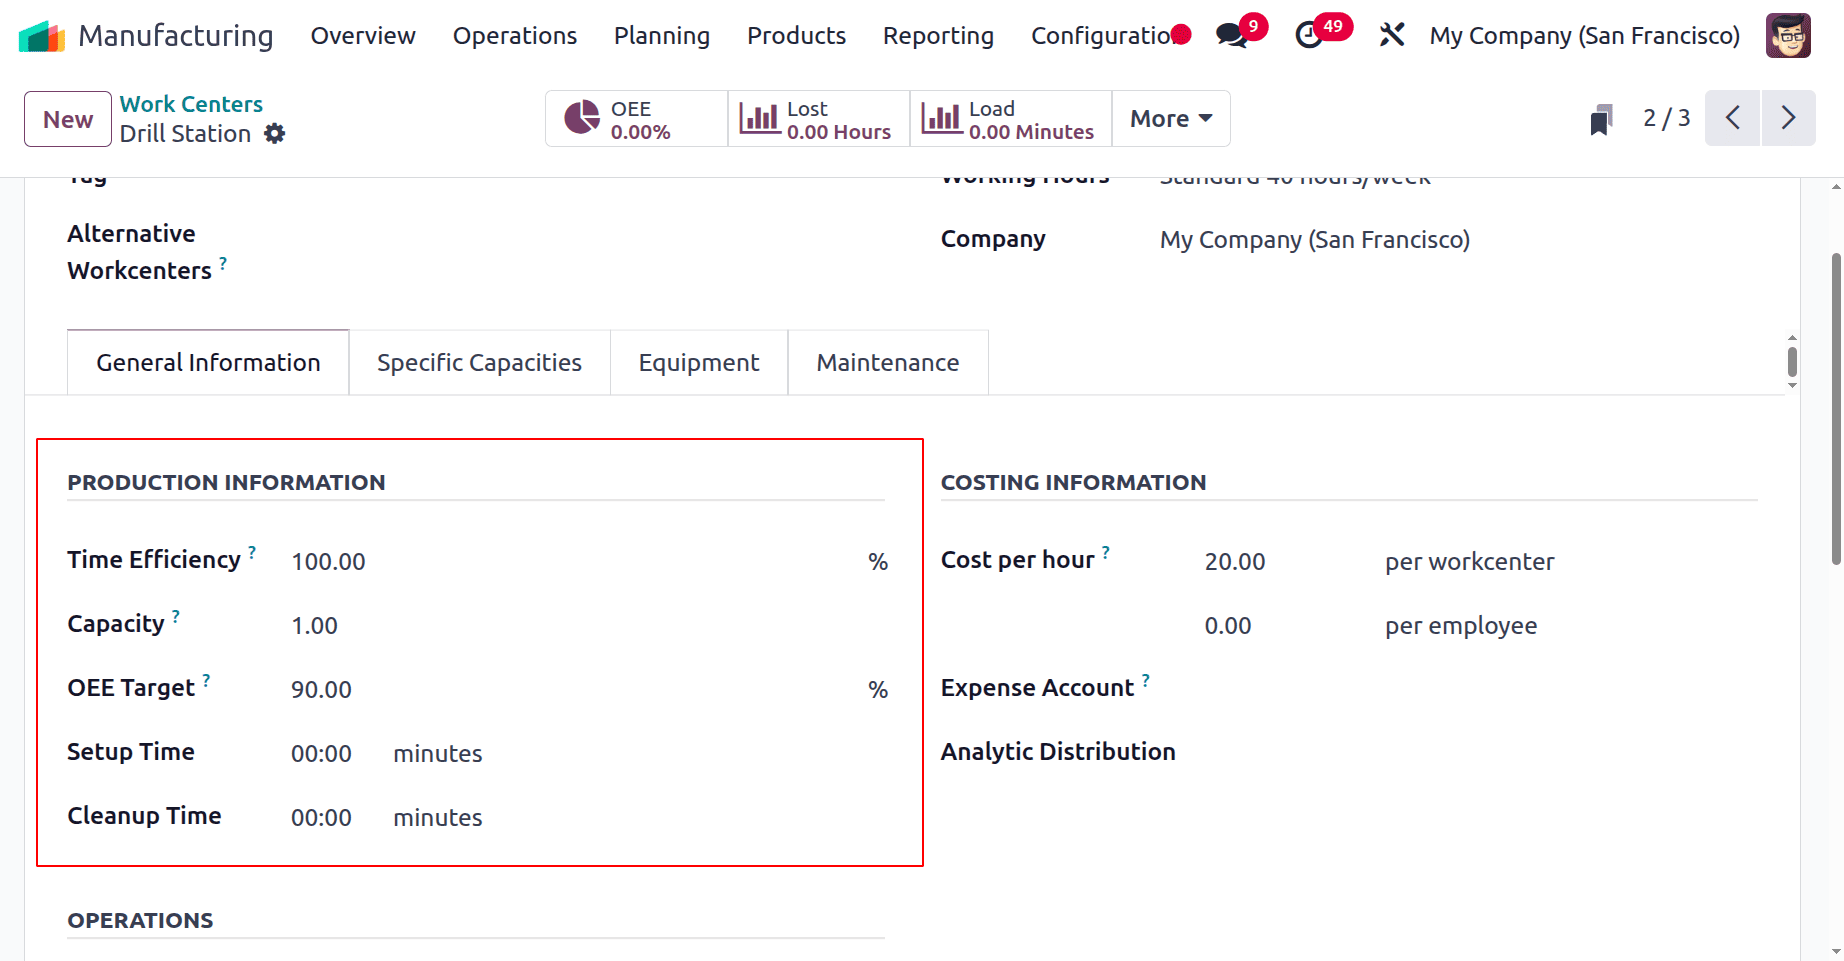
The General Information tab contains PRODUCTION INFORMATION, COSTING INFORMATION, OPERATION, and DESCRIPTION.
The product information contains Time Efficiency, Capacity, OEE Target, Setup Time, and Cleanup Time.
This work center uses the time efficiency field to determine how long a work order is estimated to take. For example, if a work order takes an hour and the efficiency factor is 100%, the expected time will be one hour. However, 30 minutes is the anticipated duration if the efficiency factor is 200%.
Next is OEE Target, and the OEE means Overall Effective Efficiency. By comparing actual production times to anticipated timings, a work center's Overall Effective Efficiency in Odoo 18 Manufacturing indicates how efficiently it runs. It takes into account quality (scrap or rework), availability (downtime), and performance (speed). This measure aids in locating bottlenecks and maximizing the use of resources to raise overall production levels.
Setup time is the necessary time to set the work center before production starts, and cleanup time is the time needed to clean the work center after completing the operation.
The next section is Costing Information, which contains fields like Cost per Hour per employee, Cost per Hour per work center, Expense Account, and Analytic Distribution.
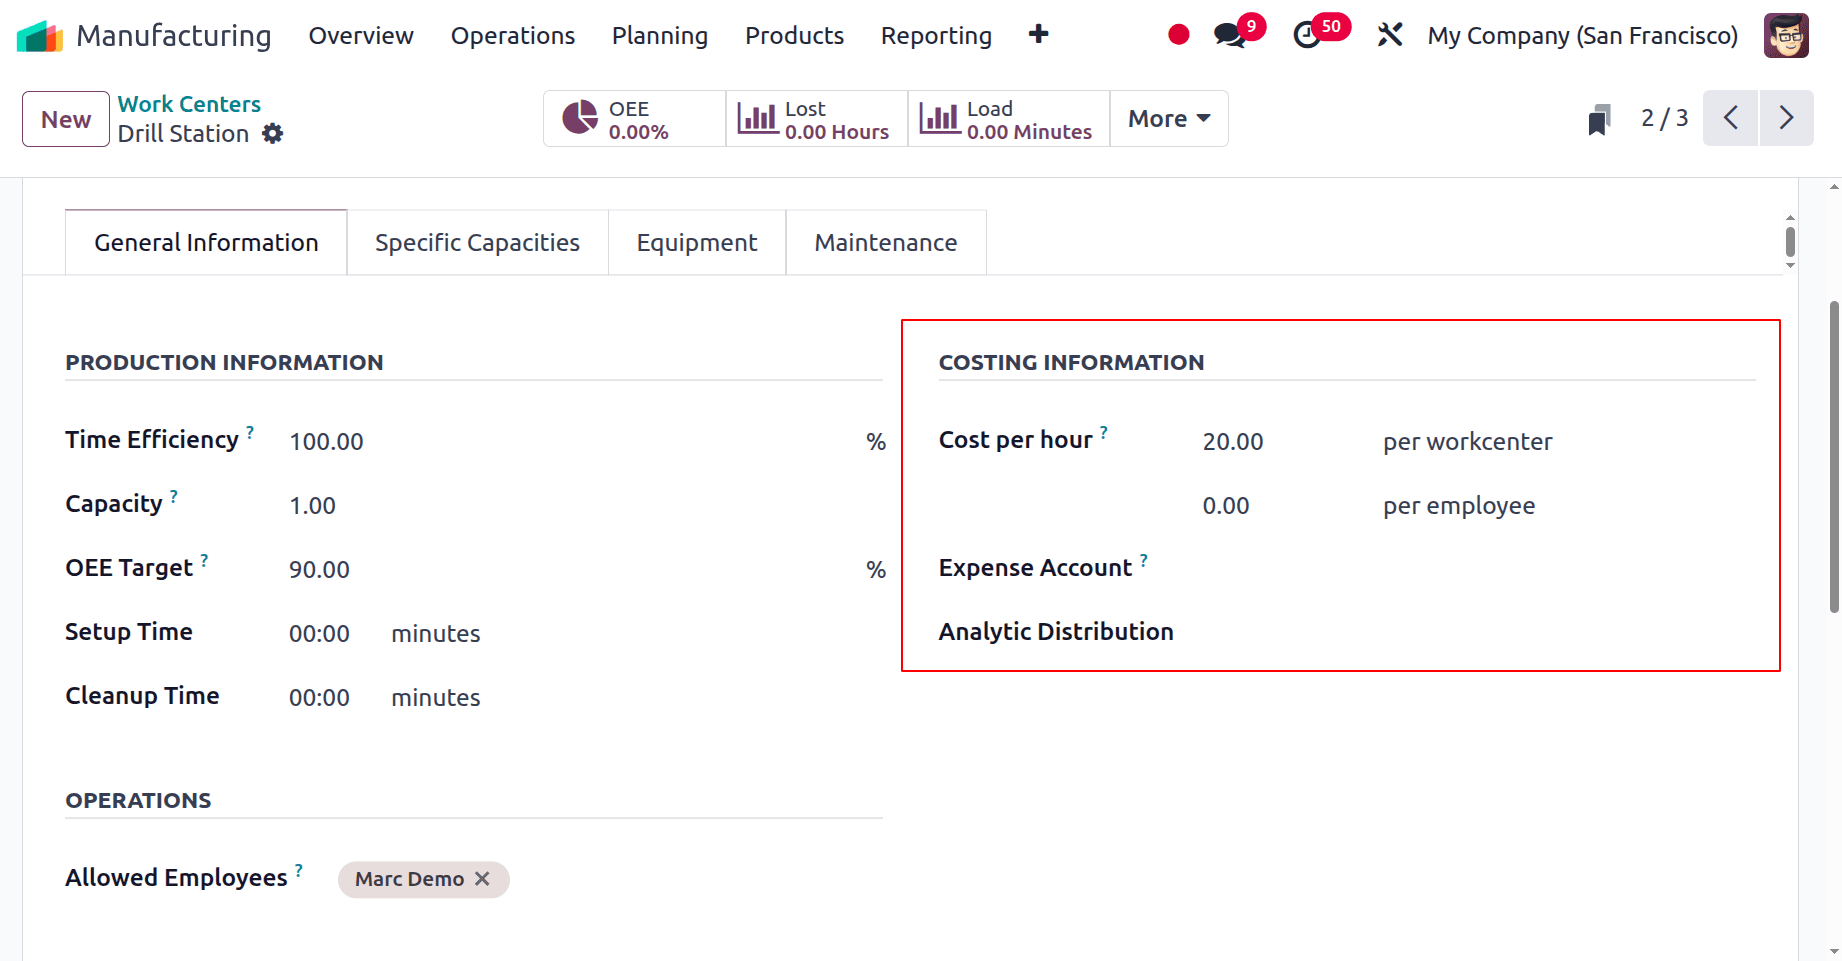
The work center's hourly processing costs are added using the Cost per Hour field. Employee and work center costs can be specified independently by users. When the manufacturing order is marked as completed, the cost is recorded. The expenditure account of the finished product will be used in its place if an expense account is not set. For the production process, an analytical distribution could be added.

Under the Operations section, mention the employee allowed to log in to the work center. All employees can access the work center if this field is left blank. Then any description about the workcenter can be mentioned under the Description section.
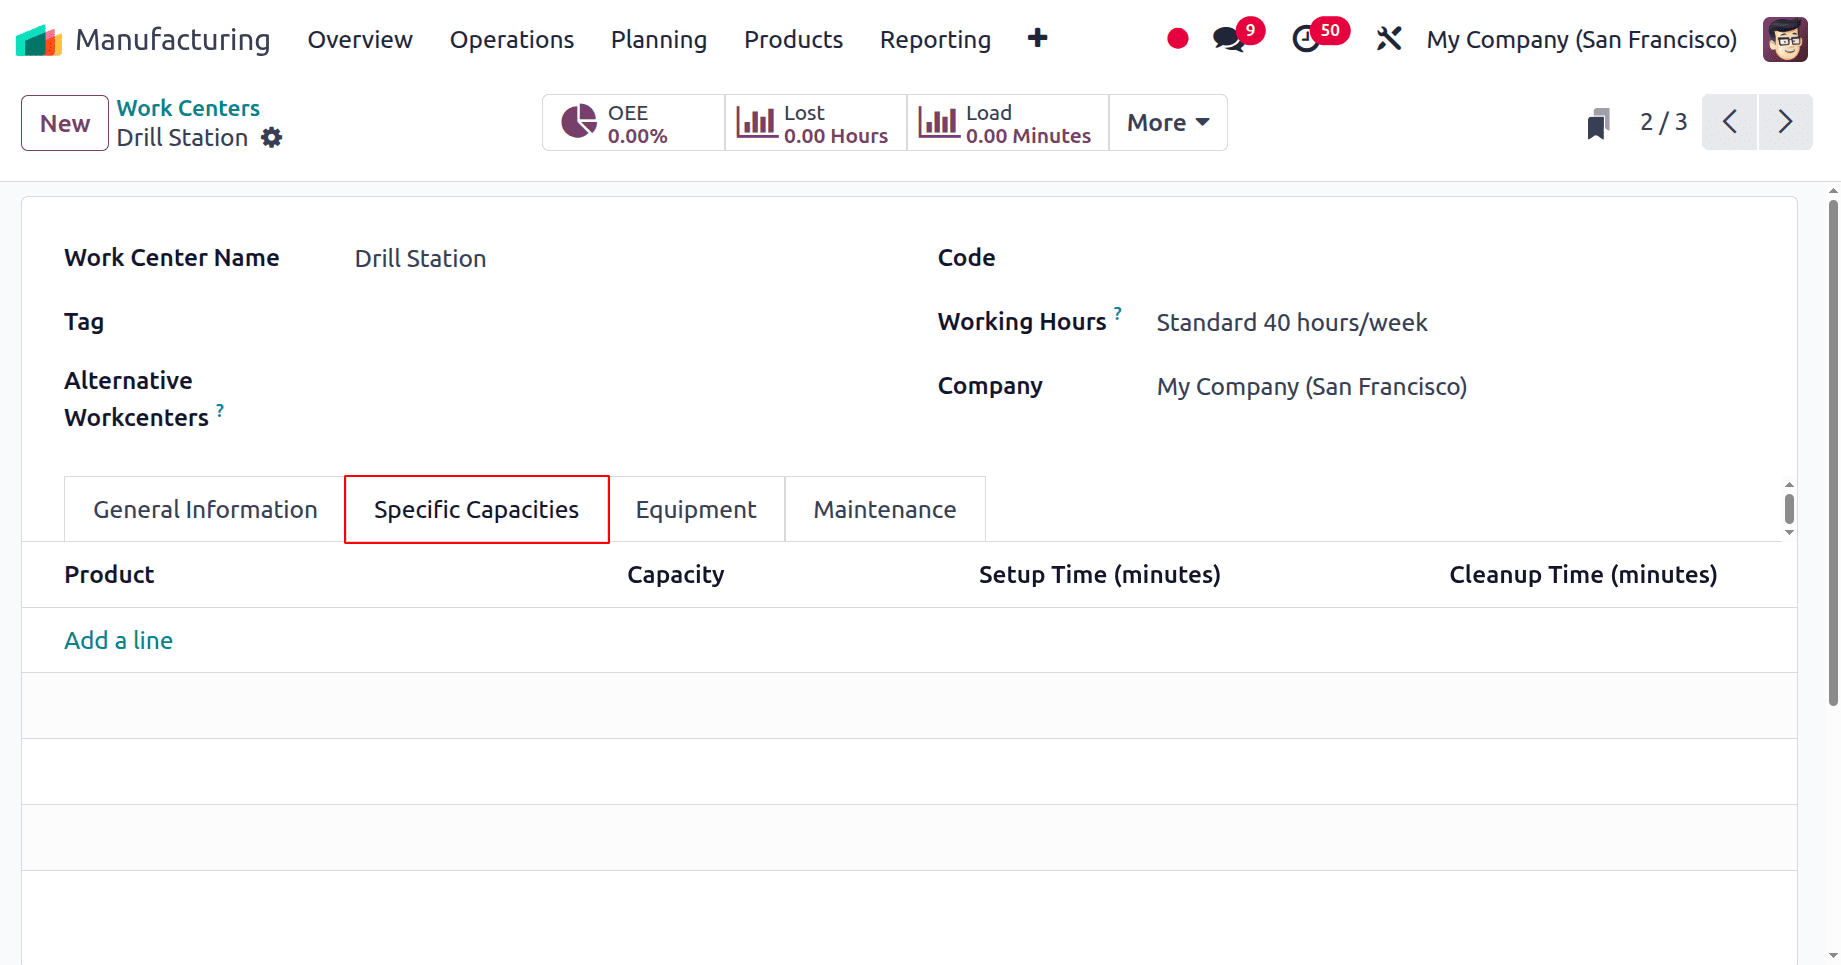
The next tab is Specific Capacities. Inside the tab, users can mention specific capacity per product. By clicking on the Add a line, users can add product, capacity, setup time, and cleanup time.
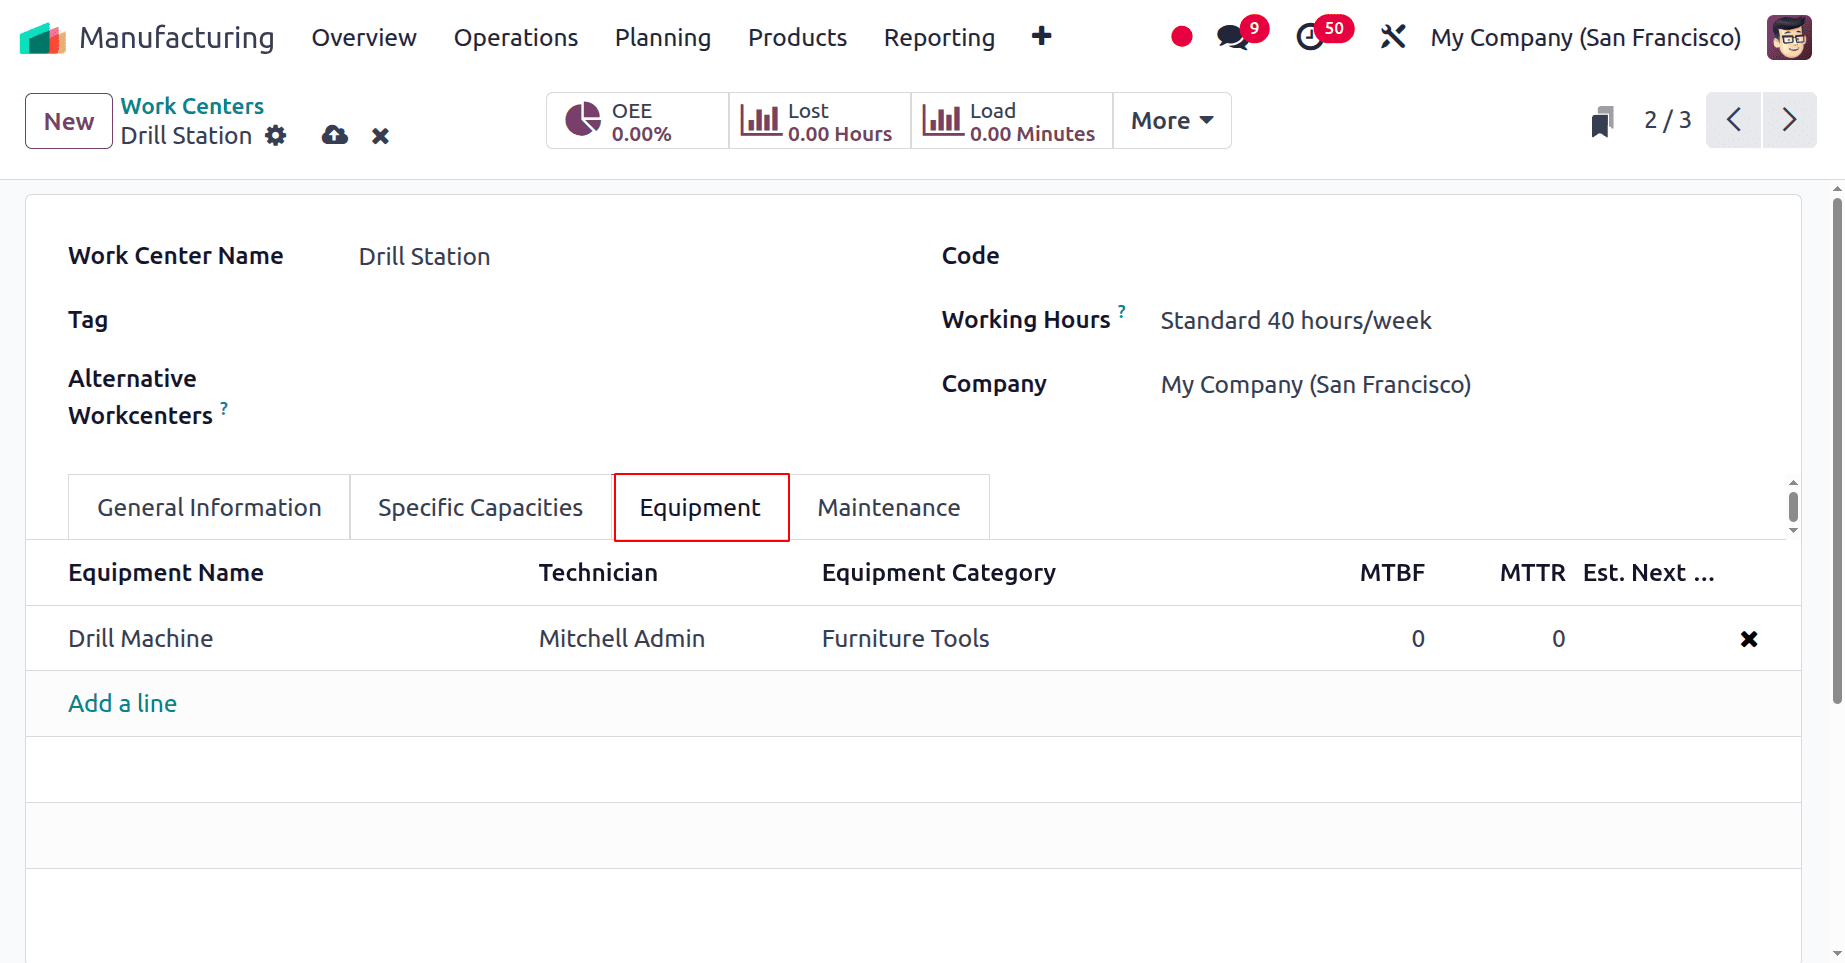
Sometimes there are chances of using some equipment for the manufacturing process. Such equipment is added inside the work centers, which are mentioned in the Equipment tab. The details of equipment, like Equipment Name, Technician, Equipment Capacity, MTBF, MTTR,
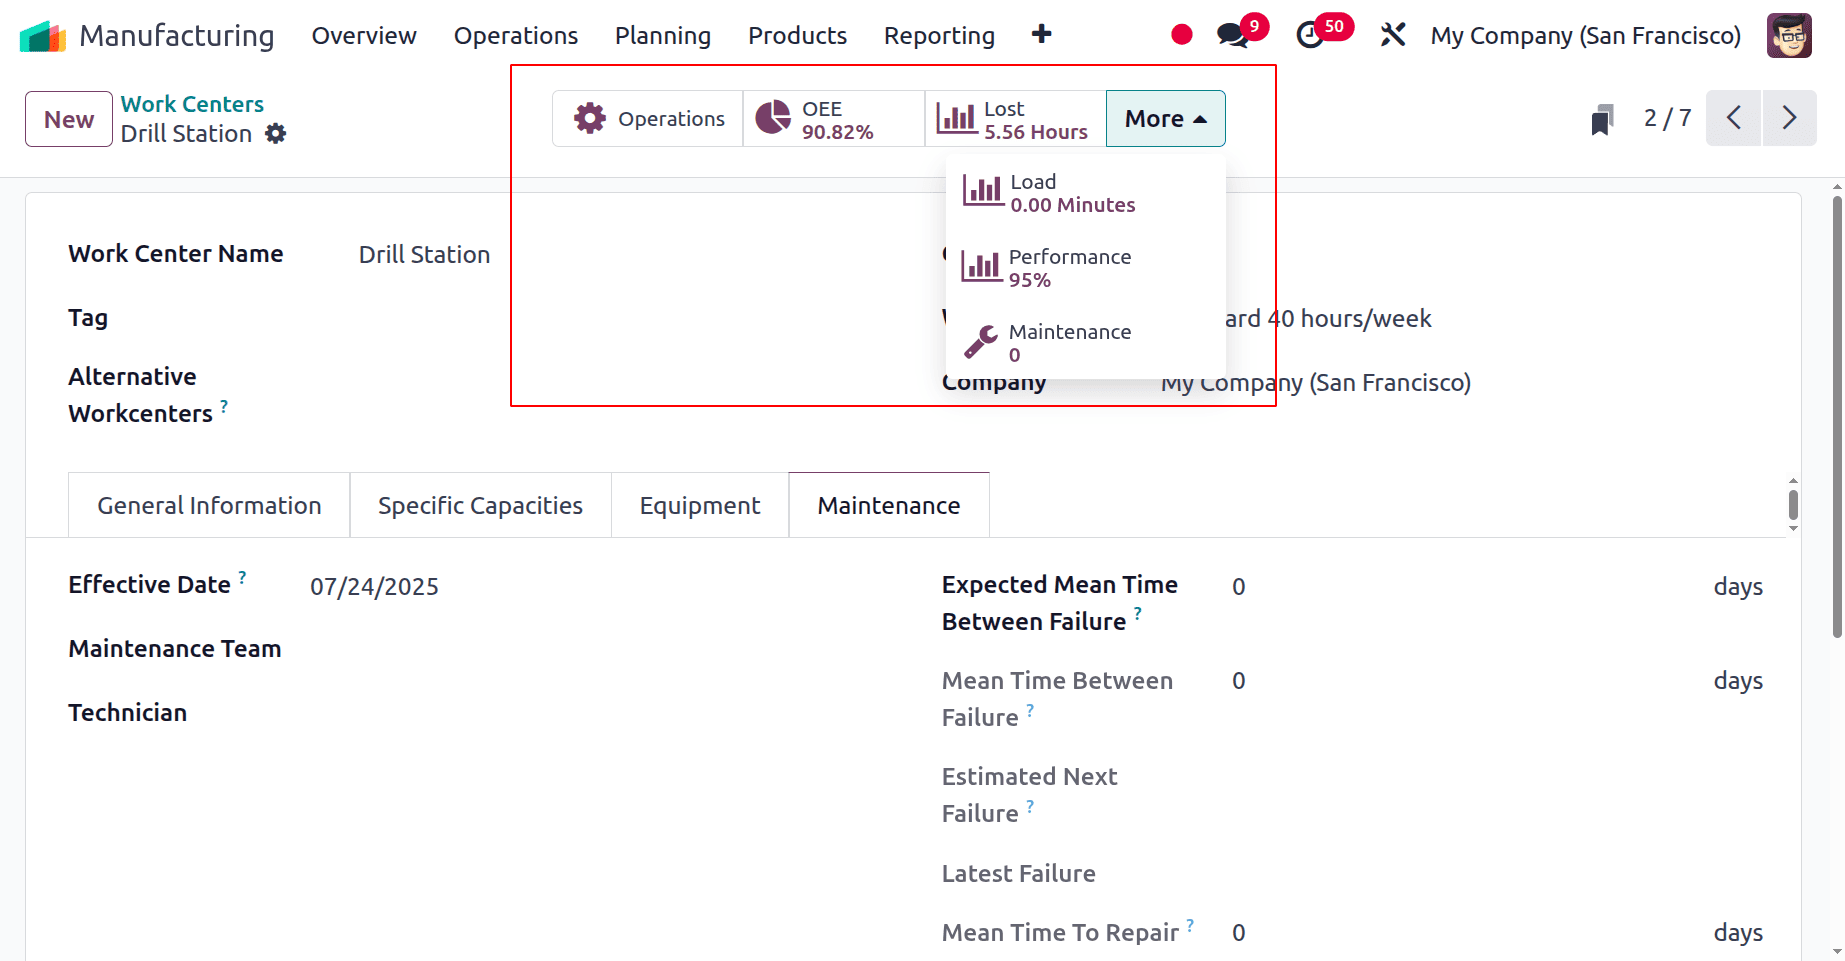
The next tab is named Maintenance, which contains the maintenance details of the equipment work center. The fields are there like Effective date, Maintenance team, Technician, Expected Mean Time Between Failure, etc.

The Mean Time Between Failure will be calculated using the Effective Date, which is the date the work center goes into effect. The presumed mean interval between two work center failures is known as the Expected Mean Time Between Failures. According to the corrective maintenance, the Mean Time Between Failures was updated. The MTBF with the Latest Failure date is added to the Estimated Next Failure. The Mean Time To Repair is the amount of time needed to fix the work center.
There are smart tabs named OEE, Lost, Load, Performance, and Maintenance.
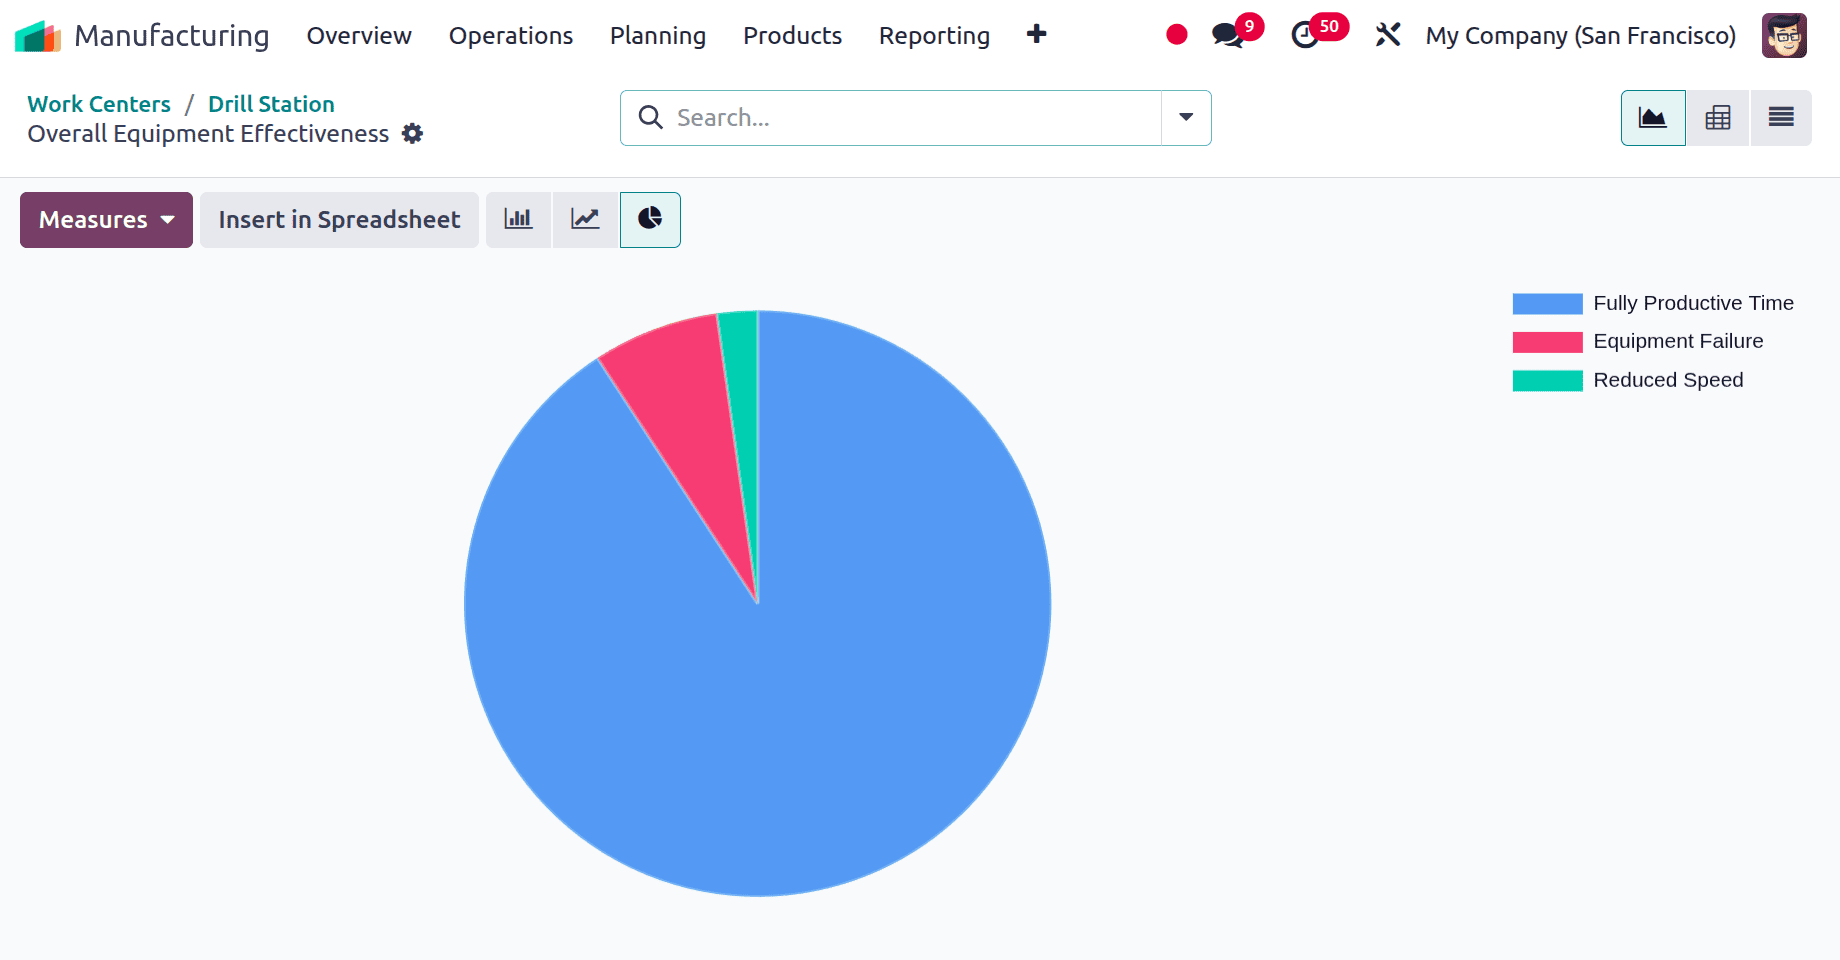
 1. OEE: The Overall Equipment Effectiveness button provides access to the work center's performance analysis report, which is based on the cost, length, user, and loss elements of the personnel. The dashboard display is blank because this Work Center currently has no OEE data available.
 2. Lost: You can obtain a report on productivity loss due to a number of issues, including equipment failure and decreased speed, by using the "Lost" smart button. An overview of the specific loss, including Start Date, End Date, Work Centre, User, Loss Reason, Duration, Company, etc., is provided by this "Productivity Losses" dashboard.
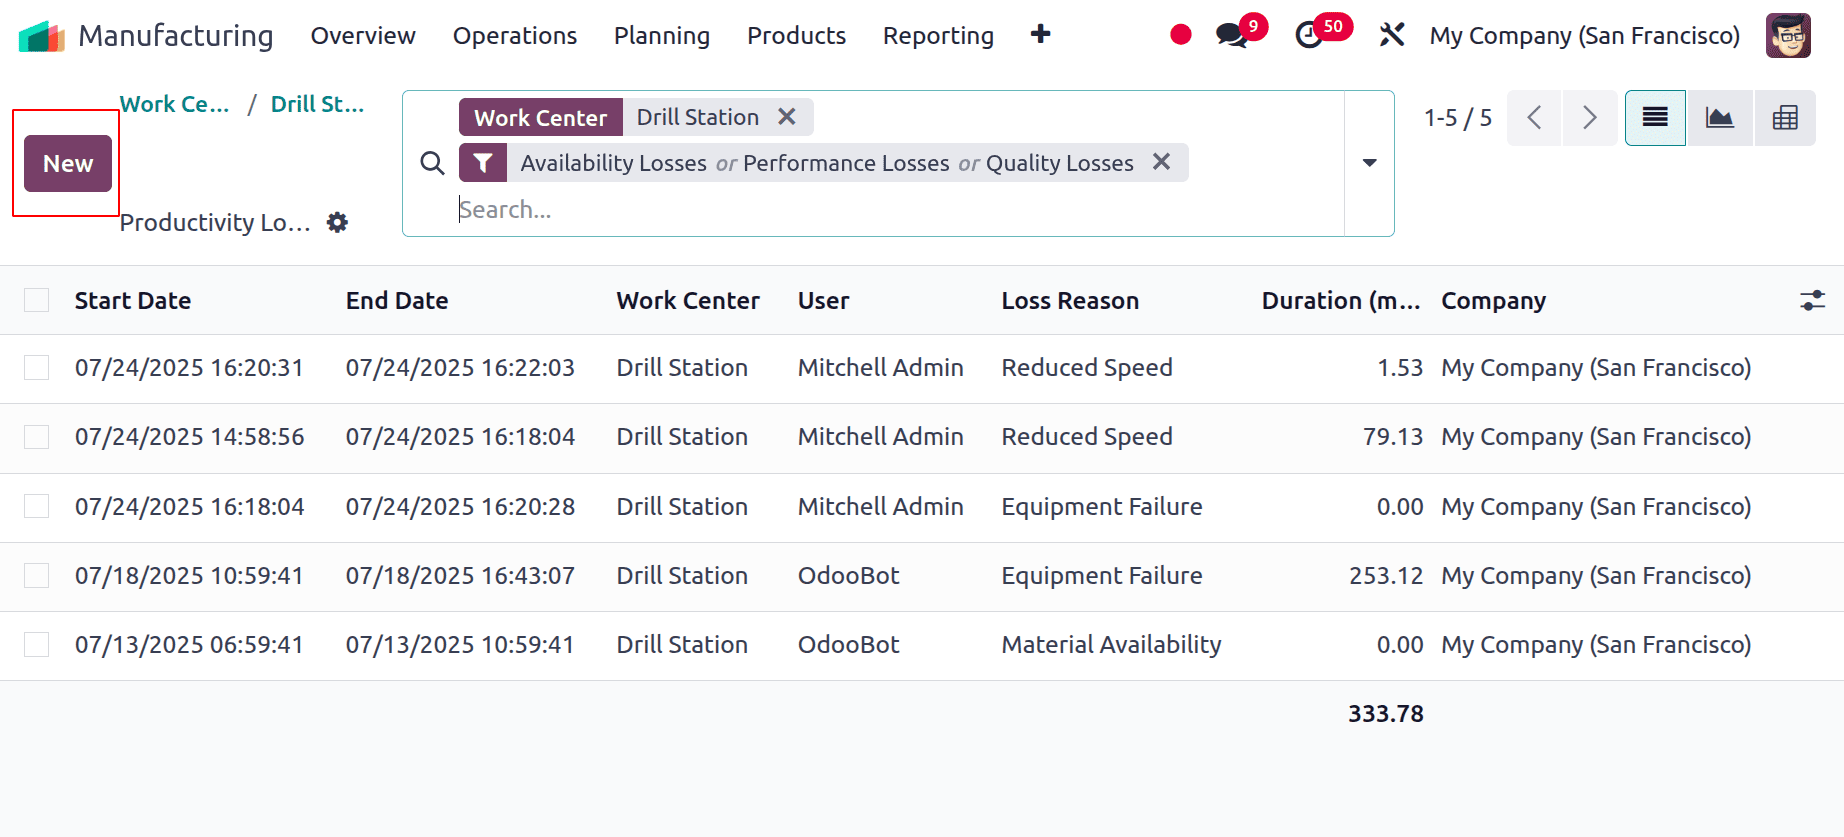
Selecting the "NEW" option will create a new Productivity Loss data set. A brief configuration form similar to the one below will open as a result.
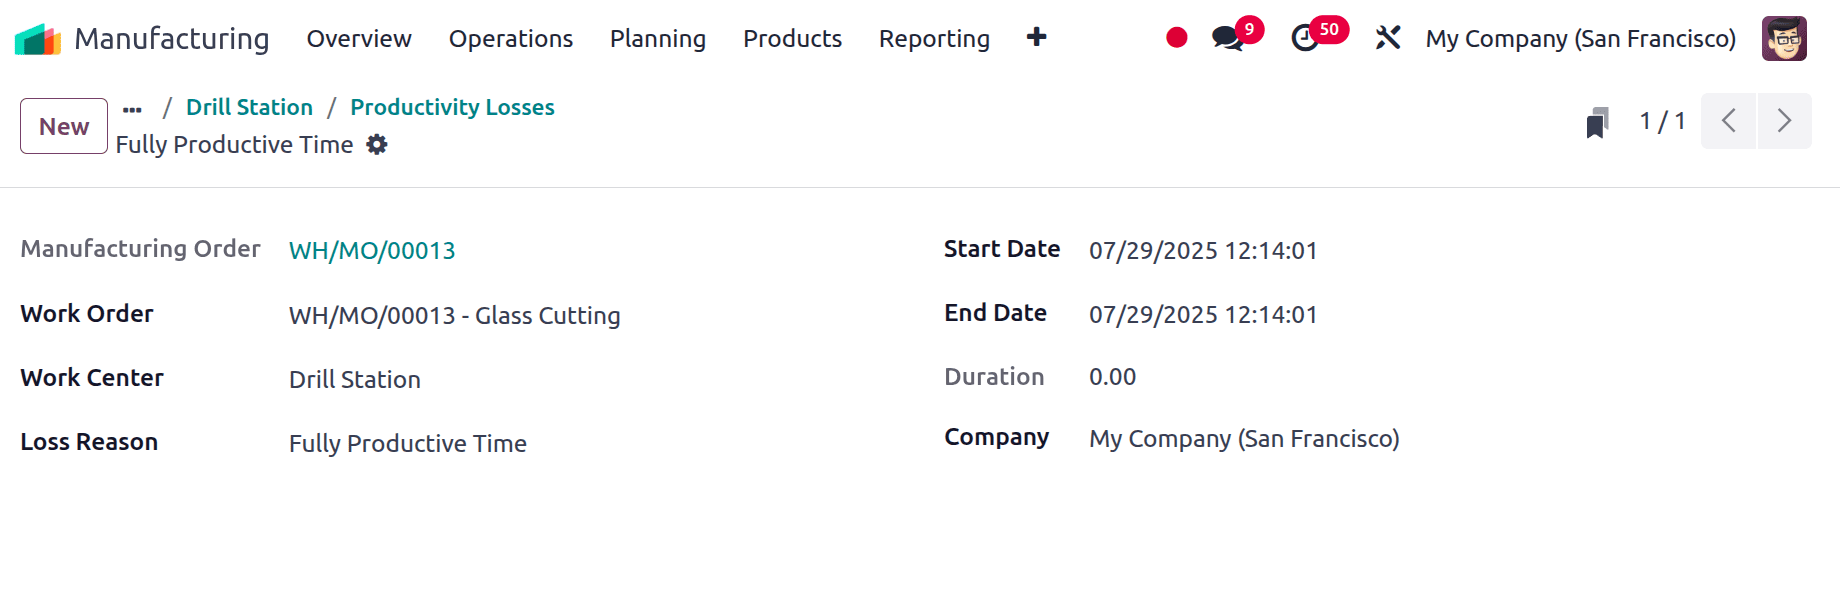
When you select or input the correct "Work Order" in the designated box, the "Manufacturing Order" and "Work Centre" fields will be immediately filled in. The "Start Date" and "End Date" of the Productivity Loss can be entered in the corresponding boxes. Both the "Duration" and "Company" details are modifiable. The explanation for the loss can then be edited or selected from a list in the "Loss Reason" section.
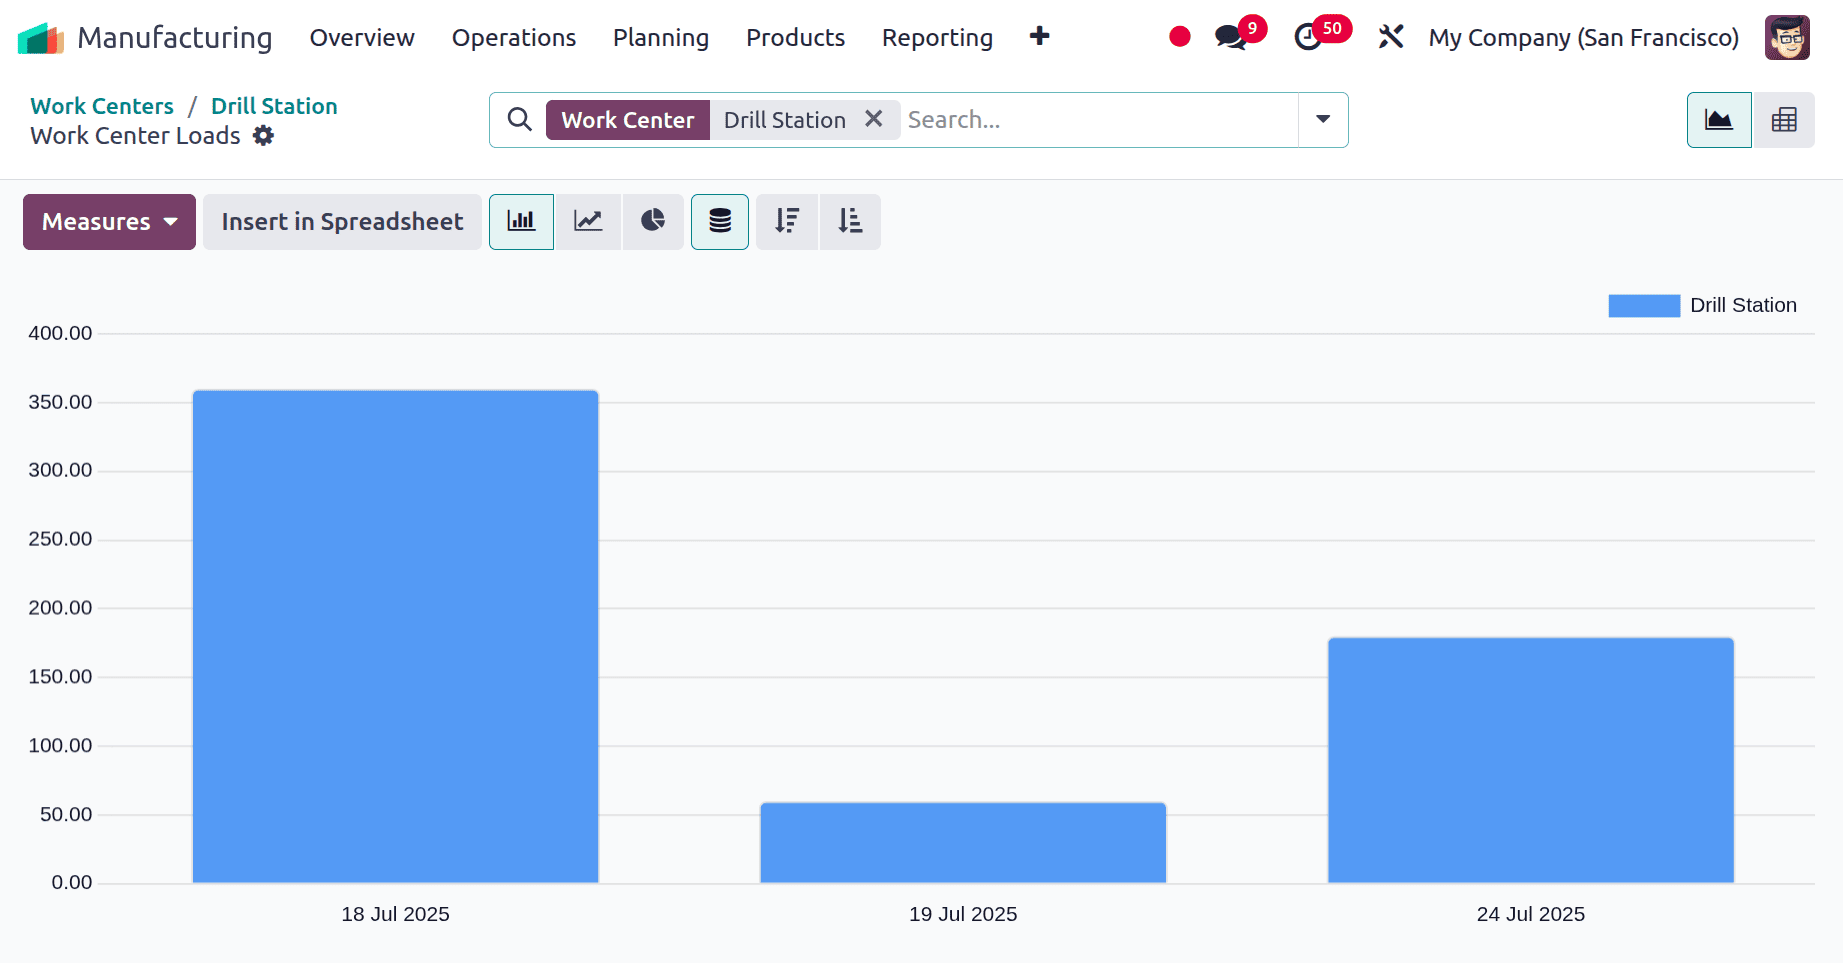
3. Load: Real-time work order information is provided by the Work Centre Loads in relation to the expected time ratio. Clicking the performance button will display a breakdown of the work orders related to this work center's performance.
 4. Performance: The "Performance" Smart Tab provides a Work Center Performance analysis based on Work Orders. After selecting the "Performance" smart tab, you can view the analysis reporting window, as illustrated below.
5. Maintenance: all the created maintenance requests for the work center view while clicking on the Maintenance smart tab, as shown below.
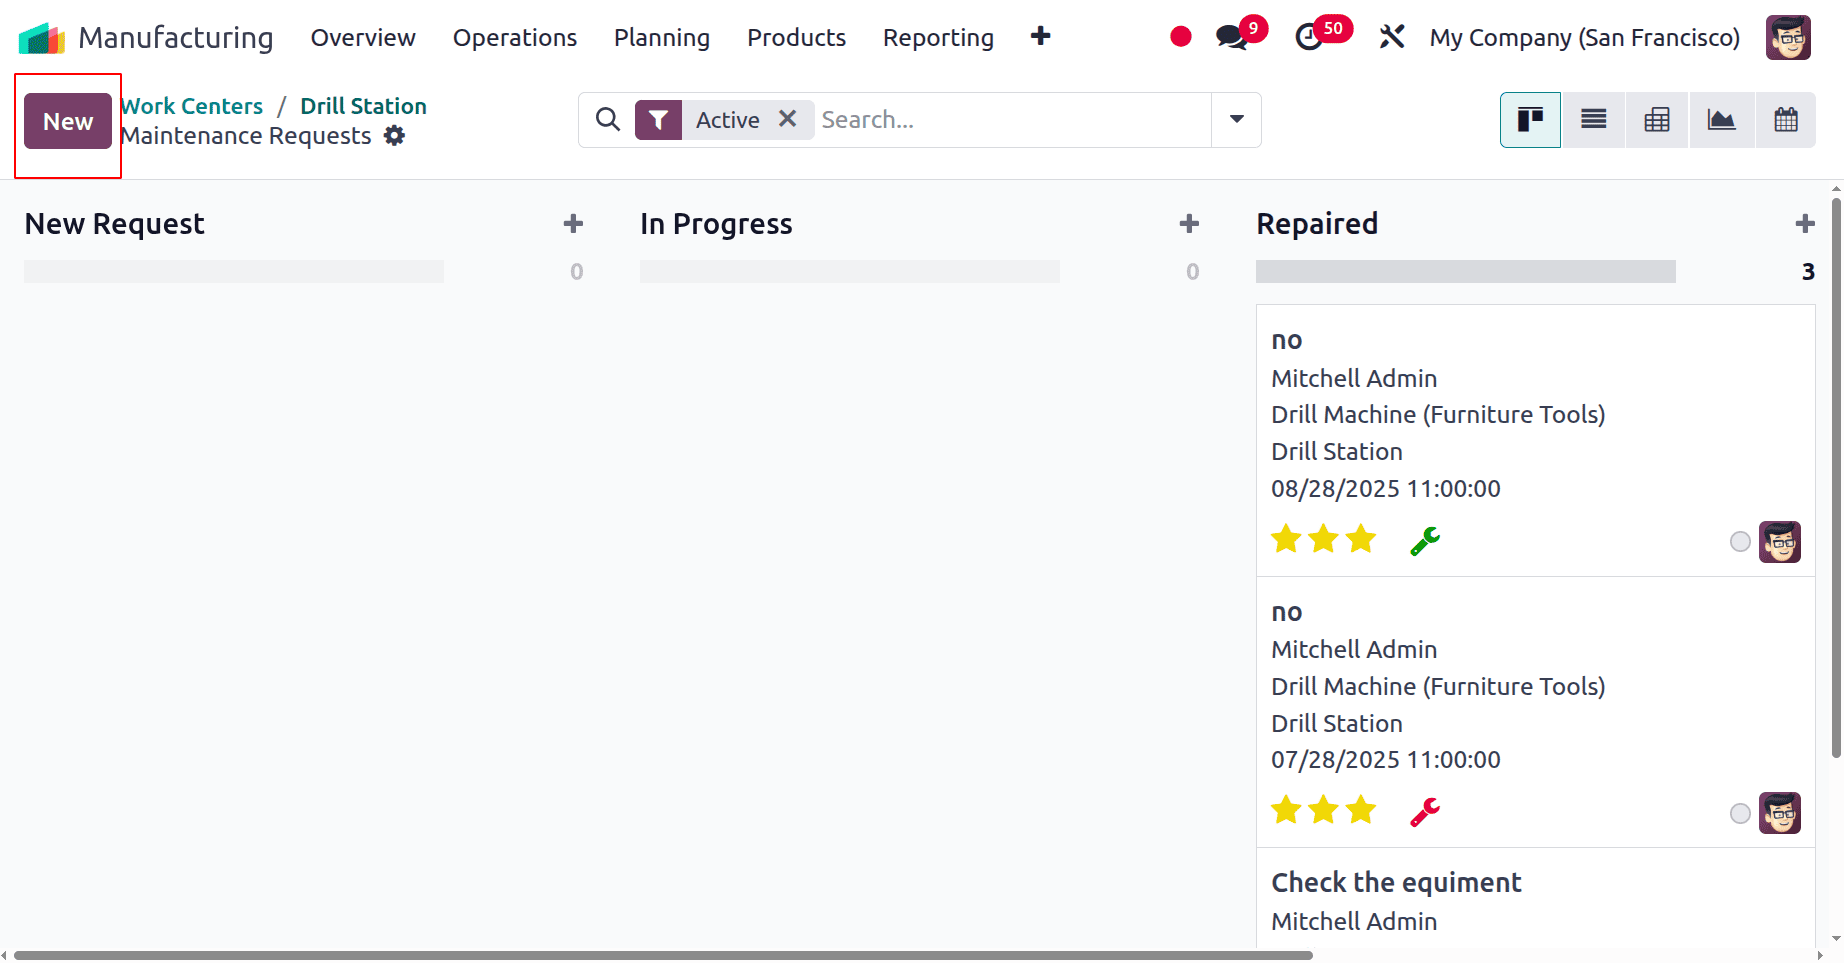
While clicking on the new button, users can add a new maintenance request for the work center.
The capabilities offered by the Work Center Configuration Process and the Smart button features offered by the Workcenter Configuration form have been covered in this blog. The Work Centre facility in the Odoo16 production Module aids in the production process and boosts corporate efficiency by ensuring optimal resource utilization and meticulously planned activities.
To read more about How to Manage Production of Variants in Different Workcenter in Odoo 17, refer to our blog How to Manage Production of Variants in Different Workcenter in Odoo 17.