A consumer can review a single account using an analytic account method, and it allows an individual to filter an account when it is not published in a journal entry. The analytical account did not develop a journal entry if we made an invoice. It assists users in seeing real purchase charge and holding the main account untouched. Analytic tag helps for analytic distribution by separating income and expenditures. It provides additional aspects of an analytical account that are beneficial for users. Odoo 15 Accounting module enables you to quickly generate new analytic tags for your accounts.
This blog provides you to develop analytic tags using Odoo 15 Accounting module.
With the Odoo 15 Accounting module, users can manage ledgers, journals, bills, payments, and more. We can quickly maintain the analytic accounting of the company, including various data such as default groups, accounts, and tags. The analytic tag function is helpful for Odoo users and ensures to make report-related functions. Let’s see detailed information about analytic tags in Odoo 15.
Analytic Tags
For managing analytic tags in Odoo 15, the user needs to activate the function from Odoo Settings. Choose the Settings menu in the Configuration tab of the Odoo Accounting module. As specified in the screenshot below, you can see the Analytic Tags field below the Analytics section.
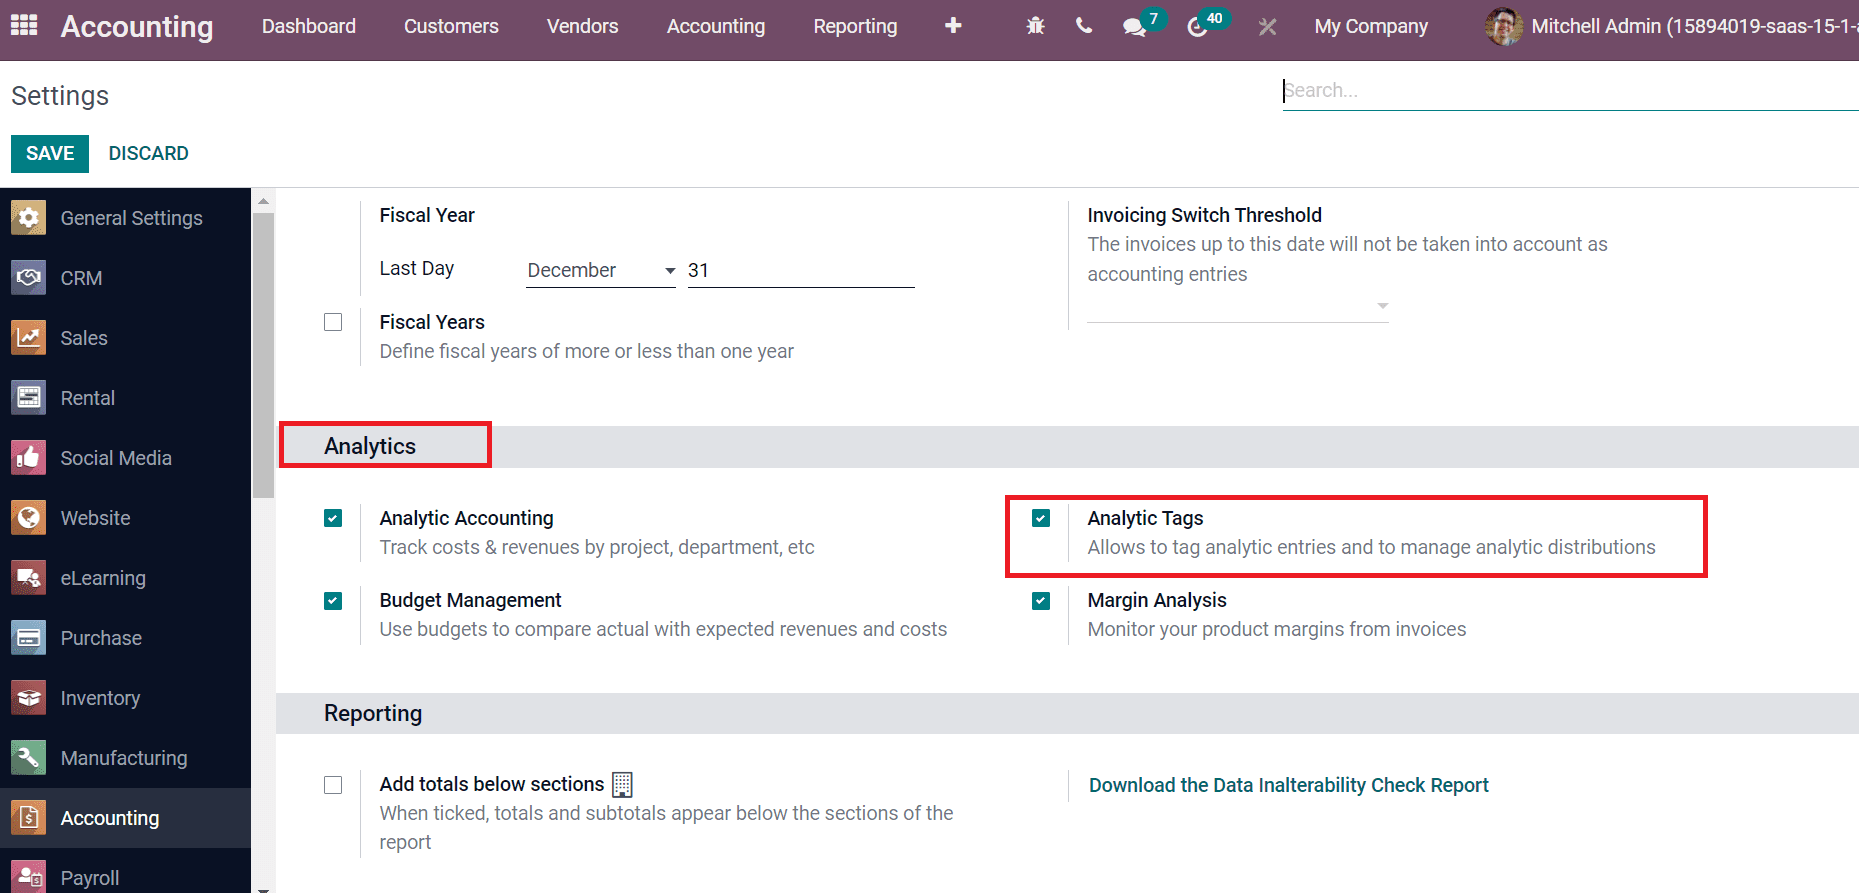
Activate the Analytic Tag field that ensures analytic distribution and entries in Odoo 15. Choose the SAVE icon after enabling the Analytic Tags option. After saving the function, the analytic tag menu is viewable inside the Analytic accounting section of the Configuration feature, as specified in the screenshot below.
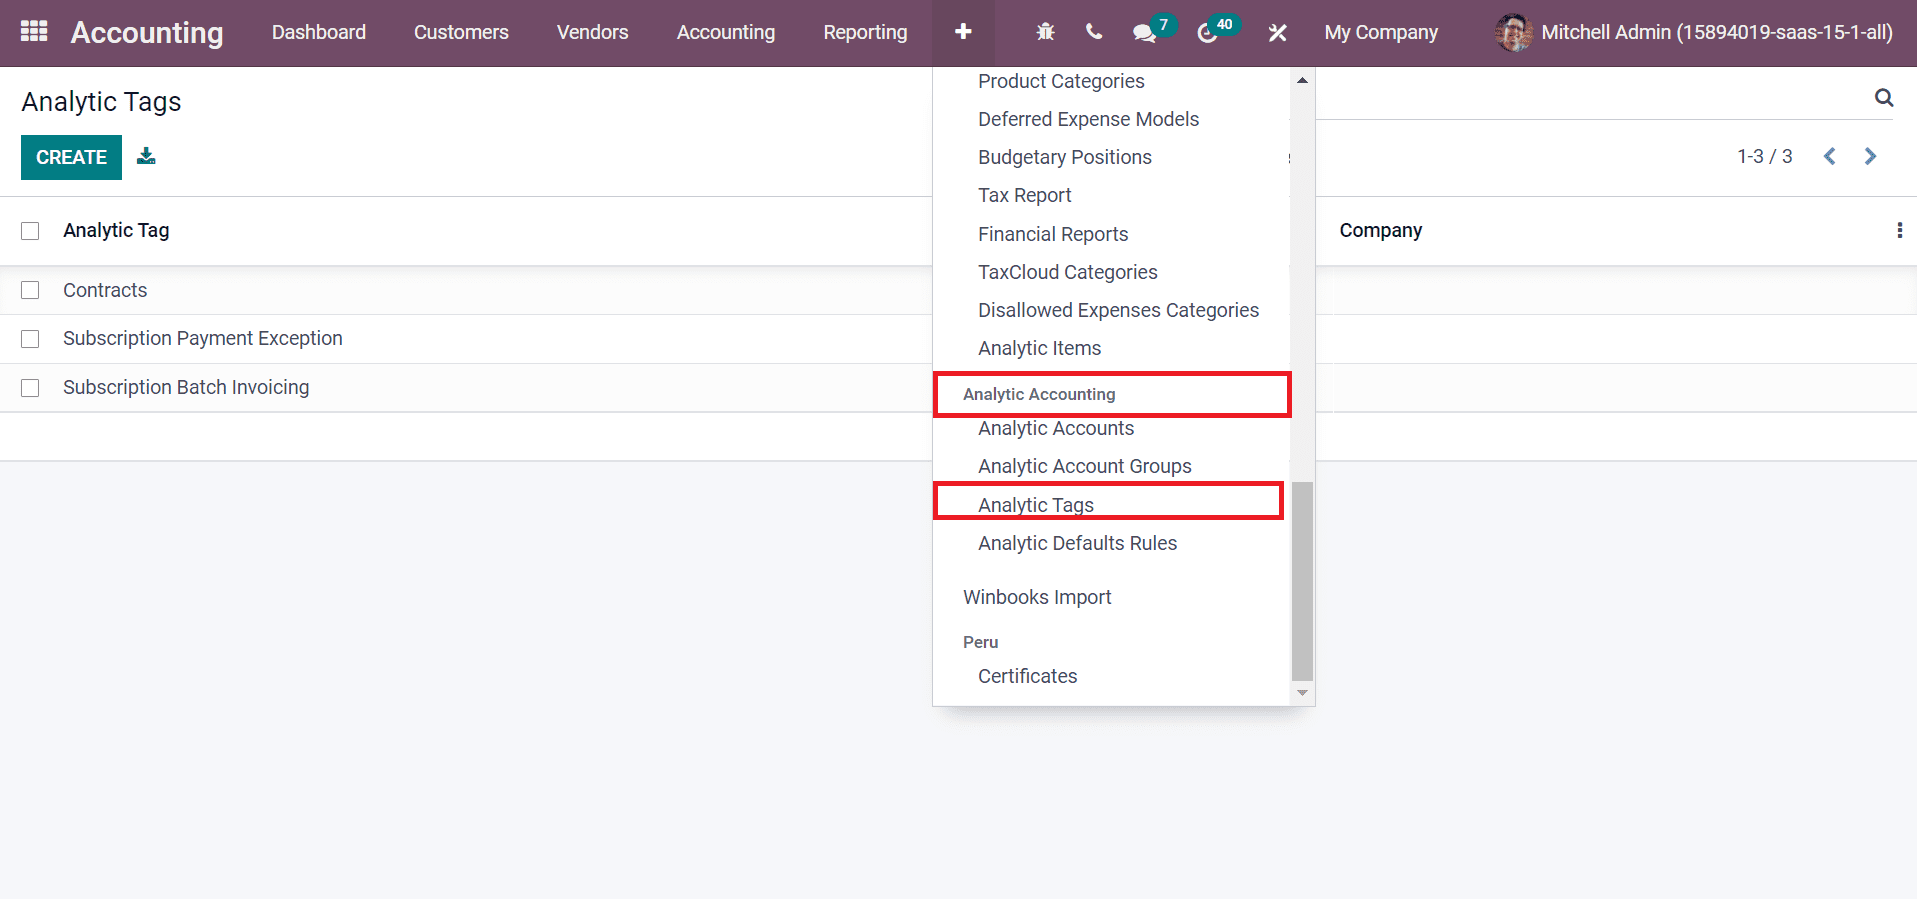
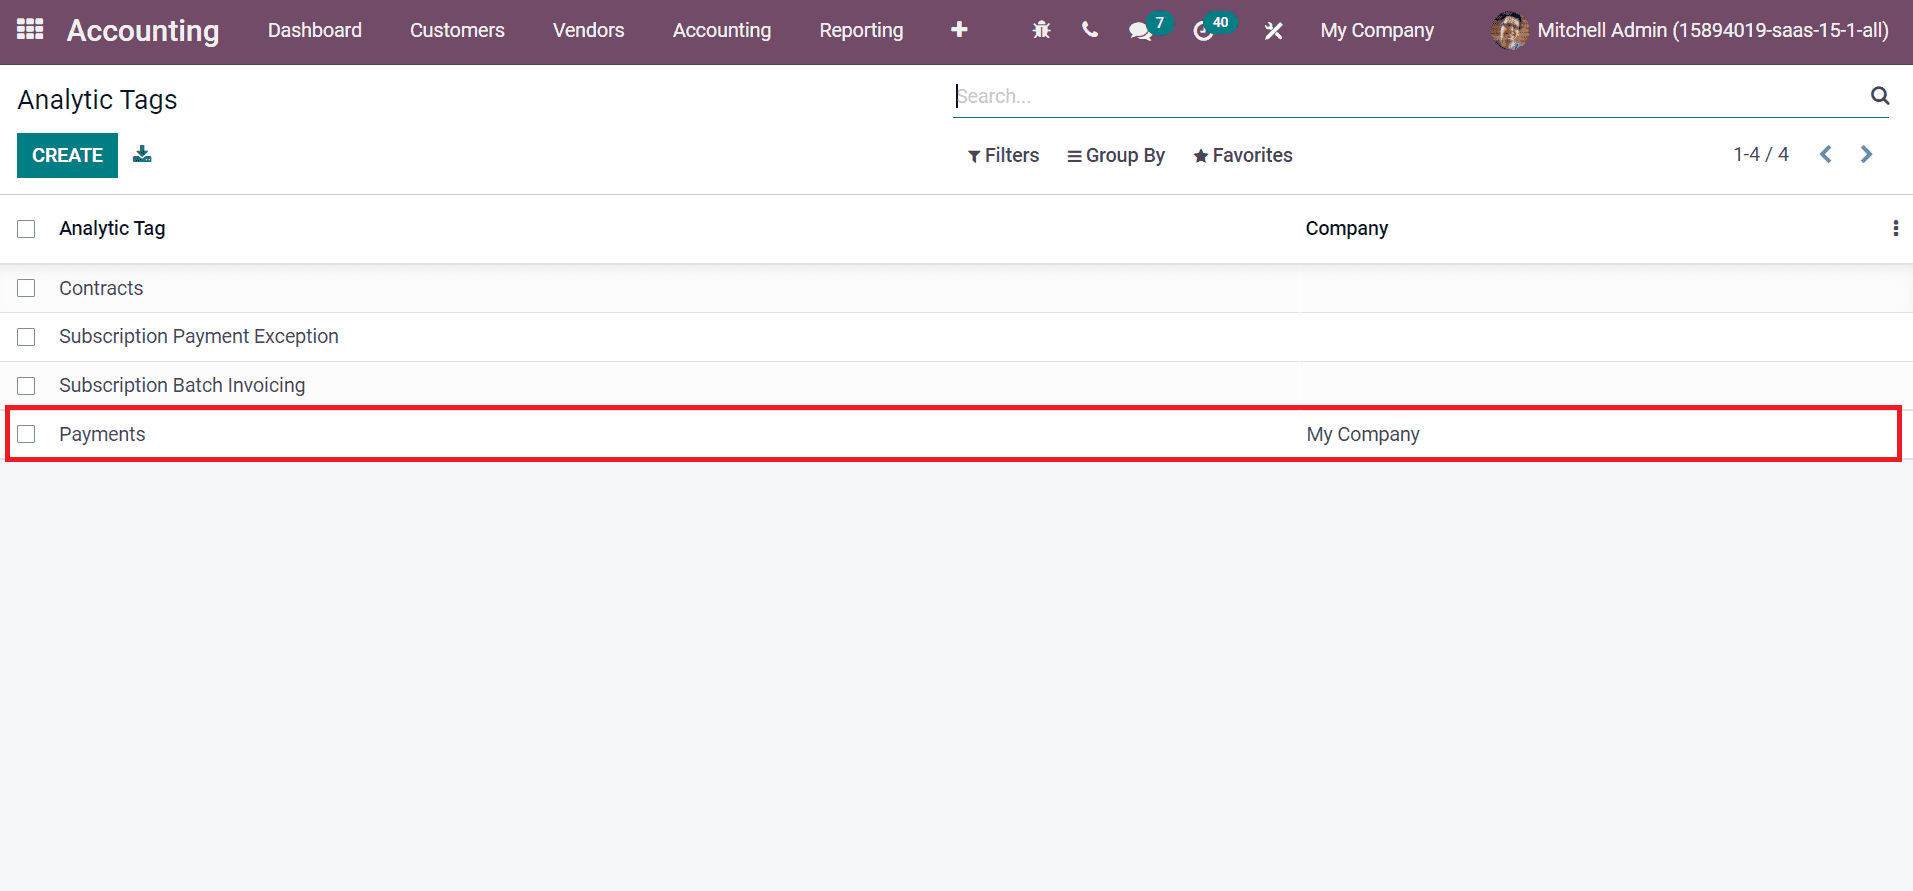
We can now view how to create an analytic tag within the Odoo 15 Accounting module. For that, choose Analytic Tags inside the Configuration tab. All created analytic tags with company details are specified in the Analytic Tags window, as depicted in the screenshot below.

By clicking on CREATE icon, you can constitute a new Analytic Tag. Let’s create an Analytic Tag ‘Payments’ in the next window. Entering payments in the Analytic Tag field and enabling the Analytic Distribution option ensures adding your account details, as depicted in the screenshot below.
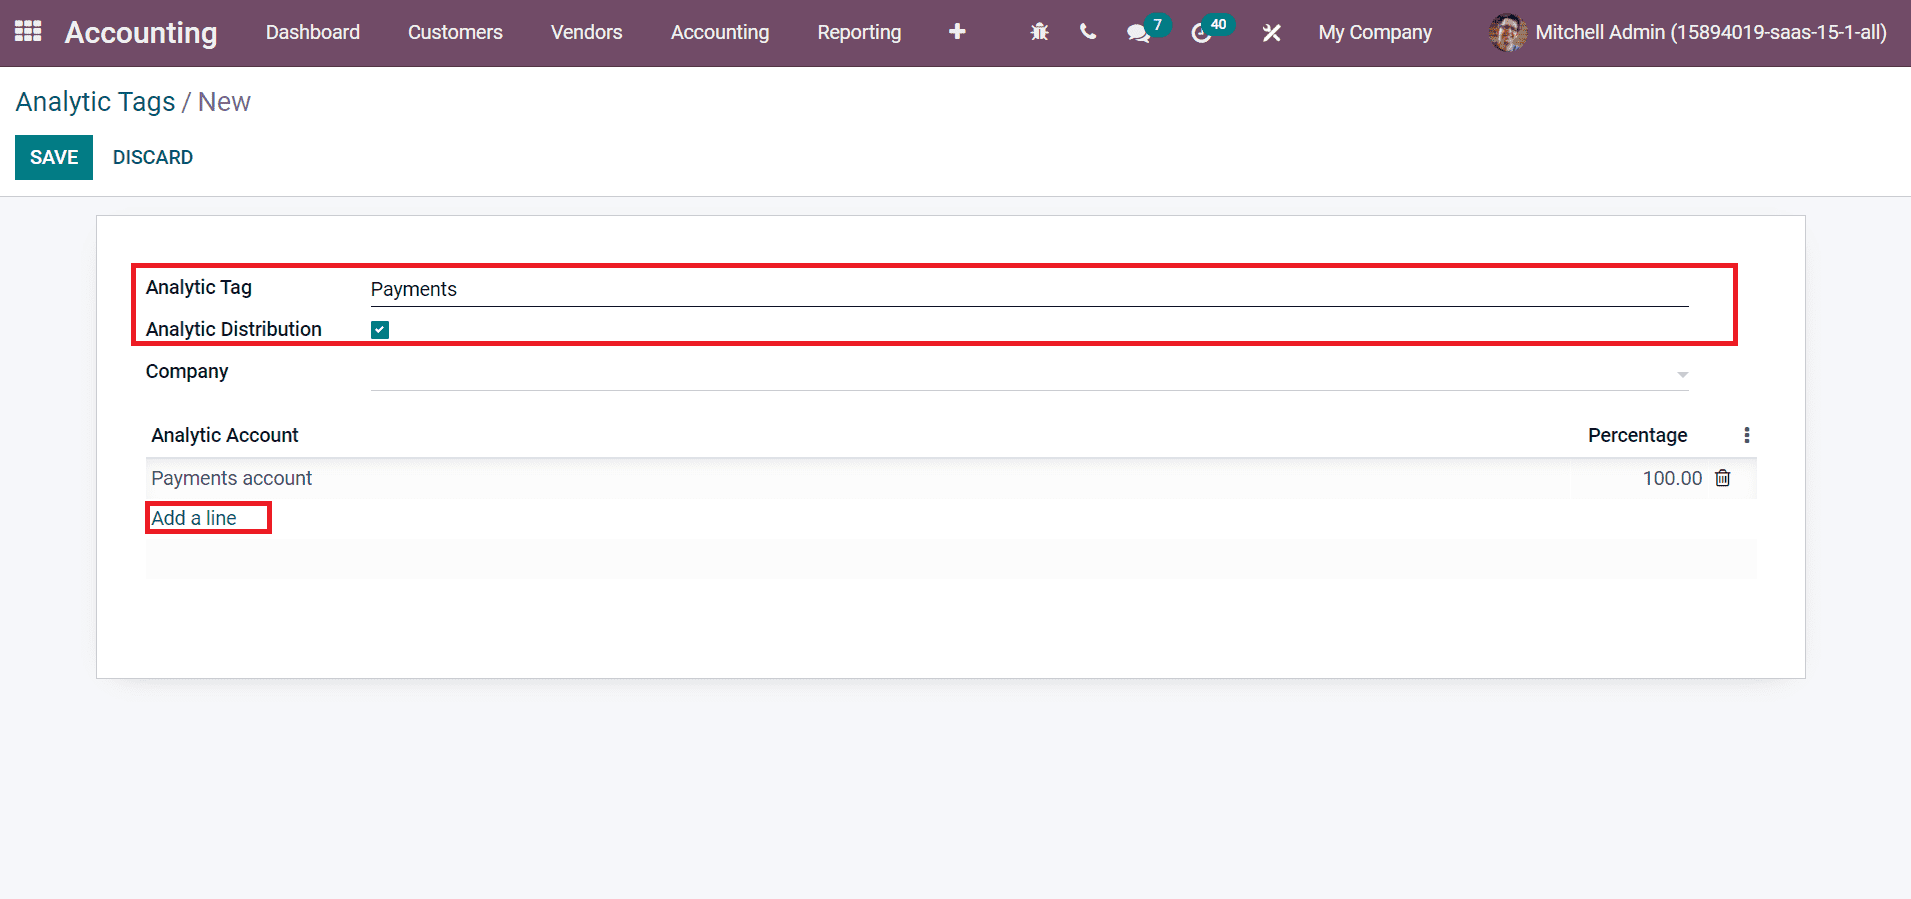
Choose the Add a line option to enter your analytic account for a specific tag. We can also see the percentage rate at the end. Later, pick up your company and click on the SAVE icon, as displayed in the screenshot below.
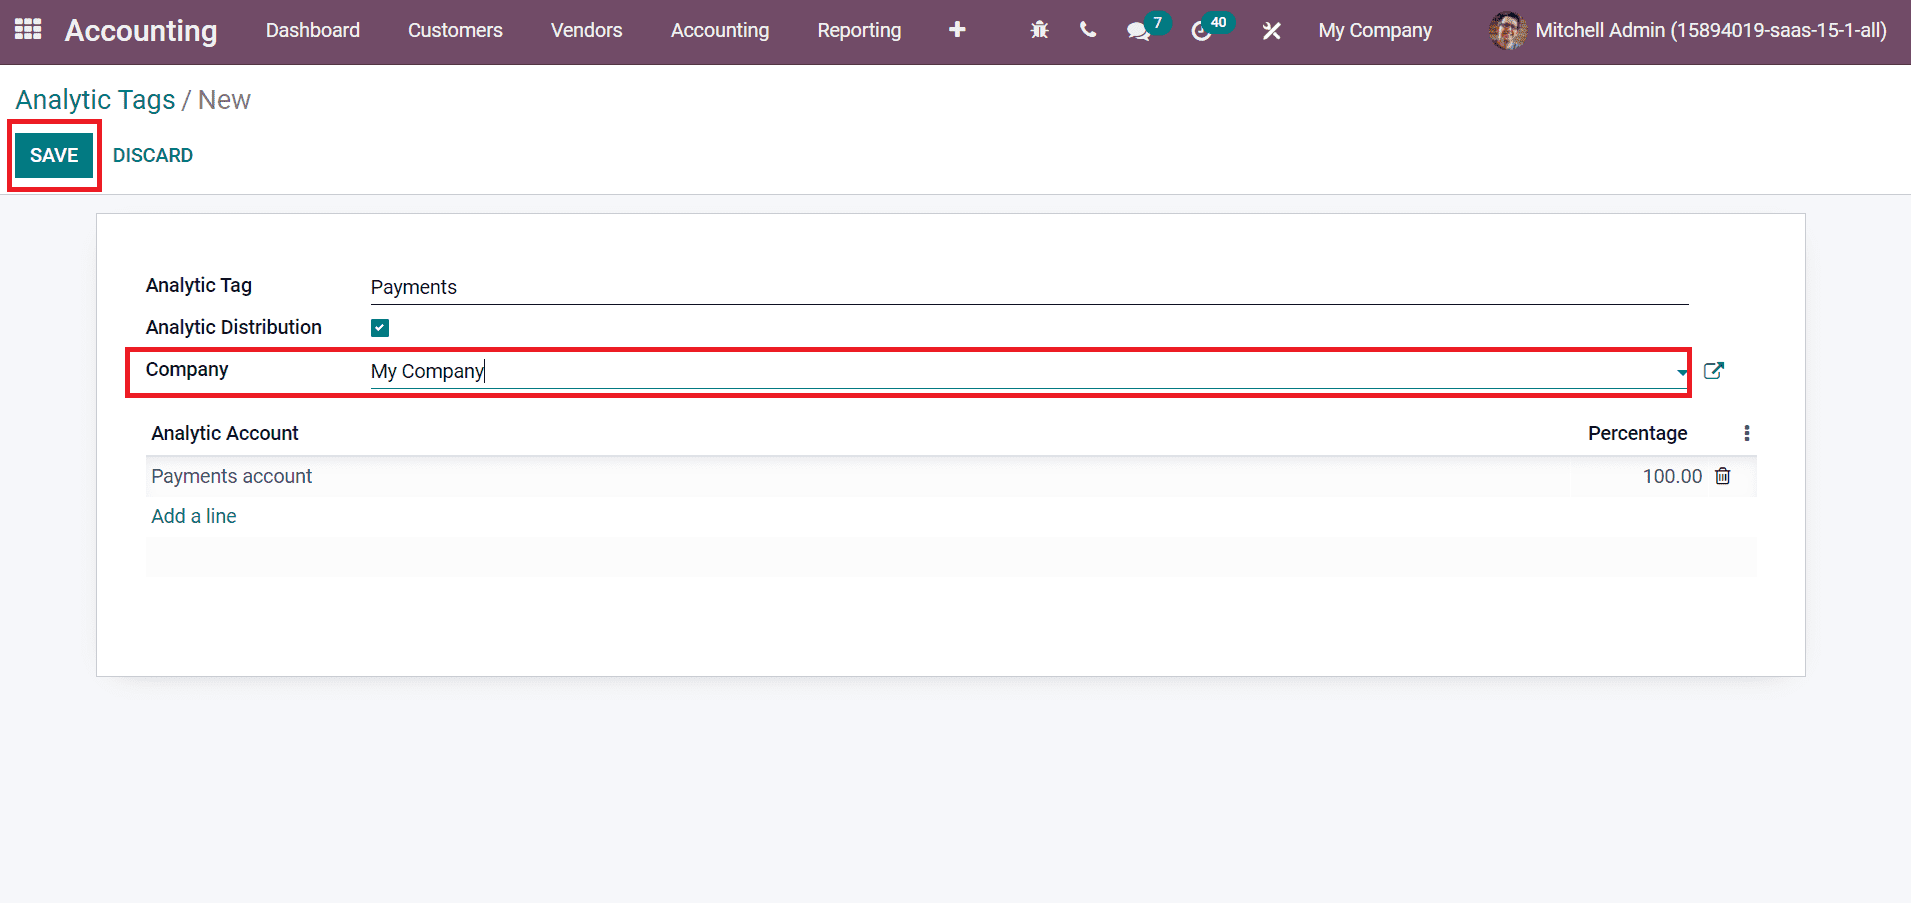
Hence, we developed one analytic account under the payments analytic tag. As mentioned in the screenshot below, we can see the created tag in the Analytic Tag window.
To develop a Bill for a Specific Analytic Tag
Now, let’s view how the analytic tags work. First, we need to create a bill from the Vendors tab of the Odoo 15 Accounting module. In the Bills window, all developed bills with details such as Bill Date, Vendor, status, Number, etc., are visible here, as portrayed in the screenshot below.
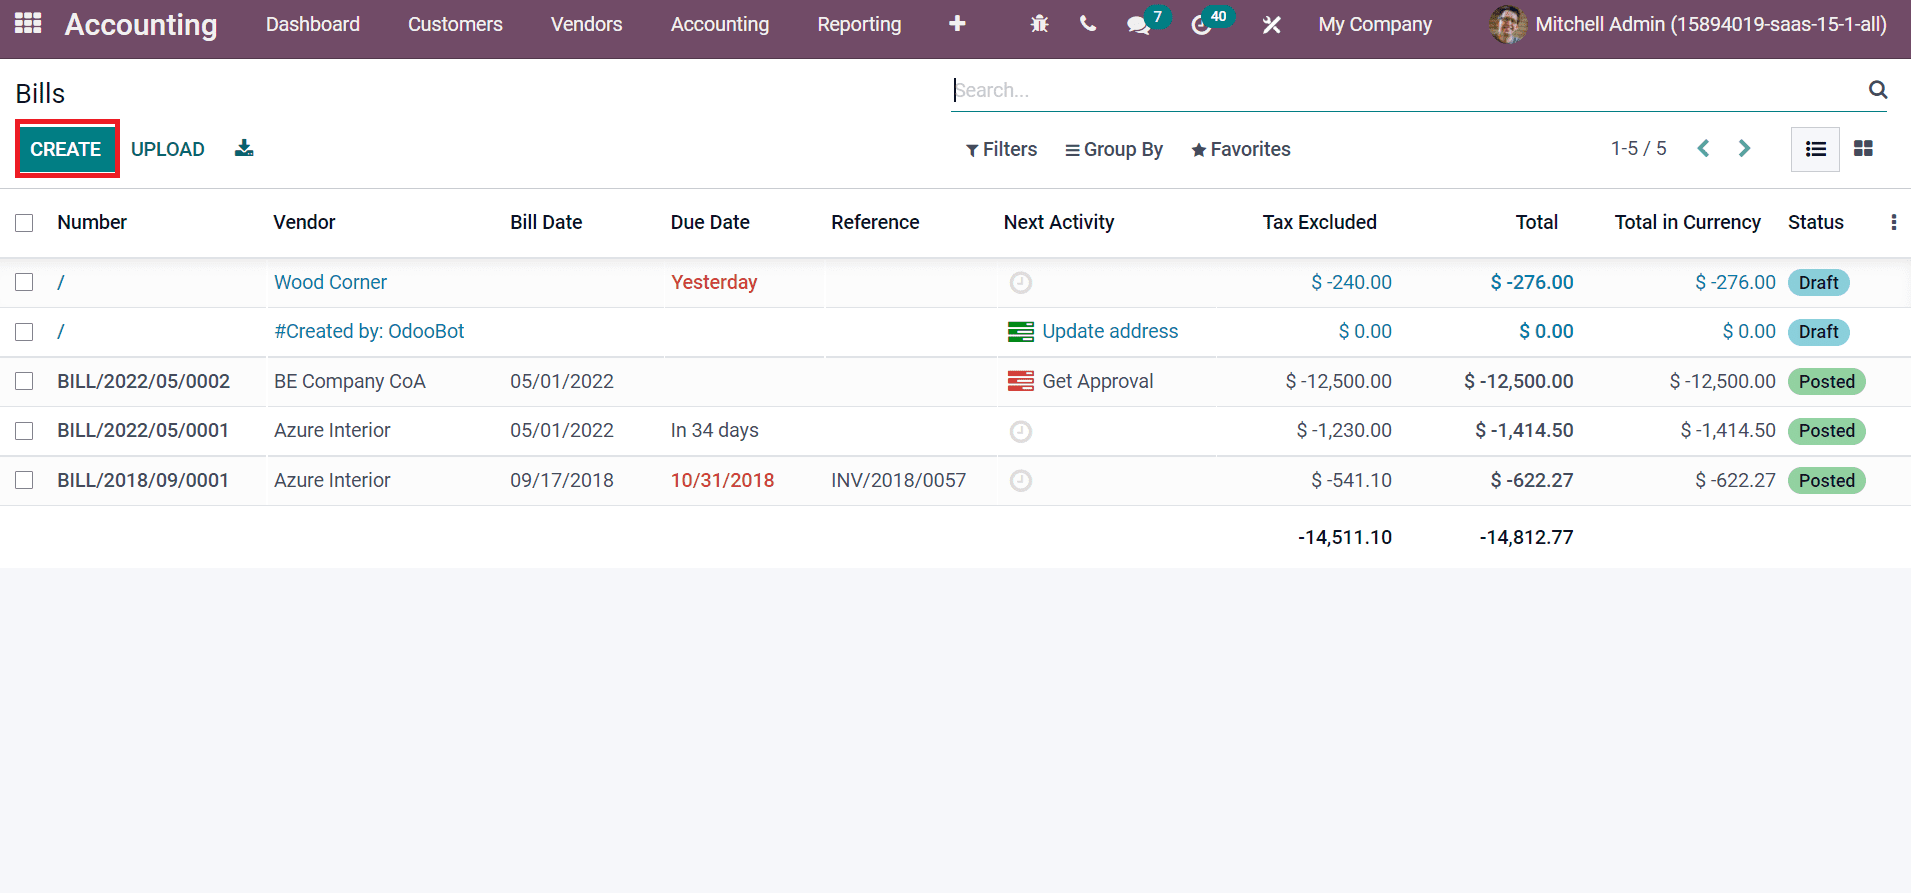
Select the CREATE icon to formulate a new Bill. In the new window, choose your Vendor and Payment Reference for journals. You can select a bank account number for the invoice inside the Recipient Bank option. Moreover, we can also pick up an old bill or purchase order from the Auto-Complete option, as illustrated in the screenshot below.
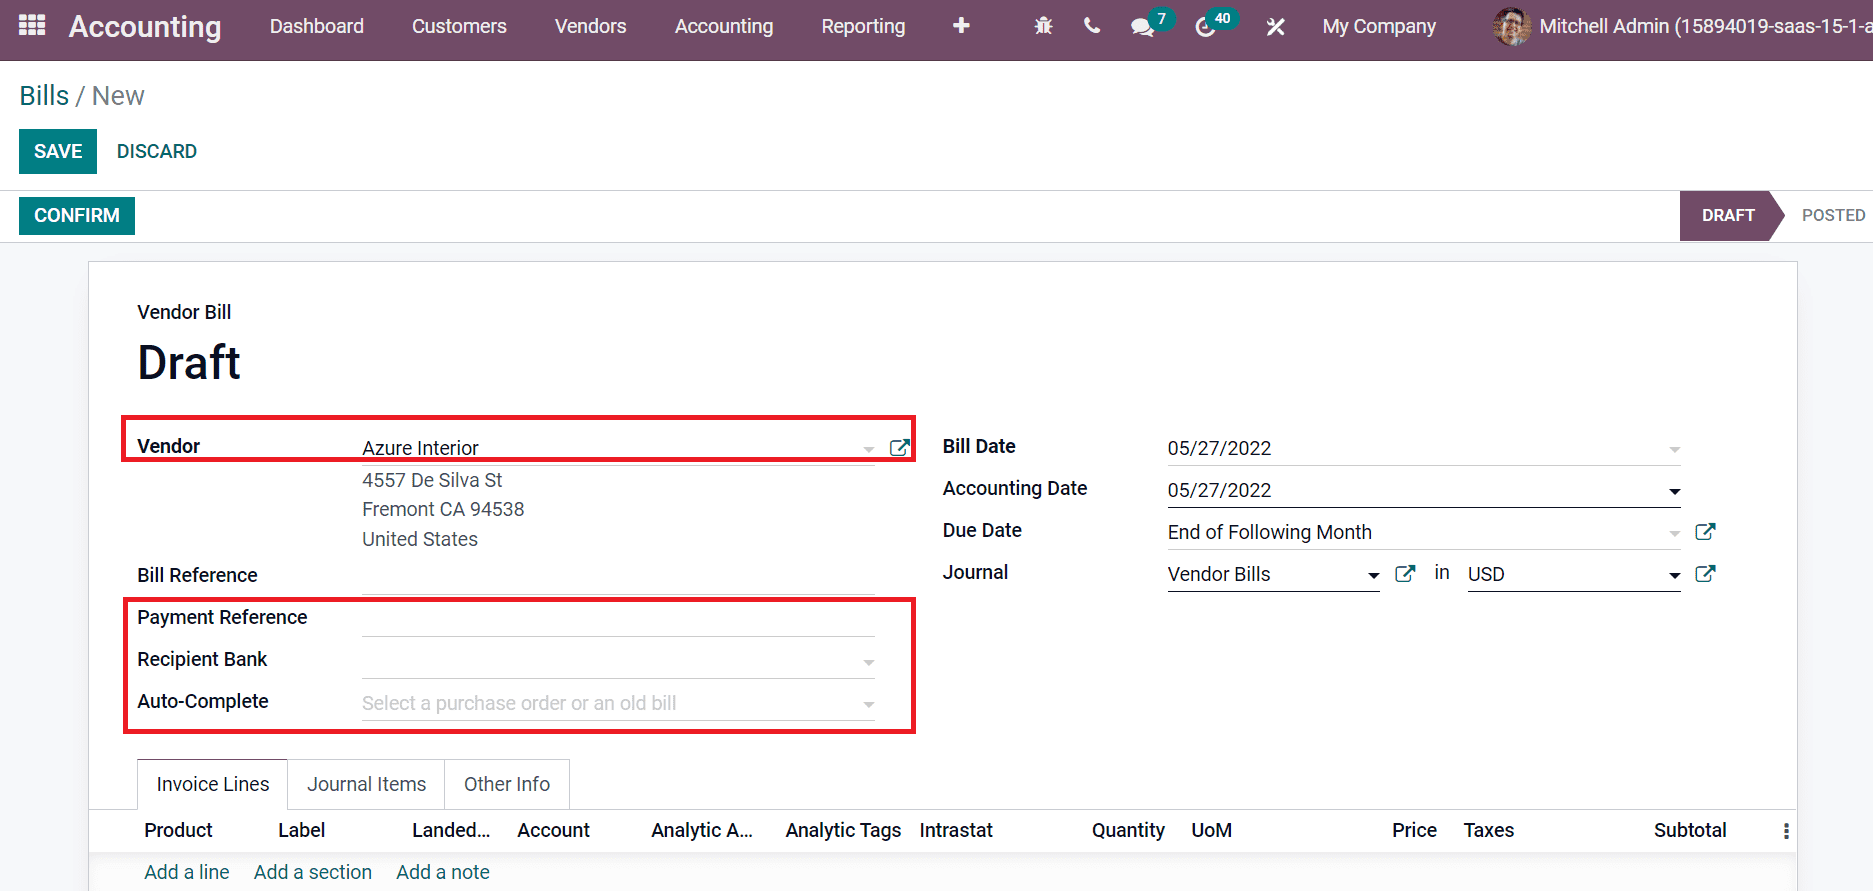
Users can add a Bill Date, and the Due Date is the last date of the bill. Later, choose your Journal in the respective currency as mentioned in the screenshot below.
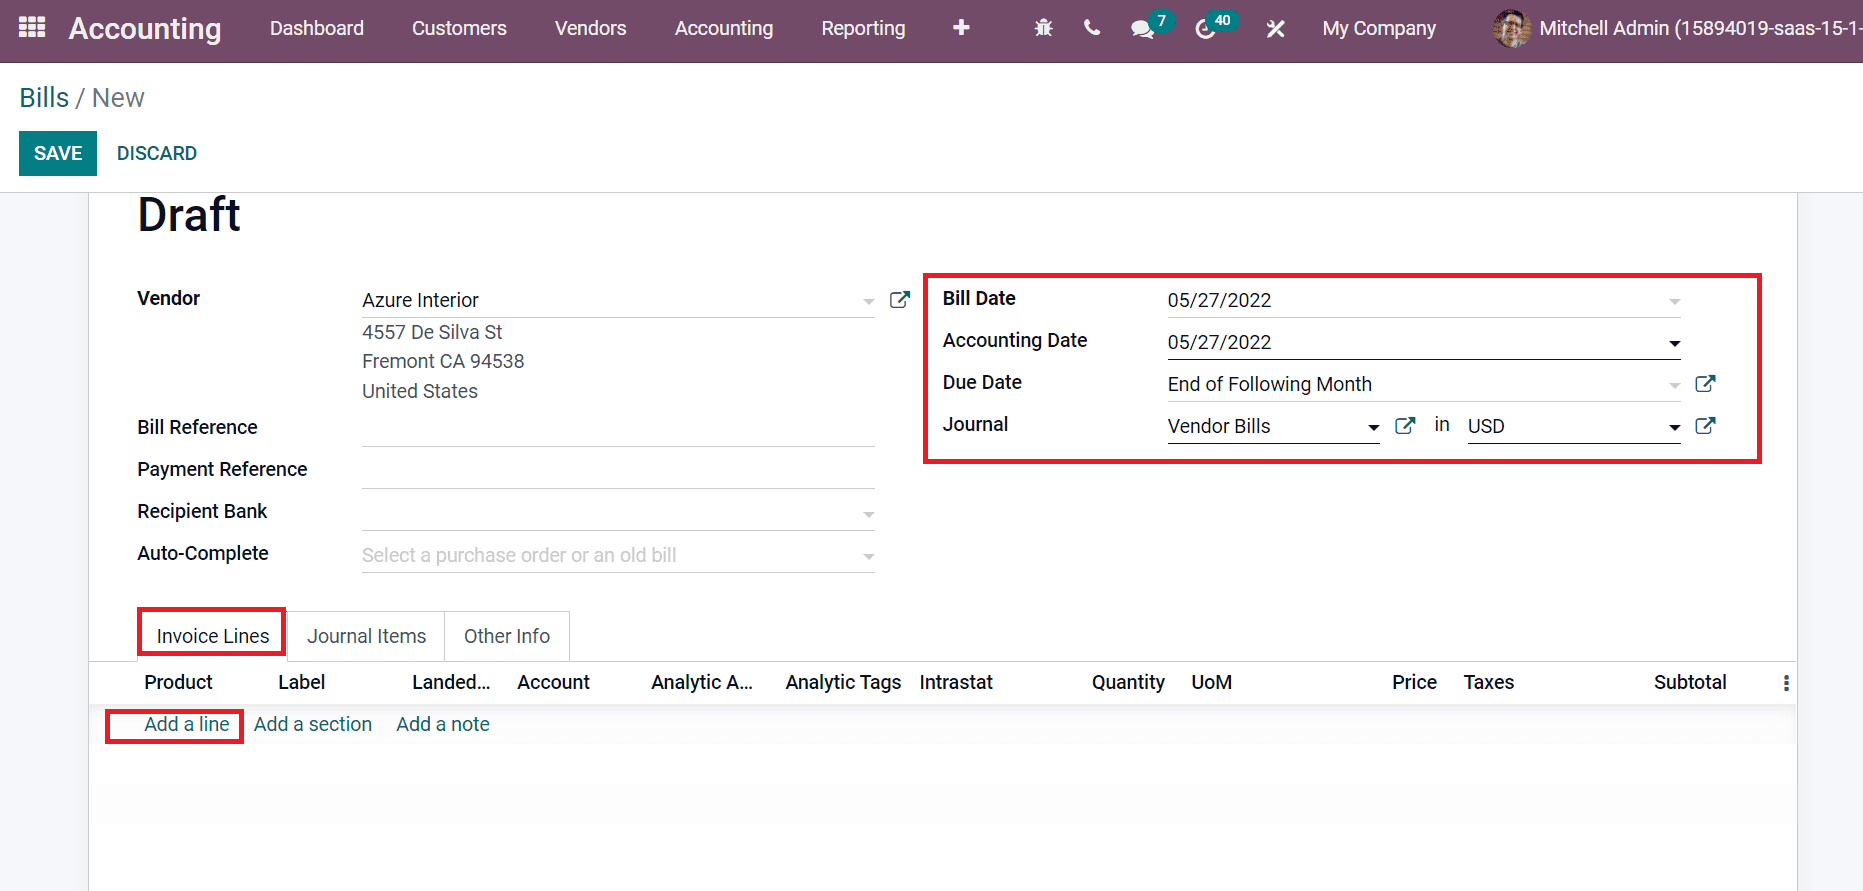
You can apply product details by selecting Add a line option from the Invoice Lines tab. After clicking on Add a line option, a new space appears before you. Choose your Payments tag inside the Analytic Tags title as portrayed in the screenshot below.
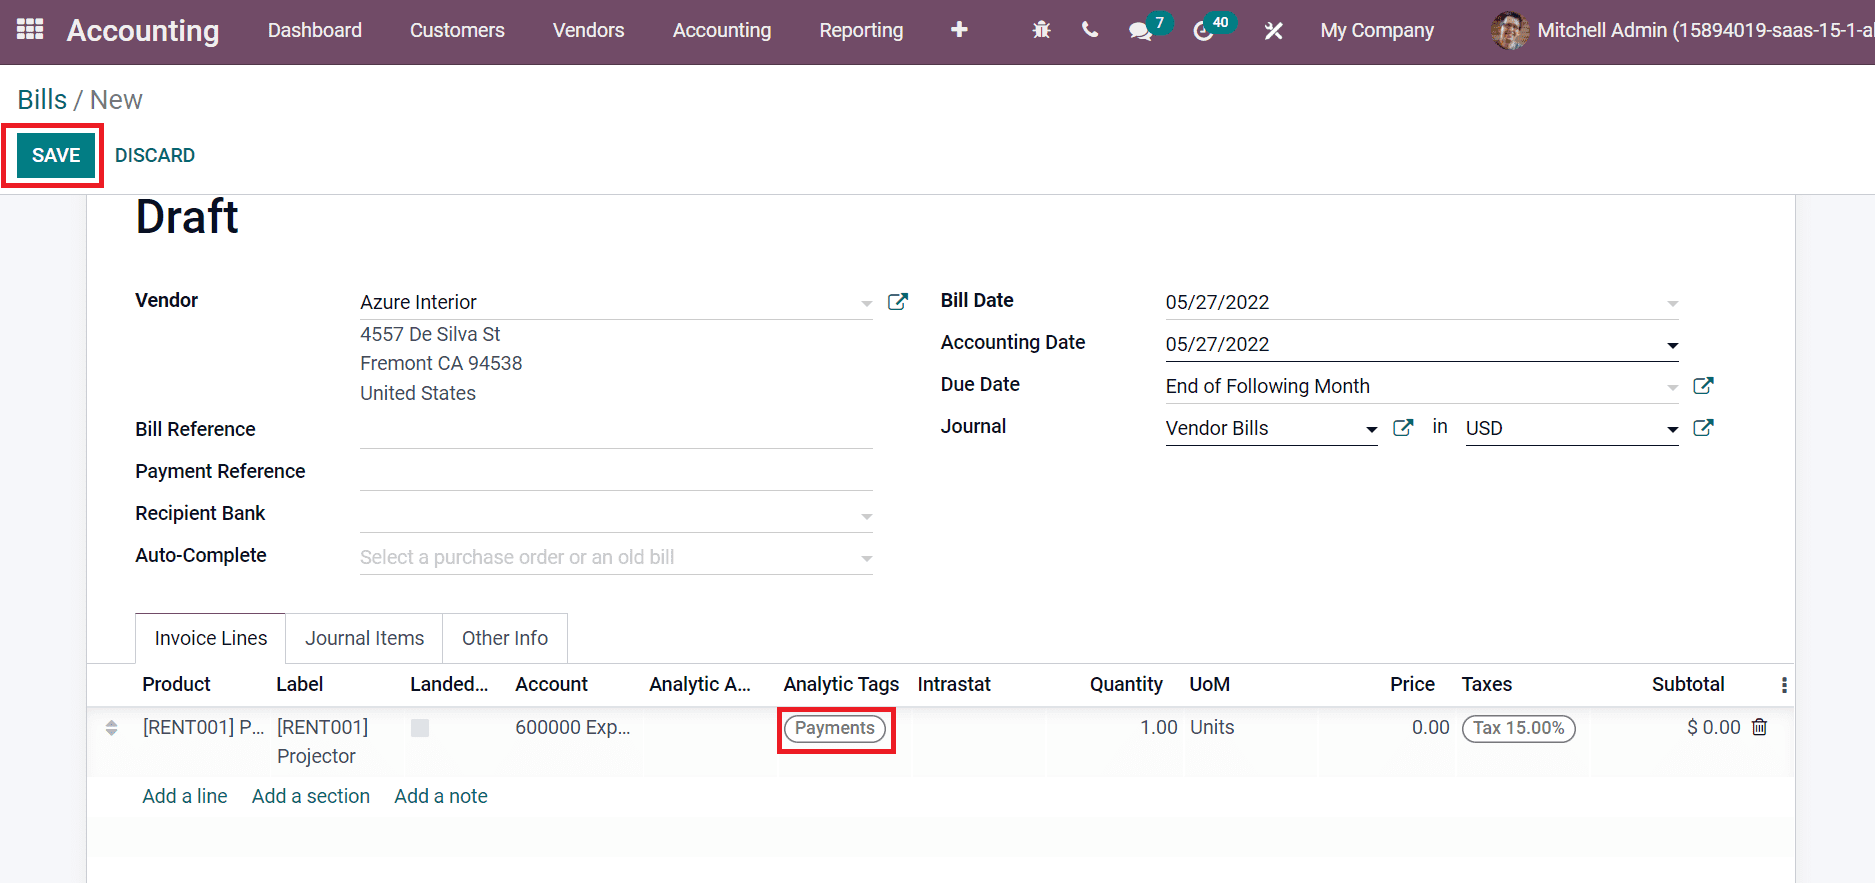
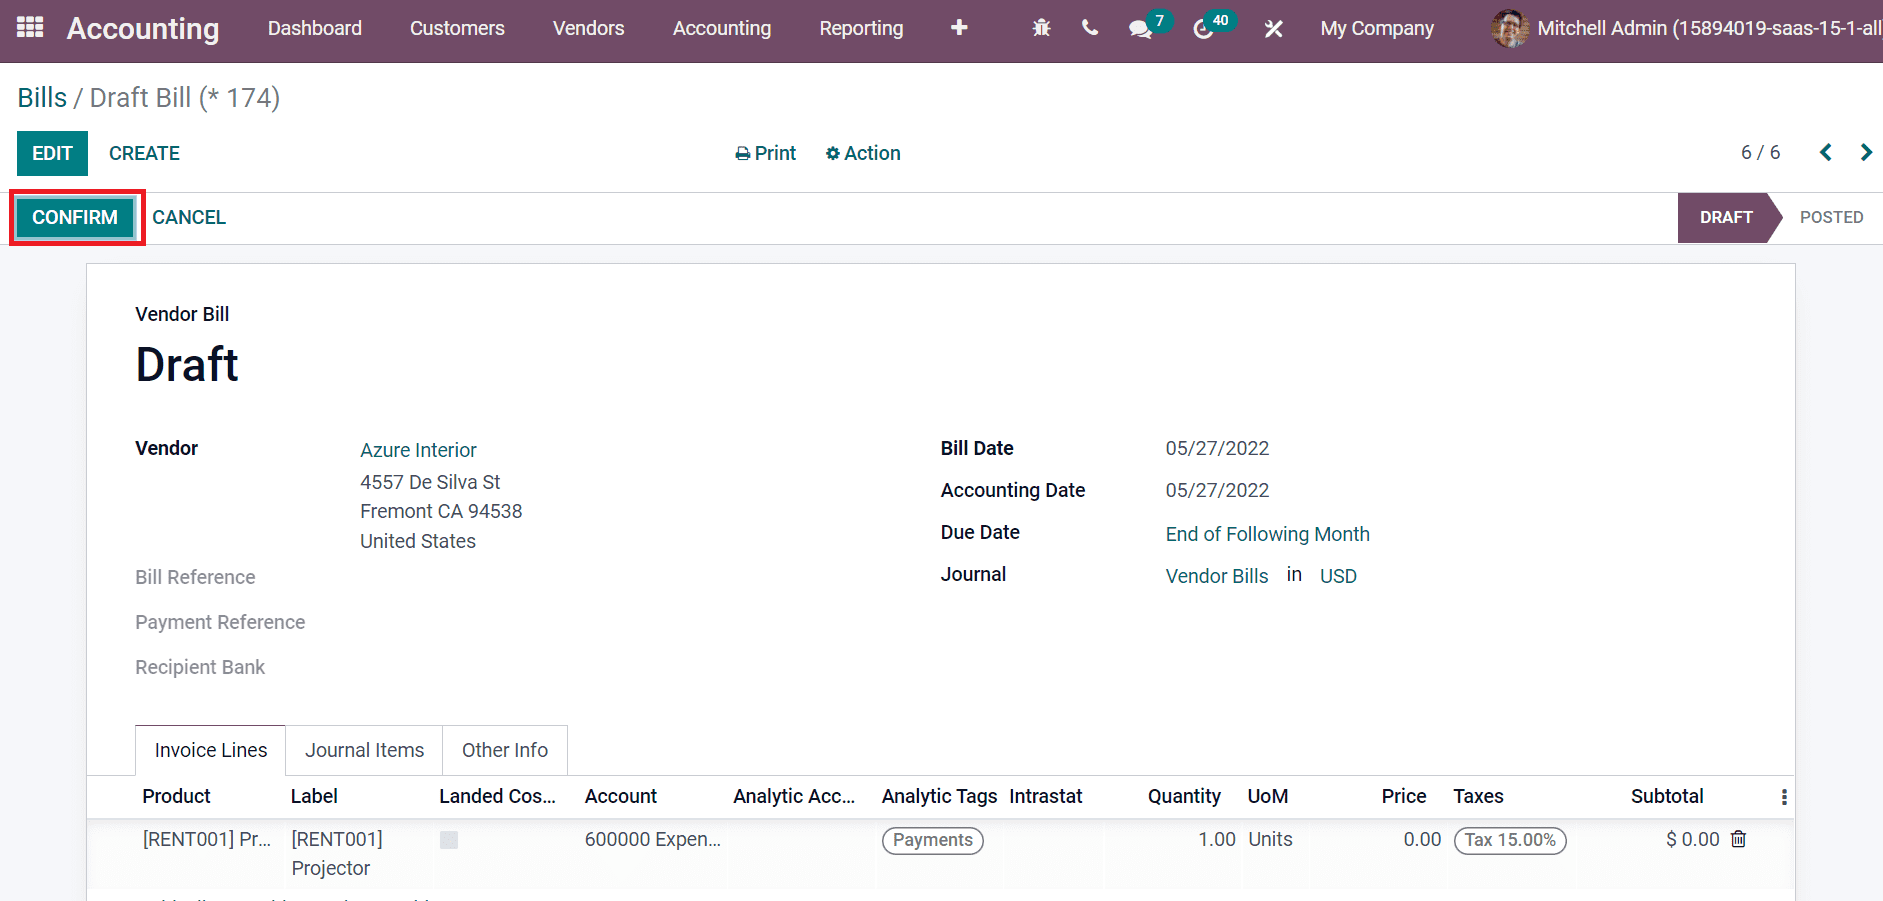
Select the SAVE icon to formulate your bill. Later, click on CONFIRM icon to verify your bill, as denoted in the screenshot below.
Now, we can move to the management section once created the bill. Select Analytic items from the Management section of the Configuration tab. In the List view, you can access various analytic items list from the Analytic items window, as denoted in the screenshot below.
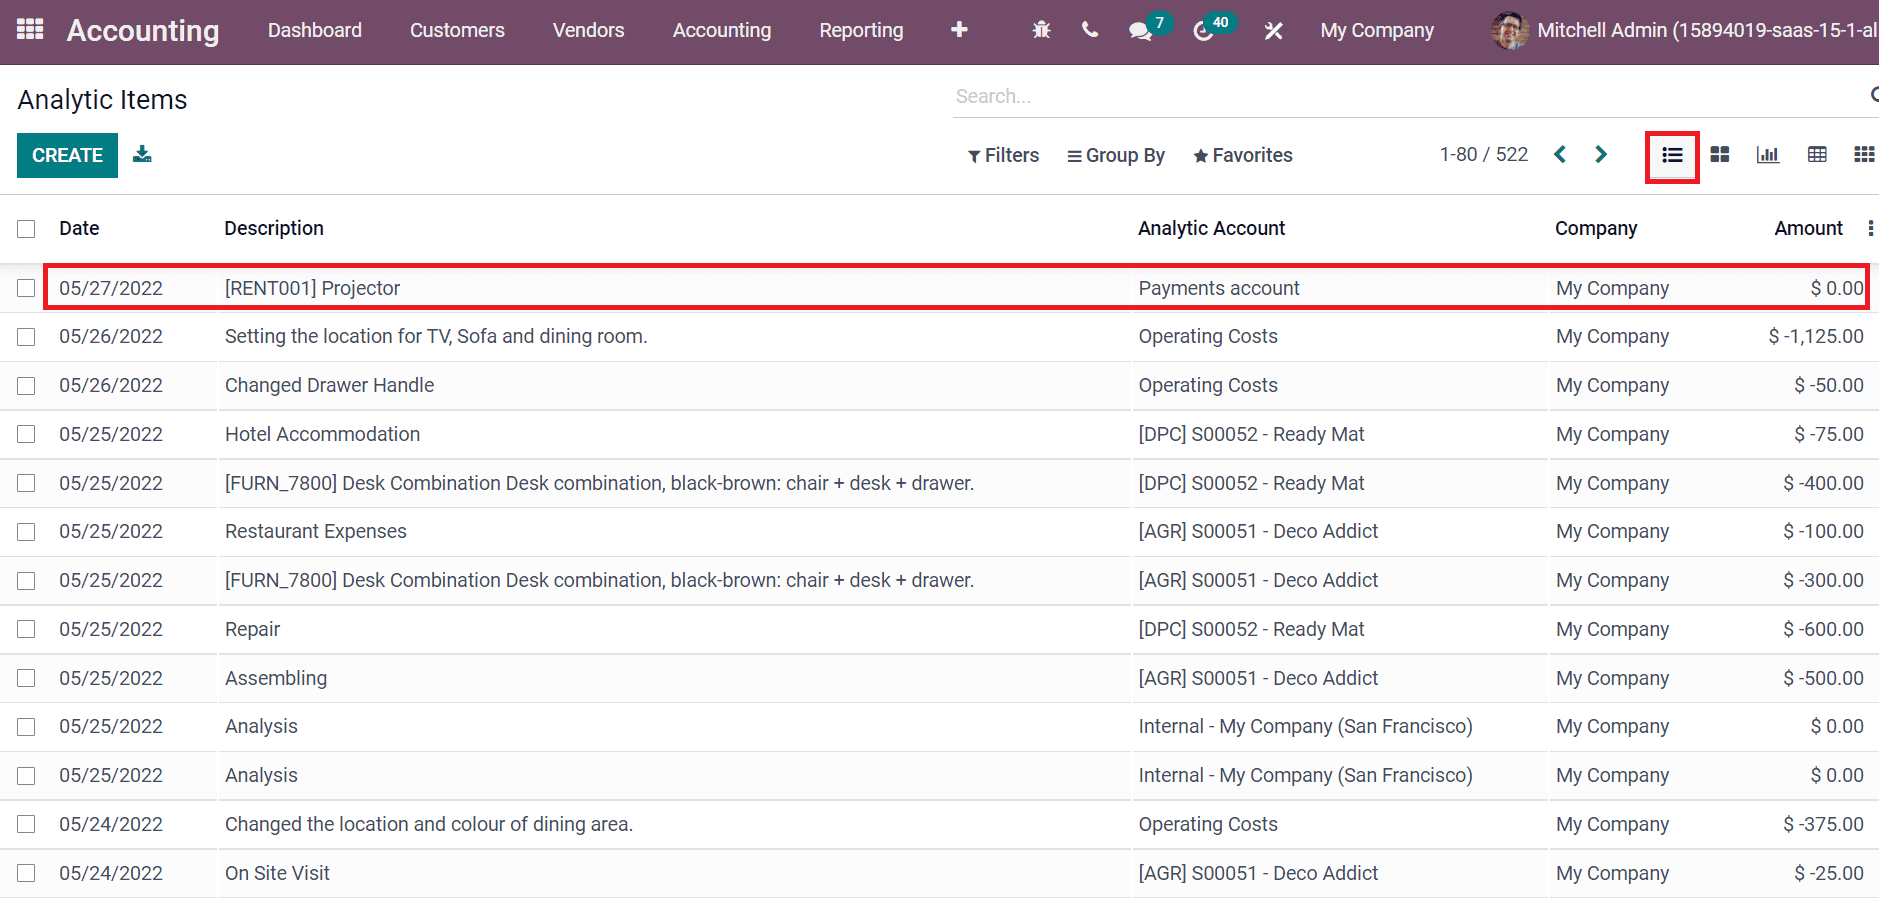
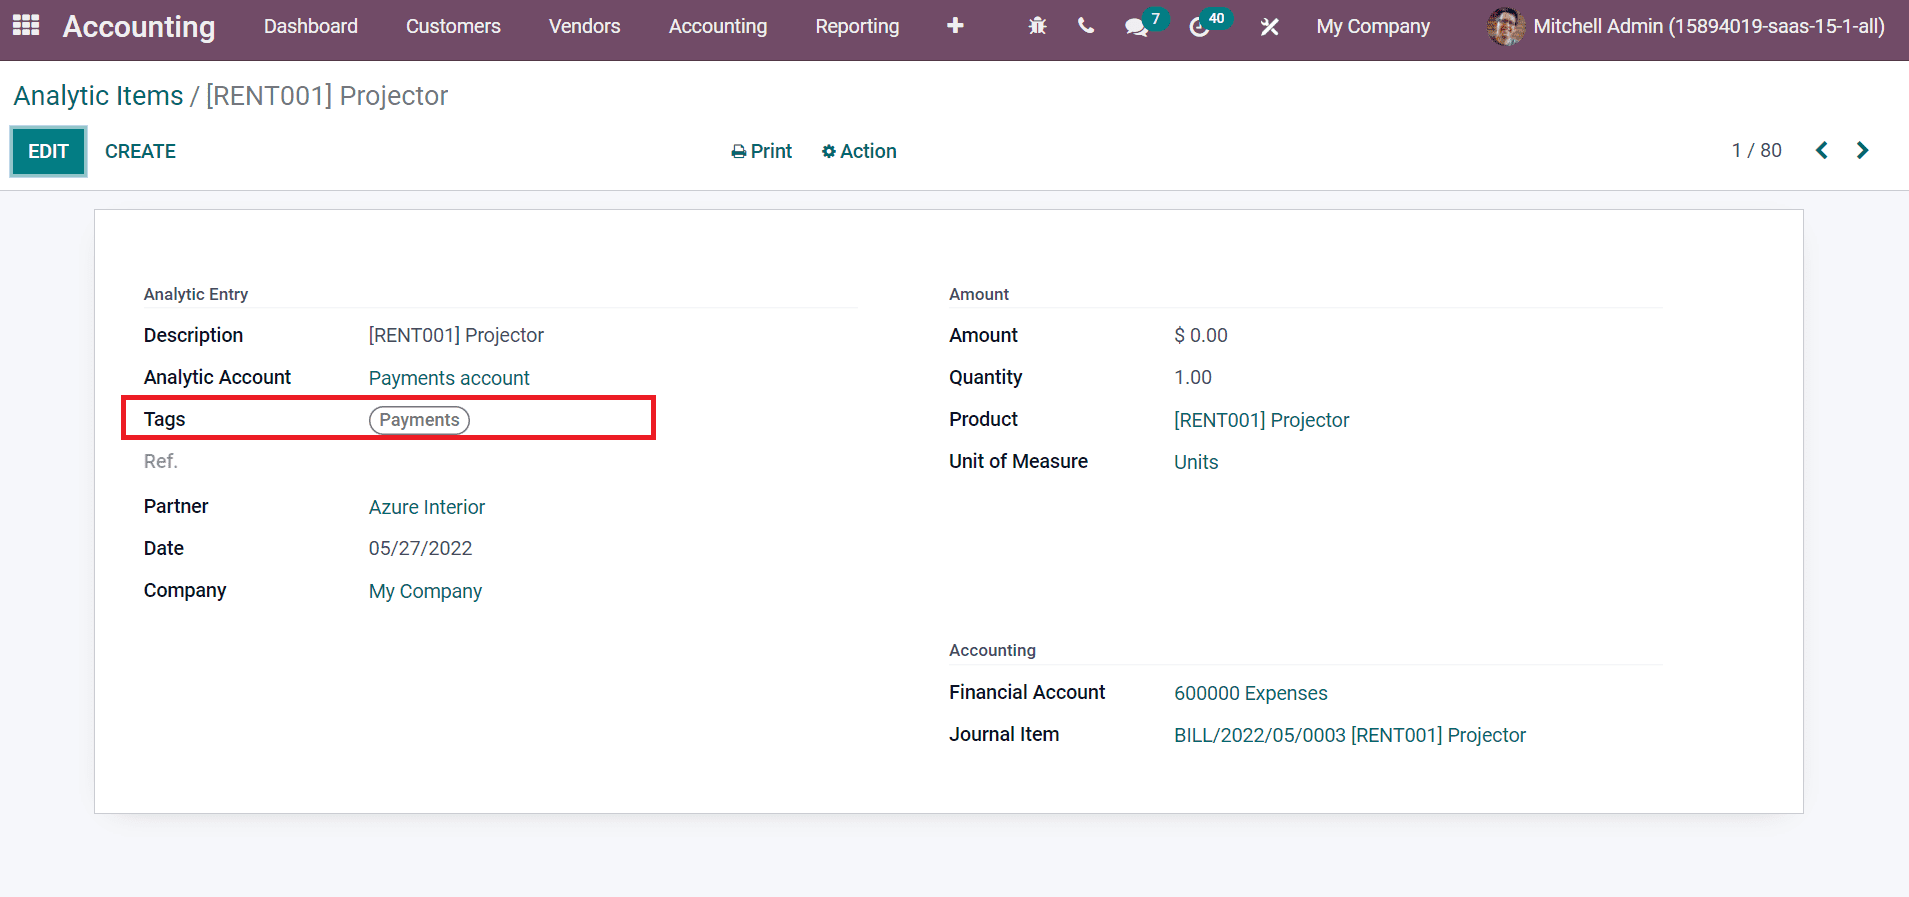
Users can see the product details we gave in a particular analytic account inside the Analytic Items window, as depicted in the screenshot above. Clicking on the analytic item Projector, you can see the Tags option inside it, as in the screenshot below.
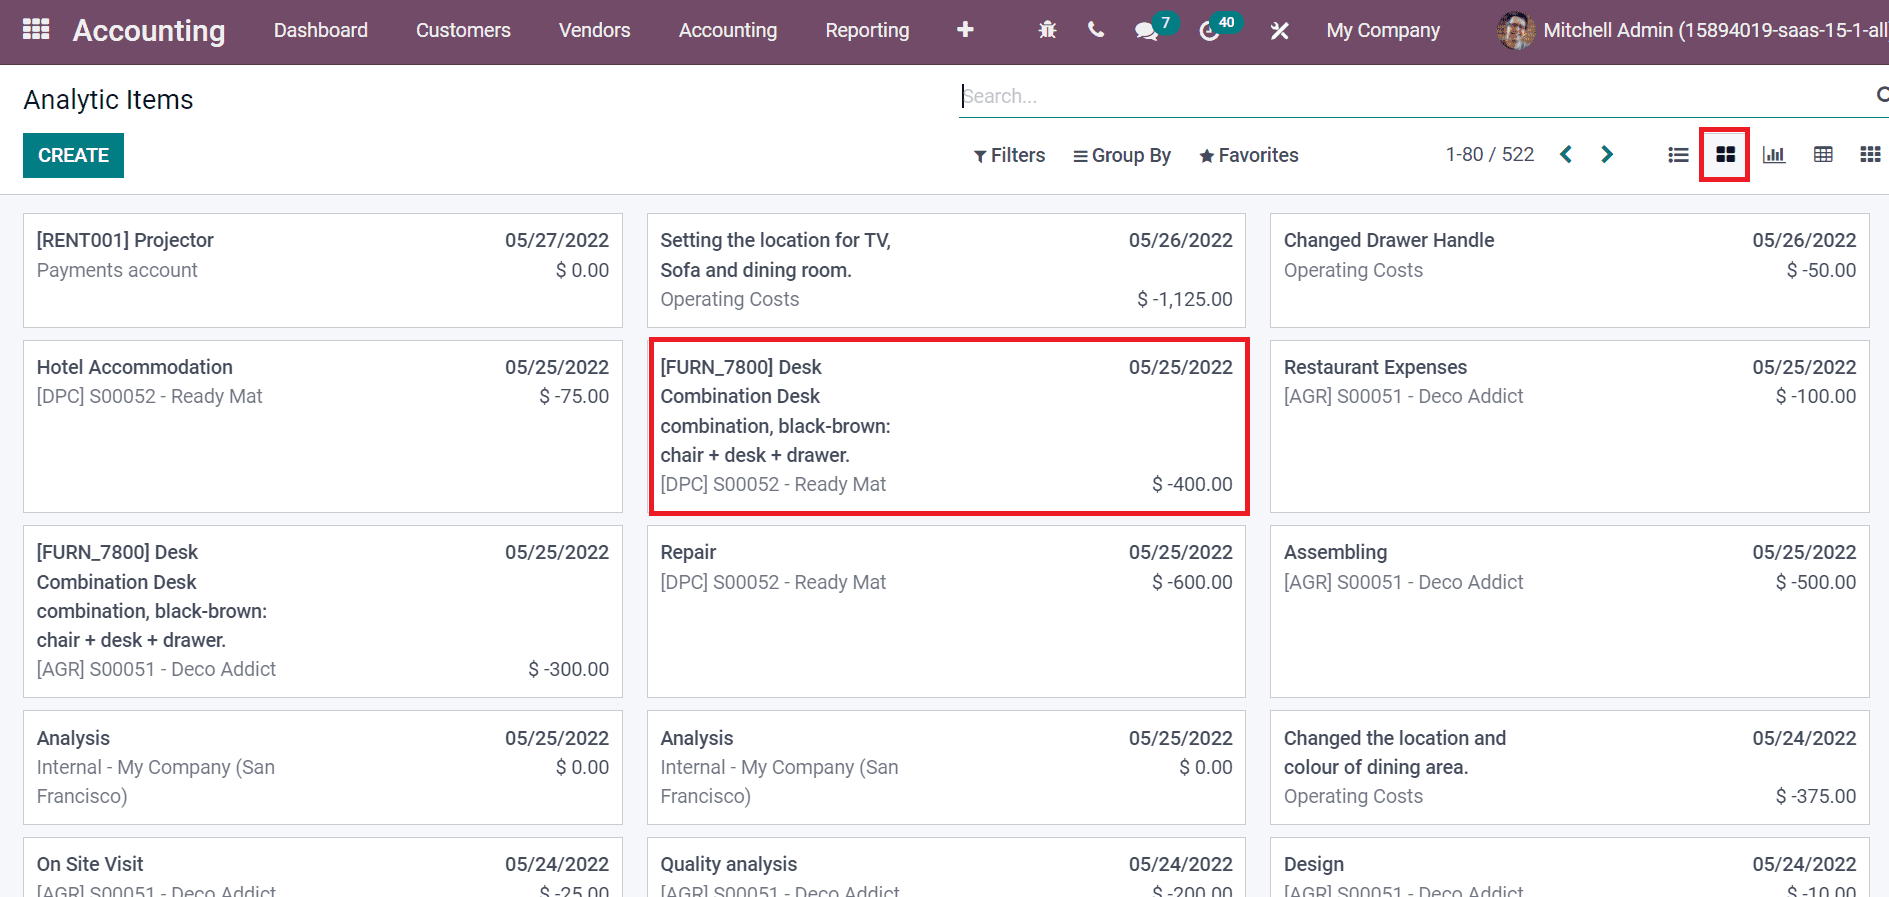
Kanban view of analytic items shows the name, date, cost, and analytic account, as depicted in the screenshot below.
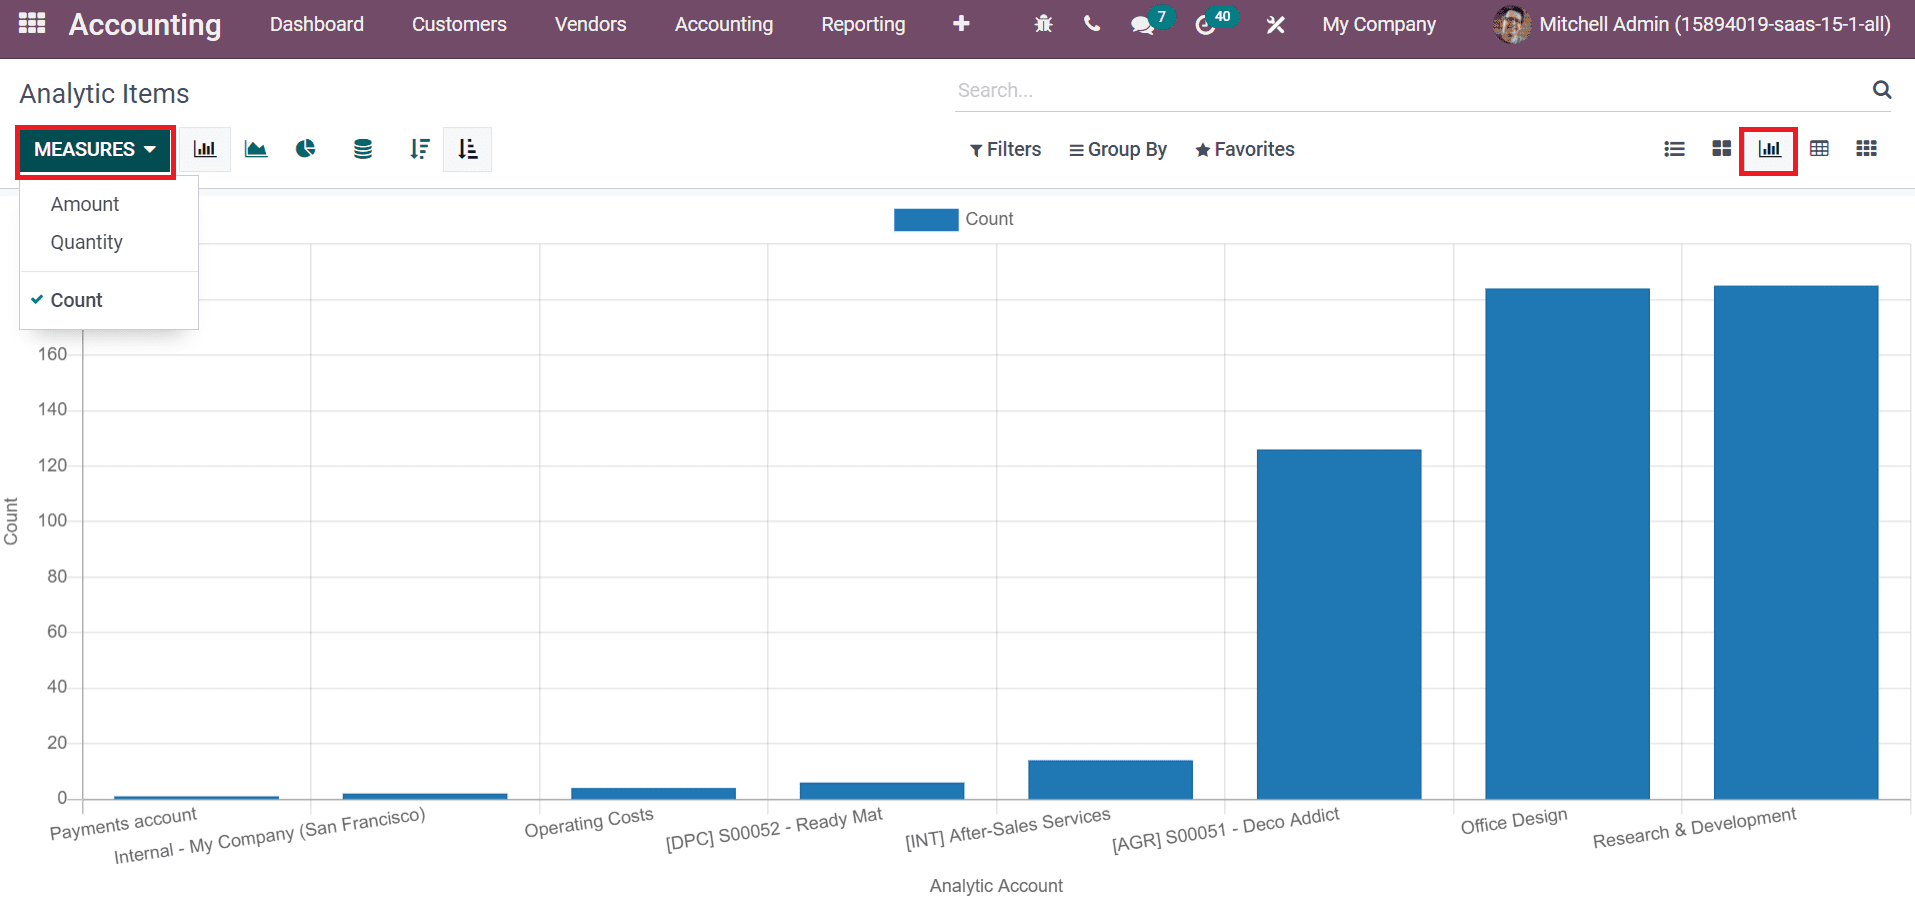
In the graph view, you can view analytic account details on X-axis and Count on Y-axis. By choosing the MEASURE icon, we can add various measures to the graph as specified in the screenshot below.
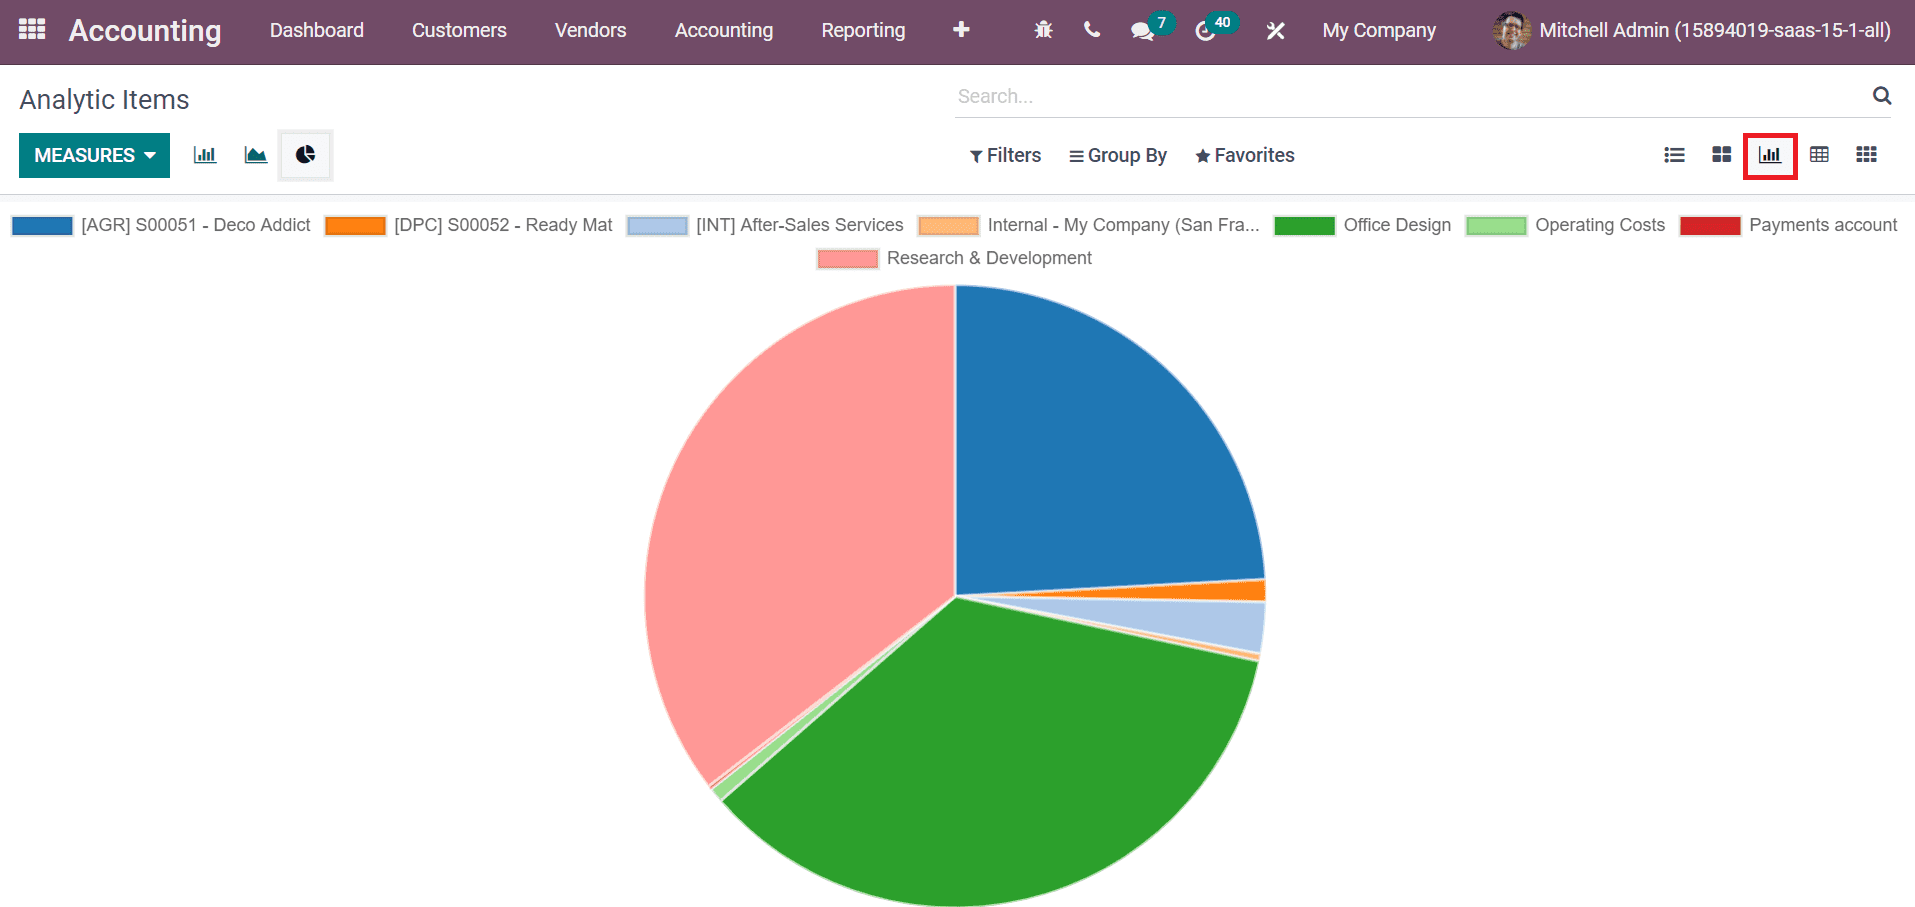
The graph is also viewable in Pie and Line chart formats. A pie chart shows the percentage rate of each analytic item separately in a circle format, as illustrated in the screenshot below.
On the Grid view, you can see the details of analytic items on a specific month of the year. It shows a count of each analaytic item on a particular month. The total amount shows at the end of the Analytic Items window, as denoted in the screenshot below.
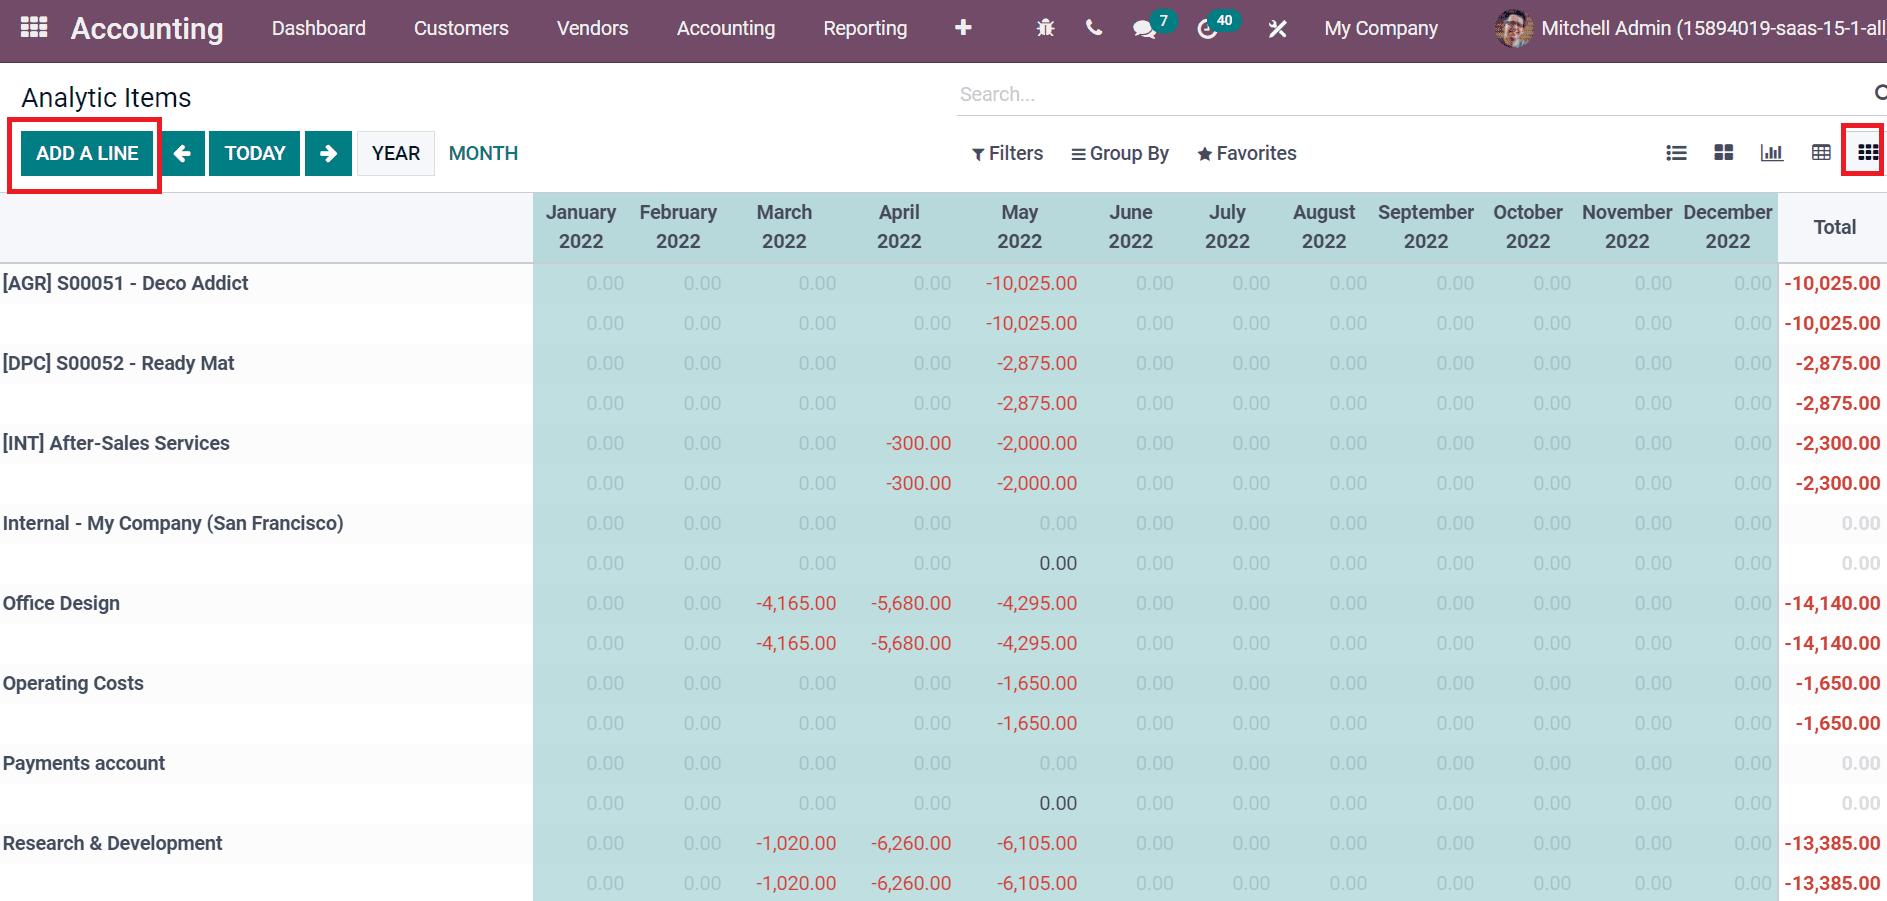
Users can formulate a new analytic entry by selecting the ADD A LINE button. You can also sort out analytic items data based on month, year, and recent day.
How to Evaluate Analytic Reports in Odoo 15 Accounting?
We can analyze the company analytic report inside Reporting feature of the Odoo 15 Accounting module. Select the Analytic Report menu below the Management section of Reporting tab. You can view Partner, Reference, and Balance details in the new window in the new window. It is easy to filter the report based on specific months and years, as displayed in the screenshot below

From the Analytic option, you can select your account and evaluate the report efficiently, as specified in the screenshot below.

In this way, it is possible to check your particular accounts infirm and assess from the Analytic Report window.
For essential budget planning, analytic accounts play a crucial role in your company. Users can manage the performance of services and products in a firm using the support of the Odoo 15 Accounting module. The analytic distribution of expenditures is easily configured with analytic tags and reports. Refer to the following blog to learn more about analytic accounting features.