Business organizations often follow different payment collection and payment making methods. In many cases, the payments to suppliers or payments from customers are made as installments. Odoo ERP has the feature to configure and use a different payment methods in it. In Odoo, it is called Payment terms, we can set different payment terms and use it for both customer bills and vendor bills. In this blog, I will be explaining 'how to configure and use different payment terms in Odoo'.
Configuration:
We can create new payment terms from,
Accounting->Configuration->Management->Payment Terms
Here we are creating a new payment term, “20 % advance within 3 days and balance in 10 days”
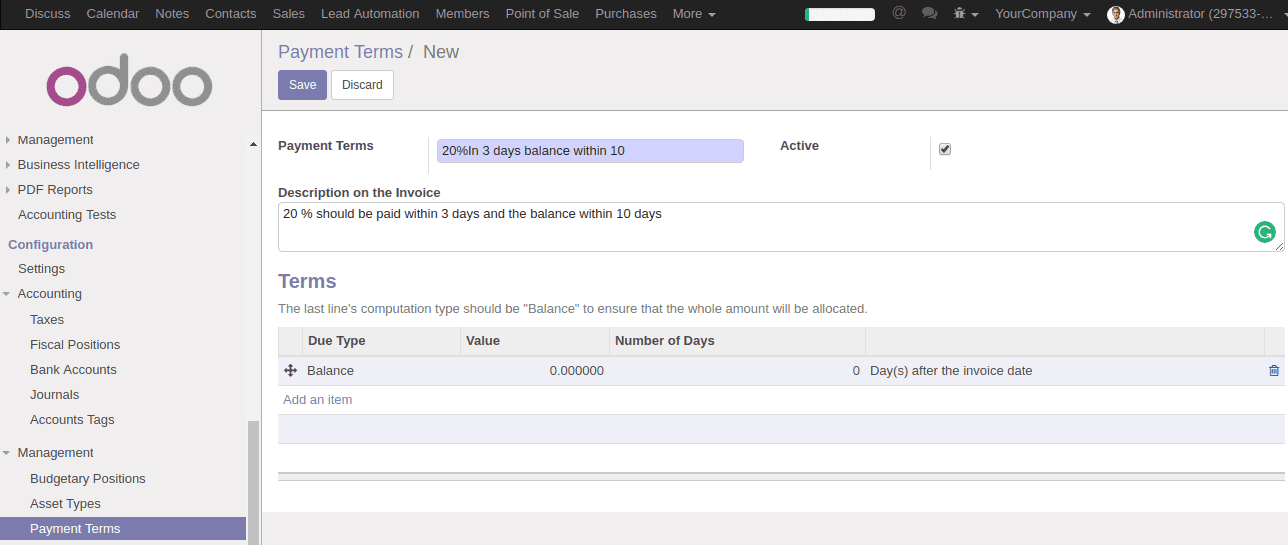
Give payment term description in the provided space, this description will be displayed in the invoice or sale order. Then add the terms, click on 'Add Item' and add the details of the term. Please note that the last line of terms always should be the 'Balance', otherwise a warning message will be displayed while attempting to save the payment term and we can’t save it.
When we add a new Term, we will get redirected to the following wizard.
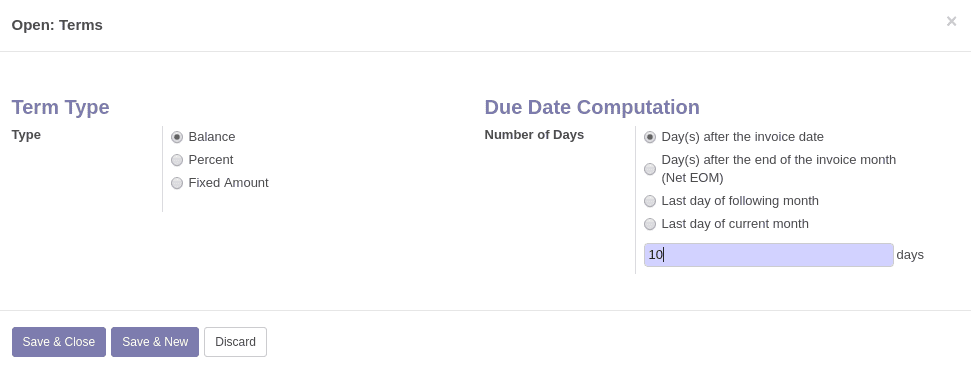
From here you choose the type of Term and the Due Date computation method.
There will be three different Term Type,
1. Balance
2. Percent
3. Fixed Amount
We can select any of the Types according to our needs. On the right side of the Term Type, there is the option to select the Due Date computation method for that particular type. The options are explained below.
1. Day(s) after the invoice date
The amount should be paid within the specified days after the invoice date.
2. Day(s) after the end of the invoice month (Net EOM)
The payment should be made within specified days after the end of the invoice month.
3. Last day of the following month
The amount should be paid within the last day of the following month
4. Last day of the current month
The amount should be paid within the last day of the current month
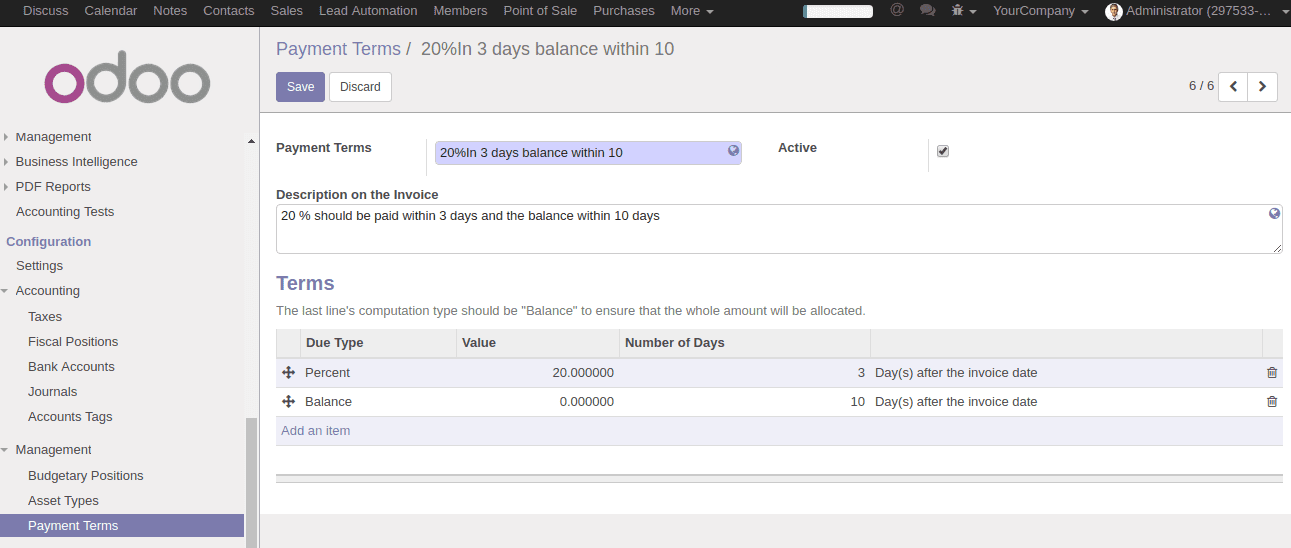
After all, terms are set, click Save save the payment term.
After this, we can set this payment term in Partner master or Sale Order or Invoice.
We can set payment terms in:
1. Sale Order or Quotation
We can set a payment term for a particular quotation or sale order
2. Partner
We can set payment terms in the partner master and whenever we select the partner, the payment term will be automatically added to the invoice or sale order.
3. Invoice
We can set a payment terms for a particular invoice.
Let us see how payment term is set to Partner master. Open the master form of a partner, under Sale, Purchase, tabs we can see the Customer Payment Terms and Vendor Payment Terms respectively. Click there and choose the appropriated payment term for the partner.
Now let us create a customer invoice for this partner. When we select the partner the payment term will be automatically added.
When we check the journal entry we can see the entries are made according to the payment terms.
So this is how we configure and use Payment Terms in Odoo. Hope this piece of information was helpful.
You can also have look Setup Payment Terms in Odoo 13