Managing employees’ Salaries, Loan deductions, Allowances, etc., is a bit complicated in most organizations. It is a time-consuming, risky task to manage. With Odoo’s Payroll module, anyone can easily manage their Salaries, Deductions, and Allowances with ease of time.
For managing Salaries in Odoo, first, we need to set up the Salary Rules regarding the Employees on how it is to be calculated. Let’s dive into setting up the Salary Rules in Odoo.
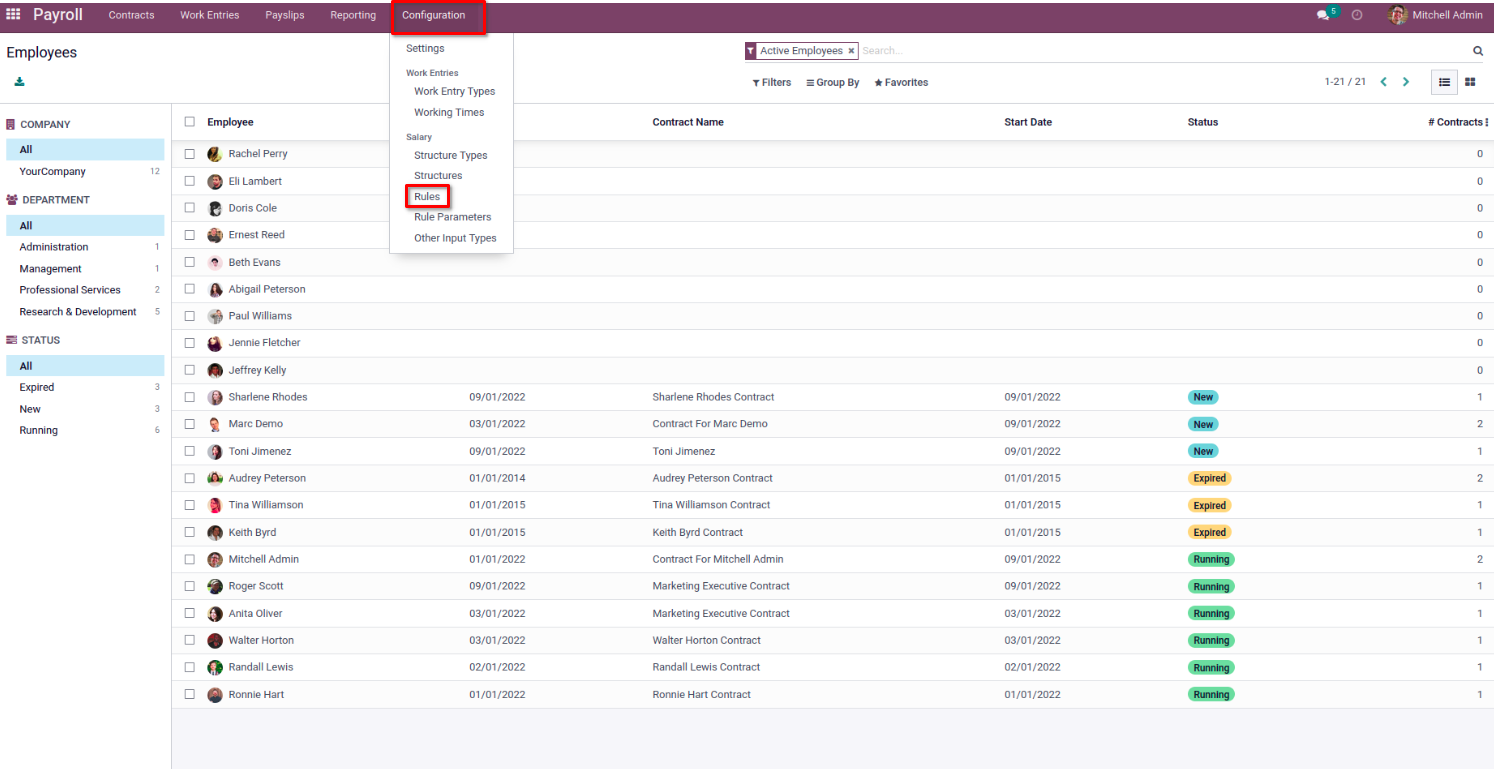
First of all, install the Payroll module from the Apps and then move to Payroll > Configuration > Salary > Rules.
From the view opened, all the configured rules will be grouped based on the Salary Structure.
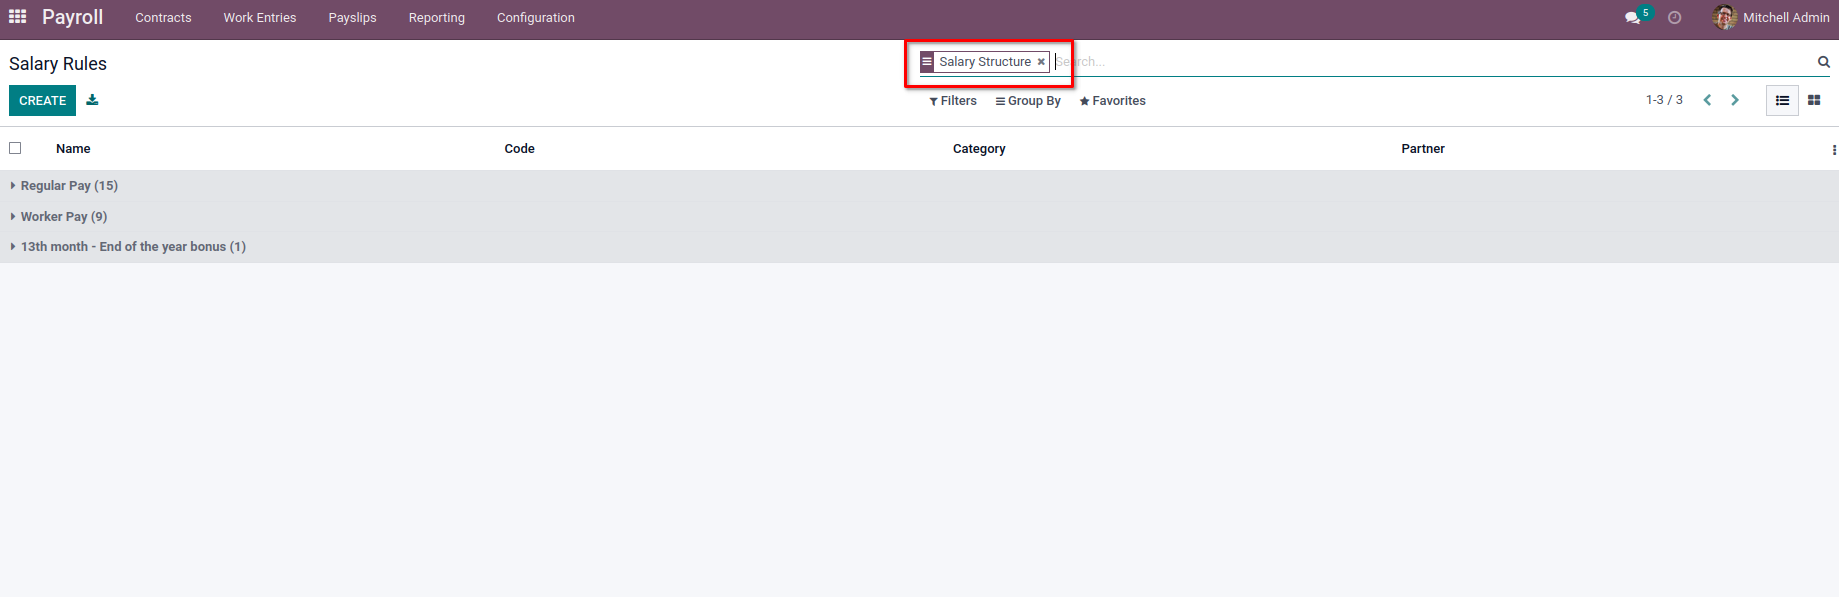
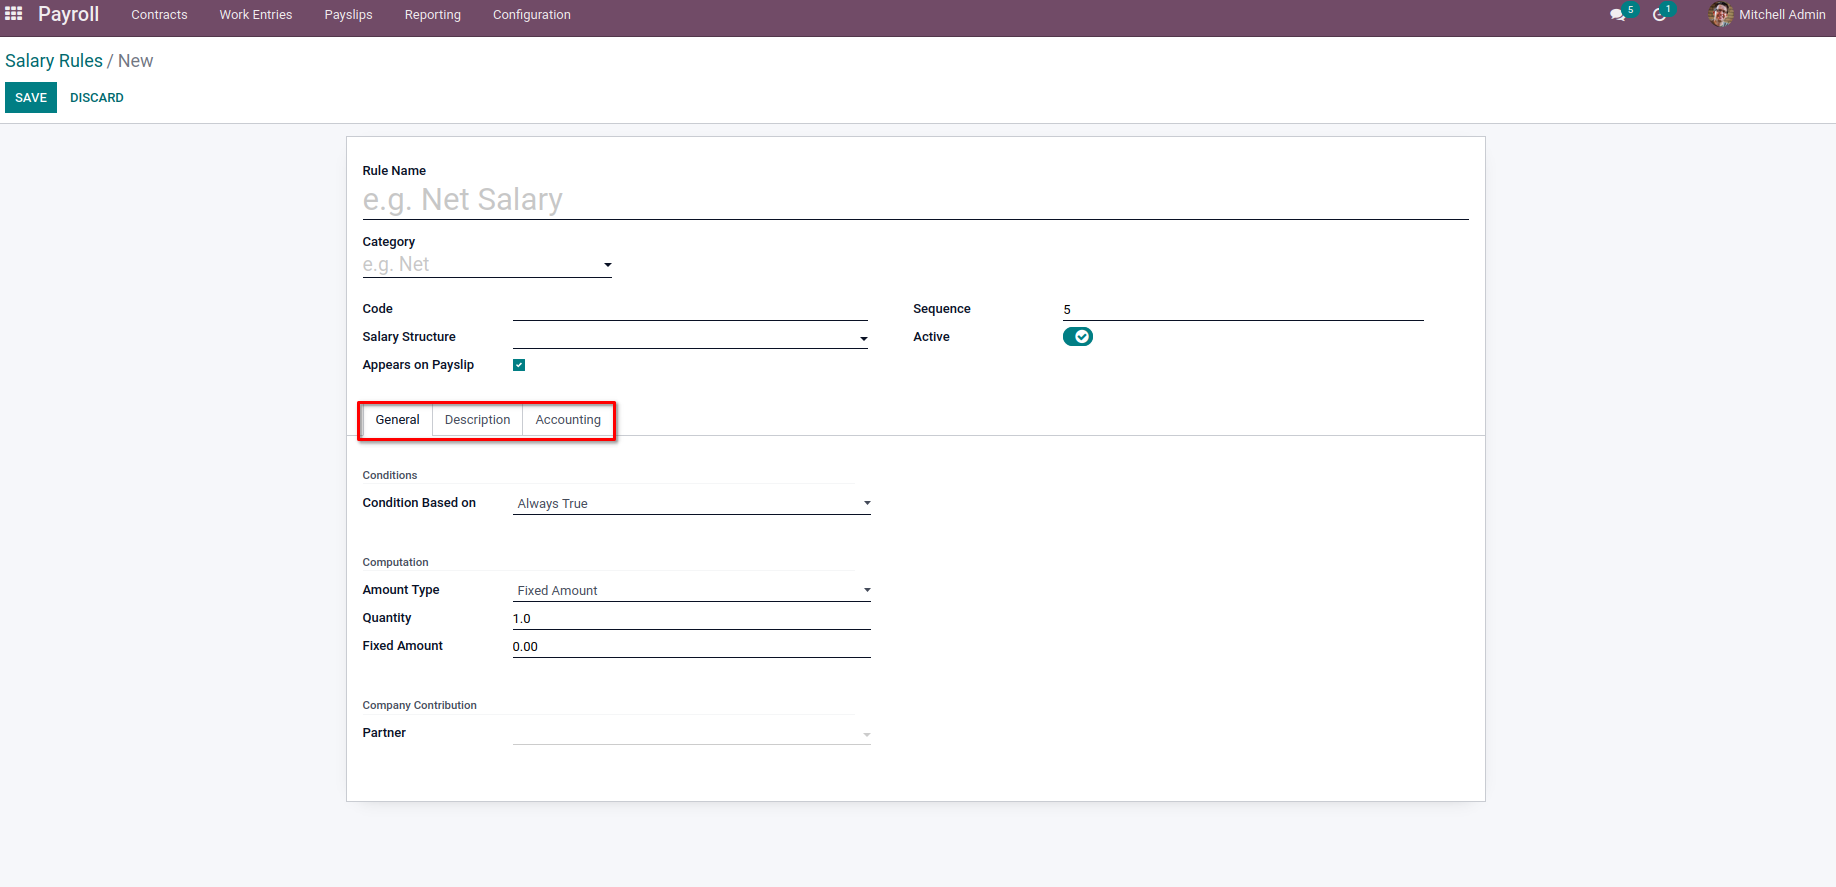
To create a new rule, select the Create button at the top of the view, which will open the form view to configure the Salary rules with the details.
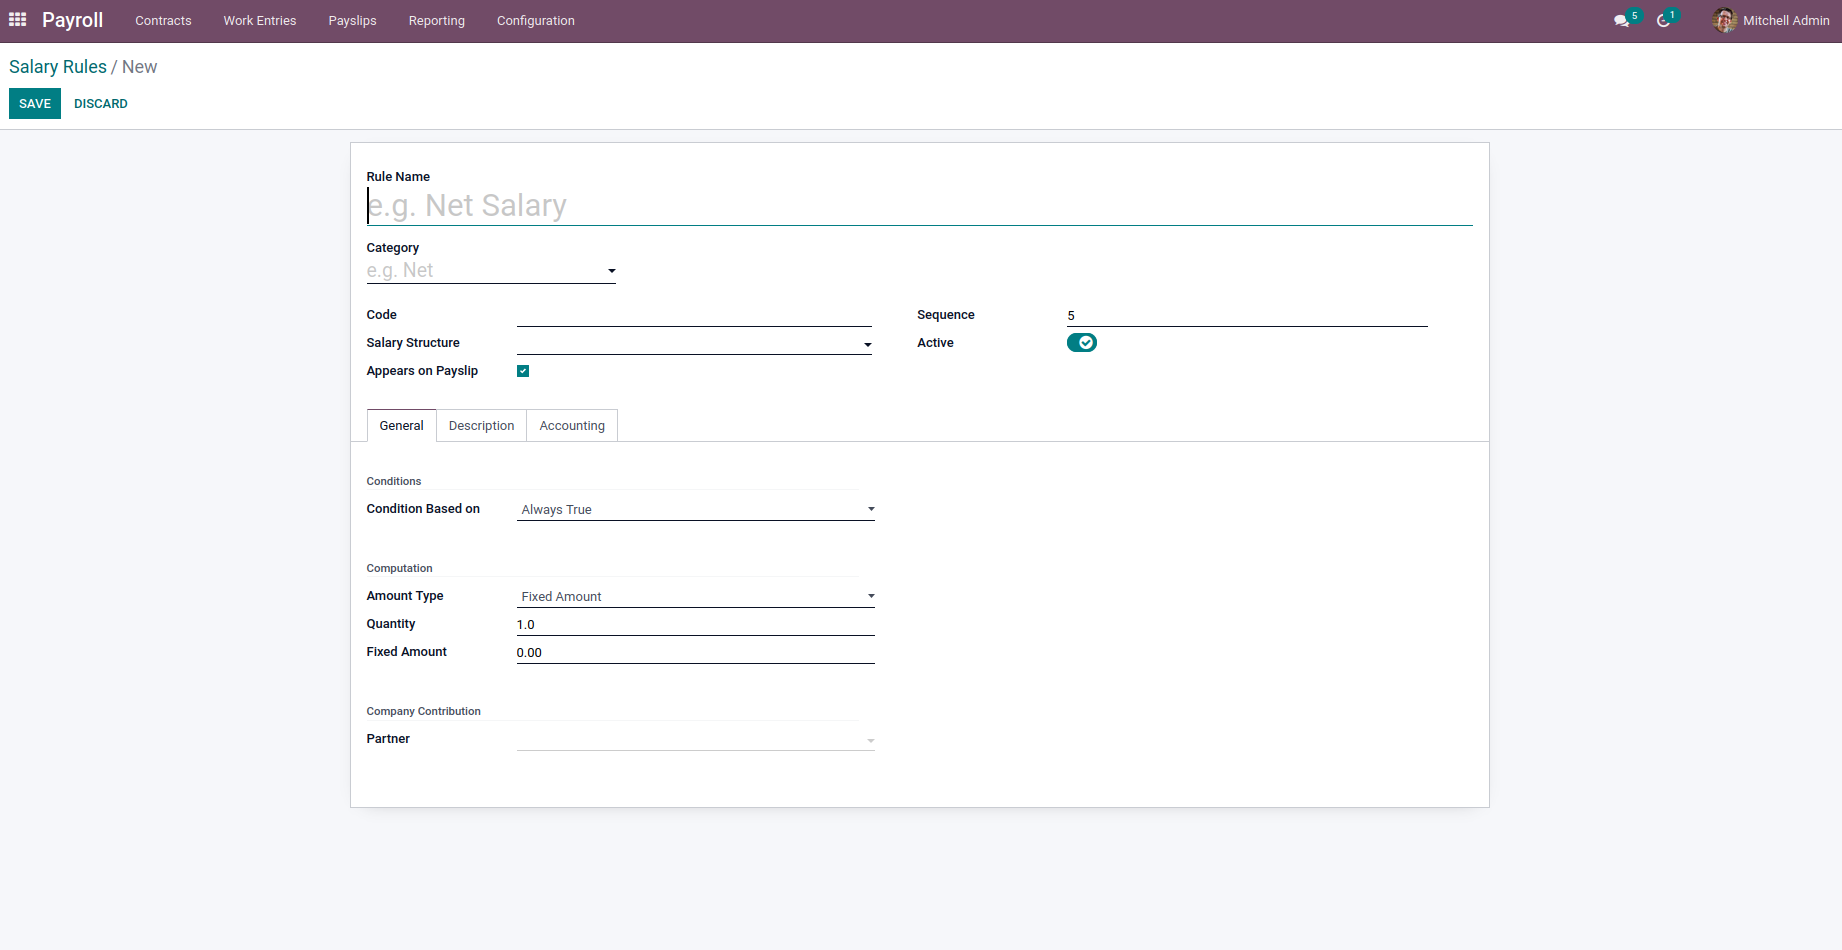
In this view, provide a name for the rule along with the Category of the rule, which is Basic, Gross, Allowance, Deduction, Net, etc. Following by, we can add the Code, Salary Structure, Appears on Payslip, which is a boolean field used to display the rule on the Salary Payslip. On the right-hand side, we can add the sequence at which the rule is to be shown on the Salary slip. Enable the Active button to use the rule in the Salary Computation. So by disabling the boolean, we can hide the rule without removing it.
Next, we have different tabs available on the form view where we can provide additional information regarding the Salary Rule.

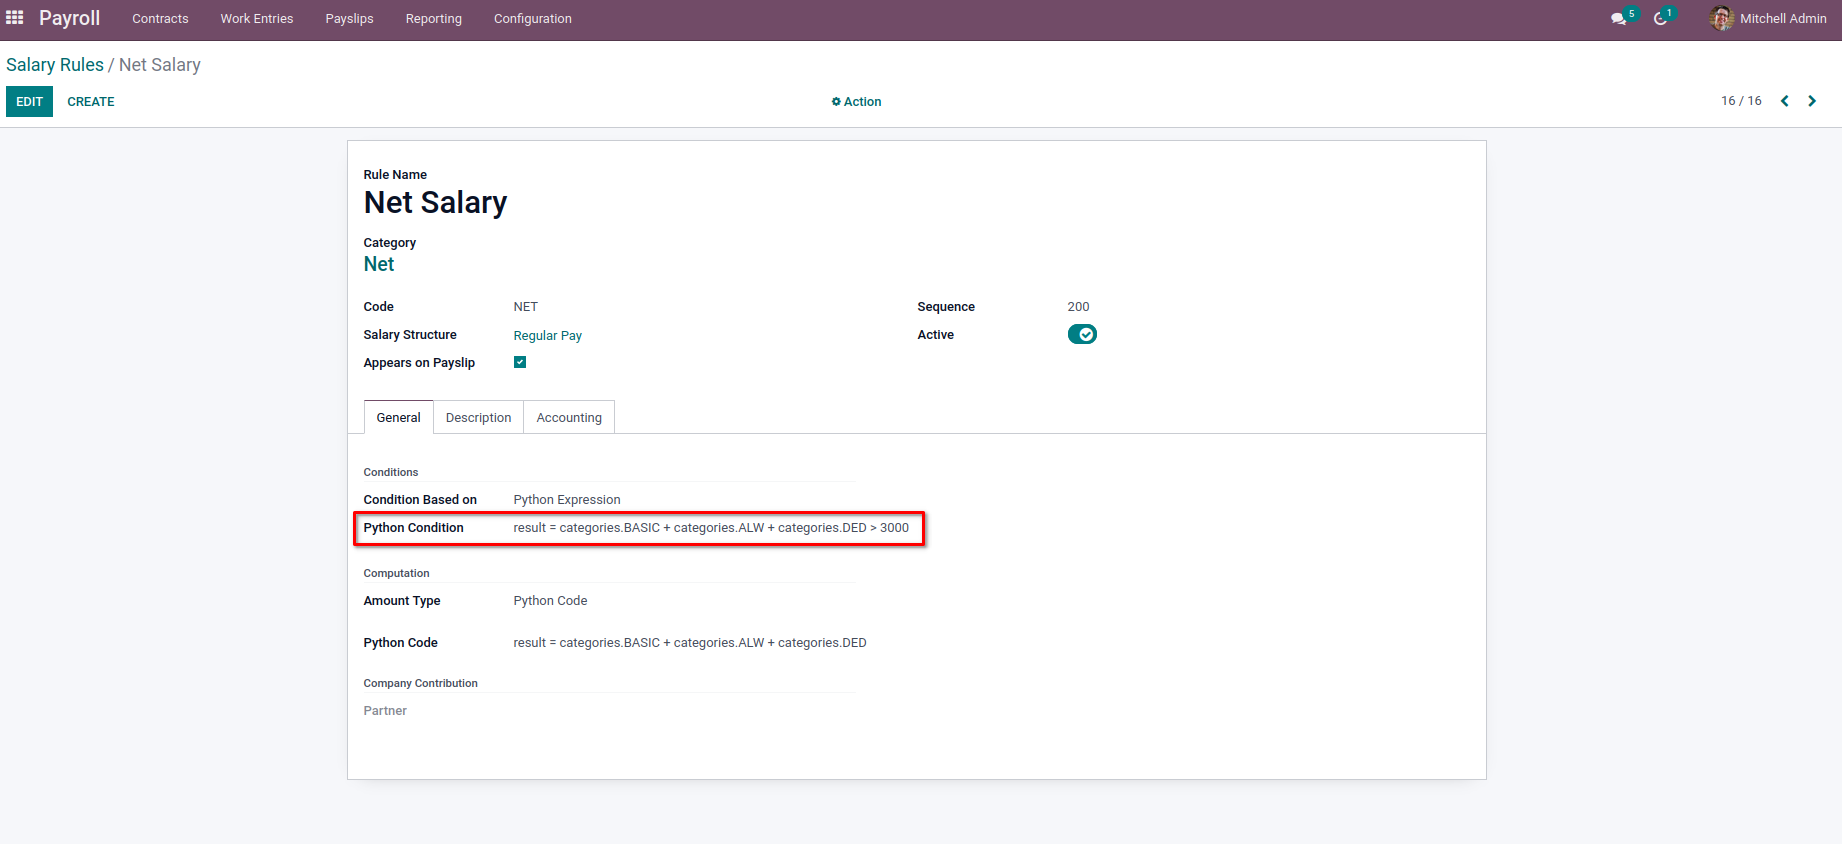
In the General tab, we can add the condition and computation for the rule. Under the Conditions section, we can provide the condition to calculate the rule on Condition Based on where we will have three options.
Always True: which specifies this rule will be calculated in every salary computation. This will be useful when the organization has some salary rules for all employees for further calculations.
Range: This will use some ranges like Minimum, and Maximum on some base values. We can set the basic value on the Range Based on the field. The ranges can be added in Minimum Range and Maximum Range. Moreover, the Range Based on Field can include the values from different objects, which we will use for Python expressions like ‘contract.wage’, ‘payslip.date_from’ etc.
Python Expression: For the option on Python Expression, we can set some sort of python expressions as the condition to compute the rule.
Let’s discuss more on the Python Expression option for the Salary Computation,
Python Expression:

We can use the Python expression as Calculation for the Salary rule as well as the Computation. One thing to note is that the value to be returned for checking the condition must be set on the variable ‘result.’ We will be available with some variables which we can use on the python expression to get the data related to the Payslip, Employee, Contracts, etc.
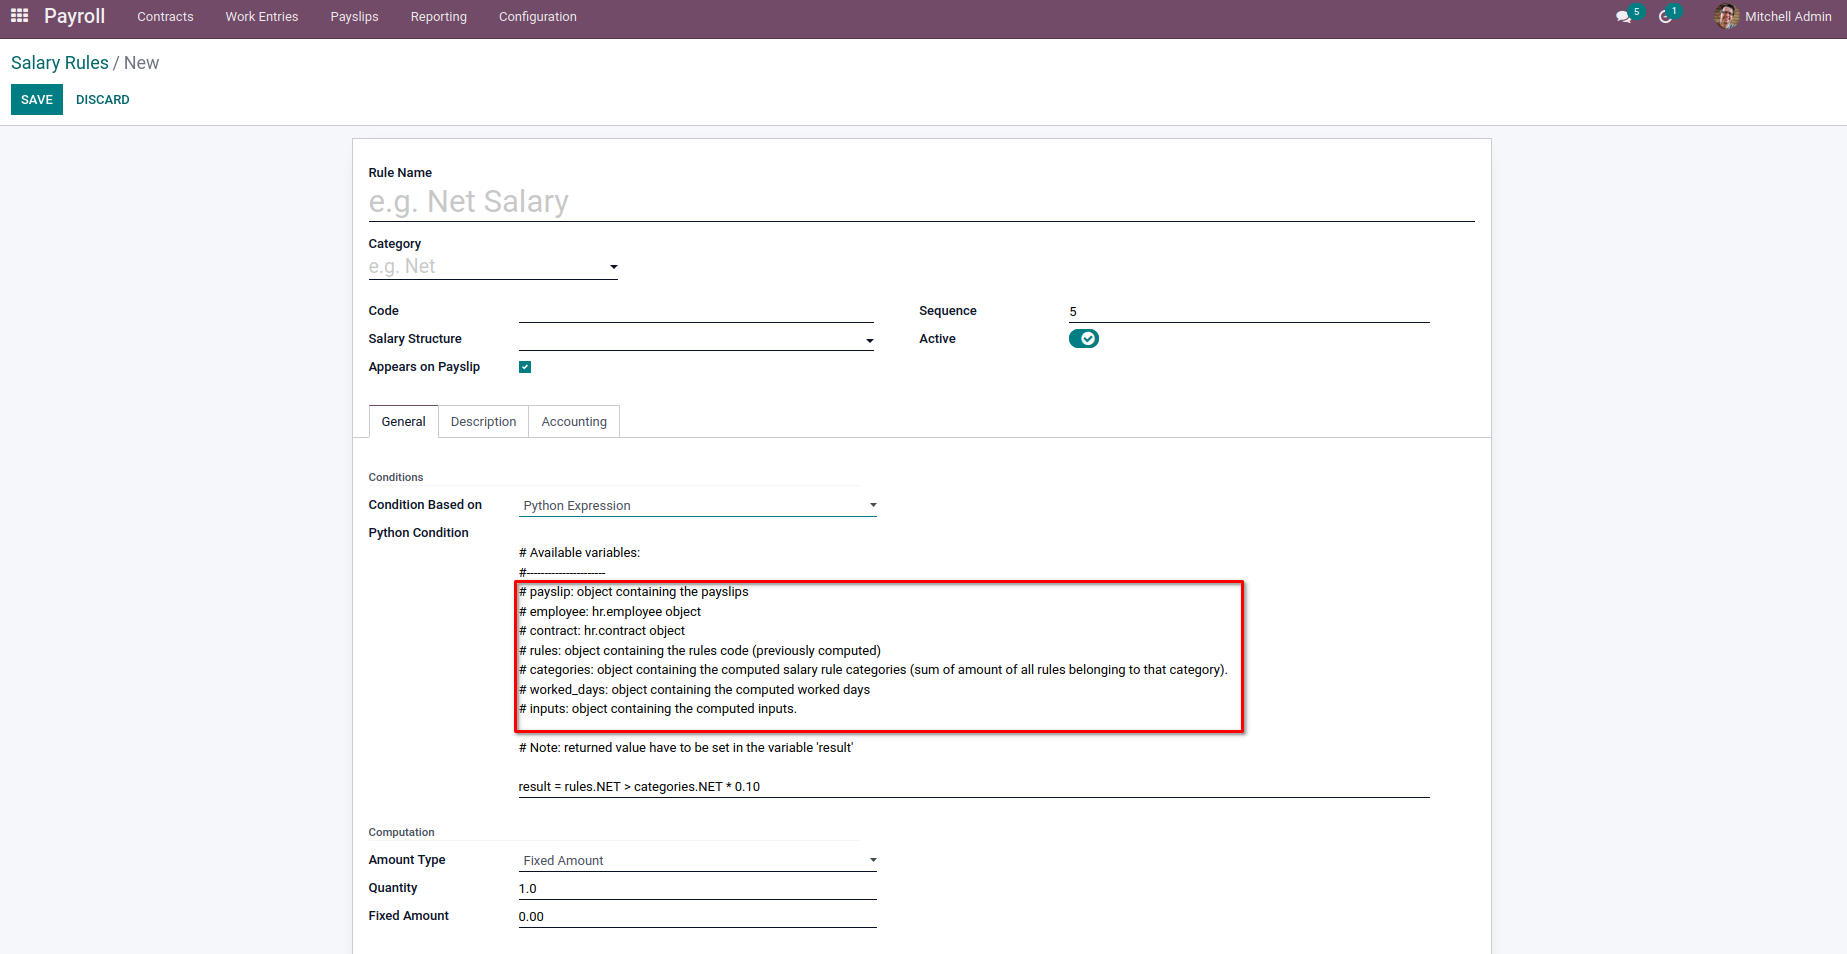
In the variable marked on the image, we will get all the details from Payslip as it is an object containing Payslip.The corresponding Employee and the Contract Object can be obtained from the ‘employee’ and ‘contract’ variables. There may be chances of using the values of some other Salary rules. For this case, we can make use of ‘variable’, which contains the object of previously computed rules code. So in order to get the value of some other rules, we need to provide the sequence less than the current one, which calculates them before the current one. The variable ‘categories’ has the object containing computed salary rule categories. It will contain the sum of all the rules in that category. The ‘worked_days’ and ‘inputs’ will have the computed worked days and inputs of the corresponding Payslip.
Let us check each case in detail with some examples.
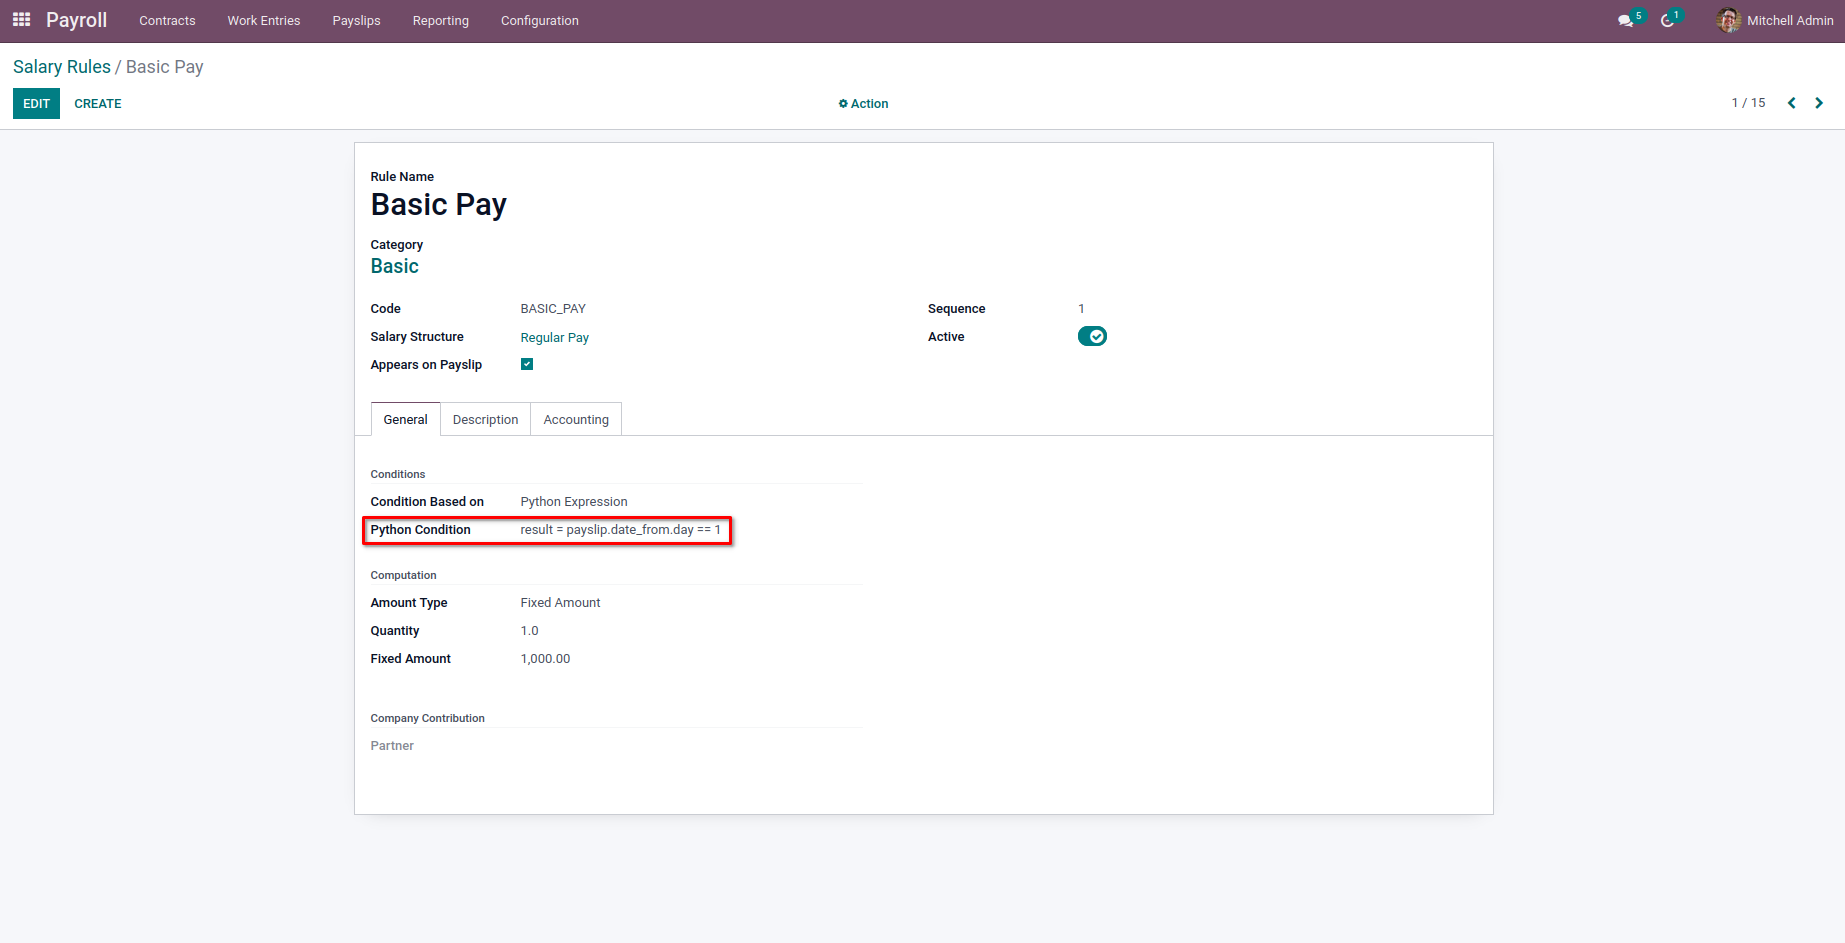
First, we can check the ‘payslip’ variable. From it, we will get all the values from the corresponding Payslip, which we compute the Salary.
In the above image, we specified the result as
payslip.date_from.day == 2
By this, when we specified the start date of the Payslip as the second of the month, the Basic Pay is not added to the Salary computation.
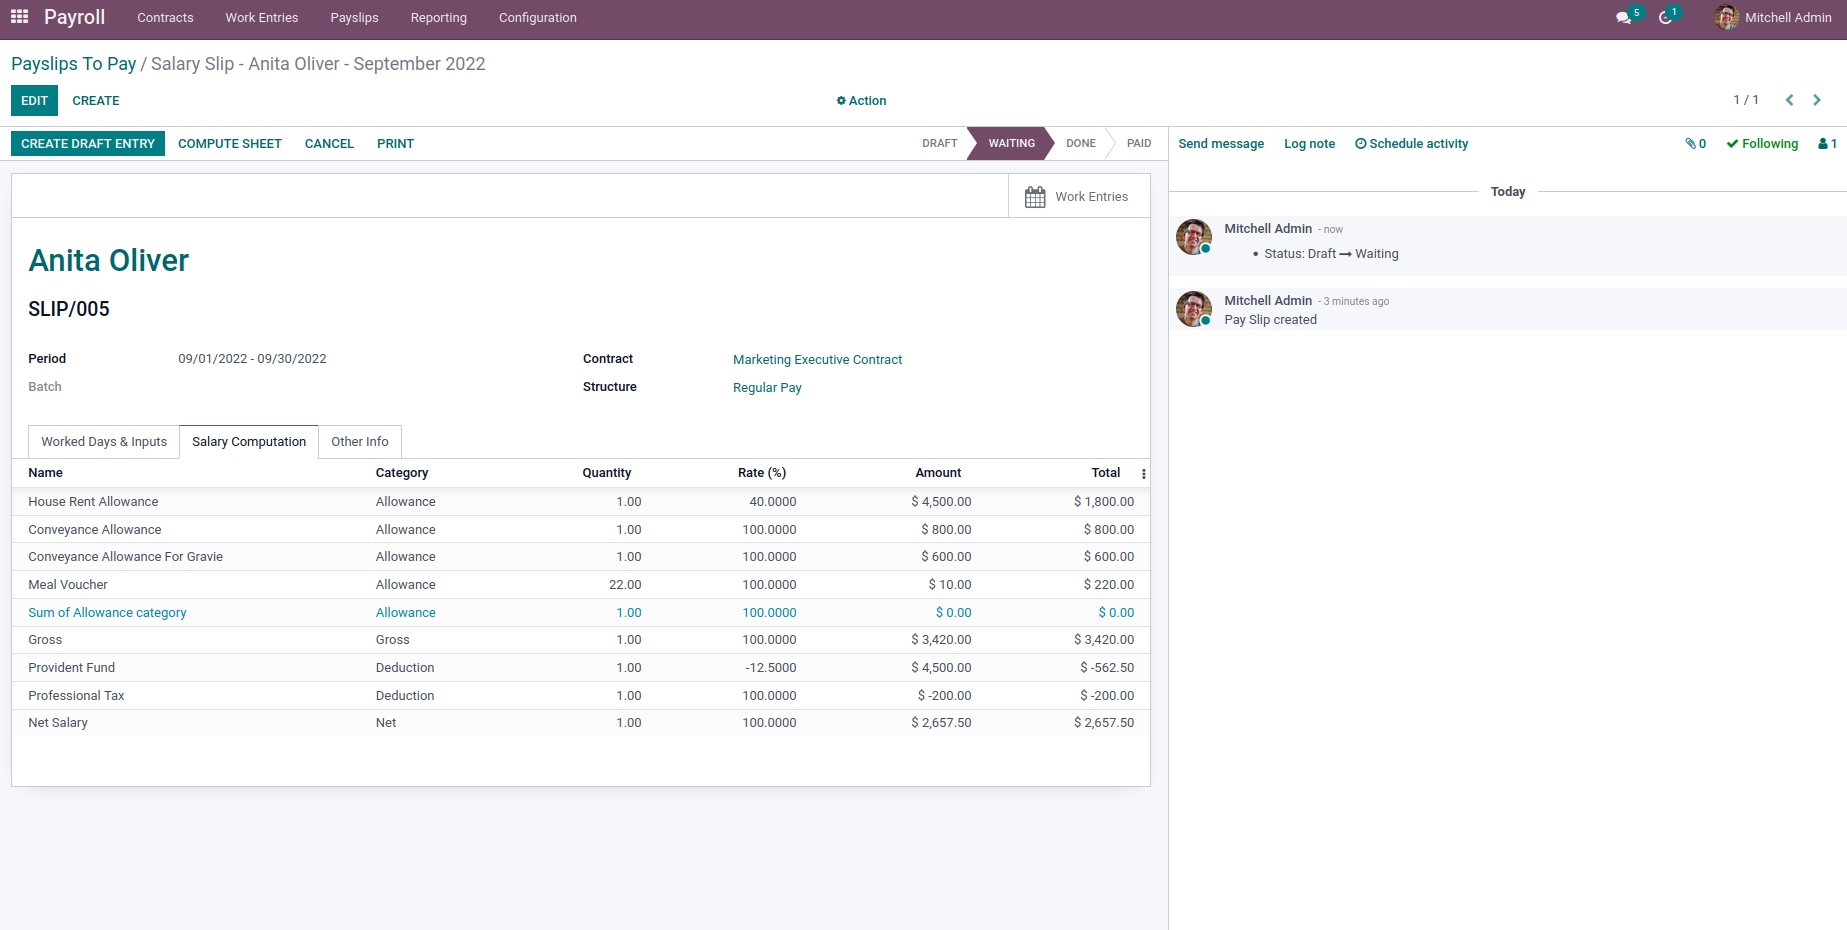
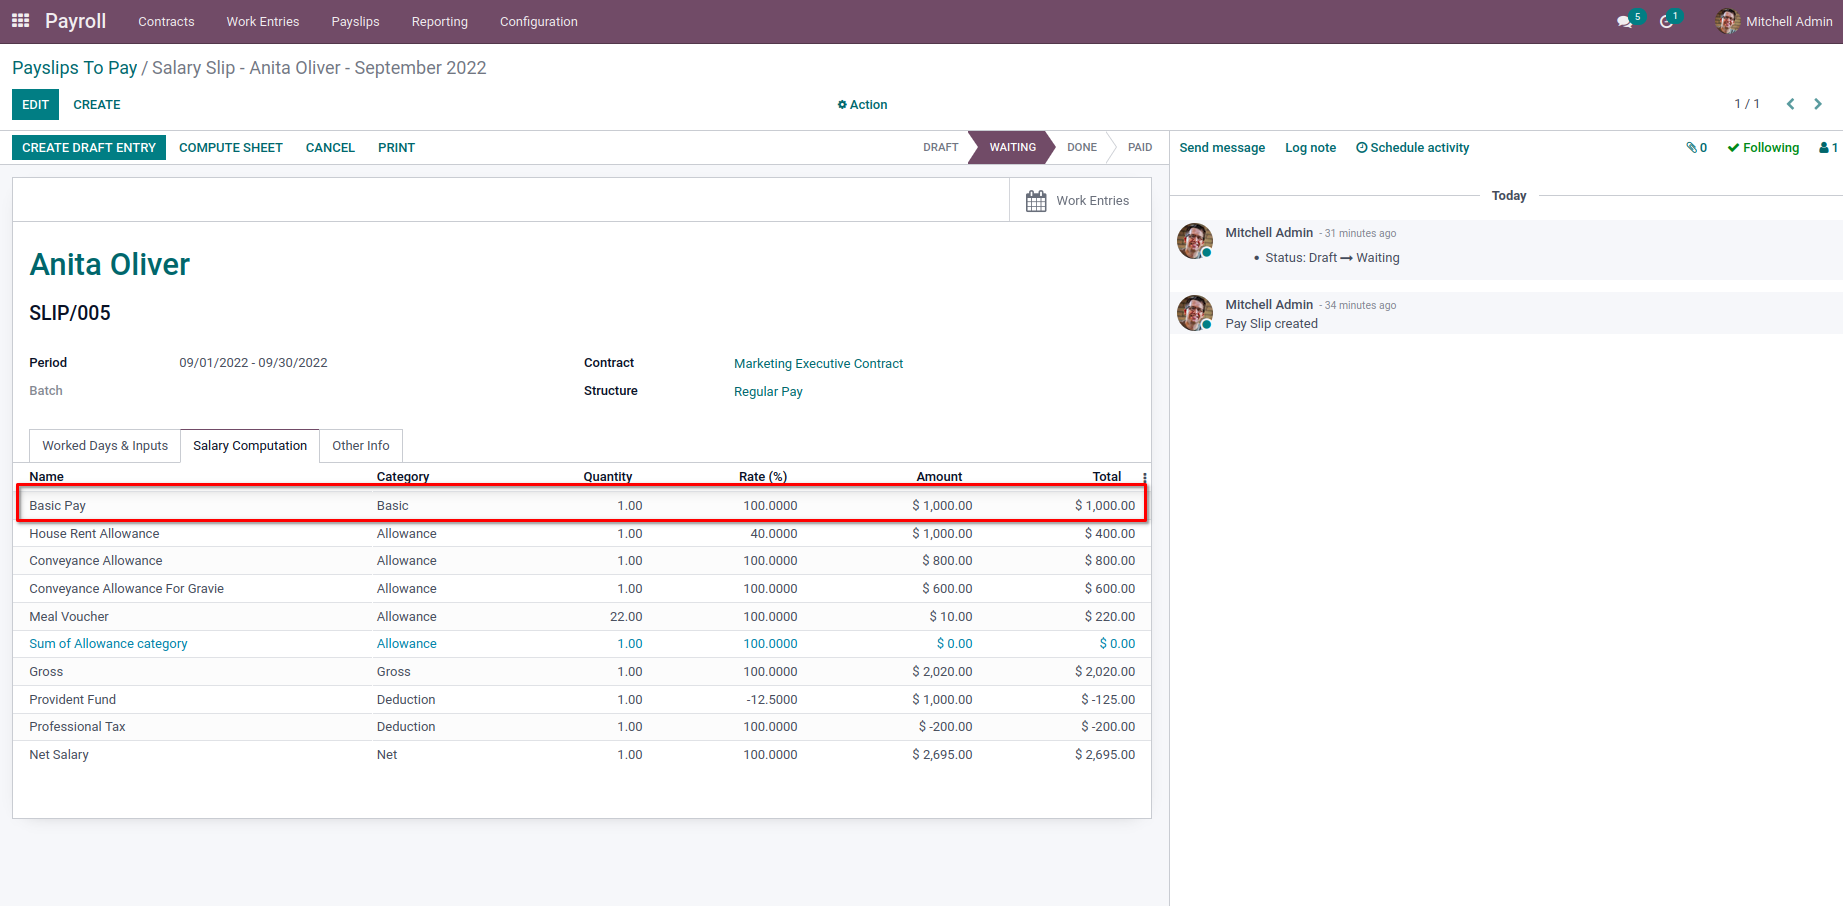
When we provided the start date of the Payslip as the first day of the month, the Basic Pay was added to the computation of Salary.
The Basic Pay will now be added to the Payslip.
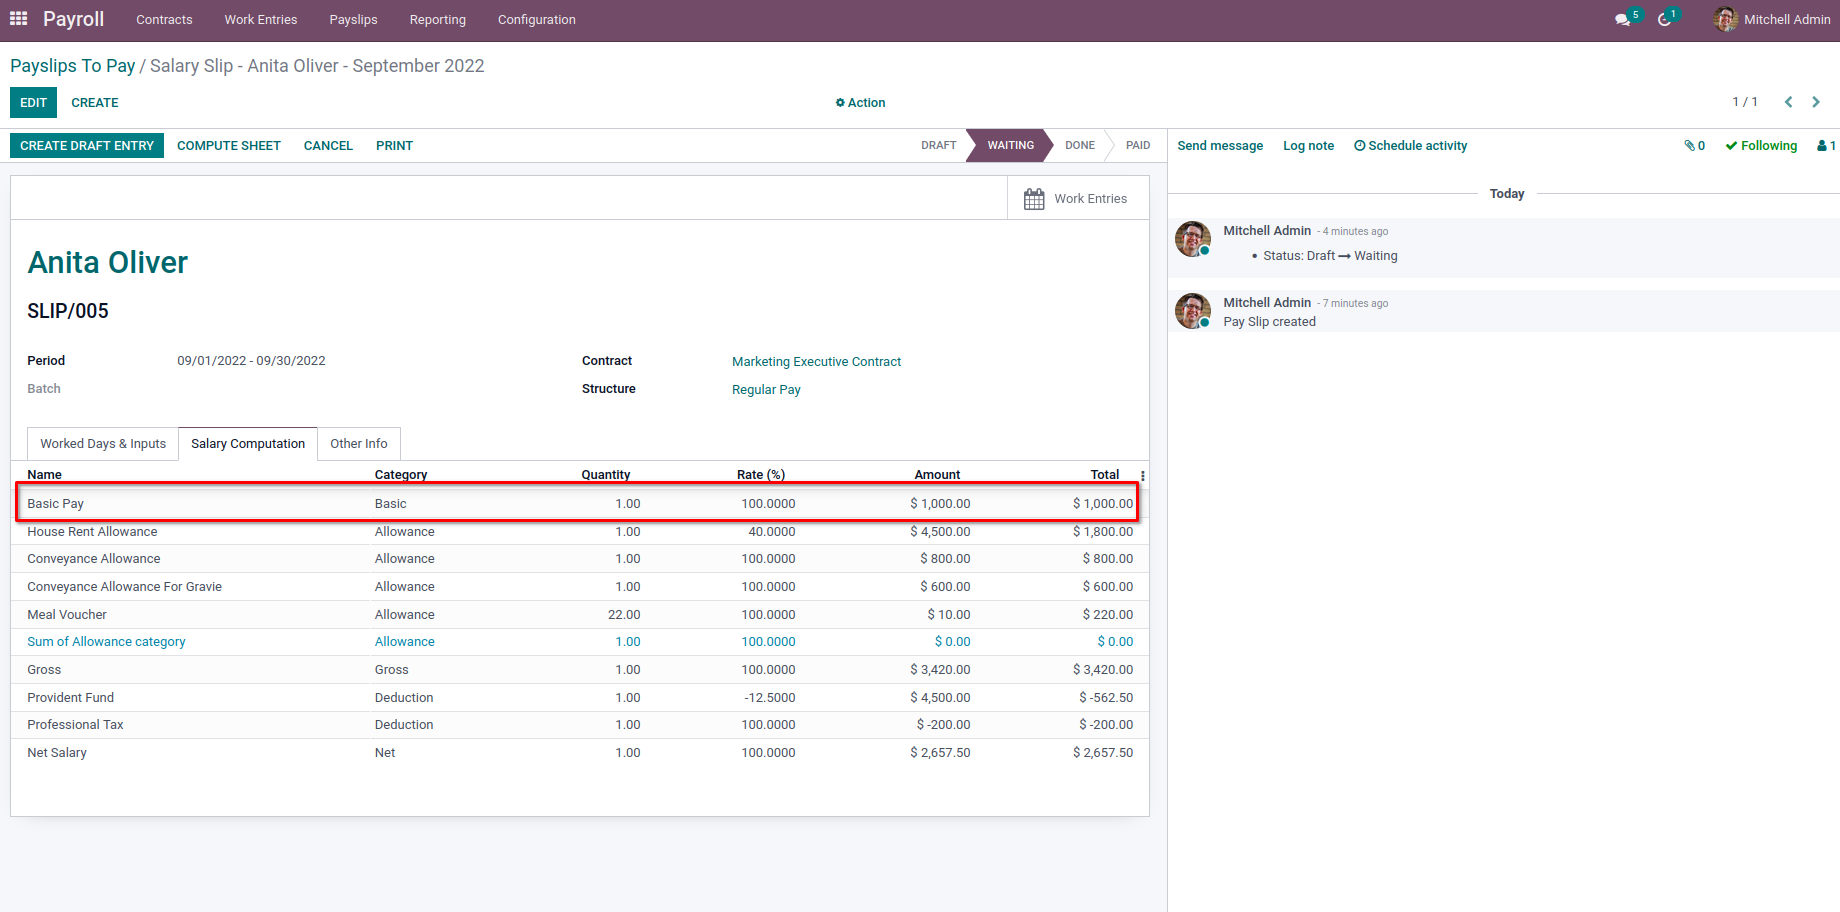
Likewise, we can add different fields of Payslip for checking the condition to add the current rule for Salary computation.
Next, we have an ‘employee’ object for employees. We will get all the field values of the corresponding Employee from Payslip.

In the above example, we used
result = employee.barcode == ‘123’
And by this, the Basic Pay is not added to the Payslip as their barcode is not 123.
But as we given
result = employee.barcode == ‘111’
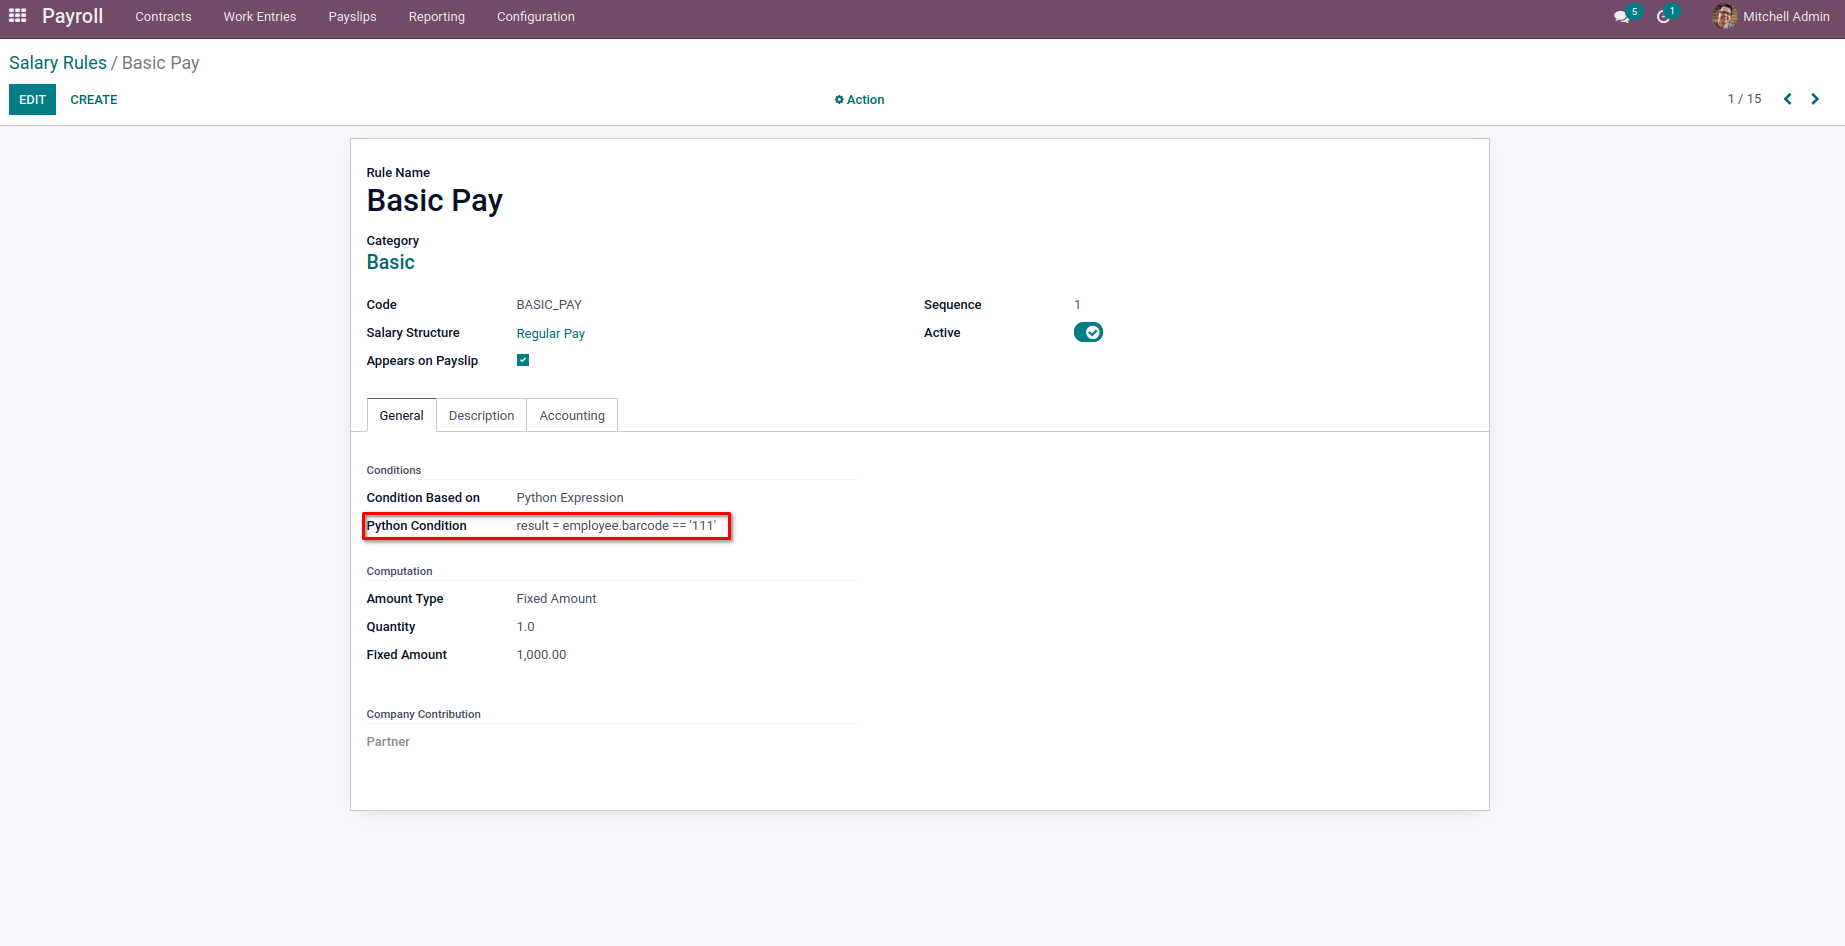
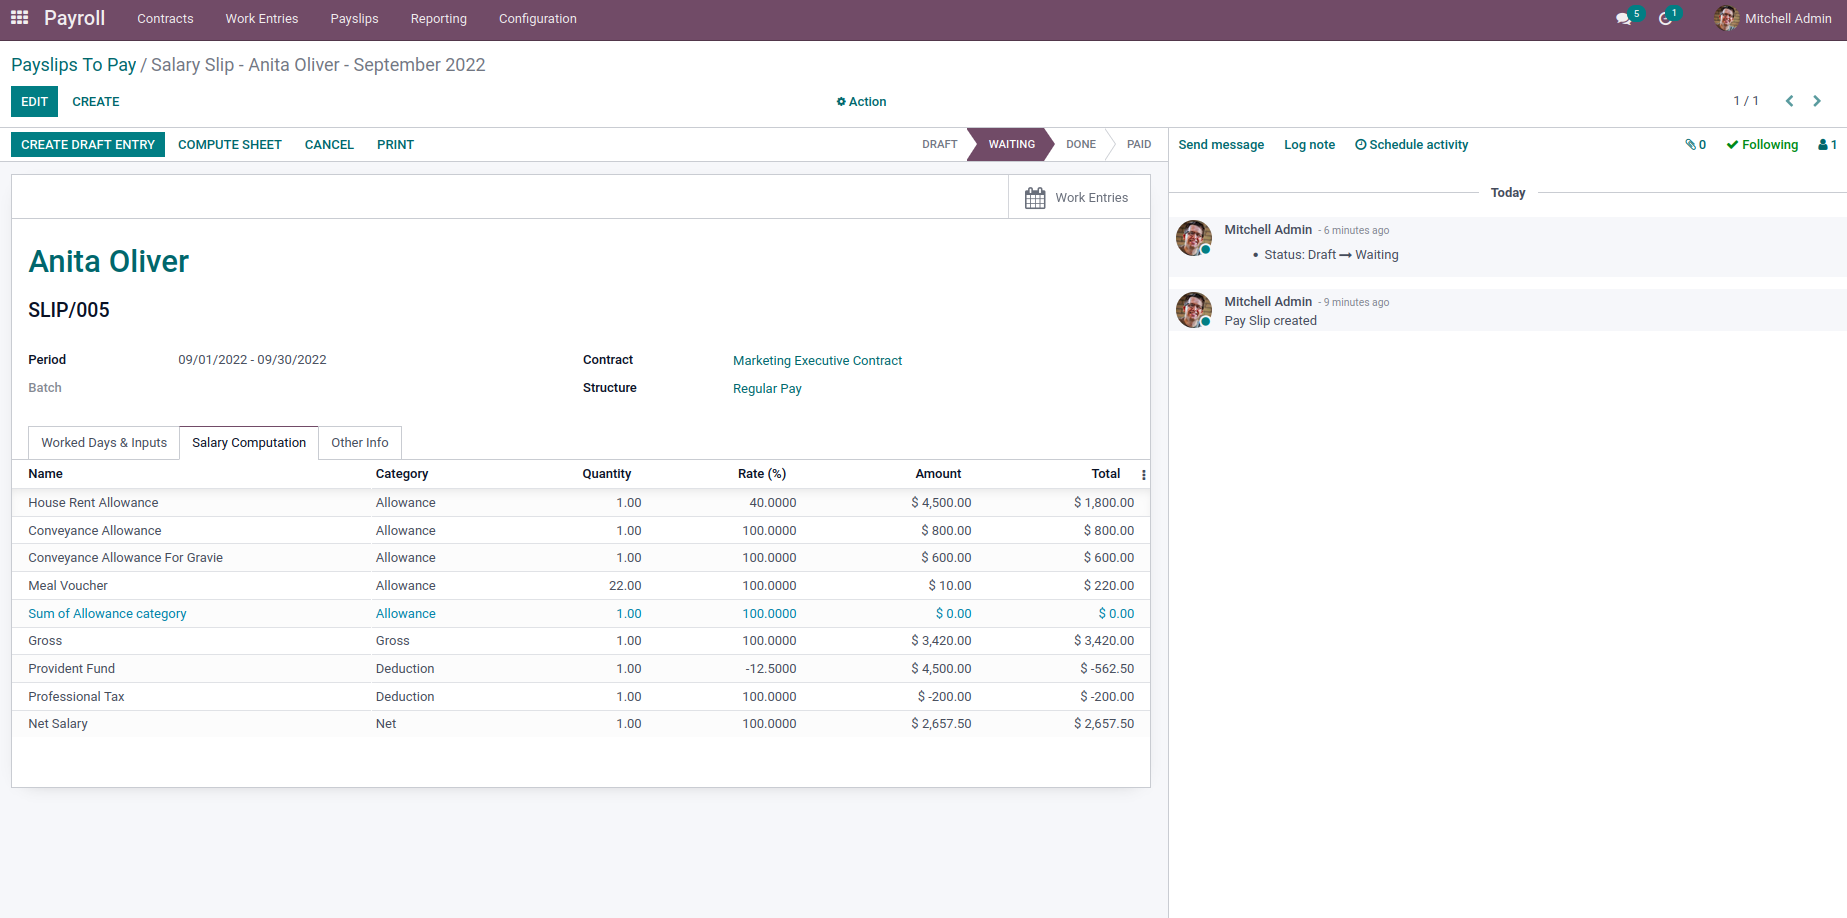
The Basic Pay is added to the Payslip for the Salary Computation.

The ‘contract’ variable contains the corresponding Employee’s contract, which is chosen on the Payslip.
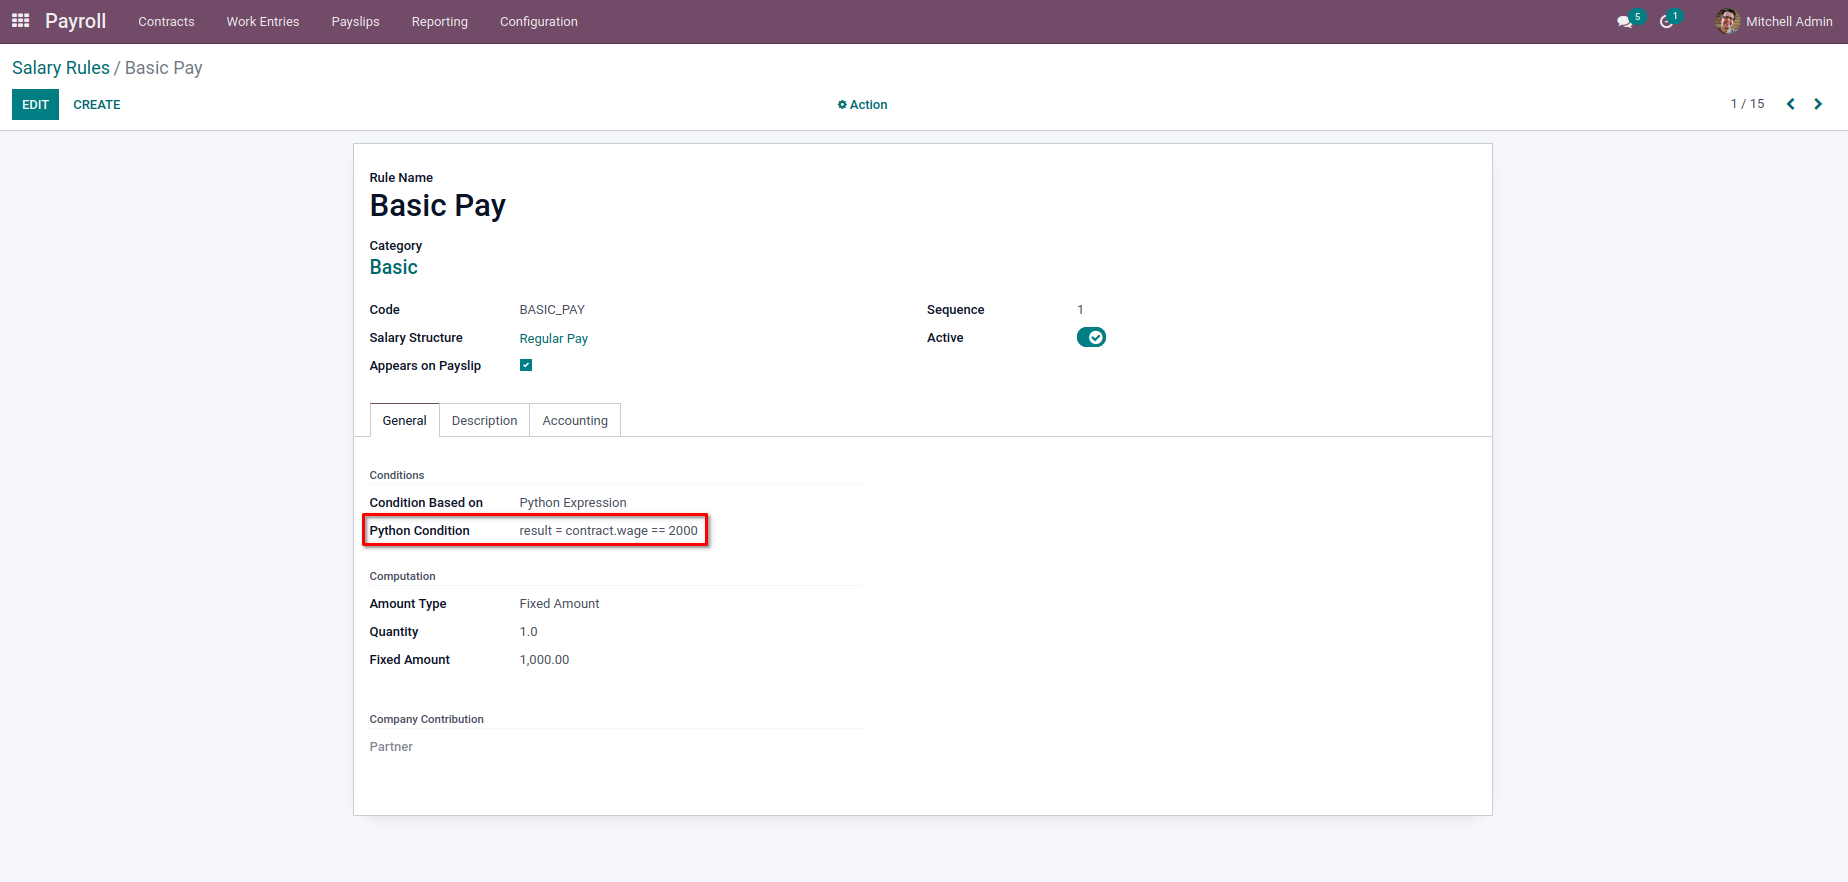
From the above image, we have
result = contract.wage == 2000
As the wage in a contract of the Employee is not 2000, the Basic Pay is not added to the Salary computation.
When we provided
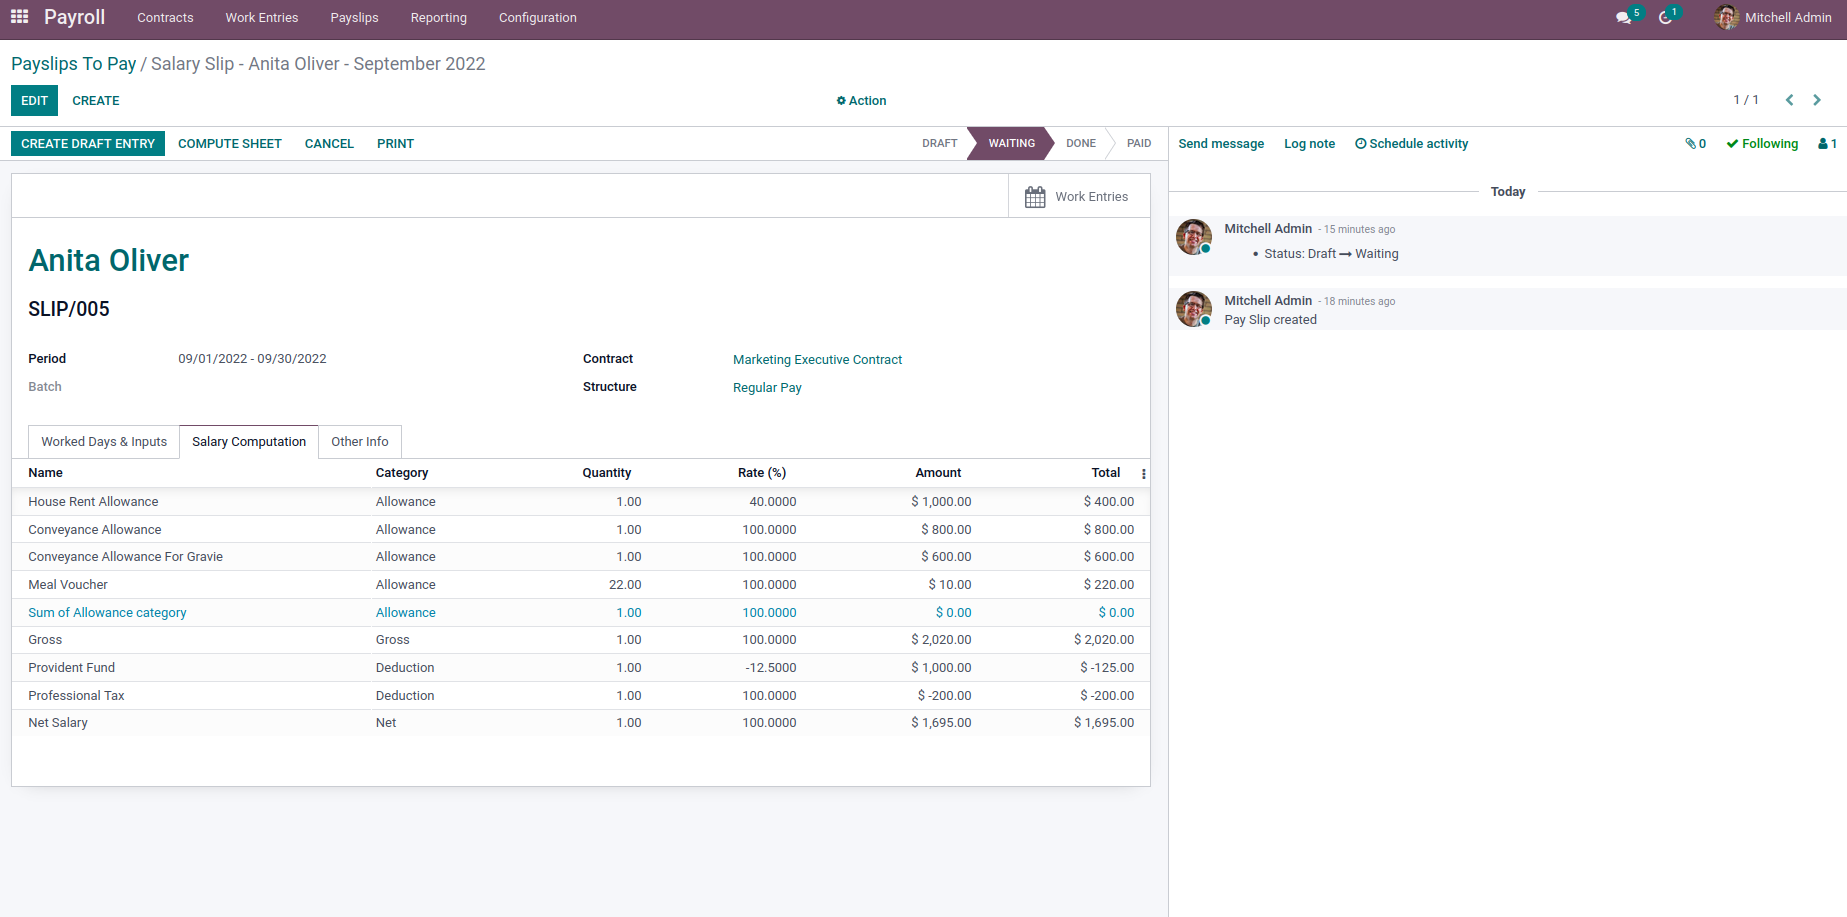
result = contract.wage > 1000,
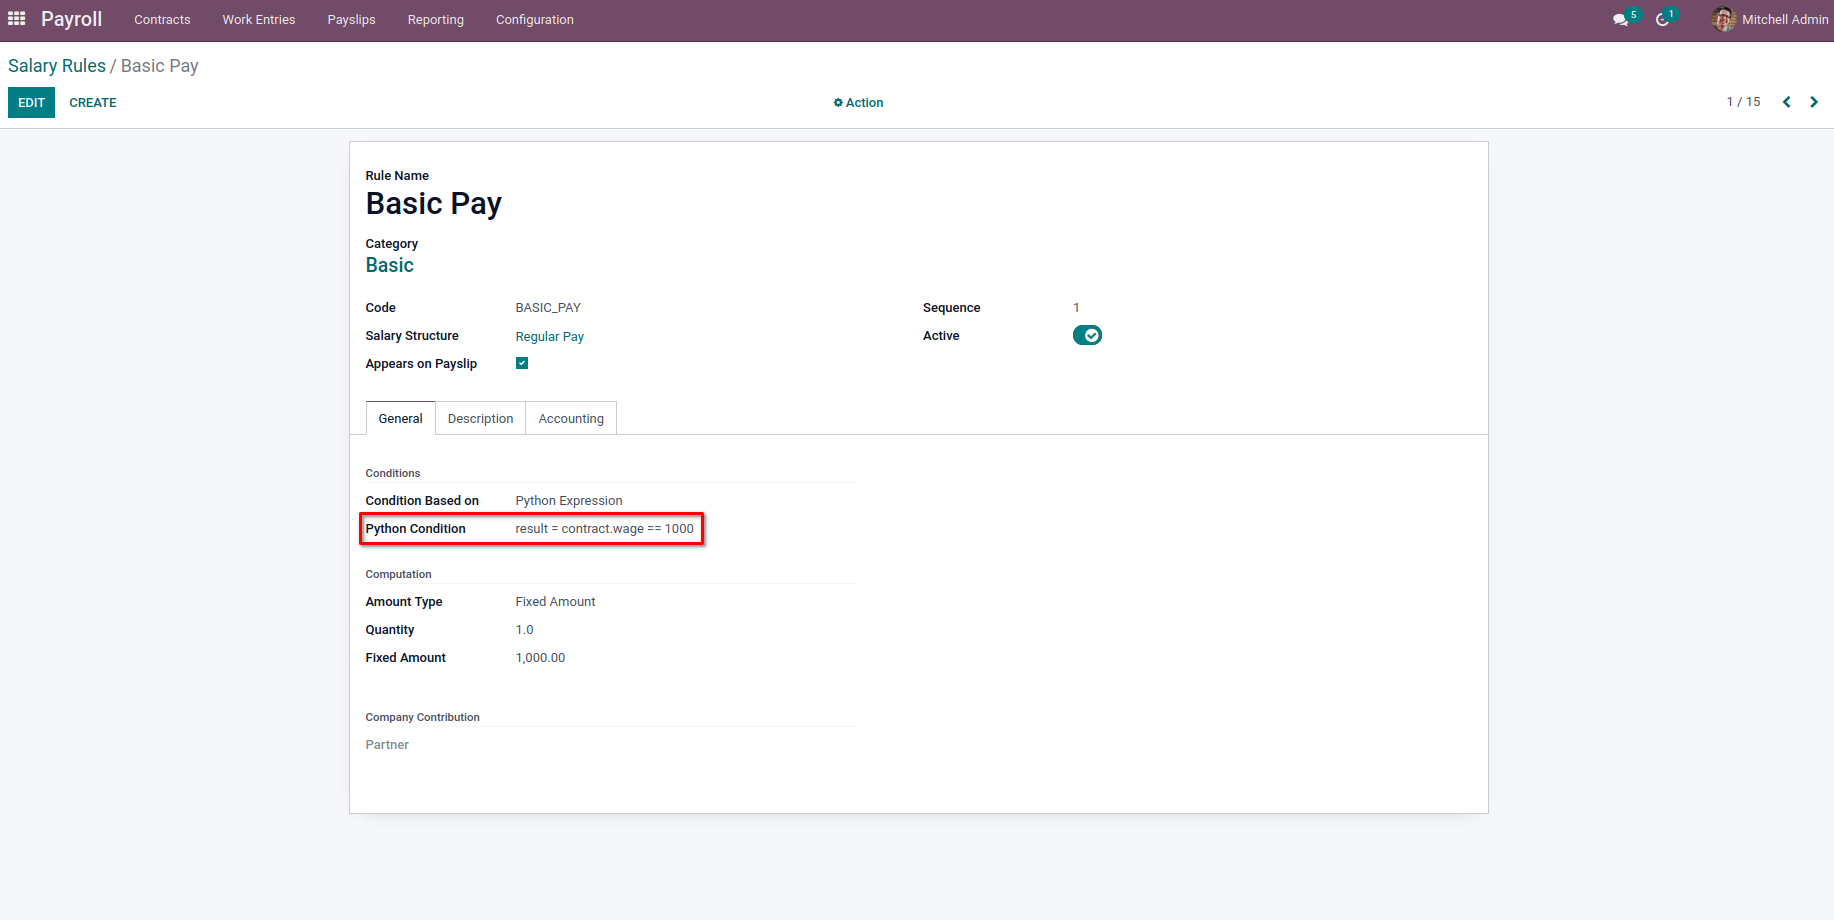
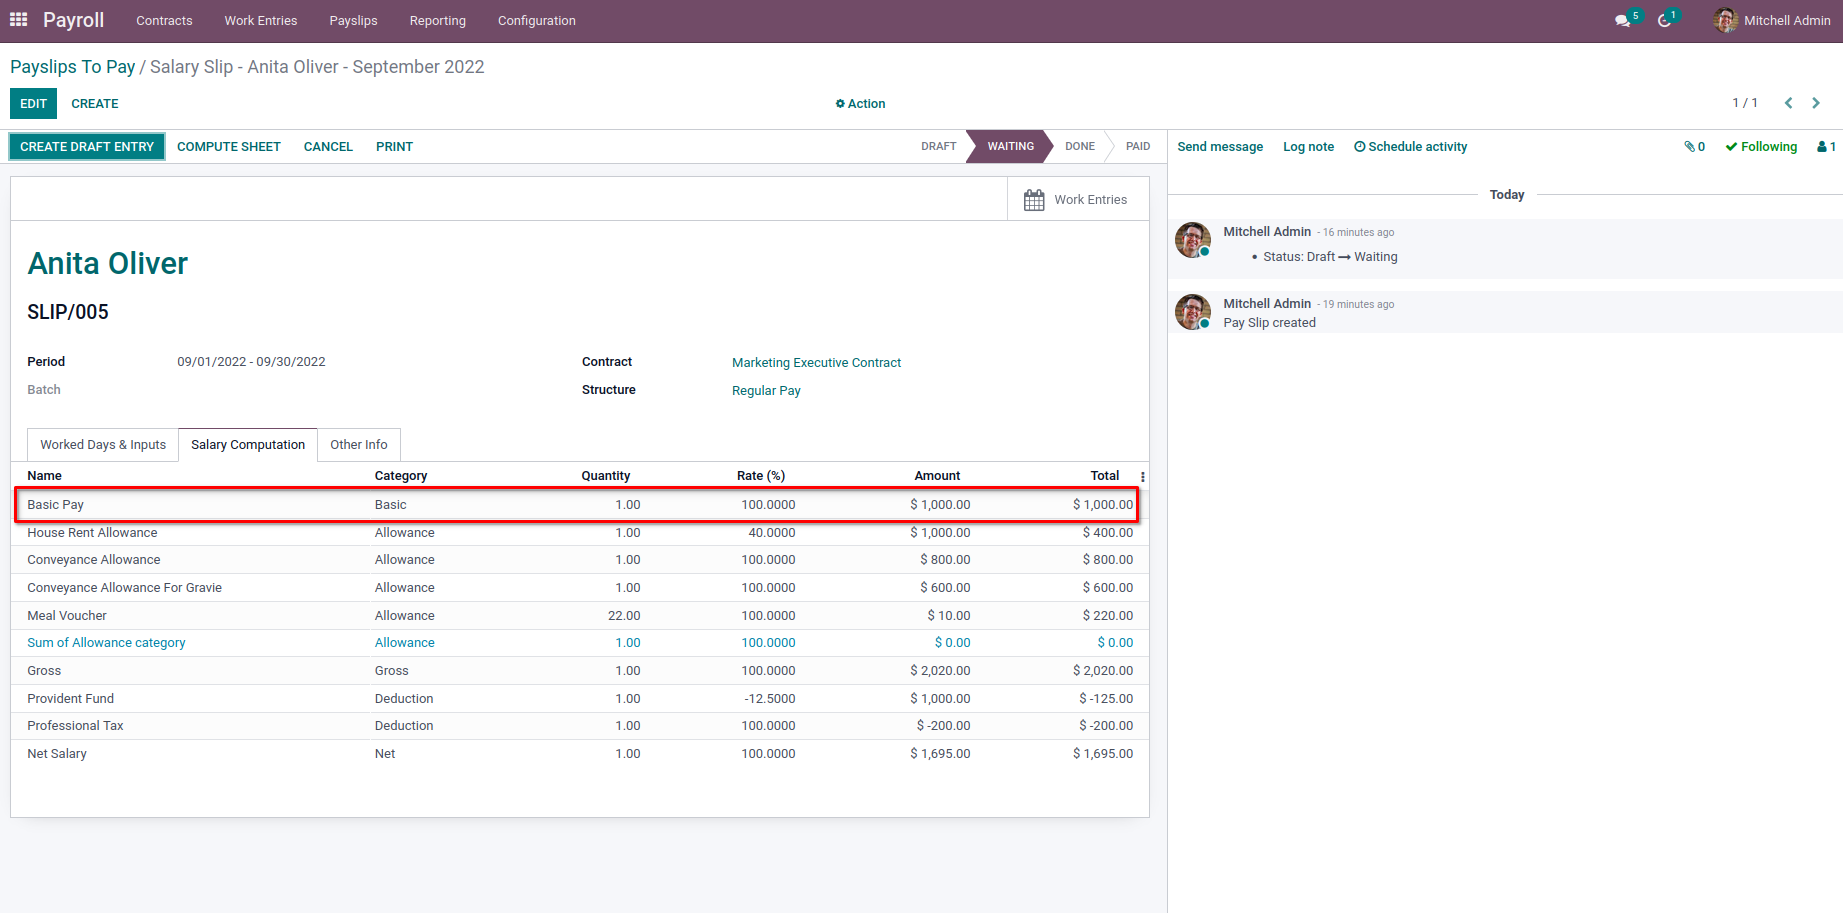
The Basic Pay is added to the Salary Computation from the above python expression.
For the variable ‘rules’, we will have all the previously computed rule objects where we can get their values for the computation. One thing is to note that the sequence of the current rule should be greater than that of the other rules we need to use for the computation.
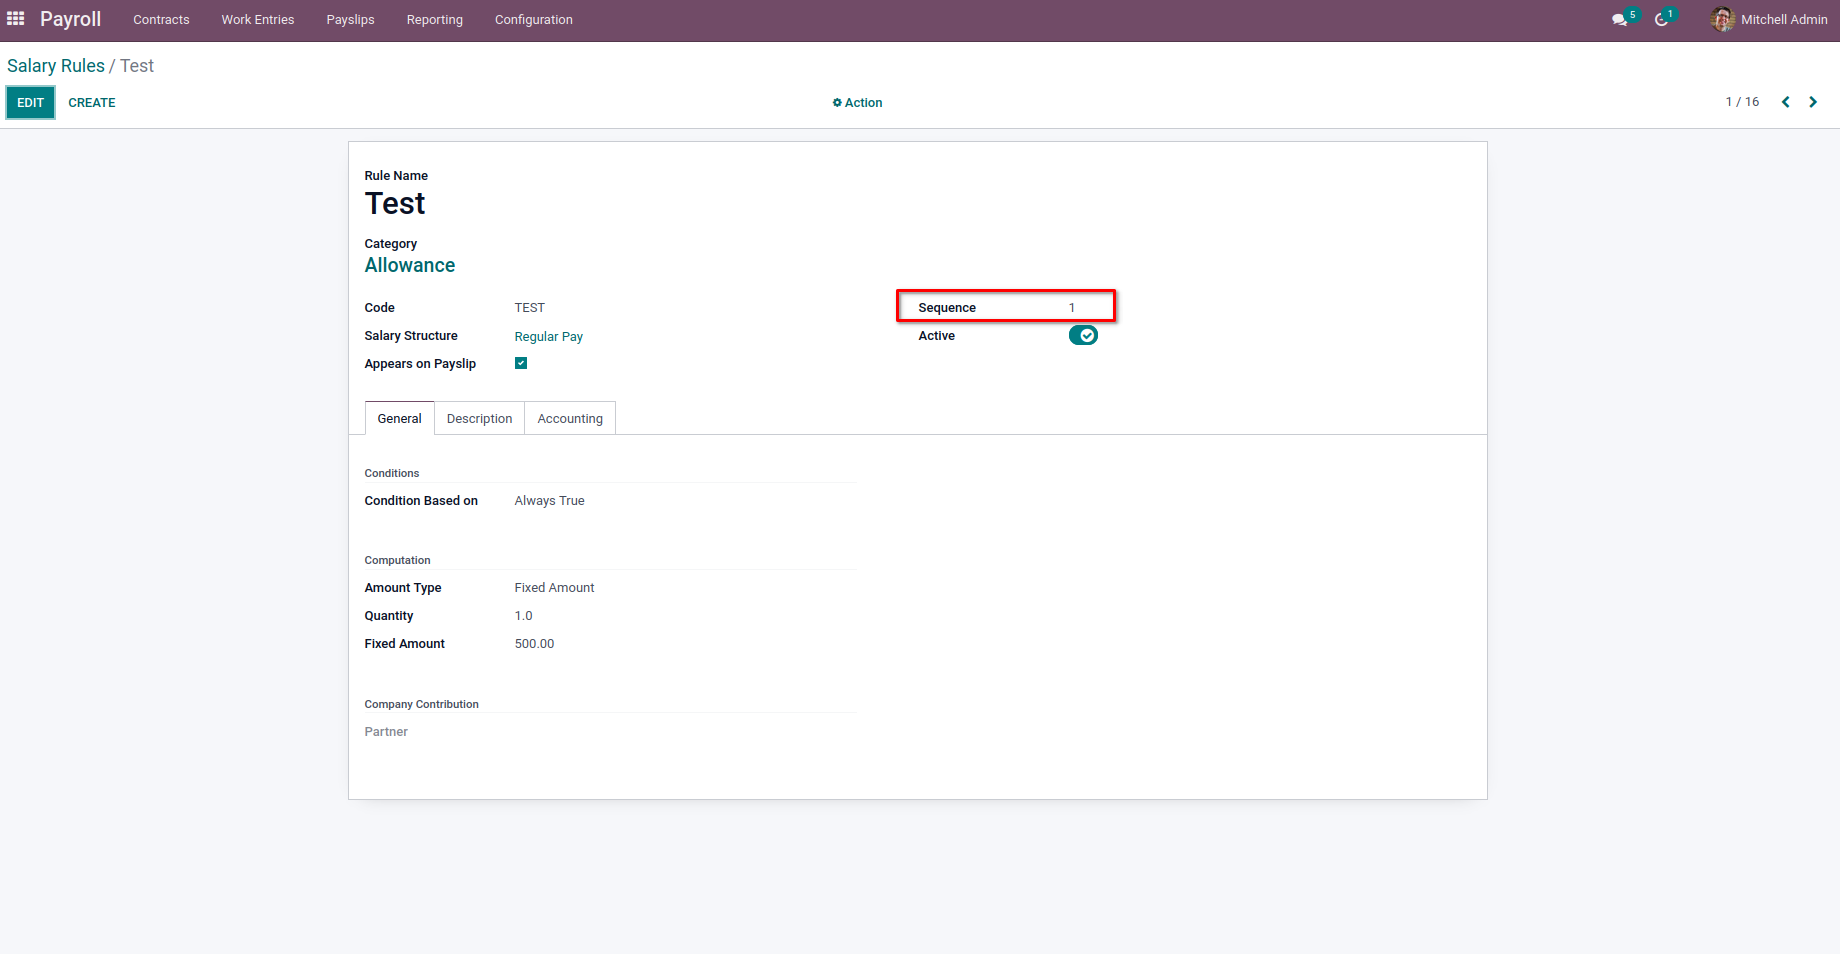
Let’s create a new rule with a sequence greater than the sequence of Basic Pay.
Now the Basic Pay rule is updated as,
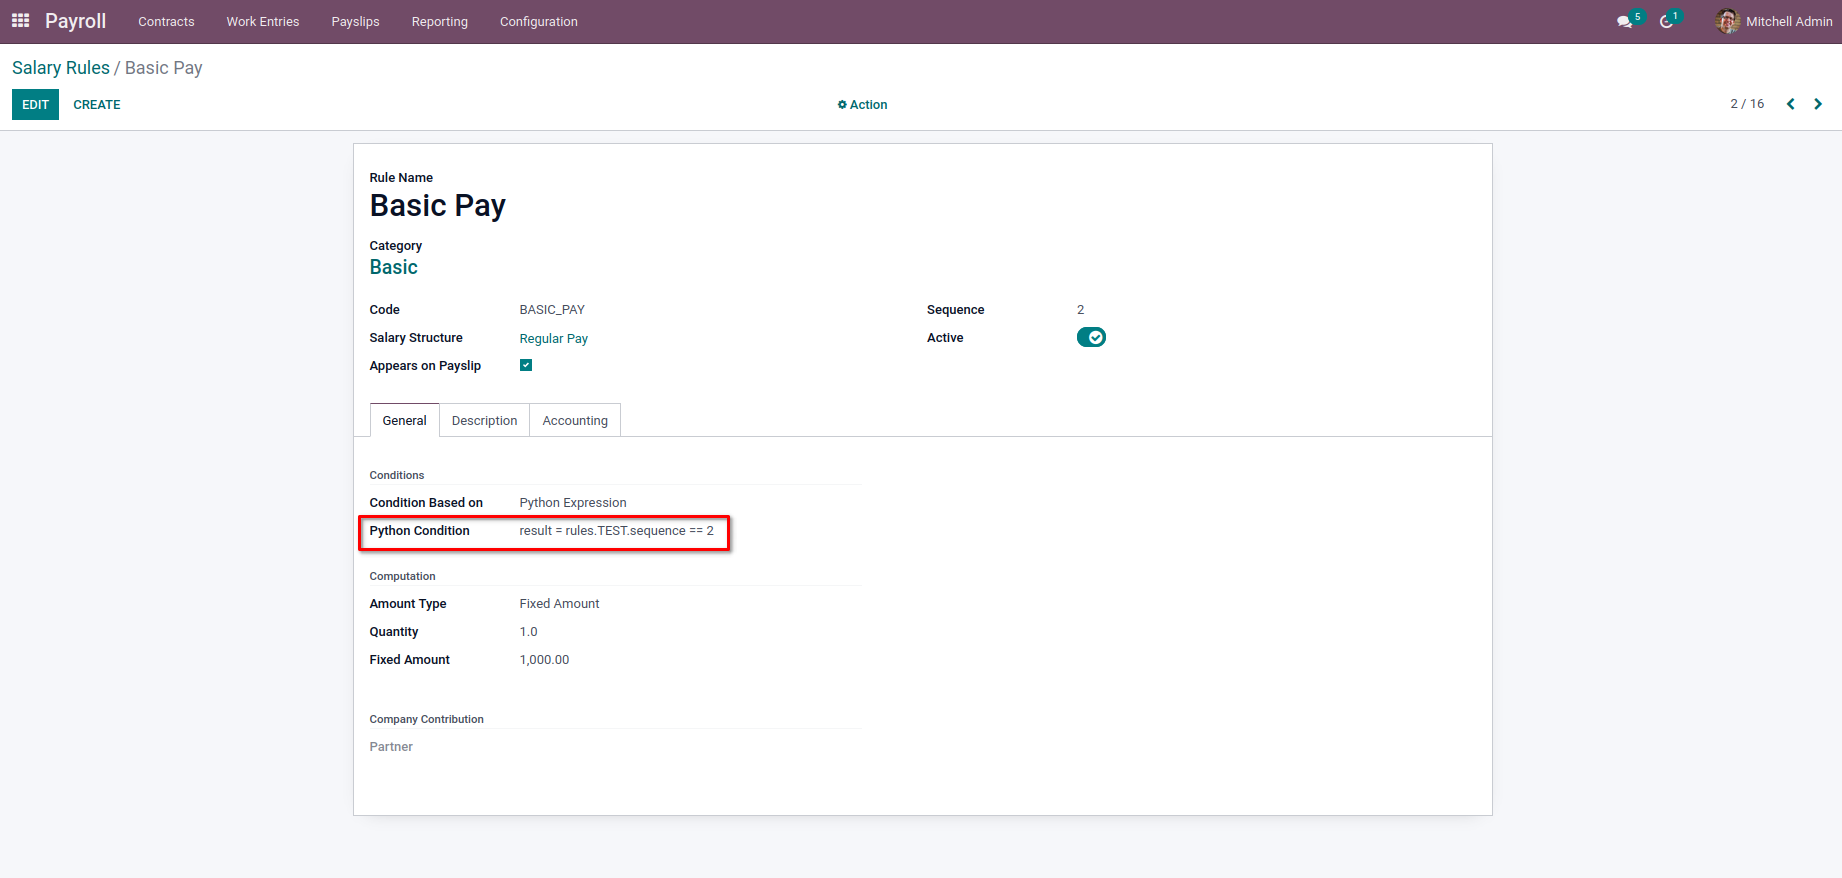
In the above image, the sequence of Basic Pay is greater than the Test, so the Test will be computed first. So, we can make use of the Test rule value inside the Basic Pay rule. Here we have used the sequence of the Test to check.
result = rules.TEST.sequence == 2
As above code, the result will be false as the sequence of Tests is not 2, and so the Basic Pay will not be added to the Salary computation.
But when we try like above as,
result = rules.TEST.sequence == 1

The Basic Pay will be added to the Payslip for Salary Computation.

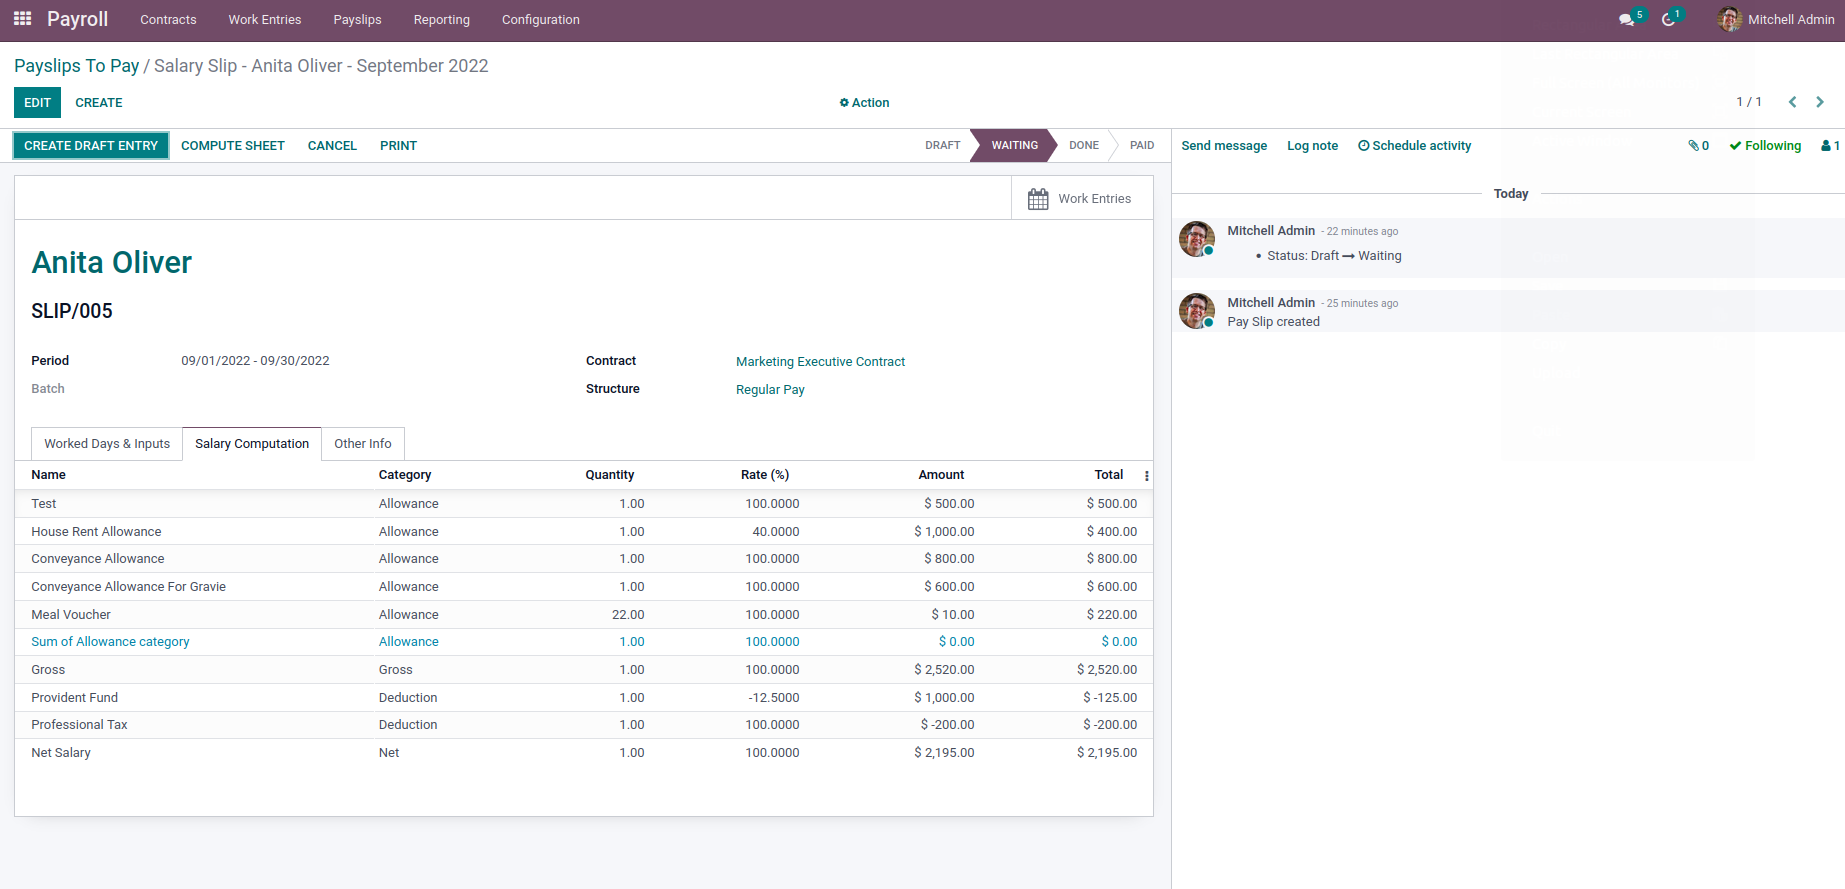
In the case of ‘categories,’ we will get the sum of the amount of all rules belonging to that category since it's the object containing computed salary rule categories.
From the above image example, we have
result = categories.BASIC + categories.ALW + categories.DED > 3000
The value of the result will be false as the category's sum is not greater than 3000.
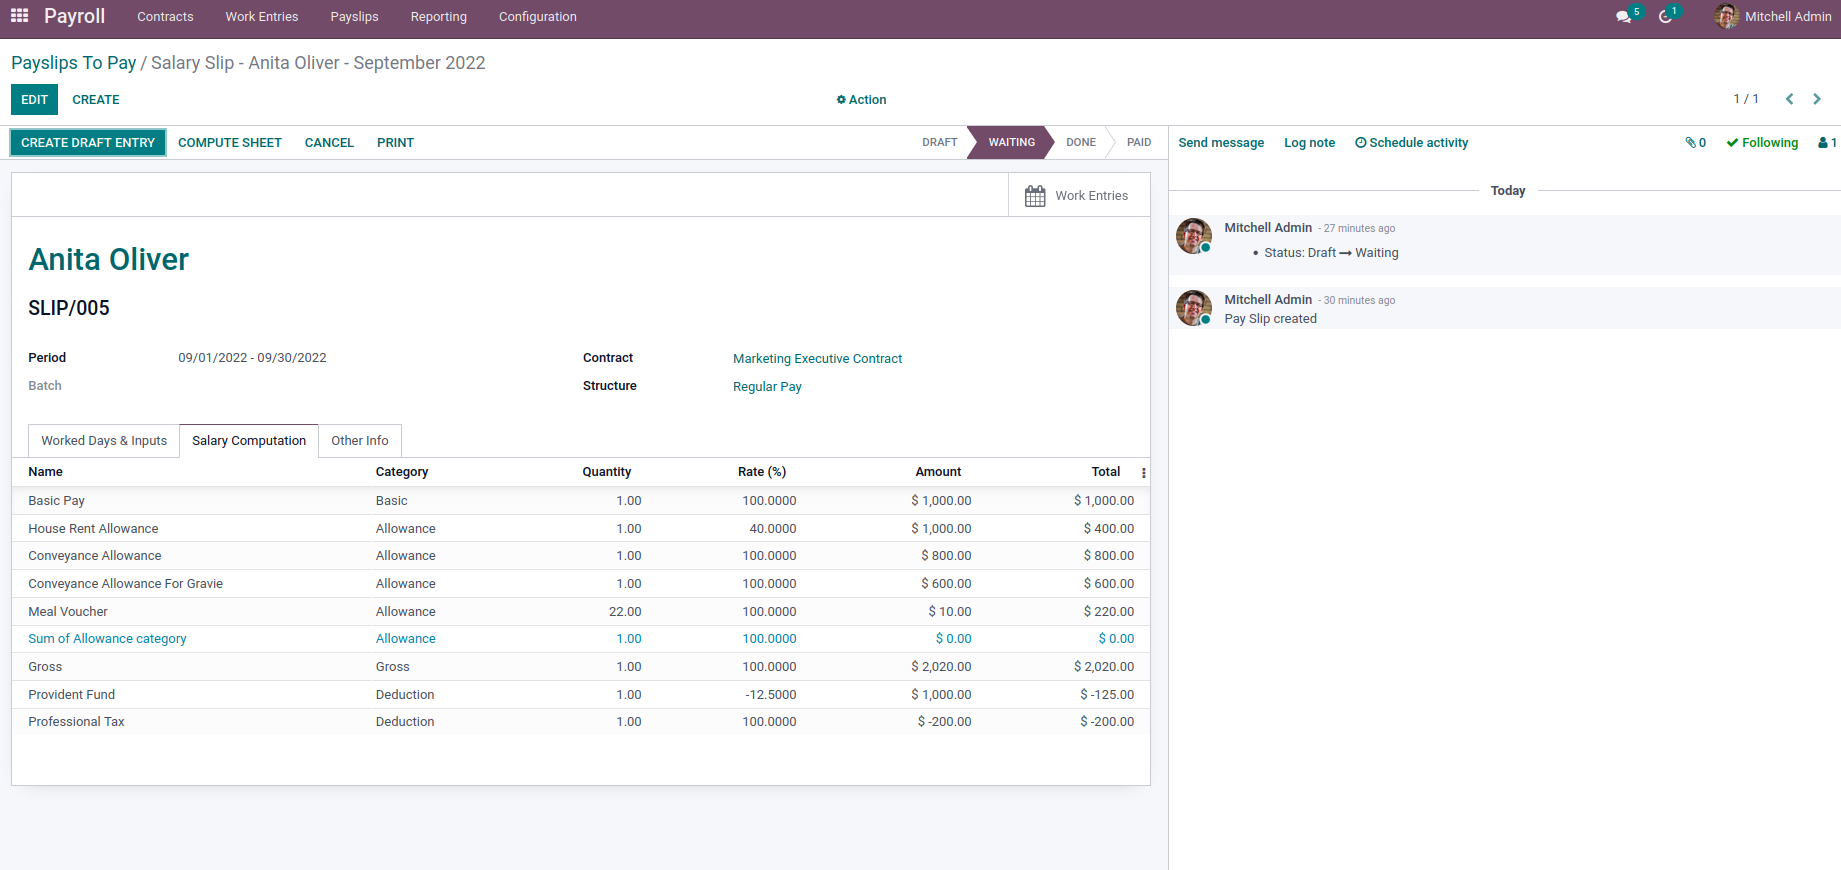
So the Net Salary will not be added to the salary computation. So to get a particular category's sum, we can call it like ‘categories.category_code’.
The ‘worked_days’ variable has the object containing the worked days of the particular payslip. We can get each Worked Days line if there are multiple Worked Days lines by using the code of the appropriate work entry types.

In the above example, we have used the result as
result = worked_days.WORK100
So if there are Worked Days lines with work entry type code as WORK100, the Basic Pay will be added to the salary computation.
We can also get the number of days, number of hours, or amounts of the lines by just calling as,
result = worked_days.WORK100.number_of_day
result = worked_days.WORK100.number_of_hours
result = worked_days.WORK100.amount
Likewise, we can use the same flow for ‘inputs.’ The variable ‘inputs’ will have the object containing the computed inputs.
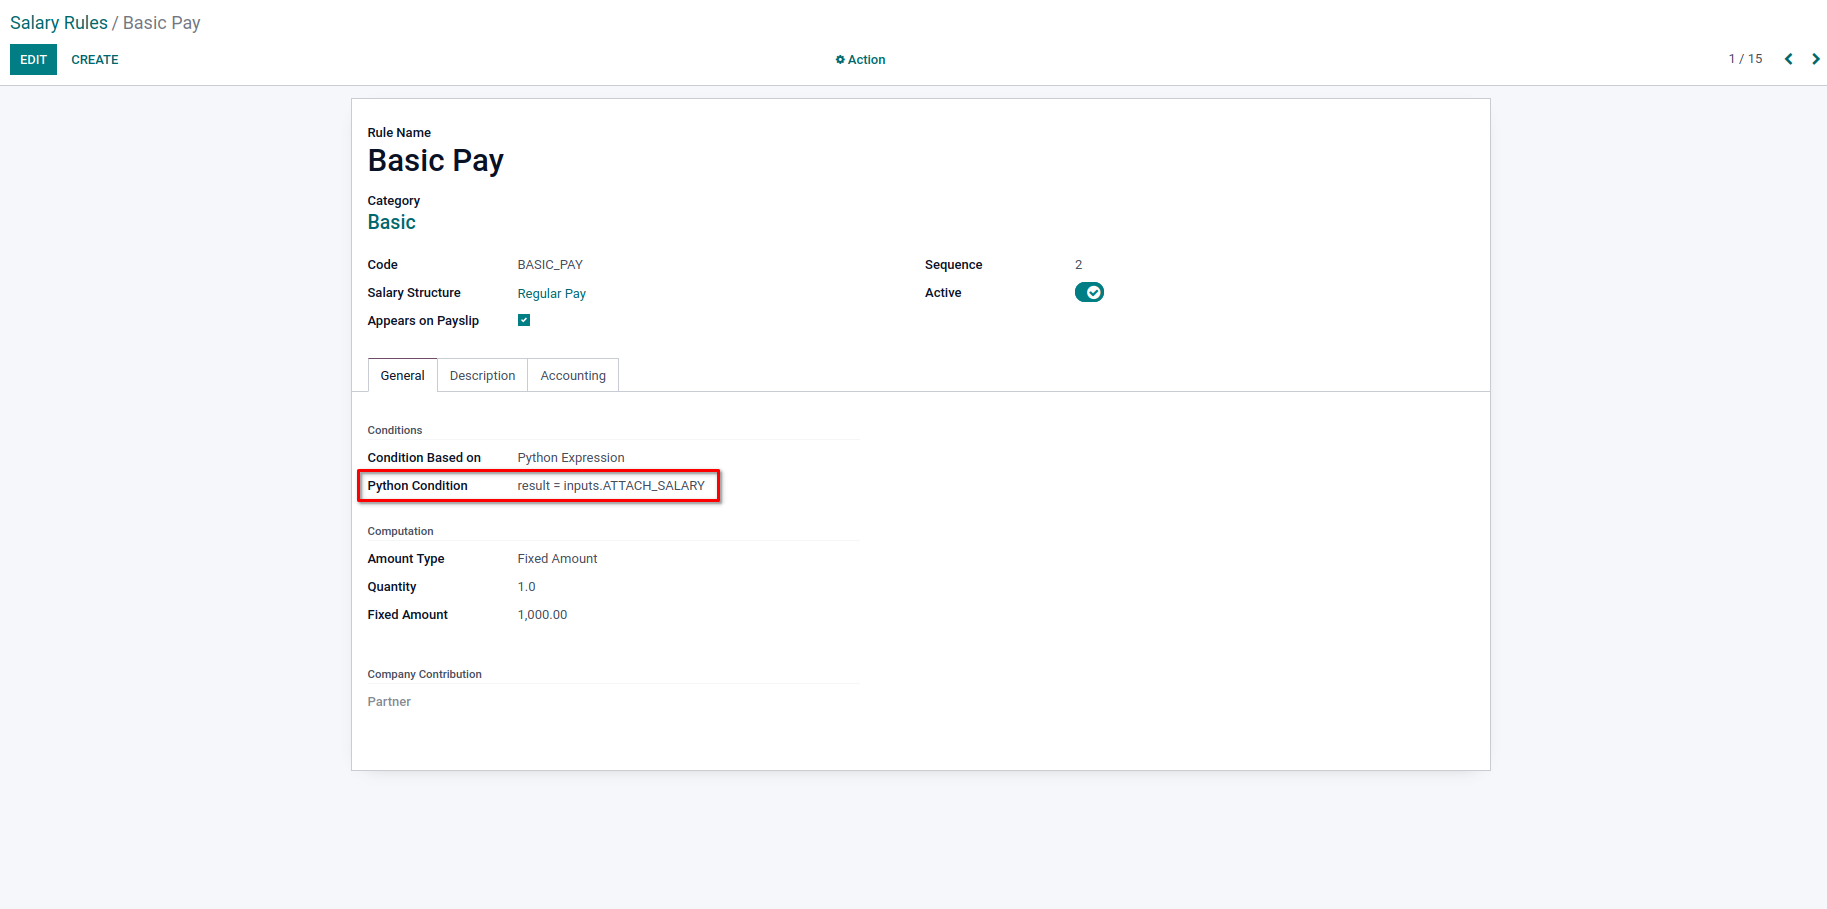
Here we have added the result condition as,
result = inputs.ATTACH_SALARY
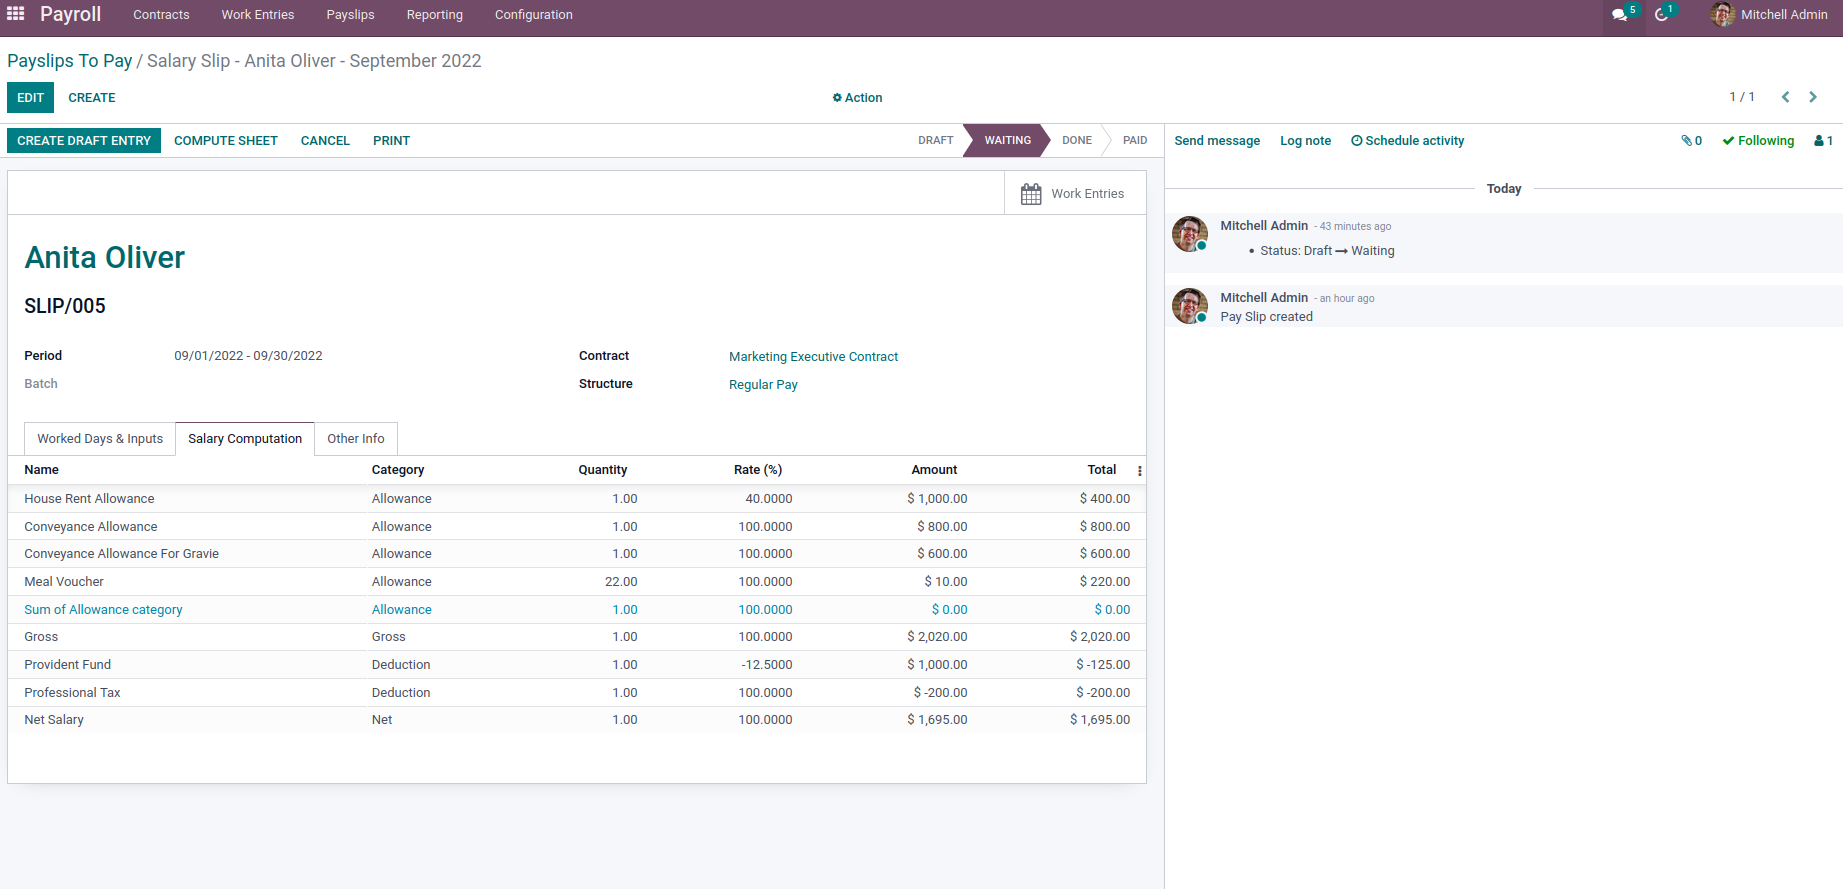
There are no input lines in the Payslip.
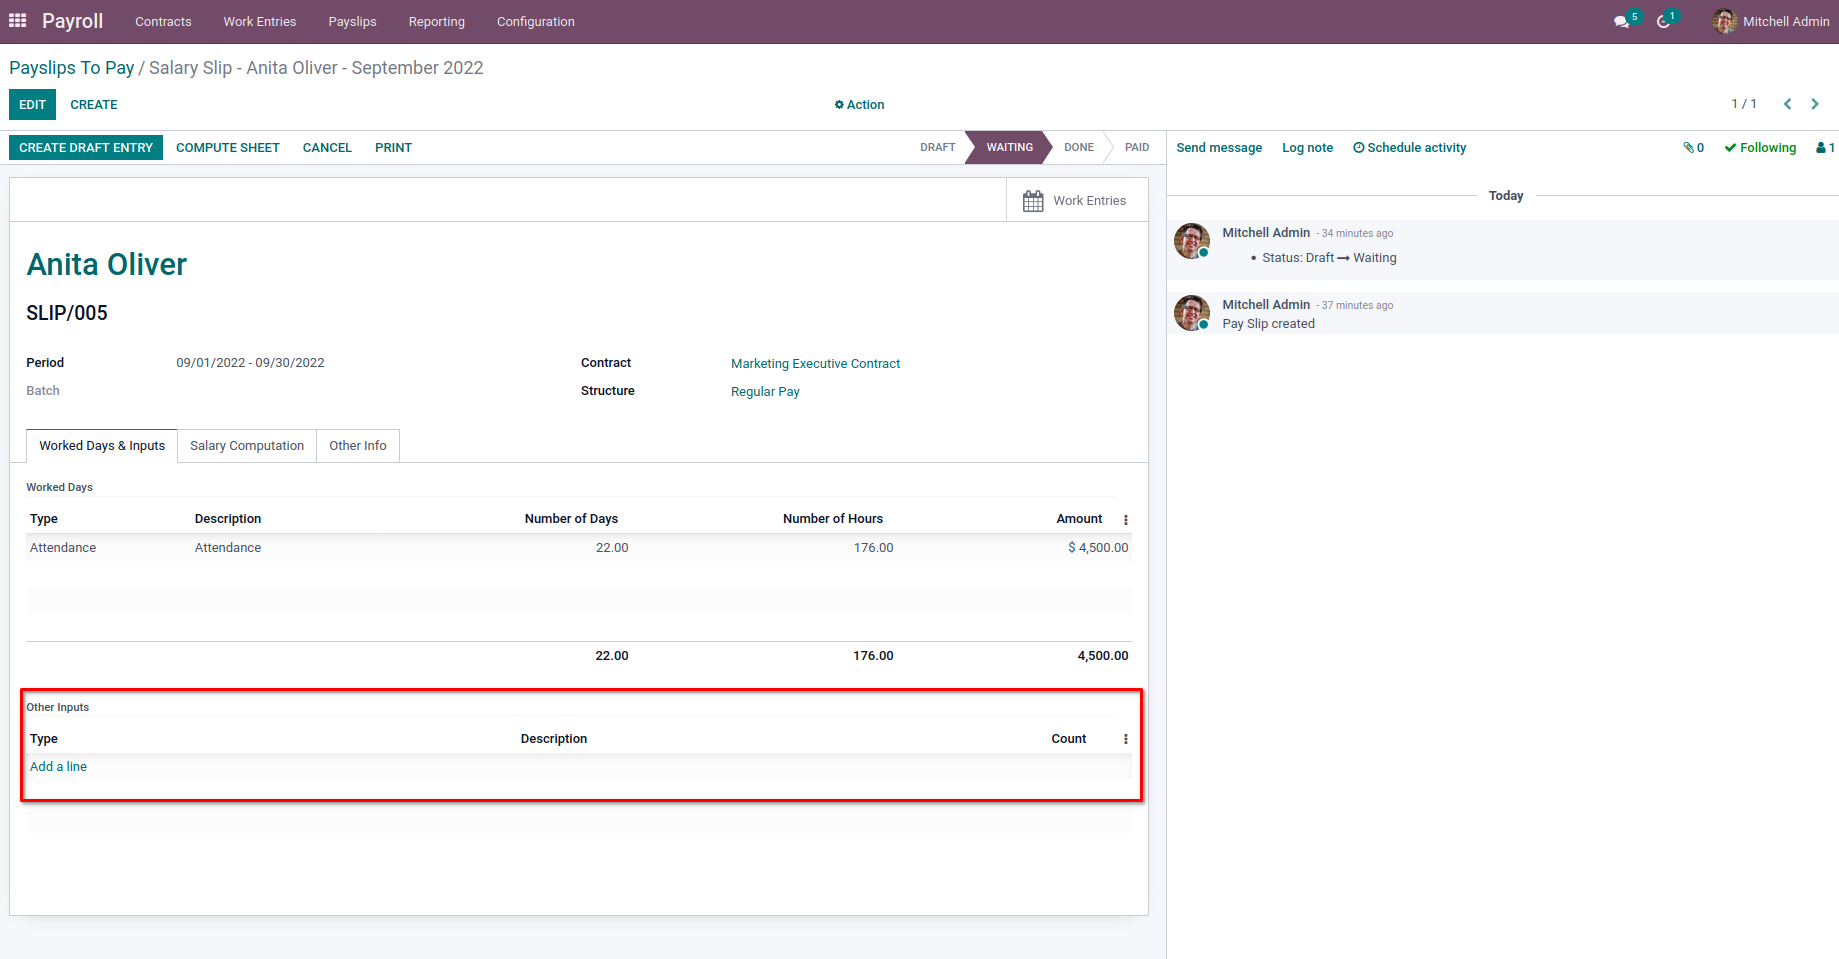
And so the Basic Pay is not added to the Payslip.
From here, we can get the input lines and the values based on the code of the input type. For getting the amount, we can try like,
result = inputs.ATTACH_SALARY.amount
Next, we have the computation of the Salaries. So after the conditions we specified satisfies, the rule will be added for the computation, and the amount of the salary rule will be added to the Payslip. For the Amount Type under the Computation section, we will have three options, Percentage, Fixed Amount, and Python Expression. For the fixed amount, we can provide the fixed value to be added with Salary in the Fixed Amount field and provide the Quantity to multiply the amount with some factor.
For the Percentage option, we can give the Percentage base field, which we need to take the percentage of like ‘contract.wage’. Next, provide the Quantity and Percentage value to calculate the Salary amount for this rule. In the case of Python Expression, we can use the same codes as we discussed for setting the rule conditions.
We can add the Description or notes for the Salary rule in the Description tab. Next, we have the Accounting tab, where we can add the particular accounting details for our salary rule. We can choose a particular Debit account and Credit account for the Salary rule. Also, can set the Analytical account to have an analytical entry. Next, we have a boolean check field Not computed in net accountably where we can enable in order not to add the amount of the particular rule on the Net salary accounting entry while creating an account entry for the Payslip.
That’s all. Now we have configured the salary rule completely. And we can create multiple rules like this to have Salary Payslips.