According to Odoo, “the Odoo Web LIbrary (OWL) is a smallish UI framework intended to serve as the foundation for the Odoo Web Client.” The OWL is a modern framework written in TypeScript that takes the best ideas from React, and Vue presents them in a clear and consistent manner.”
Now, let's look at how to make a custom popup in Odoo 16 when you click a POS button.
Please refer to the blog: How to Create a Custom Pop-Up in Odoo 16 PoS Using OWL for more information on adding custom popups in your POS.
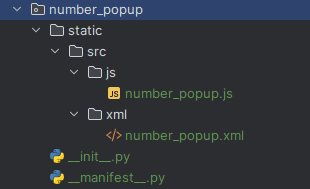
This blog will walk you through the process of creating a custom number popup in Odoo 16 POS using owl. The following diagram depicts the construction of the custom module.
To obtain the default number popup, we must provide ‘NumberPopup’ as shown in the code below, and then we will obtain the input value if confirmed as the payload (the value consoled in the code below).
To obtain a number popup, we must provide 'NumberPopup' as shown in the code below, and then we will obtain the input value if confirmed as the payload (the value consoled in the code below).
async onClick() {
var self = this;
const {confirmed,payload} = await this.showPopup(‘NumberPopup’, {
Title: this.env._t(“Success”),
});
If (confirmed){
console.log(payload)
}
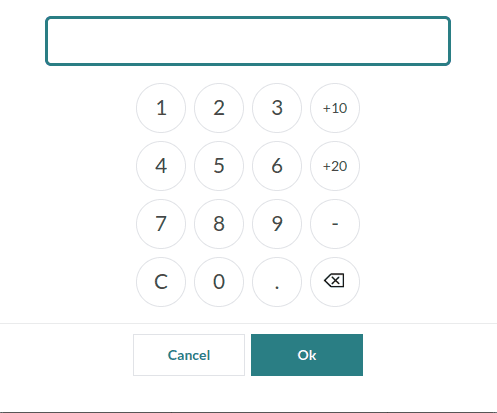
} The resulting number popup window is depicted in the image below.
If we want to extend the number popup, create a new file number_popup.js.
We can use the code:
Odoo.define(“module_name.filename’, function(require) {
       ‘use strict’;
const Registries = require(“point_of_sale.Registries’);
const NumberPopup = require(“point_of_sale.NumberPopup’);
const Popup = (NumberPopup) =>
      class extends NumberPopup {
               //Write your functions here
 }
Registries.Component.extend(NumberPopup, Popup);
         return Popup;
});
For creating a custom number popup create a new template that inherits the number popup template.
Create a new xml file number_popup.xml. For example:
If we want to remove some of the keys from the default number popup, we can use the code below.
<templates id=”template” xml:space=”preserve”>
     <t t-name=”NumberPopup” t-inherit=”point_of_sale.NumberPopup”             t-inherit-mode=”extension” owl=”1”>
     <Draggable>
           <div class=”popup popup-number” t-att-class=”{ ‘popup-password’ : props.isPassword }”>
                   <header class=”title drag-handle”>
                          <t t-esc=”props.title”/>
                   </header>
           <div class=”popup-input value active”>
                 <span t-att-class=”{ ‘highlight’: state.toStartOver }”>
                        <t t-esc=”inputBuffer”/></span>
          </div>
          <div class=”popup-numpad”>
              <button class=”input-button number-char” t-on-mousedown.prevent=”() =>         this.sendInput(‘1’)”>1</button>
                  <button class=”input-button number-char” t-on-mousedown.prevent=”() =>      this.sendInput(‘2’)”>2</button>
 <button class=”input-button number-char” t-on-mousedown.prevent=”() =>      this.sendInput(‘3’)”>3</button><br/>
 <button class=”input-button number-char” t-on-mousedown.prevent=”() =>      this.sendInput(‘4’)”>4</button>
 <button class=”input-button number-char” t-on-mousedown.prevent=”() =>      this.sendInput(‘5’)”>5</button>
 <button class=”input-button number-char” t-on-mousedown.prevent=”() =>      this.sendInput(‘6’)”>6</button><br/>
 <button class=”input-button number-char” t-on-mousedown.prevent=”() =>      this.sendInput(‘7’)”>7</button>
 <button class=”input-button number-char” t-on-mousedown.prevent=”() =>      this.sendInput(‘8’)”>8</button>
 <button class=”input-button number-char” t-on-mousedown.prevent=”() =>      this.sendInput(‘9’)”>9</button>
<button class=”input-button numpad-char” t-on-mousedown.prevent=”() =>
this.sendInput(‘Delete’)”>C</button>
<button class=”input-button numpad-char” t-on-mousedown.prevent=”() =>
this.sendInput(0)”>0</button>
<button class=”input-button numpad-backspace” t-on-mousedown.prevent=”() =>
this.sendInput(‘Backspace’)”>
  <img style=”pointer-events: none;”  src=”/point_of_sale/static/src/img/backspace.png”      width=”24” height=”21” alt=”Backspace”/>
</button>
<br/>
            </div>
<footer class=”footer centered”>
         <div class=”button cancel” t-on-mousedown.prevent=”cancel”>
                 <t t-esc=”props.cancelText”/>
         </div>
         <div class=”button confirm highlight” t-on-mousedown.prevent=”confirm”>
                  <t t-esc=”props.confirmText”/>
         </div>
</footer>
</Draggable>
</t>
</templates>
The number popup window is depicted in the image below :
This blog will help create a custom number popup by inheriting the template. And we can customize the number popup.