In the previous blog, we have discussed how to create models, how to define the fields and how about adding the security file. If you haven't gone through the blog yet and are interested in reading them, please have a look at the previous one from the following link: how to create a module in odoo12
So in this blog, we will discuss how one can define the views for the module one have created. Right now we have the model named the Student. A student with the fields such as name, age, photo, gender etc.
Once you define the menu for the school in the view and give an action for it, the system automatically shows it as a tree and as form view. But the view which has displayed here look likes below,
We have definitely some order for the fields to appear in the view, here comes the necessity to define the views.
So let us retake the code that we have added in the XML file,
Right now if you create a record and save it and check the tree view, you will see the window like below.
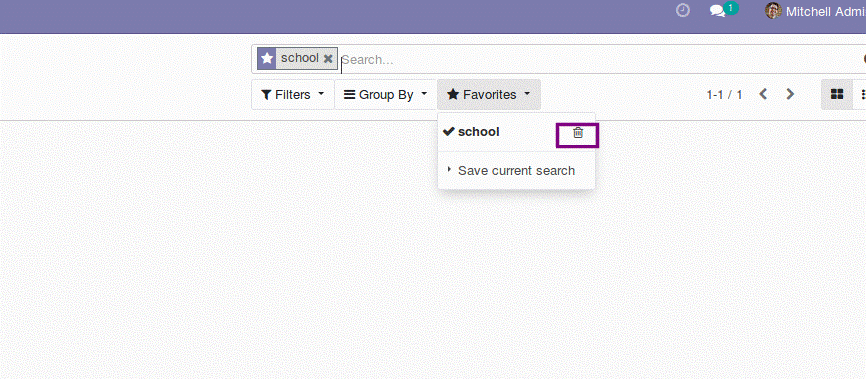
Before moving further, I have a small development tip for you, which can help you sometime. There are many cases where you have to upgrade the module you are developing, so going to the apps menu and searching is little time taking. So just for the first time search our module, in this case, it is school,
After searching the school, click on the Favorites and click on Save Current Search. Enter the school there and tick use by default as shown in the above image.
Later when you open the Apps menu, you will find them there, saving much of your time. After the module development, one can delete the same from the Favourites menu itself.
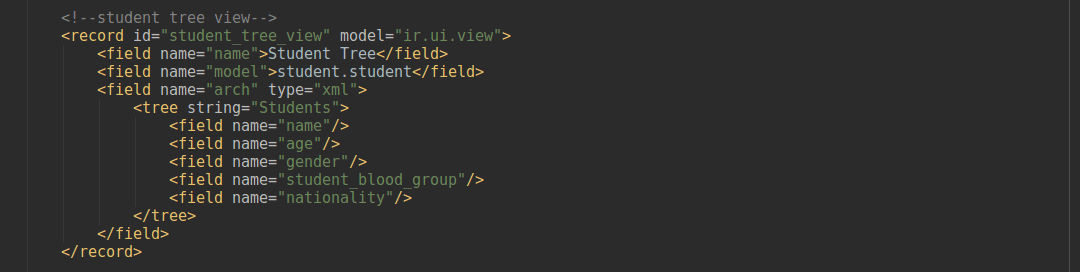
So let us define the tree view for the model first and later we can move to form.
 <record id="student_tree_view" model="ir.ui.view">
 <field name="name">Student Tree</field>
 <field name="model">student.student</field>
 <field name="arch" type="xml">
           <tree string="Students">
          <field name="name"/>
          <field name="age"/>
          <field name="gender"/>
          <field name="student_blood_group"/>
          <field name="nationality"/>
            </tree>
  </field>
   </record>
In the above code, one can see how the tree view is defined. We have to create a record in the model ir.ui.view, specify the model for which the view is creating, here in our case the model is the student. Student and inside the tree tag we have specified the fields and order in which fields have to appear in the tree view. The fields which have to be displayed in treeview has to be given here. If you check the above code, we haven't shown the field photo(student image) in the tree view. So it is only required to give the field which has to be displayed in the tree view.
So let us upgrade the module and see how the tree view gets changed. As we haven’t made any changes in the python file there is no need of the restart of the service. We can just upgrade the module and see the changes. Hope you haven't forgotten how to upgrade the module, just go to the Apps menu and search school, then you will see the module and click on the upgrade button.
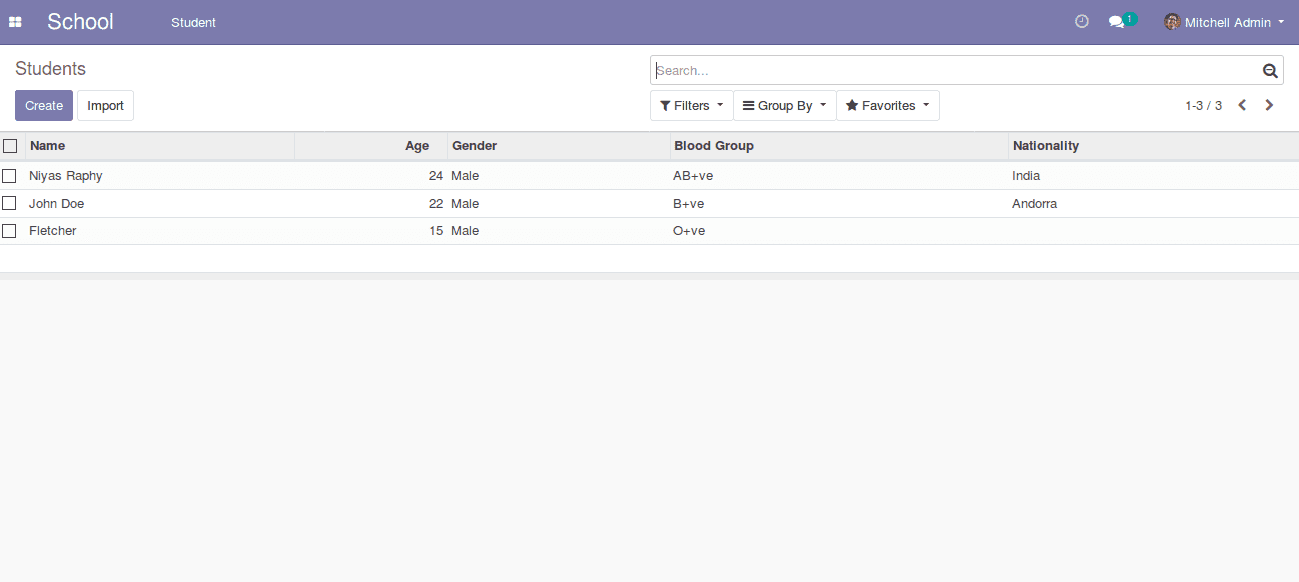
Now you can see that fields have been added to the tree view, which we have defined in the above tree view.
So now let's move on to the form view,
<!--student form view-->
<record id="student_free_view" model="ir.ui.view">
<field name="name">Student Form</field>
<field name="model">student.student</field>
<field name="arch" type="xml">
          <form string="Student">
                <sheet>
                    <field name="photo" widget="image" class="oe_left oe_avatar" />
                    <div class="oe_title">
                     	<h3>
                            <field name="name"/>
                        </h3>
                    </div>
     <group>
                       <group>
                            	<field name="age"/>
                            	<field name="gender"/>
                        </group>
                        <group>
                            	<field name="student_dob"/>
                            	<field name="student_blood_group"/>
                            	<field name="nationality"/>
                        </group>
                    </group>
           </sheet>
    </form>
</field>
</record>
If you check the above code, you can see that we have created another record in ir.ui.view and inside the form tag, we have defined the form view for the model student.student.
So let us upgrade the module and see the changes.
To understand the difference compare the above form with the one we had earlier.
If you check the photo field you can see a change in appearance, it is because in the view we have given widget=”image” for the field photo.
<field name="photo" widget="image" class="oe_left oe_avatar" />
The sheet tag is given so that the view will look better if you remove the sheet from the above code. You can see the difference, let us comment the sheet tag in the view and upgrade the module as shown in below image,
The new view after commenting on the sheet tag.
The difference is that once we add sheet tag, the view will have a div like this in below image,
Then let us discuss the usage of the group tag in the view, what happens if we comment out the groups from the view. Just comment the group tags now and upgrade the module and see the difference.
So in the above image, you can see the group tag has commented, that means it does not get into effect.
Let us upgrade the module and see the difference,
Now you can see all the labels of the field have gone and the view looks not good enough. So remember to get/visible the field labels you must define the fields inside the group tag. Now let us uncomment the outer group tags as shown in below image and check.
On upgrading the module we will get field labels as shown in below image,
From here you will understand the use of two inner group tags used inside the group, that will align the fields to the sides of the page. Just uncomment the rest of the group tag and see.
Now hope you have got enough idea about how to define the form and tree view for the models. There are other types of views like kanban, pivot, calendar, Gantt etc. Explore all those view types and how to define it. Once you get the basics it's easy to explore the rest.