As this modern era is concealed with advanced technology, most enterprises are serving their platform digitally. In this competitive world, all kinds of businesses start and develop by keeping a goal in mind to ensure productivity. The digital signature can tackle effortless, paperless and priceless progress in your business in a fraction of the time. With Odoo 15, the Sign module can deliver your important documents and agreements with a few clicks and drag and drop options. As the Sign module in Odoo is more secured, it places proper intact communications and transfers your documents to the concerned partner by proper encrypted documents. Thus the system maintains the document’s appropriate integrity.
Every business tycoon executes time management in one way or another to imply their operations easily and efficiently and replace manual paperwork such as scanning, printing, copying and faxing. Instead of using paper and pen, they can modify the usage of the document with e-signature and digitally be equipped with Odoo 15. And this can be also be used anytime, anywhere at the same time and be stored with security. Moreover, with this system, you can prepare audit reports and any essential agreements, and you need not wait for the other party to get signed within a few clicks. The electronic signature that Odoo performs is valid under EU regulation 910/2014 (eIDAS), and US ESIGN ACT is authorized by almost every country.
WHAT IS ODOO SIGNATURE? AND HOW IT IS USEFUL?
Odoo signature is a module that is implemented and integrated with other Odoo Apps to moderate your time and tasks with ease. For example, it maintains higher and quicker dealings like having access to sales orders, purchase orders, invoices and any other critical agreements which are essential can also be approved with E-signature.
It is useful in many ways like-
- Time-saver and can be handled easily
You need not anticipate the documents with the clients to get signed; instead of within a few clicks, it manages the role within seconds.
- Paperless and manages the low cost of operations
As in this digital world, all business processes must be used without paper and should reduce their expenses for manual tasks like not scanning, printing, shredding, copying, faxing, or any other must be avoided as the trend. And thus, the business operations can be settled with more efficacy.
- Easily accessible at anytime, anywhere and can be archived with a private server
Due to all the documents being saved and used by the Odoo, you need not be tense about whether the documents are correctly archived since it is auto-archived and can be accessed anytime and anywhere as per your need.
This blog gives you a detailed understanding of keeping the authorized documents digitally equipped by E-signature and how useful the Sign module is in Odoo 15.
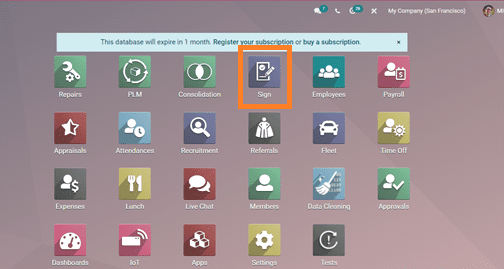
To get connected to the Odoo Sign module, you need first to install the Sign module from the Odoo Apps Store.
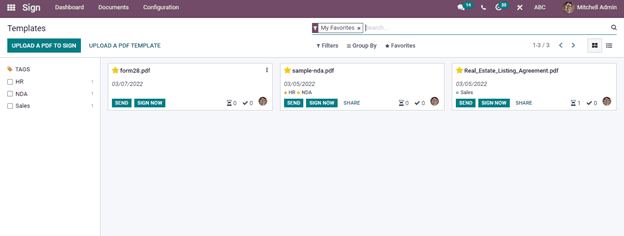
By clicking on the Sign module, you will be redirected to the dashboard of the main menu of the Sign module. While entering into the dashboard, you would get a preview of the template where you can create a sample, and if you have already created it, you get the dashboard with the templates you have created. Now by going through the screenshot below, you can illustrate the dashboard.
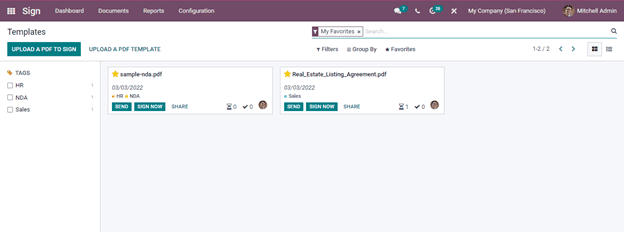
The above screenshot gives you an illustration of the Kanban view. You can also change the dashboard window or templates in the list view. You can access these views by clicking on the top-right corner. By going through the dashboard window, you can see the templates created on the right side of the window in a card-like pattern. In this type of pattern, you get all the information of each template. From each template, you get a short description provided with the name of the PDF, date, and tags associated with the respective template, and you can also see SEND, SIGN NOW, and SHARE buttons, respectively. And even you can see other icons, namely showing the Number of Documents in progress with this template and the Number of Documents signed with this template and with a photo of the person who is in charge given at the bottom of each template. In addition, you can notice a drop-down menu representing the three dots on the right-hand side of each template.
To know what is included in the drop-down menu, let us click on the three dots, which are seen on the box's right-hand side and see its options. Given down, highlighted in the screenshot below, it gives you an idea of the available options.
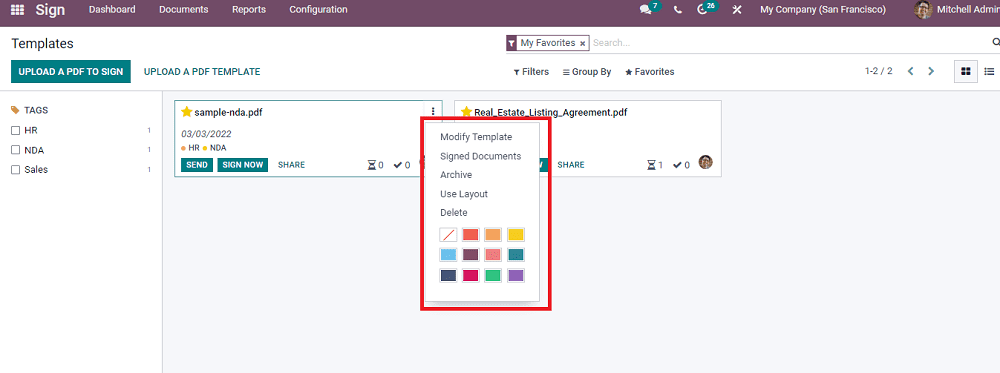
In the drop-down menu, you can find Modify Template, Signed Documents, Archive, Use Layout, delete options, and even different colours to easily recognise boxes as per the priority. The left-hand side of the dashboard window is defined with TAGS which makes you separate the folders if you have several folders and that you can segregate them with your needs with the help of tags.
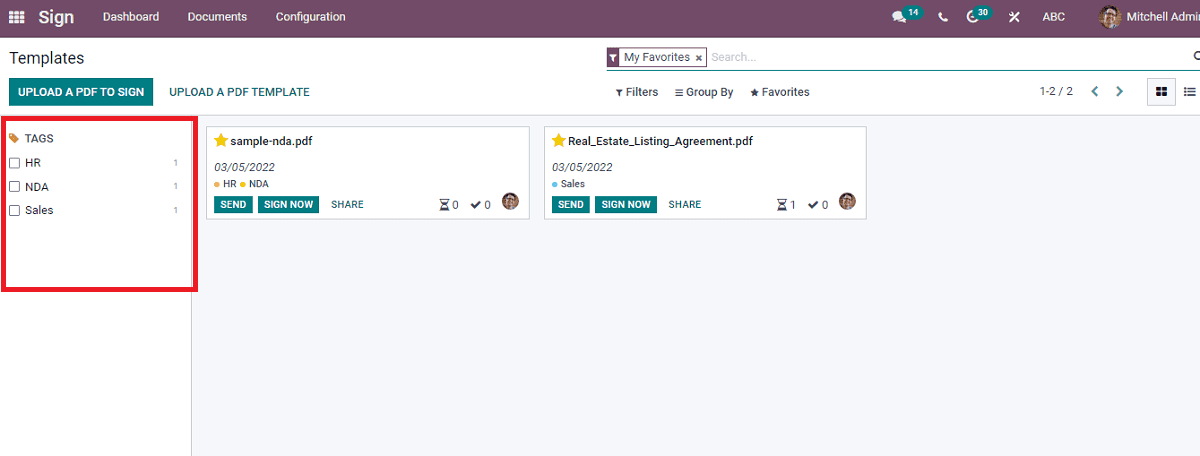
As seen in the above screenshot, various other options are seen at the top of the window near the highlighted portion. These are default and customizable pipeline options like Filters, Group By, Favorites and a Search bar to search your requirements. Now let us move to the List view of the window by clicking on the window's top right corner. Let us see the screenshot below to observe the list view.
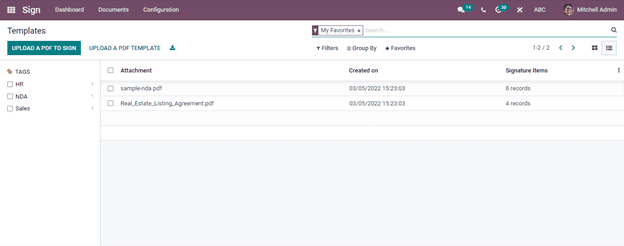
As in both the Kanban view and list view, you can see the two buttons with options UPLOAD A PDF TO SIGN and UPLOAD A PDF TEMPLATE. In addition, in the list view, you can see an icon Export all near to other buttons. By clicking on the UPLOAD A PDF TO SIGN button, you can upload a file from the system to sign. Then Odoo downloads the file from the system, and if you require a PDF template for the file, Odoo enhances to upload a PDF template by clicking on the UPLOAD A PDF TEMPLATE button. In uploading a PDF document from the system, you can add the tags and separate the document as your requirement. By uploading the PDF file Odoo allow you to get the Preview of the document.
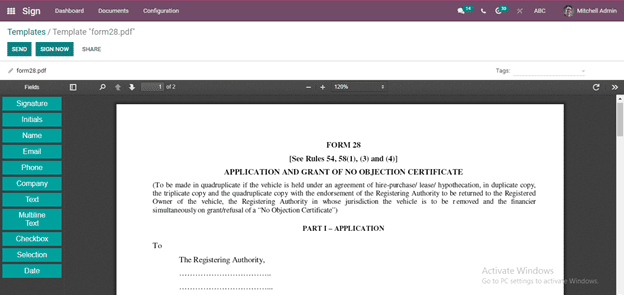
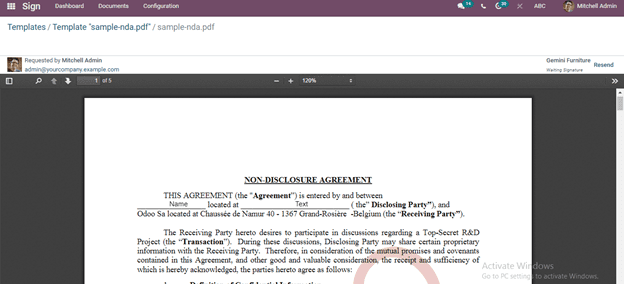
For example, by clicking on the UPLOAD A PDF TEMPLATE, you can download a PDF file from your system and see the preview in the screenshot below given.
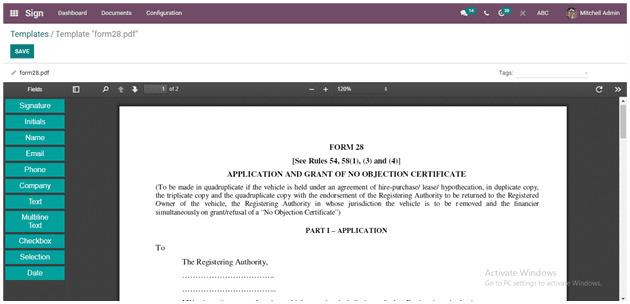
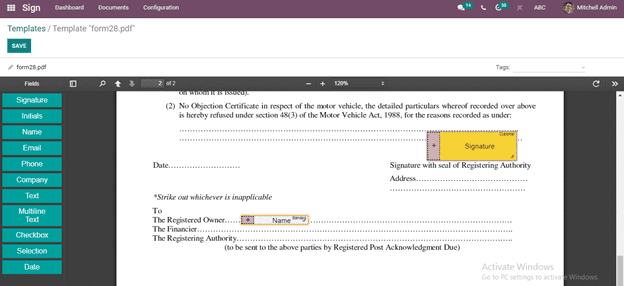
In the above screenshot, you can see a list of options on the left-hand side box-like Signature, Initials, Name, Email, Phone Company, Text, Multiline Text, Checkbox, Selection, Date a group of buttons with different functions. In these fields which you require to add, you can drag and drop each icon at the corresponding fields you require. If you need to add the Signature to any field, you can click on the Signature button from the left-hand side box and drag it to the required field. After dragging and dropping the Signature field by clicking on it, you will be getting a pop-up box, as shown below in the screenshot.
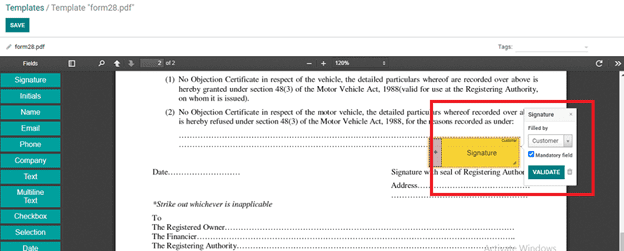
From the above screenshot in the highlighted box by seeing the pop-up box, you can adjust the requirement of the required field to be signed by seeing the pop-up box. And it can be formed by clicking on the dropdown menu from the Filled by, option you get different options that Odoo builds. By seeing the below screenshot, you can analyze the different options from the drop-down menu.
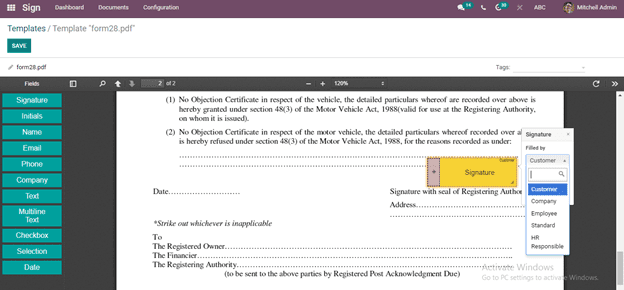
By clicking any of the options as per your choice, the signature table is filled by the concerned person to be signed, and will gradually change the table colour as per the choice. After selecting, click on the VALIDATE button, and thus, the colour and the filled concern person will be entered at the tab. Also, you can rename the document by moving the top of the window and adding different tags on the right-side top of the window. We will see the changes while dragging and dropping the NAME button to the required field. The given below screenshot gives you the changes.
And in the section Name, you can see a (+) symbol whereby clicking on it you can increase or decrease the tab, not only in the name but in every section you can notice it to resize the tab. And by clicking on the SAVE button, you can see the document is saved and will be seen a the home menu or in the Dashboard.
By clicking on the newly created tab, you can see the screenshot below depicted.
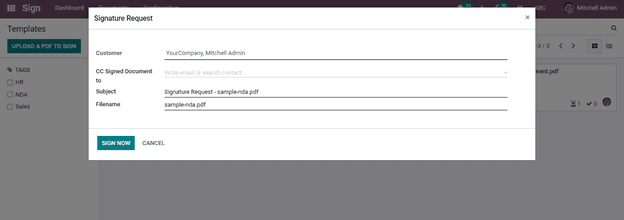
At the top of the window, you will notice SEND, SIGN NOW and SHARE buttons with various functions. The SEND button navigates you to another pop-up window for sending the document to the responsible person, the SIGN NOW button to sign the document and the SHARE button to share the document respectively. While clicking on the SEND button, you will be redirected to another window, as in the screenshot below.
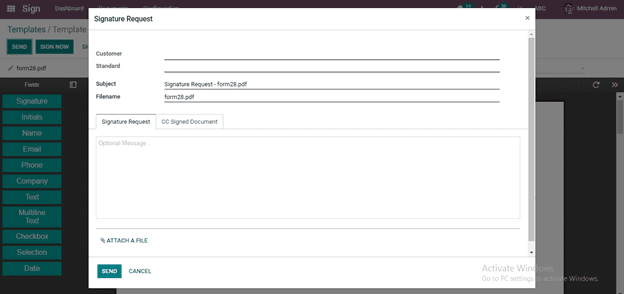
In this pop-up window at the Customer portion, you can add the name of the person you need to send and at the same time define the Standard. You can add the name and email of the person you want to send. The Subject part is auto-assigned by the Odoo, or else you can customise it by adding any other subject. And the File name is the name of the File, which is auto-assigned by Odoo. In the space given at the Signature request, you can add any message for the sender if required. And at the CC Signed Document space, you can provide if you need to add any person as a cc and any message to the follower for the signed document. And after all, if you want to attach another file, you can send it to the responsible person by clicking the ATTACH A FILE icon, and at last, you can click on the SEND button. And now you will see the document is sent to the sender, and you will be redirected to another window showing as seen in the screenshot below.
In this window, you will be illustrated with the details of the person who sent you the document and also the person who gets the document is waiting to sign, and they can even resend the document if it is not correct.
Now by clicking on the SIGN NOW you would be navigating to another window as shown below in the screenshot.
As seen, you can add the CC Signed Document part and the rest portions are auto-assigned. After adding click the SIGN NOW button and then you can see the document is ready for signing. If required you can add Attach file option and then click on the SIGN NOW.
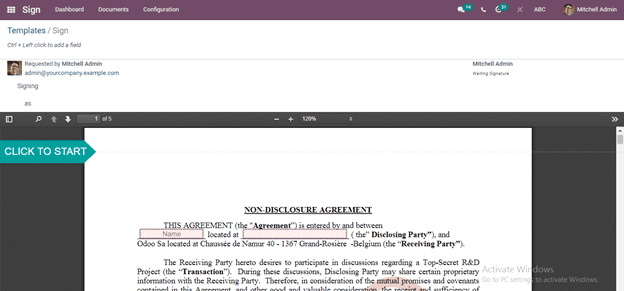
Here you can see a CLICK TO START option where the Odoo redirects you to fill in the necessary information at each part without missing any part.
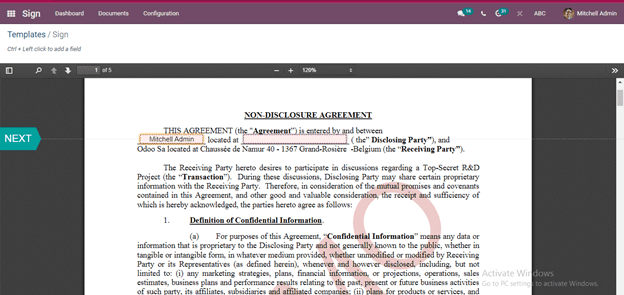
By moving each part and while reaching the Signature field the system will navigate you to a pop-up window as shown below.
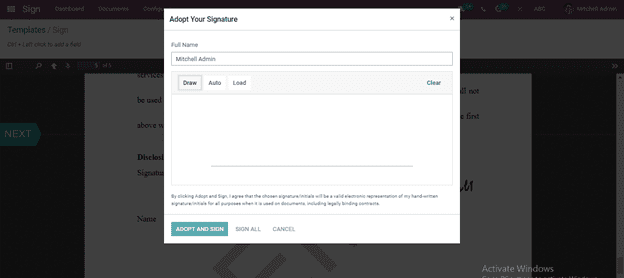
Here first you have to fill in your name and then Odoo facilitates you to sign in different methods by opting for the Draw option you can sign using a digital pen or mouse pointer or any other way. And then there is an Auto option where you can get different styles of your signature where Odoo performs. And also a Load option where you can upload any file of your signature from your system and do the signature. The Signer can use their preferred way of signing and last can click on the ADOPT AND SIGN option. Thus the signature will be encoded with an electronic signature in the required fields.
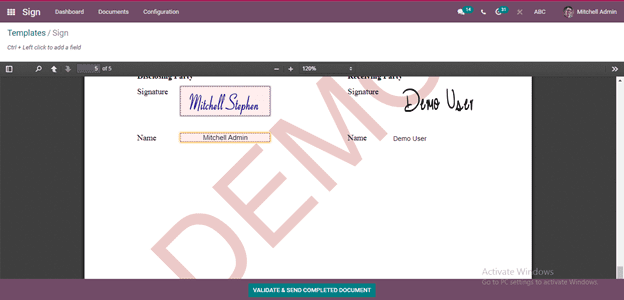
After marking all the necessary fields you will be navigated to the VALIDATE & SEND COMPLETED DOCUMENT button at the bottom of the document as shown in the screenshot.
Thus by clicking on that button you will get a pop-up window showing that your signed document is saved. And you will receive a copy of the signed document through email.
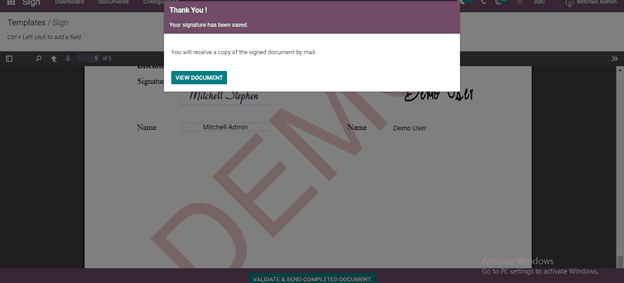
And if you have any additional documents to sign the box will be different and not as seen in the above screenshot. And by clicking on the VIEW DOCUMENT you will be redirected to another window shown below screenshot.
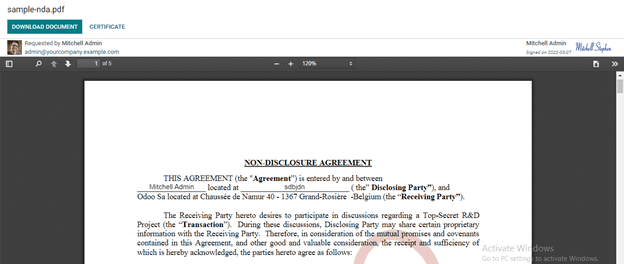
Here you can download the document by clicking on the DOWNLOAD DOCUMENT at the top left corner of the above screenshot and by CERTIFICATE it will be downloaded into your system as a certificate.
With this blog, the readers can serve their business by digitally authorizing their documents with the Sign module in Odoo 15 and implementing impressive productivity in their time management. This can encompass the ideal security with an encrypted interface. So your business can be imparted with a delicate efficacious pattern with Odoo 15 Sign module.