Odoo 16, the most recent version of Odoo, is renowned for its extensive and advanced features that make it a prime choice for comprehensive business management solutions. Powered by Python 3.8+ for backend development, PostgreSQL as the database server, and JavaScript for frontend development, Odoo 16 offers a cutting-edge framework.
Ubuntu 22.04, a Long-Term Support (LTS) release, guarantees ongoing app updates and critical security fixes for an impressive five-year span post-release. This includes regular software updates like new Linux kernel releases and graphics driver enhancements every six months.
In this blog, we will guide you through the process of establishing a development environment for Odoo 16 on Ubuntu 22.04 LTS Server.
We will break down the steps to ensure a smooth setup that allows you to harness the full potential of Odoo 16.
Update the system:
To install Odoo16 on an Ubuntu 22.04 LTS Server Open terminal and in the terminal, use the ssh command followed by the remote server's IP address or hostname and your username. Replace <server_ip> with the actual IP address or hostname, and <username> with your username on the server.
ssh <username>@<server_ip> -p <port_number>
For example,
ssh ubuntu@192.168.1.100 -p 22
After logging in to the server by providing the password, verify that the server version is Ubuntu 22.04 itself. To verify the version, use the command
lsb_release -a
Which will provide the version details like this.
No LSB modules are available.
Distributor ID:	Ubuntu
Description:	Ubuntu 22.04.2 LTS
Release:	22.04
Codename:	jammy
Next, run the following command to ensure that all installed packages on the server are updated to their most current available versions:
sudo apt update && sudo apt upgrade
Secure your server:
Make sure the system is protected against ssh assaults; using Fail2ban will aid in ssh attack prevention.
sudo apt-get install openssh-server fail2ban
Create a System User:
We're installing Odoo 16 on a specific system user account. For this, we need to make a new system account. Use the given command to create a user called "odoo16".
sudo useradd -m -d /opt/odoo16 -U -r -s /bin/bash odoo16
Install Dependencies for Odoo:
We have to add some extra Python packages like Python version, wheel, venv, etc., to our Ubuntu 22.04 system before we can install Odoo 16. To do this, Run the following command:
sudo apt install build-essential wget git python3-pip python3-dev python3-venv python3-wheel libfreetype6-dev libxml2-dev libzip-dev libsasl2-dev python3-setuptools libjpeg-dev zlib1g-dev libpq-dev libxslt1-dev libldap2-dev libtiff5-dev libopenjp2-7-dev
Install and Configure the PostgreSQL database server:
Odoo exclusively uses PostgreSQL for its data storage. Now run this command to install the PostgreSQL server on our Ubuntu 22.04 system.
sudo apt-get install postgresql
After installation, Do the following to create the user Odoo16. Additionally, you must change the password for the user Odoo16 at that time. You must enter the new password in the Odoo configuration file at the very end of the installation process.
sudo -u postgres createuser --createdb --username postgres --no-createrole --no-superuser --pwprompt odoo16
The user must then be designated as a superuser in order to receive further privileges.
sudo su postgres
psql
ALTER USER odoo16 WITH SUPERUSER;
Exit from psql and Postgres user:
\q
exit
Install Wkhtmltopdf:
Odoo requires the Wkhtmltopdf package for printing-related purposes, which is a free, open-source command-line utility that utilizes the Qt webkit engine to transform HTML content into PDF. Install Wkhtmltopdf by executing this command.
sudo apt install wkhtmltopdf
Since Odoo requires a wkhtmltopdf 0.12.1 or higher version verify it by using
wkhtmltopdf --version
And the output will be as follows:
wkhtmltopdf 0.12.6
Install Odoo:
To install Odoo 16, we can clone odoo16 from the odoo git repository. So first, we need to install Git to clone odoo16 to our server.
sudo apt-get install git
Next, it's important to switch to the system user we established for Odoo. This step is crucial to avoid encountering issues related to access rights. So we can switch to the user that we have created before.
sudo su - odoo16 -s /bin/bash
Now we are ready to clone Odoo 16 (Community Edition)
git clone https://www.github.com/odoo/odoo --depth 1 --branch 16.0 odoo16
In this guide, we will set up Odoo 16 within a Python virtual environment. Once the cloning process is finished, run the subsequent command to generate a new Python virtual environment.
python3 -m venv odoo16-venv
After the virtual environment is installed, we need to activate it by running
source odoo16-venv/bin/activate
After running the command, your shell prompt will appear like this:
(odoo16-venv) odoo16@ubuntu:~$
Now, let's proceed to install Odoo.
(odoo16-venv) odoo16@ubuntu:~$ pip3 install wheel
(odoo16-venv) odoo16@ubuntu:~$ pip3 install -r odoo16/requirements.txt
After completing the process of installing all requirements and building wheels exit from the odo16-venv
(odoo16-venv) odoo16@ubuntu:~$ deactivate
Now we can now make a new directory where we'll store our customized Odoo add-ons.
mkdir /opt/odoo16/odoo16/custom
Now exit from the user “odoo16” and create the Odoo16 Configuration file.
To copy the configuration file to /etc:
exit
sudo cp /opt/odoo16/odoo16/debian/odoo.conf /etc/odoo16.conf
The following step is to add the required information to the file.
sudo nano /etc/odoo16.conf
Now paste this configuration into it.
[options]
   ; This is the password that allows database operations:
   admin_passwd = admin
   db_host = False
   db_port = False
   db_user = odoo16
   db_password = False
   addons_path = /opt/odoo16/odoo16/addons,/opt/odoo16/odoo16/custom
   logfile = /var/log/odoo/odoo16.log
The following parameters should be configured before the operations are conducted:
admin_passwd: This is the master password for Odoo, and it may be used to create, remove, duplicate, and many other types of database operations in database management.
db_host: the database host.
db_port: the database port.
db_user: the database user name.
db_password: supply the password for the database user that was specified when it was created.
addons_path: give the path to the directories that hold the directories for Odoo addons.
Multiple directories may be mentioned, separated by commas:
Eg: addons_path = /opt/odoo16/odoo16/addons, /opt/odoo16/odoo16/enterprise, /opt/odoo16/odoo16/custom
logfile: the log file path.
Next, you should set the access right of the conf file for the system user Odoo
sudo chown odoo16: /etc/odoo16.conf
sudo chmod 640 /etc/odoo16.conf
Also, create a log directory of Odoo, which will help you to find Odoo-related issues and set permission to the log directory.
sudo mkdir /var/log/odoo
sudo chown odoo16:root /var/log/odoo
Create an Odoo Service:
We have to create a systemd unit for Odoo16 So that it can behave like a service.
sudo nano /etc/systemd/system/odoo16.service
Copy and paste the following content into the systemd unit file odoo16.service:
[Unit]
   Description=Odoo16
   Documentation=http://www.odoo.com
   [Service]
   # Ubuntu/Debian convention:
   Type=simple
   User=odoo16
   ExecStart=/opt/odoo16/odoo16-venv/bin/python3 /opt/odoo16/odoo16/odoo-bin -c /etc/odoo16.conf
   [Install]
   WantedBy=default.target
Finally set the root user's permissions for this service file.
sudo chmod 755 /etc/systemd/system/odoo16.service
sudo chown root: /etc/systemd/system/odoo16.service
That concludes the setup. You can now reload systemd and start running Odoo16. Since we edited the service file, we need to run daemon-reload
sudo systemctl daemon-reload
sudo systemctl start odoo16.service
Check if Odoo is active by running this command:
sudo systemctl status odoo16.service
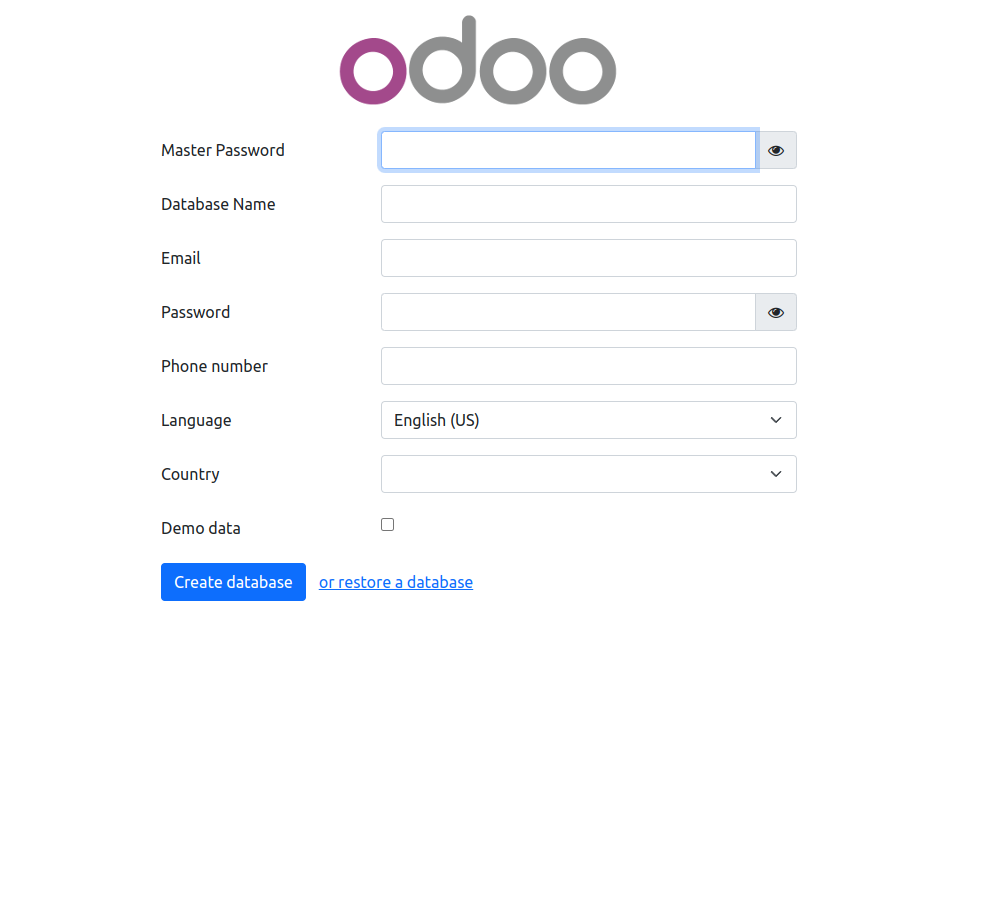
Now open your web browser and go to “http://<your_server_ip_address>:8069”. This will take you to the Odoo page.
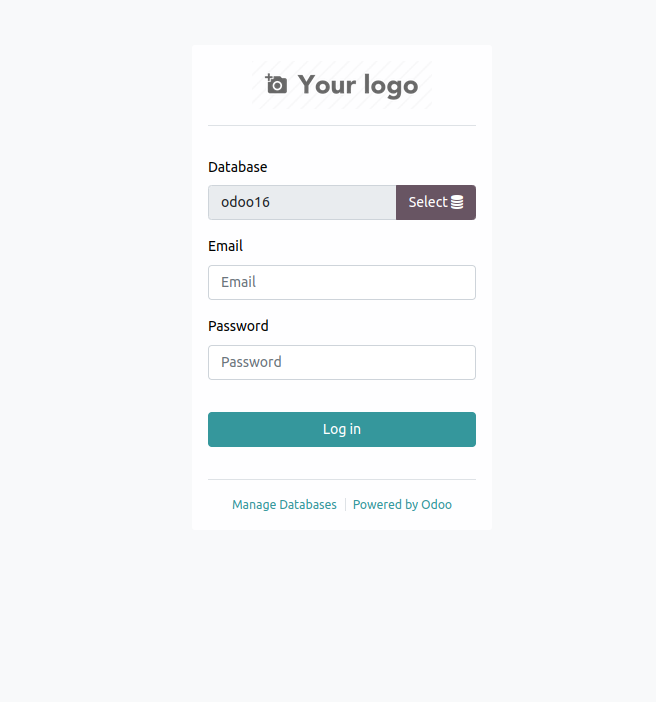
Finally, after creating the database, you will be redirected to the Odoo login page.
Check Odoo Logs:
If you are having problems with the installation or for any other reason, you can use the following command to check the logs of the Odoo platform that you have set up. The following command will display the terminal's live logs:
sudo tail -f /var/log/odoo/odoo16.log
Finally, use the following command to start the Odoo service automatically after restarting the server:
sudo systemctl enable odoo16.service
Use the following command to restart the Odoo service if you have made any modifications to the add-ons so that your instance will reflect the updates:
sudo systemctl restart odoo16.service
Are you searching for instructions on How to Configure Odoo with Nginx as a Reverse Proxy you can understand it by reading our blog which can be obtained by selecting the link. If you finally Installed Odoo 16 in your System, you can download our Odoo Development Tutorial App from Odoo Apps Page to learn more about Odoo Development and Build a career in Odoo.