The detachment between educational content management and business operations brings about unwanted inefficiencies, redundant efforts, and excessive spending that comes with manual tasks. Organizations that employ Moodle as their learning management system and Odoo 19 as their ERP can eliminate those issues with the help of Odoo Moodle Connector.
With Odoo Moodle Connector, users will be able to exchange courses and course categories with enrolled learners in both systems, allowing the data to be transferred between applications seamlessly.
This article will offer a detailed guide on how to connect Odoo and Moodle, that includes setting up Moodle web services, receiving the access tokens, linking Moodle with Odoo, learning content implementation, and exporting courses back to Moodle.
Important Characteristics
Two Way Synchronization
Moodle data can be imported into Odoo while Odoo eLearning materials can be exported back to Moodle, ensuring data consistency across both systems.
Course Category Synchronization
Transfer course categories between Moodle and Odoo without manually recreating the learning structure.
Course Synchronization
Moodle courses can either be imported to Odoo or their Odoo eLearning courses can be sent directly to Moodle.
User Enrollment Synchronization
Synchronize enrolled users between Moodle and Odoo, reducing manual enrollment management.
Secure Token-Based Authentication
It is possible to link to a Moodle system using the unique authentication token with Moodle Web Service API.
Simple Configuration
The app is easy to set up while using the external Moodle web services for interaction.
Prerequisites
Before configuring the connector, ensure the following:
- Odoo 19 is installed.
- Moodle is hosted on MoodleCloud.
- Administrator access to both Moodle and Odoo.
- First, log in to it, which is installed in Odoo.
Step 1: Set up Moodle Web Services
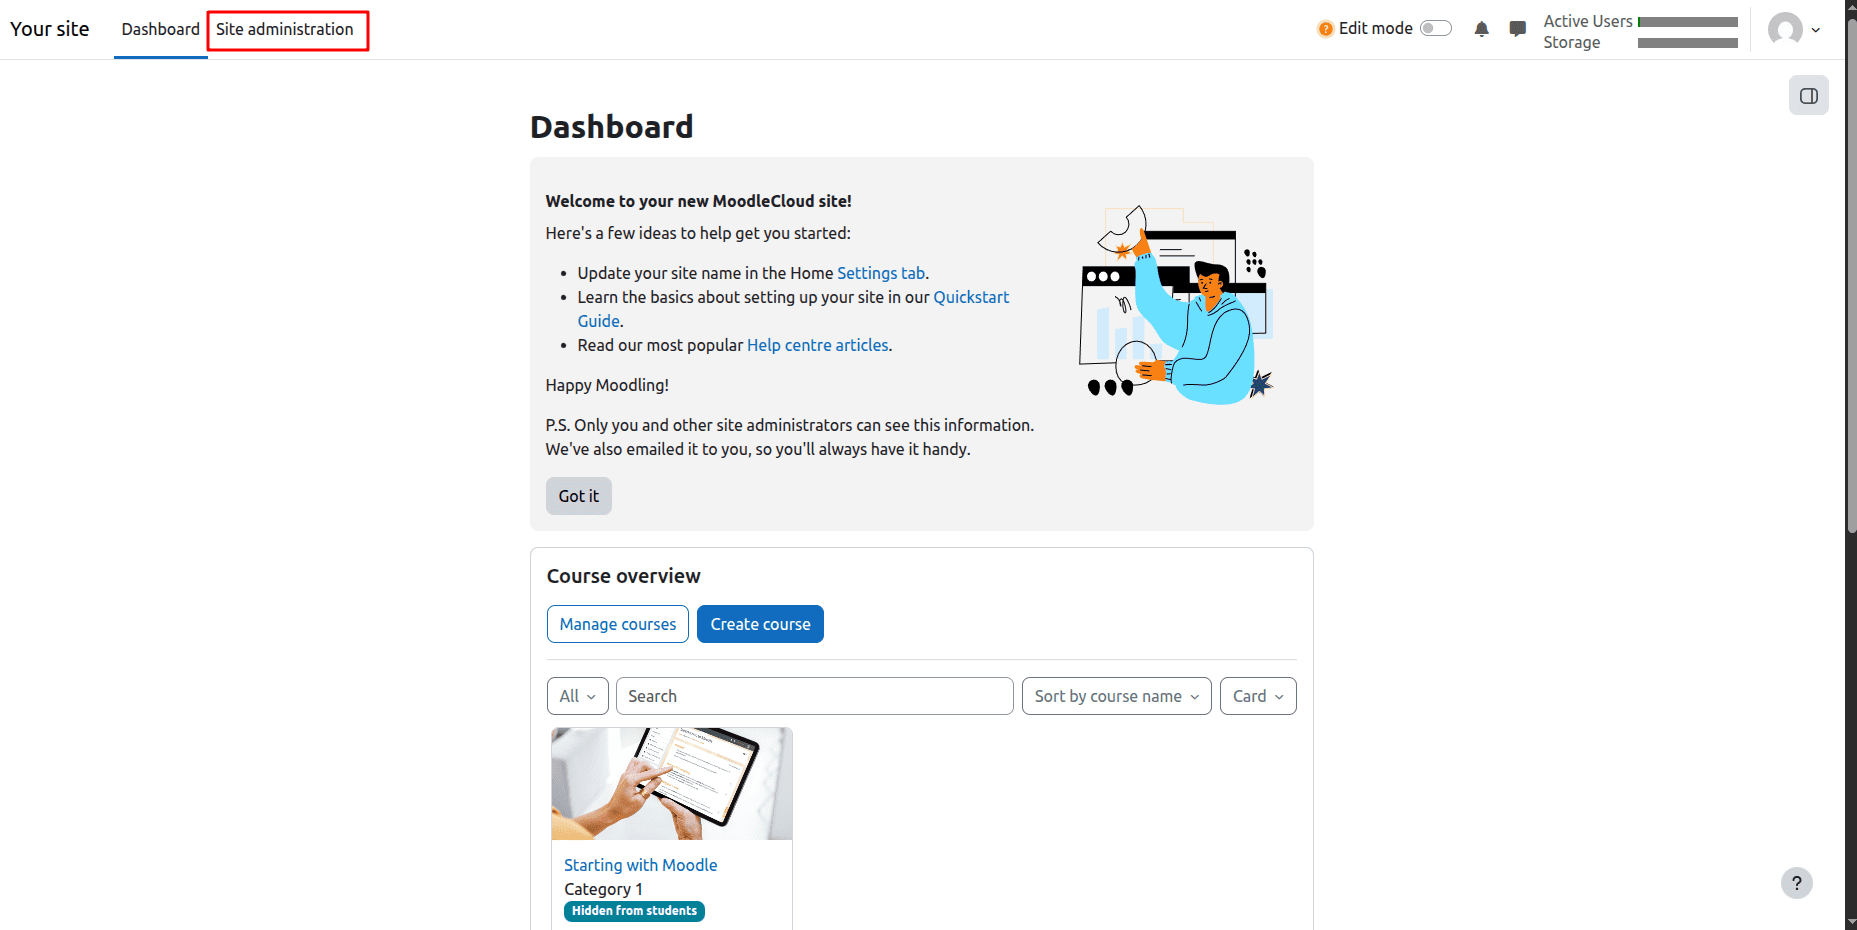
Begin by logging into Moodle as an administrator.
Go to:
Site Administration > Server > Web Services > External Services
Add a new external service that will be used by Odoo.
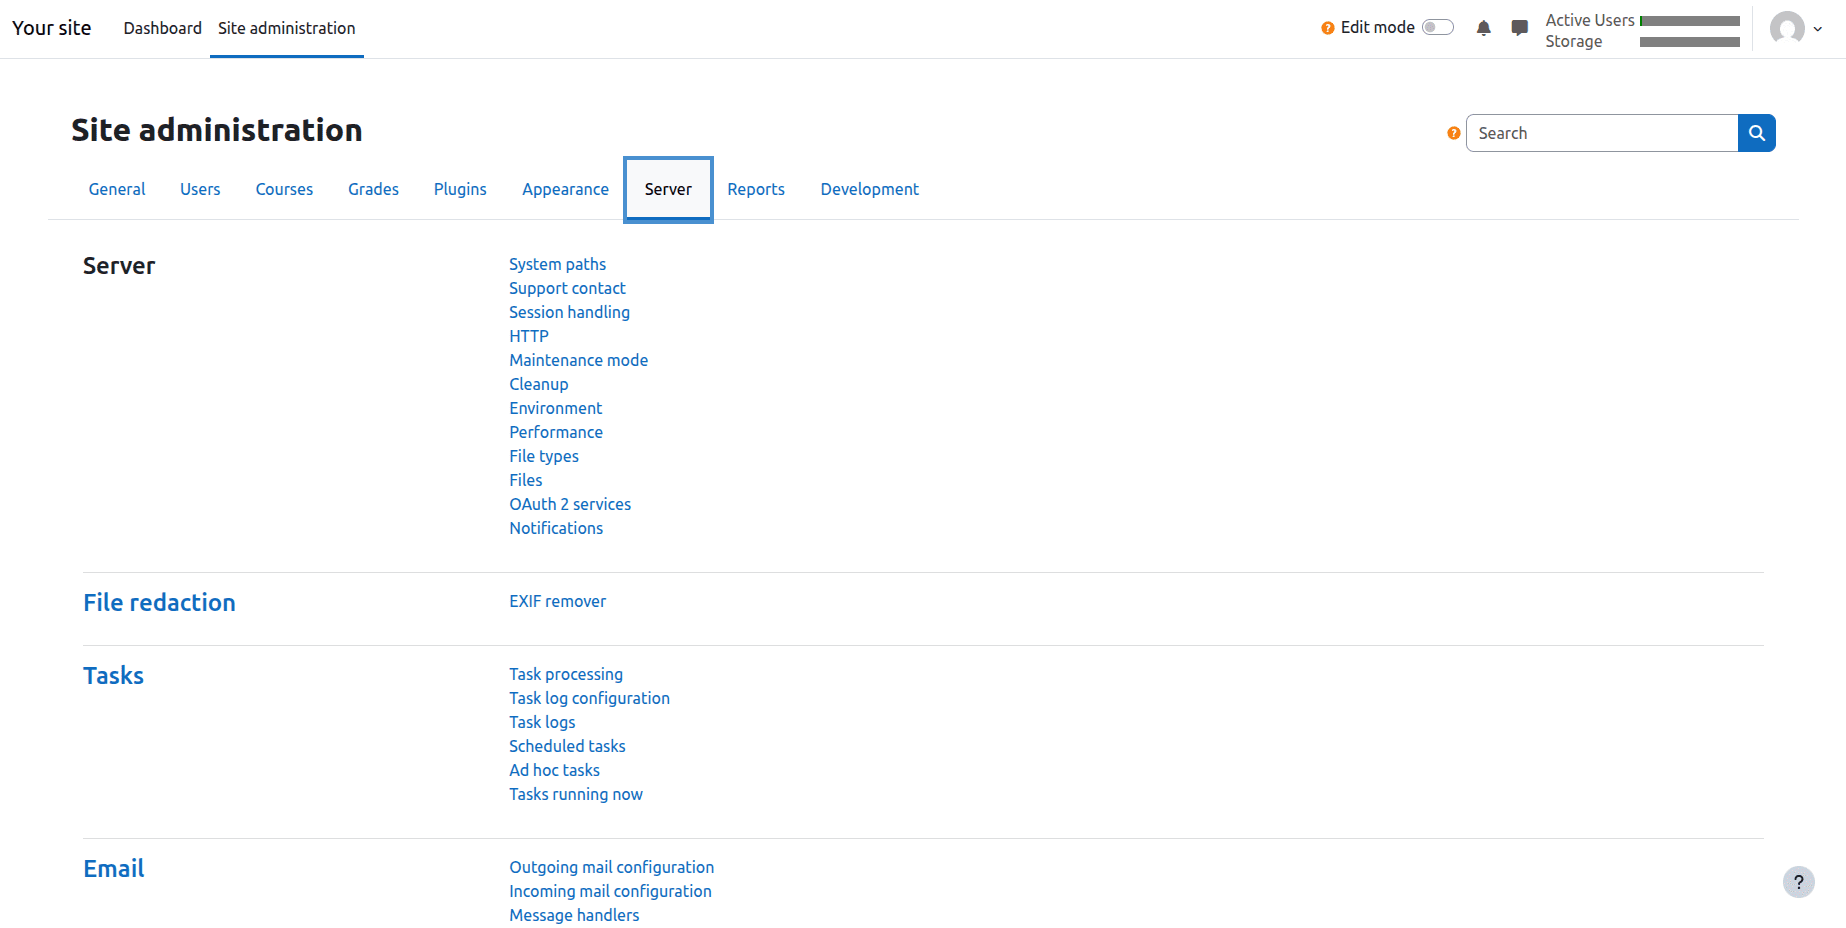
Click on External Services.
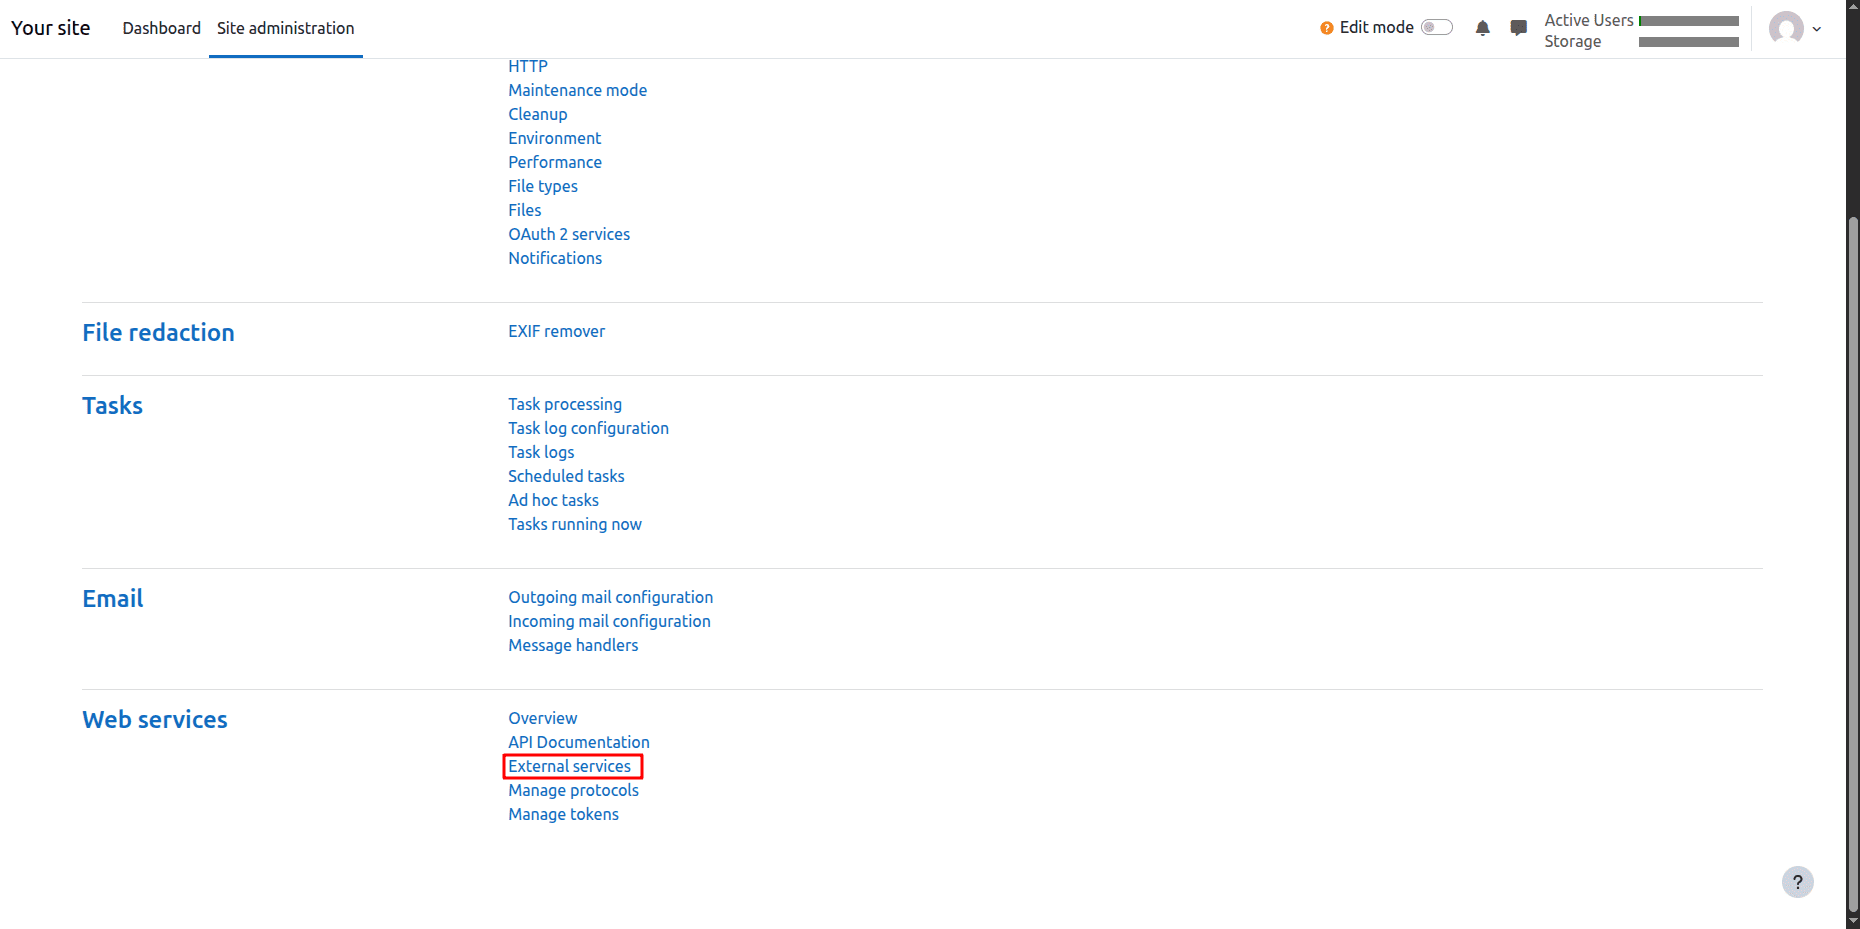
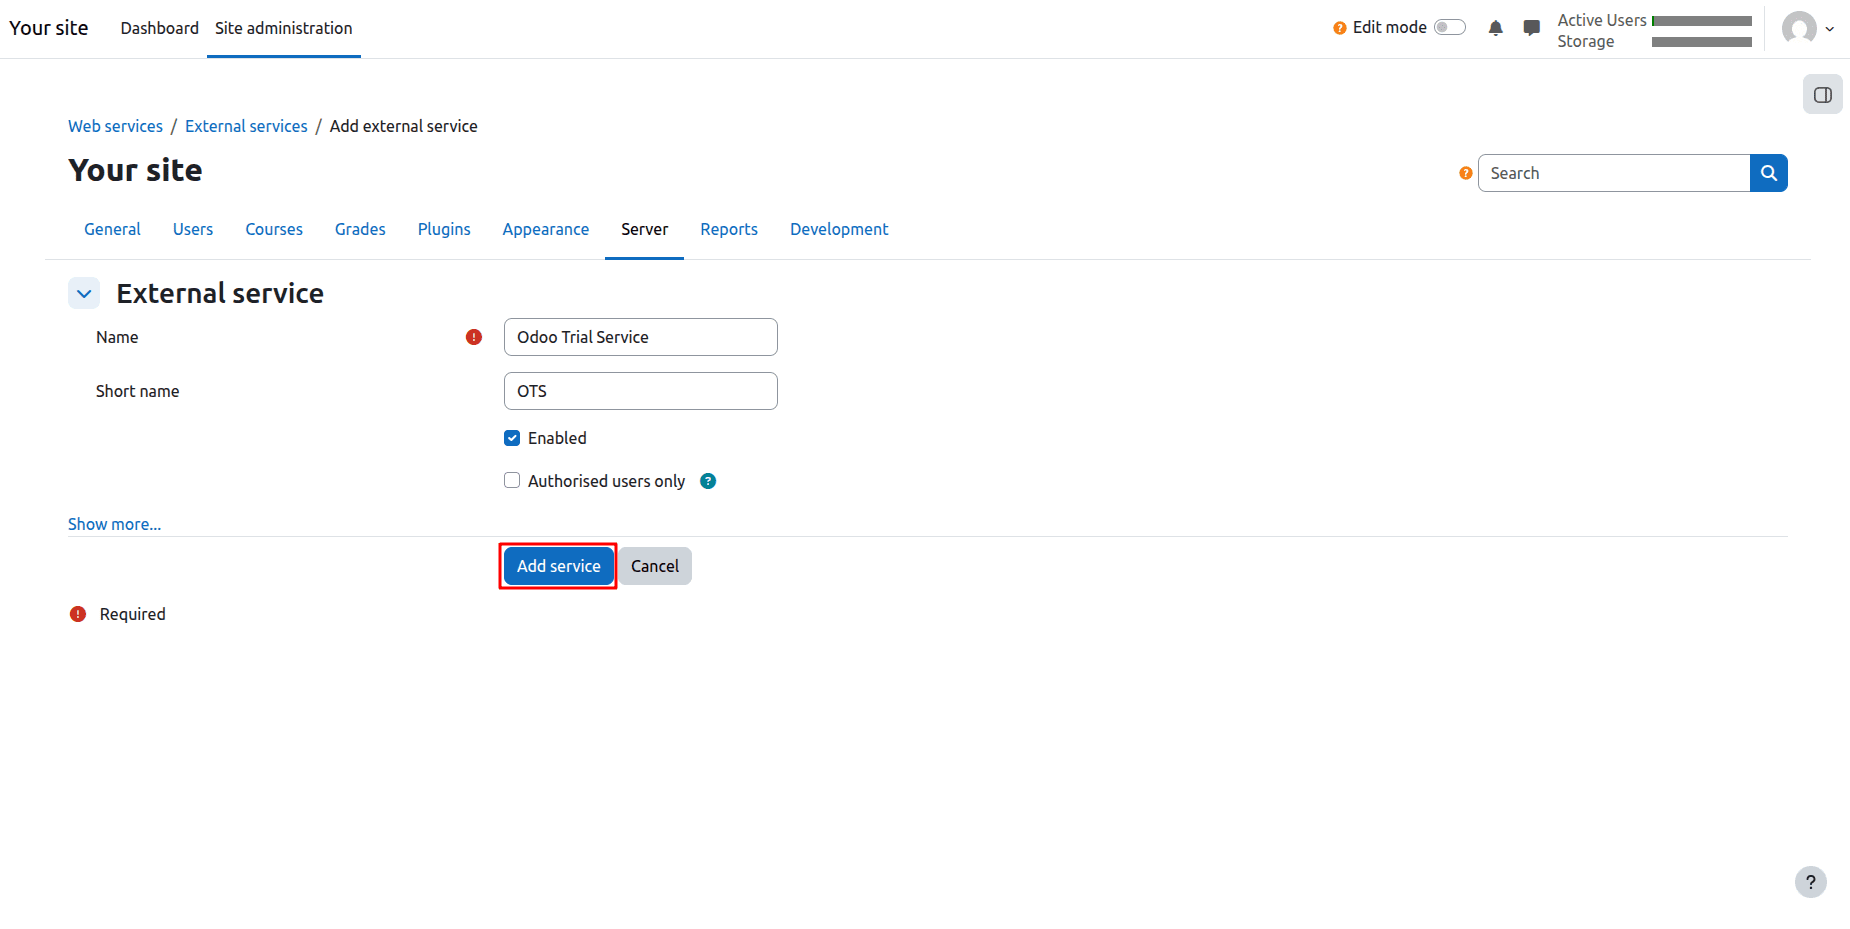
Click Add to open a new service.
Give the necessary data like:
- Service Name
- Short Name
- Enable the service
Then press Add Service.
Step 2: Add Required Moodle Functions
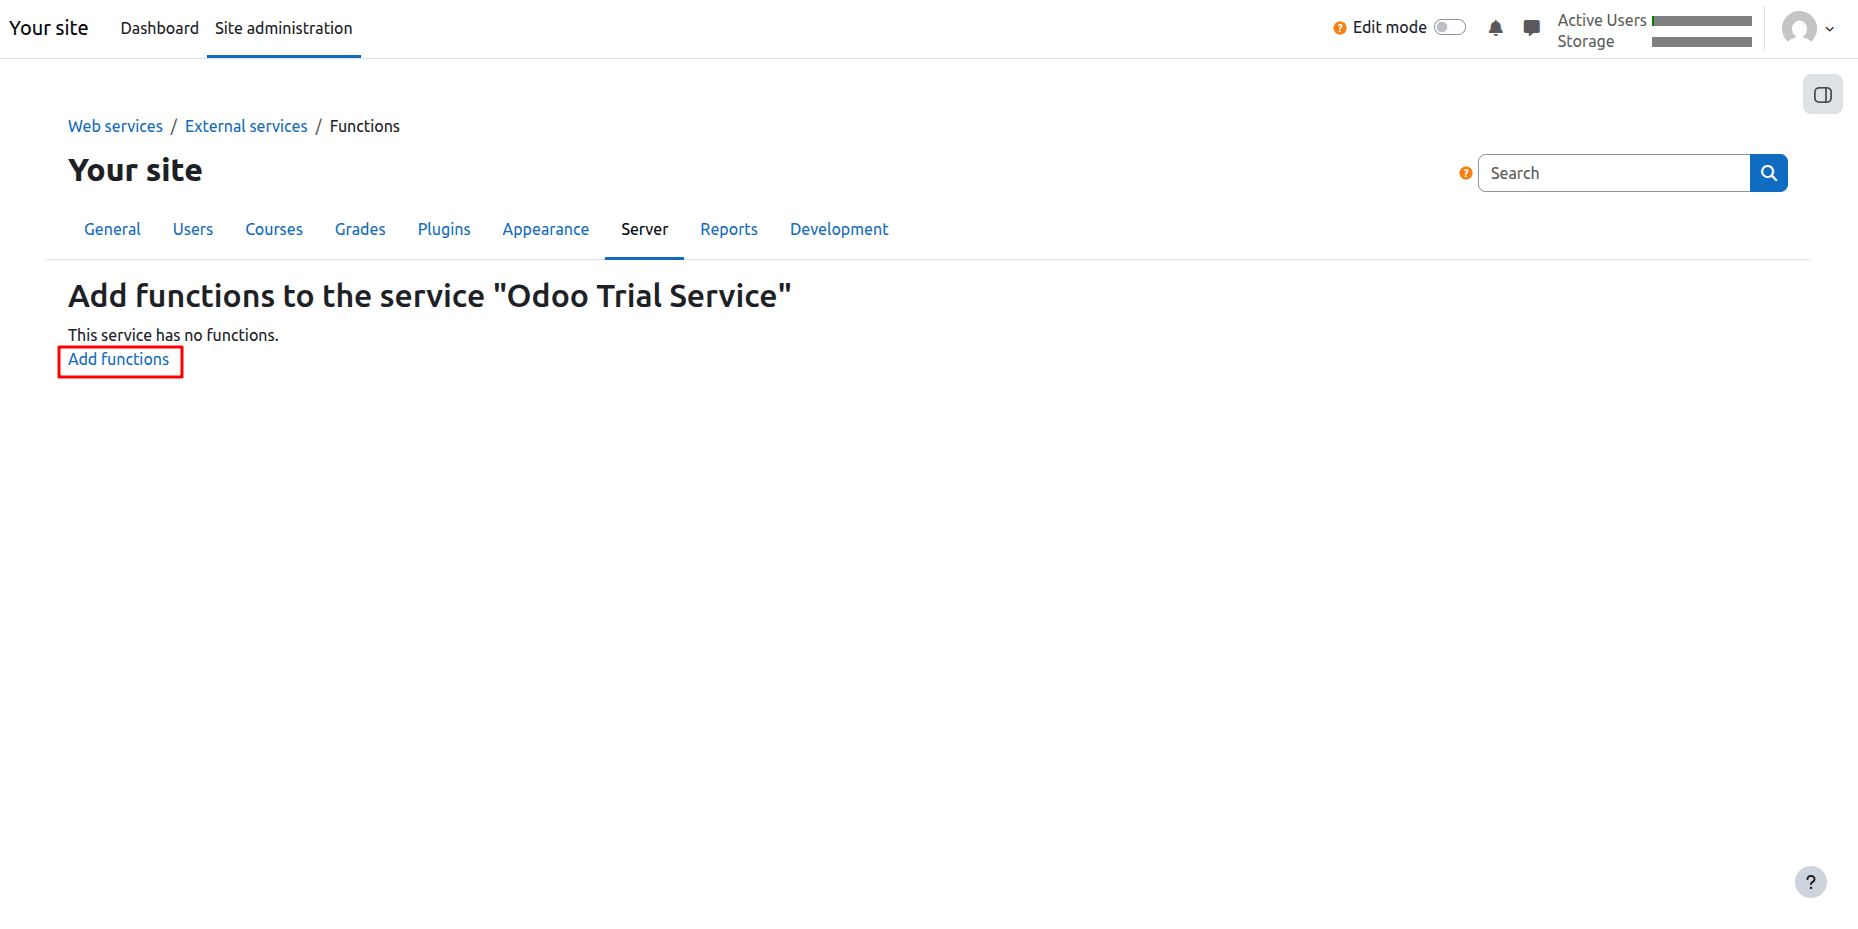
After creating the service, click Add Functions.
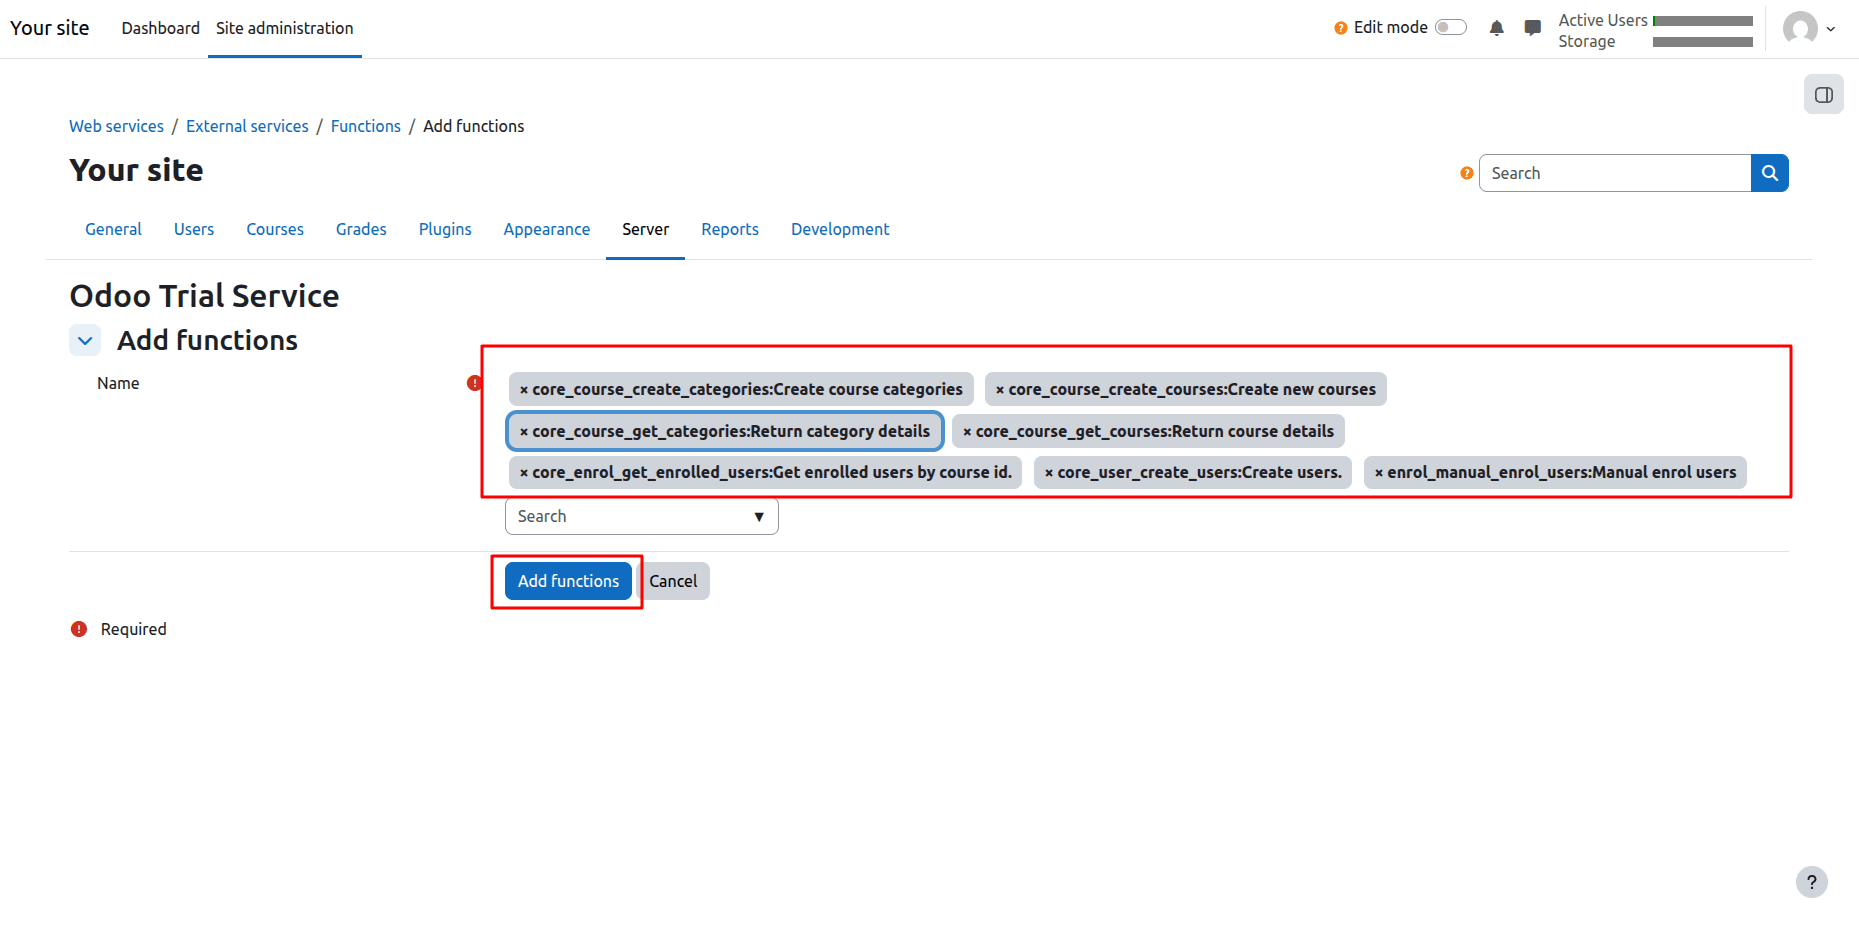
Add required functions. Must choose the following functions
- core_course_get_categories
- core_course_get_courses
- core_enrol_get_enrolled_users
- core_user_create_users
- enrol_manual_enrol_users
- core_course_create_categories
- core_course_create_courses
Click Add Functions.
Step 3: Generate a Web Service Token
Next, navigate to:
Site Administration > Server > Web Services > Manage Tokens
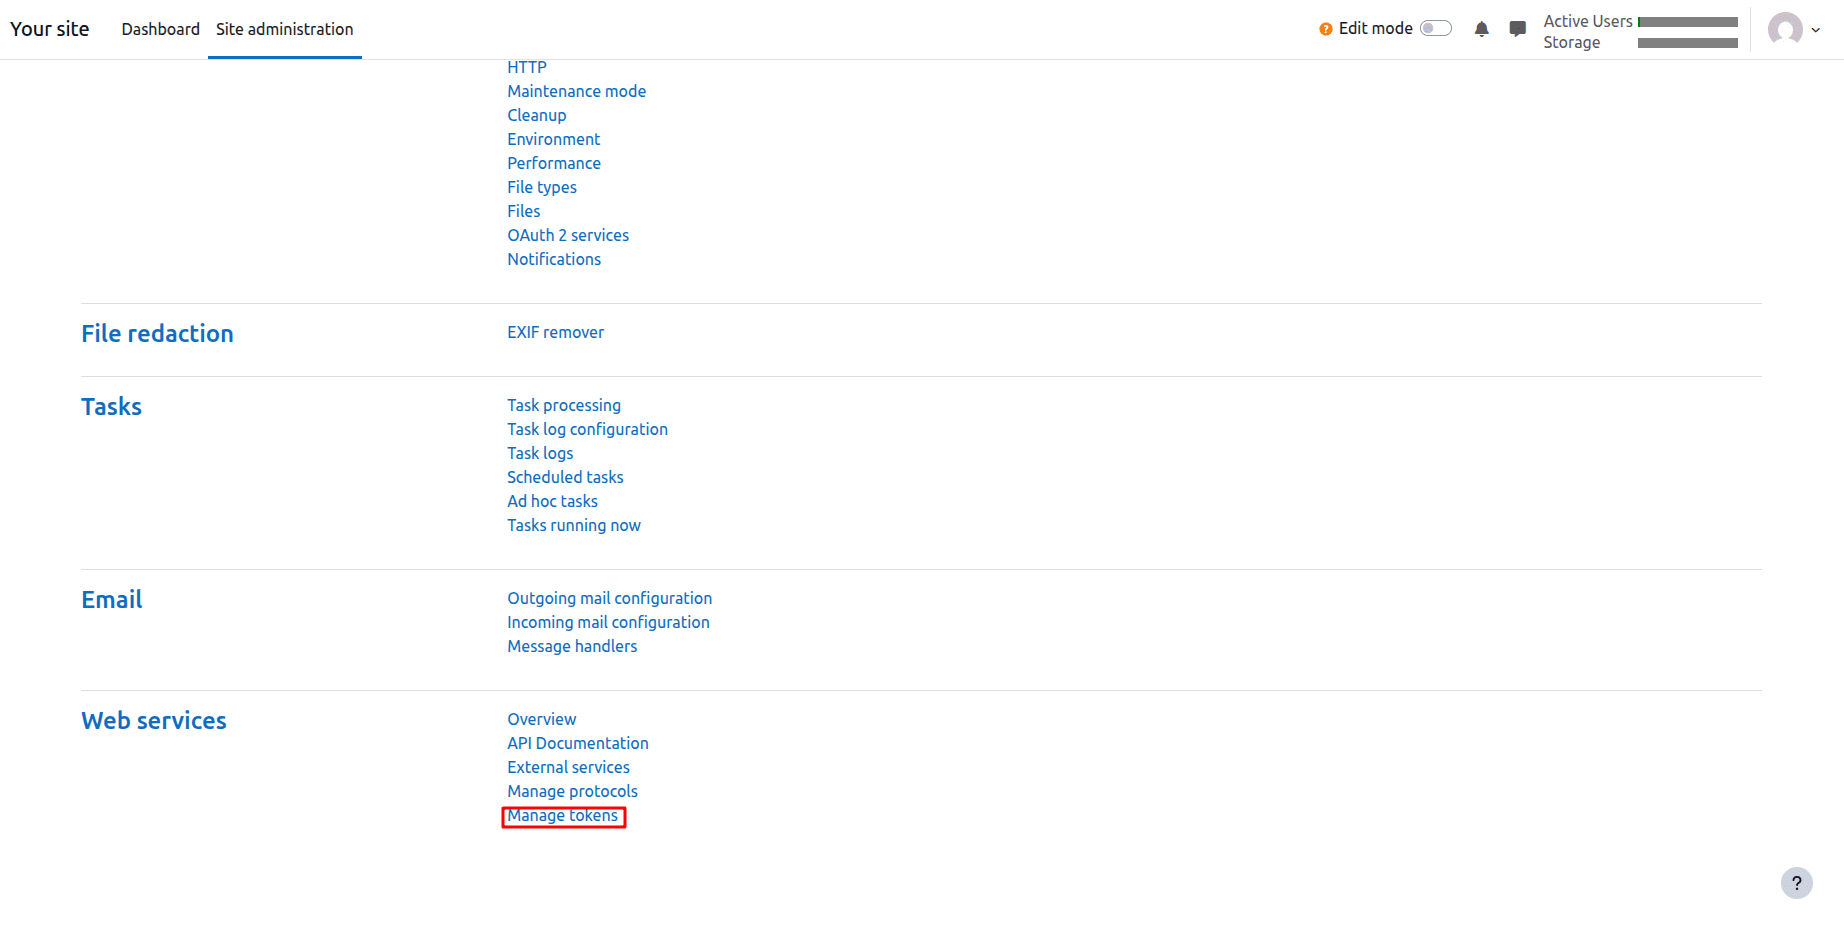
Click Create Token.
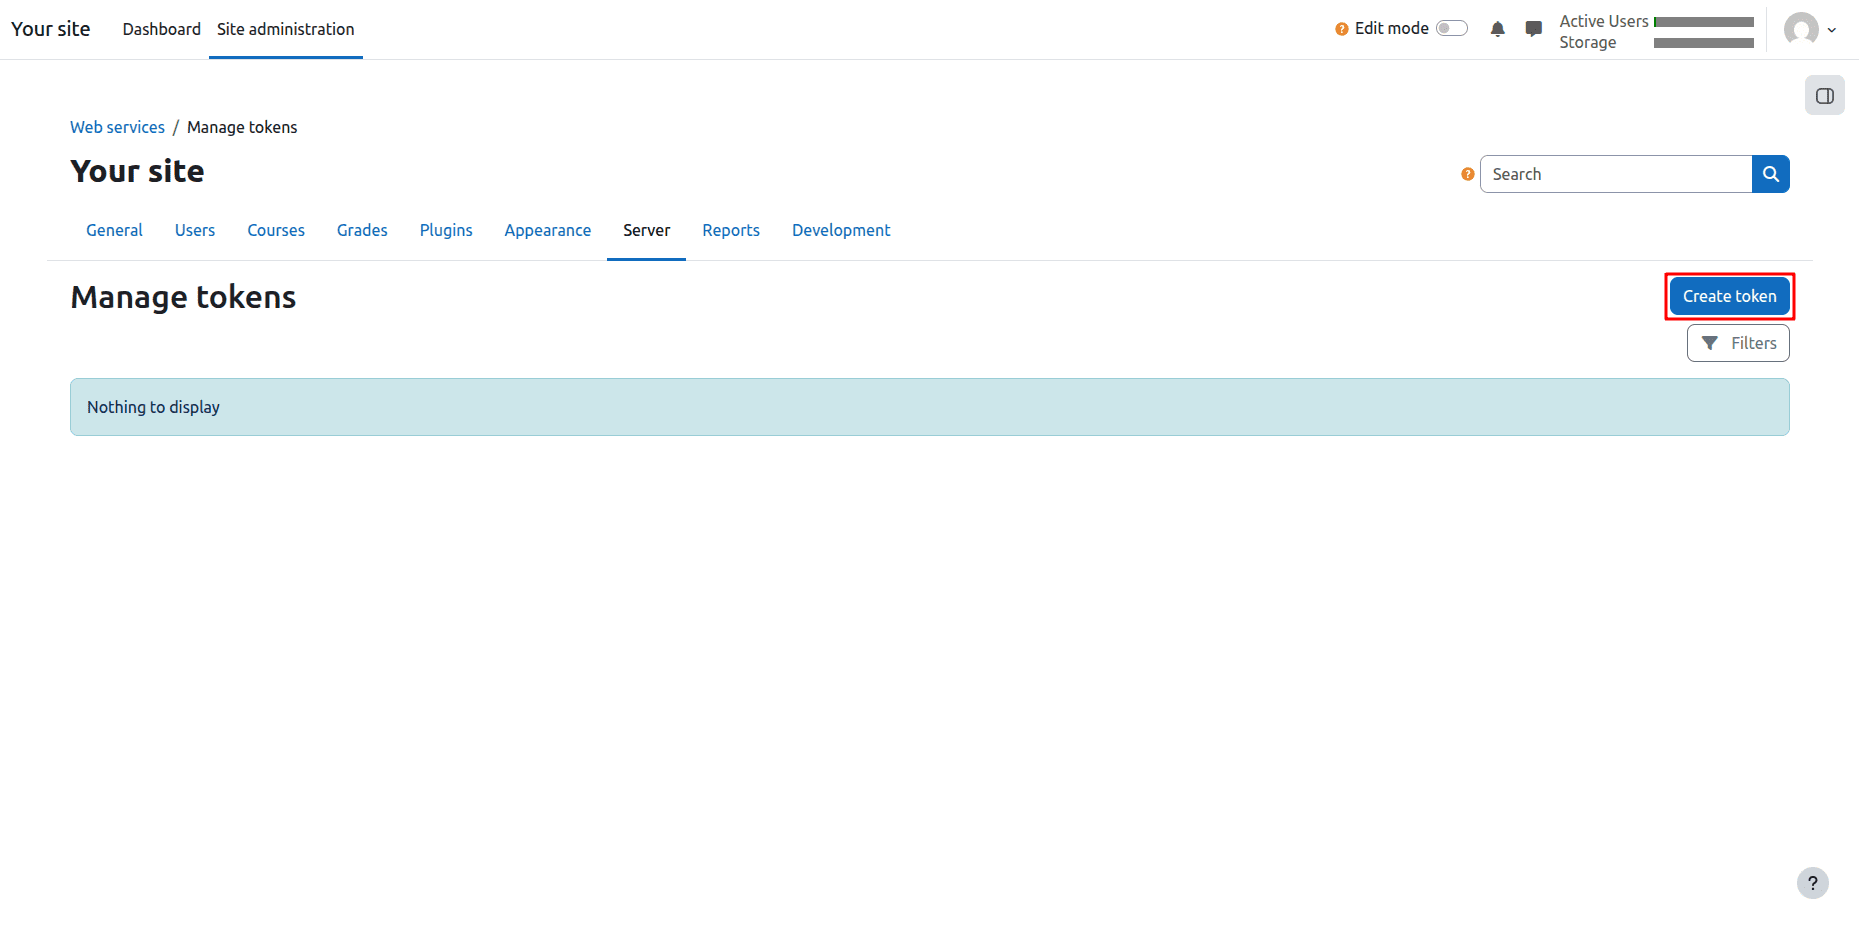
Choose:
Then save the configuration.
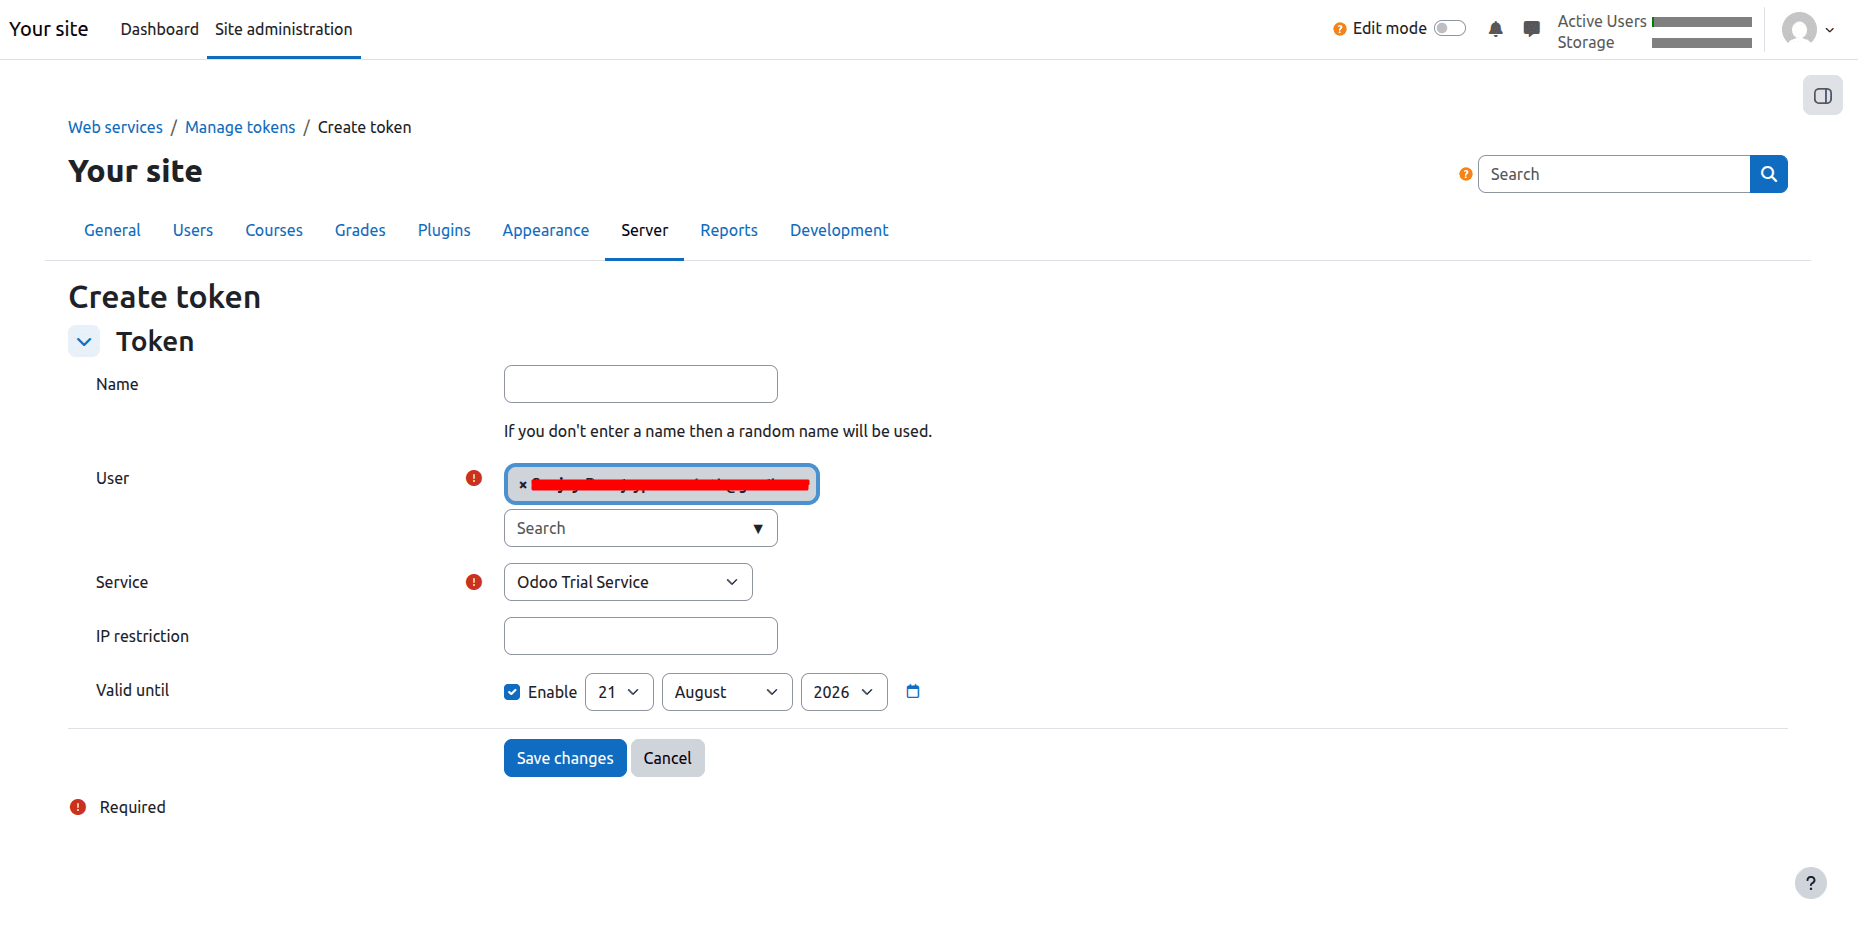
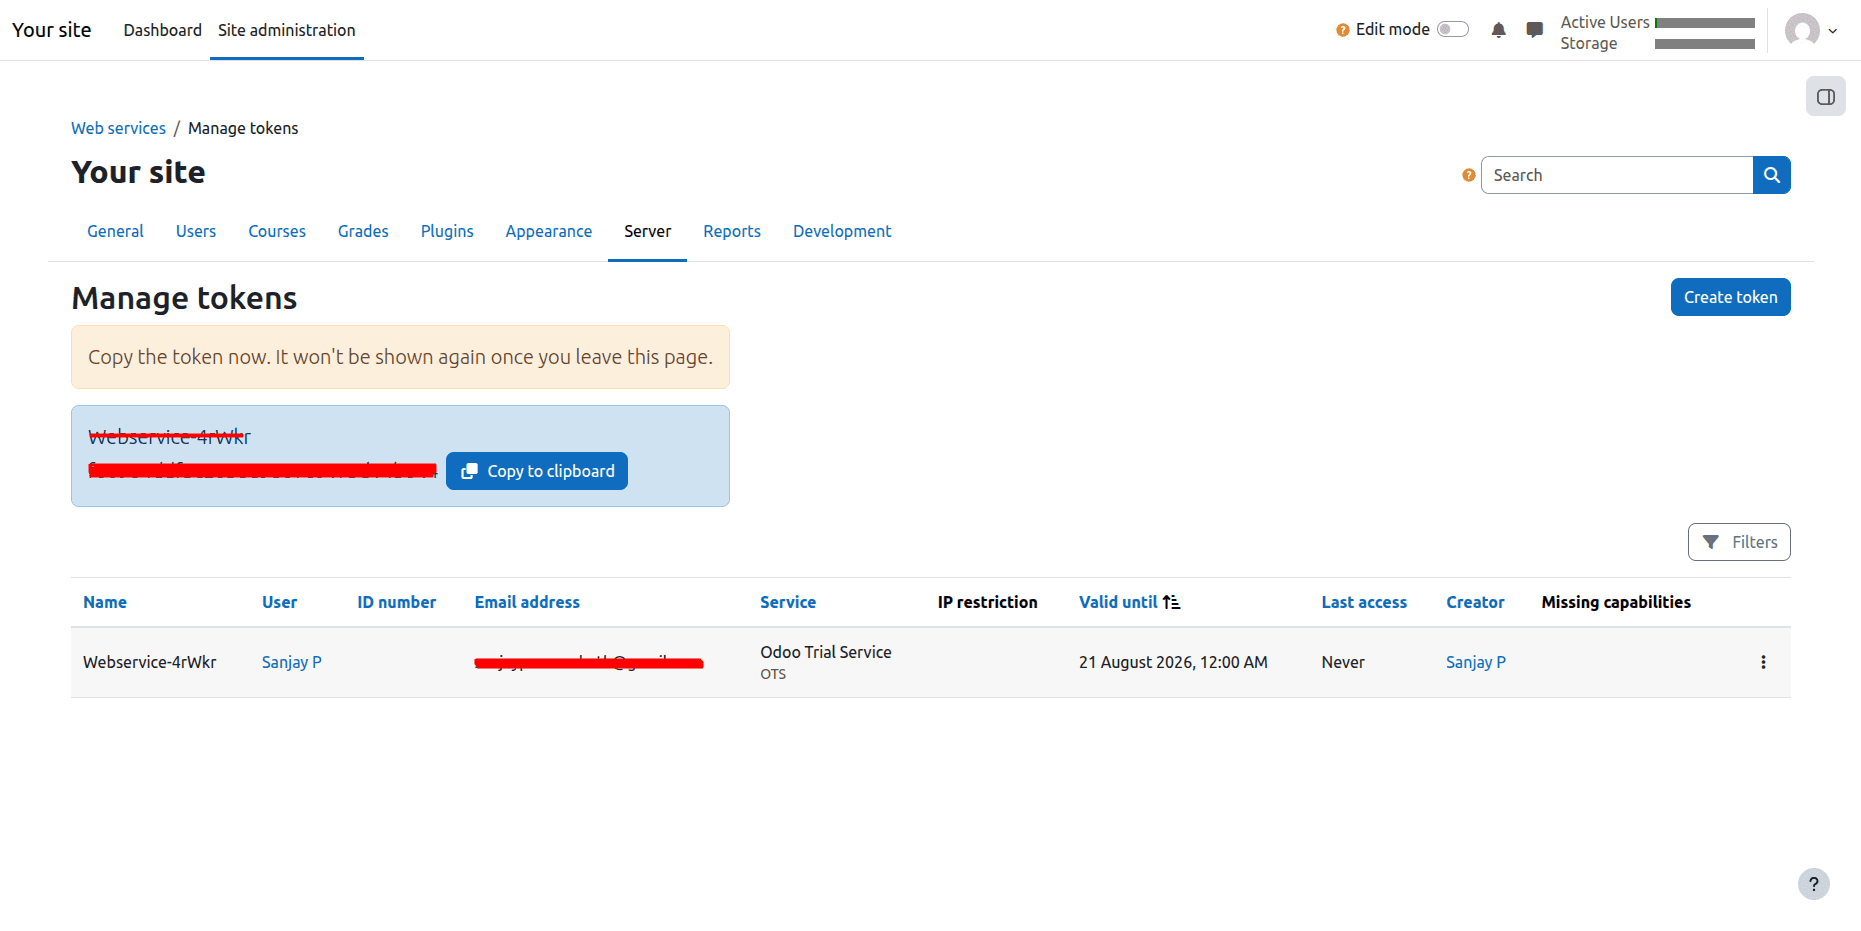
Moodle will generate an authentication token.
Copy this token because it will be required when configuring Odoo.
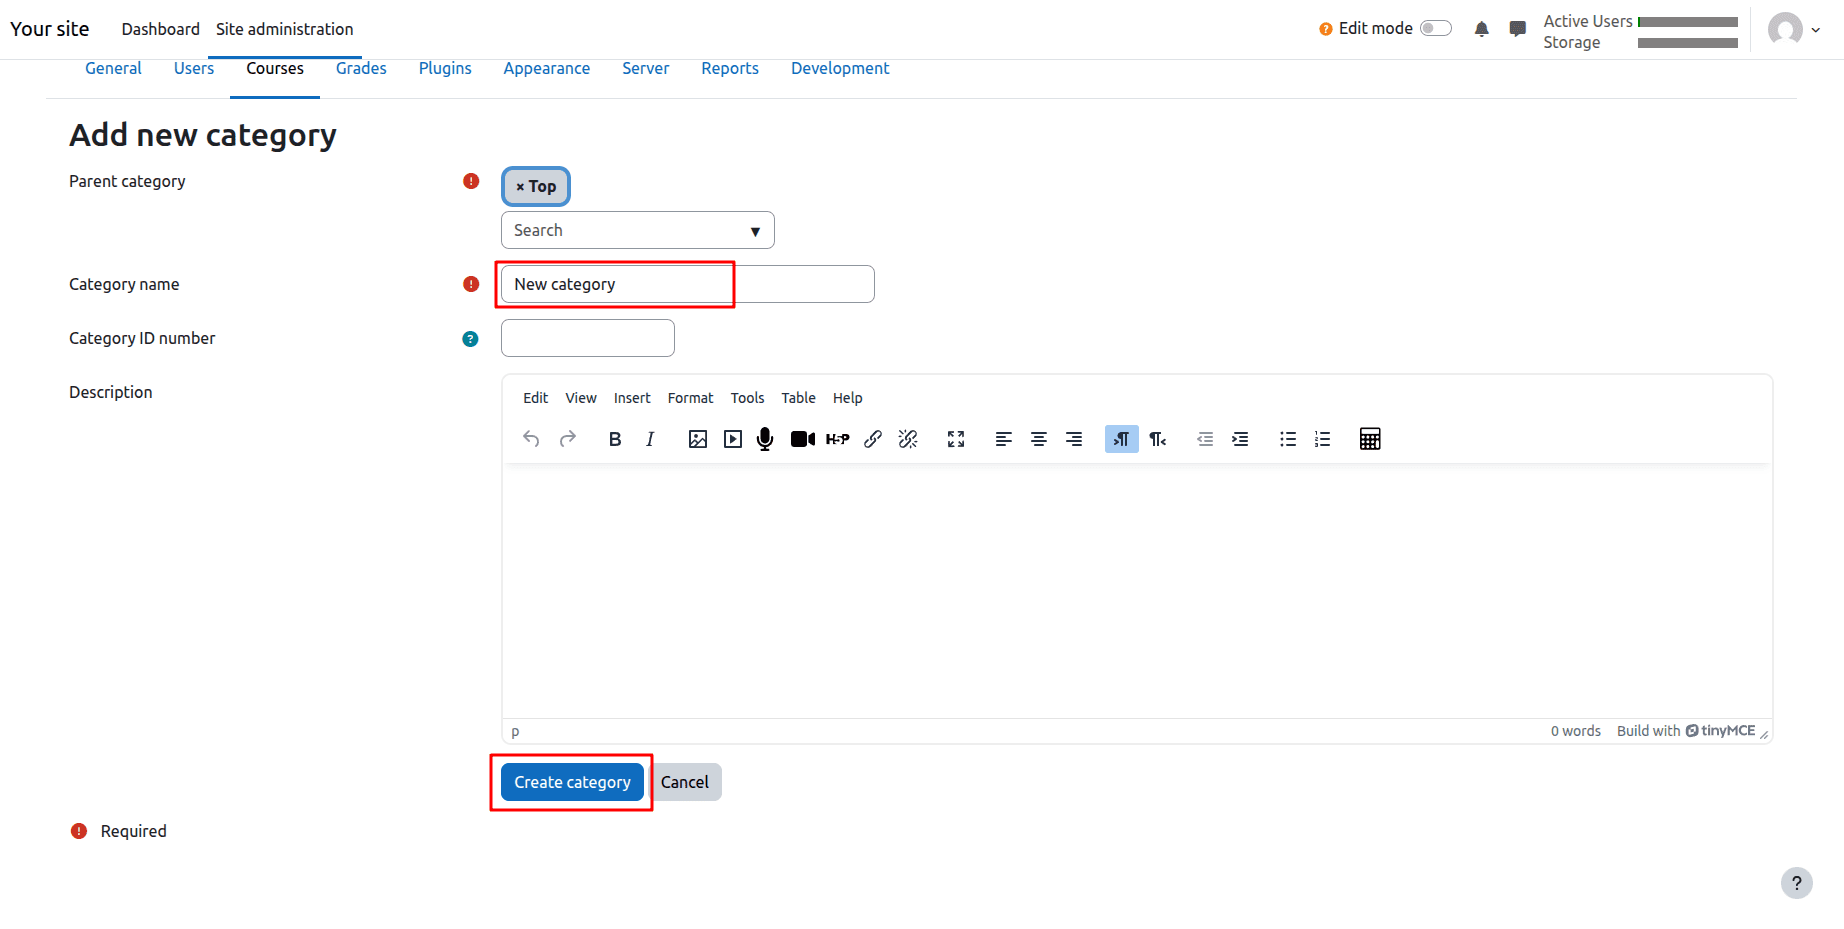
Step 4: Create Course Categories in Moodle
Before importing data into Odoo, create a course category in Moodle.
Navigate to:
Site Administration > Courses > Add a Category
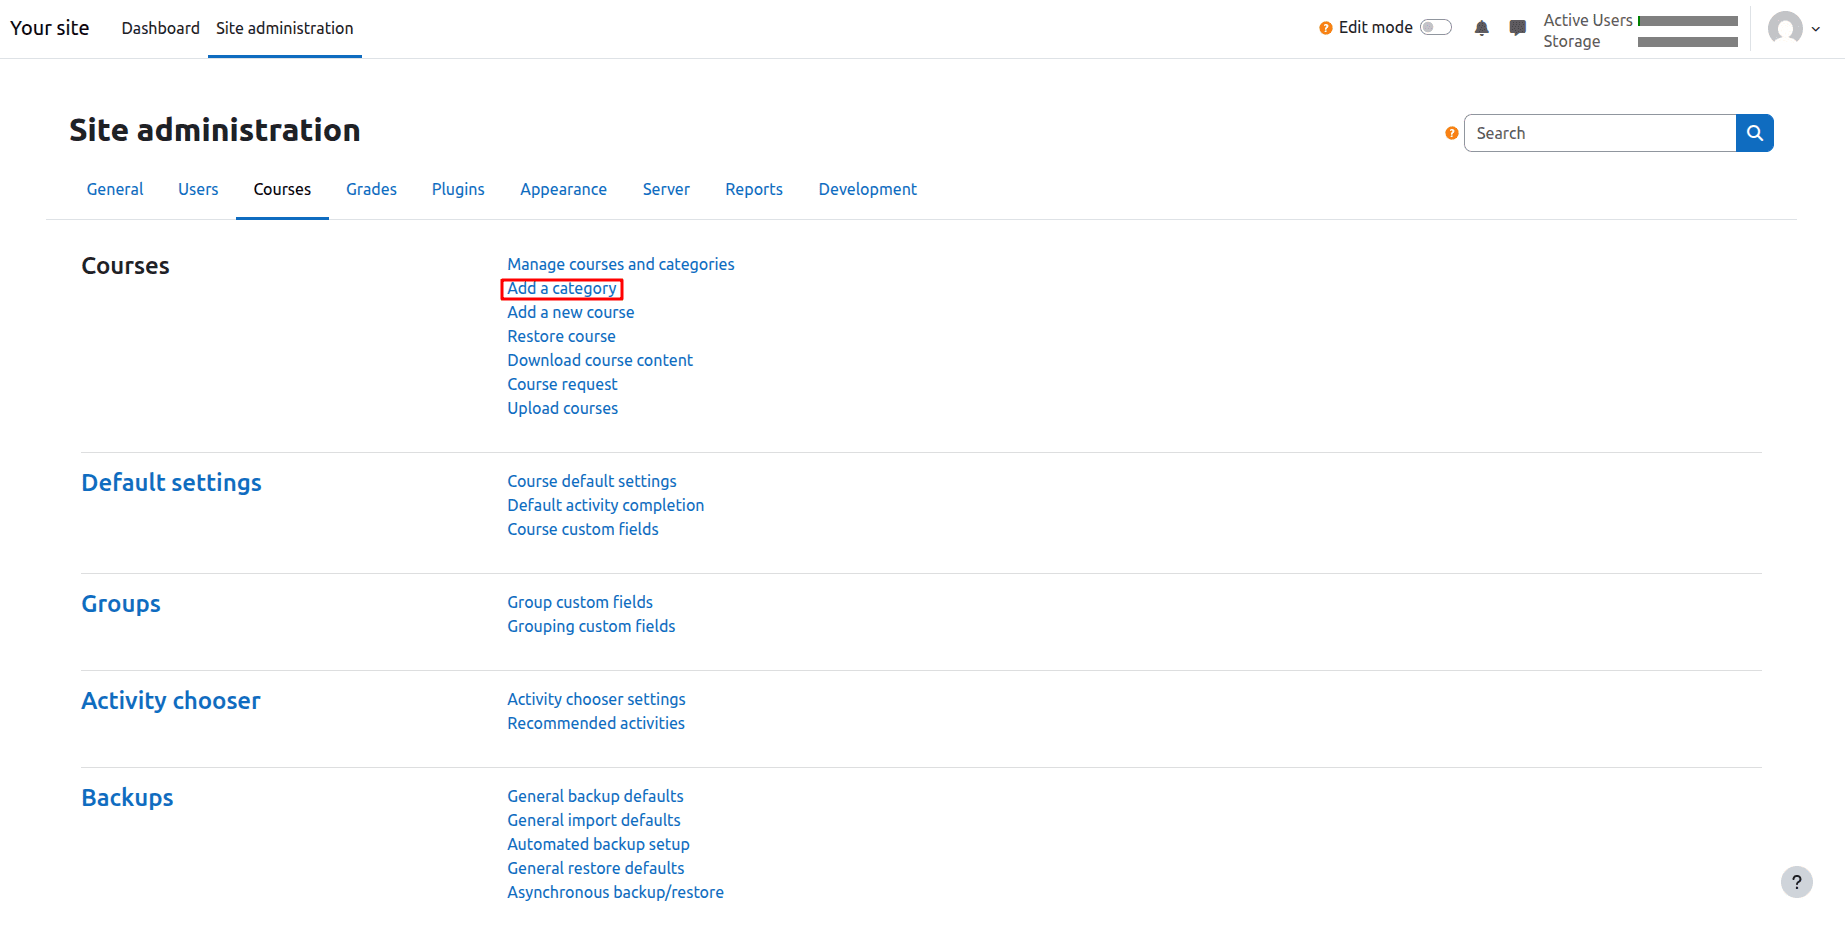
Provide the category name and save it.
Step 5: Create a Moodle Course
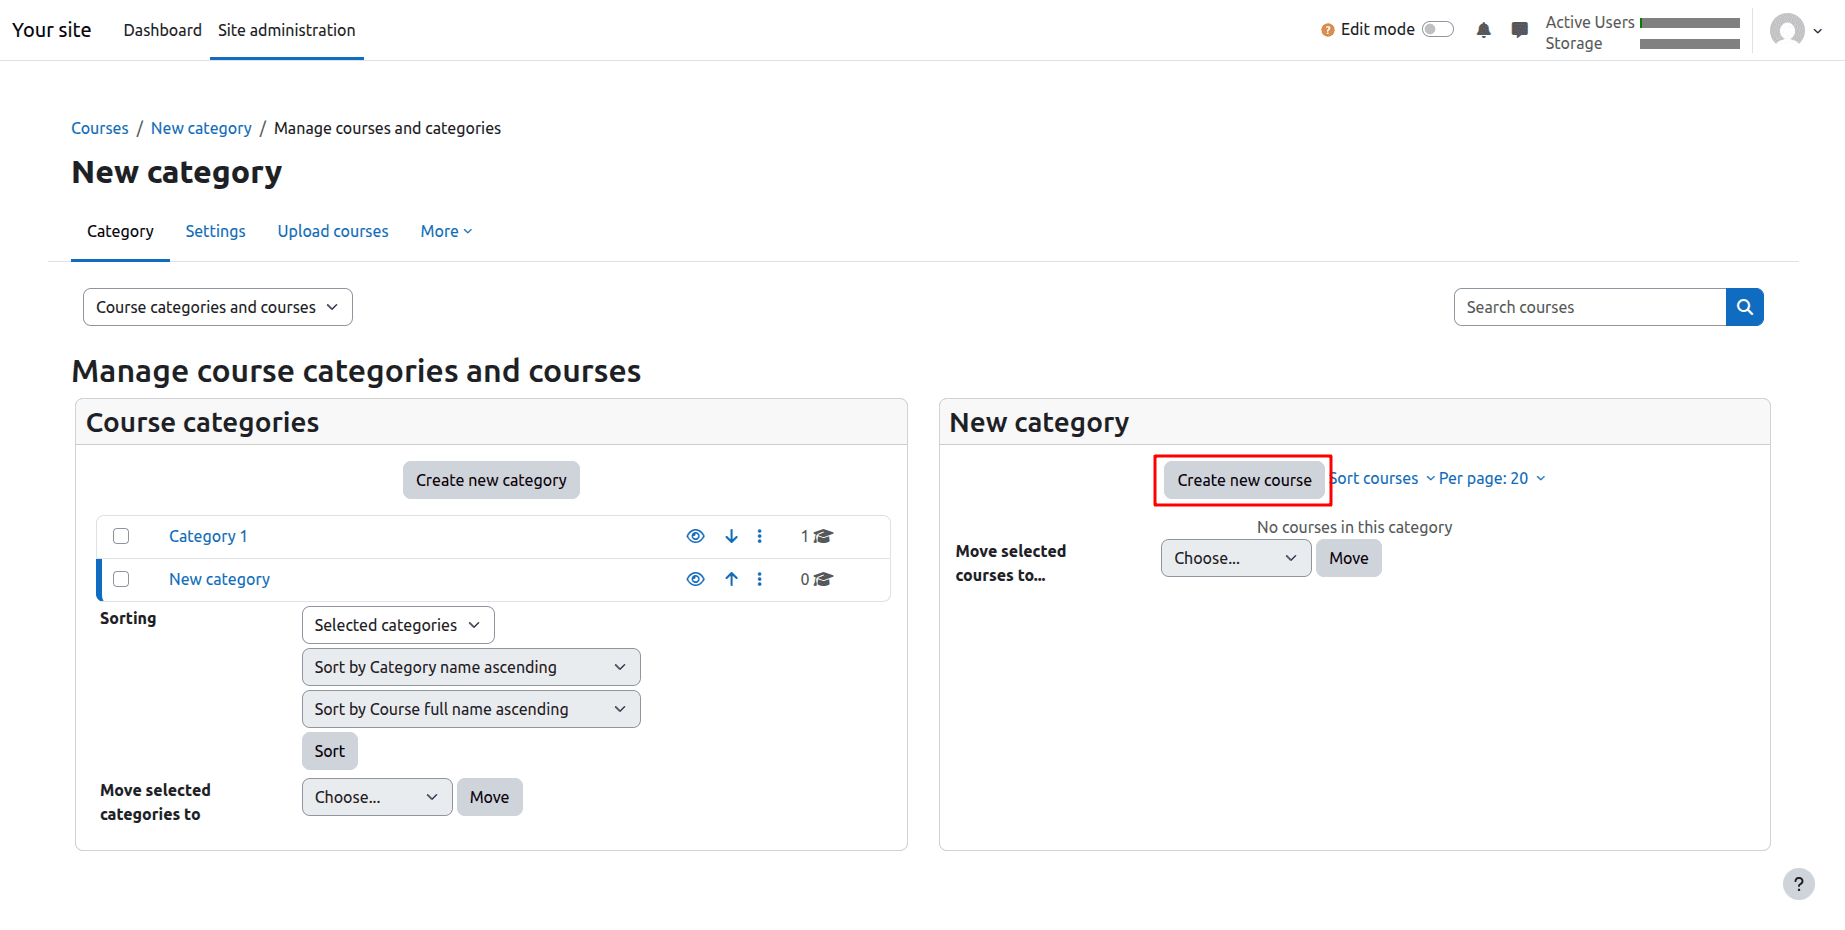
Now create a course under the category.
Click Create New Course.
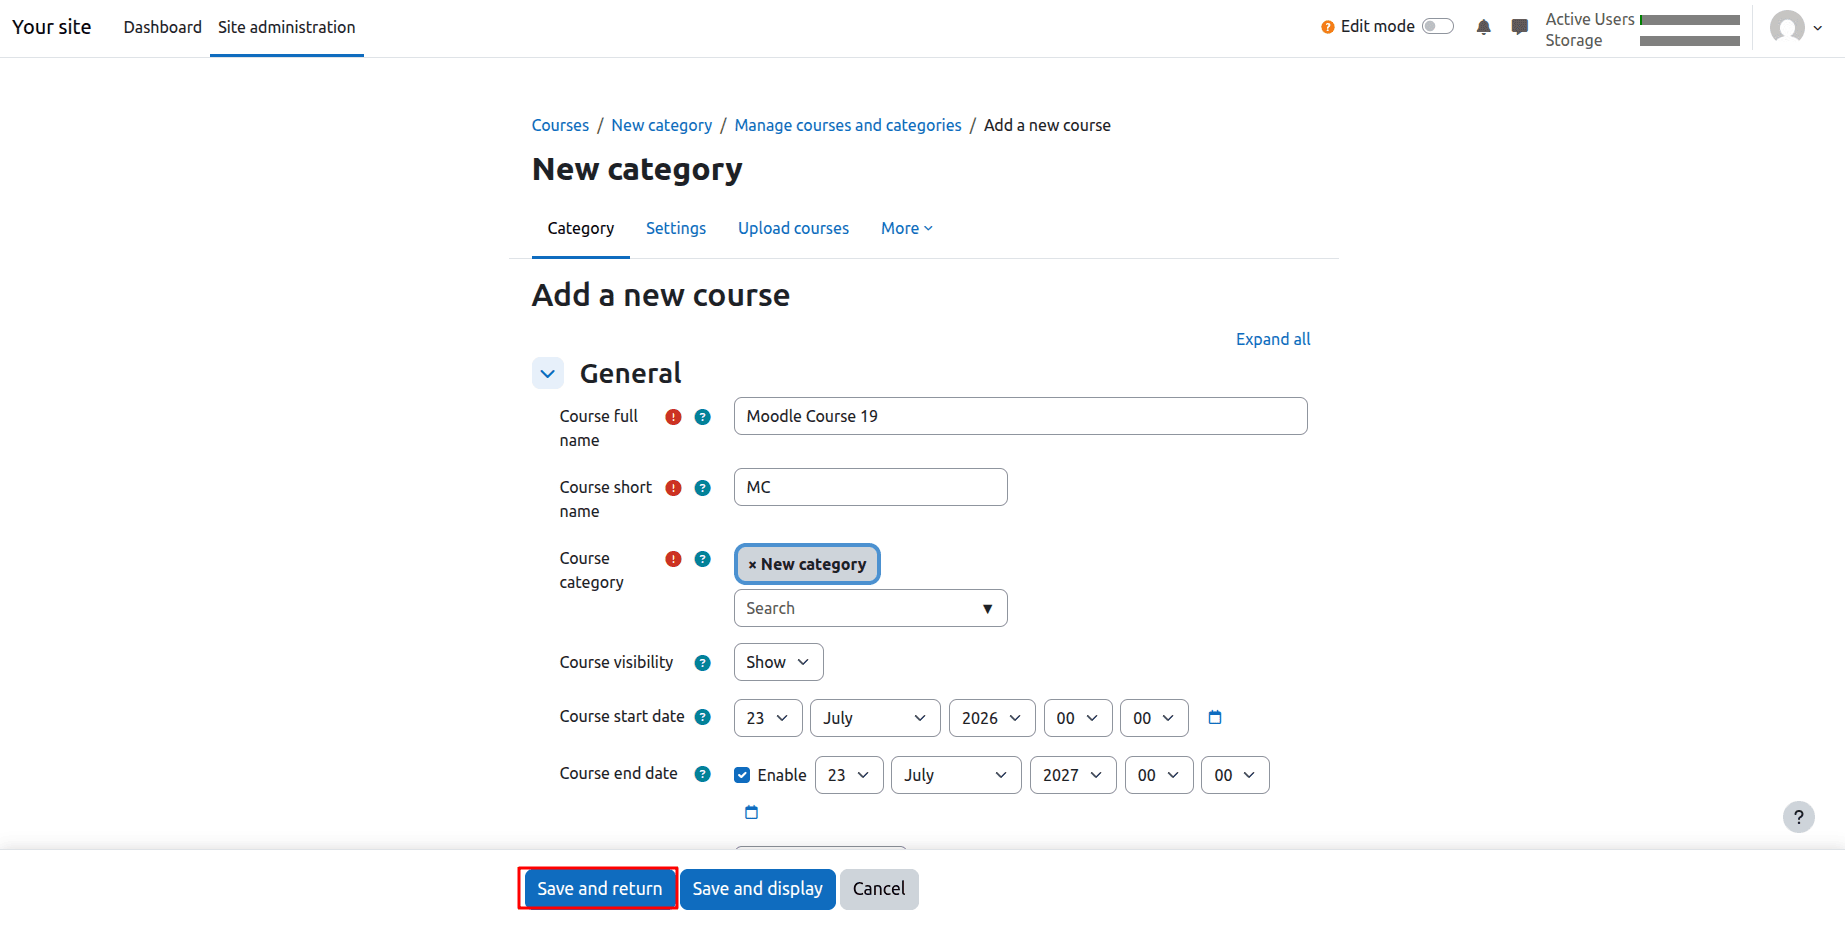
Fill in:
- Course Name
- Short Name
- Category
Save the course.
After saving, the course will appear under the selected category.
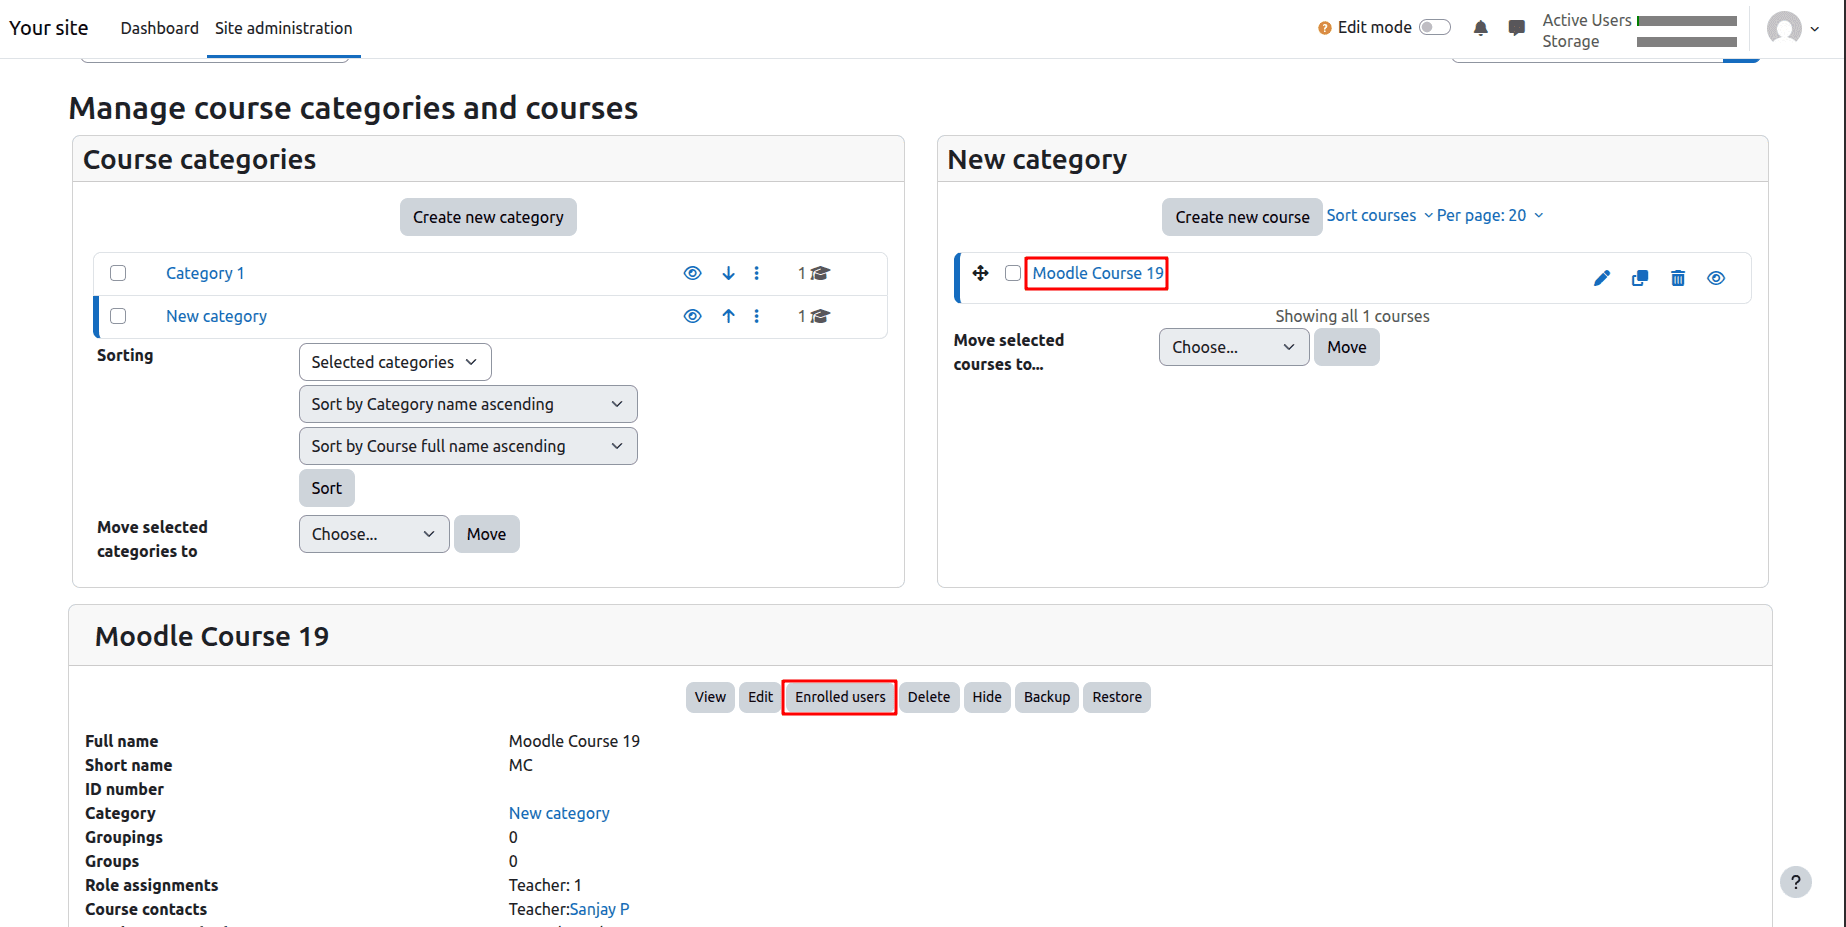
Step 6: Enroll Users in Moodle
Open the course.
Navigate to:
Participants > Enrolled Users
Click Enrol Users.
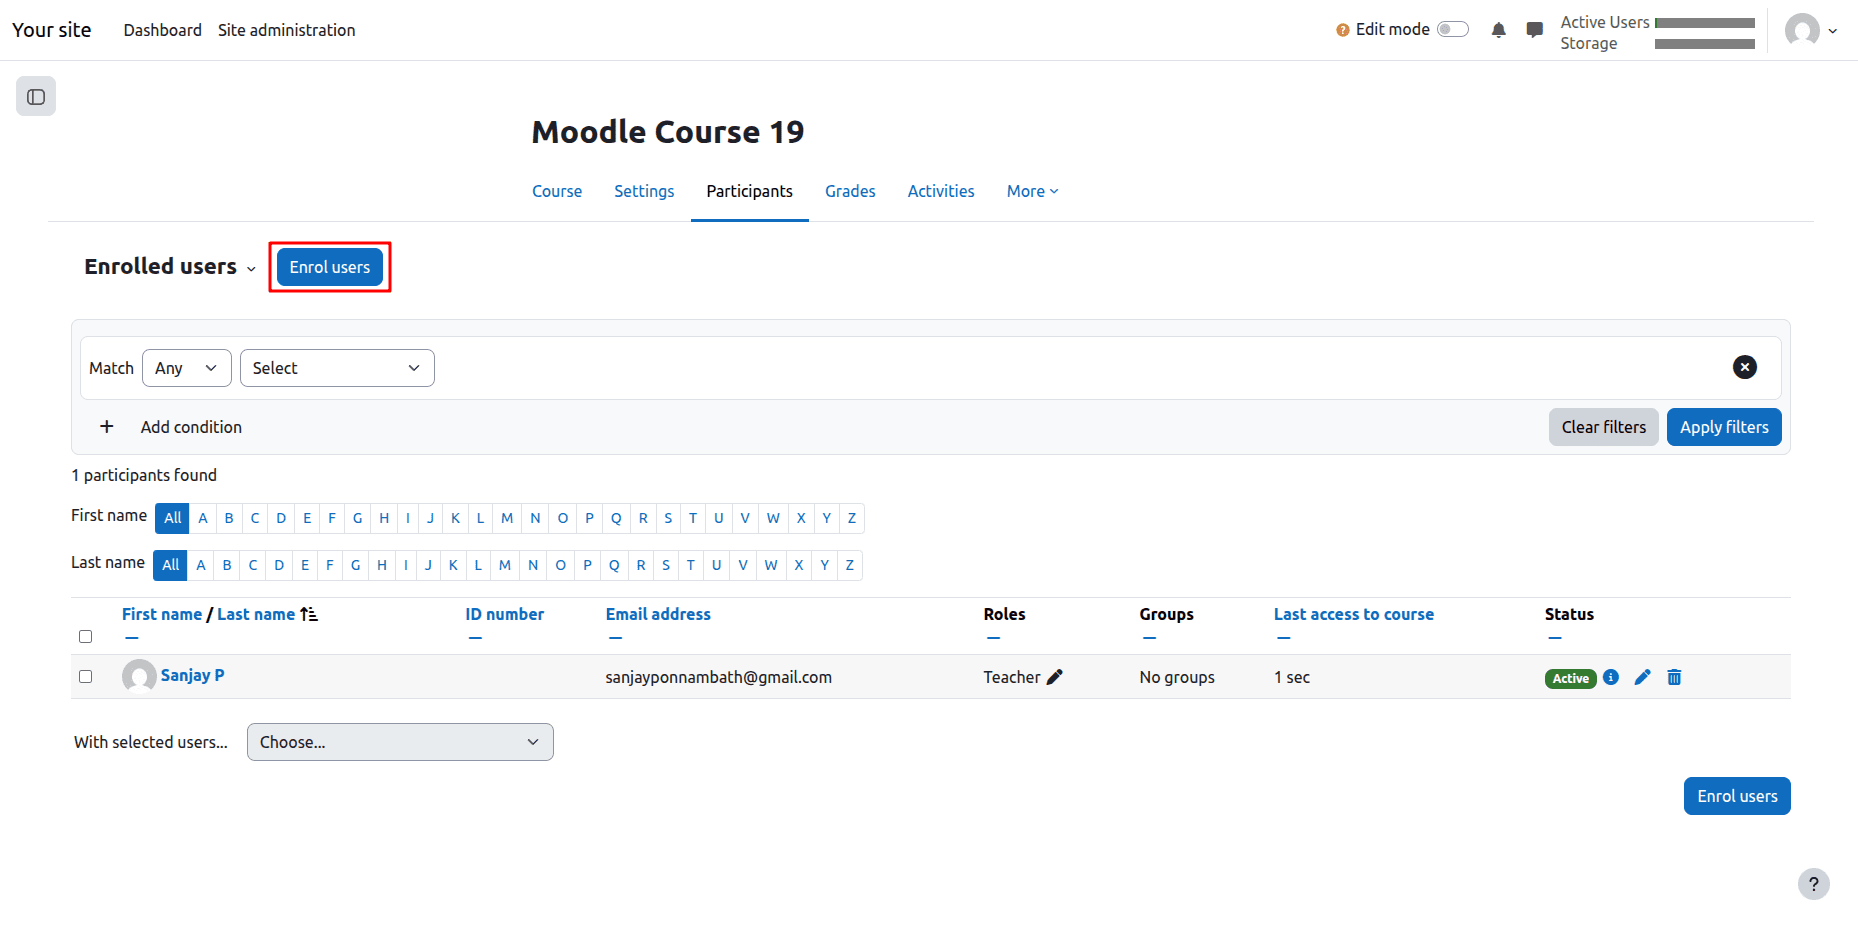
Select users and assign the desired role.
Finally, click Enrol Users.
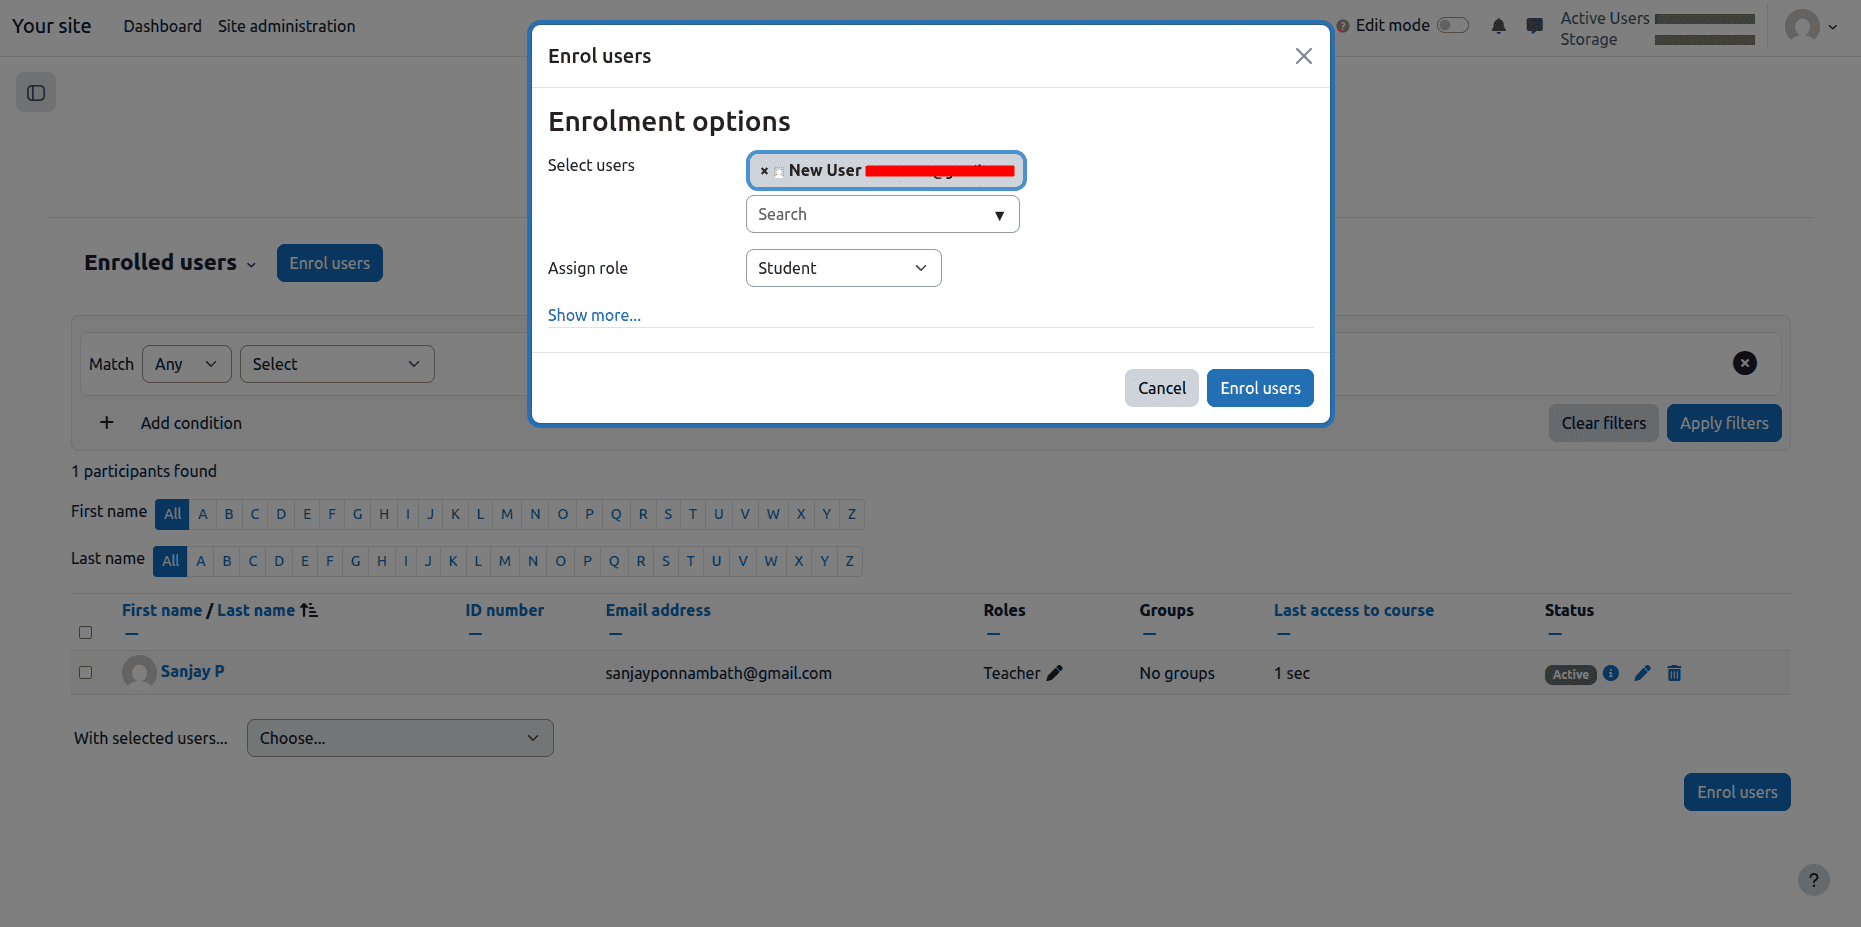
The selected users are now enrolled in the course.
Step 7: Configure Moodle Credentials in Odoo
Navigate to:
eLearning > Moodle > Credentials
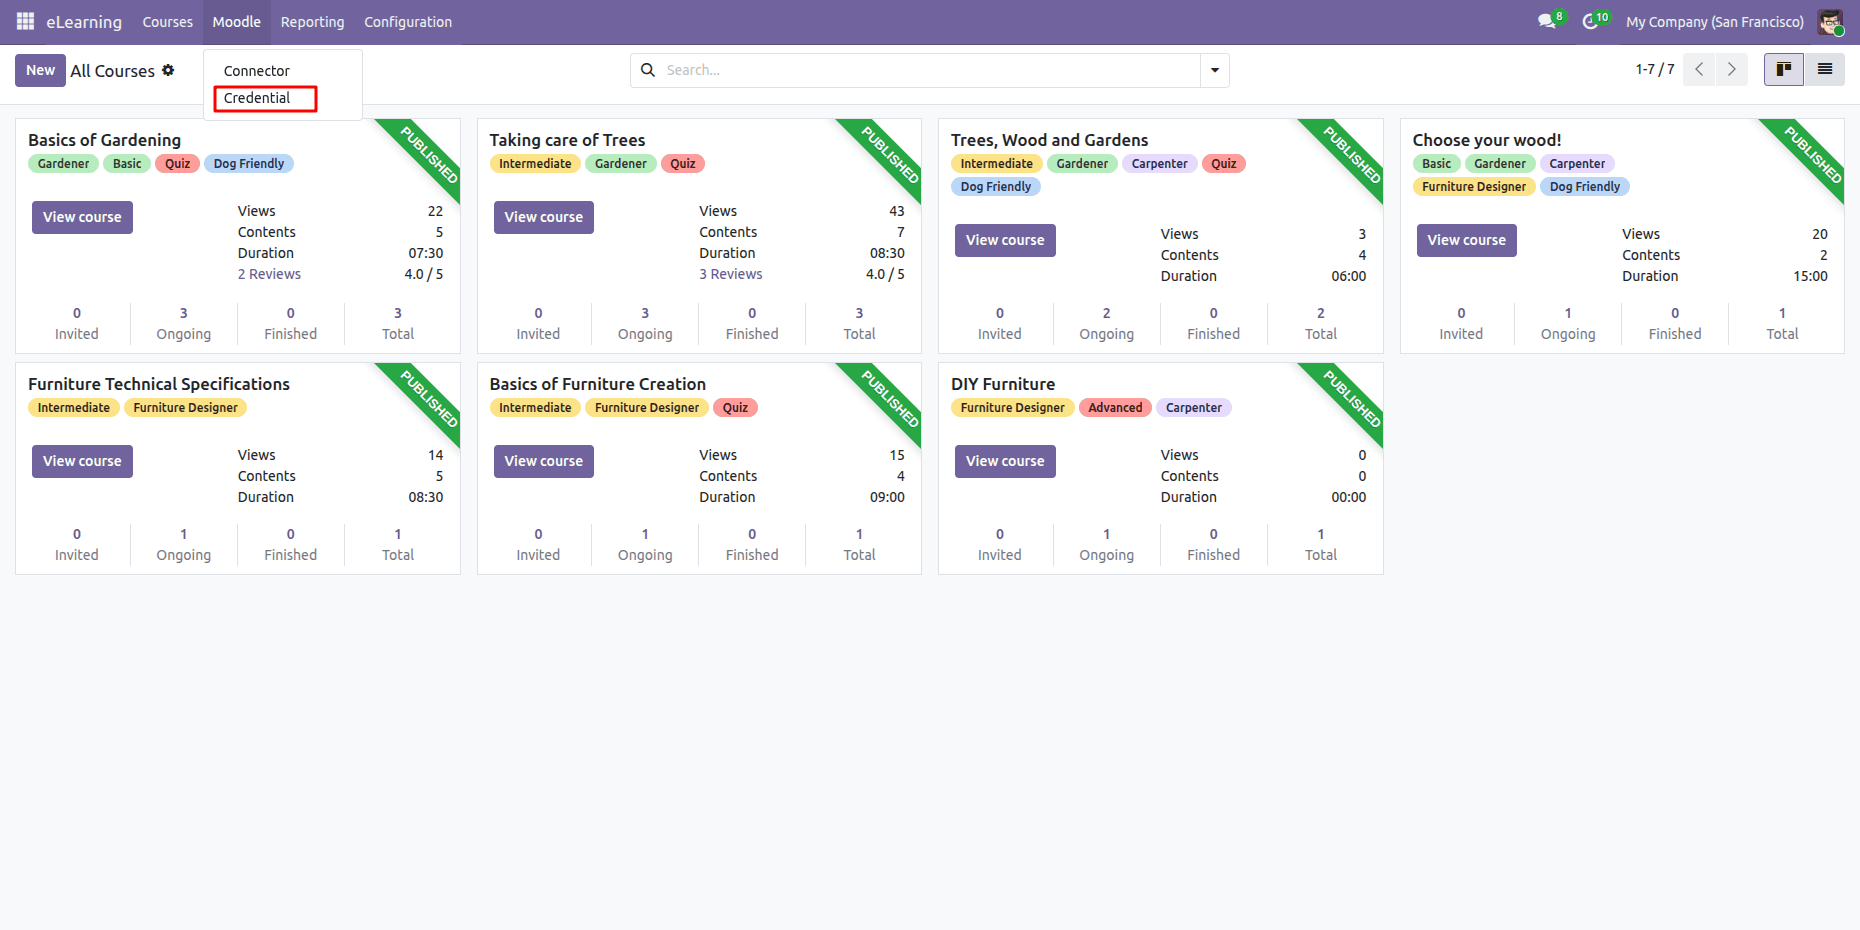
Create a new Moodle credential.
Enter:
- Moodle Site URL
- Authentication Token
- Credential Name
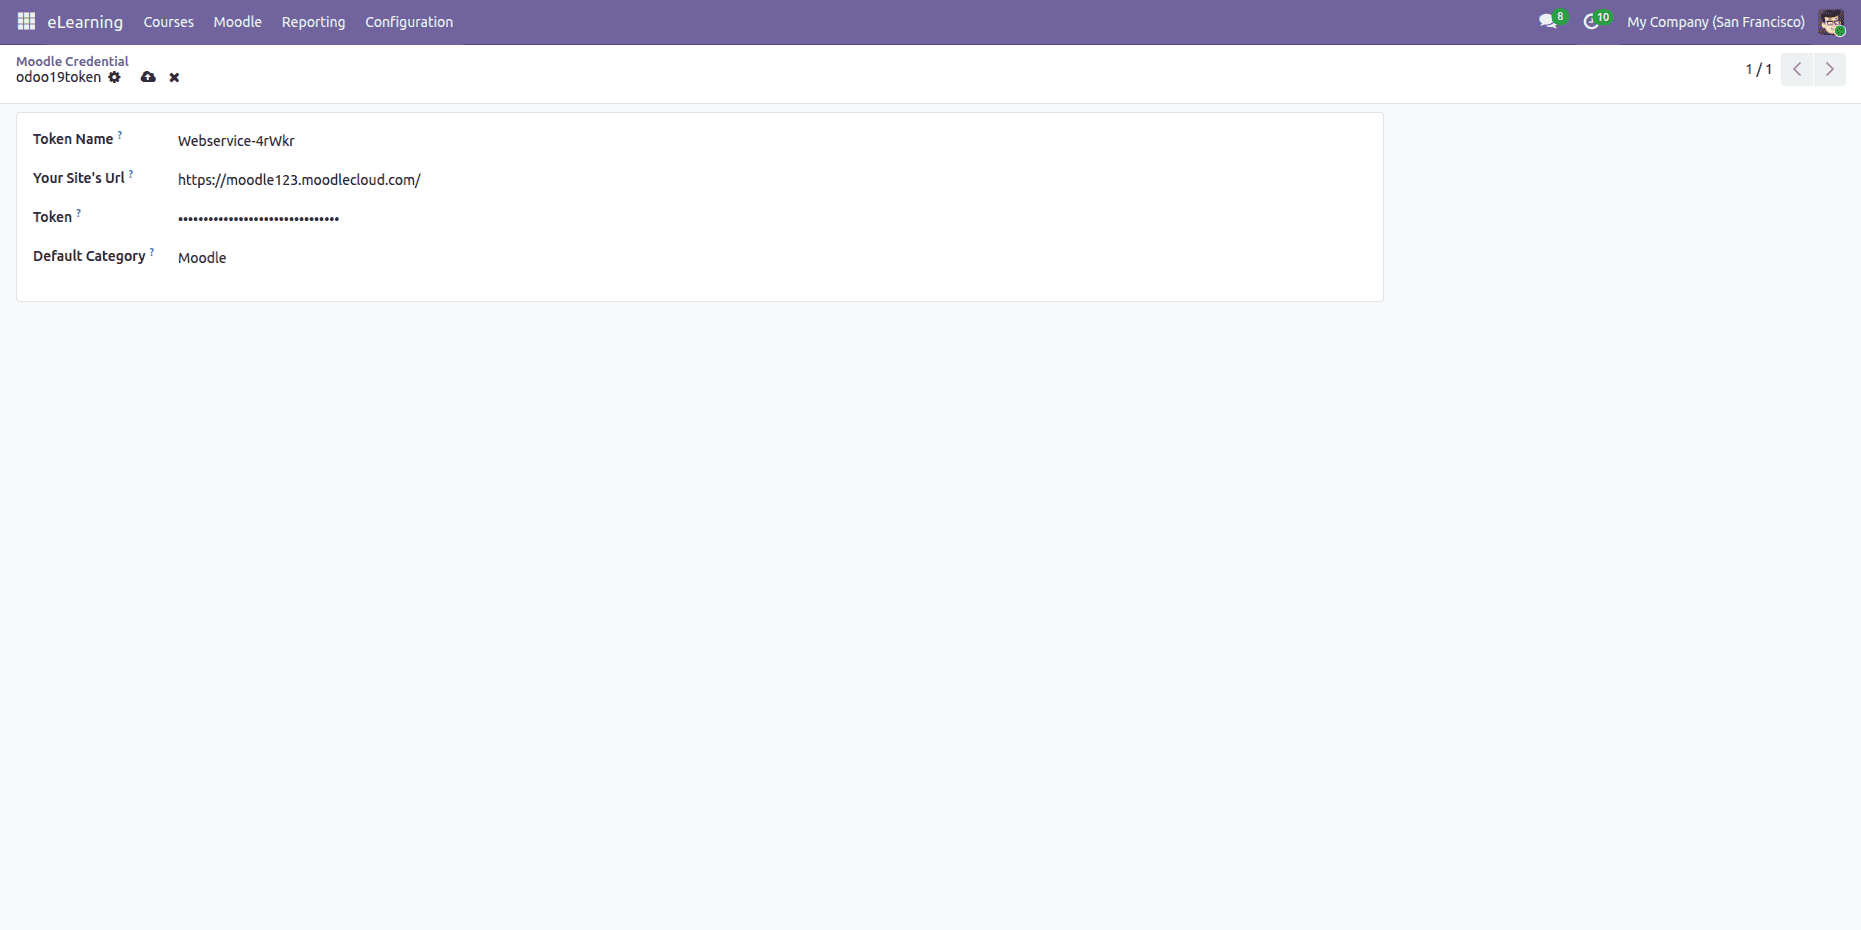
Save the credential.
Step 8: Import Moodle Data into Odoo
Navigate to:
Moodle > Connector
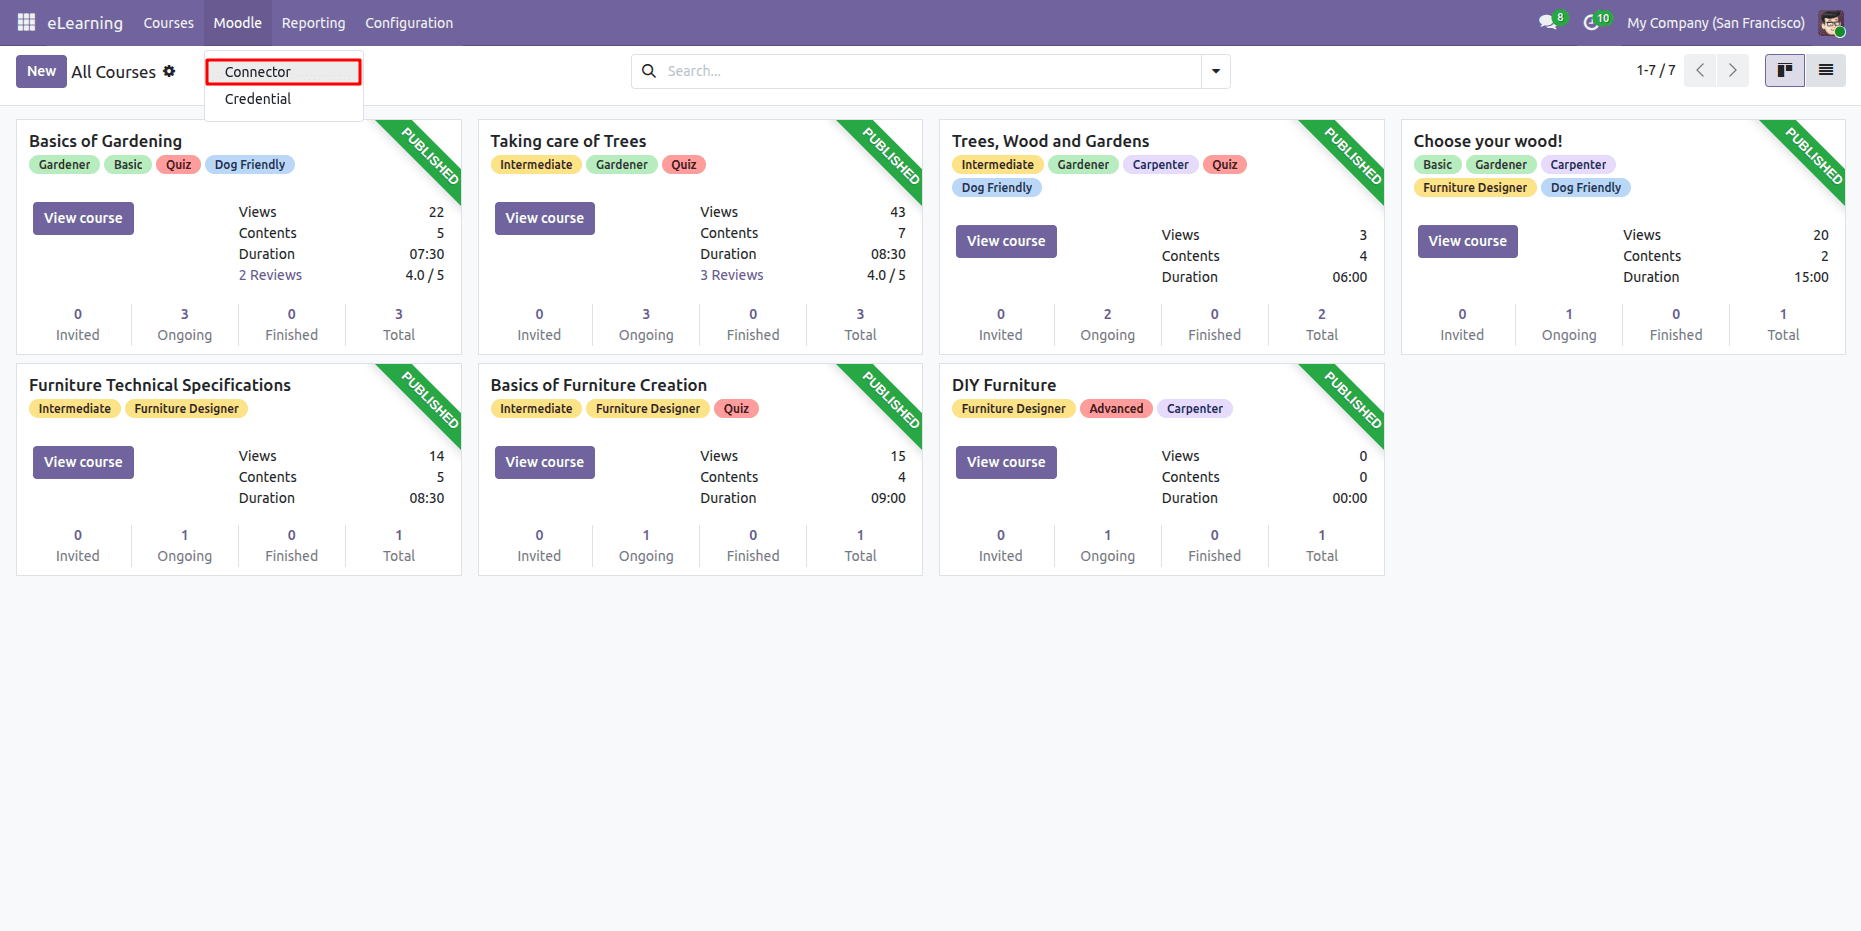
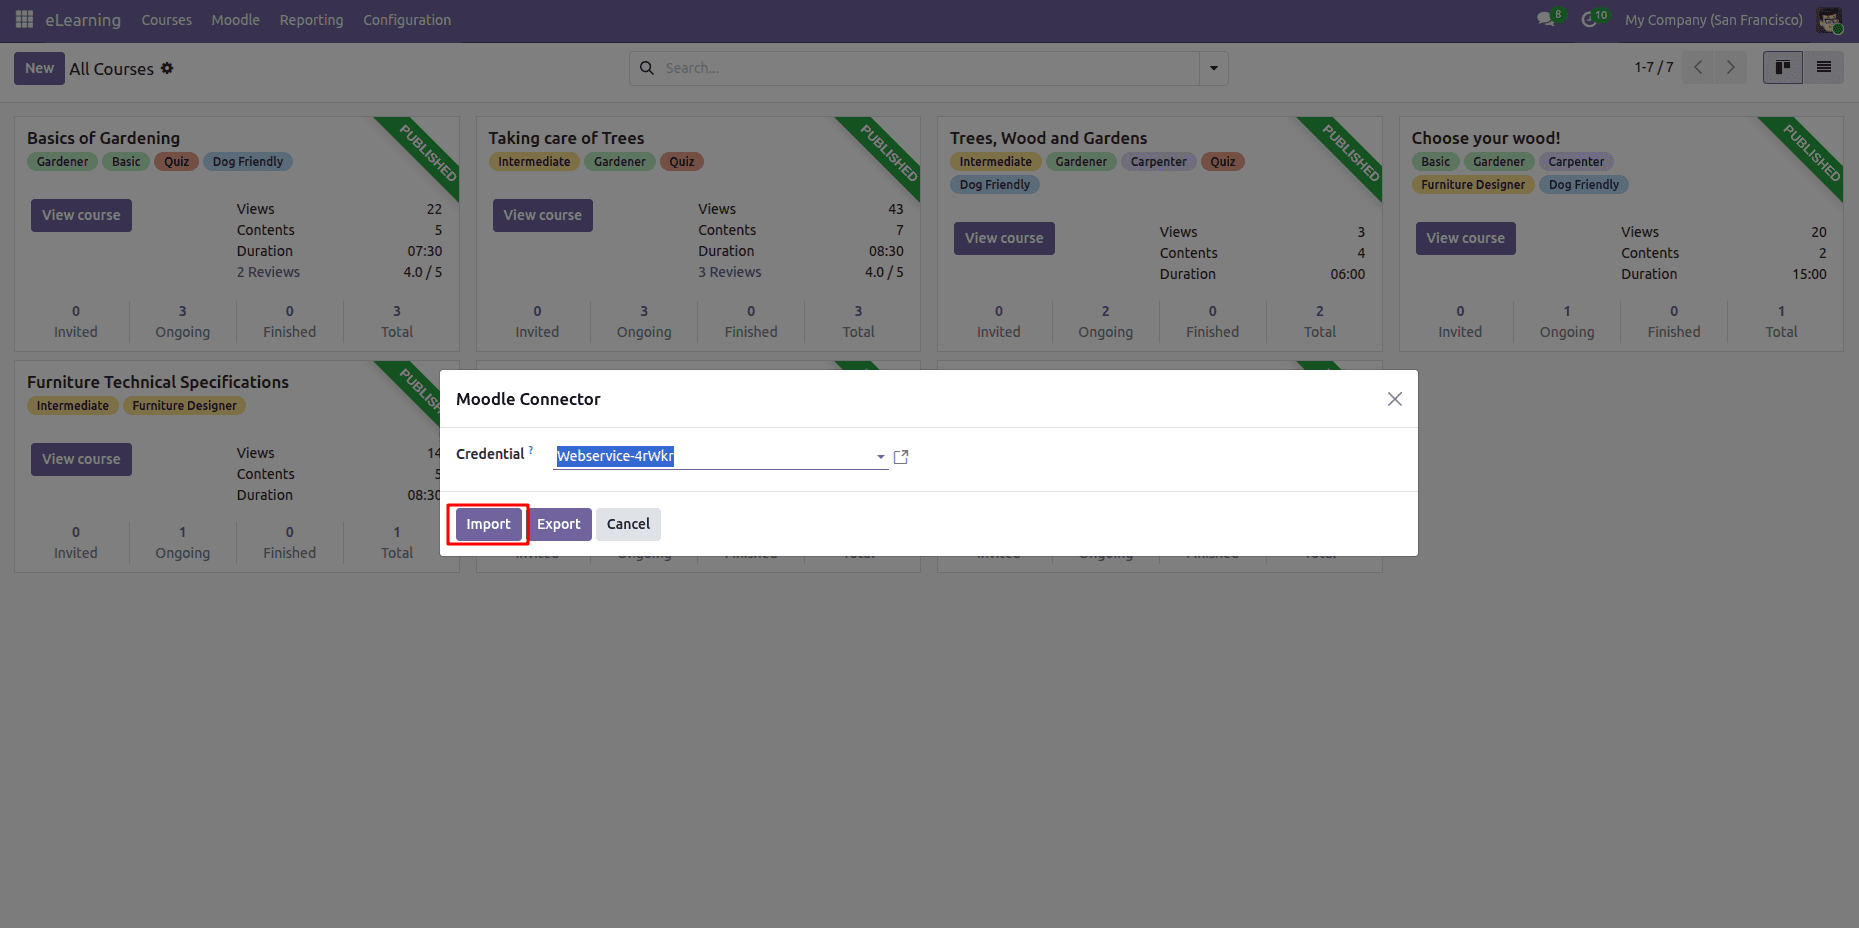
Select the credentials.
Click Import.
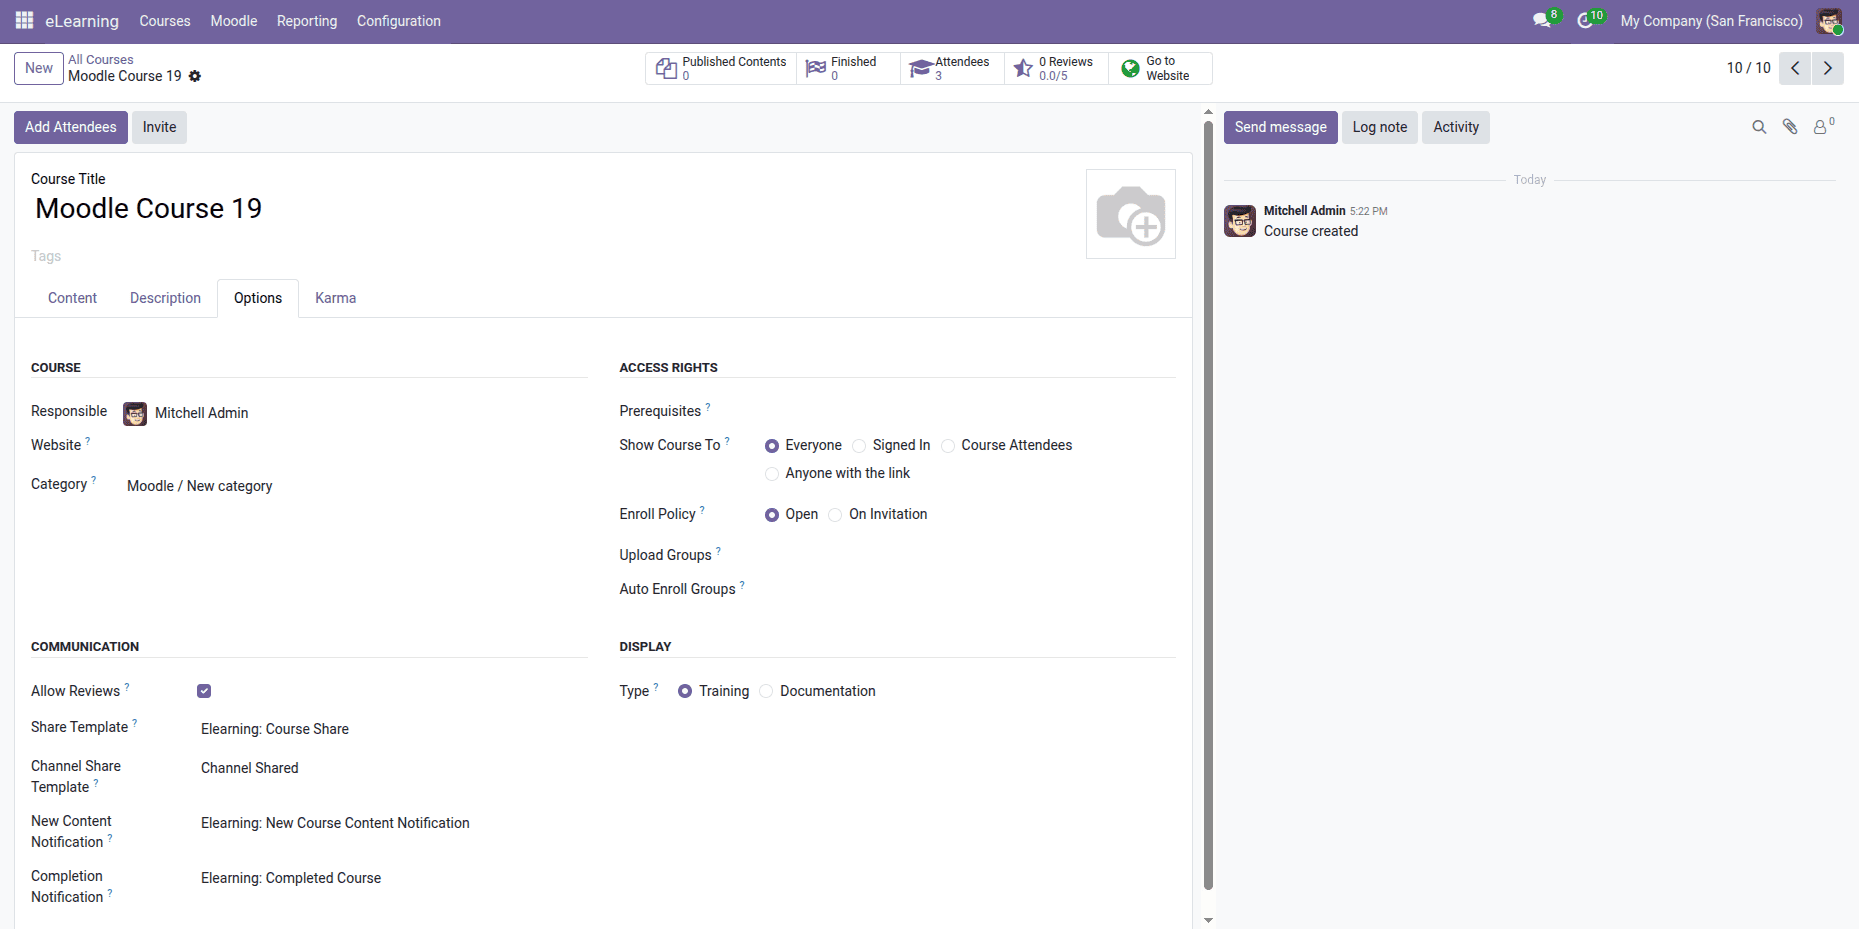
The connector imports:
- Course Categories
- Courses
- Enrolled Users
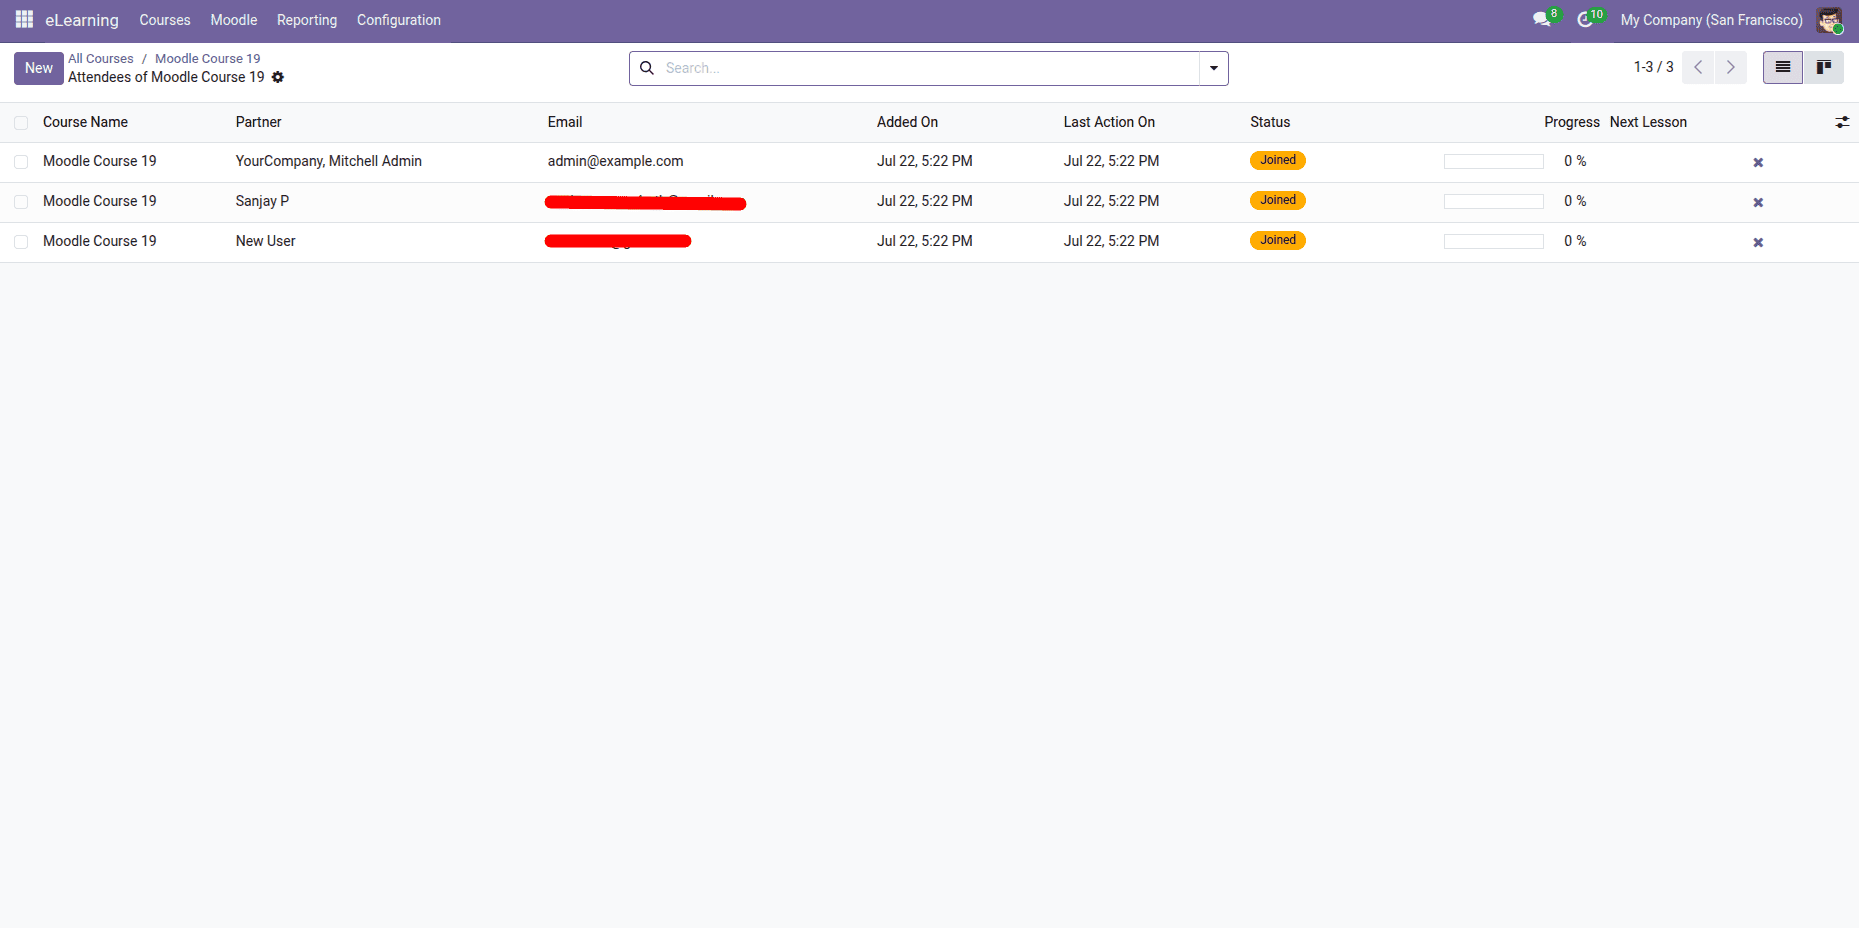
Users imported from Moodle are automatically linked with Odoo partners, and the logged-in user becomes an attendee by default.
Step 9: Export Odoo eLearning Data to Moodle
Once categories and eLearning courses are available in Odoo, they can be exported to Moodle.
Navigate to:
Moodle > Connector
Select the Moodle credential.
Click Export.
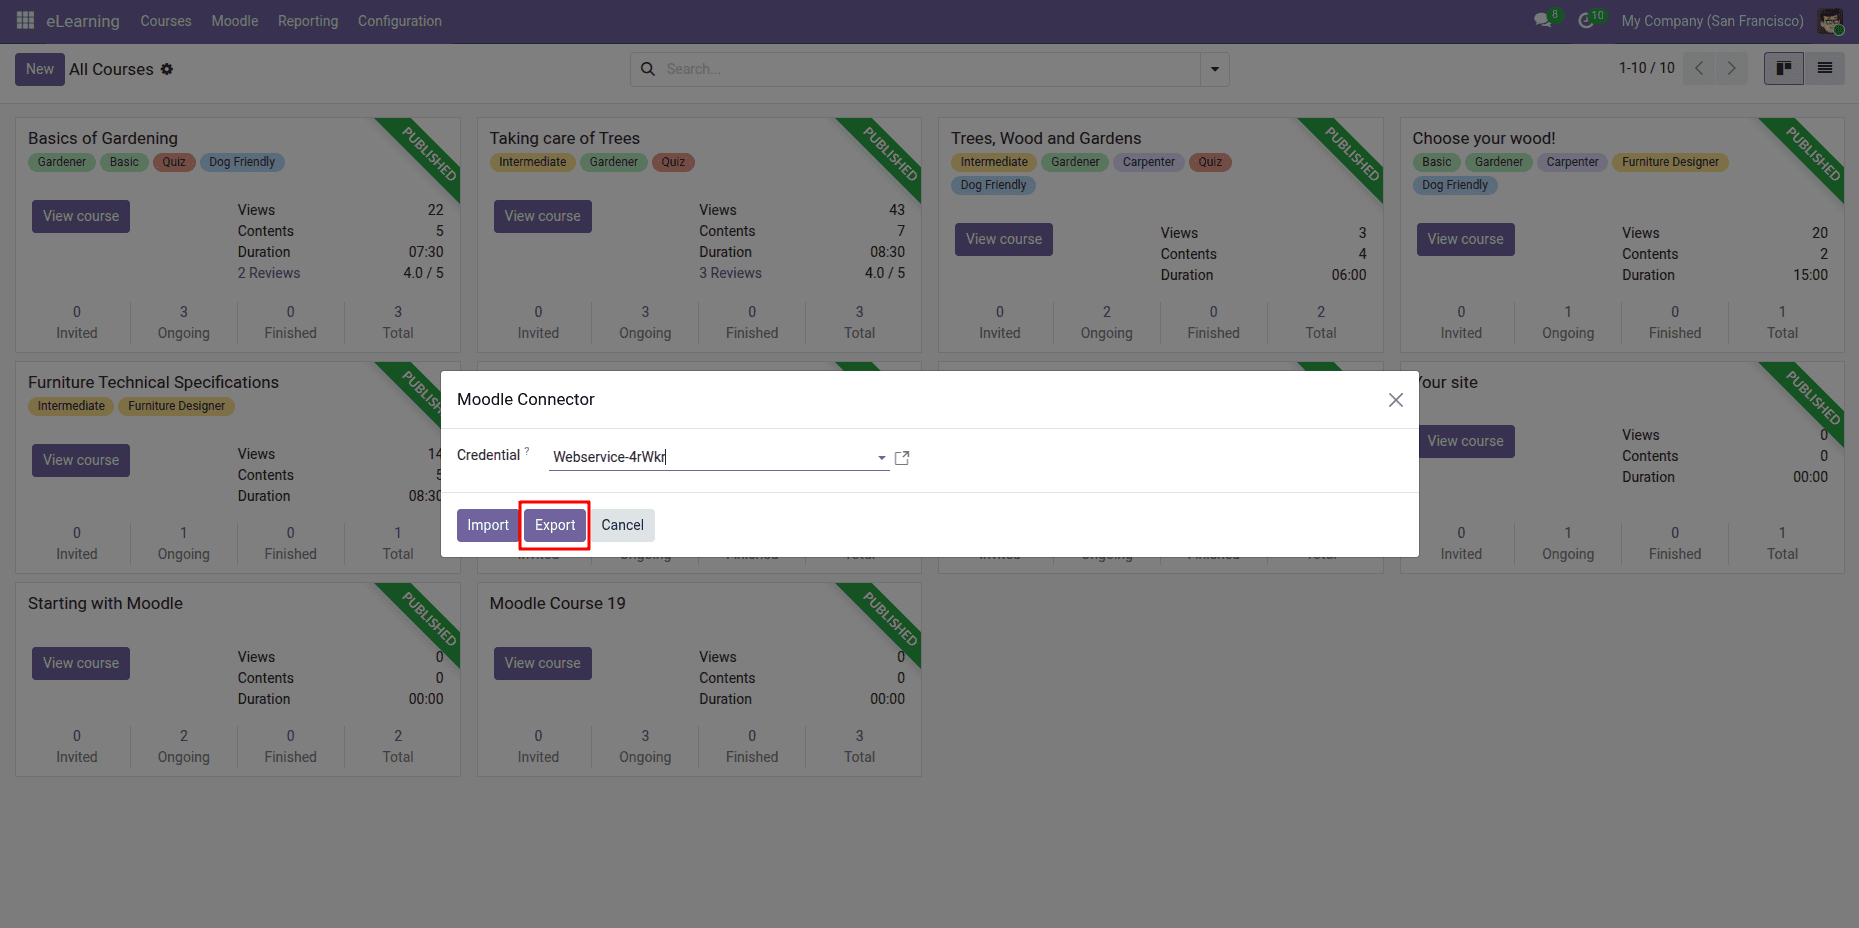
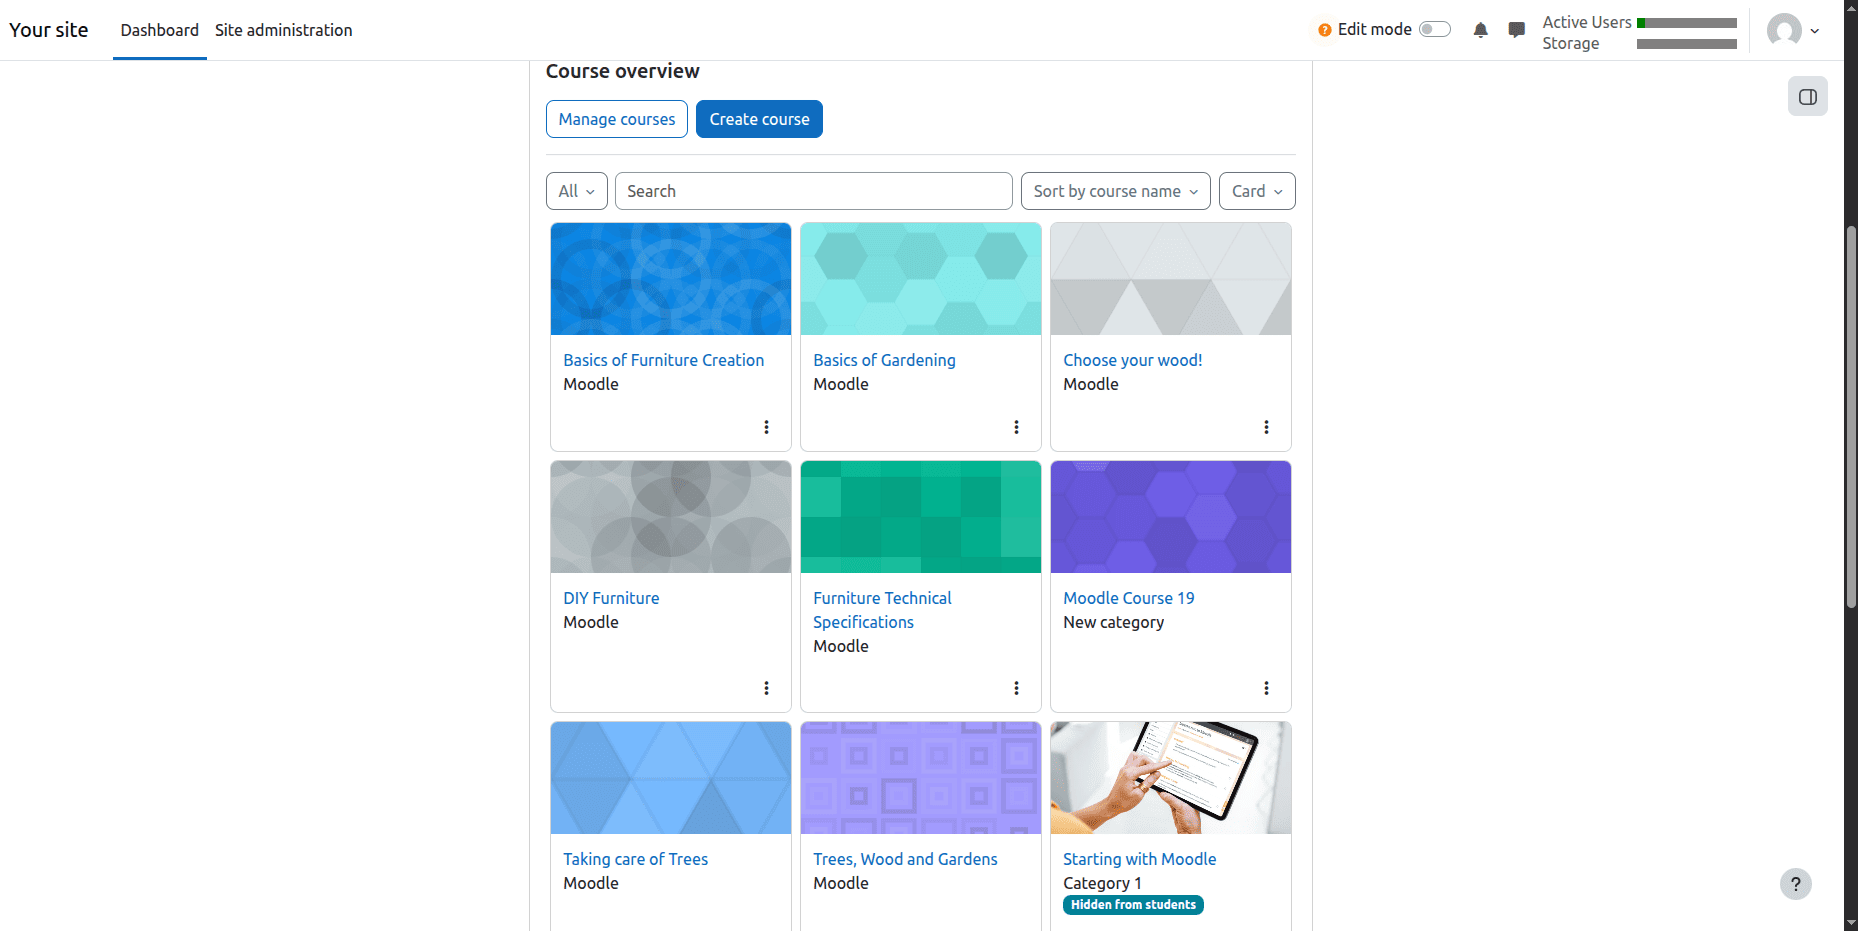
The connector exports:
to the connected Moodle instance.
Advantages of Implementing the Odoo Moodle Link
Utilizing independent solutions for ERP and Learning Management frequently leads to excess management tasks and variations in information. Odoo Moodle Link makes the learning management process easier by making the flow of information automatic between two platforms.
Some primary advantages consist of:
- Eliminating the burden of manual data input.
- Automatic transfer of course content and course categories.
- Providing the necessary updates on registered users.
- Minimizing administrative workload.
- Enhancing the effectiveness of Learning Management.
- Employing Moodle’s Web Service API to guarantee secure communications.
- Providing companies with a single repository of training data
The Odoo Moodle Connector creates a seamless connection between the two platforms, thereby enabling organizations to run educational and business operations in one ecosystem. This Odoo Connector allows for the importation and exportation of course categories, courses, and users leading to less manual work needed to maintain the two systems synced and ensuring a successful result in every type of course.
To read more about A Complete Guide to Hotel Management in Odoo 19, refer to our blog A Complete Guide to Hotel Management in Odoo 19.